How to Add Forms to Your Website for Free
If you are searching for an easy and free way to add forms to your website, good news! Developers offer a one-click solution to reduce manual work with HTML code. You are able to create forms for any case with no need to code. Multi-step forms creation, integration with Zapier or Google Sites with a simple field to connect them, a conditional logic feature – all of these options can be tried online for free. Today’s article about the Form Builder explains how.
Adding forms to your website within a few minutes
- Create a free account on Elfsight.
- Go to Elfsight online widget creator.
- Choose the needed template.
- Customize the widget and press save.
- Copy the form installation code.
- Paste the HTML code to your website.
You have embedded forms to your website. Try the widget in the editor!
Pros and cons of Form Builder by Elfsight
Here you can see a true picture that can help you decide whether a solution to add forms offered by Elfsight fits your needs.
First of all, here is a list of advantages that can be obtained using the builder:
- the forms are supported by most website builders and require no code knowledge for integration;
- you can create form widget at no cost via free plan or subscribe to any of paid plans to get more functionality;
- if you are not totally satisfied with the builder, you can make a refund within 14 days from the date of online subscription;
- if you have any problems, you can address to Customer Support and they will always be online to help you with the form embed;
- there are features to report and collect data that can help you analyze the builder efficiency on the website;
- with a variety of form templates you can gather customer feedback on your website and use it for remarketing.
Though there are many advantages, some drawbacks should also be mentioned:
- there is no ability to subscribe yearly and no lifetime subscription function;
- when starting to use the builder, website performance rating may drop by about 3%;
- it is a simple solution that can hardly beat integrated plugin functionality;
- there is less ability for website interaction.
Having all the points in mind, you can make a balanced decision on whether you wish to give it a try.
List of Form Widget Features
In this table you can view full functionality of ready-to use solution for online form embedding by Elfsight.
| Any form types | With Elfsight Form Builder, you can create forms of any kind to embed on your website. This is an all-in-one tool that allows you to make a contact form, a survey, or other form type you may need online in one place. |
| Flexible layout | The builder provides you with flexible opportunities for online layout customization to fit your website needs, such as:an option to divide your fields in columns to create a peculiar look;an option to edit labels the needed way – you can hide them if required or create the common label for each group of fields;an option to make a wholly horizontal form; an option to edit the width of your form;an option to structurize the form using distinct label, heading and paragraph elements. |
| Multistep forms | If you need to divide your form into several pages, just set the number of pages and distribute your fields within them. Then you can further customize your website pages online by adding a title and a description to each page. |
| 20 form elements | Having 20 various online form elements, the widget can be used to create any form desirable. Here include:long and short texts;different online scales (thumb, smiley, star and number);responsive date and time options;and many more.Moreover, all the fields can be changed the way you need. For example, in Elfsight online creator you can configure the required fields of your responsive form, date and time formats, files available for uploading, etc. |
| Form styling | You are free to create a unique design for your form without having to code: choose between light or dark mode, add your own brand color, set a specific design for the fields of your form or change the font. And if you need a peculiar look of your responsive form, you can easily reach it by altering each of its components individually via the online editor. |
| Form header | You can set a header to the form and provide it with a title and a description. Also, there is an option to add a website cover image and your brand logo. With the header, you can improve your responsive form appearance, which is especially relevant when using forms outside the website via the link. |
| Floating forms | There is a way to choose how the form will be embedded into the website: either it will be placed directly into the content area (Inline form), or there will be a floating button that opens a panel with your form if clicked on (Floating form). |
| Integrations | Elfsight responsive forms can be integrated with such online services as Mailchimp and Google Sheets for efficient gathering of user statistics. This way, all the data from your forms will be sent directly to any of these services if you add the function in the online creator. One more service available to connect is Zapier, which allows you to integrate information from your website forms with 5000+ services and solve almost any integration task. |
| Spam protection | To provide the best experience with the widget, the forms support Google reCAPTCHA. Google reCAPTCHA is a free yet loading anti-spam solution for protecting your forms from spam. It’s invisible, therefore customers will not have to go through the checkbox on the website as everything works automatically. Whereas spam bots will definitely have a hard time. |
| Email notifications | In the online creator you can set up various email notifications when filling out the form. For example, send an email to yourself with all the information from the form. Or send an email to the client after they have filled out the form on your website online (autoresponder feature). For each notification, you can configure all the responsive sending parameters and customize the email template. |
| Post-submit actions | It’s for you to choose what action will happen after the form is submitted: whether a success message will appear, a redirect to another page of the website will occur, or the form will simply disappear. Each action can be further customized code-free in the online form maker. |
| Pre-fill forms with URL params | For deeper integration of the form, you can configure pre-filling of certain fields by default using URL parameters. For example, if you know that your customer is interested in a certain product or service, you can give them a website link where the parameter will already be specified. This way there will be a pre-filling of the corresponding field in the form and again, with no need to code. You can also add responsive analytical information using hidden fields, pre-filling them through URL params. |
| Multilingual forms | All the fields of your customized form can be translated into any language, here are just some of them: Spanish, French, Italian, Portuguese, Serbian, and many, many more. |
Thorough guides on how to add forms to different website builders
Here is a simple guide on how to embed the form you have created and customized online to any website. You will need nothing more than pasting the form widget code into an HTML field of your web page. Ready, steady, code!
- No charges: both options to create the form and review of its functionality are free
- If you wish to perform any changes to the existing form, you can do it online in the Elfsight admin board. Therefore, there is no need to edit your platform code to alter the form.
- All your responsive form updates are automated, so there is no manual work for you to do.
With these step-by-step instructions you will see that embedding forms on any site is so easy that even code non-professionals can manage. You are free to watch the video to make sure:
Here is a brief video transcript that you also can follow:
- Authorize on Elfsight for free and go to the admin board;
- Create your responsive form in the widget creator;
- Save your Form Builder after all settings are completed;
- Copy the code for form installation from the popup;
- Go to your website and paste the form code to the HTML field.
Now you see how fantastically easy it is! After you are done, go to your web page and check your embedded Form Builder in action. And if you have faced any difficulties, Elfsight Support Team is always online to help!
How to embed forms on WordPress
Here you can see how to add Form Builder to your WordPress website. There are two distinct instructions as some users of the platform choose Elementor and not the default WordPress website editor, have a look:
Variant 1: For those who use WordPress online editor
So, you have created your responsive form and modified it in the Elfsight dashboard. Now, after all the alterings are finished, open your WordPress website and go to the admin panel. Then you need to paste the form widget code from Elfsight in the HTML code field. Follow the steps:
- Create the form in Elfsight online maker.
- Copy the code for form installation.
- Authorize on your WordPress website.
- Go to the ‘Pages’ section.
- Choose a page to place your form.
- Add a custom HTML code block where required.
- Paste the form code from the free widget creator.
- Click ‘Update’ and save the changes.
When the widget is embedded on your website, all the changes can be done right through the Elfsight admin board for free. They will be automatically displayed in your Form Builder. So, you do not need to modify your created forms on the WordPress site.
Variant 2: For those who use Elementor
If you choose Elementor, here is a quick guide for you:
- Generate your custom form on Elfsight.
- Copy the form installation code.
- Go to the admin panel on the WordPress website.
- Select the needed page to add the form.
- Go to the page manager or the pages list.
- Choose the option ‘Edit with Elementor.’
- Drop the ‘HTML’ element to add form to the page.
- Click ‘Update’ to save the modifications.
Follow the guide to add the form widget code to every WordPress page you created with Elementor. Just perform the steps on each page one by one and see your responsive Form Builder displayed on the website in a blink of an eye.
Embedding forms on Wix HTML website
To add Form Builder to the Wix site, you will firstly need to open the Wix dashboard panel. Then find an option to embed custom HTML code to the website and go through the steps below:
- Go to the Elfsight admin board.
- Create the form and press ‘Save’.
- Copy form widget code shown in the popup.
- Authorize to the admin panel of Wix website.
- From there, go to the ‘Settings’ section.
- Choose the ‘Custom code’ option.
- ‘Add Custom Code’ field will arrive.
- Here you need to paste your form code.
Done! You can go to Wix and see how your free and responsive builder works. And if you perform any changes in your forms, they will be automatically shown on the Wix website. This article describes how you can easily add a form to Wix websites.
A way to add forms to Squarespace
Here is a brief tutorial to add the HTML Form Builder to Squarespace:
- Log in to the Elfsight dashboard.
- Create your form in the widget maker.
- Copy the code for form installation.
- Authorize to Squarespace admin board.
- Go to the Squarespace website editor.
- Click ‘Code block’ to insert the form code.
- Press a button to save the alterings.
- Check the widget on Squarespace website.
When you have saved the changes, you can see your form displayed straightaway on the Squarespace website. You are free from doing any work with HTML code on the platform. As soon as you make any modifications in the Elfsight admin panel, they will appear on your website automatically.
How to add forms on HTML website in Shopify
Below, you can see an instruction that will help you to to embed Elfsight responsive widget on Shopify website:
- Log in to the Elfsight admin panel.
- Create the form via the online maker.
- Press a button to save your progress.
- Copy the form code from the popup.
- Go to the admin board of the Shopify website.
- Choose ‘Online Store’ – ‘Customize’.
- From the menu, pick ‘Add section’.
- Go to ‘Custom Content’, press ‘Add’.
- Delete the parts installed on the website by default.
- Go to the ‘Add Content’ menu.
- Paste the form code to ‘Custom HTML’ field.
- Save and check the widget website performance.
Once you need to change the responsive widget look or functionality, you can do it in the Elfsight admin panel for free. All the changes will be automatically displayed on your website, which means no dealing with platform code.
Embedding forms on Webflow HTML website
Please follow a quick guide on how to integrate forms into your Webflow website:
- Launch Elfsight free editor to start building your form.
- Select the suitable design and features of the widget.
- Press to save and then copy the form embed code.
- Insert the form widget code to the Webflow homepage.
- Save the edits and check the responsive widget functionality.
Do not hesitate to contact the Assistance Team in case of any trouble with the website code embed. They are always there to give you a hand.
Adding forms to Google Sites HTML website
There need to be two distinctive tutorials as there is a new and an old version of Google Sites. Here you can see how to add forms to any of the versions you are using.
Variant 1. New Google Sites website
- Create, customize and save your widget on elfsight.com.
- Copy the form installation code from the popup window.
- Go to Google Sites editor and then click ‘Embed’.
- Select ‘Embed code’ option, paste the form code, press ‘Next’.
- Adjust the desired width and height of your responsive widget.
Done! You have successfully embedded forms on your Google Sites website.
Variant 2. Classic (old) Google Sites website
This option is a little bit more complicated than the first one, but do not worry! With the help of this tutorial it is not as scary as it may seem.
- Create the responsive widget in the Elfsight admin board.
- Customize all the elements in online creator and press save.
- Get the form installation code from the popup.
As the platform does not support JS codes, you will need to convert your responsive widget into iframe. This needs to be done before you continue the embed on Google Sites website. Click the link for an instruction you can use to do so.
After you have installed the widget in iframe, follow the brief code embed guide:
- Open the Google Sites editor, then click ‘Edit’.
- Press ‘Edit HTML Source’ to add a new code element.
- Insert the created iframe and then press ‘Update’.
- Change widget settings and size via ‘Properties’.
- Check the widget work on Google Sites website.
Wasn’t it simple? Now your responsive widget works perfectly on Google Sites web page! If it happens that it doesn’t, do not hesitate to address the Elfsight Support Team. They are always there to help you.
How to add forms to Blogger HTML website
To embed forms to website on Blogger, follow the steps:
- In the Elfsight admin panel, create your form.
- Set a design and click to save the changes.
- Copy the HTML code from the popup.
- Go to Blogger homepage and click ‘Theme’.
- Press ‘Edit HTML’ and see the code editing page.
- Find “body” tag, paste the code after “div class”.
- Press save and enjoy the responsive widget performance.
Congrats! You have embedded the form on your Blogger website.
What You Should Know About Using Forms on Your Website
According to the BuiltWith Trends statistics, 40% of the top 1000 websites use forms to collect user data. No wonder why it is so – there were researches showing that forms are valued by customers and boost the conversion up. Here you can see some tips and facts from these studies that should be definitely kept in mind before form installation.
1. Can it be that using forms on a website affects sales increase?
Sure thing! There were studies that proved that using forms can boost sales. For example, according to Venture Harbour, multi-step forms can lead to 300% more conversions.
One of the best discoveries I’ve made in my career was finding out how well multi-step forms convert… Back in 2014, I had just launched an online calculator for measuring people’s “comfort zones”… due to the nature of the tool, traditional web forms were no use to us. We needed to capture in-depth information about users but long forms were killing our conversion rates.
After a lot of research and testing, we stumbled across the concept of multi-step forms and designed one for ourselves… The multi-step form converted 53% of site visitors into leads, despite asking a lot of questions (including email, name, phone number and salary).
Marcus Taylor
2. When to collect user personal information?
According to the study, 65% of website visitors stated they wouldn’t submit a form if “too much personal information” was required. And there is a reason for that. Customers don’t want to share such details as their phone numbers or email addresses with someone they don’t know. So, adding such question fields in your forms can raise suspicions for those who visit your website for the first time.
Gather important information, such as a phone number, when you’ve built trust and your prospect is ready to take the next step with you.
Huff Industrial Marketing, KoMarketing, & BuyerZone
3. How many fields should there be in my form?
There were various studies that tested shortening or widening form content questions. Thanks again to Venture Harbour, we can see how form length affects the efficiency of their usage. The results are controversial and depend on such factors as:
- The type of conversion: Email sign-ups and account creations demand very different forms.
- User expectations: If users see value in filling out a field, they’ll be happy to do so.
- Incentive: With this in mind, can you create incentive to reduce friction?
- How much info you need: Sometimes adding friction is the price you pay for quality leads over quantity.
- Formatting: Multi-step forms create space for much longer forms, formatted in a design that reduces friction.
- Best practices: These are guidelines, not rules. Accepted design trends don’t always work out.
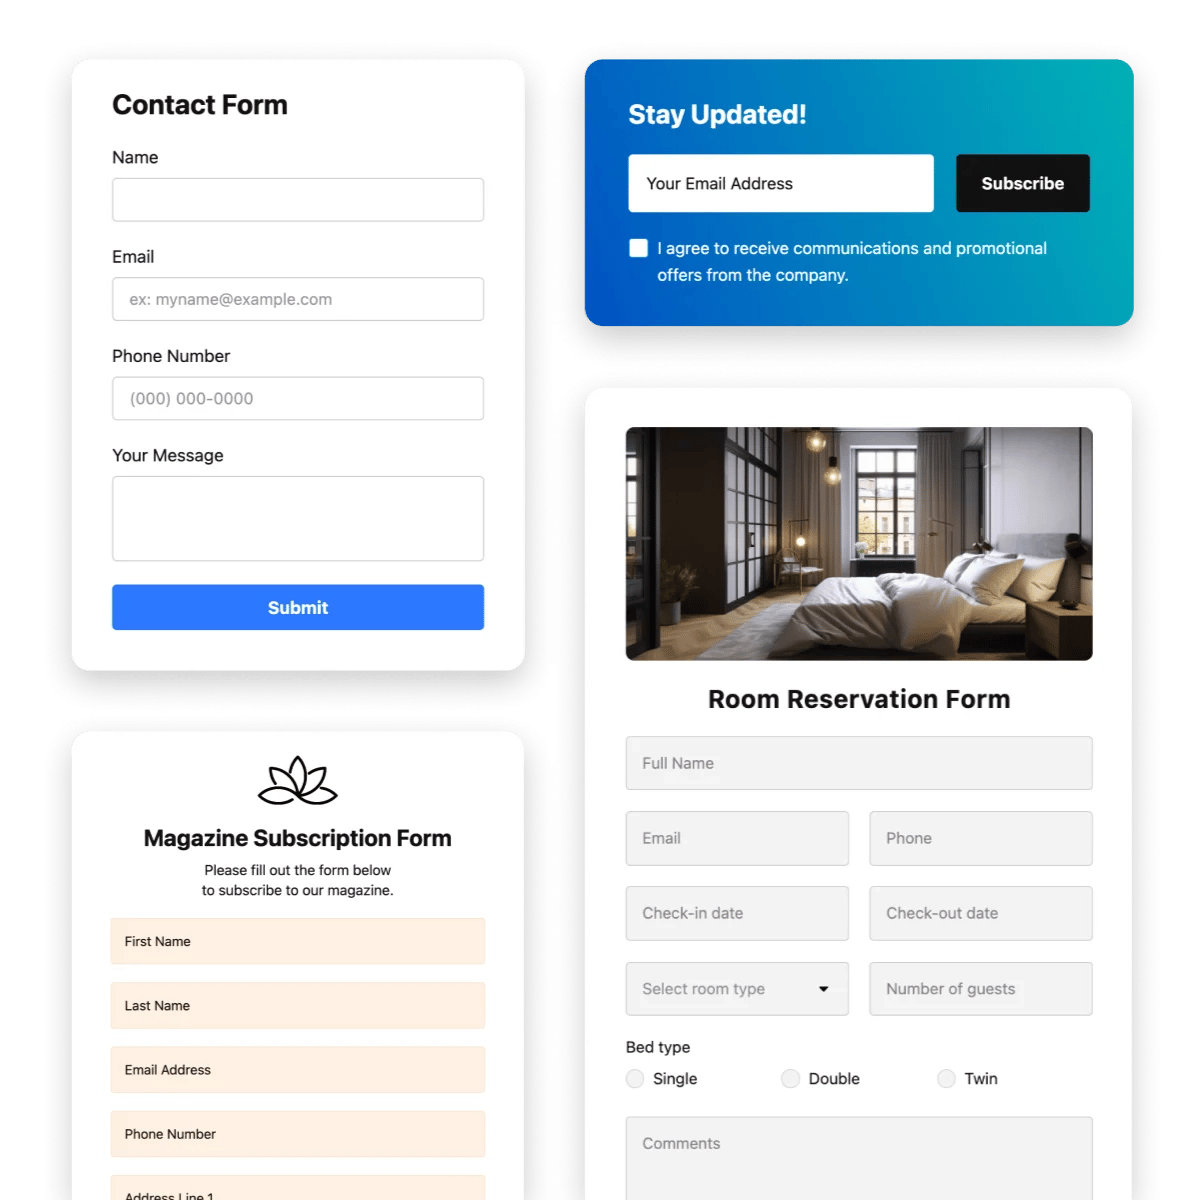
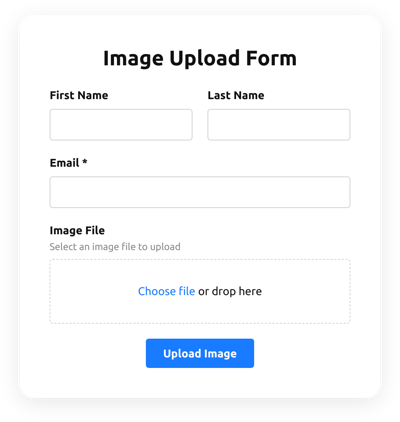
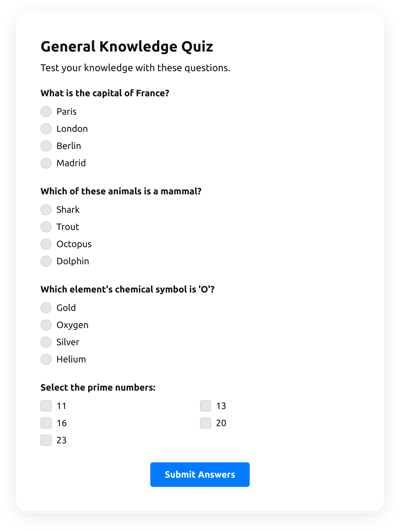
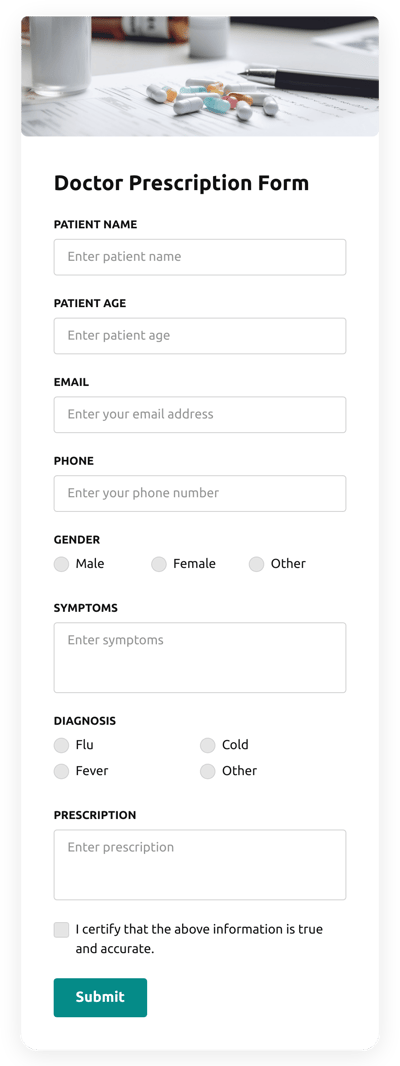
All-in-One Solution to Create Any Form Types in One Click
Elfsight Form Builder widget is an all-in-one tool for you to create any forms in just one click. Embed the one that best fits your needs: Contact us form, Feedback form, Survey form, Order form, Custom form
With Elfsight Form Builder, simply make needed form types within one place.
Explore 300+ Form Builder templates


If Having Uncovered Questions
Now you know how to simply add forms to any website builder, and why they are effective. You also know that you can create any type of form you may need with Elfsight responsive widget. Nevertheless, if you still have questions that weren’t covered in the article, please see the following options:
- visit Wishlist to offer features that you need but the Form Builder doesn’t have yet.
- go to Help Center to see more Form Builder-related articles and tutorials.
- explore the widget existing templates that you can choose from to make a custom tool.
- connect with likeminded people and share your thoughts in the Elfsight Community.
Hoping that the article on embedding a form was useful to read. Come back again and thank you for your attention!
Also, keep in mind that we’ve also got other awesome guides, for example, you can find out how to embed google business reviews on website!