Best-in-Class
Coding-Free
Easy-to-Use
Weather widget for website
Display current weather information for any location to engage your local or traveling audience with helpful daily insights.
Create Widget for Free
No credit card needed
Trusted by over 3,000,000 small business, agencies and top global brands worldwide
Create your Weather widget
Configure your widget and add it to your website for free!
Why do I need Elfsight Weather?
Accurate weather. Higher engagement.
Increase sales for weather-sensitive products
Use weather insights to trigger buying decisions for seasonal goods or travel plans.
Increase on-site engagement by +30%
Timely, relevant weather info keeps visitors interacting with your website longer.
Make weather checks effortless for users
Let visitors see the forecast at a glance without leaving your website or searching elsewhere.
99.9%
websites support
1000+
hours of development invested
1 min
to start using the widget
97%
customer satisfaction rate
Join 3,000,000 customers already using Elfsight Apps
You can start with creating your first Elfsight Weather widget for free.
What makes Elfsight Weather special?
Weather
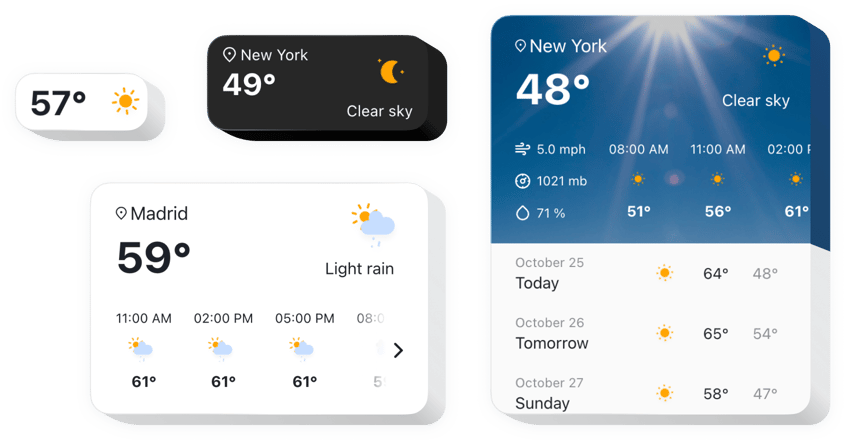
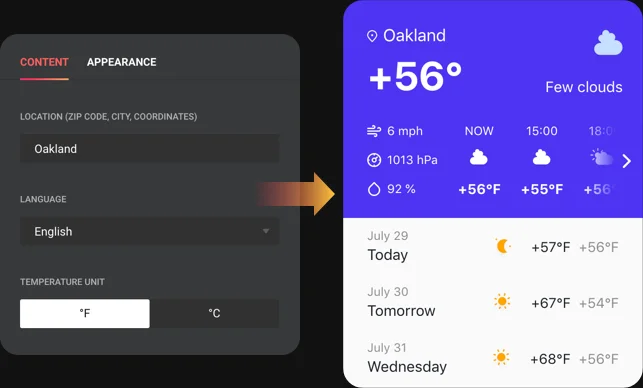
Instant weather outlook on your site
Keep website visitors updated about the weather in any part of the world. Your local town or a faraway touristic destination - display the precise forecast for any location. Just enter the name of the place, or its ZIP-code, or coordinates - the widget will do the rest. Choose your language and temperature unit and you will get the most user-friendly weather forecast widget.
It’s handy to see the weather right where you’re choosing the date for your future outdoor event
Design
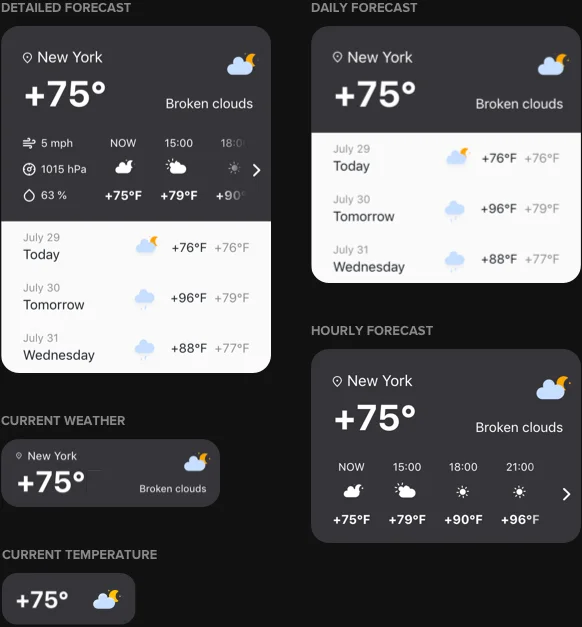
Choose the best look. Find the right place.
From a simple and unobtrusive to the most informative - there are five options for the widget design. Choose what set of meteo data you need on the site, vary the size of the widget and embed it on any place of the page. With Elfsight Weather it will be simple and fast.
Style
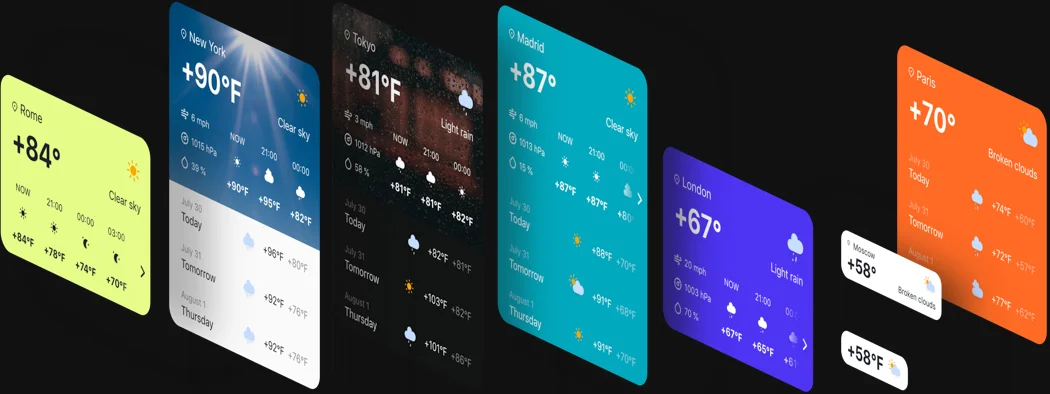
Easy options of the great styling
It’s super easy to turn your weather widget into a website element that contributes to the overall style and color solution. Adjusting the colors of the main and daily backgrounds, you can find your optimum combination. Or just choose the themed images, that will show the current weather situation.
Usage examples
See a selection of real examples to explore the full potential of Weather for your website.
See in action
Live demo
Try all the features of Weather in live demo now. No fees. No registration. No coding.
Try now
Why Elfsight widget of all others?
Diverse features are not the only thing to enjoy about the widget. Our support team is always ready with professional guidance in any issue and the freshest updates.

Manageable interactive editor
No programming, no need for a developer - our active editor ensures widget embedding with ease to save your effort.

Professional Elfsight team
High-quality timely help and free setup aid will ensure you problem-free for smooth experience with the widget.

Fabulous Elfsight Apps service
Cloud tools for regular automated updates, fast bug fixes and great loading speed wherever you are.
What our customers say ❤️

Elfsight Weather channel plugin is real cool, and their customer support is really practical and friendly. Relevant and flexible widget, personally I recommend Elfsight!

Elfsight apps gorgeous, well built, clear, and easy to adjust. I'm so pleased and impressed with their widget and support.

Great weather forecast widget, easy to personalize and in case of any query, you will get first-class help. I am strongly considering using all products.

Impressive weather radar for a very affordable price. Customizable, untangled and the Elfsight staff is really friendly and useful. Excellent user experience!

Elfsight team extremenly quickly fixed an issue I was having with their custom weather forecast. I think I will test their other widgets now!

The current weather forecast widget is brilliant and flexible interface. Highly customizable and integration is swift. Customer service was greatly polite and friendly.
Frequently Asked Questions
What location options can I use to display the forecast?
Elfsight accepts location names, ZIP codes, or latitude/longitude coordinates, automatically geolocating any place worldwide for accurate forecasts.
How can I add the Weather widget to my website?
You can add the widget to your website in just a few quick steps:
- Open the Elfsight editor and choose a template that suits you best.
- Set the location, units, and display style you want to use.
- Copy the embed code generated in the editor.
- Paste the code into your website where the weather forecast should appear.
After installation, the widget will appear on your website.
If you have any questions during setup or customization, feel free to contact our Support team.
Can I use it on any website platform?
Yes, Elfsight works on any website platform that supports embedding custom HTML including BigCommerce, Blogger, Drupal, Joomla, jQuery, iFrame, Magento, Elementor, HTML, OpenCart, Shopify, Squarespace, Webflow, Webnode, Weebly, Wix, WordPress, WooCommerce, Google Sites, GoDaddy, Jimdo, PrestaShop.
Which way do I embed the Weather plugin to the iFrame website?
To add the Weather widget to iFrame website, you have to open our Configurator or use the free demo and create your perfect widget, applying one of premade templates. After that, copy the code that will be shown in the popup window. Go to your iFrame site and open the editor. Paste the installation code to the HTML code of your website and save the changes. Remember that you can always find a detailed guide on installation here. And don’t hesitate to let us know if anything remains not quite clear.
What types of weather forecasts can I show?
Five layout options include Current Temperature (minimal), Current Weather (essentials), Hourly Forecast (12 hours), Daily Forecast (week ahead), and Detailed Forecast (full data).
Can the forecast show wind, humidity, or air quality?
Detailed Forecast reveals pressure, humidity, wind speed, and weather elements alongside temperature, providing comprehensive meteorological information.
Can I customize the background of the weather display?
Themed weather images reflect current conditions (rain, sun, clouds) or custom solid colors create branded backgrounds with automatic text contrast adaptation.
Join 3,000,000 customers already using Elfsight Apps
Get the taste of 90+ powerful apps by Elfsight. No credit card. Joining is free!
Get started
Get 20% discount now!
