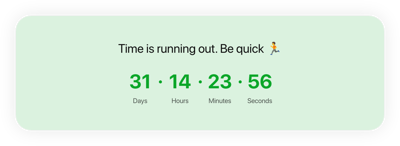
Launch Countdown Timer template for website
- 3 Types of Timer
- Custom Expiry Date Setup
- CTA Button
- 4 Switchable Count Units
- 3 Actions After Timer Expires
- 4 Placement Options
- 5 Timer Styles
- Advanced Design Settings
- 3 Number Changer Animations
- Responsive Interface
- Support Multiple Time Zones
- Custom CSS
- Easy Website Integration
- Tech–Free Customization
Need a Different Template?
Here’s what people say about Elfsight Event Calendar widget
FAQ
How to create the Launch Countdown Timer template for the website?
If you want to create the Launch Countdown Timer for your website, follow these instructions:
- Choose the Launch Countdown Timer template.
- Adjust the elements and features to match your branding.
- Log in to your Elfsight dashboard.
- Obtain the installation code.
How to embed the Launch Countdown Timer template on the website?
To embed the Launch Countdown Timer on your website, take these steps:
- Personalize the appearance of the Countdown plugin to match your aesthetics.
- Log in to your Elfsight admin panel or set up a free user profile.
- Receive the unique installation code.
- Access your website.
- Paste the code into your website editor. Done!
To get more information, we suggest checking out our article about how to embed Countdown Timer on any website.
What is going to happen when the timer expires?
You play the role of the storyteller for what lies ahead! The Launch Countdown Timer widget presents three alternatives once the clock reaches zero: hide the countdown, showcase a message with a CTA button, or redirect consumers to the specific URL. It is crucial to make your decision wisely that aligns with your business goals.
What website platforms are compatible with the Launch Countdown widget?
It doesn’t matter which platform or CMS you use: the plugin allows you to add your Launch Countdown Timer on almost every website. The following are the common ones:
Adobe Muse, BigCommerce, Blogger, Drupal, Joomla, jQuery, iFrame, Magento, Facebook Page, Elementor, HTML, ModX, OpenCart, Shopify, Squarespace, Webflow, Webnode, Weebly, Wix, WordPress, WooCommerce, Google Sites, GoDaddy, Jimdo, PrestaShop.
Can I use the Launch template for free?
Yes, certainly. Elfsight utilizes a multi-level subscription model and offers a Free option. This option fulfills all the fundamental needs with no limitations on features. Nonetheless, if you would like an upgrade to unlock additional perks, you can opt for one of these alternatives: Basic, Pro, Premium, or Enterprise.
Can I add a call-to-action button to the Countdown widget?
Certainly! Simply follow these steps:
- Open the Countdown Timer configurator.
- Go to the “Button” menu choice.
- Set the toggle to “Show Button.”
- Insert the desired button URL and text.
Does the widget support different time zones?
Yes, it definitely does. The plugin automatically adjusts to the time zone by considering your location. That being said, if you decide to make any changes, you can find the most commonly used options by scrolling through: CST, EST, HST, PST, etc.
How to customize the Launch Countdown Timer widget?
Witness the elevated audience interaction and brand recognition, thanks to the plugin’s customizable features:
- Timer Information
The personalization differs: from time duration to timer description, labels, CTA button, concluding statement, and redirect link. Craft content that is thought-provoking and stays impactful. - Placement settings
Elfsight provides four options: install to the required position, static top banner, floating top banner, and floating bottom banner. Ensure your Countdown Timer is displayed in the most noticeable spot on your website for increased views. - Custom elements and features
That’s not all—there is still a lot more to cover: actions after the timer expires, alignments, animation effects, themes, timer separator styles, colors, sizing, fonts, Customs CSS, etc.
For more clarification, contact our Support Team to resolve any issues and prevent misunderstandings in the future!
Help with Launch Countdown Timer Setup and Website Installation
If you find yourself in need of more information on the widget templates or guidance, take advantage of these resources:


