How to Embed A Calendar on Website?
An interactive calendar is a must-have tool for any business that hosts events, relies on appointments, or has important dates. It allows your visitors to easily view and stay updated on your schedule, making it a vital part of any website focused on events, booking, or planning. With so many options out there, it’s crucial to choose a solution that is both efficient and easy to manage.
So, most likely your goal is to have an interactive calendar for your website in order to create, manage, and synchronize events. You don’t want to spend much time and effort on coding or building it out of custom blocks with a constant need of manual updates, right?
Great, then let us recommend you a no-code Event Calendar widget by Elfsight. This embedded calendar works on any website and offers you a lot of customization options – it will function seamlessly and look natural on your pages.
Here’s how you get it:
- Start working with the editor below this instruction. No need to sign-up until you try out everything!
- Add your events manually or just connect your Google Calendar.
- Customize the appearance of the widget according to your liking.
- Get an HTML code of your widget and embed the calendar in the website by simply pasting this code into your CMS.
Just check out the editor and test its functionality for yourself! ⇓
Detailed Guide: Create and Customize Your Calendar Embed
Now let’s create our free embeddable calendar from scratch. It will only take you a few minutes and no messing around with coding and stuff. We will also add illustrations to all of the steps to make the process even more convenient for you.
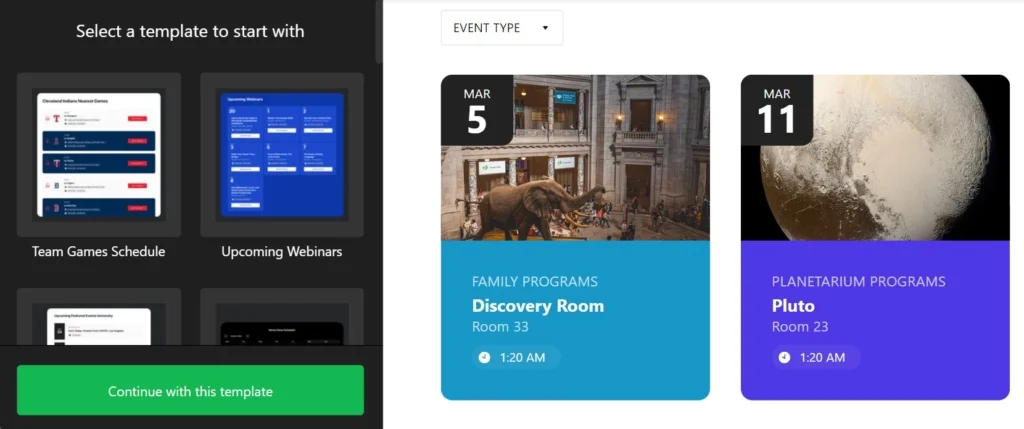
- Start with a suitable template. Select a starting option in the editor above or pick one of our pre-designed calendar templates.
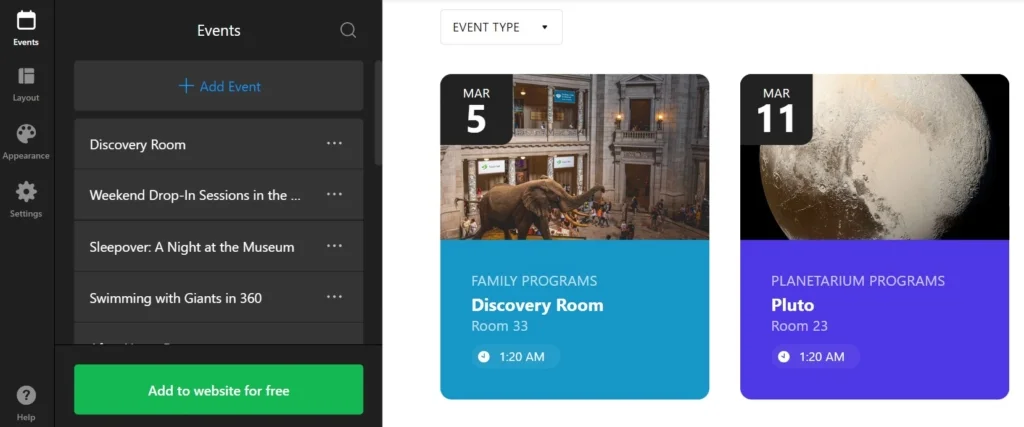
- Add events to your calendar. You can either connect Google Calendar or manage your embeddable calendar manually, by adding your planned events.
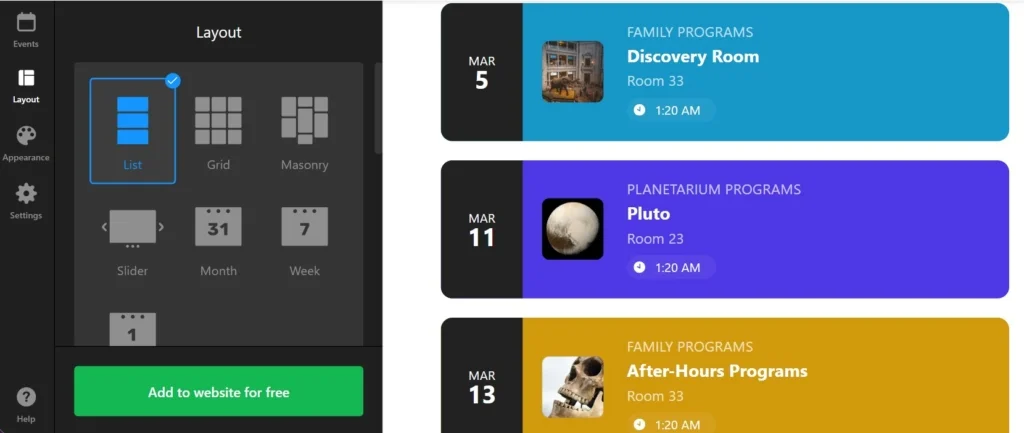
- Choose a layout for your events. In the ‘layout’ tab you can specify how the website visitors will see your calendar: grids, masonries, sliders, and other ways to display events are at your service!
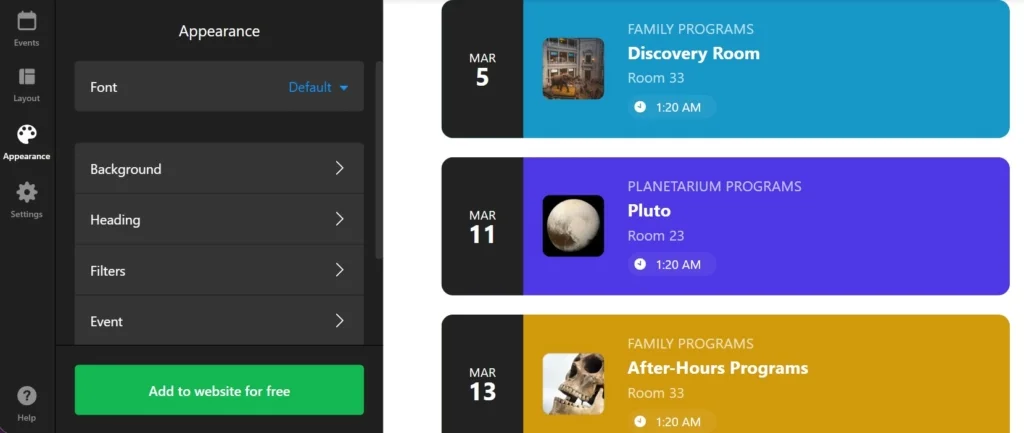
- Customize the way it looks. Your calendar embed is almost ready. Now it’s time to make it really suit your website, which is simple with a possibility to change nearly everything.
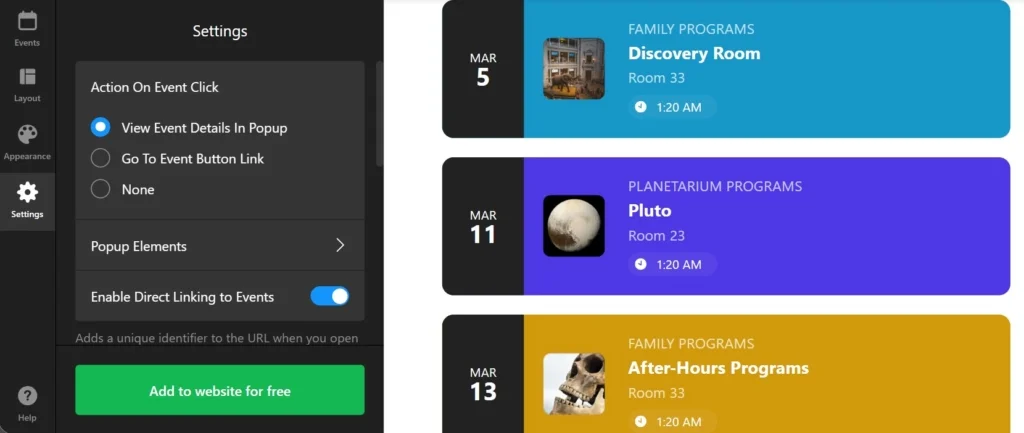
- Explore additional settings. Adjust on-click and popup settings, enable simple ways to interact with your events, or even add your custom CSS and JS to the widget if necessary.
- Get your HTML code. When you press finish creating your calendar, move on to publishing it. You will see a short code snippet that holds the whole information about your widget. Copy it.
Integrate Calendar Widget on Your Website Builder or CMS
As we promised, it is very simple to add the widget to any website. We will take a look at some manuals that cover the process for the most popular CMS platforms.
How to embed Calendar on HTML website
Watch this video to learn how to quickly embed the Calendar widget on any HTML-based website. It’s helpful to see the process in action before getting started. If you prefer, you can also follow the straightforward written steps provided below.
- Go to the backend of your website. Make sure you can edit the HTML code in your admin panel to integrate the widget seamlessly.
- Put the Elfsight code into the HTML of your website. Choose the location where you want your Calendar to appear to pursue your business goals.
- Save the changes to your website. Check whether everything functions the way you planned and looks consistently on the page.
Add Calendar to WordPress website

You can quickly embed your no-code widget into your website, by inserting the provided code into a block. Thus, you will make your Calendar appear exactly in the spot that you need.
- Log in to your WordPress account. You will need to work in your admin panel in order to make changes to the HTML code.
- Go to ‘Pages’ and choose the page you want. Keep in mind your business goals and reasons for embedding the plugin into a certain area.
- Add a custom HTML block. It must appear in the required part of the website that you have chosen to embed Calendar into.
- Insert the generated code in this block. Don’t forget to ‘Update’ the page and check the functioning of the widget.
Add Calendar to Wix website

Adding the widget with your Calendar to a required page of the Wix website is simple. The custom code that you received from Elfsight integrates seamlessly with a desired area of the pages.
- Access your Wix website editor. Log into your Wix account and select the site you want to edit. Navigate to your site’s dashboard and click on ‘Edit Site’ to open the website editor.
- Add an HTML block for the Calendar widget. Click the Plus icon on the left-hand menu and navigate to the Embed section. Under the ‘Custom Embeds‘ tab, select ‘Embed a Widget‘ to add a new HTML block to your page.
- Insert the Calendar widget installation code. Click ‘Enter Code’ and paste the installation code provided by your Calendar widget editor. After entering the code, hit ‘Update‘ to embed the widget into your page.
- Adjust the widget’s dimensions and placement. Adjust the widget’s dimensions and placement on the page. Make sure the widget fits perfectly and is visually appealing by resizing and positioning it appropriately.
- Optimize for mobile devices. Switch to the mobile editor and adjust the widget as needed. Ensure the widget looks great on mobile devices, then publish your changes once you are satisfied with the layout.
Add Calendar to Shopify website

You can quickly add the Calendar widget to any page of your Shopify website. You will only need to insert the ready-made code from Elfsight into a required area of your website.
- Go to the Shopify admin panel. You need to find the ‘Online Store’ area of the website.
- Select ‘Customize’ from the drop-down menu. Then in the left-hand menu, select ‘Add Section.’
- In ‘Custom Content,’ click ‘Add.’ You will have to remove the Shopify parts that were pre-installed.
- Select ‘Custom HTML.’ It is the option that you will find in the ‘Add Content’ menu.
- Locate the ‘HTML’ section. It is where you can embed the Calendar installation code and save all modifications.
Add Calendar to Squarespace website

Anyone can quickly embed the calendar of events to the desired page on a Squarespace website. All you need to do is to enter the generated code from Elfsight into a specific block on the page.
- Sign in to your Squarespace account. Log into your Squarespace account and select the site for the widget. Navigate to your site’s dashboard and choose the website you want to edit.
- Navigate to the ‘Website’ section. Pick the page where you want to add the Calendar widget. Go to the ‘Website’ section from the main menu and select the desired page.
- Hit ‘Edit’ and then ‘Add Section.’ Click ‘Edit’ on the chosen page and then select ‘Add Section’ where you want the widget. This allows you to create a new section on your page for the widget.
- Add a code block. Select ‘Add a blank section,’ then click ‘Add block’ and choose ‘Code’ from the list. This is where you will insert your Calendar widget code.
- Insert the Calendar widget installation code. In the ‘Edit’ icon, paste the Calendar widget installation code and adjust the block’s width. Ensure the widget looks well-placed and visually appealing on your page.
Create Calendar in Squarespace→
Add Calendar to Webflow website

Adding the widget to Webflow pages is smooth since you only need to add an Embed element where you deliver the generated code of your Calendar.
- Start in Webflow. Sign in to your Webflow account and pick the website where you intend to embed the widget.
- Embedding the widget. In the Webflow editor, click the Plus icon. Then, simply drag and drop the Embed element from the left menu to where you want the events to be shown.
- Inserting the code. Embed Calendar installation code in the HTML Embed Code Editor that appears. Afterwards, click ‘Save & Close.’
- Customization and publication. Adjust the settings of your Calendar, then press ‘Publish’ and choose the domains for its activation.
Add Calendar to Elementor website

It is simple and convenient to embed the Calendar widget into Elementor. You will just need to have an empty block on your page where you insert the code of the widget.
- Start in the WordPress backend. Log into your WordPress website’s backend, go to ‘Pages’, and select the page for adding the Calendar widget.
- Initiate Elementor editing. Choose ‘Edit with Elementor’ to begin customizing your chosen page.
- Implement the HTML element. Utilize the drag-and-drop feature to place the HTML element on your page.
- Add the widget’s code to the website. Embed the Calendar installation code by Elfsight into the HTML Code box.
- Update and enjoy. Hit ‘Update’ to apply your changes and see your page transform with the embedded Calendar.
Why is Embeddable Event Calendar Valuable for Your Business?
So, adding the widget to your website won’t be a problem. Let’s now see what you get from embedding the Elfsight Event Calendar on your pages. Here are the key benefits of the widget in terms of their value for your business development.
Value 1: Your website users will never miss the most important events
Our calendar allows you to break events into categories and let the visitors filter them to explore those that are relevant for them the most. The customers won’t miss your conference or roundtable if they can view the schedule clearly.
Value 2: Synchronize your current events in a click
Why create a new calendar when everything is already scheduled in your company’s Google account. With a one-click Google Calendar integration, you can display your scheduled events immediately on the website.
Value 3: Display events clearly and boost interactivity
The visitors can view the event in a popup mode that uncovers more details and promotes the event in a detailed way. You can also equip each event’s card with CTA elements like buttons and links that will increase participation and boost your conversions.
Value 4: This will be your individual, totally customizable calendar
Whether you connect your Google Calendar or create a schedule from scratch, you have numerous options to adjust layouts, fonts, colors, and style of elements. To make your customization journey even more wholesome and simple, we provide pre-designed templates for popular use cases.
Examples of Calendars for Websites
You might be wondering how to add a calendar to your website in the most engaging and effective way. To help you get started, we’ve created a variety of templates that showcase popular use cases with pre-designed layouts tailored for your needs.
#1 Conference Agenda Calendar
The Conference Agenda template is perfect for organizing regularly scheduled meetings. It provides all the essential details for each event at a glance, allowing website visitors to easily plan their participation on the most convenient dates.
#2 Grid Calendar
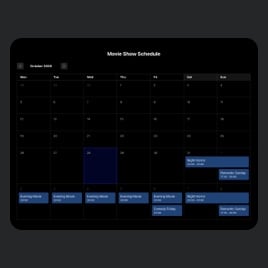
The Grid Calendar template offers a classic, structured view of the entire month, displaying all available events in a neat grid. This layout is ideal for visitors who want an at-a-glance overview, especially useful for calendars with a lot of information.
#3 Sports Scheduler Calendar
Sports fans never want to miss a game, and the vibrant Sports Scheduler template is designed just for that. Perfect for showcasing upcoming matches, it also works well for concert planners or any event-driven website that needs an engaging, eye-catching design.
#4 Scrolling Calendar
For a more minimalistic approach, the Scrolling Calendar template displays events one by one. This is an excellent option for sites with fewer events or where embedding a full calendar might not fit the design.
#5 Event List Calendar
The Event List template allows visitors to scroll through events in a clean, line-by-line format. It’s both space-efficient and informative, providing a clear and concise way to present your events without overwhelming the page.
Feel free to explore our templates catalog to set up a perfect calendar embed for your website:
Explore 30+ Event Calendar templates
Which Businesses Benefit from Embeddable Calendars?
Our Event Calendar can be easily customized for any website, purpose, or need, making it a valuable tool for promoting your business. Here are just a few examples of who can benefit from using this widget:
🧑💻Event professionals
Our widget makes event management of any class easy. It helps to promote the occasion and deliver detailed information via a website or link in a structured way to a large number of guests. The calendar can be added to a website or landing page dedicated to the occasion or shared via a link and sent out to all the participants.
🌟Personal brands
Embedding such an application is important for any professional who does teaching or public speaking activities. When taking part in many different events and hosting your own it’s necessary to promote them for best exposure and attendance. A personal website or social media account suits perfectly for embedding the calendar with your upcoming events.
🛍️Small businesses
When running occasions to widen business awareness, embedding our tool helps you to make the most of your company events. A thoroughly planned and well advertised occasion contributes to driving more online traffic to websites and potential customers, connecting with a wider audience.
🌍Civic & community organizations
Our Event Calendar widget is best for all types of non-profit or public institutions, as we provide a free version of our products for them upon request. These include school, college, and university websites, various community groups and civic associations doing some kind of charity or socially meaningful activity.
FAQ
Can I embed an Event Calendar on my website for free?
Sure. You can create, customize, and add the calendar to your website for free. All the features will be available for as long as you plan to use the widget. However, if you need more opportunities with this or other widgets, you may check out our Pricing section and consider upgrading.
Is the Events Calendar widget mobile-friendly?
Sure! You can check how the calendar is displayed on different devices in the Screen View mode in the editor.
Does your calendar widget support time zones?
Yes, you can set the time zone for your events and visitors of your website will see the time settings according to their browser time zone.
More Ideas to Grow Your Website
- Are you active in the media? We have a solution that can help you display your social media activities on the website. Check the Social Feed widget by Elfsight to engage customers and attract more visitors to your events.
- Wish to attract feedback? There’s a way to improve your communication with the customers. You can ask for direct feedback in detail or conduct surveys for new development ideas or event planning improvements with Elfsight’s Form Builder. Create user-friendly forms that invite more answers and grow the number of leads.
- How about gaining loyalty? Embed reviews from Amazon, Facebook, Yelp, and 30+ other companies in our All-in-One Reviews widget. Thus, you can display the most relevant platform’s reviews to the audience of your events. You will get more trust and attract even more people for the upcoming events.
Or just see the list of all widgets that Elfsight has developed to simplify e-commerce, social presence, and website management.
Have A Question?
We hope this guide has been helpful. Reach out to us if you need more information on embedding the Event Calendar widget or require any assistance. We’re here to make sure your experience is smooth and successful.
Elfsight is dedicated to providing a complete, no-code solution for your website needs. We’re also a vibrant Community where ideas and expertise come together, so feel free to share your creative suggestions in our Wishlist!


