Let’s start right away with learning more about what a timer widget is and what are the options for installing it on any website. Then you’ll see some of the most popular templates and best practices of using countdown widgets for the benefit of your business.
What is A Countdown Clock and How to Embed it
A countdown timer plugin is an active clock with minutes, hours and days that expires at a specific time set by the user. This can be used for a variety of purposes like informing the audience about event start or end, store opening, expiry of exclusive offers, etc.
Embedding Elfsight Countdown Clock widget on your homepage is fast, easy, free, and requires no coding knowledge. Check out the short guide to have an idea of how it’s done:
- Register an account at Elfsight. This is free, no card required;
- Choose a countdown timer plugin in your personal admin board and adjust it to fit your needs and web design.
- Copy a unique combination for further installation;
- Paste the code of your countdown clock to HTML field on the page or template of your website;
- Save the changes!
And here you can also see how you can embed google business reviews on website.
Remarkable Ready-To-Use Templates
Our coding-free countdown widget is super adaptable and has a lot of customization features. But if you are looking for a well-designed section for your site, then take a look at the most popular premade templates. They can be used in a few clicks – just pick the right one, set your timing, and it’s ready to be installed. Also, we have way more patterns for every use case or occasion.
Evergreen Timer Template
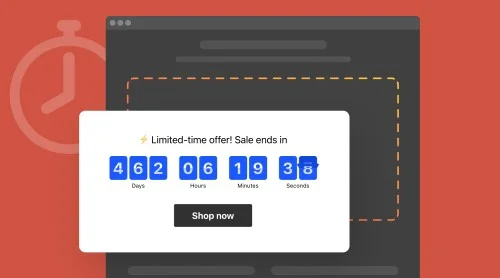
This is a repeating countdown clock that starts individually for each website user, showing the time he or she has until a special offer ends. Evergreen ticking is a great e-commerce tool for raising scarcity and urgency among the visitors. Personalised offers work great for stimulating purchase activity.

Launch Countdown Template
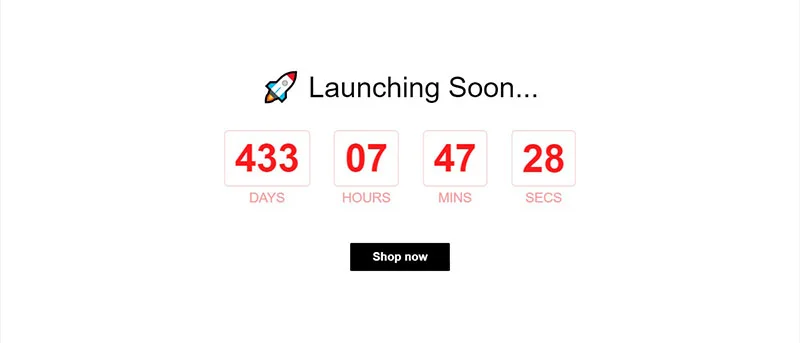
When organising an event, preparing for a business opening, launching a new product or project, it is important to create anticipation among the audience. It doesn’t matter what the occasion is – local place opening, announcing new album release, or starting the course or webinar. The Lounch Countdown widget may be counting time down to the beginning of any event on your site or Facebook page, just set the time and date and write captivating title and caption.
Black Friday Counting Template
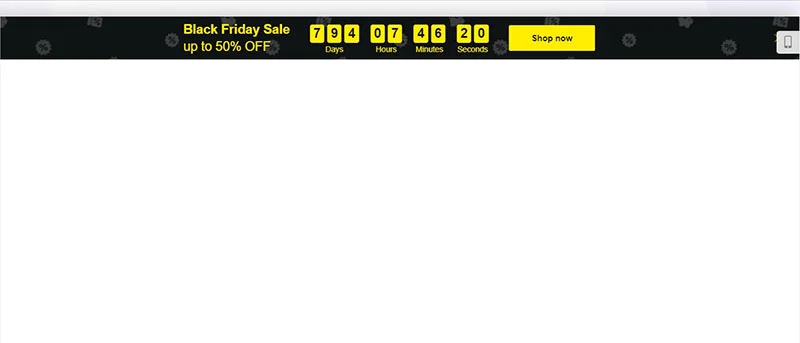
There’s no other occasion for e-commerce like Black Friday! Every online shopper anticipates it and each retailer prepares for it in advance, planning a sale or free shipping offer. Black Friday countdown clock template is a must to inform the users that you are prepared to take part in the sale, generate anticipation and raise interest around it.
Christmas Timer Template
Christmas is probably the one of the most widely celebrated holidays around the globe. It would be a shame to miss such an occasion and not use it for growing your business. There are so many options to use this festive Christmas model: simply count days back left to celebration, announce the upcoming holiday sale, or show how many presents are left in stock.
Halloween Counting Template
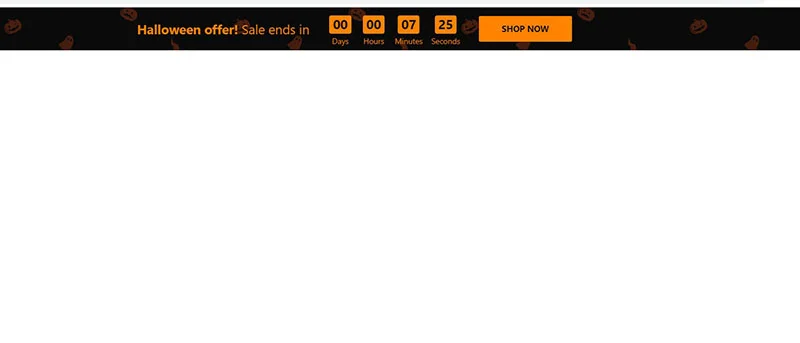
Halloween is one more holiday that many people celebrate, especially in the United States. According to Statista, people spend more and more money each year in this season. So it might be a good idea to run some kind of special promotion. A Halloween-themed countdown plugin with a clock attracts attention of your website or Facebook audience and helps visualise the time left to the holiday event or end of your festive sale.
How to Embed a Countdown on The Most Popular CMSs
Countdown clock is a popular element or plugin that is used on a wide variety of websites, and there are diverse free options to integrate it. They include open-source apps for various programming languages, third-party applications like Elfsight, or build-in apps that some CMSs are providing.
HTML Countdown Clock
The’re two options to add a countdown timer widget to your HTML website – write your own code, edit existing open-source app for a custom counting section, or use a premade plugin. If you don’t possess enough coding skills to develop your own plugin, then a third-party solution is the best choice for you. It requires no special programming, all the changes are implemented in an intuitive editor, and in order to embed it, just paste a small piece of installation text in your site.
Here is a step by step guide:
- Log into the Elfsight admin panel.
- Find the required app there.
- Pick a template and then customise it and change settings.
- Click Add to website and copy the installation details.
- Paste it to your site’s code or a custom field in a backend.
Now, you can check the widget in action on your website. You see that the process is straightforward and even a beginner can handle it!
Keep in mind that if any changes are needed, you may adjust the section as you like in the Elfsight panel, and the changes will be updated automatically. You don’t have to embed anything once again to your website.
Create and embed Countdown on HTML site→
Countdown Clock WordPress
As WordPress is an extremely popular CMS, there are many open source plugins available. They’re mostly free to use and installed right to your WordPress dashboard. There you can adjust the parameters in special fields, set time and date, and pick the colours.
Although this option may seem simple, these plugins also require you to understand the markup language to be able to configure them according to your needs and set a required positioning.
That’s why the Elfsight Countdown Clock widget is super popular among business owners using WordPress CMS. You don’t have to worry about coding and can set every parameter in a straightforward online editor. Here are two options to embed our countdown widget to your WordPress website depending on the dashboard you prefer.
Option 1: With classic WordPress editor
- Create a new Countdown Clock widget in the Elfsight admin and copy its code for installation.
- Log in to your WordPress dashboard.
- Click on ‘Pages’ and choose the page for the section.
- Add a custom HTML block where you’d like your countdown to appear.
- Insert the code you’ve copied.
- Click ‘Update’ to save it.
Remember that if you need to bring any changes, adjust the settings in the Elfsight panel, and they will be automatically updated on your site. It’s not necessary to change anything in your WordPress backend.
Set up and add Countdown on WordPress→
Option 2: Via Elementor dashboard
More and more WordPress users prefer working with a visual editor over the classic block editor since it completely eliminates any need to deal with any programming. Elementor is a plugin for WordPress that facilitates customising a whole site or separate pages. The process of adding the Countdown Timer to Elementor is also simple:
- Set up your widget in a free account at the Elfsight admin panel. Save.
- Get the two lines of code for installation.
- In the WordPress dashboard, choose the page.
- Select ‘Edit with Elementor’ in the list of pages or right in the WordPress page manager.
- Choose the ‘HTML’ element from the catalogue and drag it to the needed position.
- To save the changes, click ‘Update’ in both Elementor and WordPress.
Form your Counting and place it on Elemenor→
Countdown Clock For Facebook
This social media platform has the functionality to let the users display custom content they want. It can be done with a special Custom Tab, that is displayed in the left menu of your Facebook profile. Note that you should have a business account to be able to attach Facebook Custom Tab. You can see our brief article explaining how you can create and manage such a tab.
This functionality is used to display various types of content, including web applications. Facebook has no integrated functionality for adding a countdown timer plugin on a profile or custom tab, so here you again have a choice to develop your own code on a Facebook developers platform or use a third party application like Elfsight. See the description below:
- Create a widget in your Elfsight account.
- Copy the details for installation.
- Create a custom tab on your public Facebook page to embed your countdown.
- Set it to the HTML tab.
- Paste your content or enter the text you’ve copied.
- Press save settings. You’re done!
Now you can use the countdown timer on your Facebook Page to liven up the content, run promotions and so on. If there’s a need to update your clock, you can simply do it in the Elfsight editor. All the changes will be applied to the widget on your Facebook Page automatically.
Make your Countdown and show it on Facebook Page→
Shopify Countdown Clock
As Shopify mostly offers ready-to-use templates and almost no website building tools, you’ll have to search for a third party countdown clock plugin in the Shopify App Store or develop the code. It’s better to choose the service with an intuitive interface, wide customization options, reasonable pricing, and support available.
Here’s a detailed guide on integrating the Elfsight timer to your Shopify store.
- Create, customise and save Countdown app on apps.elfsight.com
- Copy installation code.
- Log in to your Shopify admin panel.
- Go to the ‘Online Store’ section.
- Select ‘Customise’ from the drop-down menu.
- In the menu on the left side, select ‘Add Section.’
- Initiate ‘Custom Content’ block.
- Delete the Shopify content that was preinstalled.
- Select ‘Custom HTML’ from the ‘Add Content’ menu.
- Embed the details there.
- Save all modifications.
Now the countdown clock is live on your website!
Create and add Countdown on Shopify→
jQuery Countdown
jQuery is a free and open source special software library, which makes it easier to use JavaScript on your website. If you have a site made with jQuery, then you are probably tech-savvy and can find an open-source plugin and change its code accordingly. If you have a site that was developed for you with jQuery and have no or little programming knowledge, you still can make and embed a countdown clock easily and with no sweat and coding.
- Here is a simple tutorial:
- Log into your Elfsight account and choose a Countdown Timer widget there.
- Set a clock, customise and change your widget.
- Copy the installation details.
- Paste them into a custom HTML field in a backend or to your site’s code.
- Save and check the timer in action.
The process is really uncomplicated and each average internet user can handle it! Also, if you need to apply any changes, just set the counting as you like in the Elfsight online editor. The clock will be automatically updated, so you don’t have to change anything on a website.
Build and embed Countdown on jQuery→
Squarespace Countdown Clock
Squarespace is a highly popular content management system for running a wide range of business websites – from online shop to a personal site or portfolio page. It offers a lot of tools like site builder, domain purchasing, running marketing campaigns and collecting analytics.
Unfortunately, you won’t find a countdown among the available website blocks and extensions, so you will have to look for developing a custom piece of code for your use case or embedding a third-party application. Elfsight offers a high-quality app with an intuitive interface, wide customization options, and support for every user. This is easy to adapt to fit your web design and is installed in a few clicks.
- Make a Countdown Clock on elfsight.com and copy the code for installation.
- Log in to your Squarespace account and edit your site.
- Attach a ‘Code block’ in a Squarespace editor.
- Paste the code to this HTML field.
- Save the changes.
- Go check the Clock on your Squarespace website.
The widget will be displayed as soon as you save the changes in your admin board. If you would like to transform your clock in any way, there’s no need to embed it once again – just update it in the Elfsight dashboard.
Create a Countdown and embed it on Squarespace→
Wix Countdown Clock
Wix is the only platform of the mentioned above that has the integrated functionality to add the countdown plugin. To do it, you have to go to the Wix App Market, find Wix Countdown Clock there and click on the Add to website button and choose the appropriate page. After that you’ll get access to the menu to adjust your app.
Although this option may seem quite attractive, the Wix app has little to no customisation option in terms of web design – no extra options for widget positioning, no custom fonts or captions and other elements. So this app has rather limited functionality, but is simple and straightforward.
If you would like to have more freedom in terms of personalisation, you should try a third-party clock like Elfsight. It’s full-scale functionality enables creating a custom clock for any use case
- Sign up at Elfsight Dashboard, build a countdown widget and copy its code.
- Sign in to your Wix account and select the site where you want to put it. Click Edit Site.
- Attach HTML Block.
- Click the plus icon, go to the Embed section and select Embed Widget under the Custom Embeds tab.
- Click Enter Code, paste your installation code and click Update.
- Adjust the position of the Wix Countdown Widget if needed and save.
In case you need to update your clock, there’s no need to change the installation code. Just head over to the editor, modify it, and the timer on your website will be changed automatically.
Set your own Countdown and display it on Wix→
Webflow Countdown Counter
Squarespace is a very popular content management system for running a wide range of business websites, from an online store to a personal or portfolio page. It offers many tools like site builder, buying domains, running marketing campaigns and collecting analytics. Unfortunately, you won’t find a countdown among the available Blocks and Extensions for the website, so you’ll have to deal with developing custom HTML code for your use case or embedding an application from third party providers. Elfsight offers a quality app with an intuitive interface, extensive customization options, and support for all users. It can be easily adapted to your web design and is installed with a few clicks.
- Login to your Webflow account and select the website where you want to see the countdown widget.
- Click the plus icon, locate the Embed element in the left Components menu, and drag and drop the element to the location on your page where you want the counting to appear.
- Paste your countdown installation code into the appearing HTML Embed Code Webflow Editor window and click Save & Close.
- Adjust the settings in the right-hand menu for a desired look and positioning, then click Publish and press Publish to Selected Domains.
In case you need to update your clock, there’s no need to update the installation details. The countdown clock widget on your net web page can be changed automatically, just head over to the editor, set modifications there, and save.
Make a Countdown and add it on Webflow→
Joomla Countdown Counter
Joomla is a cost-free and open source CMS written in Javascript, which optimises the process of building, running and updating your internet site. If you’ve got an internet site made with Joomla, then you are likely tech-savvy and may discover an open-source plugin and alternate the code according to your liking.
But even if you’ve got a site that was developed for you with Joomla and don’t have any or little programming knowledge, you can make and embed an HTML countdown clock for your internet site without any code, difficulty, or sweat.
- Login to the admin panel. Go to Extensions → Templates and select the one that your website uses.
- If you want your countdown plugin to be displayed on all pages of your site, you need to open the index.php file, find the body tag and paste your installation code right after <div class>. Click Save to apply the changes.
- If a countdown is only needed on separate pages of your Joomla site, follow the steps from the previous point but only paste the first line of your code and save.
- Go back to your control panel. Click Articles in the left-side menu and select the page in the Articles section where you want to display your widget.
- Open it and click on the HTML icon in the top menu to add a block. Paste the second line of your installation code into the pop-up window that appears, click OK, and then click Save.
In case you want to replace your countdown clock plugin, there’s no need to extrade the set up code. Just head over to the editor, alter it, and the clock for your internet site may be modified automatically.
Create and embed HTML Countdown on Joomla→
Countdown Timer Features
Along with simple integration to any CMS and even Facebook, free support and lots of other benefits, you get access to a super wide functionality of the Elfsight Countdown Clock. A Live-Editor has an intuitive and coding-free interface which lets you easily build your own widget. See the main features below.
| Full design adaptability |
|
| Three types of counts |
|
| Adjustable clock |
|
| Flexible positioning |
|
| Various elements |
|
| Finishing scenarios |
|
| Convey the message |
|
| Editable units labels |
|
| Number counters |
|
| Add buttons for immediate action |
|
| Scalable elements |
|
| Design options |
|
Best Practices
Now, as you’ve learned everything about the clock installation, let’s consider some essential points a website owner should know when planning to make and add a countdown clock plugin.
Why You Should Embed A Countdown
A countdown clock can be used on a homepage or business page at Facebook or in emails to increase online sales, raise awareness about some upcoming event or launch, etc. In some cases, it might be important to convey a sense of urgency or scarcity to your customers to get them to take action or engage with your promotion, email or website.
Here are major benefits of a countdown and the goals it can help you reach:
- Generate Urgency: You can use a countdown clock to highlight important moments, dates, and news and events to your users. For example, the case study by Upland found that a timely email with a built-in countdown showing customers that the Black Friday sale ends in 4 hours, increased customer urgency.
The results showed a 400% higher conversion rate during this sale. This may be due to creating a sense of FOMO (fear of missing out), but the clock also draws value to the offer and reminded customers that the cheaper prices were about to end.
- Scarcity Principle: A countdown timer can trigger the natural human response to scarcity. Online retail industry saw it in buying behaviour at the start of the COVID-19 pandemic (Accentuate research). Leveraging the scarcity and urgency models in ecommerce campaigns with countdown timers and other marketing messages is important as it shows how popular and how in-demand a product or service is. While this doesn’t turn the product to be any better or worse than those of the competitors, the results of this type of marketing are still strong.
- Emphase Value: Mckinsey investigation of different use cases revealed that the volume of online sales increases significantly towards payday. By reminding your customers when a particular sale or campaign starts, how long it lasts in hours, and when it ends, you can give your customers time to budget, prepare and plan ahead.
- Generate Interest: Generating interest is an important marketing strategy because the more interest means more eyes on the product, event, or campaign. Creating a sense of anticipation is helpful, as it can encourage sharing and sticking among the audience and, for example, on social media.
Easy to Try: We offer a free plan, so you can create a countdown, get an installation code and embed it in an HTML field at your CMS or Facebook account free of charge. If you like the service and the functionality it offers, you can upgrade your subscription anytime.
Where To Place Countdown
The power of the countdown is that the ticking of the clock gives the customer extra urgency. They can actually see that time is running out and this is becoming a factor in their purchasing decision.
The key with countdowns, as with using urgency in general, is that they provide useful information to customers via a web page for Facebook. So that a sale is ending soon or that they might have an hour or two left to order if they want to receive items the next day.
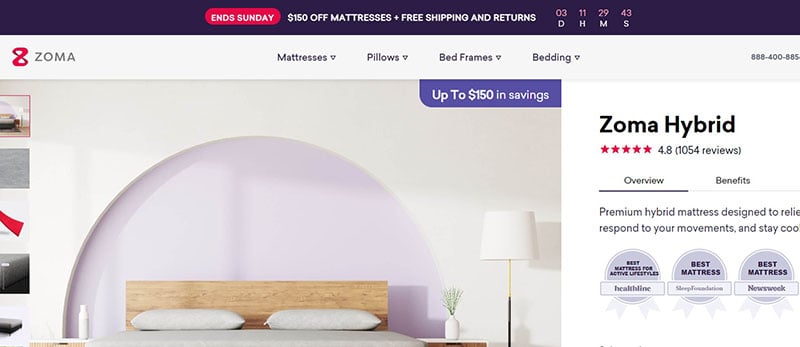
- The most common way to use an HTML countdown clock is to set it on a homepage or website’s template to be shown on every page of the site. It is usually formed as a floating banner in the upper or lower part of the screen, so it won’t be missed and is always visible but not obtrusive.

- One more obvious place to use them is where customers are considering a purchase, and as such they are more commonly used on ecommerce sites at category pages, as well as product pages. This would drive additional interest to highlighted items or groups of items.
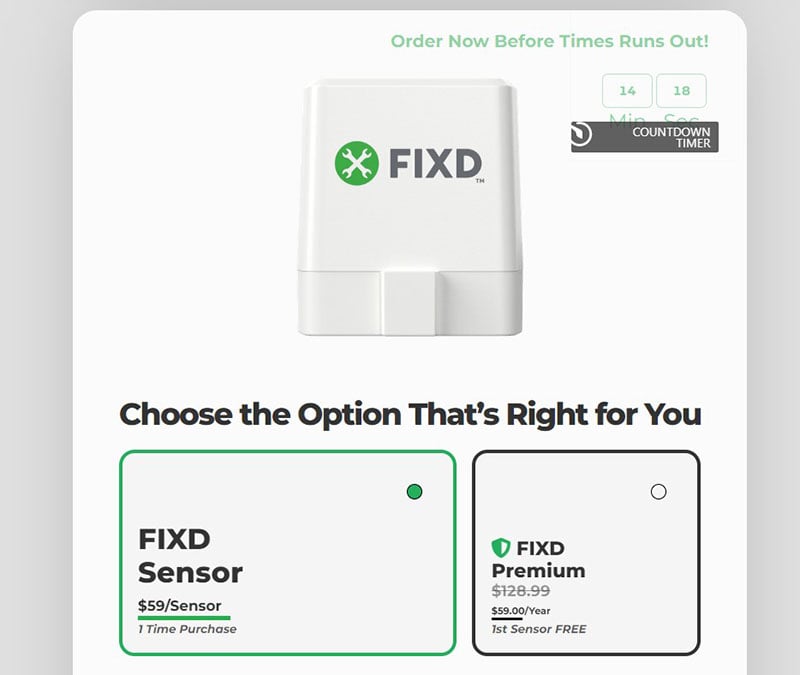
Look how it’s done on the car sensor retailer FIXD. That’s not only a good example of the widget drawing attention to individual products. See how the countdown clock is well-designed to fit the website’s template and is notable without using bright colours.
- Countdowns are also used to be displayed to a user once the items have been put to the shopping cart. This way you are giving people a personal discount that is valid only a couple of hours or even less than 20 minutes. This would certainly help in reducing abandoned carts, stimulating shoppers to complete an order.
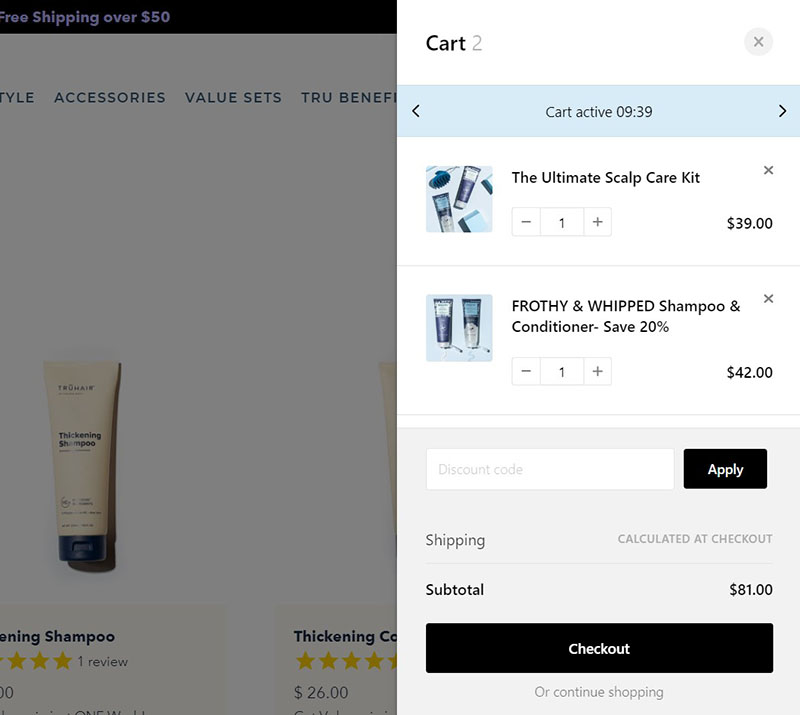
- An HTML countdown may be counting not only time, but also the number of something left available. This is a great scarcity tool to boost sales. Setting this kind of a checkout completion counter isn’t recommended for everyone, but it can work if your supplies or number of vacant tickets are really limited.
- Countdown clocks can also be extremely effective off-site, in emails to customers who have abandoned their carts. According to Nail Patel’s article, 54% of shoppers will purchase the items in their abandoned shopping cart after seeing a discount on them.
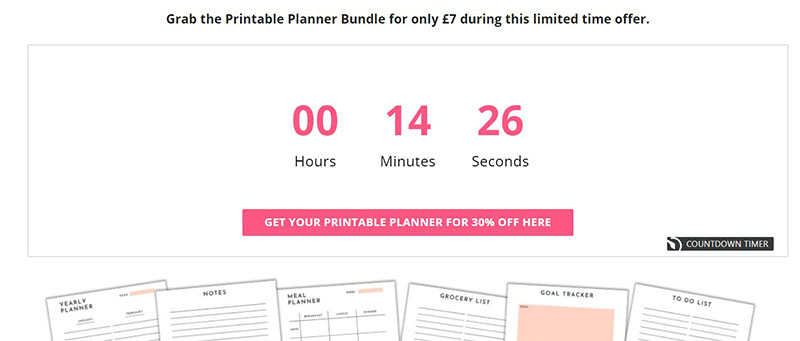
- Giving a personal discount to each new visitor is also a successful strategy. The counter shows the remaining time in days, hours, or minutes to claim the deal, adding that sense of urgency to an already effective tactic.
Tips On How To Use A Countdown For Better Results
Here are some tips on how to create unique and working countdown clocks for your site or Facebook page and use them for the best results.
- Set the colour to match your web design or even upload your own background image. Countdown clock templates available on our platform can be quickly transformed and easily customised.
- Attach the time labels to the background – write the labels for days, hours, minutes and seconds. This way the recipient will realise how much time is left to buy during the sale, use a special offer, apply for an event, etc.
- Remember to include messages and captions in and around the counting section. The marketing description is the key to making it clear what the timer is counting down to and then driving action. Use not only figures but also language to inspire action!
- To generate urgency, show seconds in the design. It might sound obvious, but displaying seconds along with minutes and hours where the viewer can literally see the seconds helps bring them to a decision and then – to action.
- Speaking of taking action, don’t forget to include a call to action. The timer is designed to drive engagement and conversion on site, so place a button nearby with a super clear call-to-action description.
Things you shouldn’t do
As we’ve seen above, HTML countdown clocks can be not only a useful tool for driving sales, but also a method of communication for consumers. Remember, that when people return to a retailer’s website for a purchase, it’s often done due to their previous shopping experience with a brand. And if we speak about loyal customers, they must have built ‘a relationship’ with the company over time. And if you see the positive effects of the countdown clock, it’s tempting to begin to overuse it. This way you are likely to compromise these relations in order to boost sales only in the short run as it would likely cost you loyal customers in the long term.
Communicate time-sensitive sales so long as they end as advertised
When running a special offer or a holiday sale, you should signpost the end of a sale or last chance for free delivery, which is a good way to develop urgency. But you also should know that various studies have shown that such sales holidays, like Black Friday for example, often result in an increase in returns.
That’s natural, because customers are placed under urgency and do not take time to think properly before they buy and decide on whether they really need and will keep the product once they receive it. So applying such countdowns unwisely is not a good strategy because it puts you under a risk of an increased returns rate due to too much generated anxiety. In the medium term, you also risk to see a decline in the conversion rate because clients lose trust if you keep on showing them those kinds of ploys. The best advice here is to stay accurate and clear about your returns policy and place a corresponding message alongside the timer
Remember the ethics – use the clock to inform, not to mislead.
With all that was said above, it is worth noting that the countdown clock is simply a tool, not good or bad. And there are no strict does and don’ts, it’s better to speak of general standards of your company. Customer-oriented brands that tend to use this kind of tool to interact with their audience should just to stay honest, exercise trustworthy retailing policy, and simply reveal integrity across all spheres of their business activity.
Conclusion
Countdown clocks can provide results on any HTML website or Facebook profile, but there are some important points to keep in mind:
- Be honest. The urgency generated by the countdown clock works well, so there can be a temptation to use fake deadlines to drive sales. However, this approach carries the risk of deterring customers and making them less likely to return to the site.
- Do not exaggerate. This is a tactic that should not be overused or customers will lose confidence in the information. It is only effective when customers believe the information they are given.
- Provide useful information. It should be about using the widget to help a customer rather than seeing it as a mere sales technique. For example, buyers have concerns about Christmas delivery deadlines, and counters on a homepage can help display this information as clearly as possible.