Adding a popup to your Shopify store is something you’ll want to tackle when you need to grab a visitor’s attention at just the right moment—maybe to grow your email list, announce a flash sale, or gently remind someone about a special offer before they leave your website. Popups can help you boost engagement, keep people interested, and encourage more return visits, especially when they appear exactly when visitors need them.
A popup widget is a practical way to handle this. It lets you create, customize, and manage popups right inside your Shopify dashboard, so you don’t have to deal with any complicated code or manual updates. Everything stays up to date automatically, the design fits your branding, and you save time while making sure your visitors see the messages that matter most.
- Step-by-step setup guide. Detailed instructions for embedding a popup in Shopify.
- Alternative methods. Comparison of app-based and manual options, including pros and cons.
- Expert checklist. Key points to verify for popup performance and compliance.
- Troubleshooting advice. Solutions for the most common setup and display issues.
To keep things easy, the instructions are broken down into clear steps, so you can set up your popup quickly and fine-tune the details whenever you’re ready.
How to Add Popup in Shopify Quickly
Here’s your shortcut for adding a popup to your Shopify website with four simple steps.
- Open Elfsight’s editor and pick a template.
- Customize your popup widget.
- Click ‘Add to website for free’ and copy the code.
- Paste it into your Shopify website’s backend.
Build and preview your custom Shopify popup in the live editor!
Popups That Help Your Website Connect and Convert
You’ve seen how easy it is to style a popup. Here’s what the widget can do to help you reach your goals:
| Key Feature | Why it Matters |
|---|---|
| Any popup type: notifications, discounts, email capture, exit-intent | Pick the message or offer that fits your audience and campaign, so every popup feels relevant. |
| Precise targeting with triggers and conditions | Show popups at the right time and for the right visitors, so your message gets noticed. |
| Full design customization for layout, color, images, and messaging | Match popups to your branding, keeping your website’s look and feel consistent. |
| Live, coding-free editor with instant previews and embed code | Set up popups fast, see changes in real time, and launch them without technical headaches. |
| Ready-made templates and build-from-scratch flexibility | Save time by starting with a template or create a unique popup for any campaign. |
These features are just a few ways Elfsight’s popup widget helps you engage your visitors and drive results. To see everything it offers, check out the popup features page. Next, let’s walk through each step to connect the widget to your website.
Full Guide to Adding and Customizing Popup for Your Shopify Website
This section breaks down every step for creating, customizing, and embedding your popup on a Shopify website, including helpful tips for targeting different audiences or conversion goals.
1. Choose a Template
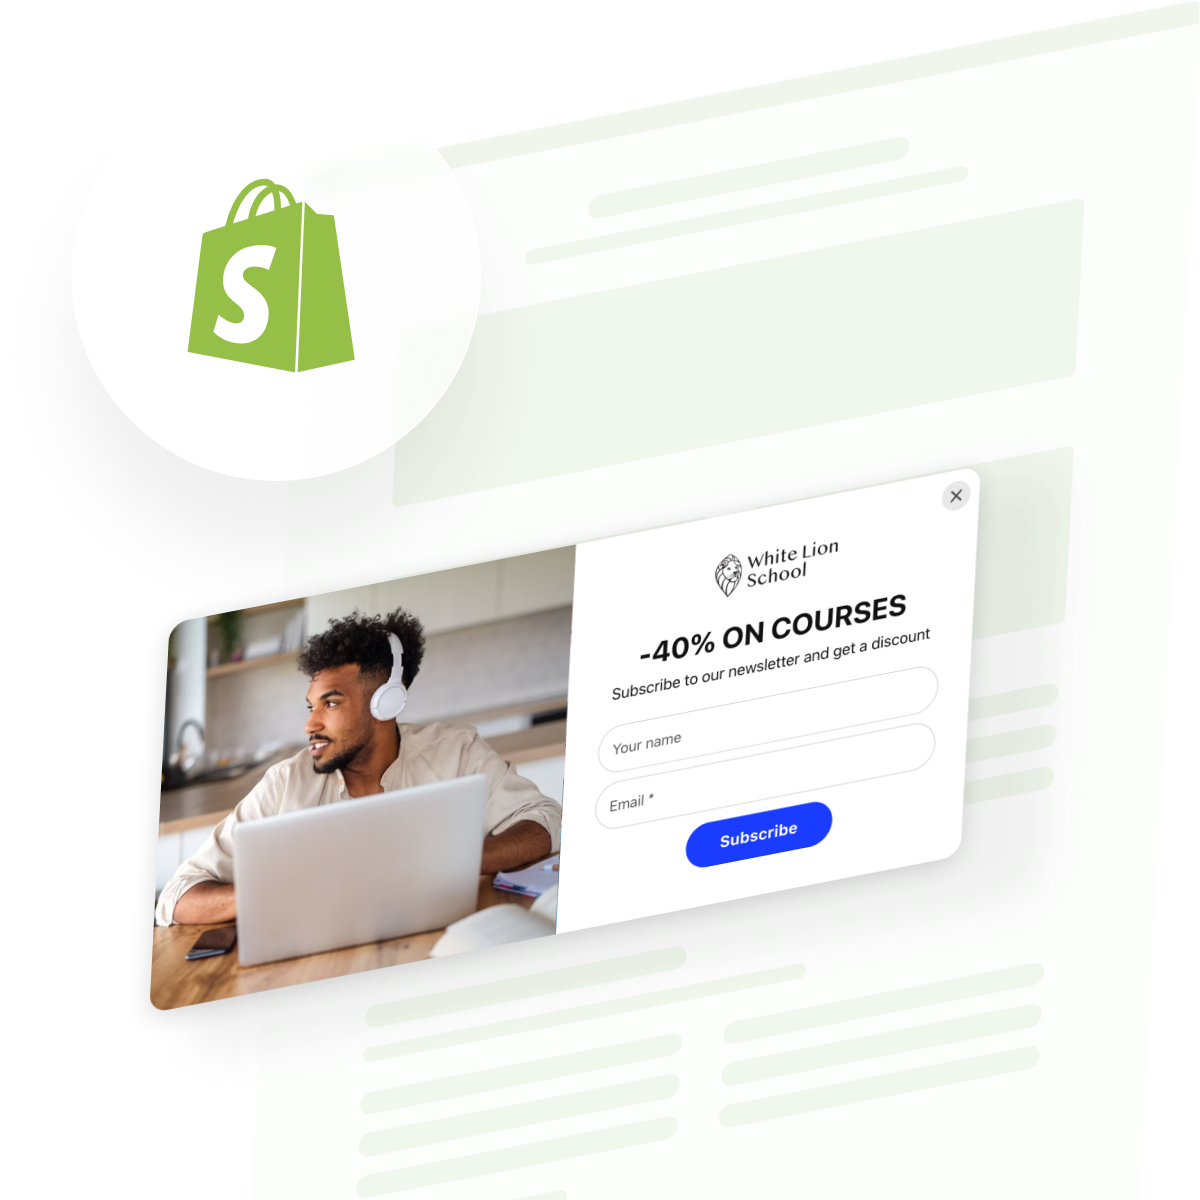
When you open the Popup widget editor, the first step is selecting a template. Elfsight offers 20+ professionally designed popup templates suited for different marketing goals — whether you want to boost sales with special offers, collect newsletter subscribers, or announce new launches. Each template comes pre-configured with relevant content blocks and messaging to accelerate your setup.
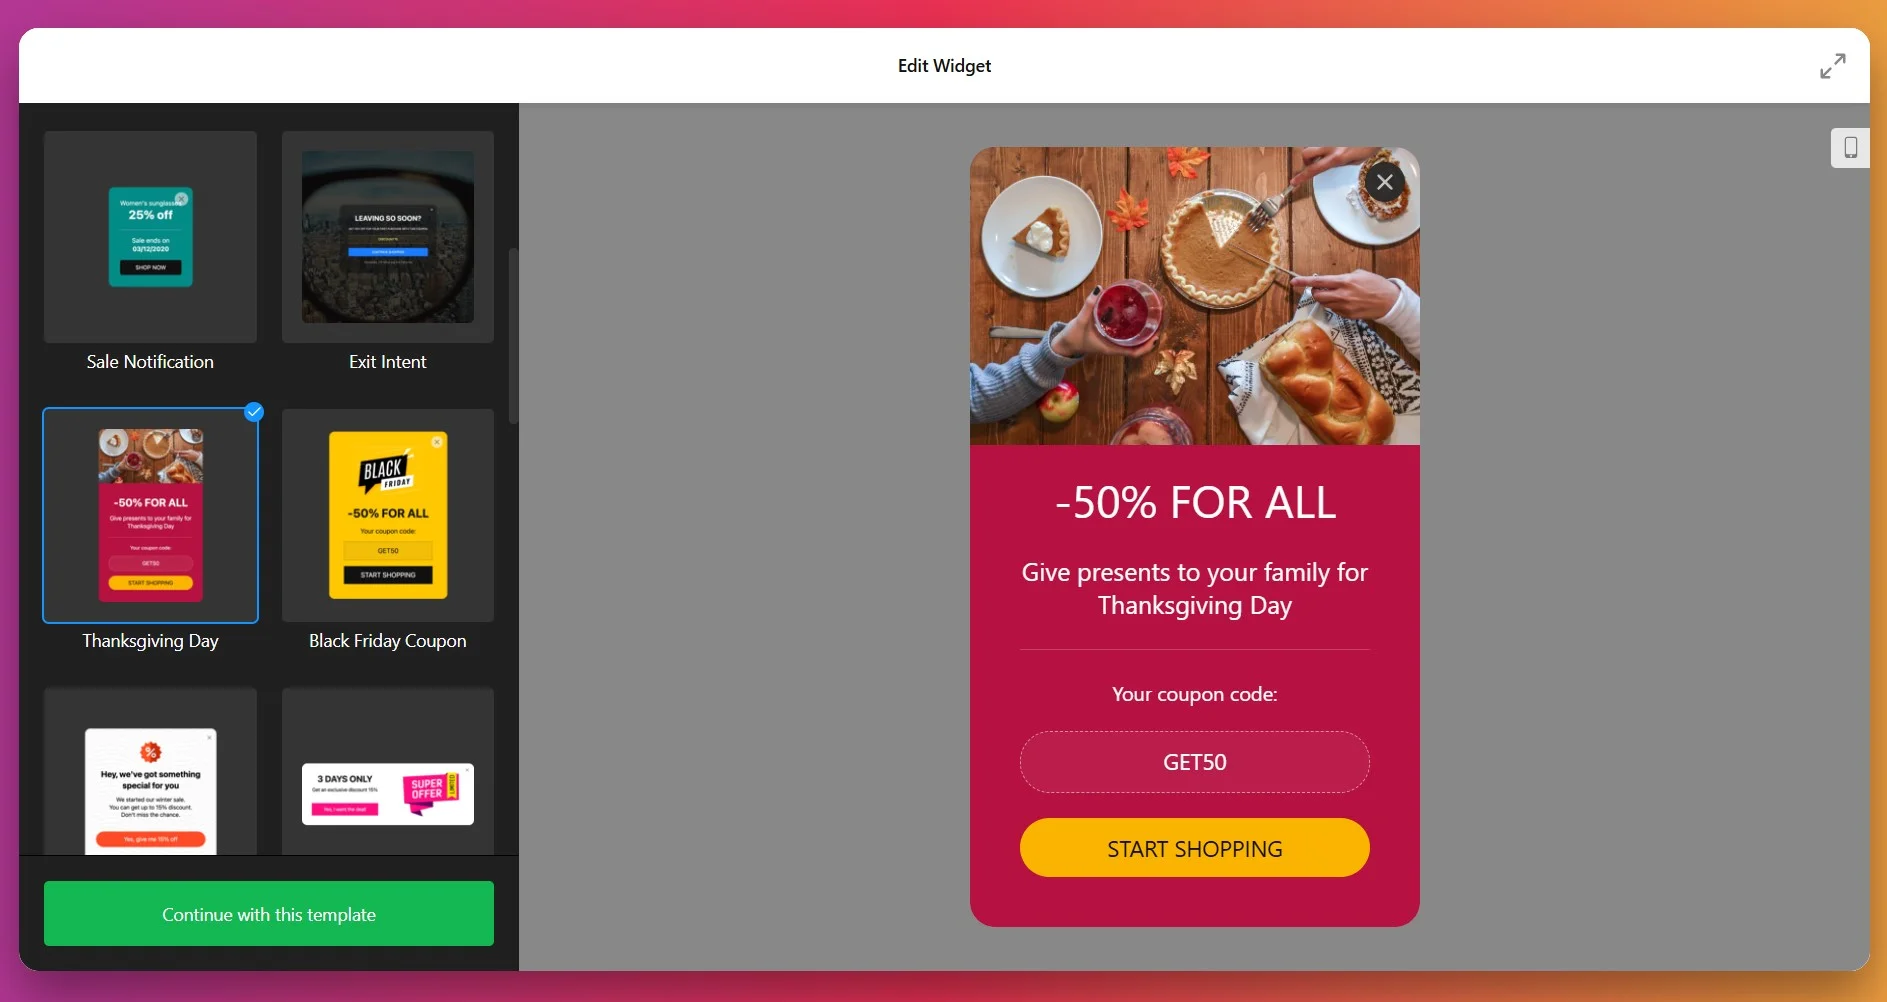
Select the template that aligns with your primary conversion goal and click “Continue with this template” to move on to the next step. You can always customize it further to match your specific needs.
2. Add and Customize Content Blocks
Switch to the Builder tab to assemble your popup using Elfsight’s flexible content block system.
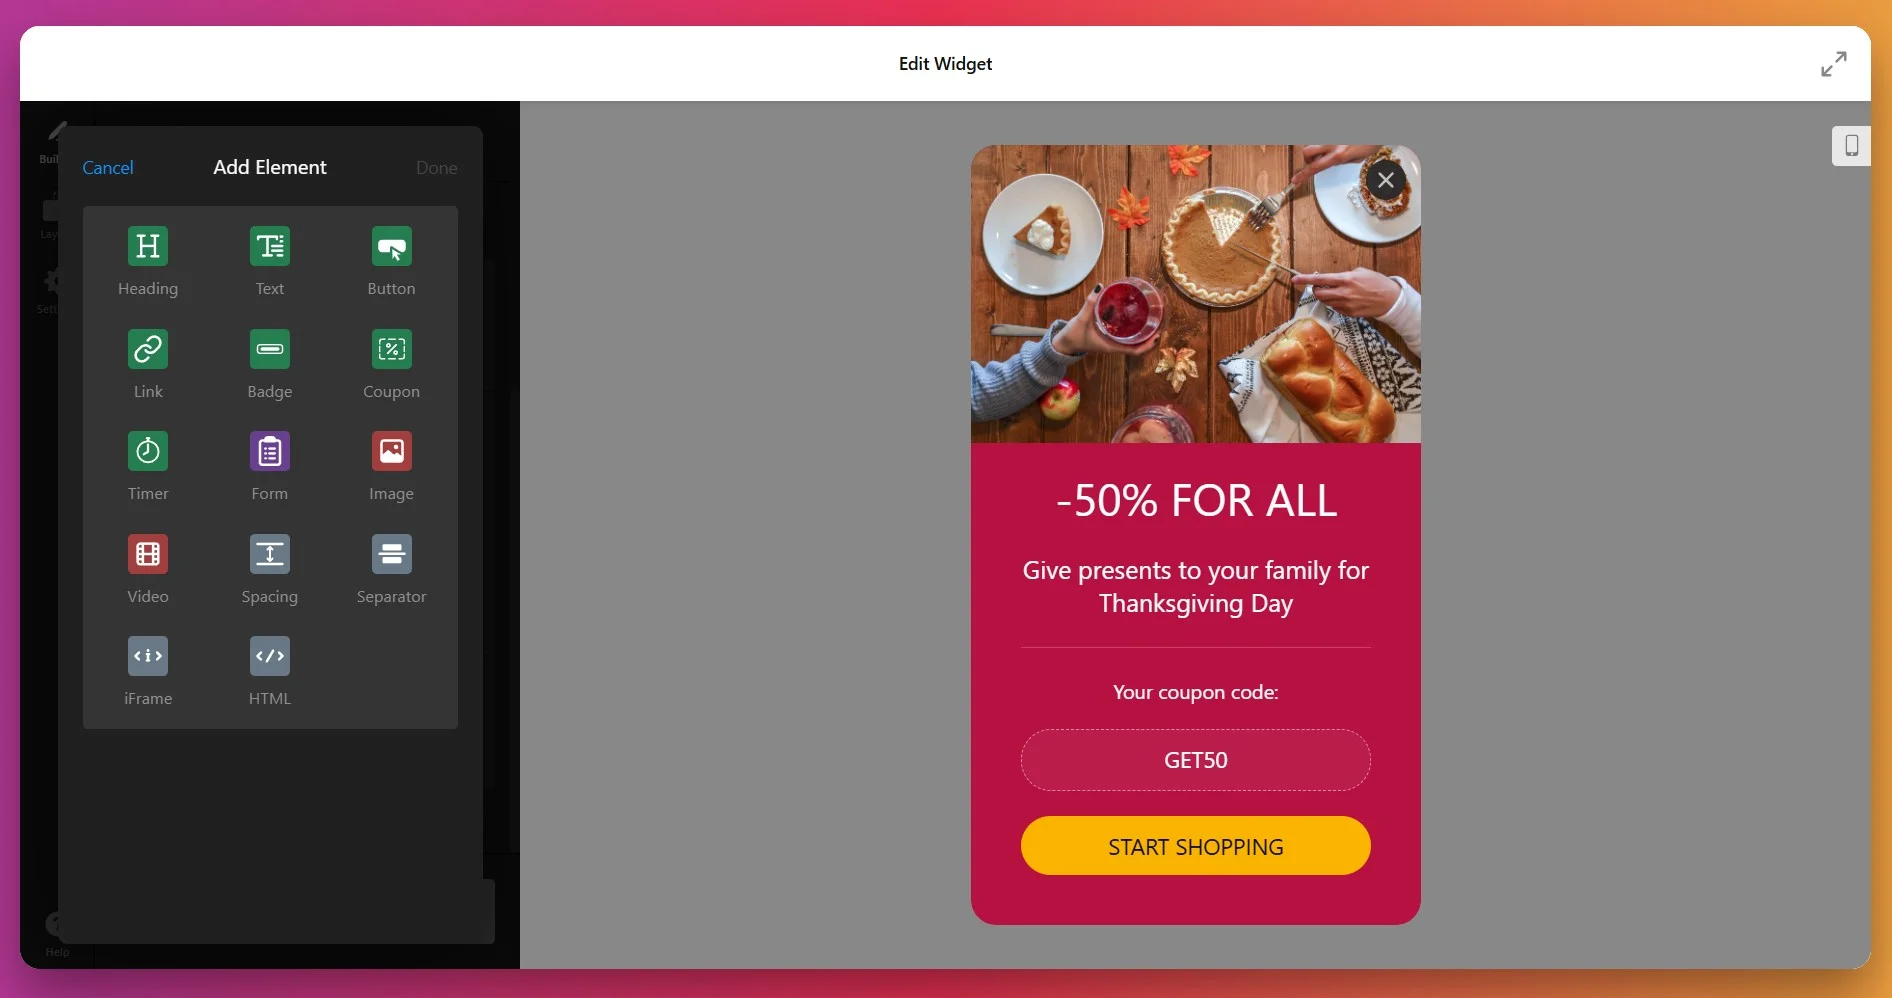
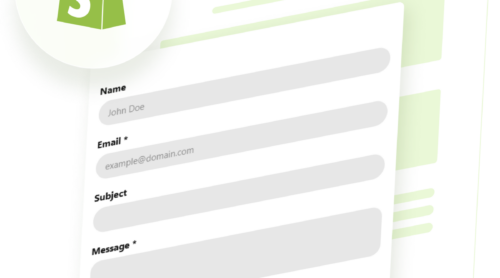
- Text & Titles – Headlines, body text, and descriptive copy
- Images & Videos – Upload product photos, promotional images, or embedded video content
- Buttons & CTAs – Call-to-action buttons that redirect to specific URLs or trigger actions
- Forms – Email signup fields, contact forms, or survey elements
- Coupons – Display discount codes that visitors can copy with a single click
- Spacing & Dividers – Organize content visually for better readability
- iFrame & Custom HTML – Embed external content or custom code for advanced use cases
3. Customize Appearance & Branding
Click the Background field to ensure your popup aligns perfectly with your website’s brand identity and design system. You can choose from:
- Solid colors – Choose from available colors or set a custom one, adjust opacity
- Gradient Background – Set your gradient colors and blending direction
- Upload Image – Add an image from your media files to use as background
- Link Video – Paste a YouTube or Vimeo URL to set a video background
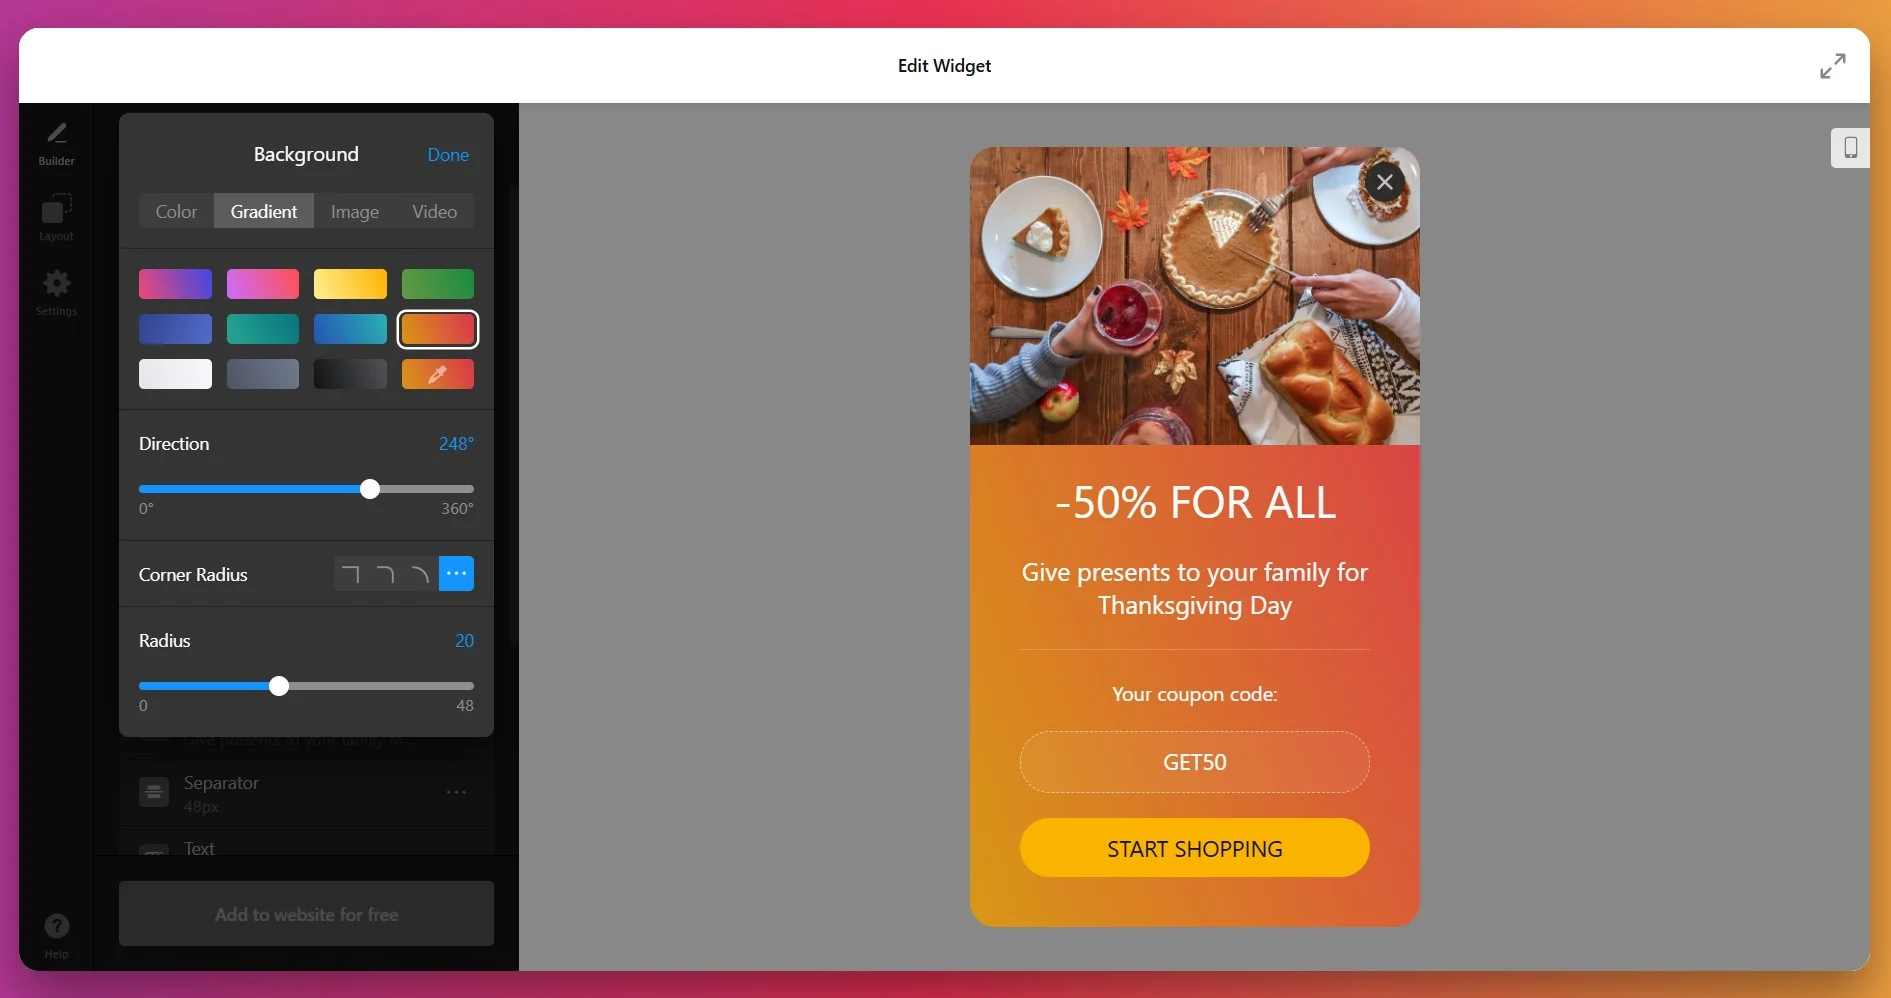
The visual editor provides a live preview of all your customizations, so you can see exactly how your popup will look before publishing. For advanced branding requirements, Elfsight also supports Custom CSS for pixel-perfect styling.
3. Choose Your Popup Layout
Open the Layout tab to select how your popup will appear on your website. Elfsight Popup offers three powerful layout options, each designed for different use cases and user experiences:
- Modal (Center) – The classic centered popup that overlays your page content with a semi-transparent background. Perfect for high-priority messages, welcome offers, or critical announcements that demand immediate attention
- Slide-in – A popup that slides in from the corner of the screen, staying visible without fully blocking page content. Ideal for exit-intent offers or unobtrusive lead capture that respects user experience
- Pane – A dedicated panel positioned on the left or right edge of the screen. Great for persistent messaging or multi-step forms that allow users to interact gradually
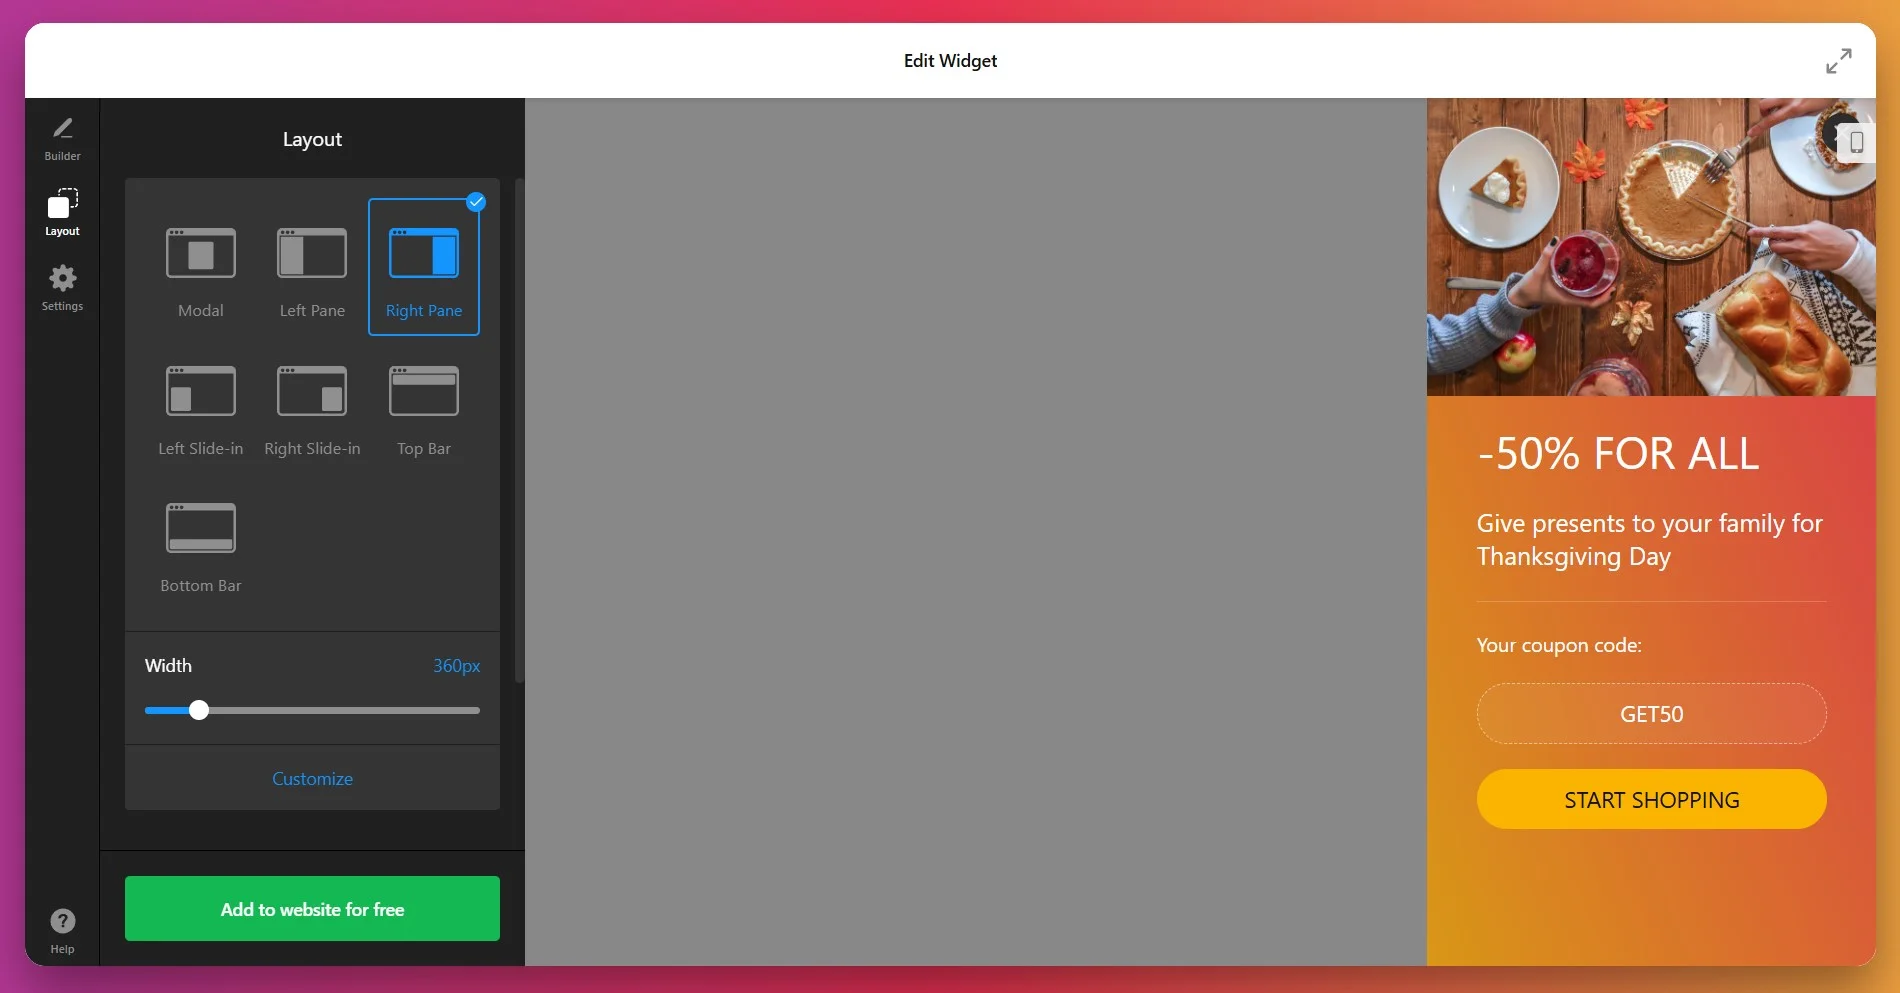
You can also customize popup dimensions (width, height, and alignment), add or remove the close button, and set the background overlay color or image to match your brand.
4. Set Triggers & Display Behavior
Open the Settings tab to define when and how your popup appears. This is where Elfsight’s precision targeting capabilities truly shine, allowing you to show the right message at the right moment. Our Popup offers 6 advanced triggers to activate your popup based on user behavior:
- On Page Load – Display immediately when the page finishes loading. Perfect for welcome messages or time-sensitive announcements
- Time on Page – Trigger after a user spends a specific number of seconds on the page. Ideal for when visitors have had time to engage with your content
- On Scroll (%) – Activate when users scroll to a specific percentage of the page (e.g., 50% or 75%). Effective for capturing attention after content engagement
- On Scroll to Element – Display when users scroll past a specific element on your page. Perfect for promoting related products or special offers at strategic content points
- On Click – Show the popup when visitors click a specific button or link. Great for “Learn More” buttons or detailed product information
- Exit Intent – Trigger when users move their cursor to close the tab or navigate away. The ultimate last-chance conversion opportunity for cart abandonment or special offers
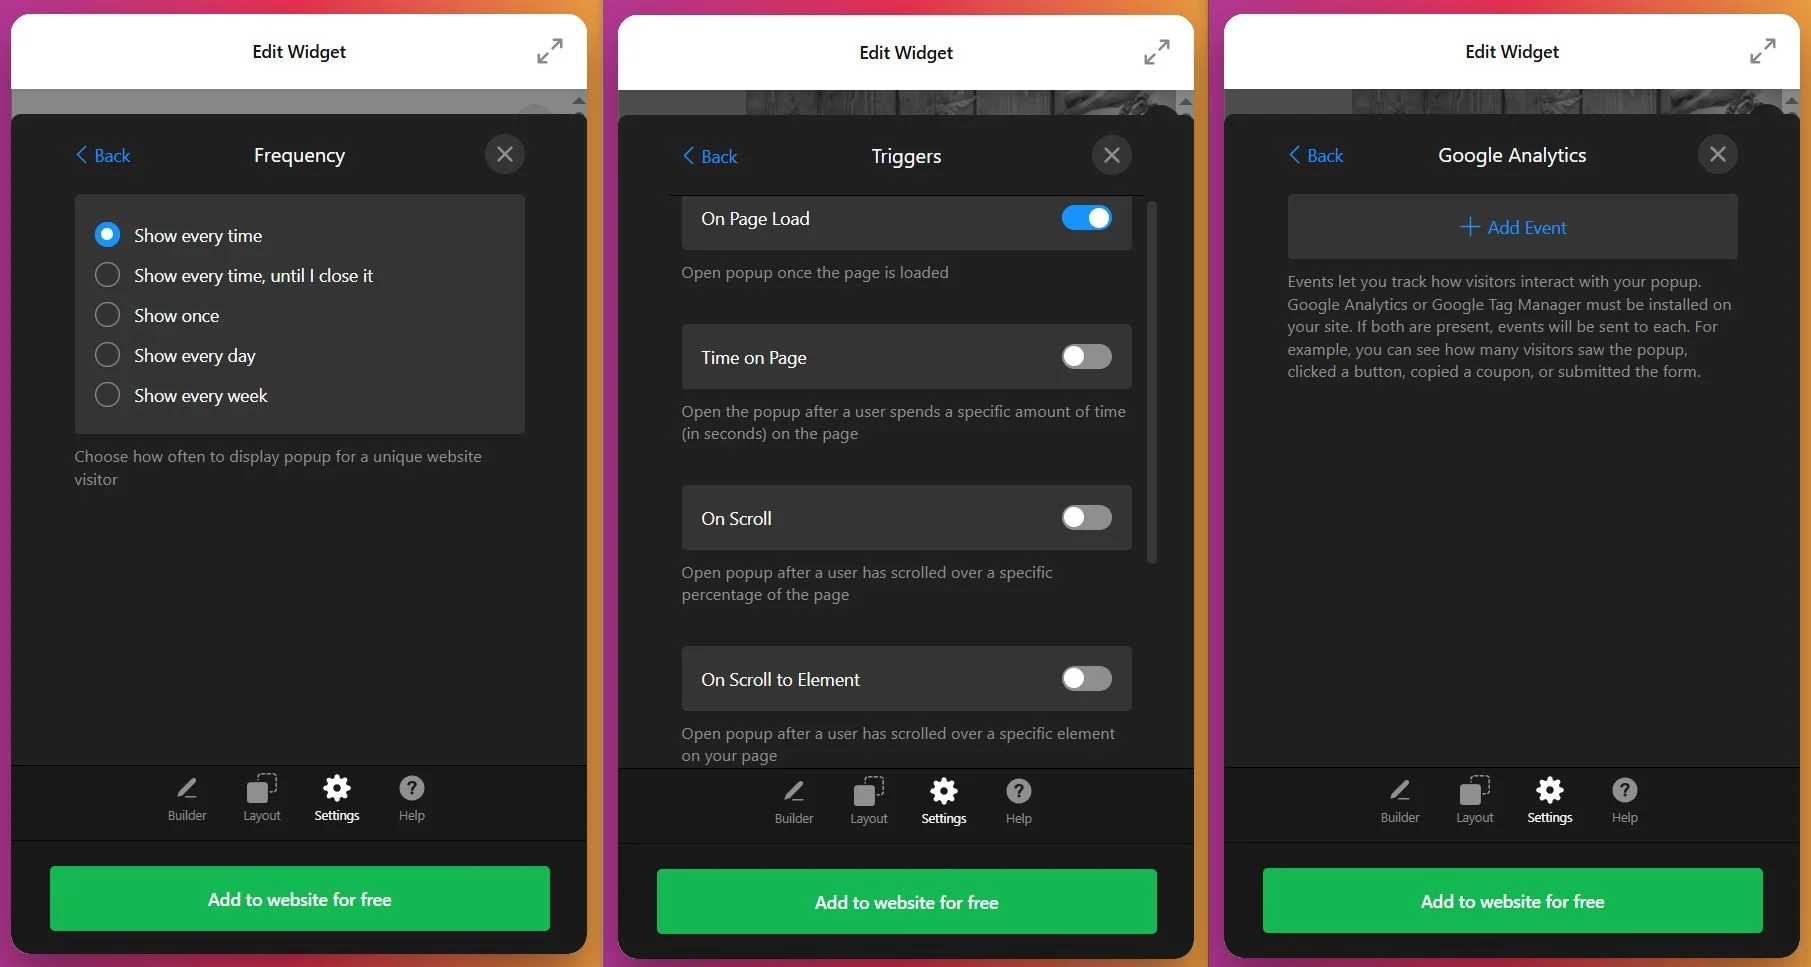
5. Configure Display Frequency & Targeting
Stay in the Settings tab and adjust frequency, page targeting, and device targeting to optimize your popup’s reach and avoid user frustration:
- Frequency Options. Define how often you want your popup to show: every time, until closed, once, every day or every week.
- Page Targeting – Specify which pages should display the popup or exclude specific pages. Show special offers only on product pages, or hide popups on checkout pages
- Device Targeting – Choose whether the popup appears on desktop, mobile, tablet, or all devices. Optimize for different user experiences on smaller screens
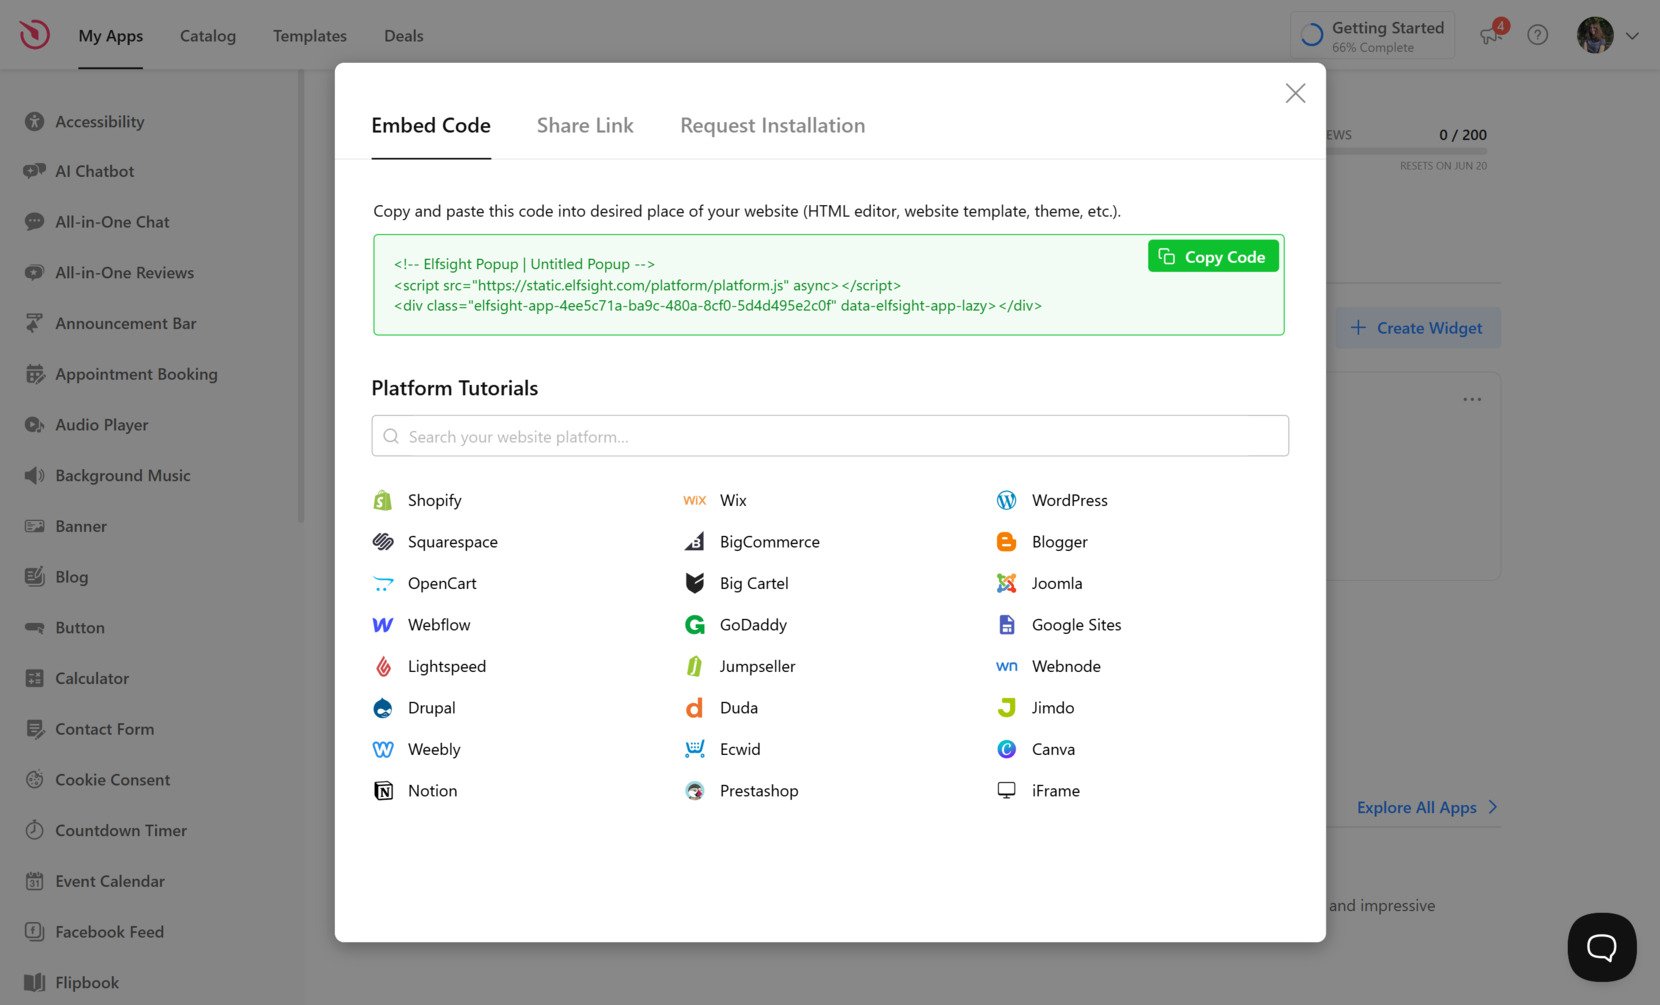
6. Get the Installation Code
Once your popup is fully configured and tested, click “Add to Website” — a popup will appear with your unique installation script. Copy this entire code snippet; you’ll use it to embed the widget on your website.
7. Add Popup to Shopify
Choose the method below that matches where you’d like the widget to appear on your store:
Specific page — Online Store 2.0
- In Shopify admin go to Sales Channels → Online Store → Themes and click Customize.
- Select the target page from the dropdown at the top of the visual editor.
- Click Add section and choose Custom Liquid.
- Paste your Elfsight snippet into the Custom Liquid field and click Save.
Specific page — Vintage themes
- In Shopify admin go to Online Store → Themes → Customize.
- Select the page to edit from the top dropdown.
- Click Add section → Custom Content. Inside the Custom Content block use Add block → Custom HTML if required.
- Paste your embed code into the HTML field, set container width to 100% if needed, and click Save.
All pages (site-wide)
- In Shopify admin click the … menu and choose Edit code.
- Open
Layout → theme.liquid - Paste your code before the closing tag and click Save.
Product pages
Adding to product description
- Go to Products and open the product to edit.
- Click the
</>icon to open the HTML editor, paste snippet, and click Save.
Adding to all product pages
- In Shopify admin go to Online Store → Themes → Actions → Edit code.
- Open
Sections → main-product.liquid - Paste the Elfsight code where you want it to appear and click Save.
If you want to explore alternative ways to add a widget, the following section will outline different approaches to displaying popups on your Shopify website.
Ways to Add Popups on Shopify
There are a few native and official ways to add a popup to your Shopify website, but each comes with some notable trade-offs compared to using a dedicated popup widget like Elfsight.
Shopify’s Built-In Theme Editor
Shopify’s theme editor offers basic popup functionality for simple announcements or newsletter signup forms.
- Open the Theme Editor. Go to your Shopify admin and select “Online Store,” then “Themes,” and click “Customize.”
- Add a Section or App Block. Choose to add a new section or block where popups are supported, such as a newsletter popup.
- Select Popup or Announcement Feature. Pick the built-in popup or announcement bar option if your theme supports it.
- Customize Content and Appearance. Edit text, images, and styling options provided by the theme.
- Save and Publish Changes. Preview and publish your changes to make the popup live.
Shopify’s built-in popups usually offer only basic design options and lack advanced trigger controls.
More details are available in Shopify’s official help documentation.
Custom Popups Using Shopify Liquid Code
Shopify allows you to create custom popups by editing your theme’s Liquid files and adding custom HTML, CSS, and JavaScript.
- Access Theme Code. Go to “Online Store,” then “Themes,” and click “Edit code.”
- Add HTML for Popup. Insert a popup container and content in the relevant theme file, such as theme.liquid.
- Include CSS for Styling. Add custom CSS in your theme’s stylesheet to style the popup.
- Add JavaScript for Behavior. Write JavaScript to handle popup display logic, such as timing or button actions.
- Test and Publish. Check your changes on the website and publish when satisfied.
This method requires HTML, CSS, and JavaScript knowledge and can be harder to maintain.
More details are available in Shopify’s developer resources.
Shopify Email App Popup Feature
Shopify Email app includes a basic popup signup form that can be enabled for list building.
- Install Shopify Email App. Add the Shopify Email app from your Shopify admin.
- Navigate to Forms Section. Go to the Forms or Signup Forms area within the app.
- Enable Popup Form. Toggle on the popup signup form feature.
- Customize Fields and Message.Edit the form fields, call-to-action, and appearance.
- Activate and Monitor.Enable the popup and monitor signups through the app dashboard.
This popup only supports email signup, with no sales or promotion options.
More details are available in the Shopify Email app help section.
How Do These Methods of Adding Popups Compare?
| Method | Major Pro 👍 | Major Con 👎 |
|---|---|---|
| Elfsight Popup Widget | Highly customizable designs and advanced triggers. | Requires an account for dashboard access. |
| Shopify’s Theme Editor | Easy to set up with no coding needed. | Limited popup types and basic trigger options. |
| Custom Shopify Liquid Code | Complete control over popup design and triggers. | Needs coding skills and is time-consuming to update. |
| Shopify Email App Popup | Simple, free email capture for growing a list. | Only works for basic email signups, no promotional popups. |
If you want practical tips for making your popup run smoothly and look great on your Shopify website, keep reading for the next set of hands-on tips.
📝 Essential Checklist for Popup Widget Success
From the Elfsight team’s experience implementing and testing popups across thousands of websites, we know that small setup details make all the difference in performance. Here are our top recommendations to help you get the most out of your Popup Widget.
- Define a specific goal for each popup. Decide if you want to capture emails, reduce cart abandonment, promote a discount, or deliver a key message before you start customizing.
- Choose the right trigger and timing. Use exit-intent or scroll-depth for special offers, delay popups for new visitors, and avoid immediate interruptions to keep engagement high.
- Segment your audience with targeting rules. Set up your popup to appear based on device type, specific pages, or user actions to ensure relevance and avoid fatigue.
- Keep the design on-brand and distraction-free. Match popup colors, fonts, and images to your branding. Limit competing elements so your message is clear and actionable.
- Use ready-made templates for speed, then fine-tune. Start with a template close to your use case, then adjust layout and content to fit your campaign’s needs.
- Preview and test responsiveness on all devices. Use the live editor’s real-time preview to check that your popup looks and works well on desktop, tablet, and mobile.
- Integrate interactive elements smartly. Add forms or copyable coupon codes only where they support your goal, and keep the interaction simple for the user.
- Set frequency and scheduling limits. Control how often popups appear for returning visitors to prevent annoyance and banner blindness.
- Verify seamless embedding on your website platform. Use the instant embed code and double-check placement in your CMS or website builder so the popup appears as intended.
Next, we’ll walk through a real-world scenario showing how one business added a Popup Widget to highlight a limited-time offer and grew their email list directly from their homepage.
Popup Widget Guiding Tourism Visitors Without Disruption
Let’s Go Peak District, a comprehensive tourism directory connecting travelers with Peak District attractions, accommodations, and experiences, needed a way to communicate important information to website visitors without cluttering the page layout or disrupting user experience.
Before Elfsight
The team struggled with critical UX challenges:
- Static page layouts left no room for key promotional or informational messages.
- Important updates about events, special features, and services were getting lost in the page content.
- Building custom popup solutions required coding knowledge and ongoing maintenance.
- Generic notification systems detracted from the premium tourism website experience.
Solution: Implementing Elfsight Popup Widget
Phil integrated the Elfsight Popup widget on the homepage to display important information at strategic moments in the user journey. The popup was designed to feel native to the site’s premium aesthetic — appearing at the right time without feeling intrusive or aggressive.
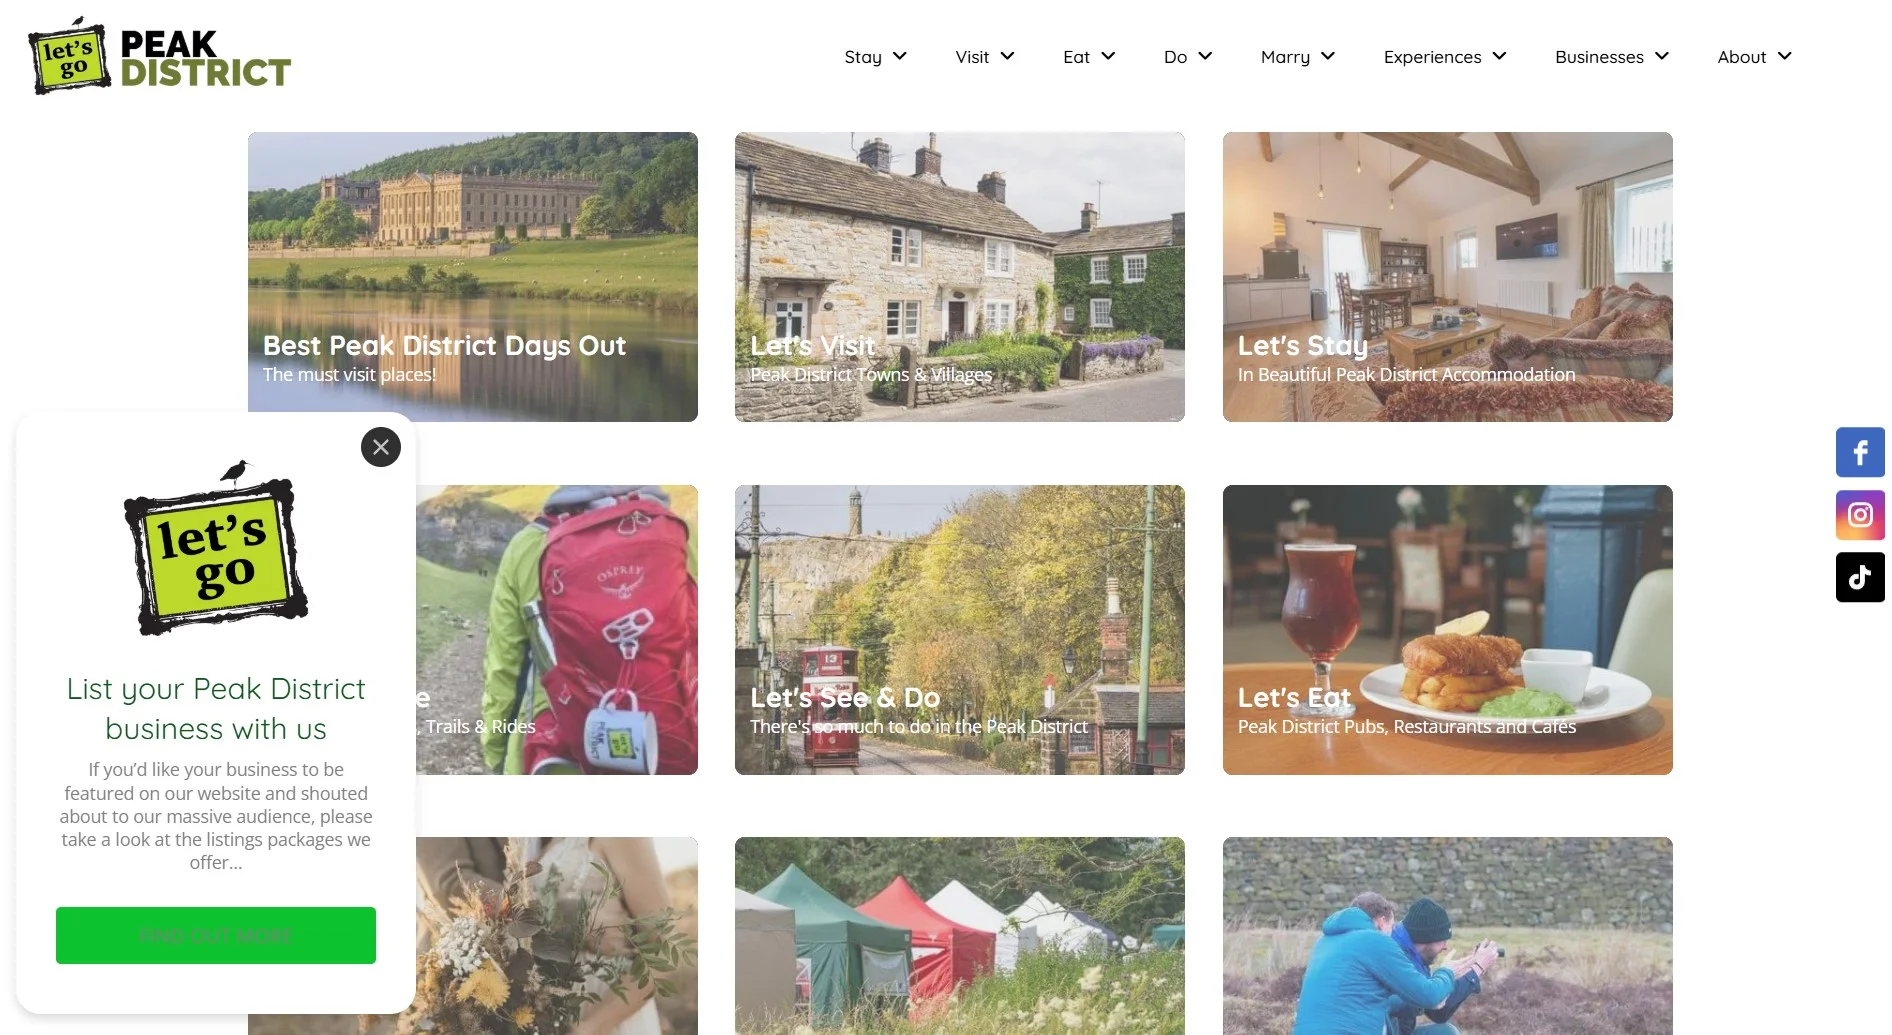
The popup strategy included targeted triggers and display rules, ensuring popups appeared only when relevant to specific visitor segments and only on pages where they added value rather than creating friction. This targeted approach meant travelers learned about new attractions or seasonal experiences at the exact moment they were most likely to engage.
Real Results
After implementing the Elfsight Popup widget:
- Improved visitor engagement: Strategic popup placement led to higher click-through rates on featured attractions and services without annoying visitors
- Better information architecture: Key messages now surface at the right moment in the user journey, increasing awareness and discoverability
- Enhanced brand perception: Professional popup design elevated the perceived quality of the tourism platform
- No design disruption: Unlike traditional static banners, popups appeared contextually, maintaining clean page layouts and visual hierarchy
- Easy A/B testing: Popup messaging and timing could be quickly adjusted to optimize for conversions and engagement
The Bigger Picture: Multi-Channel Tourism Marketing
“We have made extensive use of Contact Forms, and we sell Review widgets or Instagram Feeds as an upsell or with our higher-rate listing packages. This works really, really well.”
Phil Sproson, Let’s Go Peak District
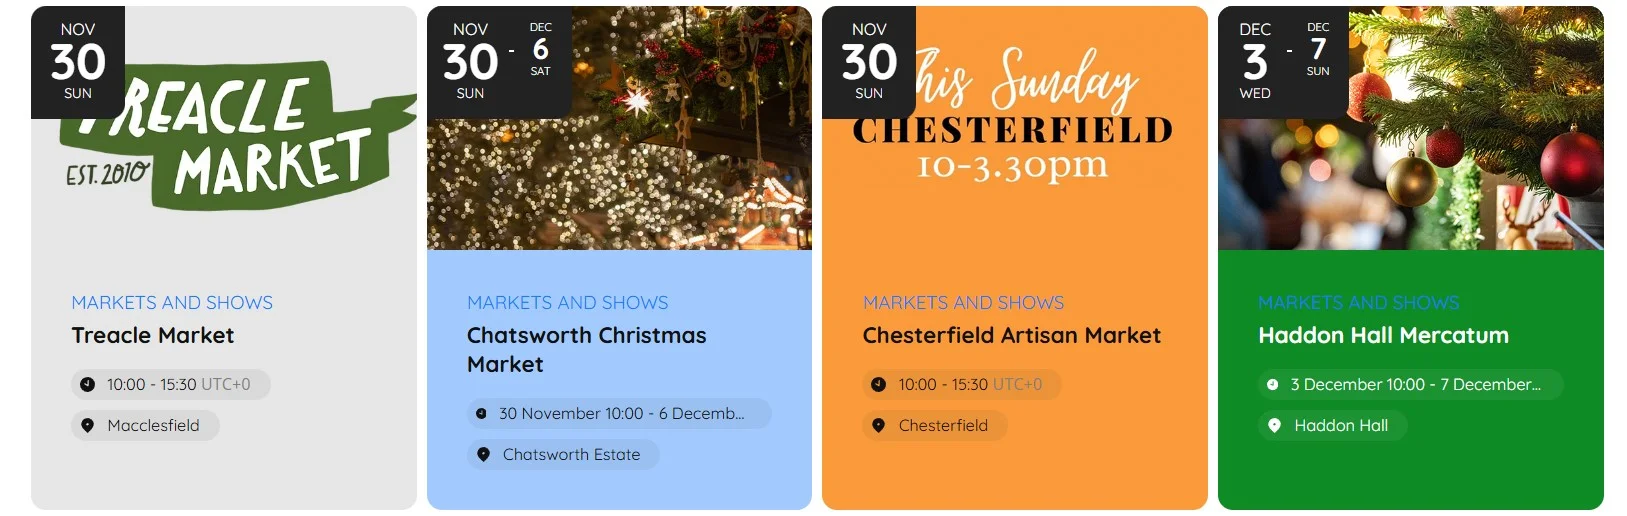
Let’s Go Peak District’s use of Popup was just one component of a larger strategy that included the Pricing Table to transparently display advertising packages, Event Calendar to showcase upcoming Peak District activities, and Contact Form to capture tourism business inquiries. By combining these tools, the platform transformed into an interactive ecosystem where travelers find inspiration, discover experiences, and tourism businesses increase their visibility.
Shopify Popup Troubles & Practical Fixes
Adding a popup to a Shopify website is usually straightforward, but real-world experience shows users run into a few persistent headaches, from popups not appearing after installation to layout glitches on certain devices. Let’s fix these issues together:
Why doesn’t my popup show after I install the code?
My popup covers checkout or navigation buttons. How do I fix overlapping problems?
Why does the popup work on desktop but not on mobile?
What should I do if my popup appears empty or with broken styles?
Are browser extensions or blockers able to hide Shopify popups?
If you still have trouble after trying these fixes, check out the official Elfsight help center and support channels for more targeted guidance.
Questions or Ideas?
We hope this guide gives you a solid foundation to start adding popups to your Shopify website. We care about helping you create a better experience for your visitors, so if you have feedback, ideas, or creative popup solutions to share, we want to hear from you. Connect with the Elfsight team on X, Facebook, or LinkedIn for updates and conversations.