
Collecting feedback isn’t just about gathering opinions — it’s about building a structured feedback loop that helps businesses improve their product, support, and overall customer experience. A well-designed form can reveal patterns in satisfaction, expose usability issues, and even guide product strategy. But only if users are motivated to respond.
- Looks familiar and straightforward at first glance
- Matches the intent of the interaction (e.g., quick rating vs. long survey)
- Avoids unnecessary scrolling or page jumps
- Sets clear expectations with progressive structure
When a form feels quick, intentional, and respectful of a user’s time, completion rates go up. The challenge – and opportunity – lies in shaping forms that invite response rather than resistance. In this guide, we’ll explore how to make it happen in practice. Let’s start with basic setup.
Create a Feedback Form in Minutes
If you’re the kind who prefers learning by doing, here’s a shortcut to making a feedback form. With Elfsight’s Form Builder, you can create and publish a fully functional feedback form in just a few clicks:
- Open Elfsight’s editor and pick a feedback template.
- Customize your Feedback Form widget.
- Click ‘Add to website for free’ and copy the code.
- Paste it into your website’s backend.
🚀 Try building your own feedback form in the live editor!
One Form Doesn’t Fit Every Use Case
Once your feedback form is live, the next step is to make sure it fits the situation. Not all forms serve the same purpose — a post-purchase survey, for instance, should feel very different from a learning experience feedback form. Let’s explore five distinct use cases and how to fine-tune your form for each one.
🛒 E-commerce – Post-Purchase Feedback
Applies to: online stores, Shopify, WooCommerce, Etsy sellers
Goal: Improve product quality and checkout experience
User motivation: Moderate — users share feedback if it feels useful and quick
Template match: Customer Feedback Form Template
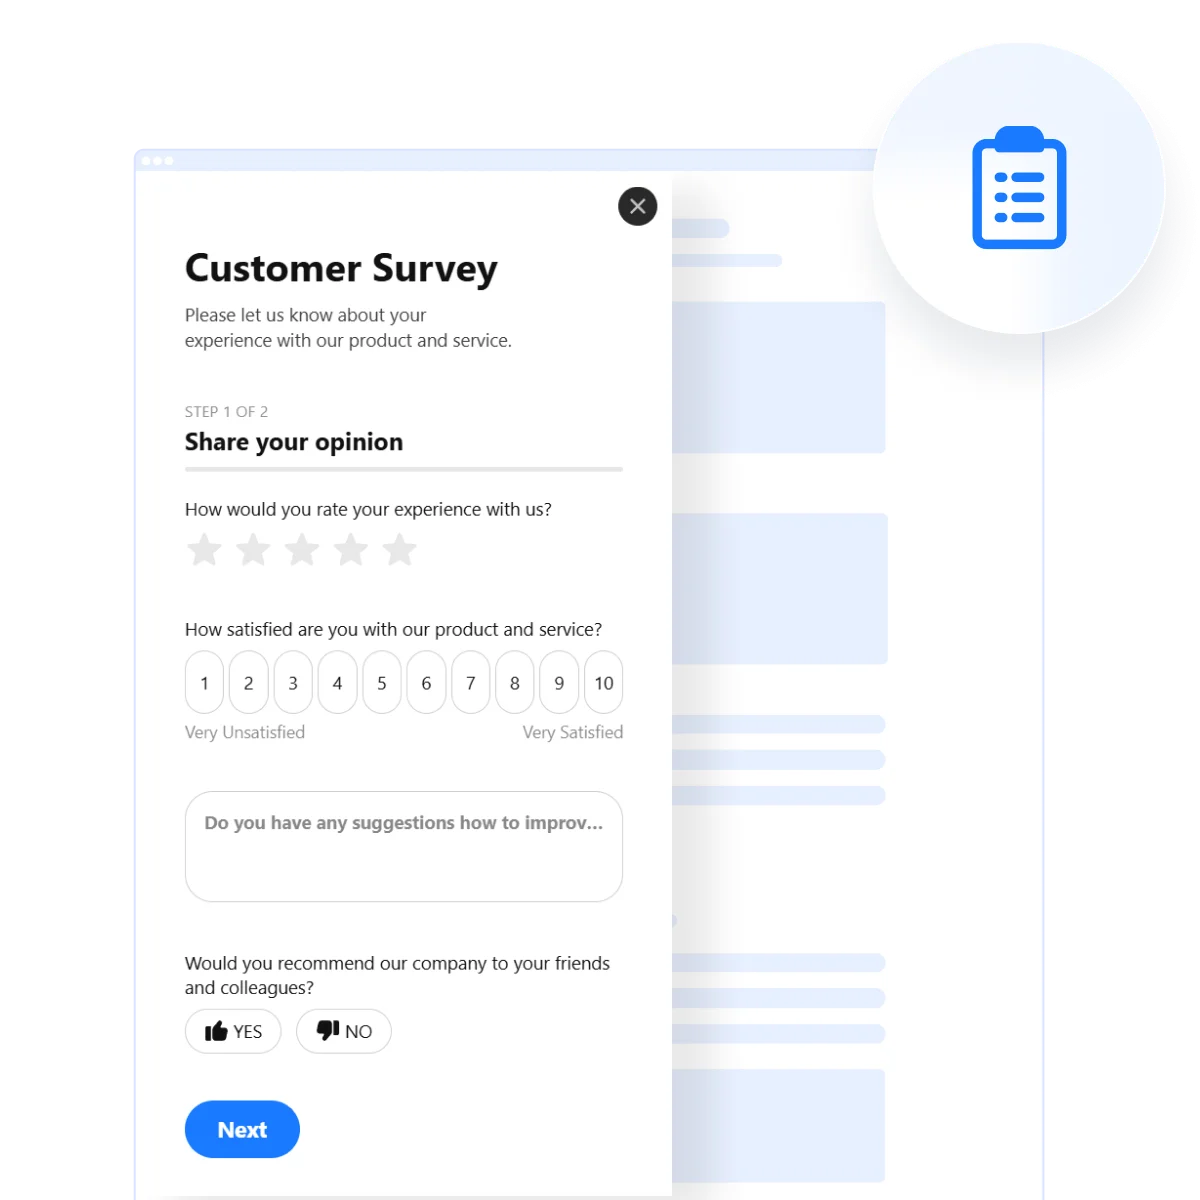
Users are often in a hurry right after completing a purchase, so the feedback form must feel effortless and quick. Short, clear questions help maintain engagement, and a mobile-friendly design ensures they can respond on any device. When forms are fast and focused, completion rates rise significantly, even for voluntary feedback.
Recommended Structure
- Star rating or emoji scale (quick initial engagement)
- One clarifying multiple-choice question (e.g., delivery, product quality, price)
- Optional comment field (keep it single-line or expandable)
- CTA that emphasizes impact (“Help us improve your next order”)
💬 Client Services – Satisfaction check
Applies to: agencies, consultants, freelancers, service providers
Goal: Measure service quality + collect testimonials
User motivation: High if relationship-based
Template match: Client Feedback Form Template
Service businesses rely on long-term trust, so feedback should feel thoughtful but not demanding. Asking only the most relevant questions shows clients you value their time, while still collecting actionable insights. Framing questions around improvements or outcomes helps clients feel their opinions truly matter.
Recommended Structure
- 1–10 satisfaction scale
- Multiple-choice “Main reason for your score”
- Open feedback question (space for context)
- Optional consent toggle to use feedback as a testimonial
🎪 Events & Workshops — Experience feedback
Applies to: event organizers, conference hosts, workshop facilitators, trainers
Goal: Learn what worked and what didn’t
User motivation: High immediately after the event
Template match: Event Feedback Form Template
Timing is critical — research from EventMB shows response rates can drop by up to 45% if surveys are sent more than 48 hours after an event. Quick, easy-to-complete forms maximize insight while attendees’ experiences are fresh. Short questions that focus on key highlights and potential improvements encourage more honest and valuable feedback.
Recommended Structure
- NPS-style “How likely are you to recommend this event?”
- Favorite moment (emotional recall)
- Optional issue report
- Future event interest checkbox
🎓 Education — Student or Training Feedback
Applies to: schools, online courses, training programs, bootcamps
Goal: Improve learning experience
User motivation: Varies — increases with anonymity
Template match: Training Feedback Form Template
Students are more honest when feedback feels safe and anonymous. Clear instructions and reassurance that responses won’t affect grades or standing help boost completion. Combining structured ratings with optional reflection questions balances data collection with personal insights.
Recommended Structure
- Overall experience rating
- Multiple-choice “Pace, clarity, materials, instructor”
- One reflective question (focus on clarity and outcomes)
- Optional identity field
🔒 Anonymous Feedback Form — Safe Input
Applies to: HR teams, internal company surveys, education, healthcare
Goal: Collect transparent insights
User motivation: High only if trust exists
Template match: Employee Feedback Form Template
Employees only share candid feedback if they feel safe and anonymous. Short, focused questions combined with optional context fields allow teams to gather both quantitative and qualitative insights without pressuring respondents. This structure also works for privacy-sensitive industries, like healthcare or counseling (patient feedback) – simply avoid personal identifiers and keep all fields optional.
Recommended Structure
- Topic/category dropdown
- Optional satisfaction rating (1–5) – only if relevant
- Short text field for open feedback
- Optional follow-up field for context (“Want to share more details?”)
- Inline privacy reassurance text
- Optional contact field (“Leave your email if you’d like a reply”)
Explore 300+ Form Builder templates


Why Users Don’t Complete Your Form (and How to Fix It)
Even visually appealing and well-intentioned feedback forms can miss the mark. Below are some of the most common issues teams face – and how you can solve them to collect responses that actually move your business forward.
| Form Issue | Why It Happens | How Elfsight Helps |
|---|---|---|
| Users don’t understand questions or skip them | Questions are vague, long, or use open-ended fields with no hints | Use Field Descriptions and structured inputs (radio, dropdown, rating). Add helper text to clarify what’s expected. |
| Users don’t see why their input matters | Weak intro or “Submit” CTA doesn’t convey purpose | Add a Header/Intro Block with purpose text (“Help us improve”) and customize Submit Button (“Send Feedback”). |
| Users stop halfway through long forms | Seeing all questions at once creates fatigue | Switch to Multistep Layout, breaking long forms into short, digestible screens with progress indicator. |
| Users drop off on mobile | Non-responsive layout, small tap zones, horizontal scrolling | Use Floating Pane or Inline Responsive Layout, test mobile preview, and keep field count minimal per step. |
| People hesitate to submit sensitive feedback | No clear indication of data privacy or optional anonymity | Add Consent Checkbox, include brief privacy text (“Responses are anonymous”), and make personal fields optional. |
| Users don’t know if their feedback was received | No visual confirmation or delayed response | Configure Post-Submit Action → show “Success Message” or redirect to a custom Thank You page. |
Most form drop-offs stem from unclear wording, long flows, or low trust. Fixing these small friction points can significantly boost completion rates and deliver feedback that truly reflects user sentiment.
From Template to Tailored: Customizing Your Feedback Form
Now that you’ve seen real-world examples and common challenges users face when completing feedback forms, it’s time to turn a template into a tailored solution that matches your website. In this section, we’ll walk through each step of customization: from field selection to layout and branding.
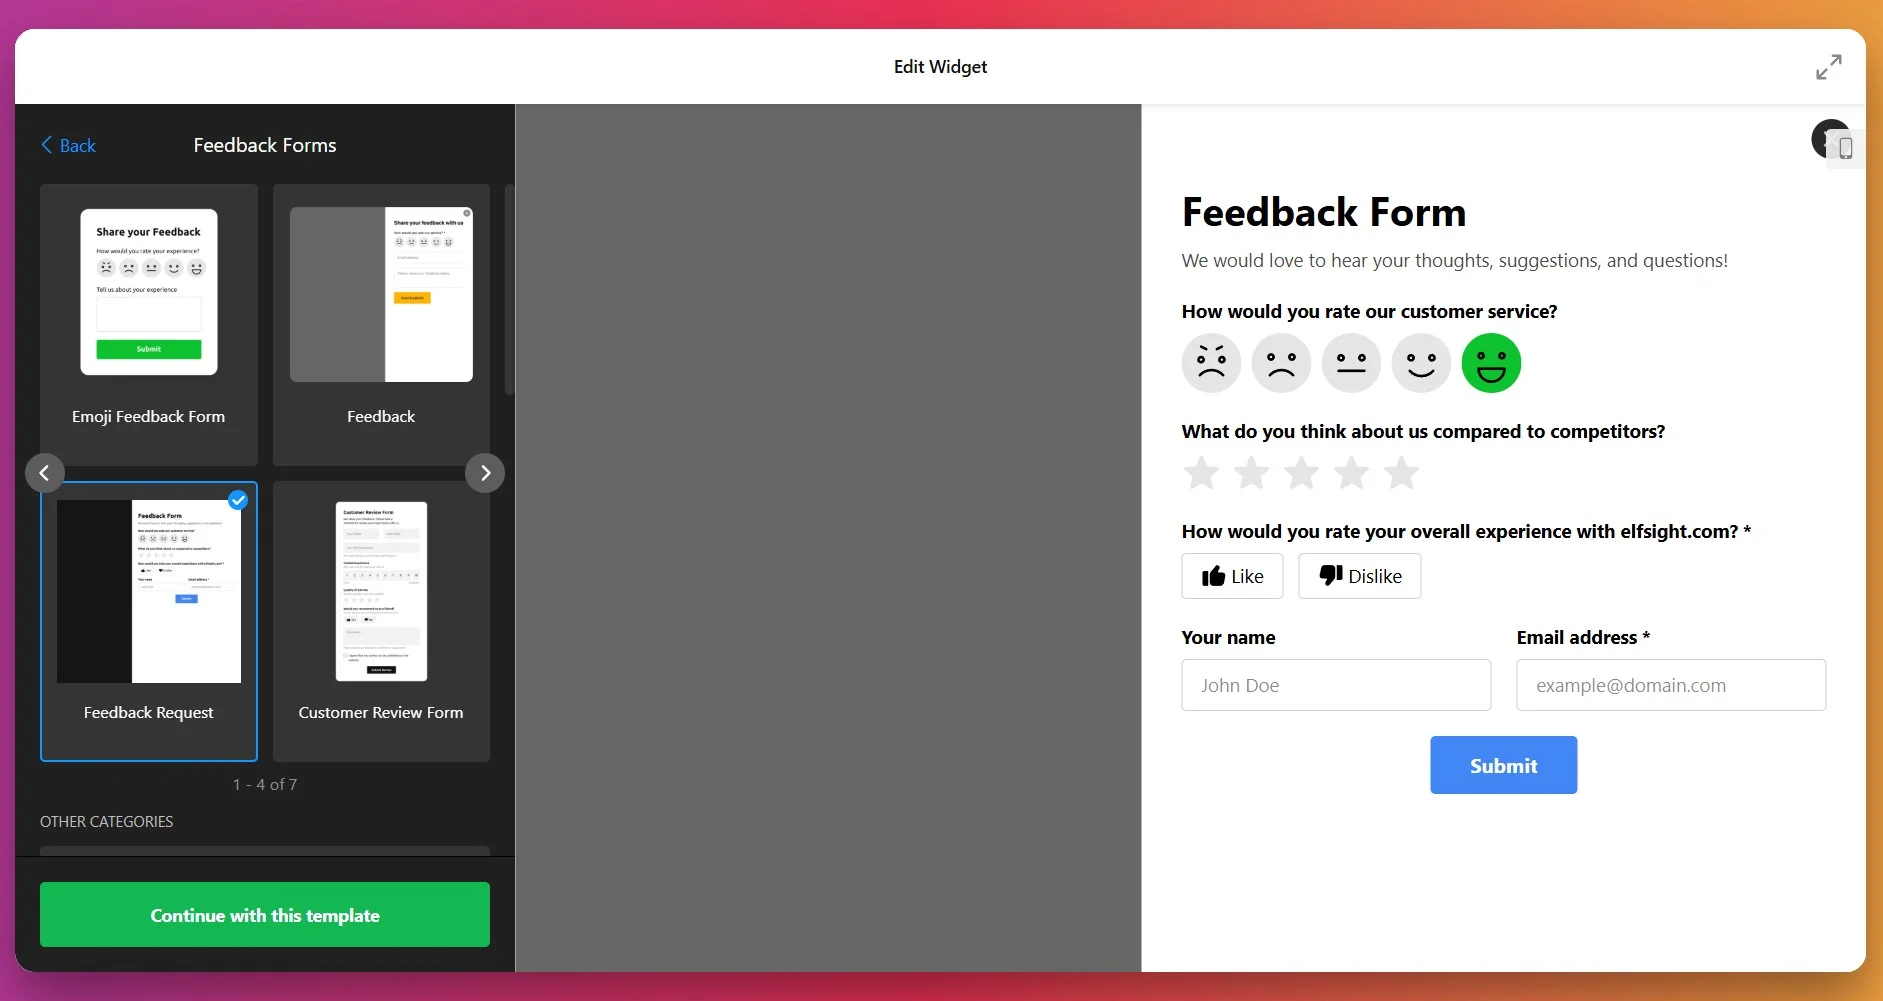
1. Choose a Template
Open the Form Builder configurator and start by selecting one of the ready-made templates. For our case, choose from the ‘Feedback Forms’ category of templates. Once you find the one that fits your purpose best, click “Continue with this template” to proceed to editing.
2. Add and Configure Form Fields
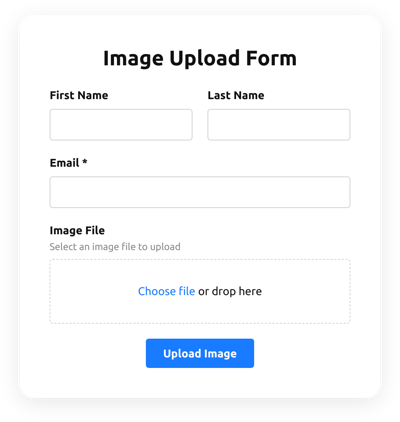
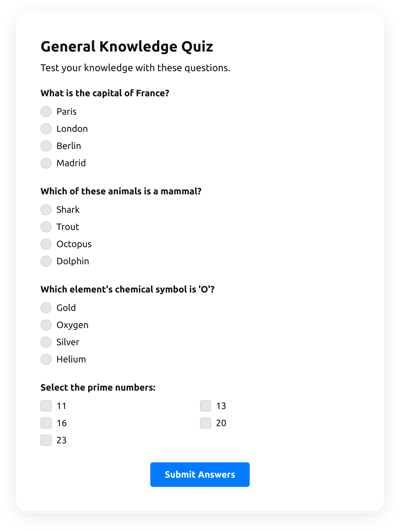
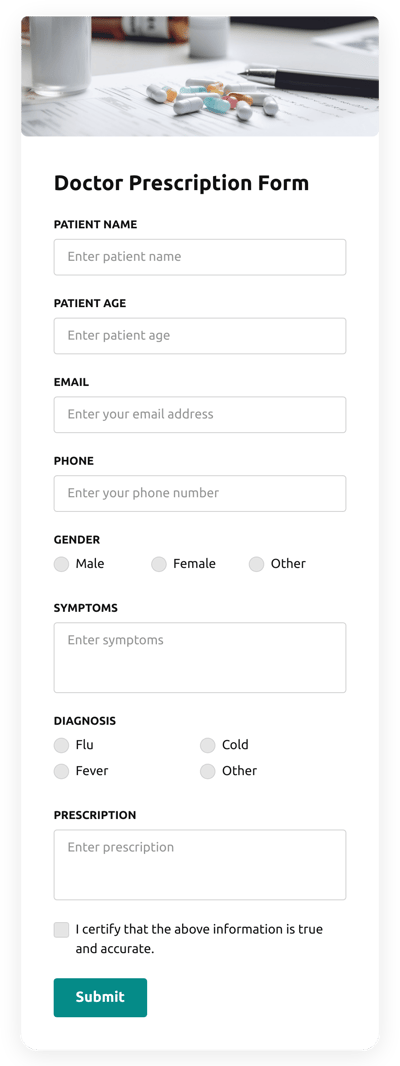
The Build Form tab is your primary workspace for creating and customizing the content of your form. Use the +Add Field button to insert new elements such as:
- Short text inputs (name, company, country, ID)
- Contact fields (email, phone)
- Date pickers, dropdowns, and checkboxes
- Rating scales (star, number, like/dislike, or smiley scale)
- File uploads, consent box, signature
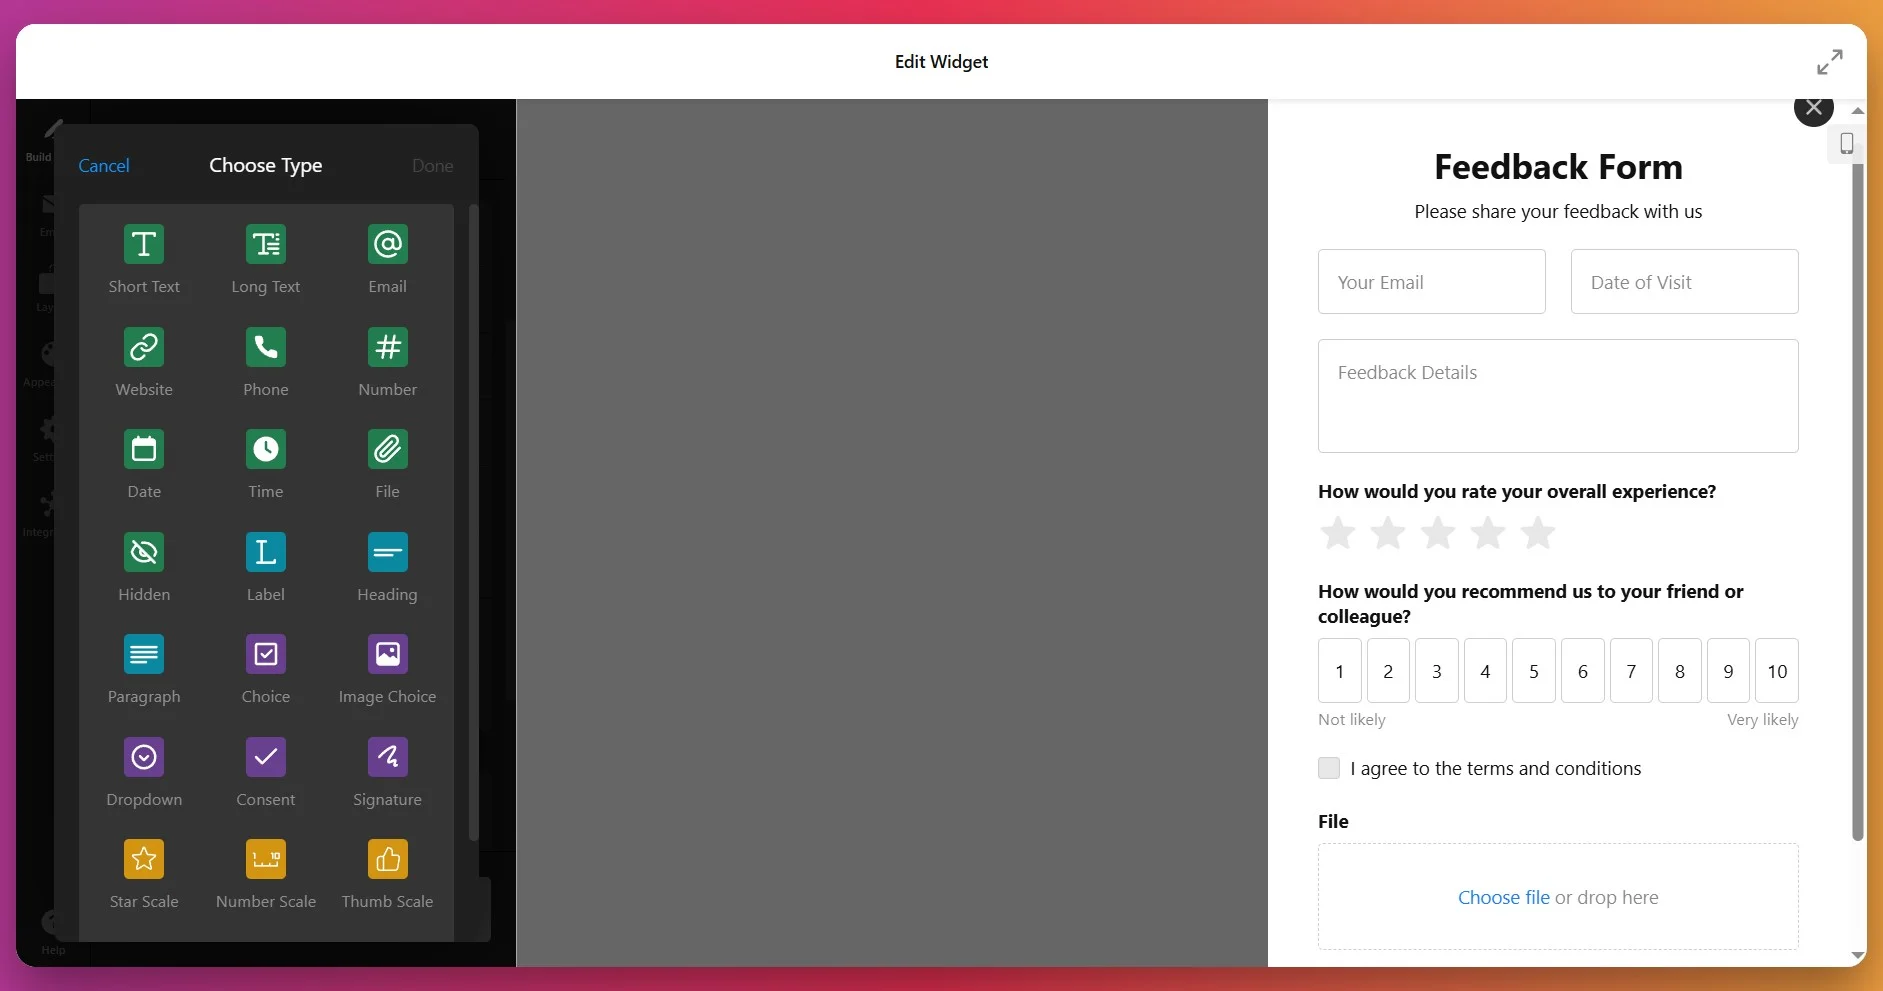
Below the ‘Fields’ section, find options to customize your Header, Submit Button, Footer, and Success Message. For a tailored branded experience, you can add a cover image, logo, and custom text for each element, and adjust their alignment to fit your website.
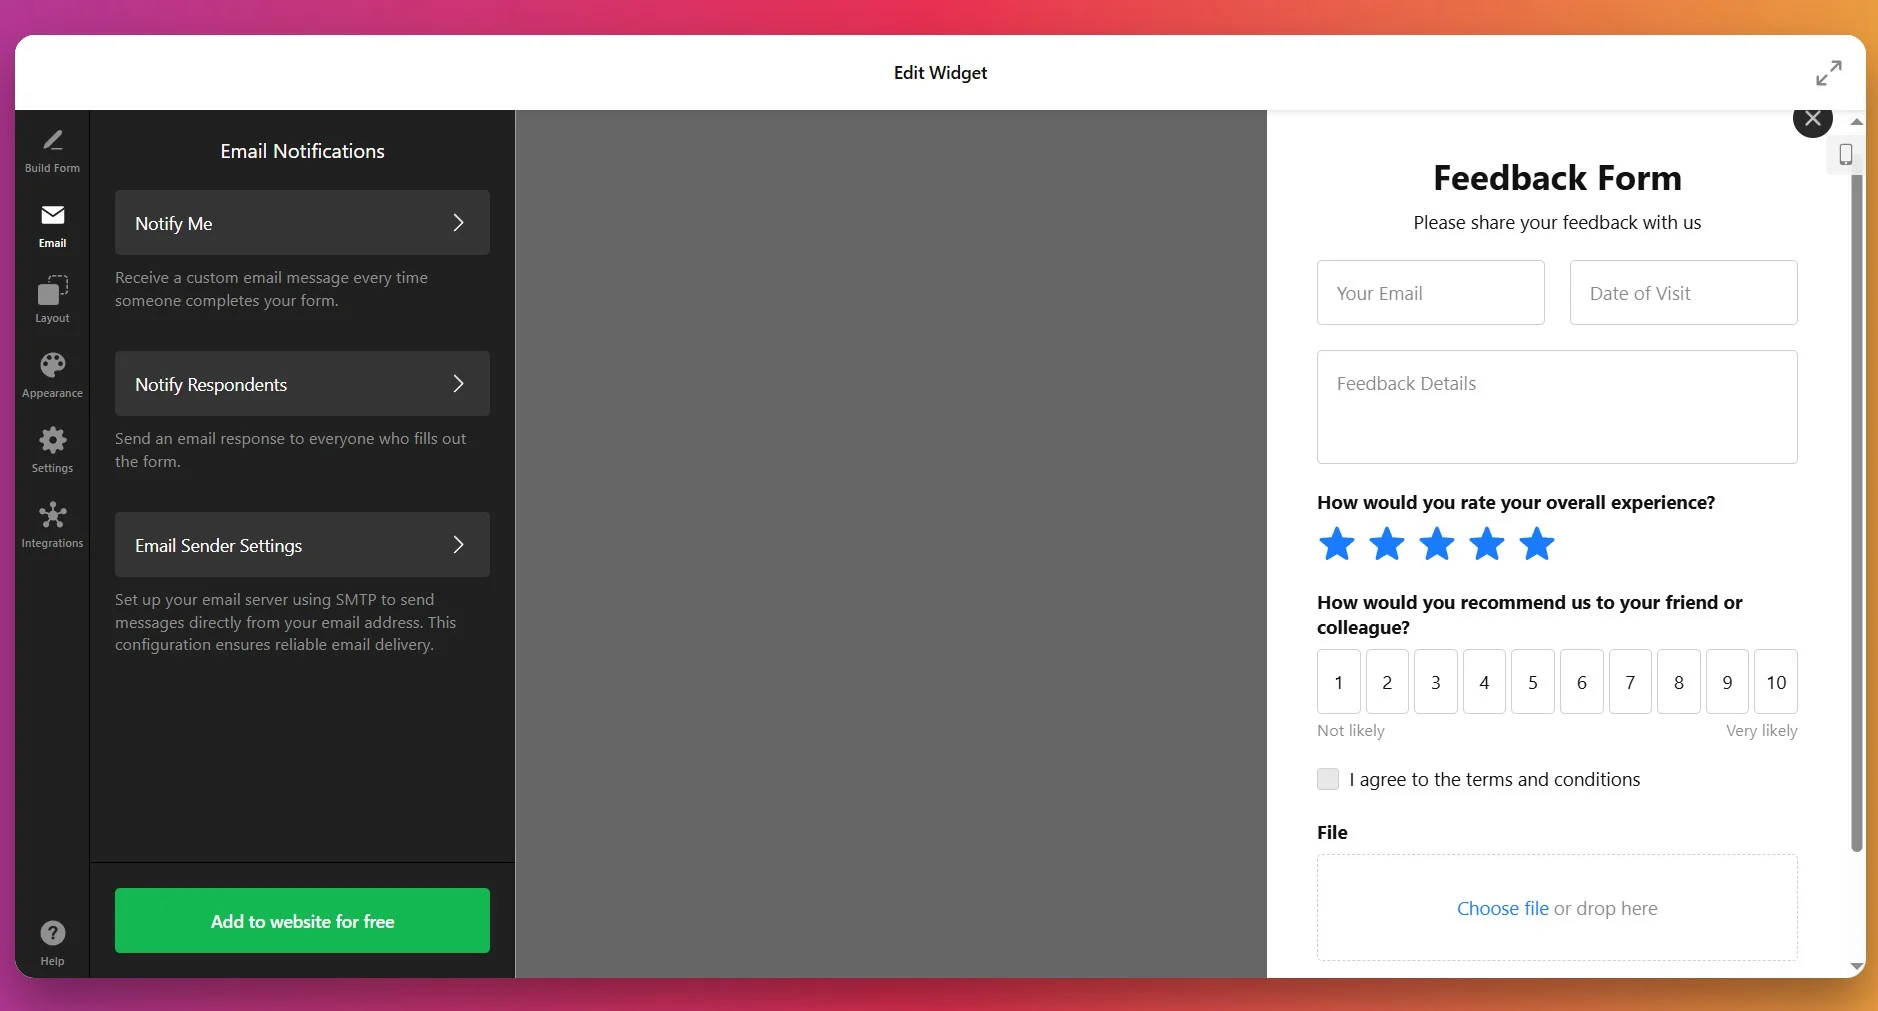
3. Set up Notifications
Navigate to the Email tab to define who gets notified when someone submits a form.
- Under Notify Me, add your email address to receive alerts each time someone fills out your form.
- Customize the sender name, subject line, and email message body.
- Enable Notify Respondents if you want to send automatic confirmation emails to users after submission.
- Optionally, configure Email Sender Settings using SMTP to ensure reliable delivery directly from your domain.
Example:
Sender name — Elfsight
Subject — New Form Submission Received
Message — “This message was sent from [page-url].”
4. Adjust Layout and Structure
In the “Layout” section, you can tailor how the form appears on your website. Choose between:
- Inline – embedded directly into your webpage content.
- Floating Pane – appears as a pop-up on the right or left side.
- Vertical or Multistep layout to break long forms into smaller sections for better UX.
If you opt for the ‘Multistep’ layout, come back to the Build Form tab to add fields to new pages.

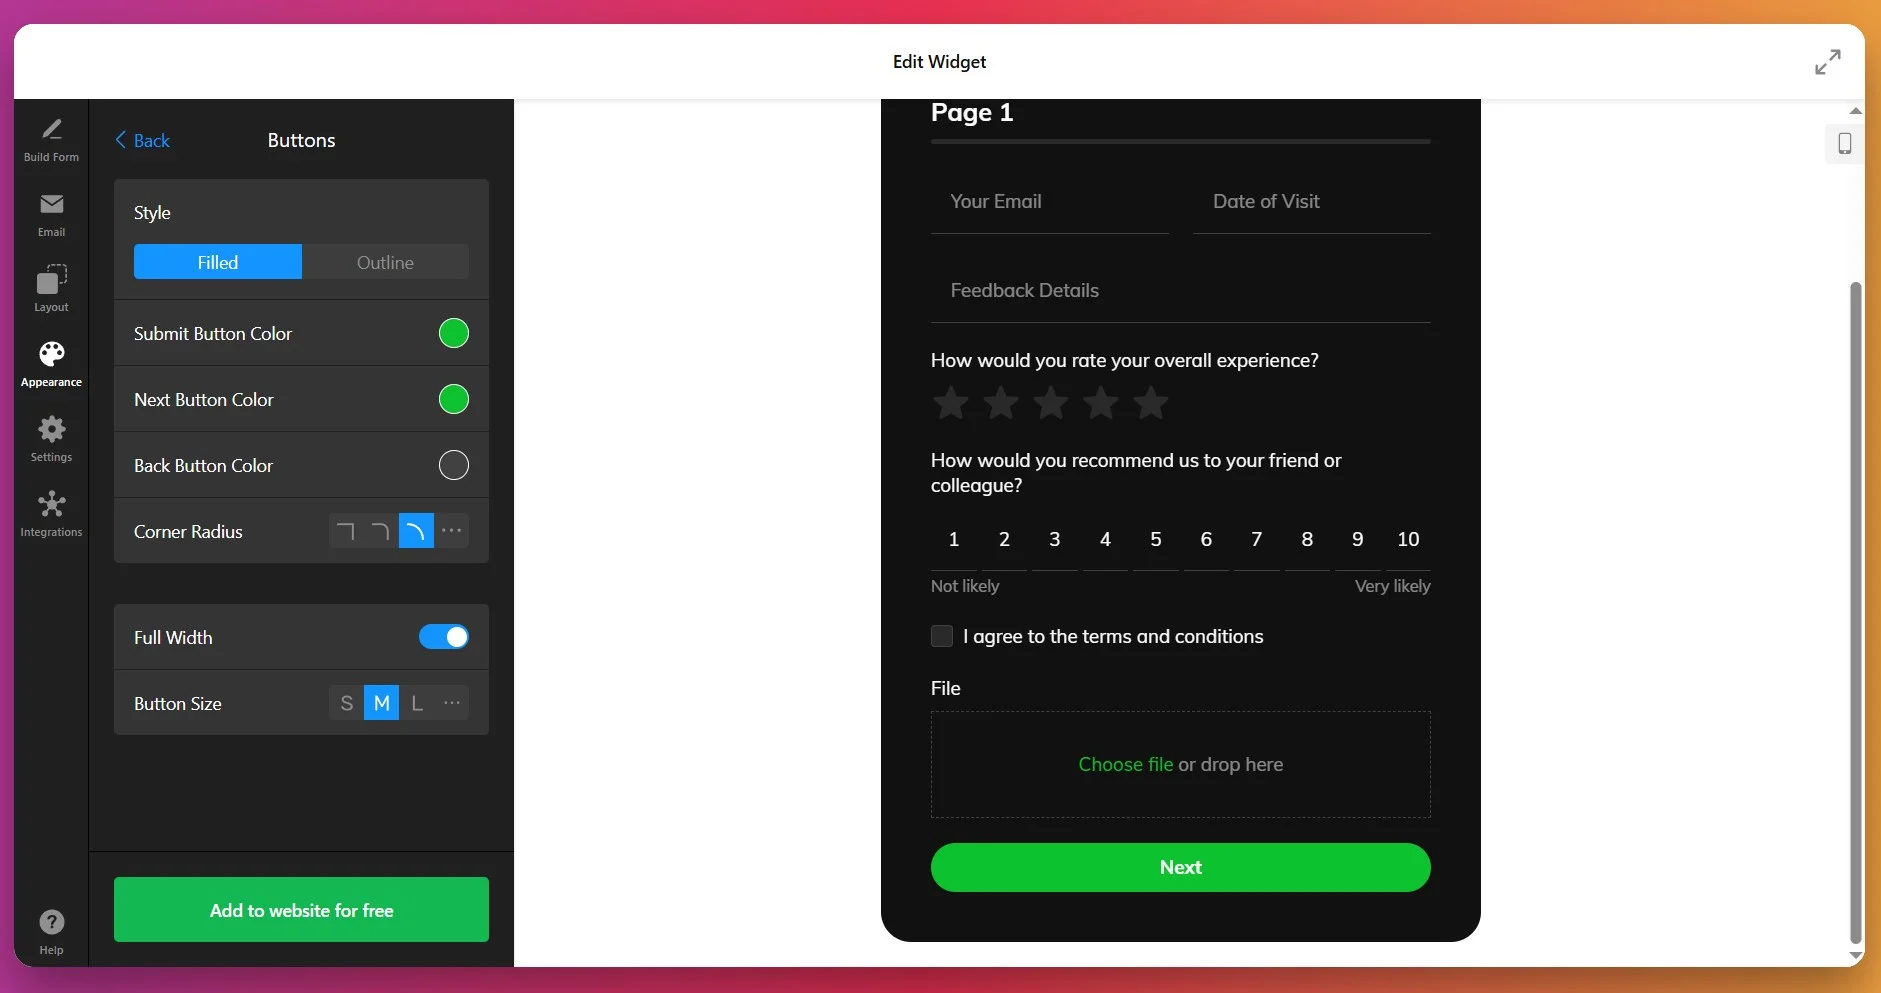
5. Customize Appearance
The “Appearance” tab will help in making your form visually match your brand. Here, you can:
- Pick a Color Scheme (Light or Dark).
- Choose an Accent Color that highlights buttons and active elements.
- Set your preferred Font style for text consistency.
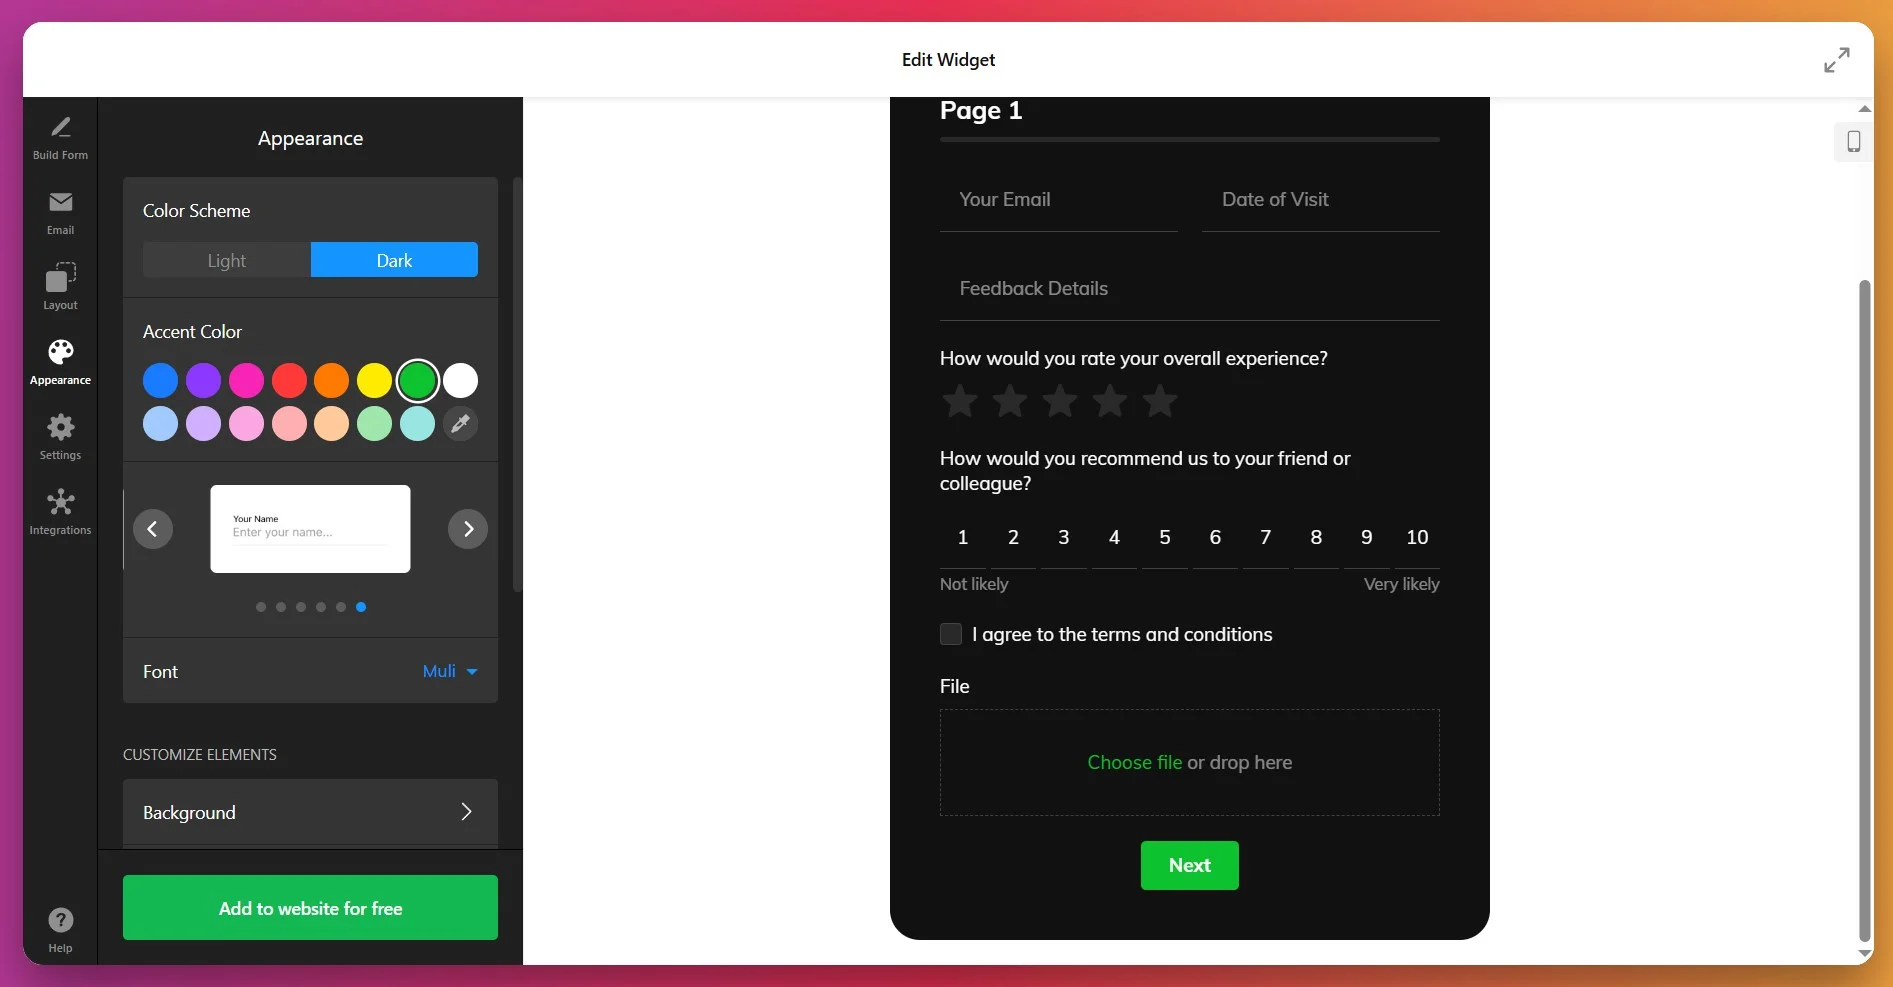
Under ‘Customize Elements’, you will be able to fine-tune:
- Background – solid color or transparent.
- Header and Footer – text, size, and alignment.
- Form Fields – shape, borders, and padding.
- Submit Button – color, label, hover state.
- Success Message – text and style.
For advanced styling control, utilize Custom CSS by entering custom code into the field. There are ready-to-use CSS builds from Elfsight users you can find in our forum discussions.
6. Configure Form Behavior and Language
In the “Settings”, control how your form behaves after submission and localize its interface. That includes Post-Submit Action (success message or URL redirect), option to prevent bot submissions with reCAPTCHA, Language settings, and Pre-fill with URL Parameters.
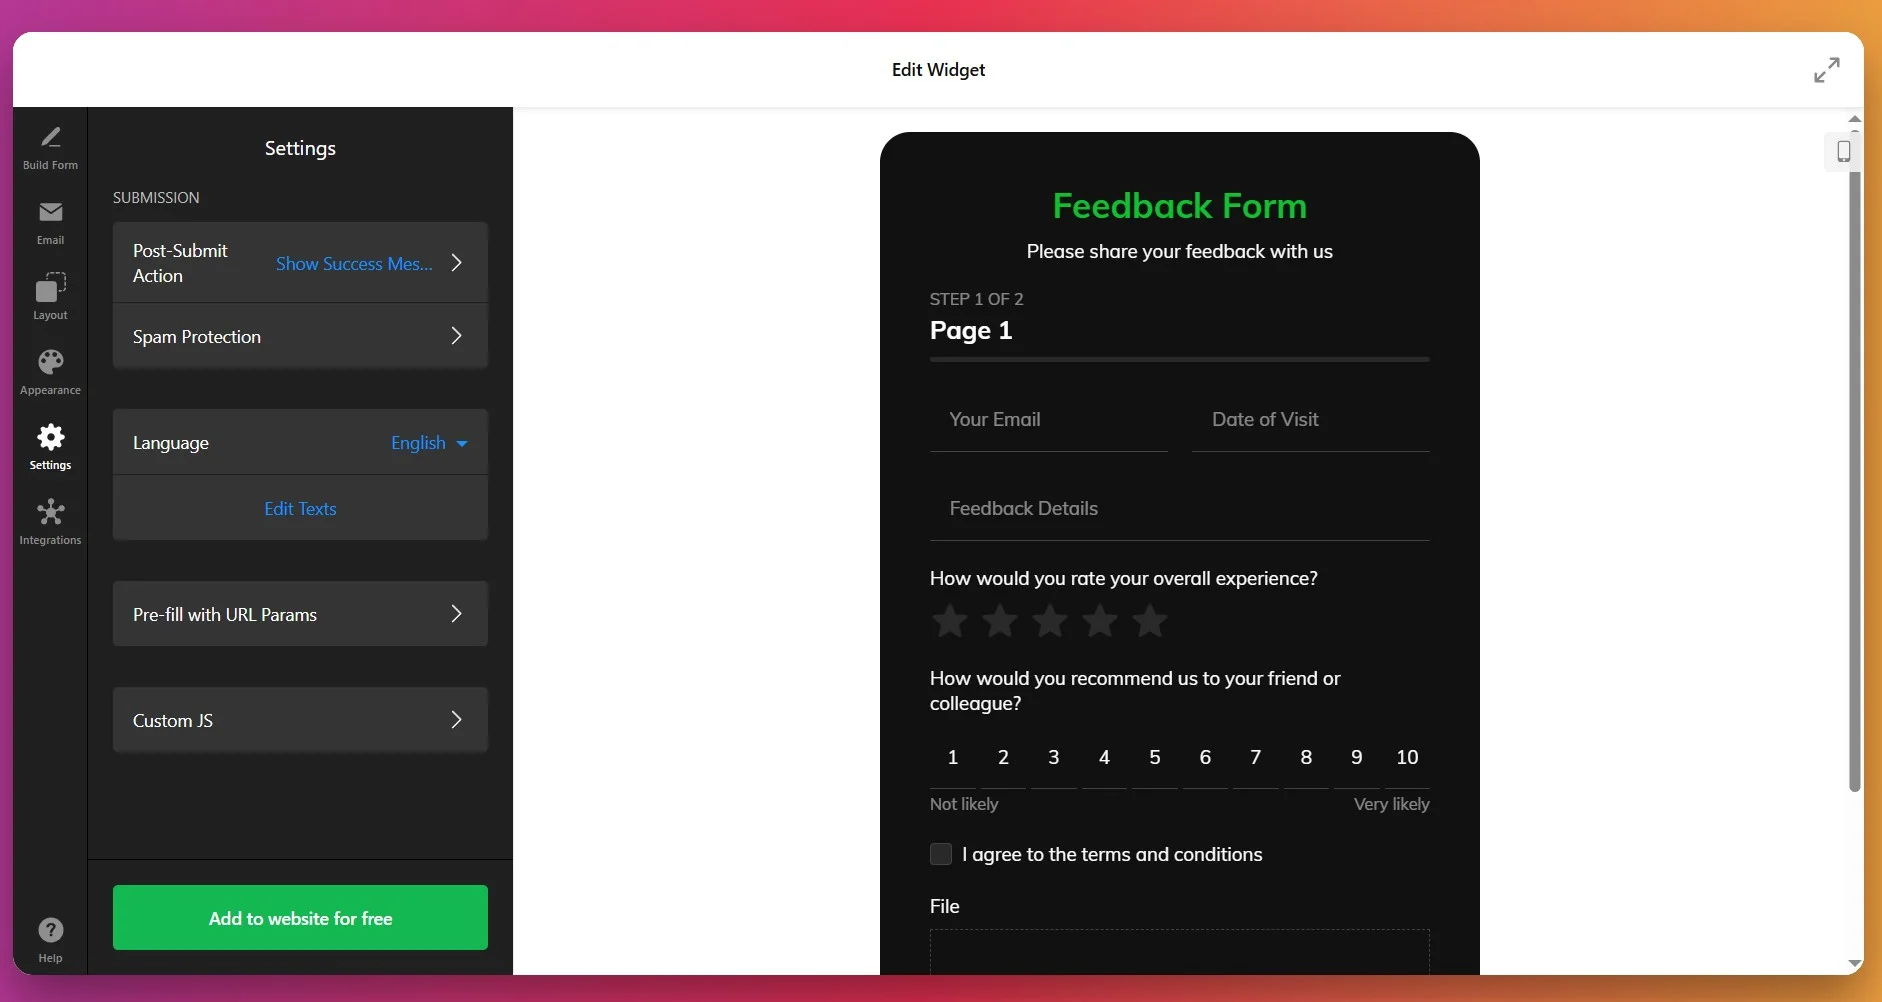
Once again, we’ve added a custom JS option if you need advanced behavioral logic or analytics tracking.
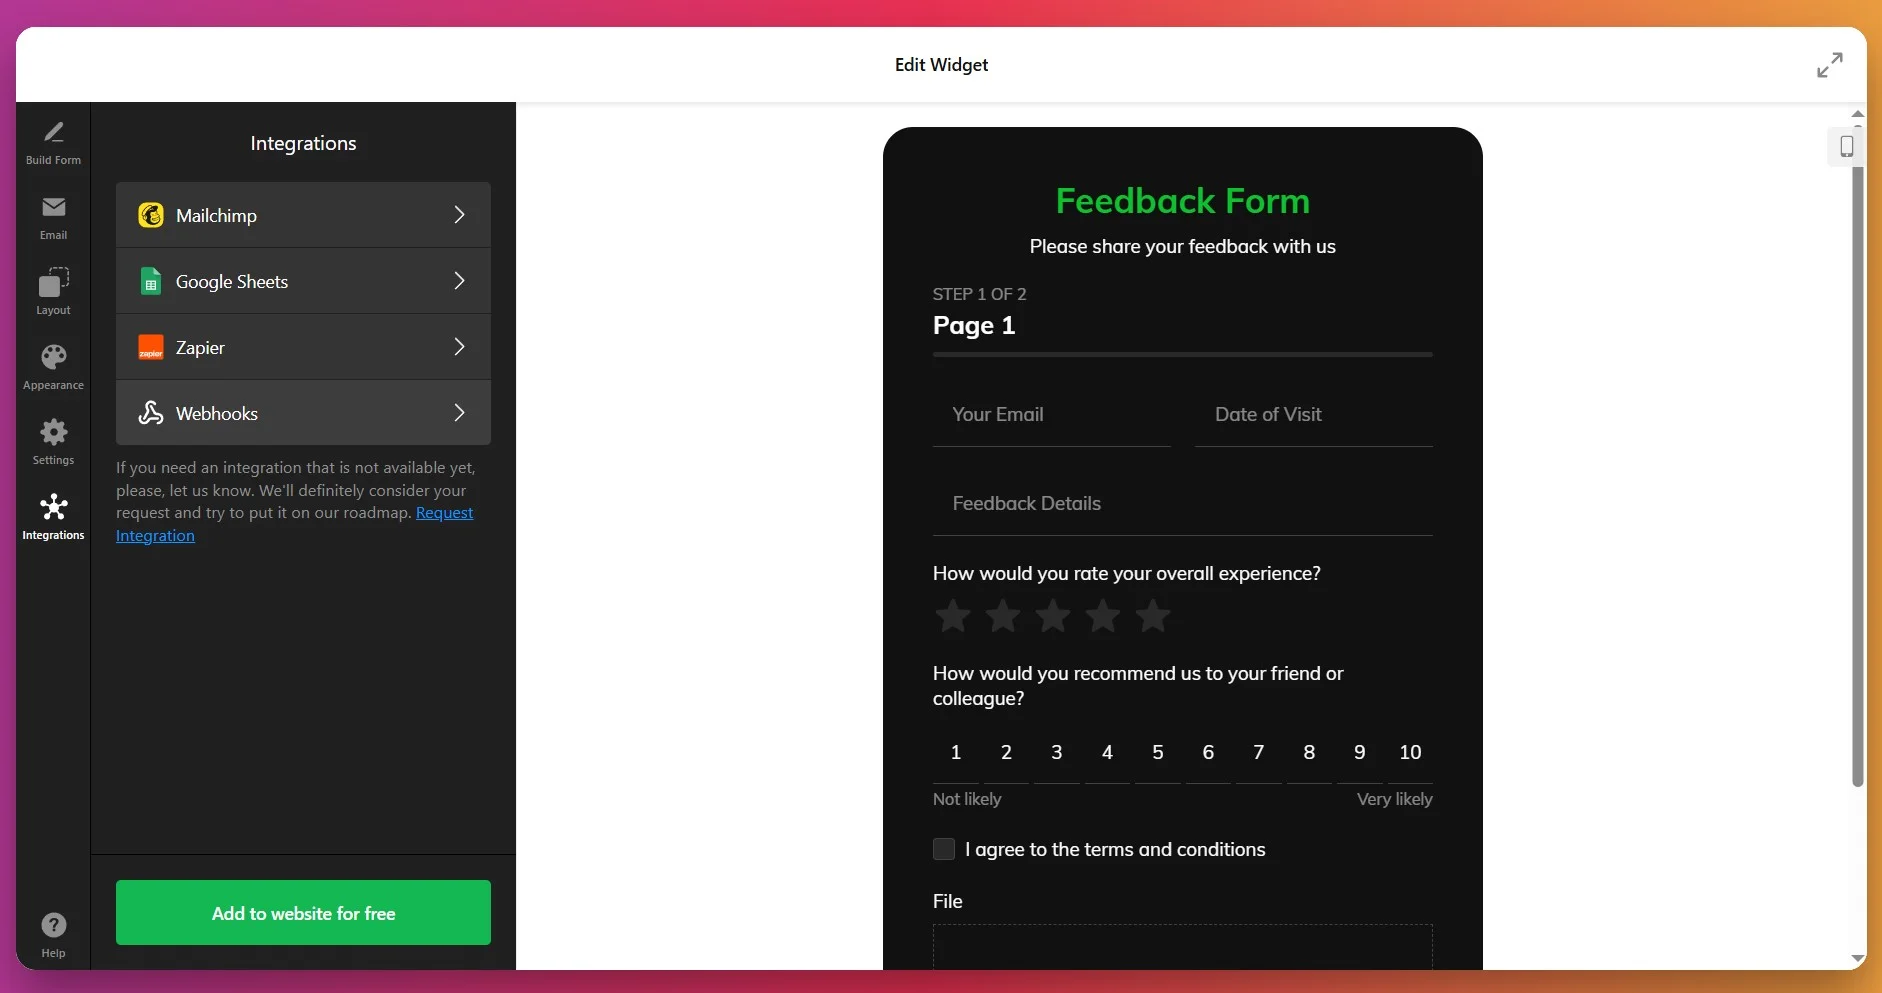
7. Connect Integrations
Finally, link your form to external services under the Integrations tab for automation and data management.
- Mailchimp – automatically add new contacts to your mailing lists.
- Google Sheets – collect all form submissions in a live spreadsheet.
- Zapier – connect with thousands of apps like Slack, Trello, or CRM tools.
- Webhooks – send real-time submission data to your own system or API endpoint.
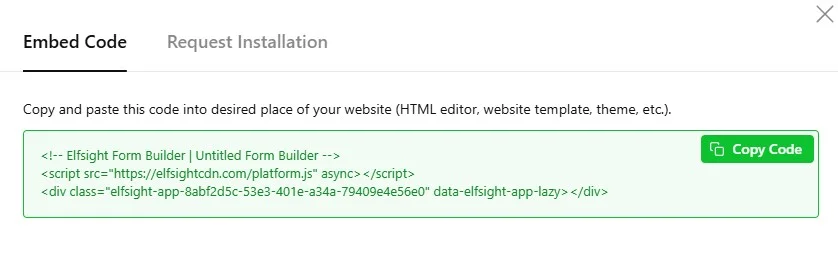
8. Embed Form into Your Website
Once everything is set up, click “Add to website for free” to generate the installation code. Copy and paste it into your website’s HTML where you want the form to appear.
📝 Feedback Form Optimization Tips
Before you publish your form, it’s worth spending a few minutes optimizing it for clarity and conversions. These Elfsight-proven tips will help you reduce friction and increase response rates:
- Reduce friction wherever possible. Keep the form short, use clear labels, and avoid unnecessary mandatory fields. Each extra step increases the chance of abandonment.
- Use structured questions to guide responses. Employ radio buttons, dropdowns, emoji scales, or Likert ratings instead of only open-text fields to make answers easier to analyze.
- Leverage progressive disclosure. Show additional questions only when relevant, using conditional logic. This prevents overwhelming users and improves completion rates.
- Clearly communicate trust and privacy Include short statements like “Anonymous responses” or “Optional email for follow-up” to reassure users, especially in sensitive contexts like healthcare or internal surveys.
- Optimize for mobile. Most users respond on phones; ensure forms fit screens without horizontal scrolling and that input fields are touch-friendly.
- Use clear, action-oriented CTA text. Replace generic “Submit” with “Send Feedback” or “Help us improve your experience” to increase engagement.
- Test different layouts and formats. Inline, popup, slide-in, and full-width sections each have advantages depending on context — pick the one that balances visibility with user experience.
- Preview and iterate. Check forms across devices and browsers, and update based on actual completion data to continuously improve response rates.
Form Builder Issues and Solutions
Still not sure how something works? You’re probably not alone—here are the most common questions answered.
Can I make my feedback form anonymous?
How do I prevent spam submissions?
- Turn on Google reCAPTCHA in Form → Settings → Spam Protection
- Enable submission limits per user/IP
- Avoid publishing your form action URL publicly
Where do form submissions go and how do I view them?
Can I add conditional logic (show/hide fields based on answers)?
Can I collect file uploads (screenshots, documents)?
Can I connect the form to my email or CRM?
Are submissions secure?
Can users save and continue later?
Need More Help?
We hope this guide gives you a solid foundation for creating a custom Feedback Form for your website. Don’t hesitate to reach out to us if you have questions, ideas, or wish to share your custom form builds with us! Stay connected with the Elfsight team on X, Facebook, and LinkedIn for the latest updates, tips, and discussions.


