Checklist Form Template
- Built-In AI Form Generator
- Spam Protection
- Multiple Email Alerts
- Filled in Advance Forms with URL Parameters
- Post-Submit Actions
- Forms with Multiple Steps
- Support Multiple Languages
- Data Transfer
- Upload Files
- Mobile-Friendly
- 20+ Customizable Fields and Attributes
- Float-Based Layout
- Color Theme Generator
- Several Layout Templates
- 5000+ Zapier-Based Integrations
Need a Different Template?


Here’s what people say about Elfsight Form Builder widget


FAQ
How to Create Your Own Checklist Form Template for the Website
In order to make the Checklist Form template for your website, use this instruction:
- Select from a catalog the Checklist Form template.
- Open the selected template.
- Click on the “Use Template” button.
- Edit all the attributes and characteristics of the Checklist Form to match the website style.
- Sign in to the Elfsight profile and obtain the code to integrate.
How to Customize the Checklist Form for Your Website Layout
It’s as simple as that; just open the “Appearance” menu in the configurator. Select the layout format. Change width and position. That’s it!
How to Add Checklist Form Plugin to the Website
In order to integrate the Checklist Form widget to your site, apply the detailed guide:
- Modify the Checklist Form template.
- Log in to the Elfsight’s control panel.
- Obtain the unique widget code and copy it.
- Go to the website and insert the code into the editor.
What Integrations are Available for Checklist Form
For our dear customers, we make available Mailchimp, Google Sheets, and 5000+ app integrations via Zapier! Making a useful Checklist Form doesn’t mean you have to be a rocket scientist. With the correct template, you can easily create an effective form for your particular case.
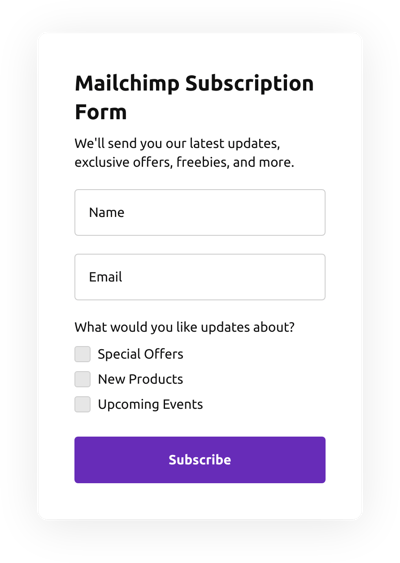
| Mailchimp Integration | This integration lets users easily create and manage regular email marketing campaigns, gather client’s contacts, and monitor the performance metrics. |
| Google Sheets Integration | This app integration lets users access and filter data kept in their Google Sheets account from different applications and services. For example, you can make use of this integration service to transfer your form results. |
| Gmail Integration | This integration allows users to gain access to their Gmail messages, contacts, and calendar events from different applications and services. |
| CRM Integration | This application integration allows companies to gain access to customer details from a number of sources in one place, simplify processes, and improve customer service. |
| Zapier Integration | This application integration lets users synchronize apps and services with each other to automate workflow processes and swap details quickly. |
How to Add Integration to Your Checklist Form
In order to embed an integration to your Checklist Form, apply the steps from the detailed guideline:
- Locate the “Integrations” menu bar in the live demo builder.
- Choose an app integration.
- Connect the Checklist Form to the selected integration and authorize the account.
What to Look for When Customizing Your Checklist Form
Form Title
The form’s title shall clearly represent what visitors are submitting. Reveal your brand identity by keeping the caption brief, simple, and memorable. This will help users easily understand the reason why they’re completing the Checklist Form and how their data will be used.
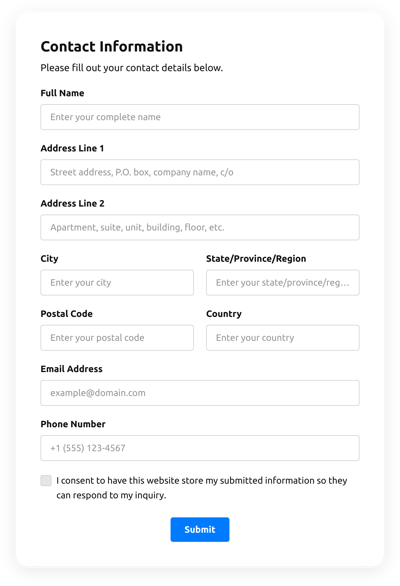
Checklist Form Input Fields
This is where users shall input their name, email address, review, as well as any additional relevant details you need to obtain from users.
Checklist Form Submit Button
This is a critical feature of any form because it lets customers know when their info has been successfully sent.
Privacy Policy
Remember to include a URL-link to your site’s privacy notice in your Checklist Form so that customer know how their information will be utilized and protected by your business or firm.
Checklist Form Anti-Spam Captcha
Adding an anti-spam reCAPTCHA helps prevent spam form submissions whilst guaranteeing only real people are gaining access to the form information and not robots.
Confirmation Message
Once a customer has successfully filled out and submitted the Checklist Form, check out if they get some verification that their submission was accepted and is being processed by your support team or company.
Checklist Form Mobile Optimization
Build the form optimized for every mobile display by using an adaptive layout. It’s user-friendly on any monitor size, browser platform, OS, and orientation. Additionally, appropriately showcase all areas, labels, and directions to get a clear and concise outcome.
Checklist Form Visuals
Improve the user experience on your webpage by adding visuals. Take into account using illustrations, icons, or vibrant colors to draw attention to the submit button or call-to-action (CTA). But stay away from using too many visuals and colors, as it can be intimidating and distract from your main point.
Checklist Form Fields Validation
Adding field validation helps reduce mistakes that might occur when customers enter inaccurate data. Validate the necessary fields in real-time, so clients understand when they have made an error and can change their information before submitting.
Help with Checklist Form Setup and Website Installation
If you have studied the guide and still have a few questions, check out the following alternatives:
