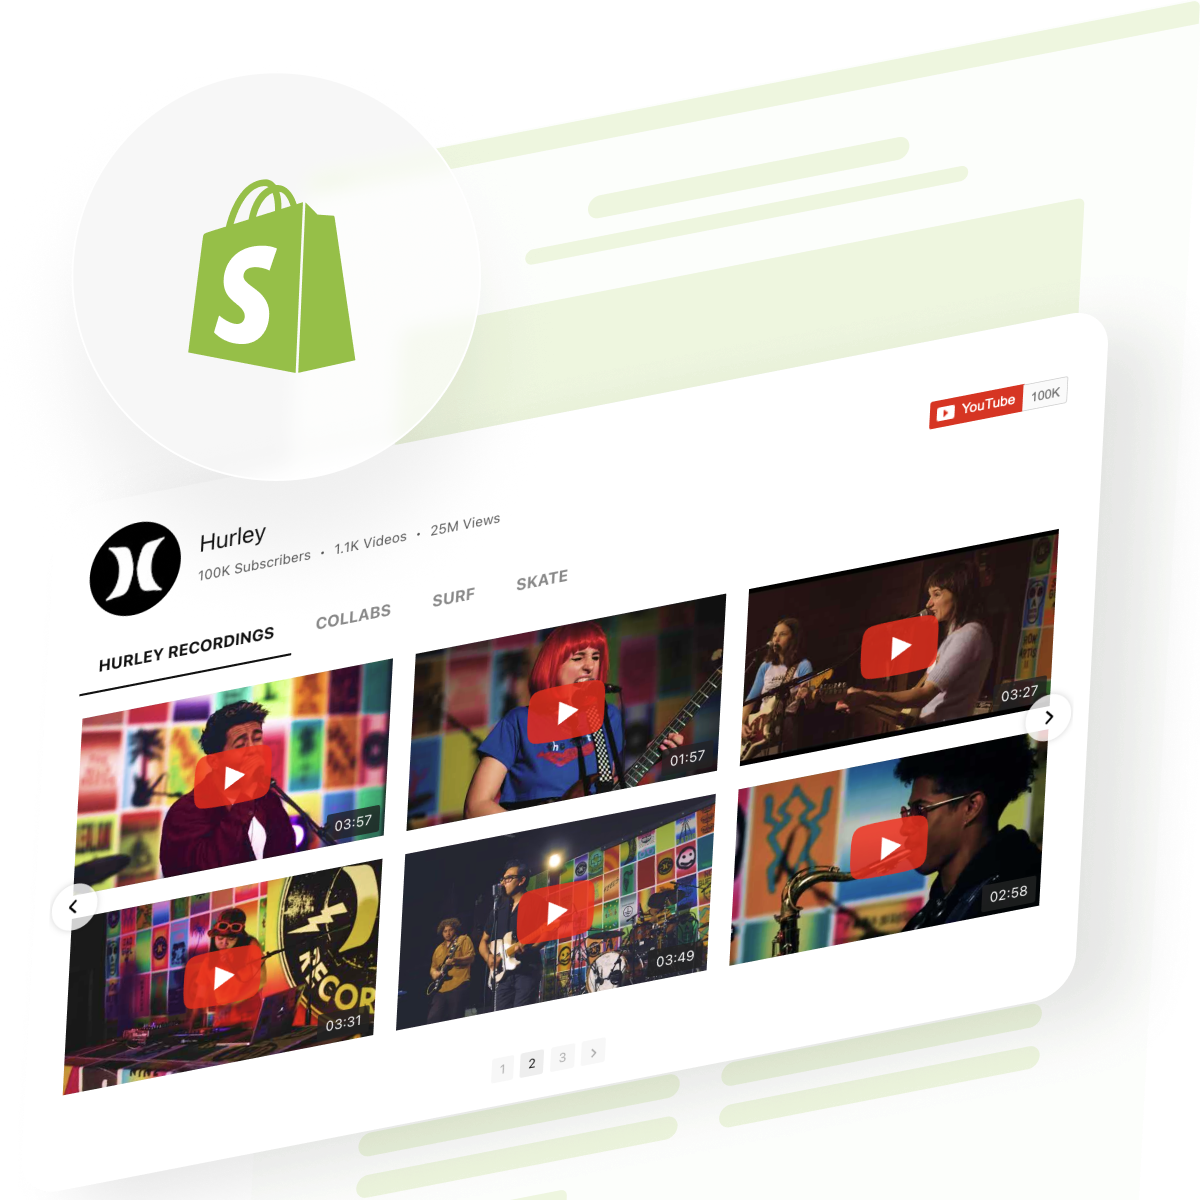
If you run a Shopify store, chances are you want your homepage or product pages to grab attention, not just sit there as a digital catalog. From what we’ve seen with Elfsight team, adding a YouTube video is one of the simplest ways to do that. A well-placed clip often means visitors click deeper, spend more time checking out product details, and are more likely to follow your calls to action.
The YouTube Gallery Widget saves time and makes it easy for you to add, customize, and display videos anywhere on your Shopify store – many of our users say they appreciate how quickly they can update content and avoid manual code edits.
- Easy installation guide. Simple walkthrough for adding YouTube videos to your Shopify store.
- Alternative methods. Clear comparison between manual code and using apps or widgets.
- Expert checklist. Key things to verify before and after embedding for a smooth result.
- Top troubleshooting tips. Fast solutions for common video display problems.
We’ll start with easy setup steps and get your YouTube video live in just a few clicks!
How to Embed a YouTube Video to Shopify Store: Quick Guide
This guide is built for anyone who wants quick results – clear steps to drop a YouTube video straight into a Shopify page without guesswork.
- Open the Elfsight’s editor and pick a template.
- Customize your YouTube video widget.
- Click “Add to website for free” and copy the code.
- Paste it into your Shopify website’s backend.
Jump into the editor below and start building your widget!
What Makes Elfsight’s YouTube Video Widget Stand Out?
Now that you’ve taken a quick look at the editor, let’s discover the key features that make this widget worth it, helping you organize, design, and monetize your YouTube content – right inside Shopify.
| Key Feature | Why it Matters |
|---|---|
| Display any YouTube content, grouped and labeled | Whether it’s a video, a playlist, or your entire channel, everything stays neat and easy to browse, so visitors get straight to what interests them. |
| Flexible layouts and playback modes | You can choose from three preview layouts and play videos inline, in a popup, or on YouTube itself, with up to 12 switchable video elements for the perfect look and user experience. |
| Robust style customization | It’s easy to match your website’s branding using five presets or custom colors for headers, groups, and videos, keeping your gallery visually consistent and inviting. |
| Adaptable gallery and navigation controls | You are free to adjust columns, rows, and width, plus add search and navigation controls, so your gallery fits seamlessly and is easy to explore on any website. |
| AdSense integration for monetization | Opportunity to connect your AdSense account and turn video views into revenue, right from your website’s video gallery – no extra setup required. |
These are just a few highlights – there’s a lot more you can do. For the complete overview of the widget’s functionality, check out its Features Page. But before you venture out to explore, let’s look at how you can install and customize the widget to Shopify step-by-step.
Full Guide to Adding and Customizing YouTube Videos on Shopify
This walkthrough covers the whole flow: from choosing a template to publishing, so that you know exactly where to click when you decide to create your own widget:
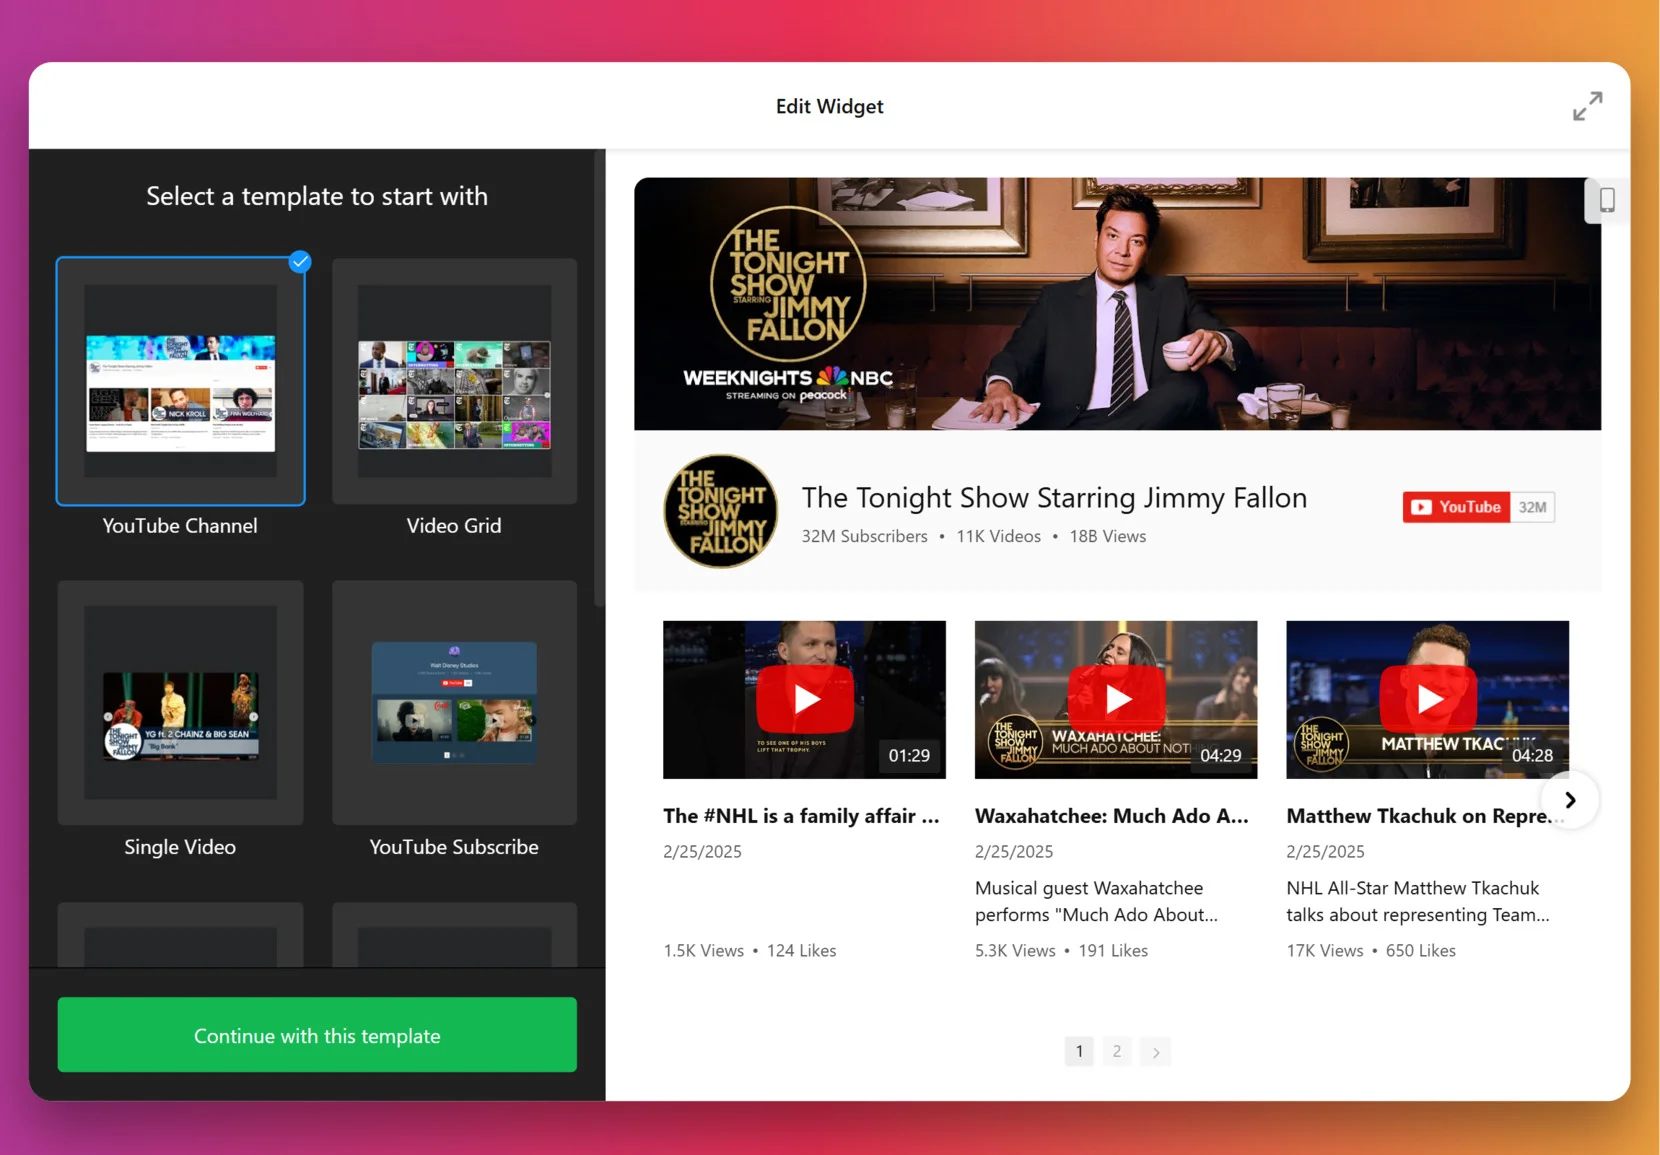
1. Choose a Template
The first thing you’ll see in the widget editor is the choice of three main layout styles: grid, list, and slider. Grid shows videos in rows, List stacks them vertically with more room for descriptions, and Slider displays them in a swipeable carousel.
Once you’ve selected a layout you like – click “Continue with this template“.
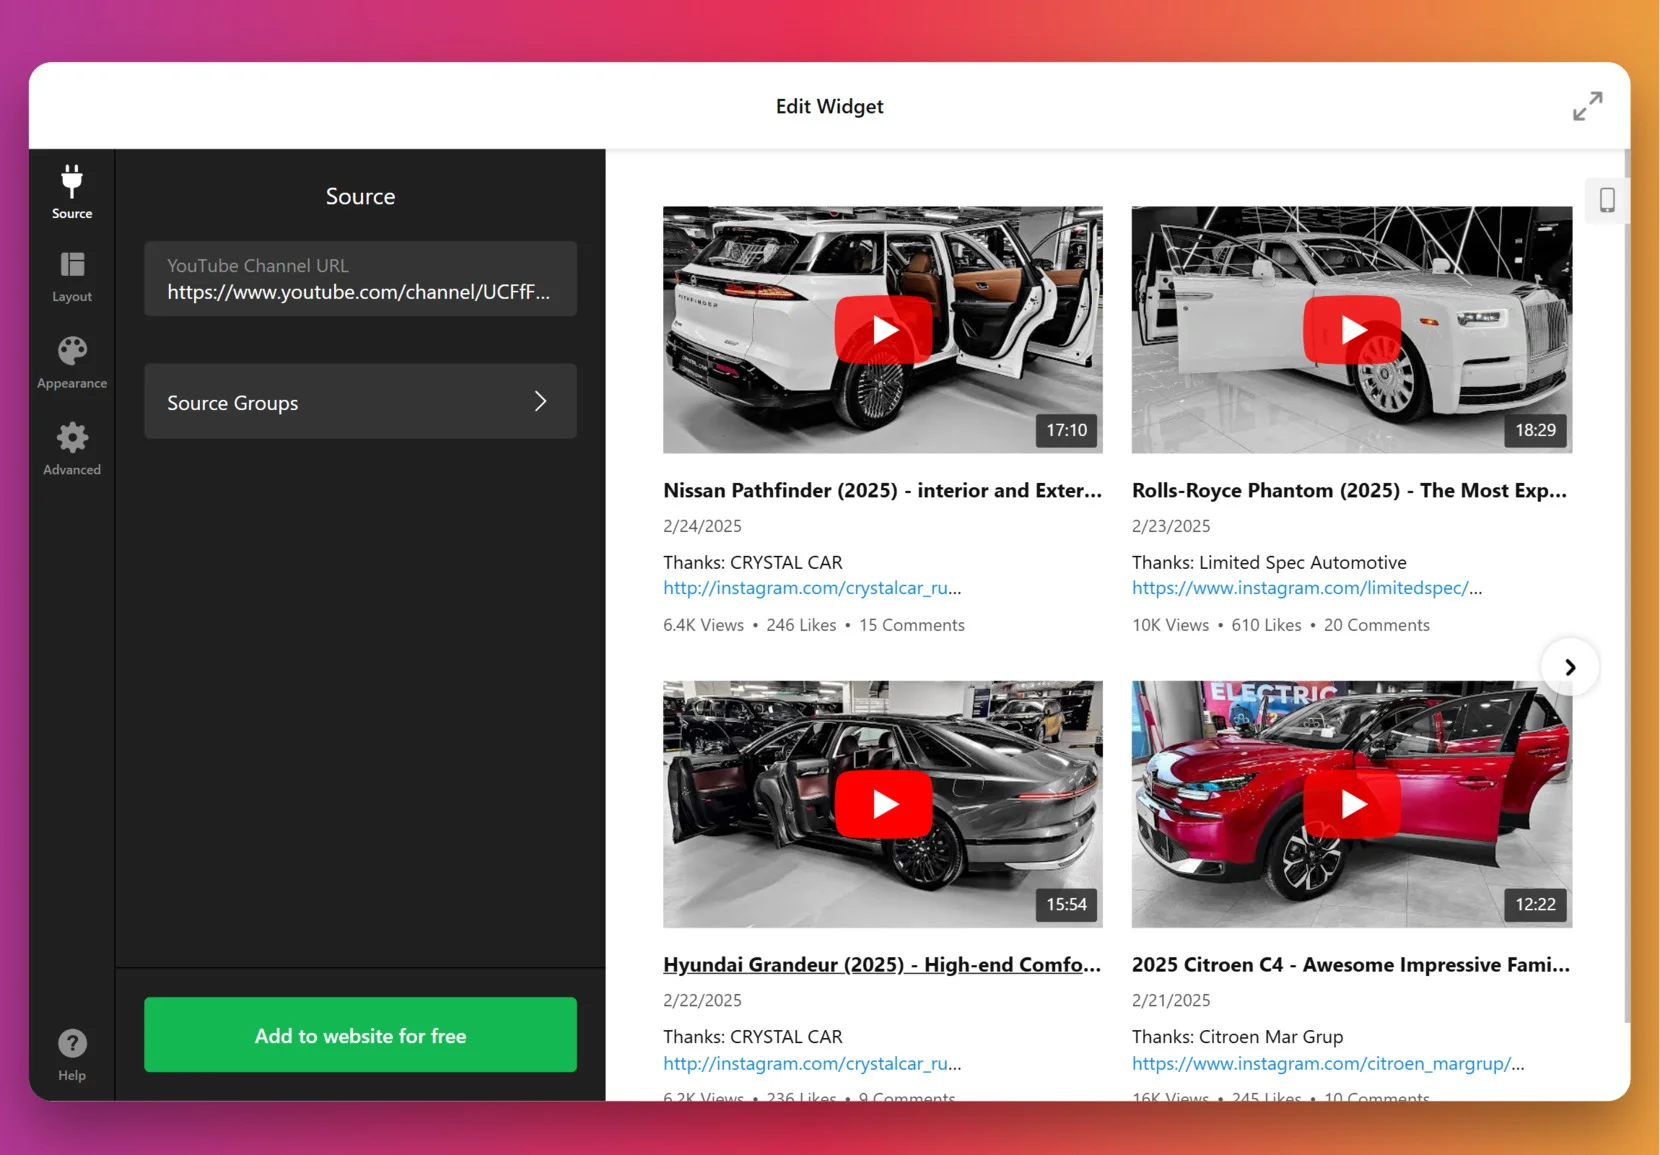
2. Add the Source
This step decides which videos appear in your gallery. Click “Source” in the left panel, enter a URL to a YouTube video, playlist or your entire channel, depending on the goal. To organize videos into categories (for example: Tutorials vs. Testimonials) – use Source Groups. This adds navigation tabs to your widget.
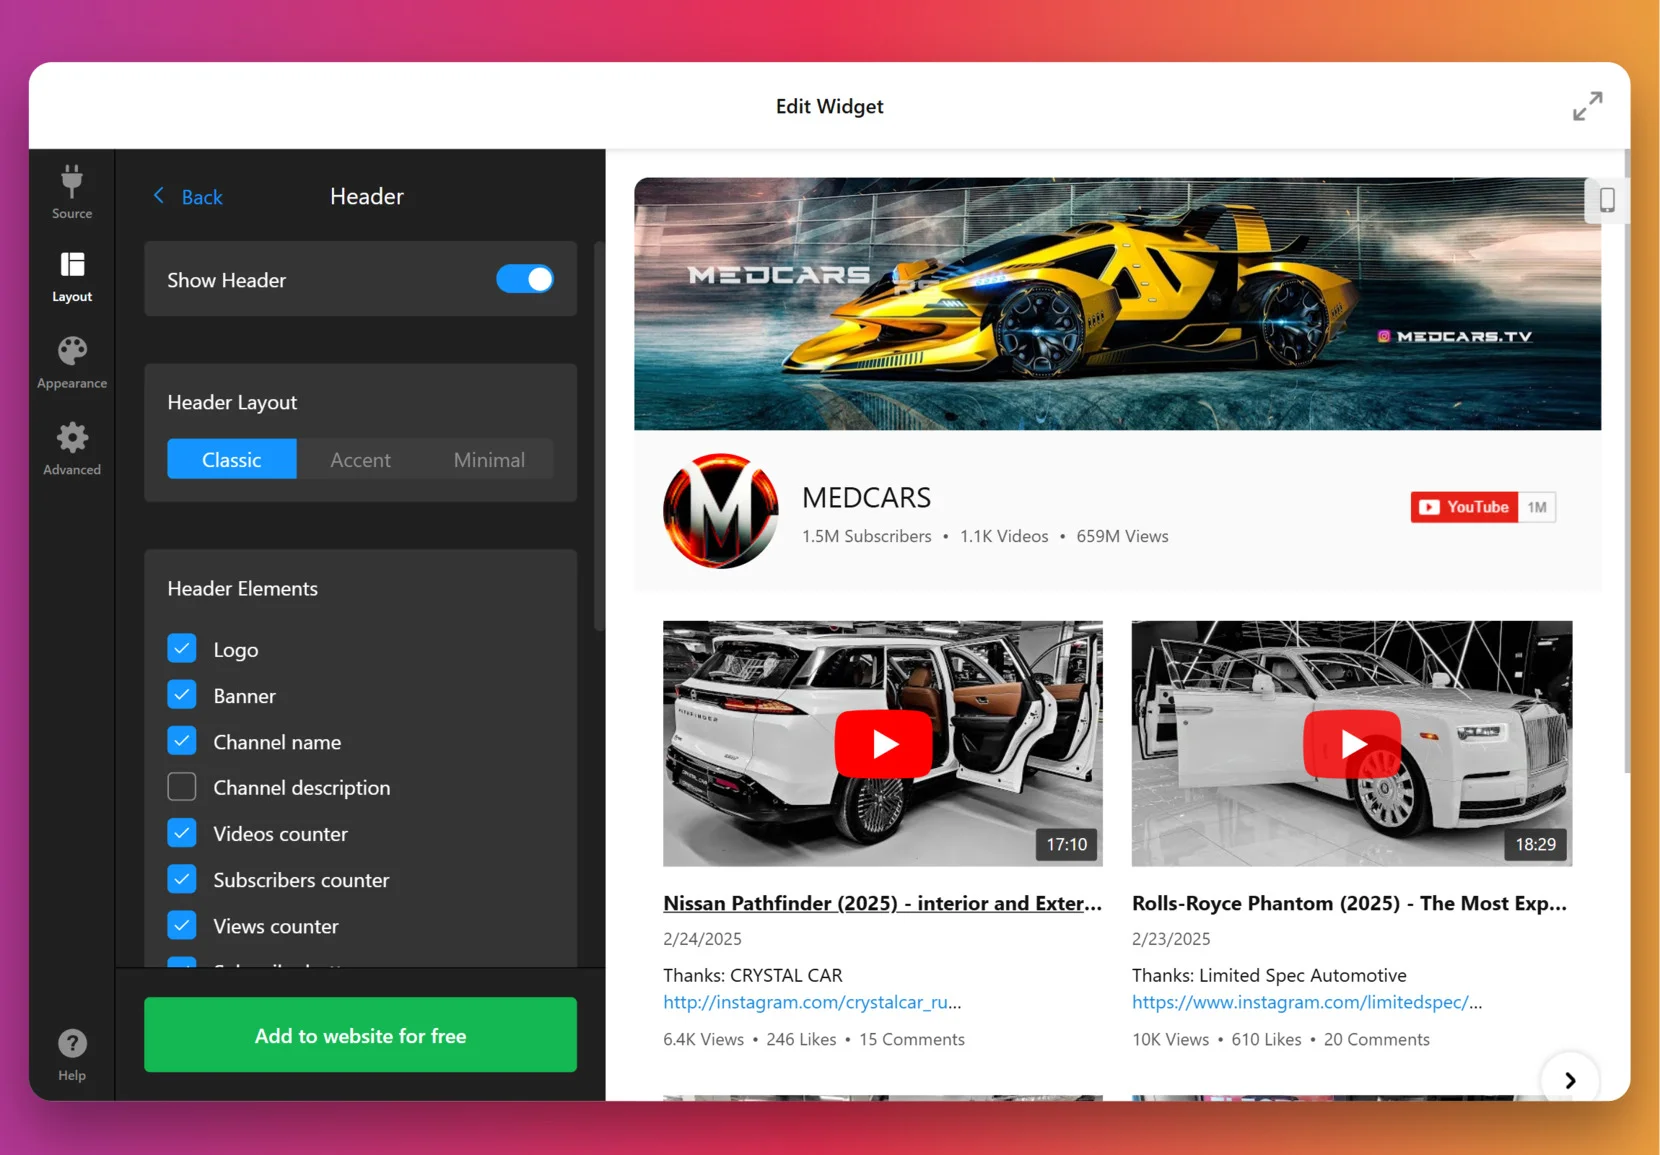
3. Customize the layout
Once the videos are in, it’s time to decide how they’ll appear. You can show or hide the channel information, video details, decide if videos should open inline, in a popup lightbox, or on YouTube itself, pick navigation styles for slider (arrows, drag/swipe, dots, or scroll), and more.
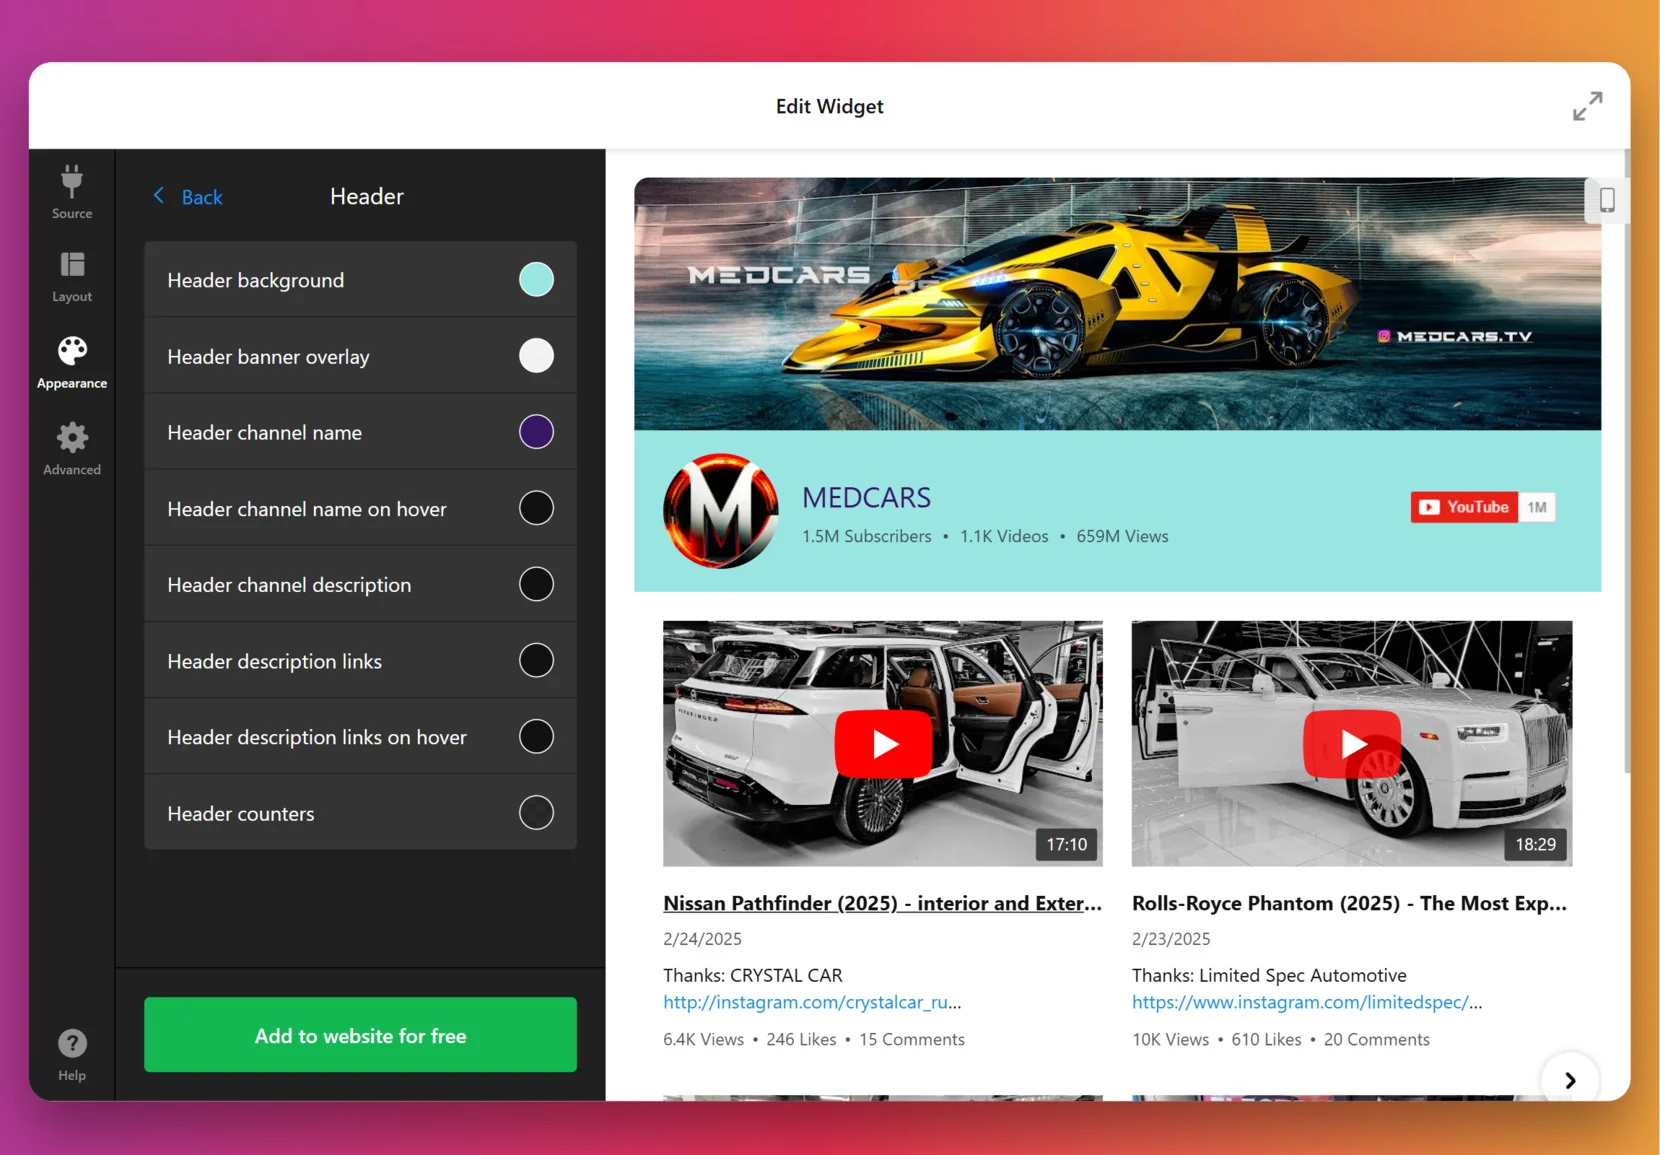
4. Set the design
Now it’s about making the widget match your website’s look. Under the “Appearance” tab, choose a preset Color Scheme to start, then adjust colors of individual elements: header, buttons, tabs, backgrounds, etc.
For full control, paste CSS code directly. For example, you could make thumbnails larger or align text differently. Feel free to explore our Forum for ready-made CSS from other users.
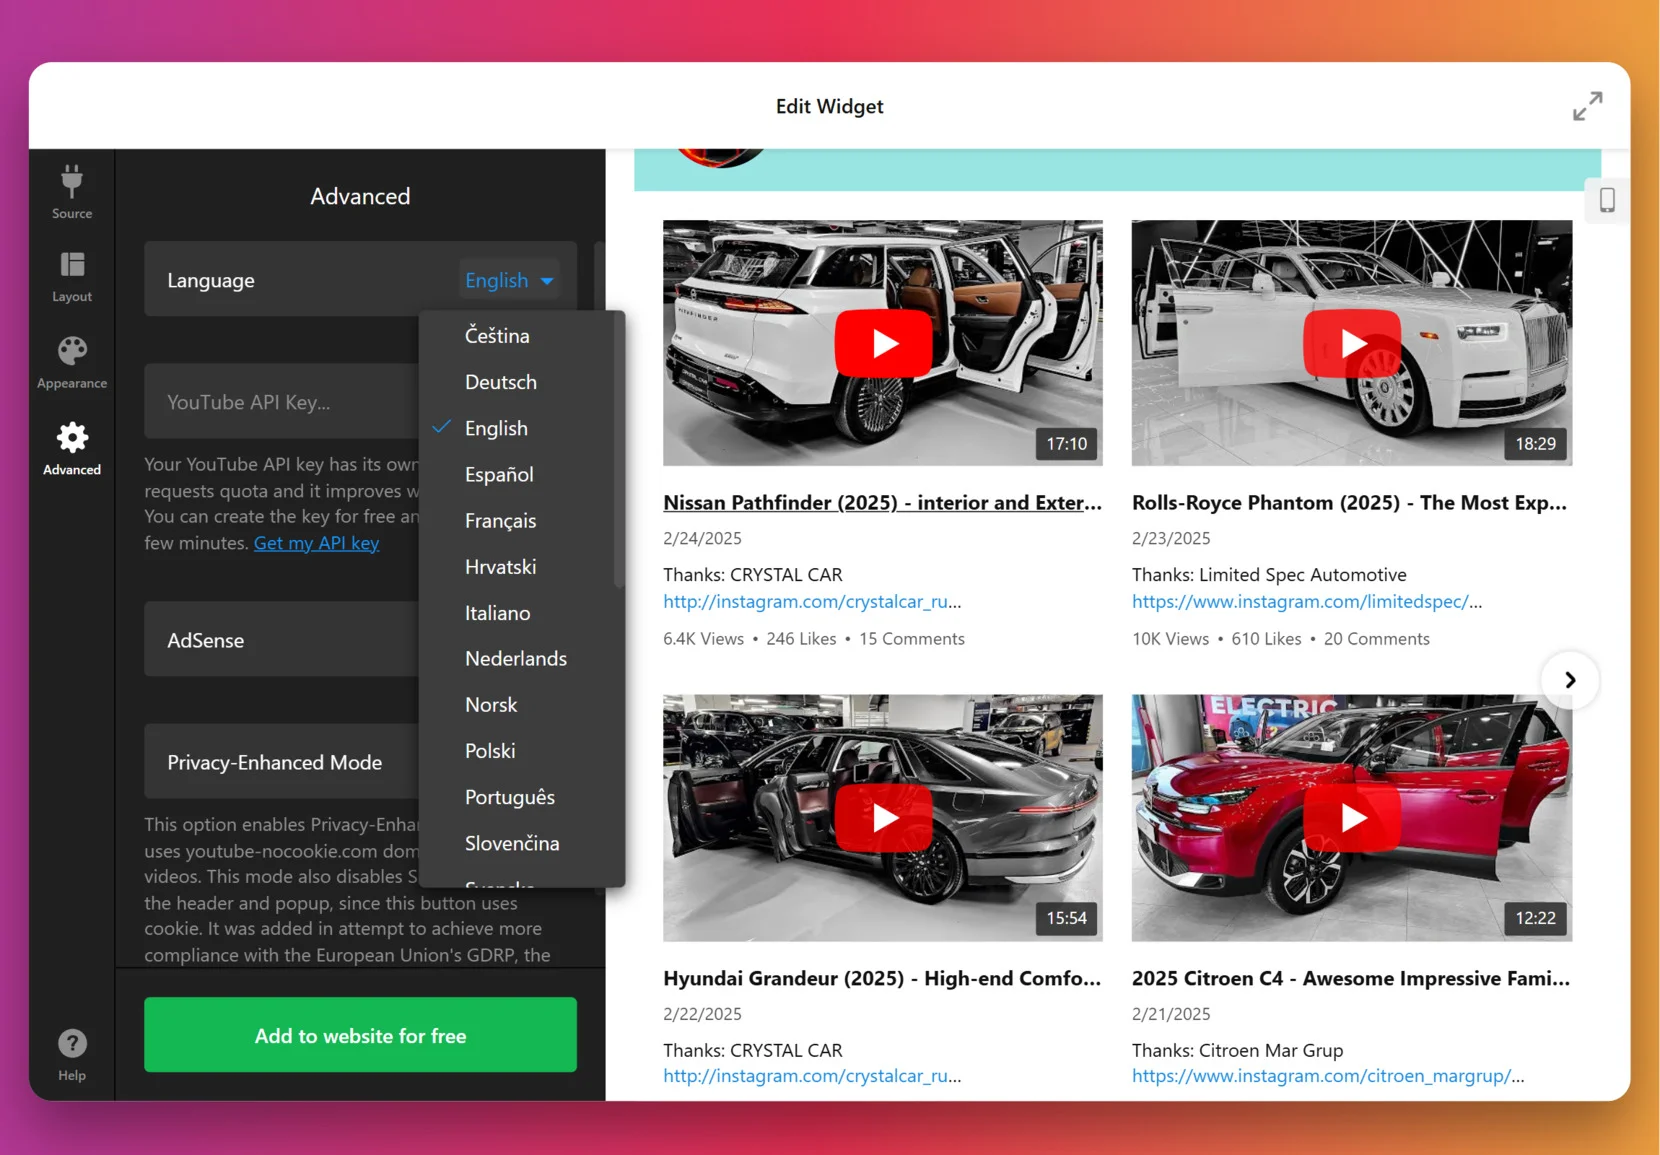
5. Finalize your widget
Before you publish, a few optional but powerful settings are worth checking. By default, the widget uses Elfsight’s key to fetch videos, but for many videos or heavy traffic you can add your own YouTube Data API key from Google Cloud Console.
At this stage, you can also enable privacy-enhanced mode, set the widget language to match your audience and double check the layout on mobile.
6. Add the widget to Shopify
Once your widget is customized and ready, you’ll need to place it inside Shopify. Here are four main options – choose the one that fits where you want the gallery to appear.
Option 1: Add to Your Theme (homepage or templates)
Use this if you want the gallery in a consistent spot, like the homepage or a template section:
- Go to Sales Channels → Online Store → Themes → Customize
- Select the page (homepage, product page, etc.)
- In the left panel, click Add section (or Add block)
- Choose Custom HTML or Custom Liquid in newer themes
- Paste in your Elfsight code into the box and click Save
Option 2: Add to a Specific Product Page or Collection
This option is good for showing tutorials, reviews, or unboxings right under product details:
- Go to Products or Collections
- Open the item you want to edit
- Switch the editor to HTML view
- Paste the widget code where you want it to appear (e.g. under product description text)
- Click Save, then check the live product page
Option 3: Add to a Blog Post or Static Page
Ideal for embedding video galleries into how-to articles, tutorials, or brand storytelling pages:
- Go to Online Store → Pages or Blog posts
- Open or create the page/post where you want to insert the gallery
- Switch to HTML mode
- Paste the widget code into the content
- Click Save and view the page
Option 4: Add by Editing Theme Code (advanced)
This one is best for permanent placement across multiple pages, like all product or collection templates:
- Go to Online Store → Themes → Actions → Edit code
- Open the file you want. For example:
product.liquidcollection.liquidfooter.liquid - Paste the widget snippet in the chosen spot
- Save changes
The main difference is placement: theme sections for a global presence, product pages for context, blog posts for storytelling, or theme code for a permanent site-wide setup. Start with the method that feels simplest, and you can always change or expand later as your store grows.
Exploring Native Alternatives
You don’t have to stick with Elfsight if you’d rather try built-in methods, but it’s worth knowing where these methods fall short. Let’s overview reliable alternatives.
Add a YouTube Video Using Manual Embed Code
This method uses YouTube’s built-in embed feature for a straightforward way to display videos on your Shopify website.
- Find your video on YouTube. Choose the video you want to showcase.
- Click the Share button. Select the “Embed” option from the popup.
- Copy the embed code. Use the provided iFrame code.
- Edit your Shopify page. Access the page’s HTML in Shopify’s admin dashboard.
- Paste the code and save. Insert the embed code where you want the video to appear.
You’ll need to manually repeat this process for each video, and there are few options for styling, moderation, or analytics.
For more details on YouTube’s embed options, see the official YouTube Embed Guide.
Upload Video Directly to Shopify
Shopify lets you upload video files to your product galleries or sections, using its native media uploader.
- Go to Shopify Admin. Open Products or the Online Store section.
- Select your product or page. Choose where you want the video.
- Click Add Media. Upload your video file from your computer.
- Arrange media order. Set the video’s position among your product images.
- Save changes. Your video will appear on the selected product or page.
Shopify places limits on video file size and type, and uploaded videos don’t benefit from YouTube’s streaming optimization or rich engagement features.
If you’d like extra guidance, Shopify’s docs explain this process step by step.
Use YouTube Shopping Integration
This official YouTube feature allows you to link your Shopify products directly in your YouTube videos for seamless shopping.
- Set up YouTube Shopping. Connect your Shopify store to your YouTube channel.
- Sync products. Choose which products will be available for promotion.
- Tag products in videos. Use YouTube Studio to add product links to your videos.
- Publish and promote. Your viewers can shop directly from the video interface.
This method promotes products on YouTube, but doesn’t natively embed video galleries or playlists within your Shopify website pages.
Need help setting up YouTube Shopping? Follow Google’s instructions here: YouTube Shopping Setup.
Comparing Methods of Embedding Youtube Videos to Shopify
With the alternatives outlined, it’s useful to see how they compare at a glance. The table below highlights the key differences.
| Method | Major Pro 👍 | Major Con 👎 |
|---|---|---|
| Elfsight Widget | All-in-one gallery, styling, moderation, and analytics. | Requires a subscription and third-party account setup. |
| Shopify Native Video Upload | Directly uploads to product galleries; easy for small clips. | Limited by file size and lacks advanced analytics, moderation, and streaming optimization. |
| Manual YouTube Embed Code | Simple and free; works with any public YouTube video. | No bulk management or design customization; manual effort for each video. |
| YouTube Shopping Integration | Enables product tagging and shopping from videos. | Does not embed video galleries or playlists into website pages; only works on YouTube. |
Now that you’ve seen the options side by side, let’s move to some practical advice on making the best of your widget.
📝 Our Go-To Checklist for Implementing YouTube Gallery
At Elfsight, we’ve guided countless users through setting up the YouTube Gallery to make their websites shine. Based on this hands-on experience, our team put together the top practical tips:
- Select the right source. Looking for an updating feed? A channel works best. Showcasing a product line? Go for the playlist. Featuring one standout video? A single link keeps it simple.
- Group videos by topic, product, or theme. Split videos into groups like “Tutorials,” “Customer Stories,” or “Behind the Scenes”, so your visitors instantly know where to click.
- Test all three preview layouts to determine which best fits your design. For example, the list layout works well when text matters, like tutorials. The slider feels lighter on crowded pages.
- Customize gallery styles with branded colors. Even a small tweak – matching the gallery’s header and button colors to your store’s palette – stops the widget from looking bolted on.
- Adjust for both desktop and mobile to guarantee an optimal viewing experience across devices. Drop columns to 1–2 for small screens and make sure tap targets aren’t too tiny.
- Enable search and navigation controls to allow visitors to quickly filter and jump to the content they want, especially in larger galleries – they’ll stick around longer.
- Integrate your AdSense account to start monetizing video traffic. Be mindful with ads: one or two well-placed units are enough to complement your content without feeling too spammy.
- Preview like a visitor. Check the gallery on multiple devices and browsers before publishing. Look out for cut-off titles, squished thumbnails, or clunky popups.
These checklist items are your toolkit, but sometimes the best way to understand what works is to see how others have put it into practice. Let’s look at how a real business uses the YouTube Gallery widget.
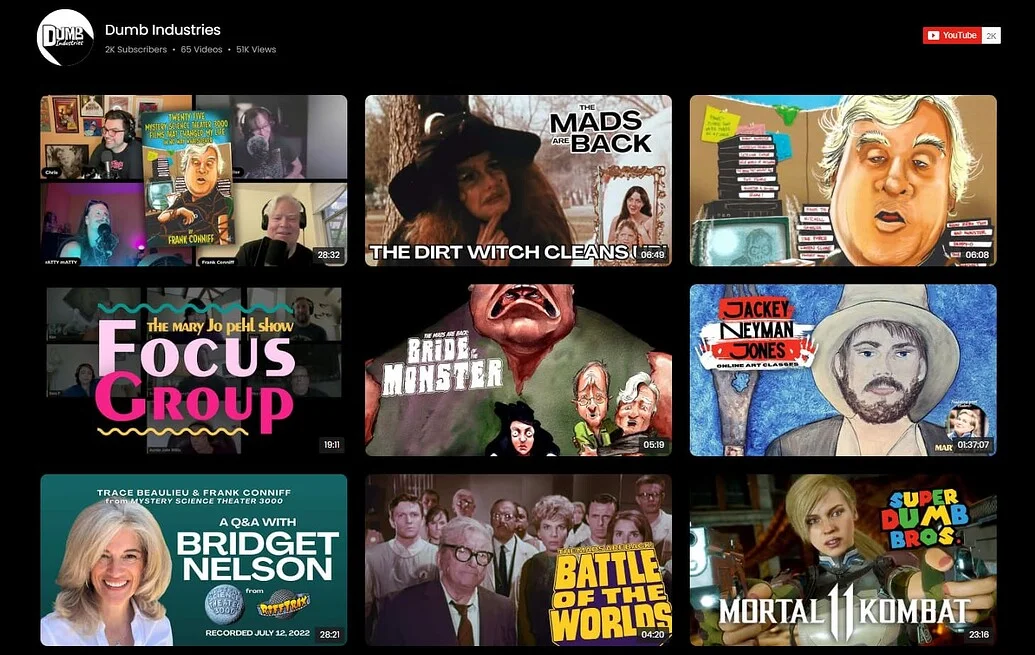
YouTube Gallery in Action: Dumb Industries
Dumb Industries produces comedy & art livestreams, including shows like The Mads Are Back, The Mystery Hour, and watch-alongs. Their website features an upcoming events calendar, membership content, replays, and merch. Though video is central to their brand, the way clips and livestreams were shown before felt fragmented.
Before using Elfsight
The default video display options left the content scattered across pages with no clear layout to scan recent shows or featured videos at a glance. Visitors had trouble finding the latest shows, and the website lacked a central hub to bring everything together.
- No single gallery to bring livestream replays and clips together
- Limited layout and playback options for YouTube videos
- A viewing experience that pulled visitors away from website
With the YouTube Gallery
“Elfsight’s widgets really help pick up the slack with quick and responsive setup that we can customize to our liking.”
Chris Gersbeck, Dumb Industries
Dumb Industries brought Elfsight’s YouTube Gallery onto their homepage, turning what used to be a jumble of embeds into a clean, central showcase. Visitors are now greeted with a grid of fresh episodes and standout clips. Playback happens inline, so audiences stay on the website while browsing. The styling options allowed them to match the gallery to the distinct voice of their existing design, which made it feel like part of the brand rather than a clunky add-on.
The YouTube Gallery didn’t just tidy up the layout, it changed how video works for both sides. Fans now have an easy way to catch replays and discover new shows, while the team saves time by letting fresh uploads appear automatically. The result is a website where video feels central and traffic trends show more people sticking around.
Alongside other Elfsight widgets like Social Feed, Event Calendar, FAQ, and Search, the gallery has become the centerpiece that keeps their audience engaged. Their traffic chart backs this up: after implementing Elfsight in September 2024, visits rose by more than 30% year-over-year.

A well-placed video gallery can turn fragmented uploads into a cohesive experience that grows traffic and strengthens brand presence.
Success stories from our community members are great for showing the potential. Next, we’ll cover the typical problems and fixes so your own setup runs smoothly.
YouTube Video Embedding: Key Issues and Solutions
The practice of adding YouTube videos Shopify reveals several recurring challenges like display glitches, mobile layout problems, or code placement errors – yet most issues can be resolved with a few practical adjustments.
Why doesn’t the YouTube video show up after I add the widget code?
What if my video embed code keeps getting removed or commented out?
How do I resolve video loading problems caused by browser extensions or security settings?
Why does my YouTube video not appear in the product image gallery?
Solving these typical hiccups makes sure your videos load properly, fit the layout, and actually add value to your Shopify website.
Questions or Insights to Share?
We hope this guide gives you a strong starting point for adding YouTube videos to your Shopify store. Your feedback and real-world experiences are always welcome. Let us know what’s worked for you, what you’d like to see next, or how we can improve. Stay connected with the Elfsight team on X, Facebook and Linkedin!