A form builder is a digital solution that lets you create interactive forms for your website without needing advanced coding skills. Whether you’re collecting contact details, feedback, or inquiries, a form builder simplifies the entire process — both for you and your visitors.
If you want to create a form in HTML but don’t want to write code manually, this is exactly what you need. A form widget lets you design, embed, and manage user submissions with ease, directly on your website.
- Collect user data effortlessly. A form builder makes it simple to gather contact info, messages, or orders with structured input fields.
- Ensure reliable email delivery. Form submissions can be connected to your email, so you never miss an inquiry or lead.
- Create fully customizable forms. Easily adjust layout, fields, and styles to match your branding and user flow.
- Boost user interaction and trust. A polished, embedded form signals professionalism and encourages visitors to engage.
Now that you understand what a form builder is and how it benefits your website, let’s take a quick look at how you can create one using Elfsight’s intuitive editor.
Create a Website HTML Form Fast
Using a form builder is the fastest way to create a custom, fully-functional form for your website — no coding required. With Elfsight, you can build and embed a form in just a few simple steps.
- Open the Elfsight editor and select a ready-to-use form template that fits your goal.
- Adjust layout, fields, spacing, and labels to fit your content and design preferences.
- Style the form with your brand colors, fonts, and background options.
- Click “Add to website for free“, copy the embed code, and paste it into your website’s backend.
As you can see, it takes just a few minutes to create a form widget that blends perfectly into your website and starts collecting submissions right away!
Ready to build your own? Try the form widget and see how easy it is!
Features of the Elfsight Form Builder
Now, let’s explore what makes this no-code solution so powerful. This block covers the key features and benefits that make elfsight worth using for creating any kind of form on your website.
- Flexible drag-and-drop editor. Build and edit your form without writing code using a simple visual interface.
- Multiple form types in one place. Create contact, feedback, support, booking, or registration forms using one platform.
- Full design customization. Match the form’s look to your website with customizable fonts, colors, spacing, and layouts.
- Responsive and mobile-ready. All forms automatically adjust to look great on smartphones and tablets.
- Smart integrations with email and CRM. Connect your forms to email, Mailchimp, Google Sheets, or other apps to automate submissions.
- Instant notifications and data collection. Get notified when someone fills out a form and access submissions in your dashboard anytime.
- No coding or backend setup. Everything works out of the box — just paste the embed code into your website and you’re live.
With this feature set, Elfsight isn’t just an online form maker — it’s a complete solution for collecting data and boosting user engagement. Let’s now walk through the full step-by-step setup process to help you make the most of its functionality.
Step-by-Step Guide to Make Forms Online
Let’s go through the complete process of setting up your HTML form with Elfsight. Each step below represents what you’ll actually do inside the editor while building your widget.
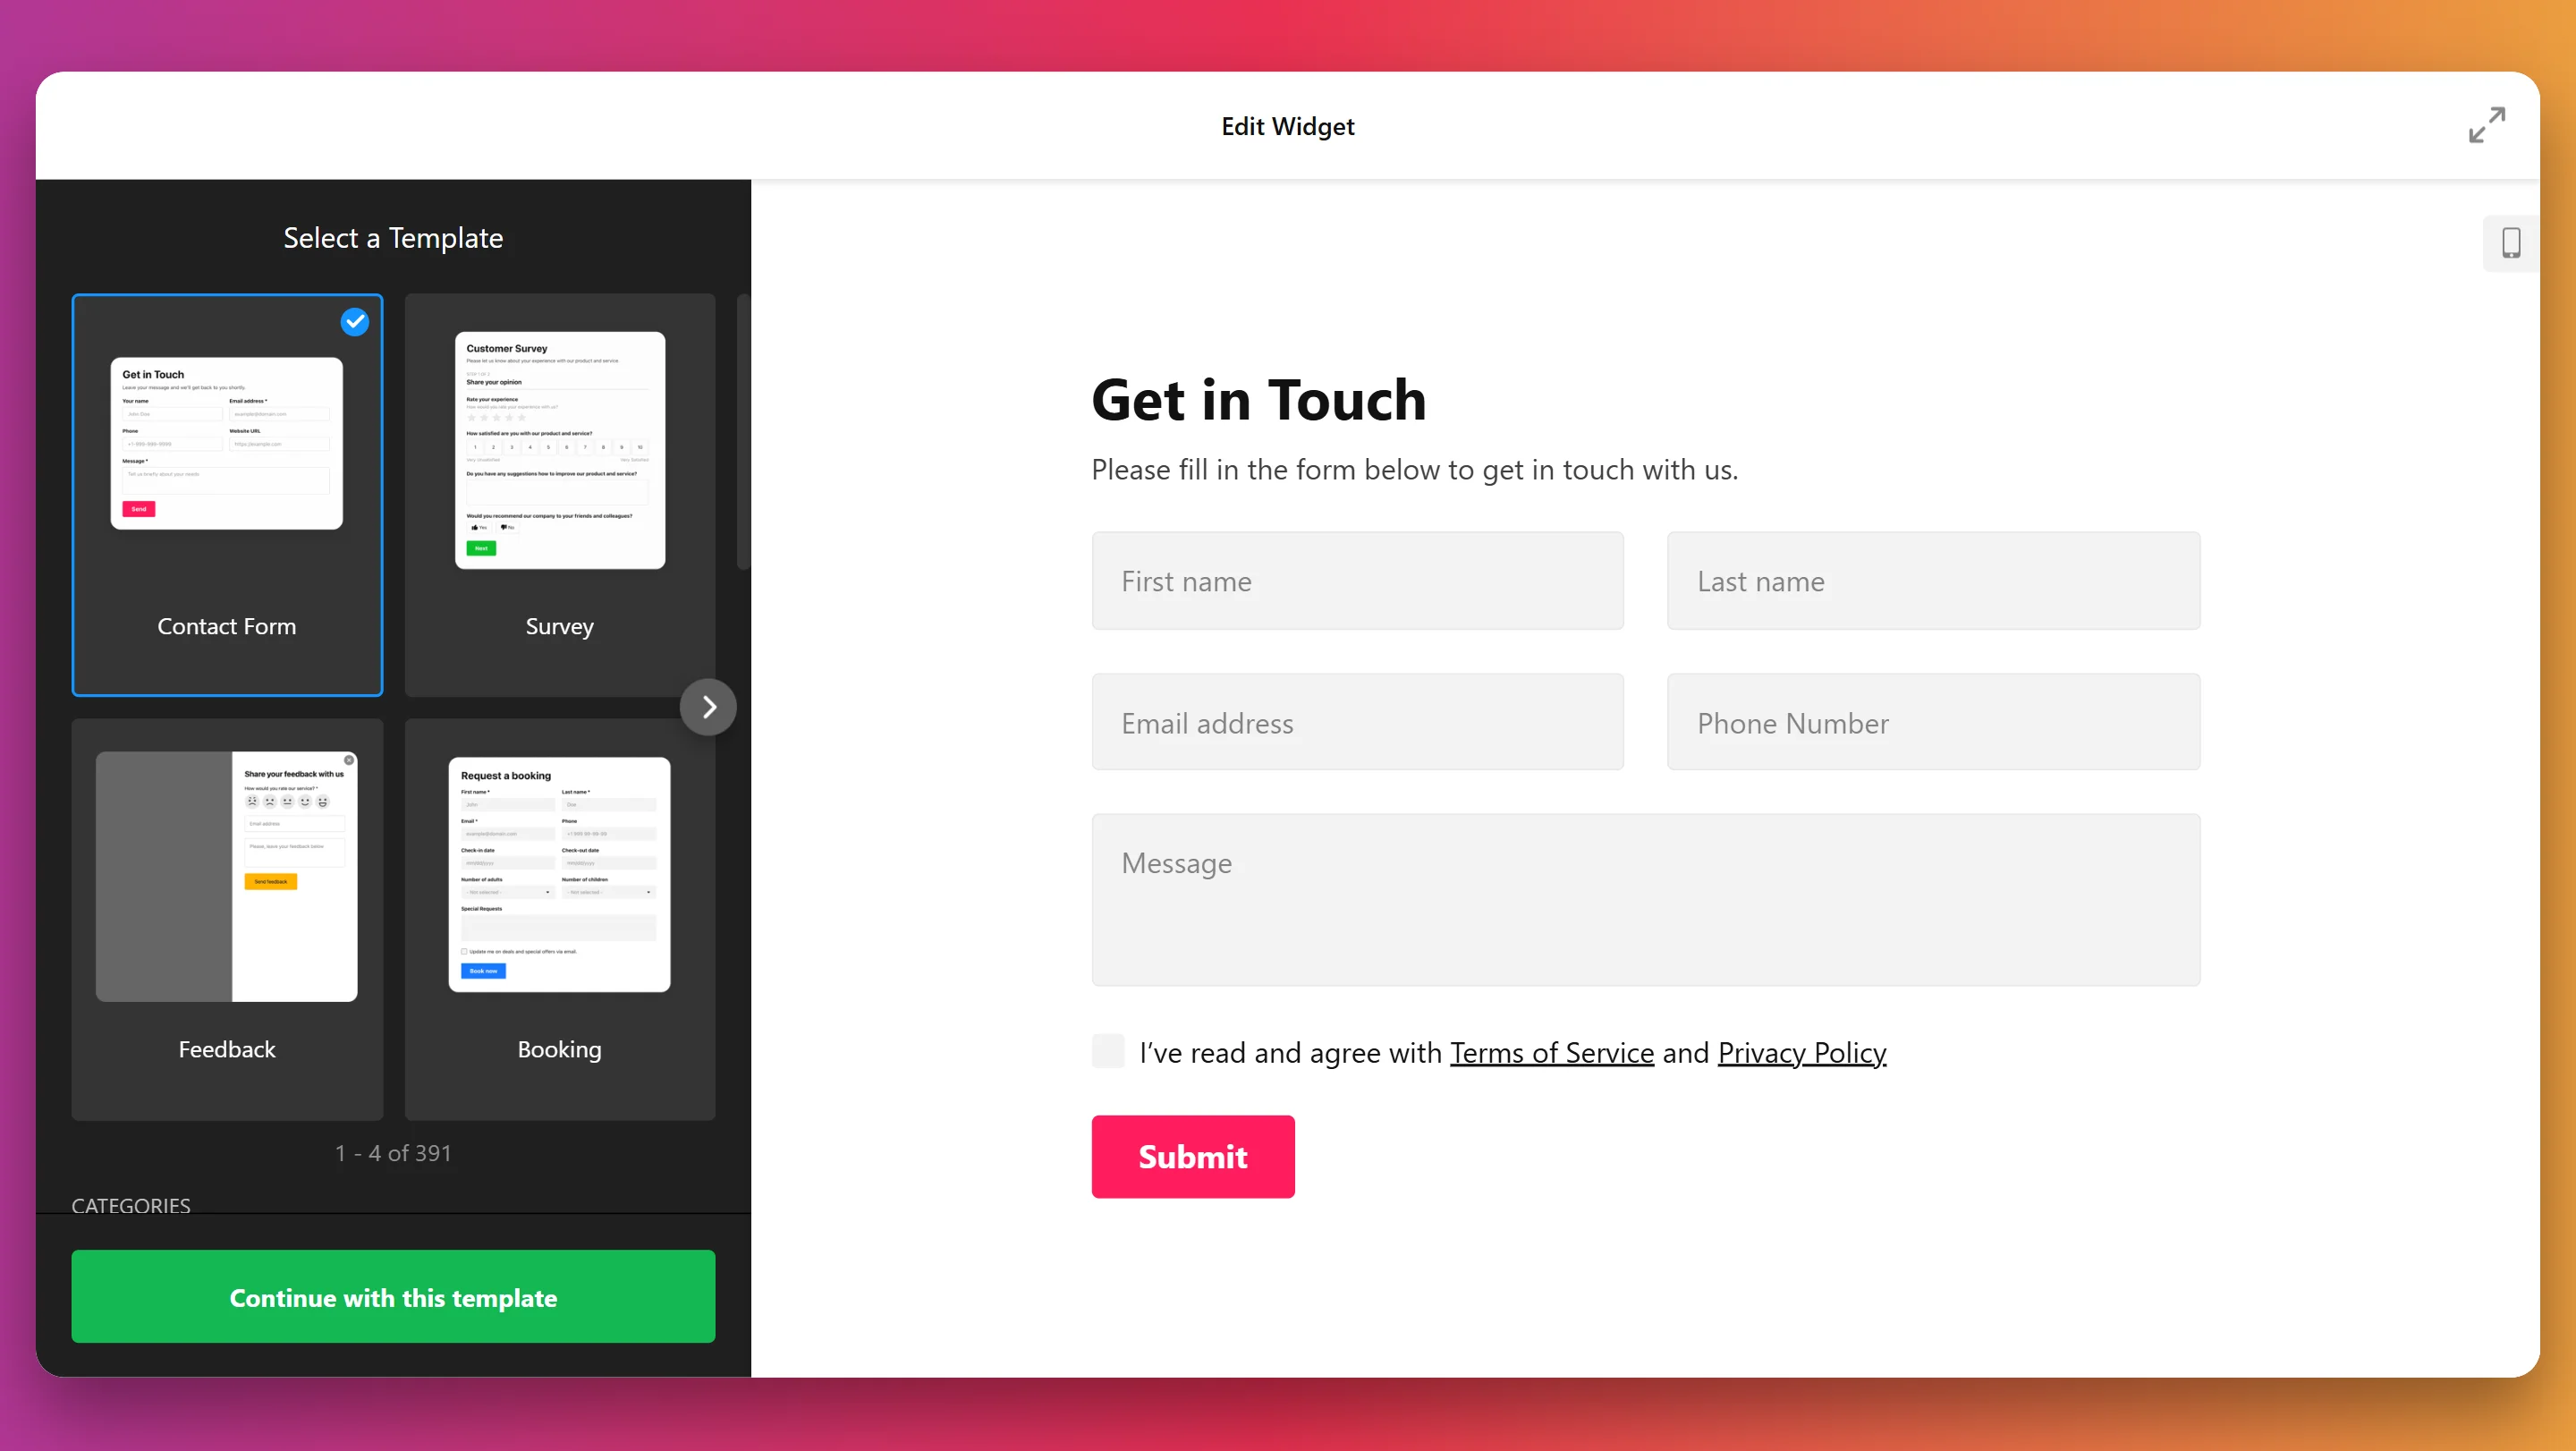
- Pick a starting template. Launch the Elfsight editor and select a ready-made template that fits your needs. Click “Continue with this template” to begin with a pre-designed layout.

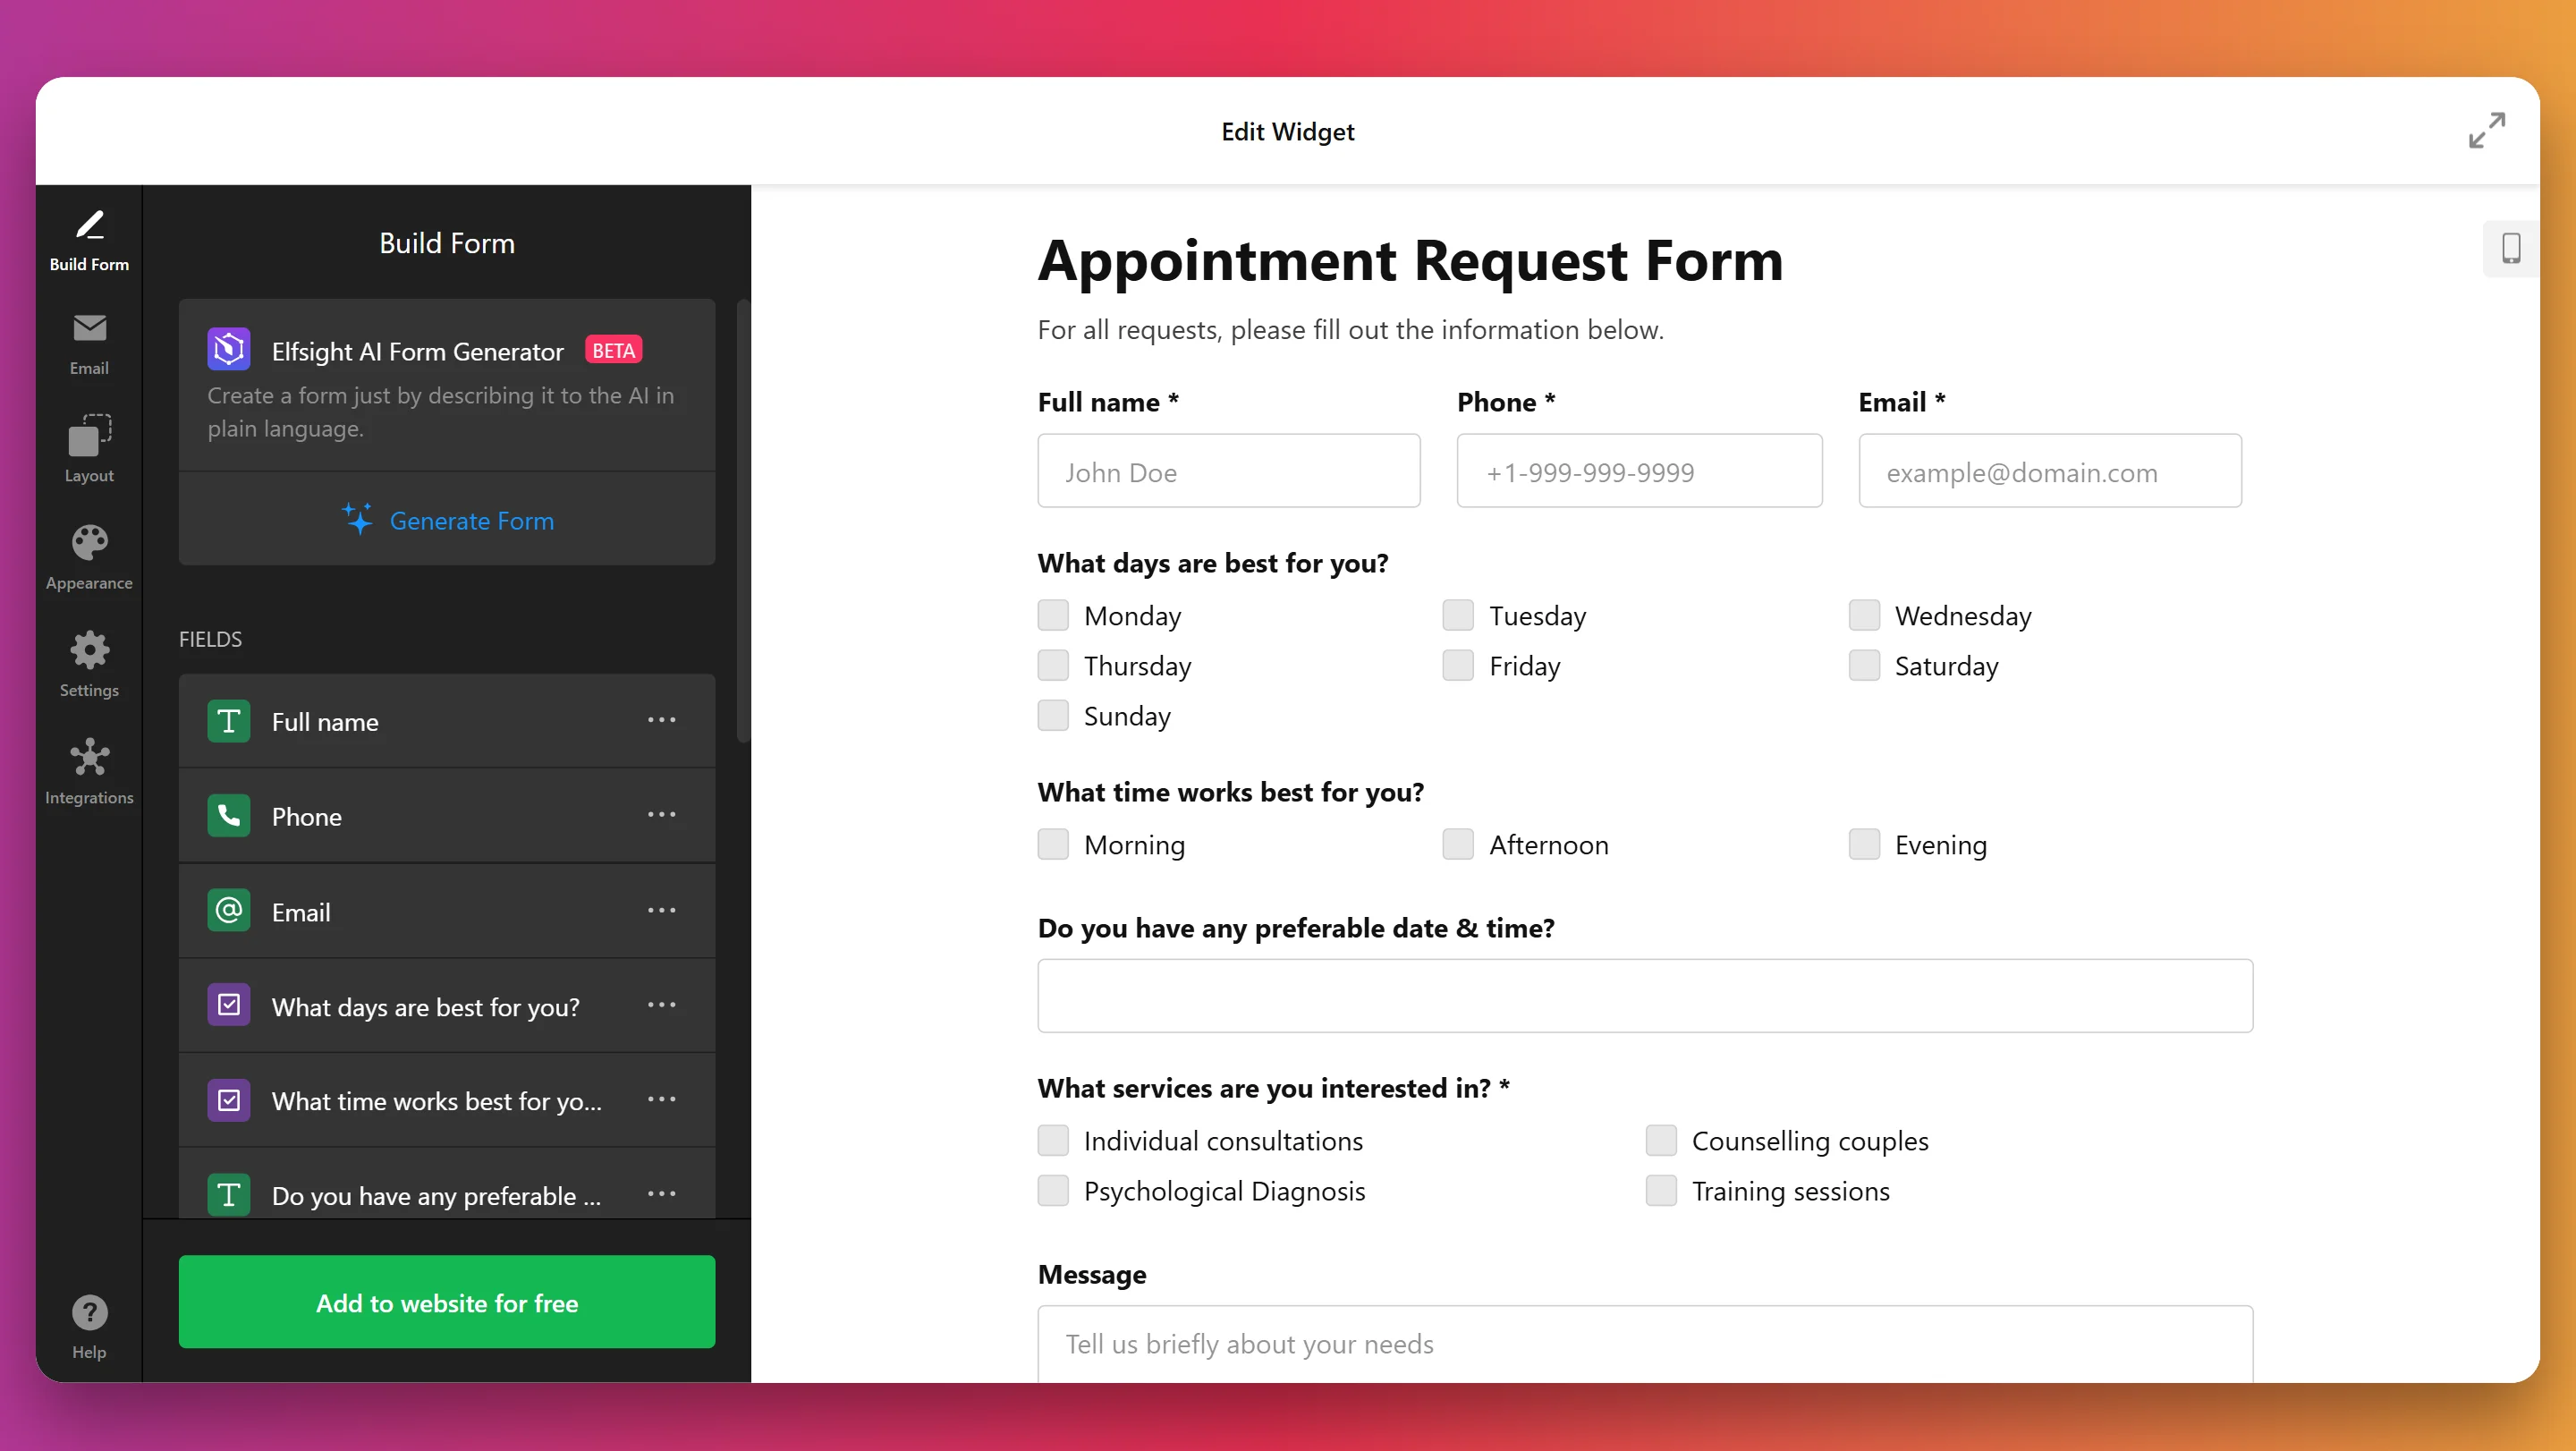
- Structure your form content. In the “Build Form” tab, you can add, remove, or edit various fields like text boxes, rating elements, and email inputs. Use the AI Form Generator to auto-create a complete form based on your prompt.
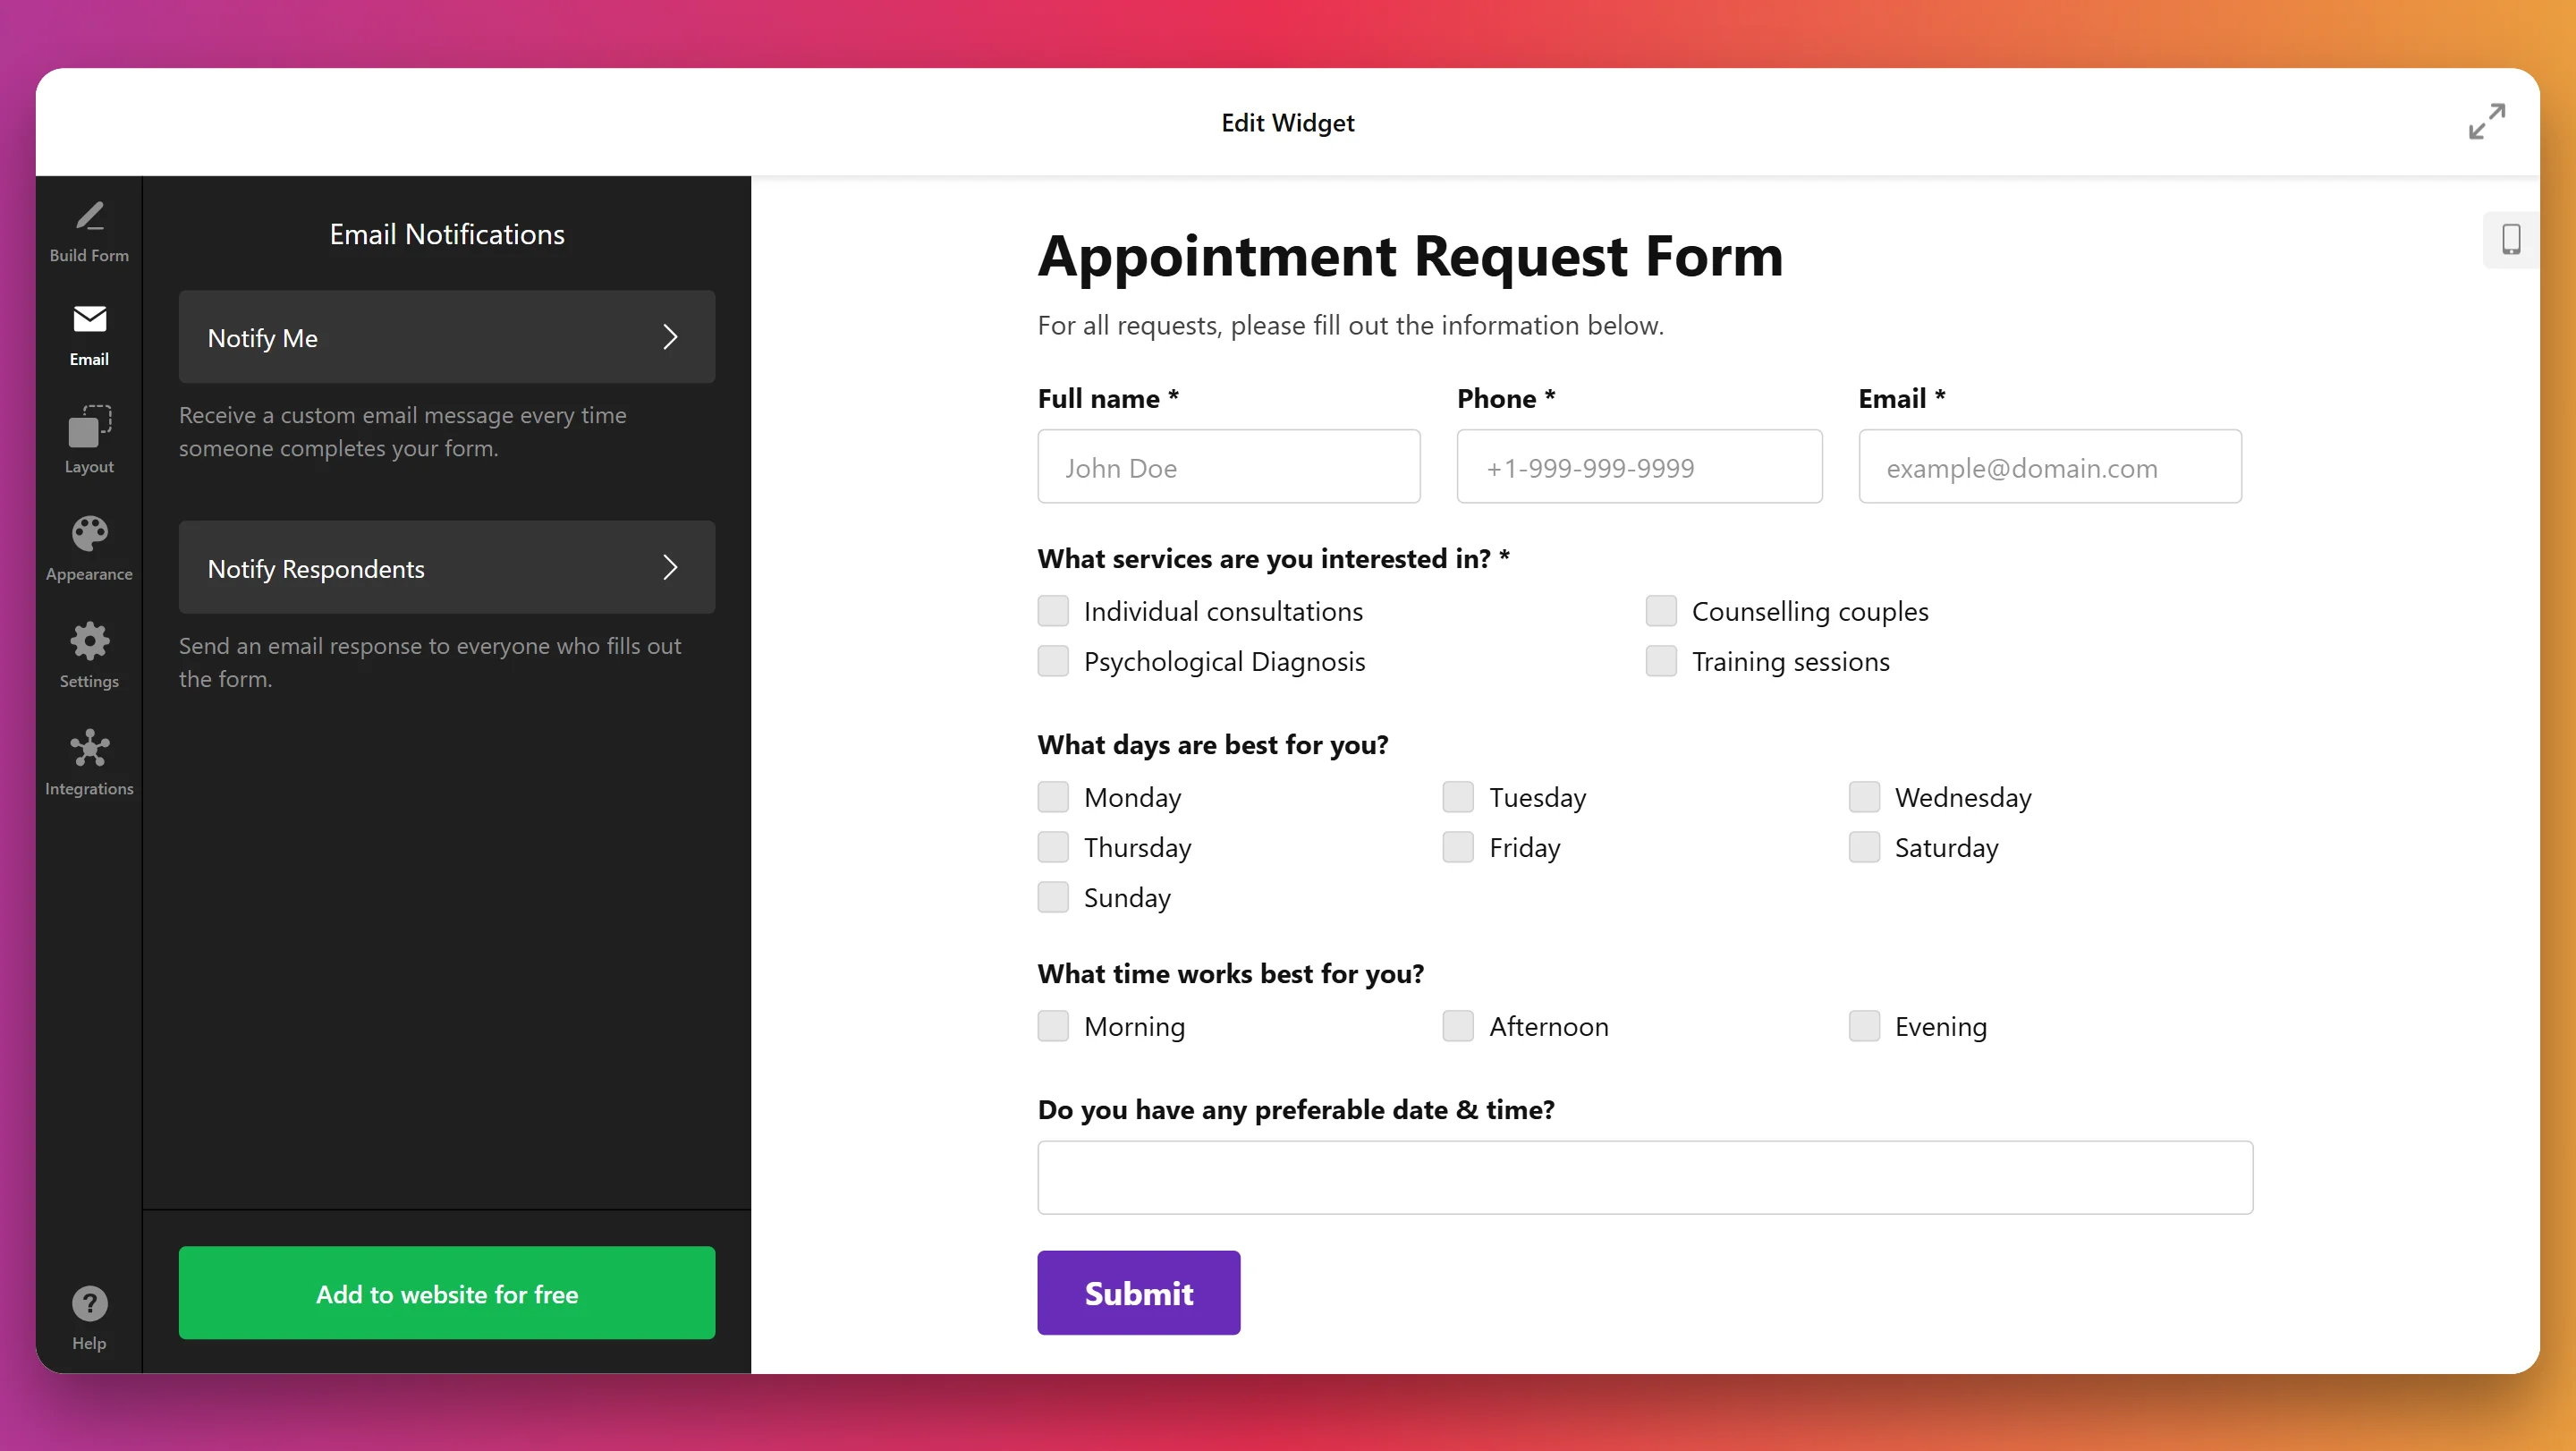
- Enable submission alerts. In the “Email” section, set who will receive form notifications. You can notify yourself and send confirmation messages to users after they submit the form.
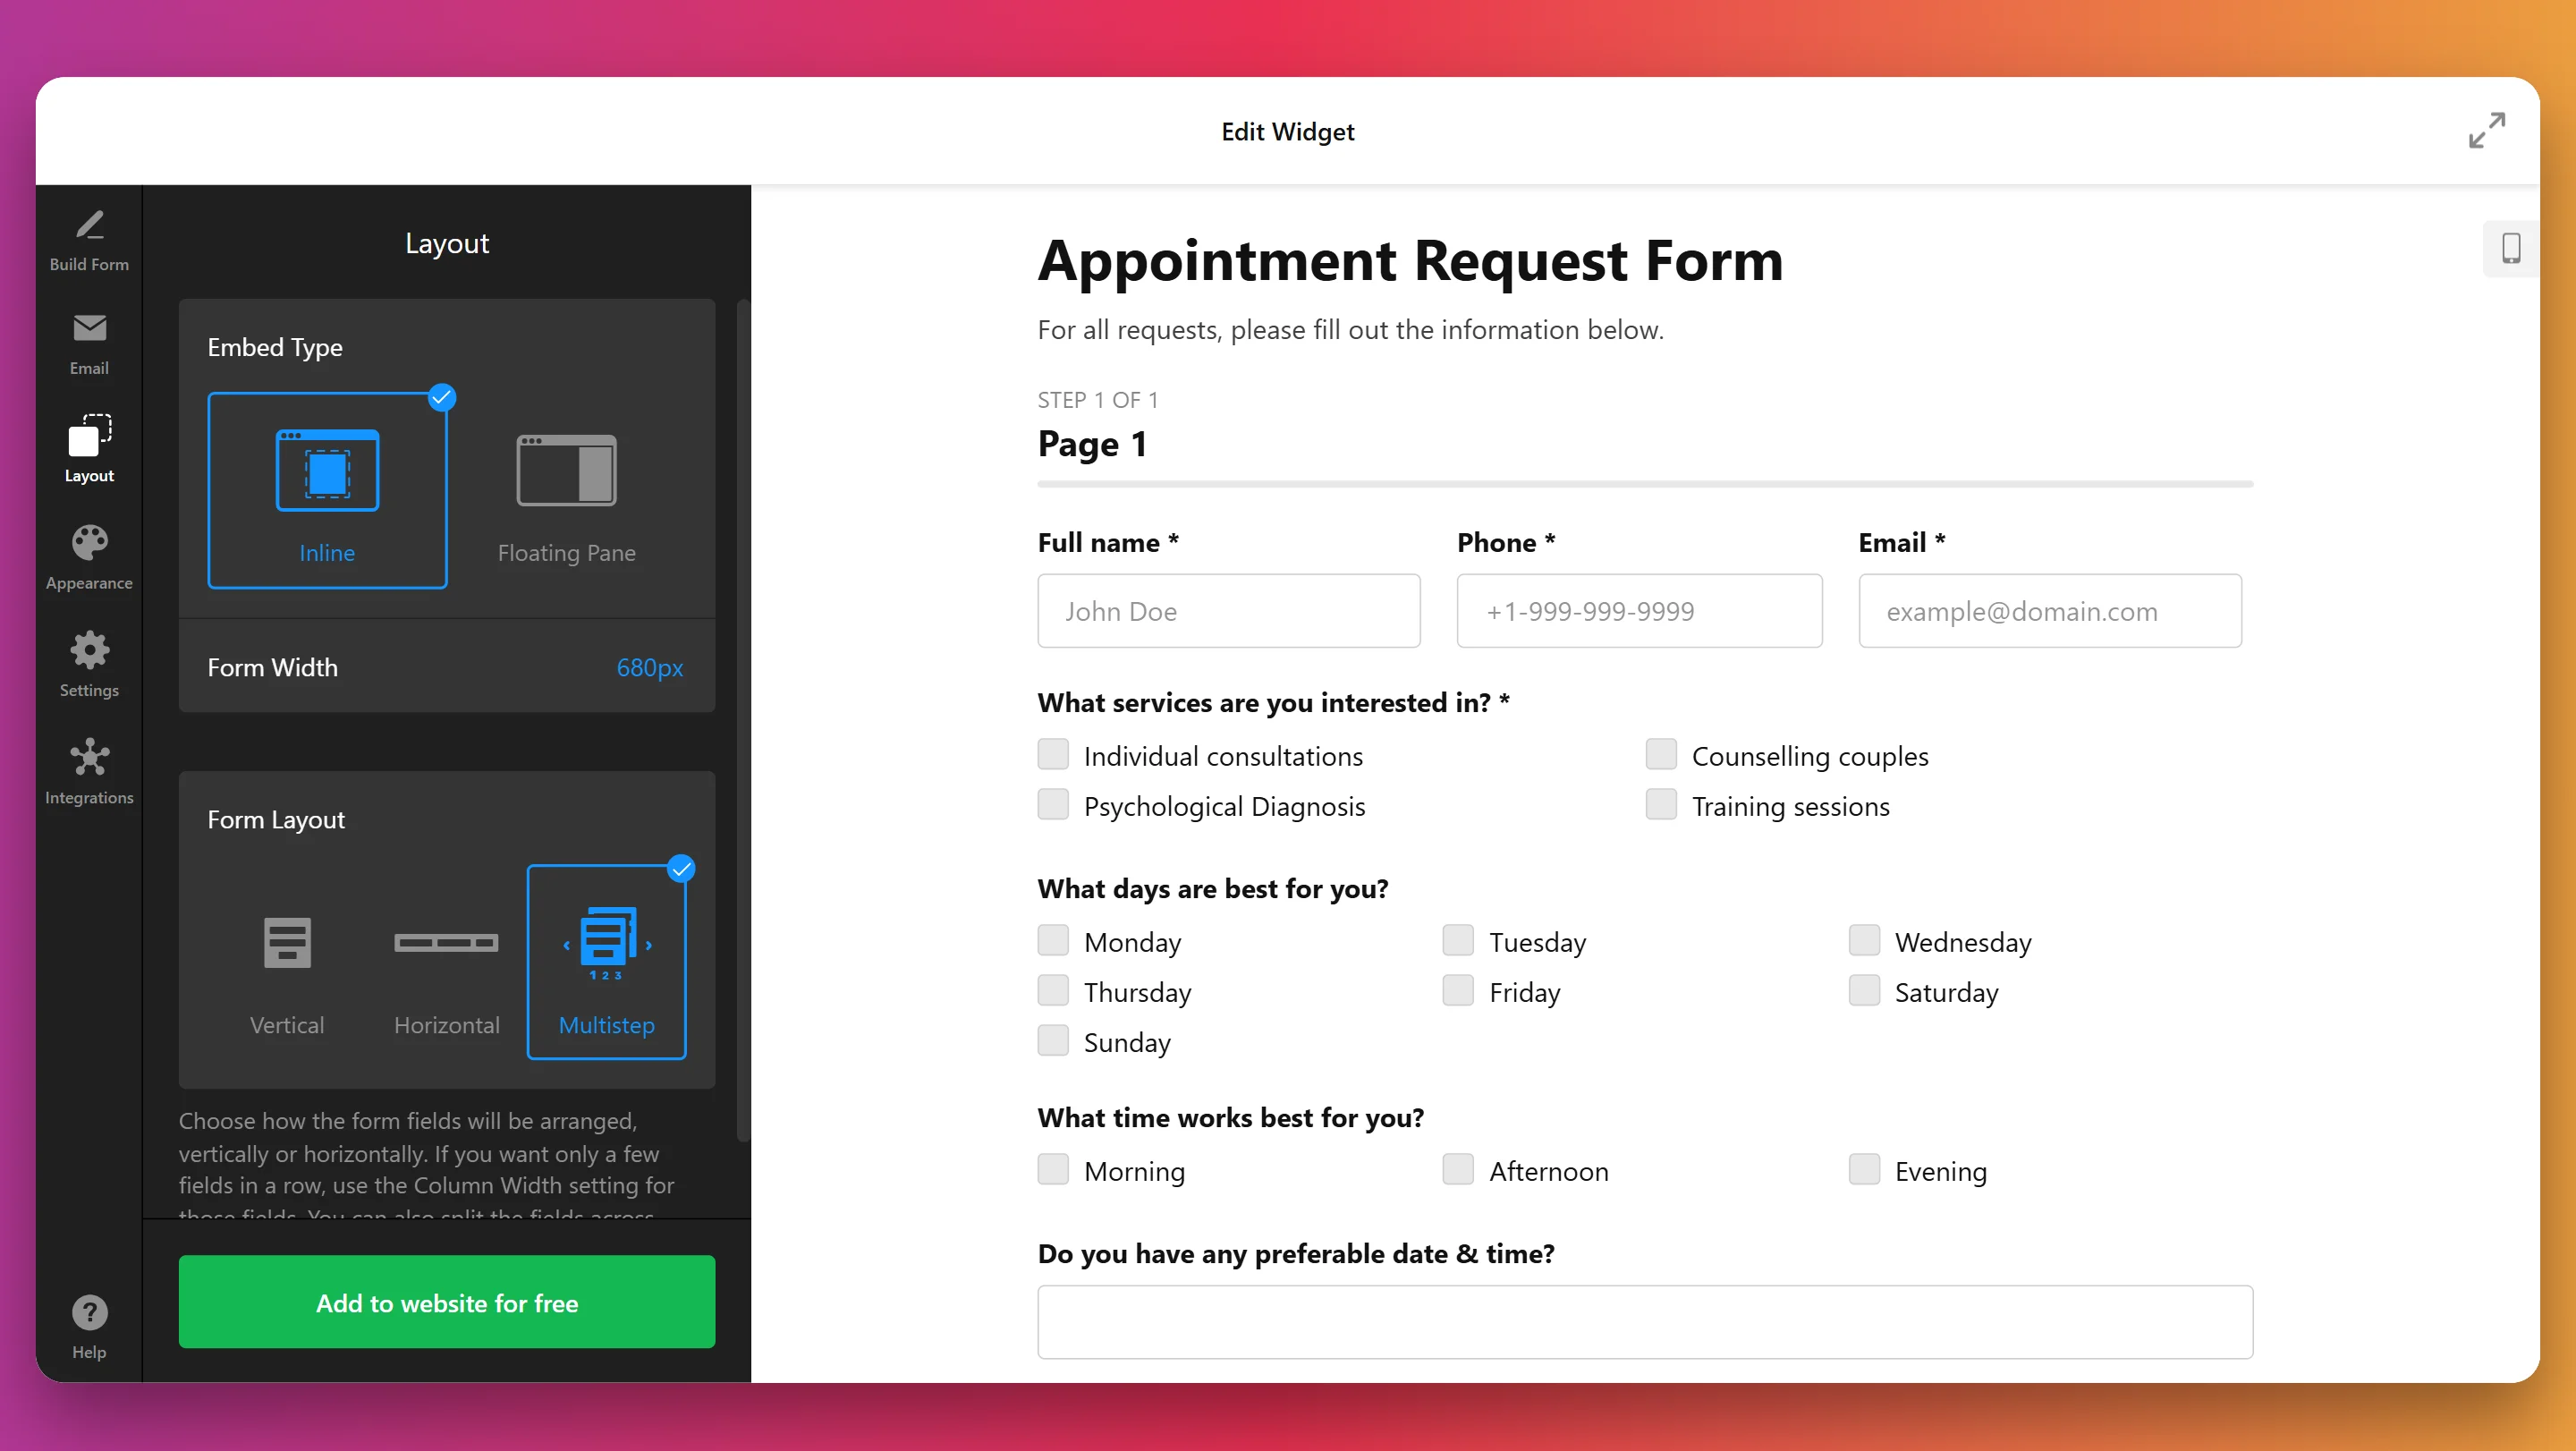
- Adjust layout settings. Open the “Layout” panel to choose how your form will appear — inline or floating. Customize its width and select from vertical, horizontal, or multi-step formats.
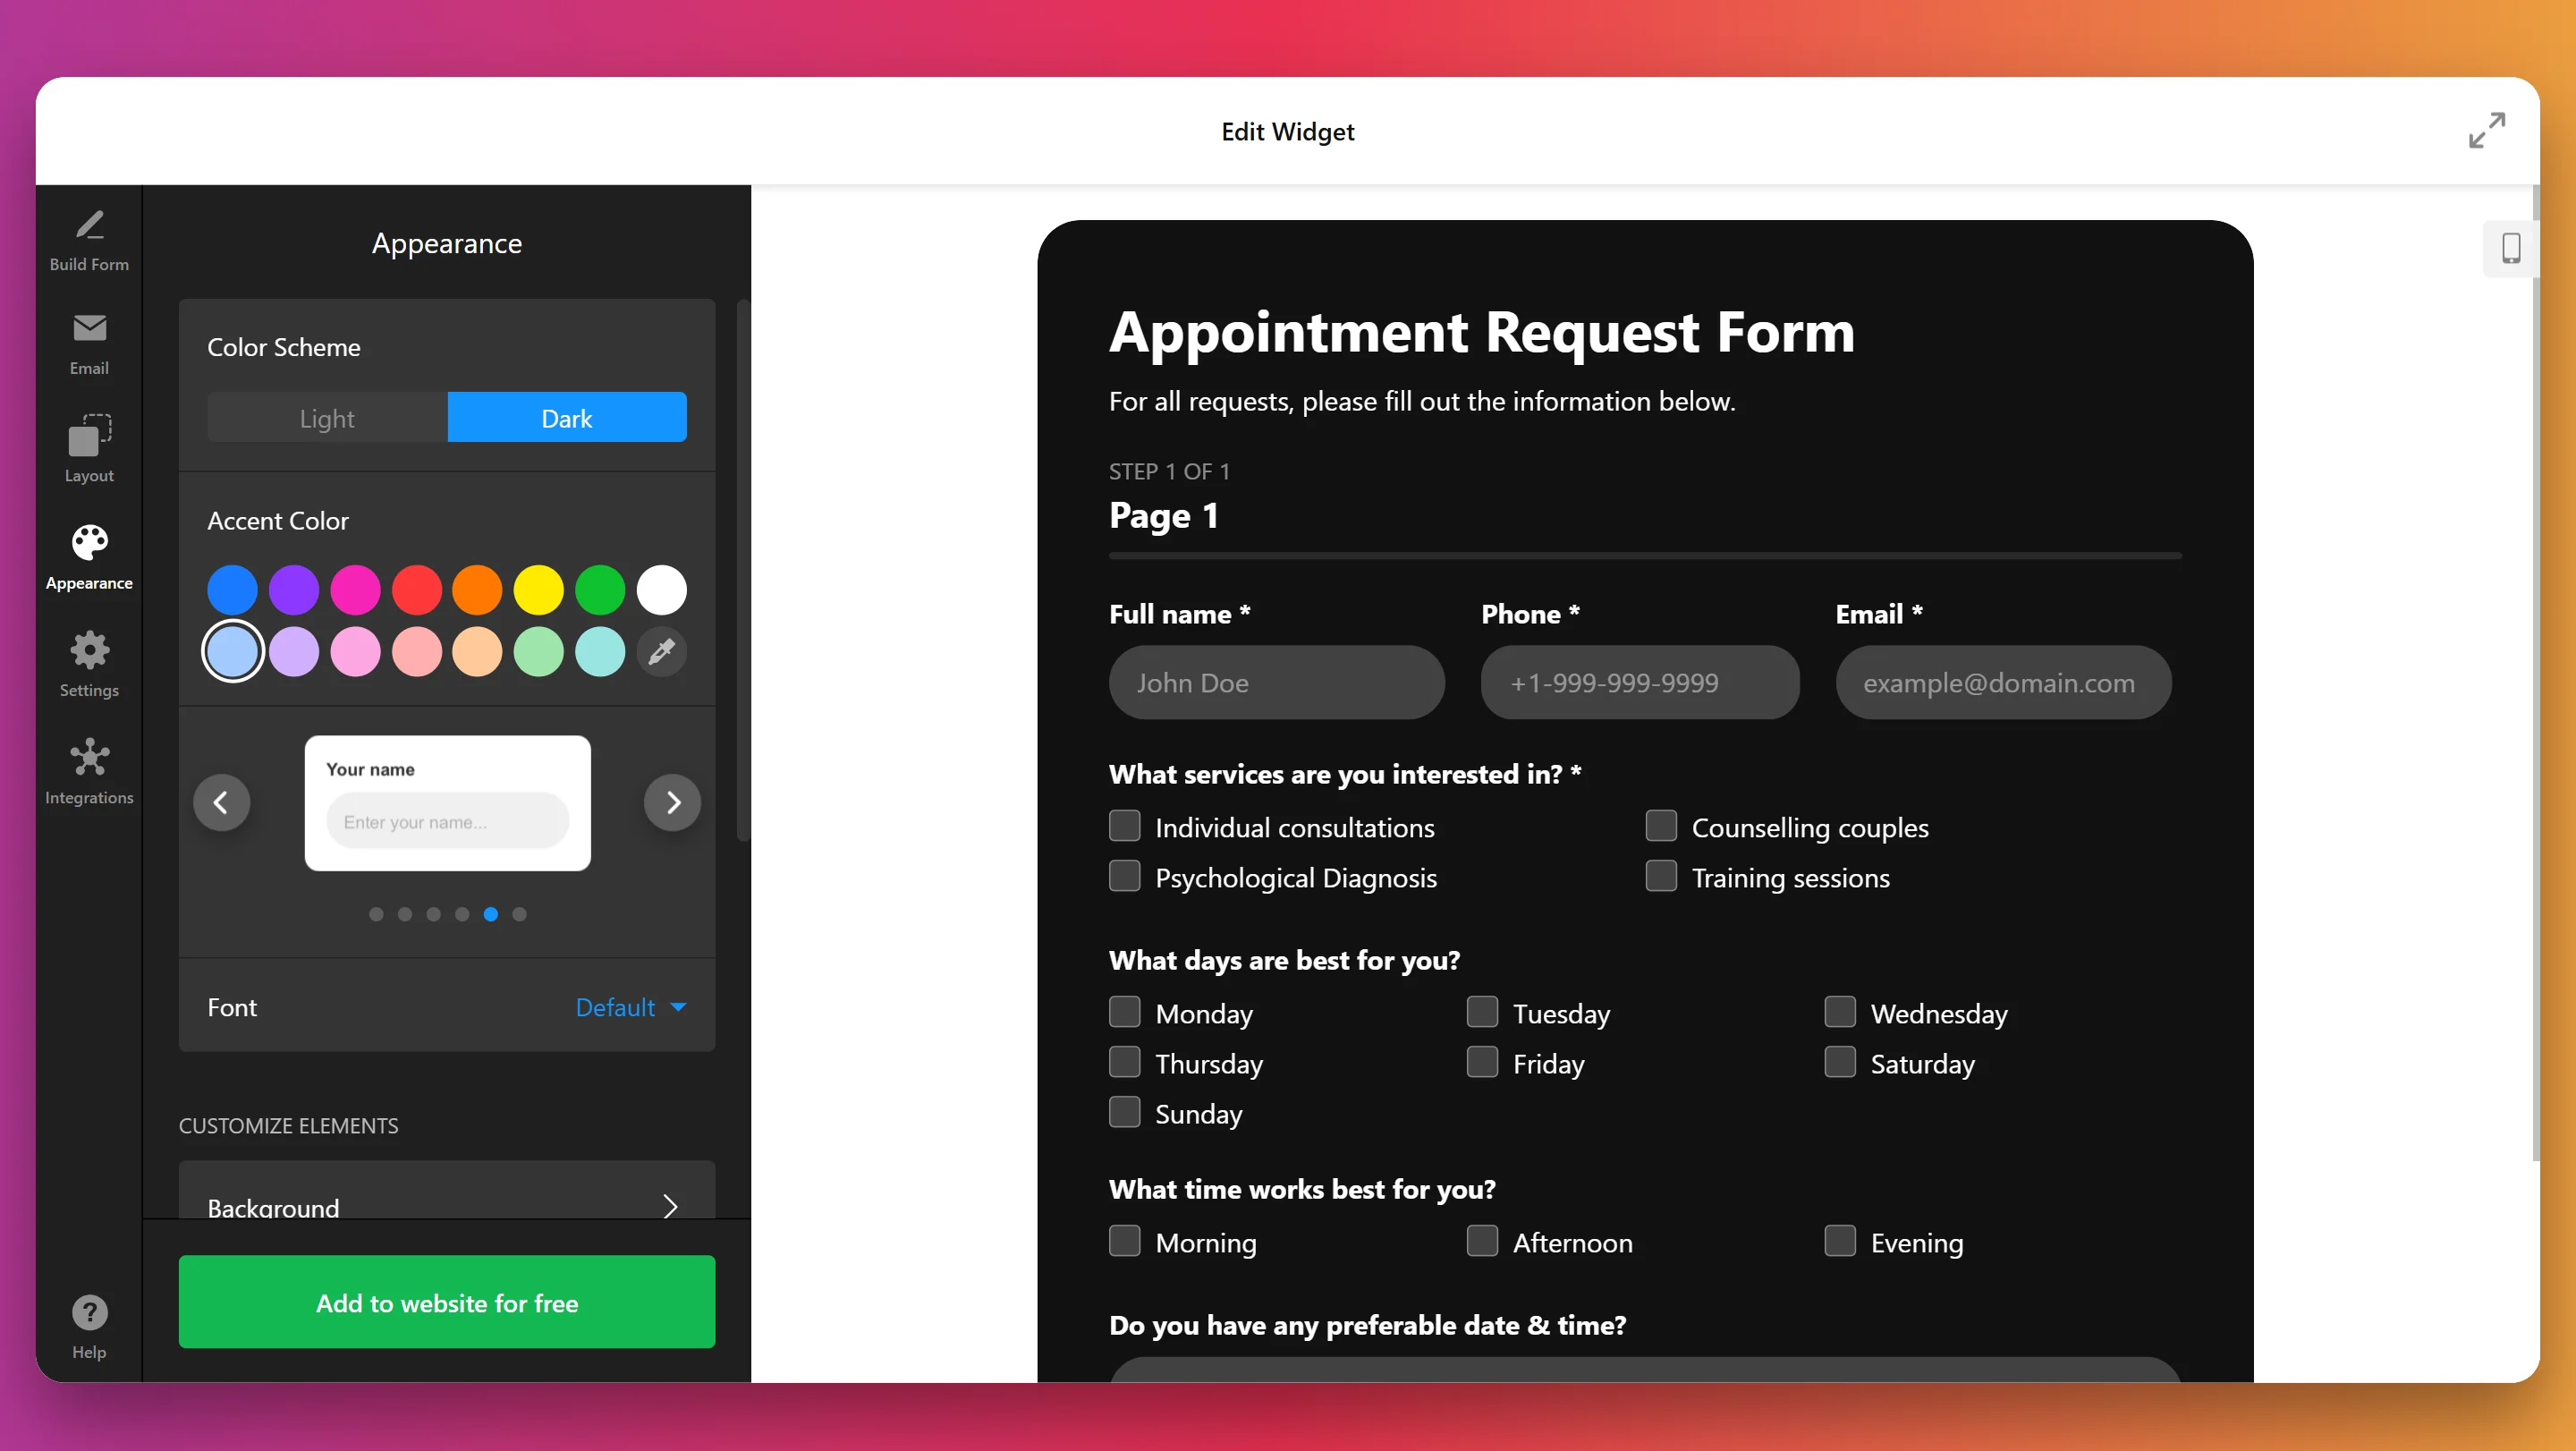
- Customize the visual style. Under the “Appearance” tab, switch between themes, choose an accent color, set fonts, and fine-tune design elements like buttons, backgrounds, and borders to match your website branding.
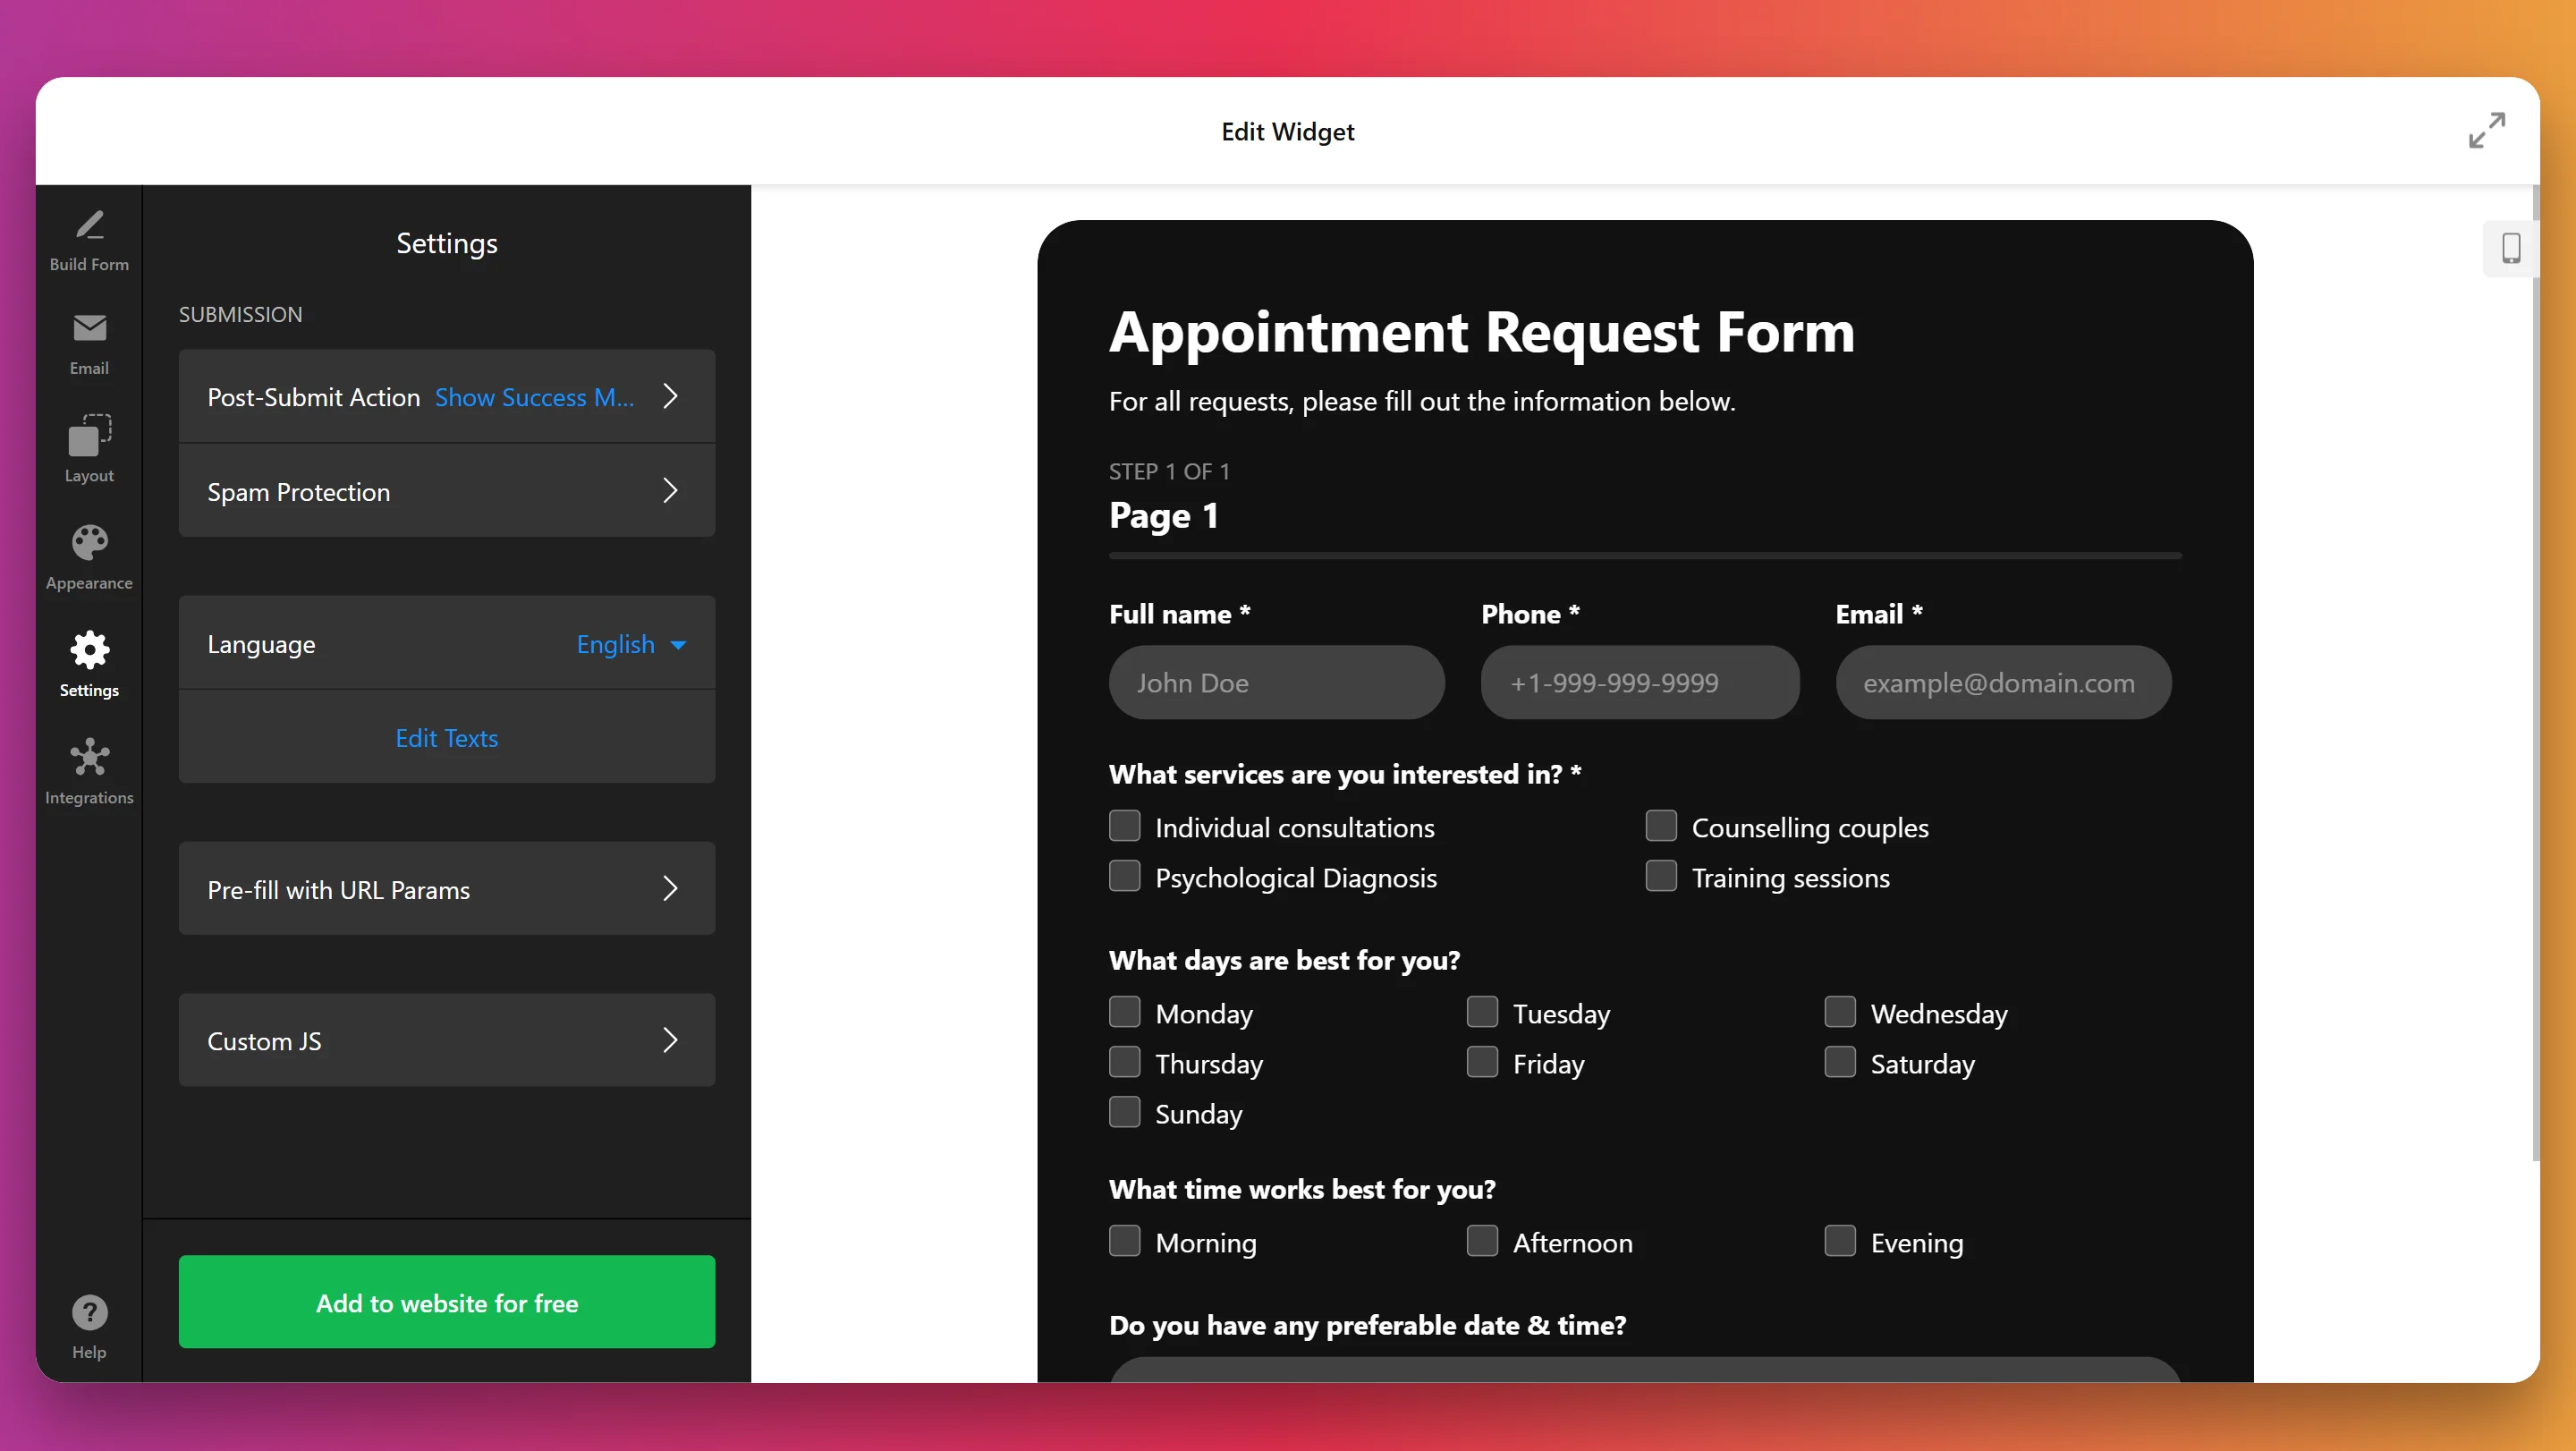
- Edit form behavior and extras. In the “Settings” area, enable anti-spam, choose a display language, set post-submit actions (like thank-you messages), and pre-fill fields using URL parameters if needed.
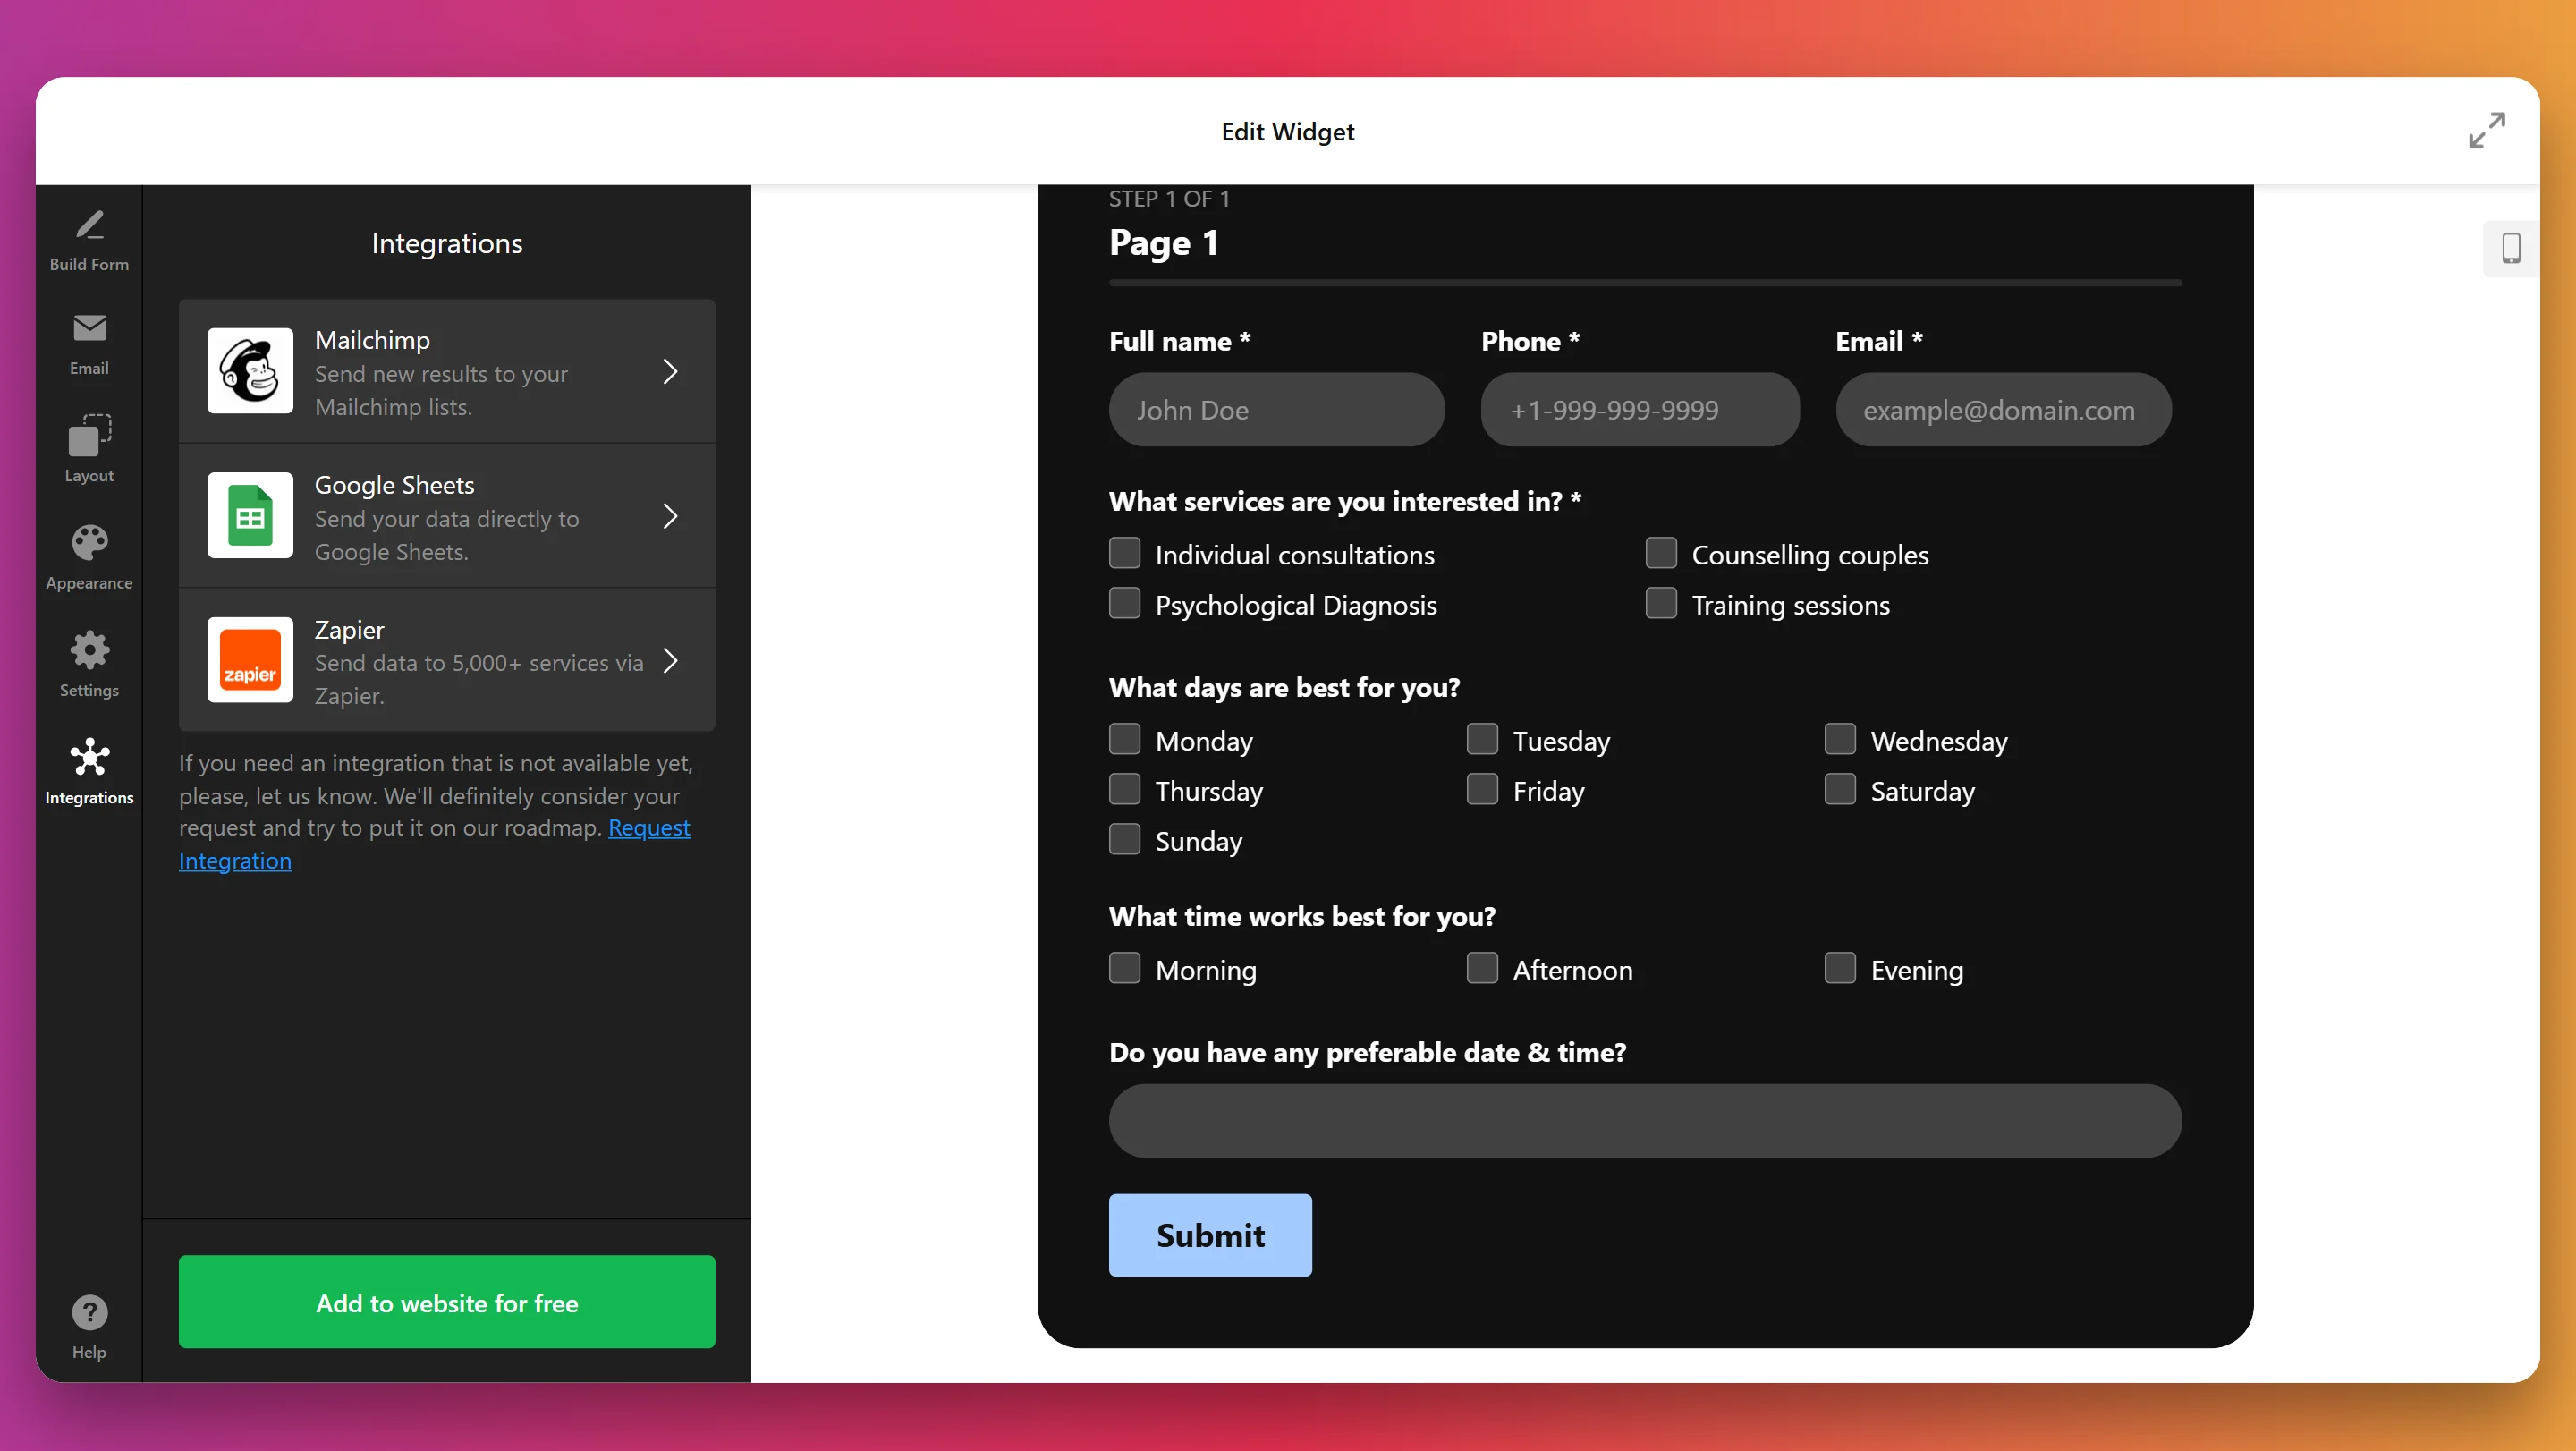
- Link external apps. In the “Integrations” tab, connect your form to Google Sheets, Mailchimp, Zapier, or other tools so submissions are sent where you need them automatically.
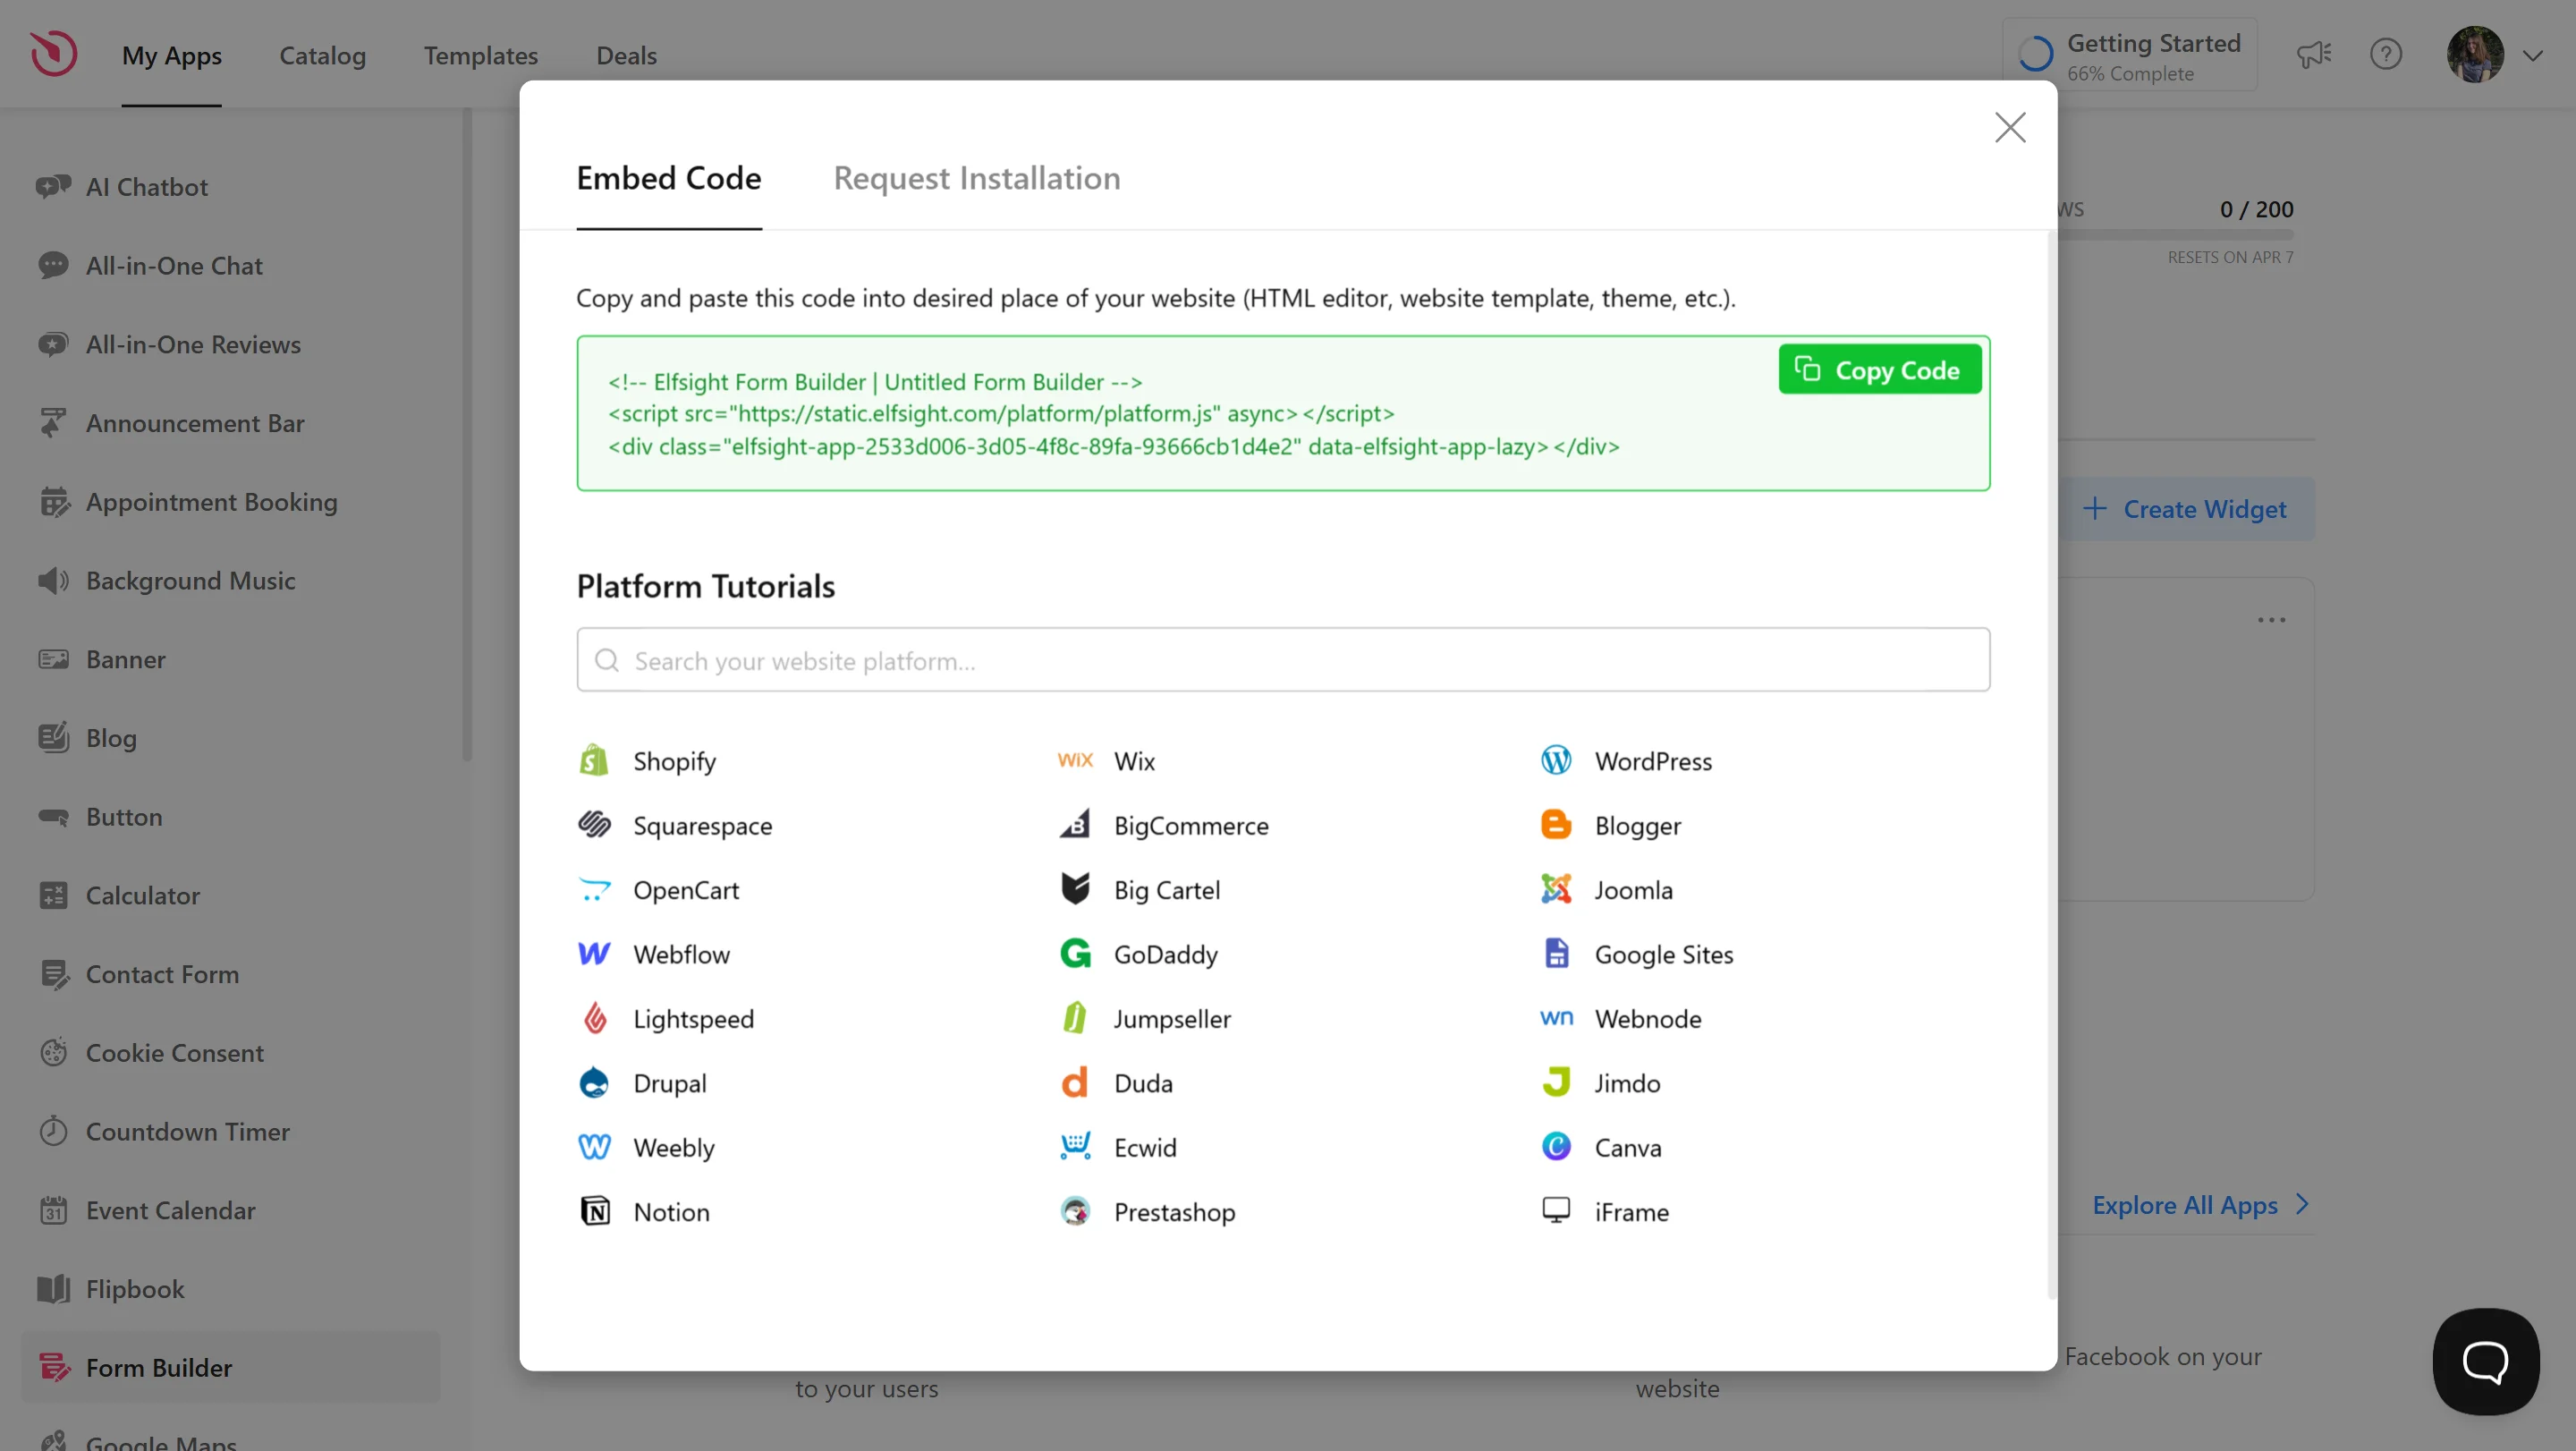
- Embed your form on the website. Click “Add to website for free” to get your HTML code. Copy and paste it into your website editor where you want the form to appear, then publish the page.
As you make edits, the live preview shows all changes in real time — so you always know exactly how your HTML form will look. Now that you’ve built and styled your form, let’s cover the other ways you can add it to a website.
Other Ways to Build HTML Forms
If you’re looking for alternatives to Elfsight’s form widget, there are a couple of reliable methods available to help you add forms to your website. Each approach has its own setup process and use case. Below, we’ll walk through both methods in detail so you can choose what fits your needs best.
Creating a form using native HTML and CSS
Building a form in HTML manually is best for users who are comfortable with code and want full control over form structure, behavior, and styling. It allows for a completely custom form design, tailored exactly to your layout and user flow.
- Open your website project or HTML file in a code editor. You can use editors like VS Code, Atom, Sublime Text, or even an online playground such as CodePen or JSFiddle.
- Add the base HTML form structure. Start by writing a <form> tag with fields like <input type=”text”>, <input type=”email”>, <textarea>, and <button type=”submit”>. Include name attributes for each field so they can be identified during submission.
- Add labels for accessibility. Use <label for=”field-id”> to link input fields to descriptive text, improving usability and accessibility.
- Apply custom CSS for layout and appearance. Style each input, label, and button using CSS. Set widths, padding, colors, font styles, and border-radius to match your design. Use media queries to make the form responsive on mobile devices.
- Set the form’s action and method attributes. Define the action (where the form sends data) and method (usually “POST”). If you’re using a server-side script like PHP, point to its URL.
- Add basic input validation. Use required, type=”email”, and pattern attributes to ensure users enter valid data.
- Test locally and upload to your server. Open the form in your browser and test functionality. When ready, upload the file to your hosting platform via FTP or your CMS’s HTML editor.
Embedding a form using Google Forms
Google Forms is a popular no-cost option that works well for basic data collection, surveys, or feedback. It’s cloud-based, simple to use, and doesn’t require you to host or code anything yourself. Although it lacks advanced visual customization, it’s a good solution for quick setups.
- Go to Google Forms and log in with your Google account. Visit forms.google.com and click the blank form or select a template to get started.
- Enter your form title and description. Give your form a name and short intro to explain its purpose to users.
- Add fields to collect information. Choose from various field types such as short answer, paragraph, multiple choice, dropdowns, checkboxes, and file uploads.
- Adjust settings for responses and email notifications. Click the settings icon to manage who can respond, limit responses, and enable email receipts.
- Preview the form to ensure it looks correct. Use the eye icon in the top-right corner to view your form exactly as visitors will see it.
- Generate the embed code. Click “Send”, select the </> embed tab, set your preferred width and height, and copy the iframe code.
- Embed the form into your website. Paste the iframe code into the HTML section of your web page where you want the form to appear. Save and publish the changes.
Comparison of Methods for Adding Forms to a Website
The table below outlines the advantages and drawbacks of each form creation method, helping you choose the best approach based on your needs, skills, and goals.
| Method | Pros | Cons |
|---|---|---|
| Elfsight Form Widget | Offers full design flexibility, instant preview, and integration without any coding required. | Some advanced features are only available on premium plans. |
| Native HTML + CSS | Gives total control over form structure, appearance, and backend handling. | Requires HTML/CSS knowledge and setup of backend systems to process submissions. |
| Google Forms | Quick and beginner-friendly solution with no hosting or technical setup needed. | Very limited design options and no ability to deeply customize layout or functionality. |
While each method has its strengths, Elfsight’s form widget remains the most efficient and flexible option for creating beautiful, functional forms — especially if you want to avoid coding and get results fast.
Now let’s see how you can take it even further by customizing the look and behavior of your form.
Best Tips to Personalize Your Form Design
This section covers practical advice for customizing the look and behavior of your form widget. Applying these tips will help your form blend seamlessly into your website and improve user experience.
- Keep the layout clean and simple. Use a vertical structure for general inquiries and a multi-step layout for longer forms to prevent user overwhelm. Group related fields together to improve readability and flow.
- Limit required fields to essentials. Asking for too much information can discourage users. Only mark the most important fields as required and avoid overwhelming visitors with unnecessary inputs.
- Use custom labels and placeholders. Be descriptive but concise in labels and placeholder text to guide users effectively. Clear instructions help reduce input errors and increase form completion rates.
- Apply a color scheme that fits your brand. Match accent colors, button styles, and fonts to your website’s visual identity. Avoid using high-contrast colors unless they’re intentional for accessibility.
- Optimize spacing and field size. Ensure there’s enough padding around fields and use responsive design so that the form looks good on all screen sizes. Avoid making input boxes too short or too long — match them to expected input length.
- Use CSS for deeper customization. If your platform allows it, add custom CSS to override default styles. This can be helpful for tweaking margins, borders, shadows, hover effects, or form animations.
- Preview the form on different devices. Always test your form on mobile and tablet screens to make sure all elements display correctly. Responsive behavior is key for usability and user satisfaction.
Now that you know how to fine-tune your form’s design, let’s look at the different types of forms you can create and what use cases they serve best.
Form Types You Can Build with Elfsight
Elfsight Form Builder offers a wide selection of pre-made templates that help you create high-performing forms tailored to your business needs. Whether you’re looking to collect leads, gather feedback, or manage job applications, there’s a template ready to go.
Below are three popular types of forms you can build using Elfsight.
Contact Form 📩
The Simple Contact Form template is designed for quick and straightforward communication. It includes fields for name, email, subject, and message, making it ideal for general inquiries or service requests. This form works well in headers, footers, or contact pages, helping visitors reach you without needing to open their email client. You can also customize field labels, add placeholders, and enable auto-responses to streamline communication even further.
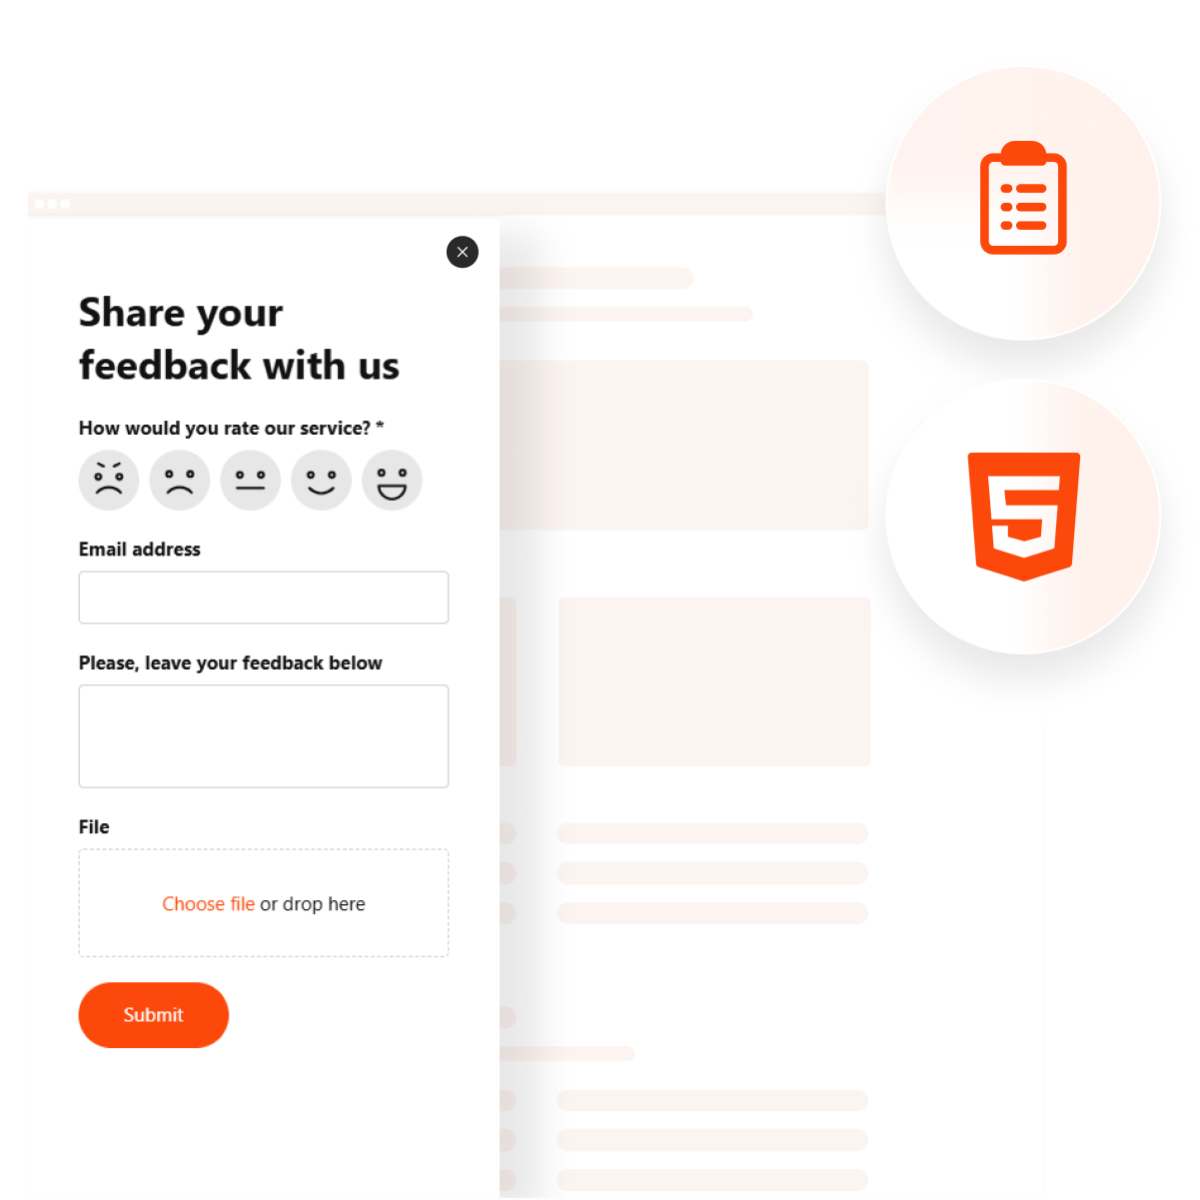
Feedback Form 💬
The Customer Feedback Form helps you understand what your audience thinks. With fields like star ratings, satisfaction sliders, and open text boxes, it’s great for post-purchase surveys or service reviews. You can customize it to ask about specific product features, delivery experience, or overall satisfaction. The simple design and mobile-friendly layout make it easy for users to submit feedback within seconds, which boosts response rates and gives you better insights.
Job Application Form 👥
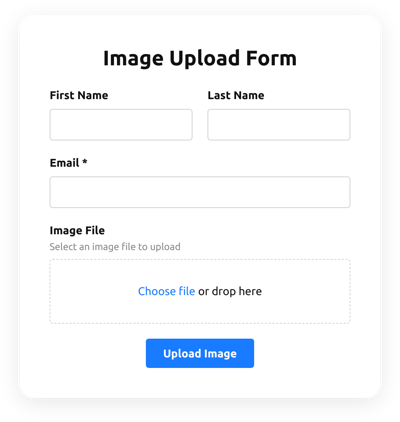
The Job Application Form is a practical solution for collecting candidate data directly from your website. It includes input fields for personal info, job role selection, and file uploads for resumes or cover letters. You can also add dropdowns for department selection or checkboxes for remote availability. This form helps HR teams centralize applications, reduce email clutter, and automate applicant tracking without relying on external hiring tools.
These examples show how Elfsight’s templates can support different business goals — from communication to customer experience to recruitment.
Explore 300+ Form Builder templates


How to Fix Common Issues
Even with a simple setup process, users can occasionally face technical difficulties or logic errors when building or embedding forms. Below is a list of common issues and how to solve them effectively using a form widget or custom form generator.
Why isn’t my form showing up on the website after embedding?
Why am I not receiving submitted form data via email?
How can I validate form inputs before submission?
required or type="email", and add JavaScript for more advanced validation logic.
How can I avoid spam submissions?
Why do uploaded files not appear in the submission email?
Knowing how to troubleshoot these common issues will help you get the most out of your form widget and avoid delays in setup or communication.
Conclusion
Creating a form in HTML doesn’t have to involve complex coding or time-consuming steps. With Elfsight’s intuitive form widget, you can build, customize, and publish professional forms directly on your website in just a few minutes. From contact and feedback forms to job applications and bookings, every form type is fully responsive, easy to manage, and designed to meet your business goals.
Whether you choose to use a ready-made template or customize your layout from scratch, Elfsight gives you all the tools you need — without writing a single line of code. With flexible integrations, design freedom, and real-time editing, it’s the perfect solution for anyone looking to integrate modern forms into their website workflow.
Have Questions?
We hope this article has given you a clear roadmap to build and embed a form on your website. If you have questions or want to explore more use cases, feel free to reach out to our support team — we’re here to help you every step of the way. At Elfsight, our goal is to deliver a complete, no-code form creation experience that helps your business grow.
Want to connect with others or contribute ideas? Join our vibrant Community to exchange insights and best practices. You can also suggest new features through our Wishlist — we’re always listening and working to make the Elfsight Form Builder even better.