
Live chat transforms how visitors interact with your website. Rather than forcing users to wait for email responses or search for your social media accounts to ask a question, an all-in-one chat experience creates direct, immediate connections that address customer questions and concerns as soon as they arise.
The All-in-One Chat widget consolidates multiple messaging platforms — WhatsApp, Facebook Messenger, Telegram, Instagram, and more — into a single, unified interface integrated directly into your website. This guide provides practical, step-by-step strategies for implementation, design customization, and industry-specific use to drive measurable business results.
- How to create a live chat widget for your website without coding skills.
- Live chat builds for various use cases – support, sales, booking, and more.
- Common live chat issues and practical solutions achieved with Elfsight.
- Useful tips on setup and customization to get the best results.
Create your live chat in four steps
If you want to get a live chat running fast, this shortcut is for you:
- Open Elfsight’s editor and pick a chat template.
- Customize your live chat widget.
- Click ‘Add to website for free’ and copy the generated code.
- Paste the code into your website’s backend.
Give it a try now and create your live chat in the interactive editor!
Tailor your live chat to a use case
Every business has different needs when it comes to live chat features, and the right structure can make all the difference. The way you set up your chat depends on who you’re helping, what you want to achieve, and how your audience likes to communicate. Below, you’ll find five practical use cases – each with a tailored approach to fit real-world goals.
Support – customer help desk
Applies to: online stores, service providers, SaaS companies, hospitality businesses.
Goal: Get stuck visitors to fast help on the channel they already use
User motivation: High — people want quick answers when they’re stuck
Template match: Support Chat Widget Example
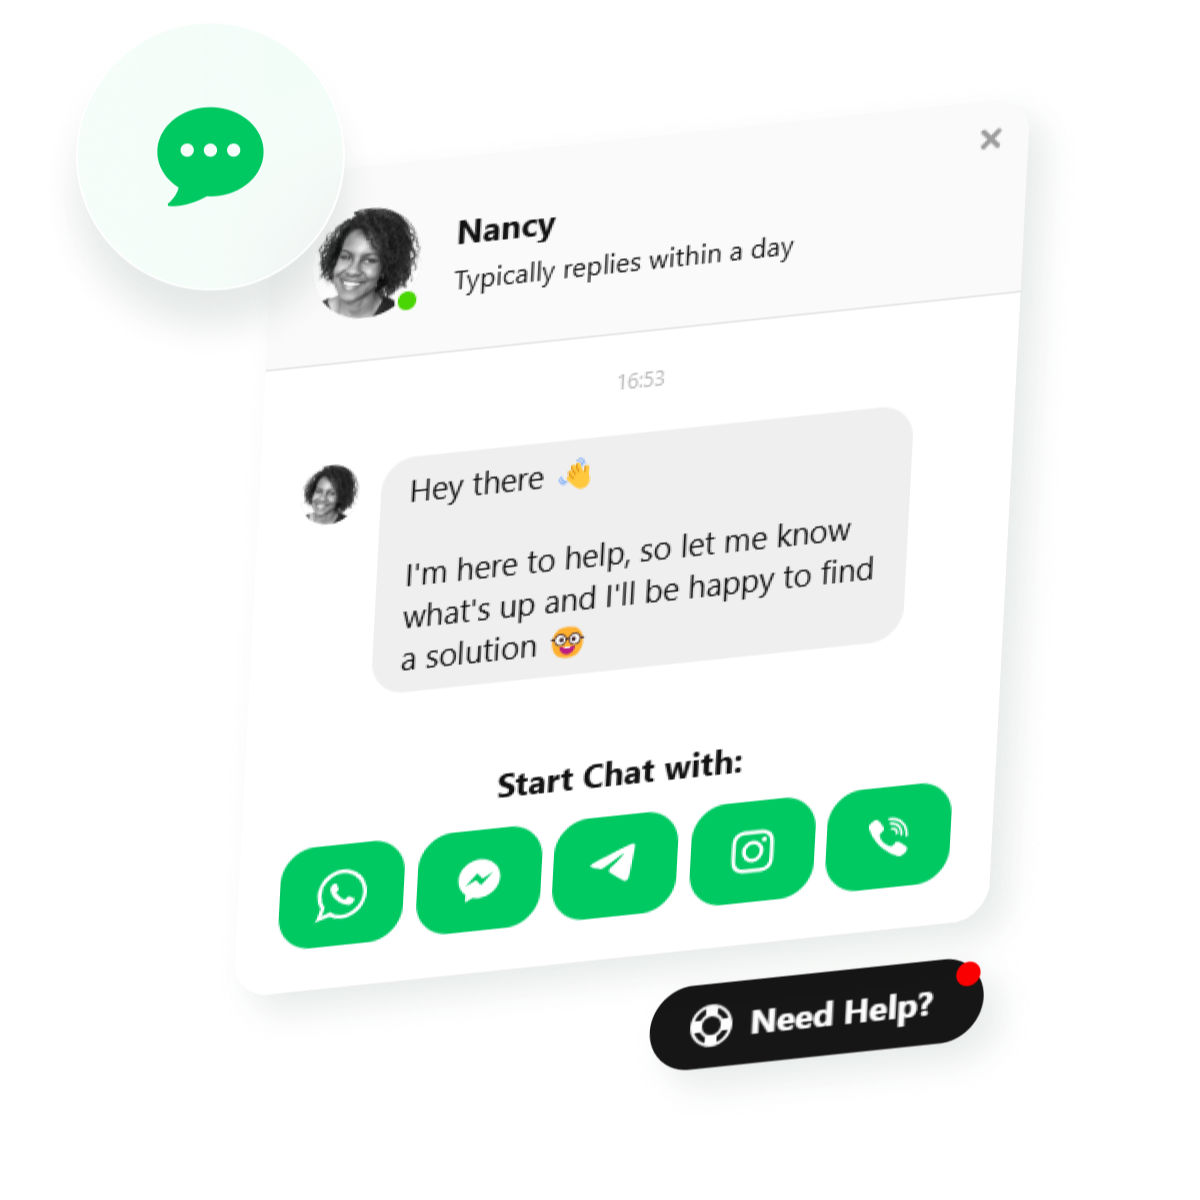
When users hit a problem, the launcher lets them reach you on WhatsApp, Messenger, or whichever app they trust — no hunting for a contact page. A clear reply-time sets expectations, and the conversation continues in their messenger of choice instead of a queue.
Recommended structure
- Visible launcher with a “Need help?” bubble text
- Agent name, photo, and an honest reply-time caption
- Your most-staffed support channels first with email as a catch-all fallback
- A Call button for visitors who’d rather talk than type
Sale – product consultation
Applies to: ecommerce, retail, subscription services.
Goal: Guide visitors toward the right product and increase conversion
User motivation: Moderate — users want advice before they buy
Template match: Sales Chat Widget Example
When someone’s weighing a purchase, a quick question answered by a real person can tip the decision. Use the welcome message to surface a current offer, and a Custom button to send shoppers straight to the product or pricing page before handing off to your sales channel.
Recommended structure
- Welcome message highlighting a current deal or “Chat with a product expert”
- The channels your sales team actually monitors (WhatsApp, Messenger, Instagram)
- A Custom button linking to your bestsellers or pricing page
- A button title that frames the intent, like “Ask us before you buy”
Booking – reservation assistant
Applies to: hotels, restaurants, clinics, event organizers.
Goal: Make it easy to ask about availability and start a booking
User motivation: High — users want to secure a time or spot with minimal effort
Template match: Booking Chat Widget Example
Availability, party size, special requests — these are quick to handle over chat. The launcher hands the visitor to a channel your front desk watches, and a Custom button can drop them straight onto your reservation page or calendar tool to finish the booking.
Recommended structure
- Welcome message inviting availability questions (“Checking dates? Message us”)
- A messaging channel your front desk monitors (WhatsApp works well here)
- A Custom button linking to your online booking page or calendar tool
- A Get Directions button for walk-in-friendly venues
Don’t have a booking system yet? Compare the best website booking systems and link the chat out to whichever you choose.
Onboarding & consultation – guided setup
Applies to: SaaS onboarding, agencies, professional services, training providers.
Goal: Help new users get started and reach an expert
User motivation: High — users are eager but need direction
Template match: Consultation Chat Widget Example
New users often just need pointing in the right direction. Use the welcome message to send them to getting-started resources, and Custom buttons to link out to guides, tutorials, or a call-booking page — then let them continue with a real person on their preferred channel.
Recommended structure
- Welcome message with a short getting-started line
- Custom buttons linking to your help docs or video tutorials
- A Custom button to your call-scheduling page
- A direct channel (Telegram or WhatsApp) for follow-up questions
If you’d rather visitors get automated answers without a person on the other end, that’s a different tool – here’s how live chat and an AI chatbot compare. This guide walks through choosing channels, wording your messages, targeting who sees the chat and when, styling it, and embedding it.
Common live chat issues & fixes
Even with the best intentions, live chat can frustrate both teams and visitors if they aren’t set up with care. Here’s a look at the issues that come up most often, and how Elfsight’s widget helps you nip them in the bud.
| Issue | Why it happens | How Elfsight helps |
|---|---|---|
| Widget not showing up on the website | Code is placed in the wrong part of the HTML, or the widget is not enabled | Clear install guides walk you through pasting the code in the correct spot, and simple toggles control widget activation |
| Chat pops up at the wrong time (too early or too often) | Widget triggers are set too aggressively, interrupting visitors | Behavior-based triggers let you show the chat only when users are likely to want help (like after they’ve lingered or scrolled) |
| Missed chats when team is offline | No clear indication of agent availability, leading to unanswered messages | Scheduling and status let you set an honest reply time window, so visitors know when to expect a response |
| Brand mismatches or generic appearance | Widget isn’t customized for your brand, which can feel out of place | Easy design options let you match colors, text, and avatars to your branding, no coding needed |
| Confusing or cluttered chat interface | Too many fields, unclear prompts, or a busy layout | Streamlined customization of the welcome message, buttons, and prompts |
| Settings changes don’t appear immediately | Caching or session issues cause updated settings not to show | Instant updates ensure changes take effect right away, so you see what users see |
Most live chat issues come down to structure and clarity. By setting up your widget thoughtfully, you can remove nearly every barrier. Pair it with a custom contact form to capture after-hours questions so nothing slips through.
How to create a live chat on website from scratch
Once you know the types of chat interactions your audience expects, you can transform a standard widget into a seamless part of your website. This section gives you every step, from choosing channels and styling options to embedding and optimizing the chat experience.
1. Choose a chat template
Open the editor and select a pre-built template that aligns with your business goals. Each template is optimized for specific interaction patterns and comes with recommended channel configurations.
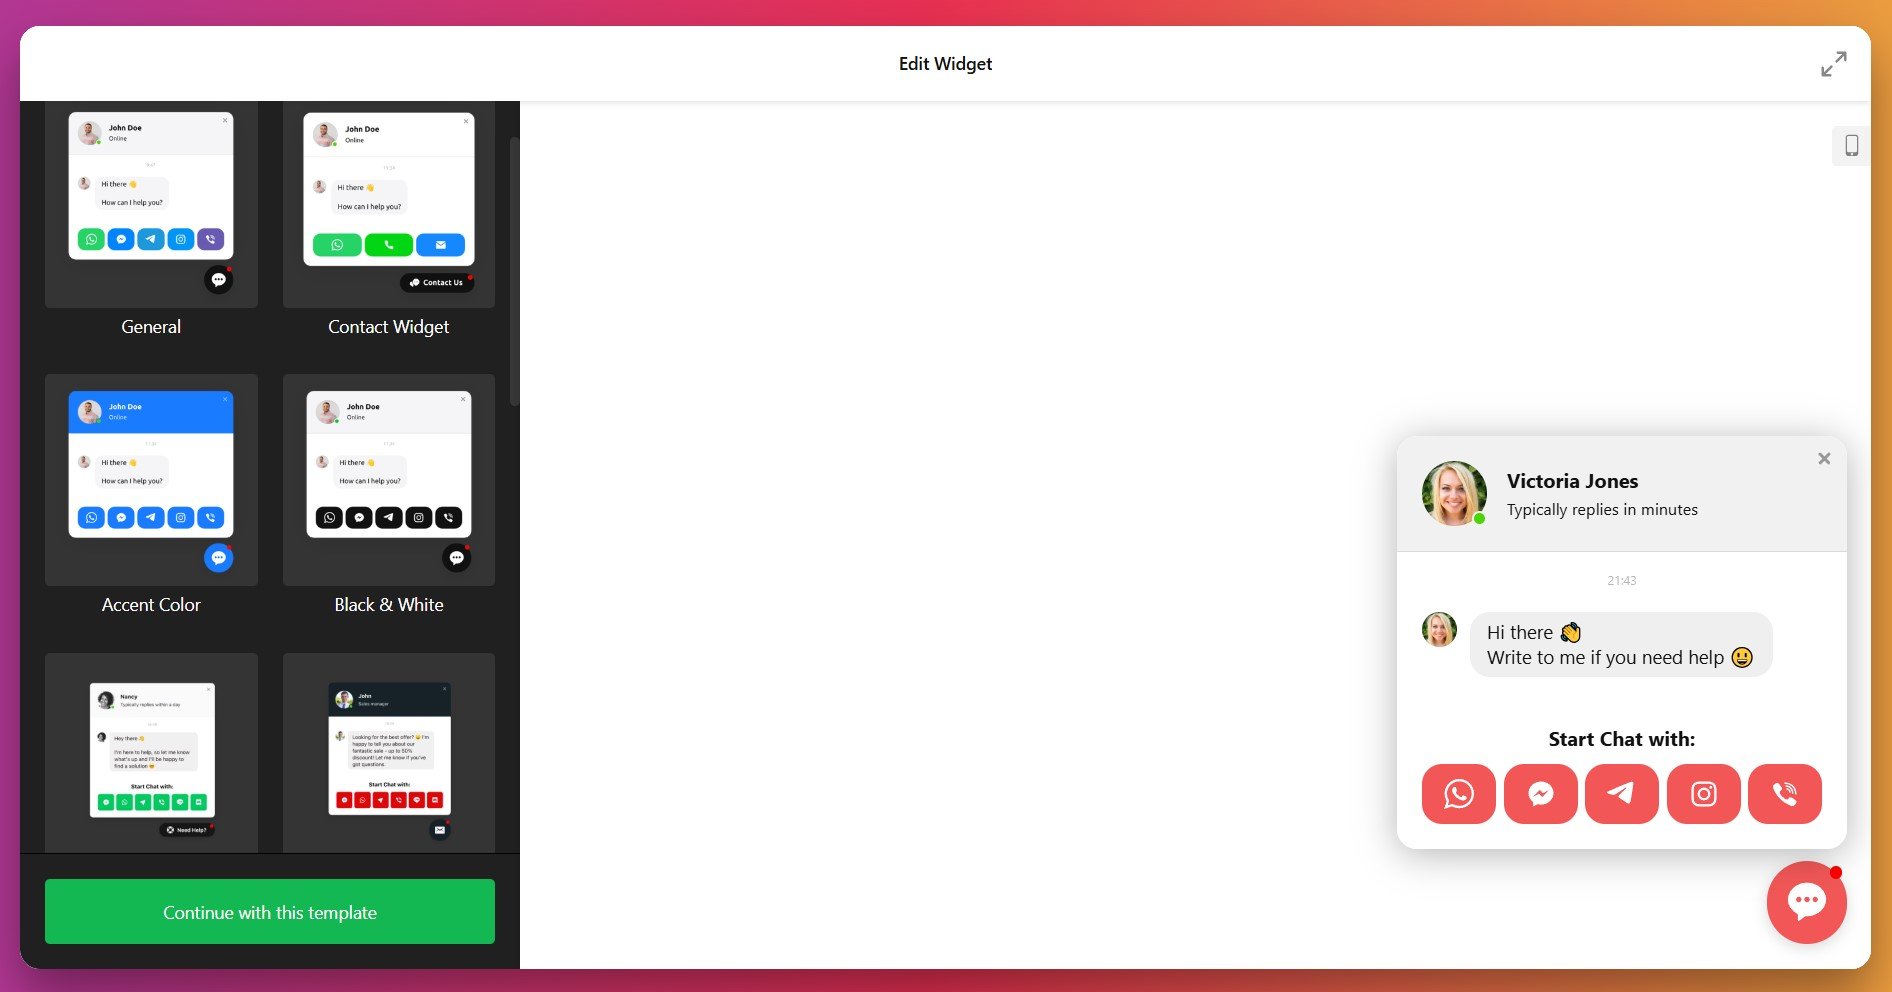
E.g., Booking Chat for service businesses, Onboarding Chat – great for SaaS and educational platforms, etc. Click “Continue with this template” to proceed to customization.
2. Add your messaging channels
Navigate to the ‘Contacts’ tab and click “Add Contact” to connect your preferred messaging platforms. The widget supports most popular messengers:
- WhatsApp – include full phone number with country code
- Facebook Messenger – requires your Facebook Page username
- Telegram – use your @username or bot link
- Instagram – Direct Messages username required
- SMS or Viber – phone number
- Email – email address your support team uses
As well as utility buttons like Call, Get Directions, and Custom Links.
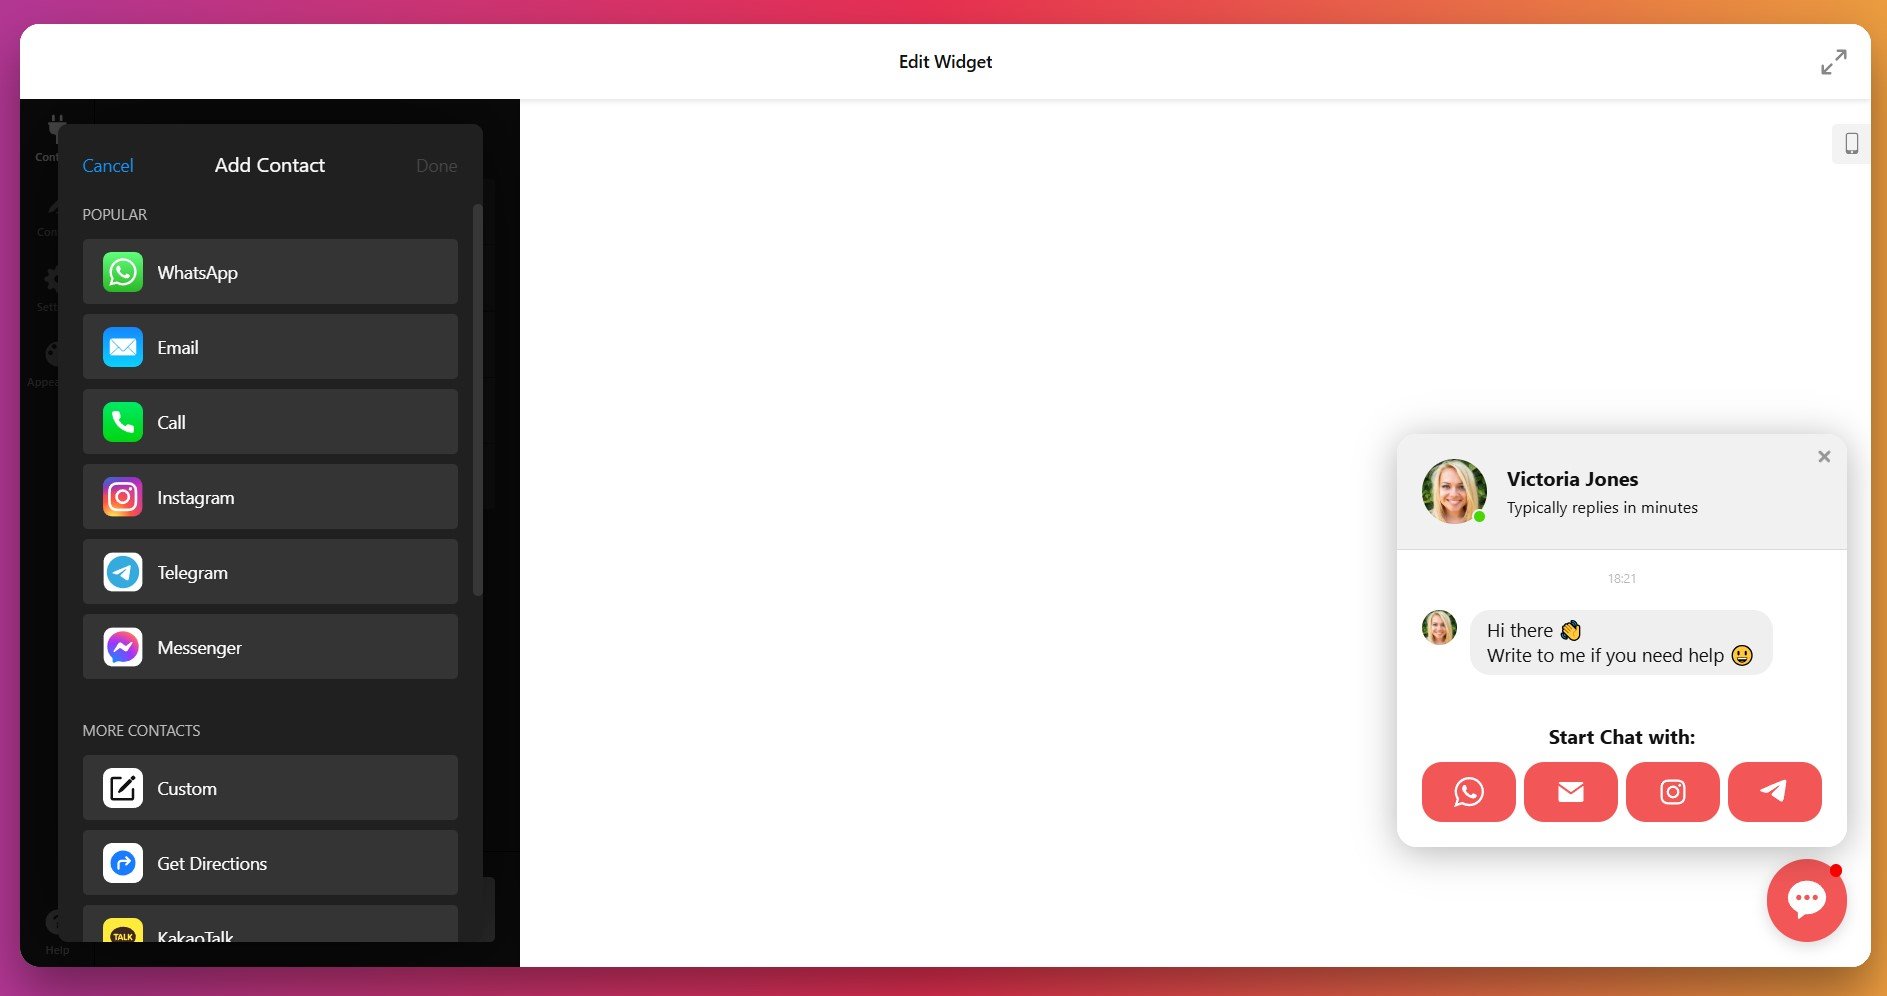
You can enable as many channels as needed to meet customers where they already communicate.
3. Personalize agent information and messages
Open the “Content” tab to configure your chat agent’s identity:
- Agent Name – use real team member names for authenticity
- Profile Photo – human faces increase trust and response rates
- Availability Status – online status, estimated reply time, or a custom status message
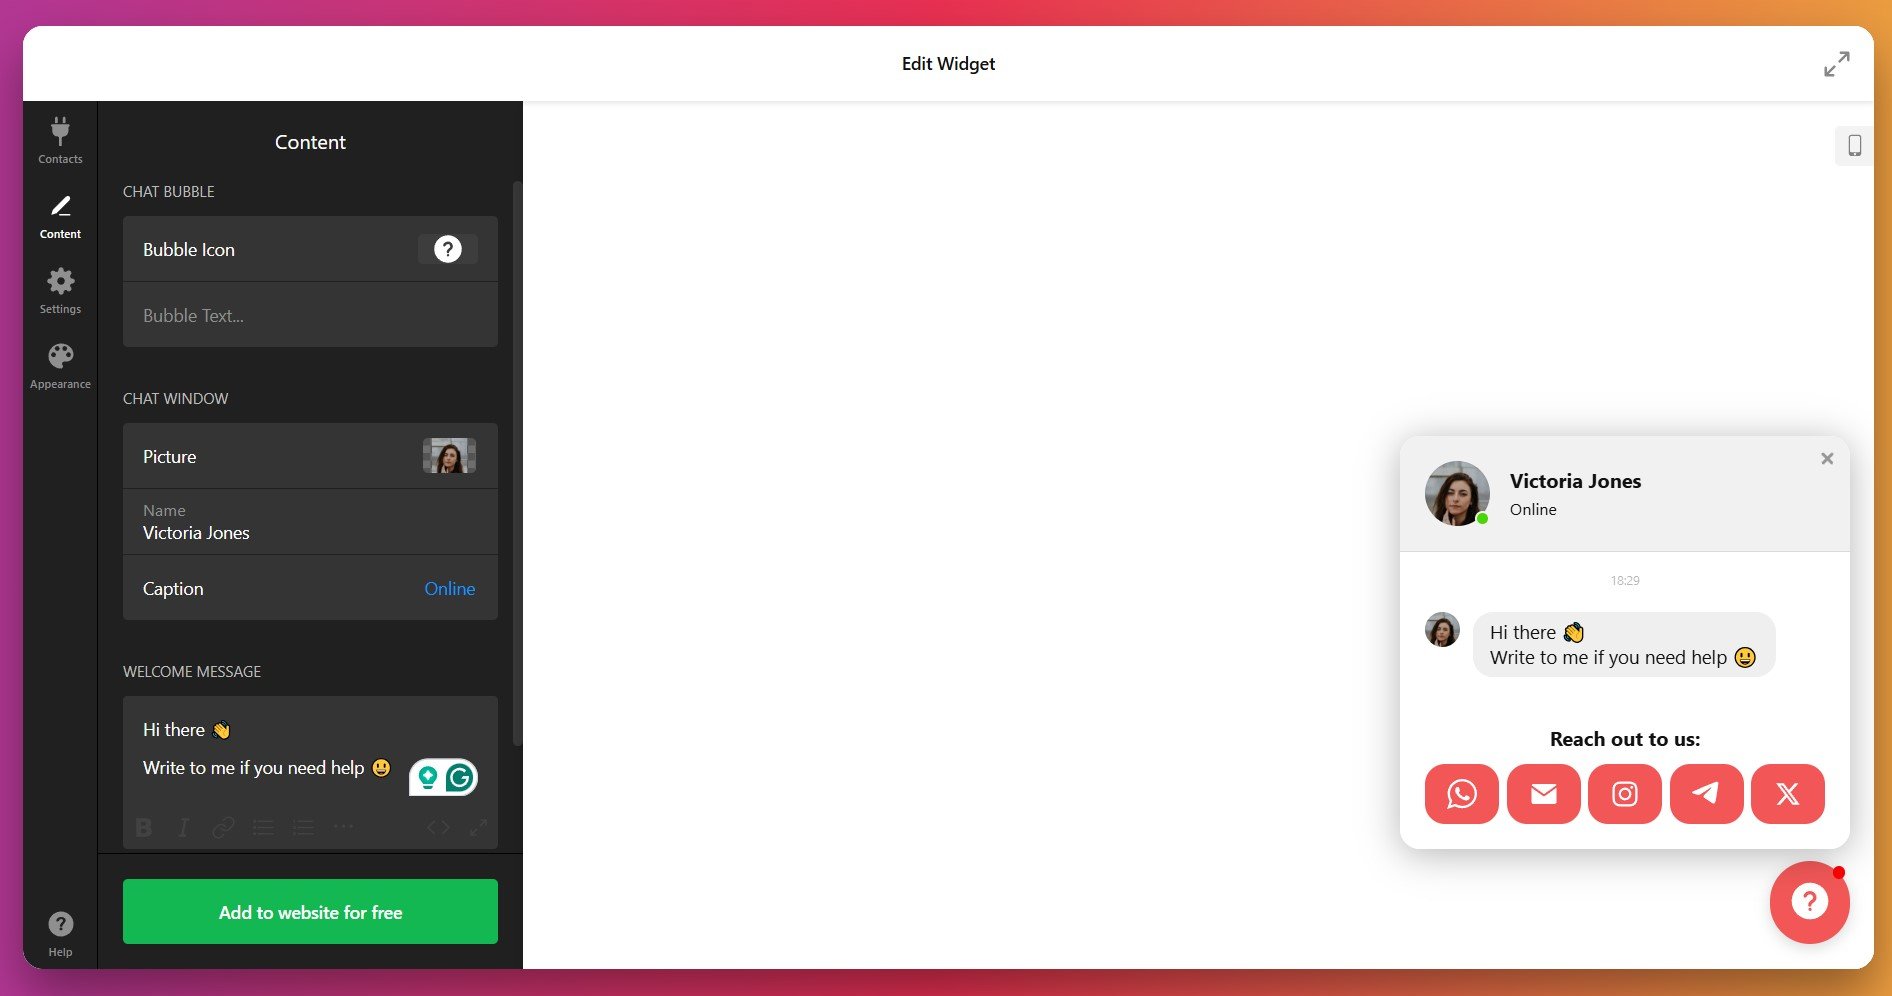
Craft a concise, contextual Welcome Message that appears when visitors open the chat window – effective greetings are under 10 words and address specific page context, such as “Need help choosing the right plan?” on pricing pages or “Questions about shipping?” on product pages.
4. Customize the chat bubble
Still in the ‘Content’ tab, scroll to the Chat Bubble section. Select an icon from Elfsight’s library – options include chat bubbles, headsets, messaging icons, and platform-specific logos – or upload your own company logo for maximum brand consistency.
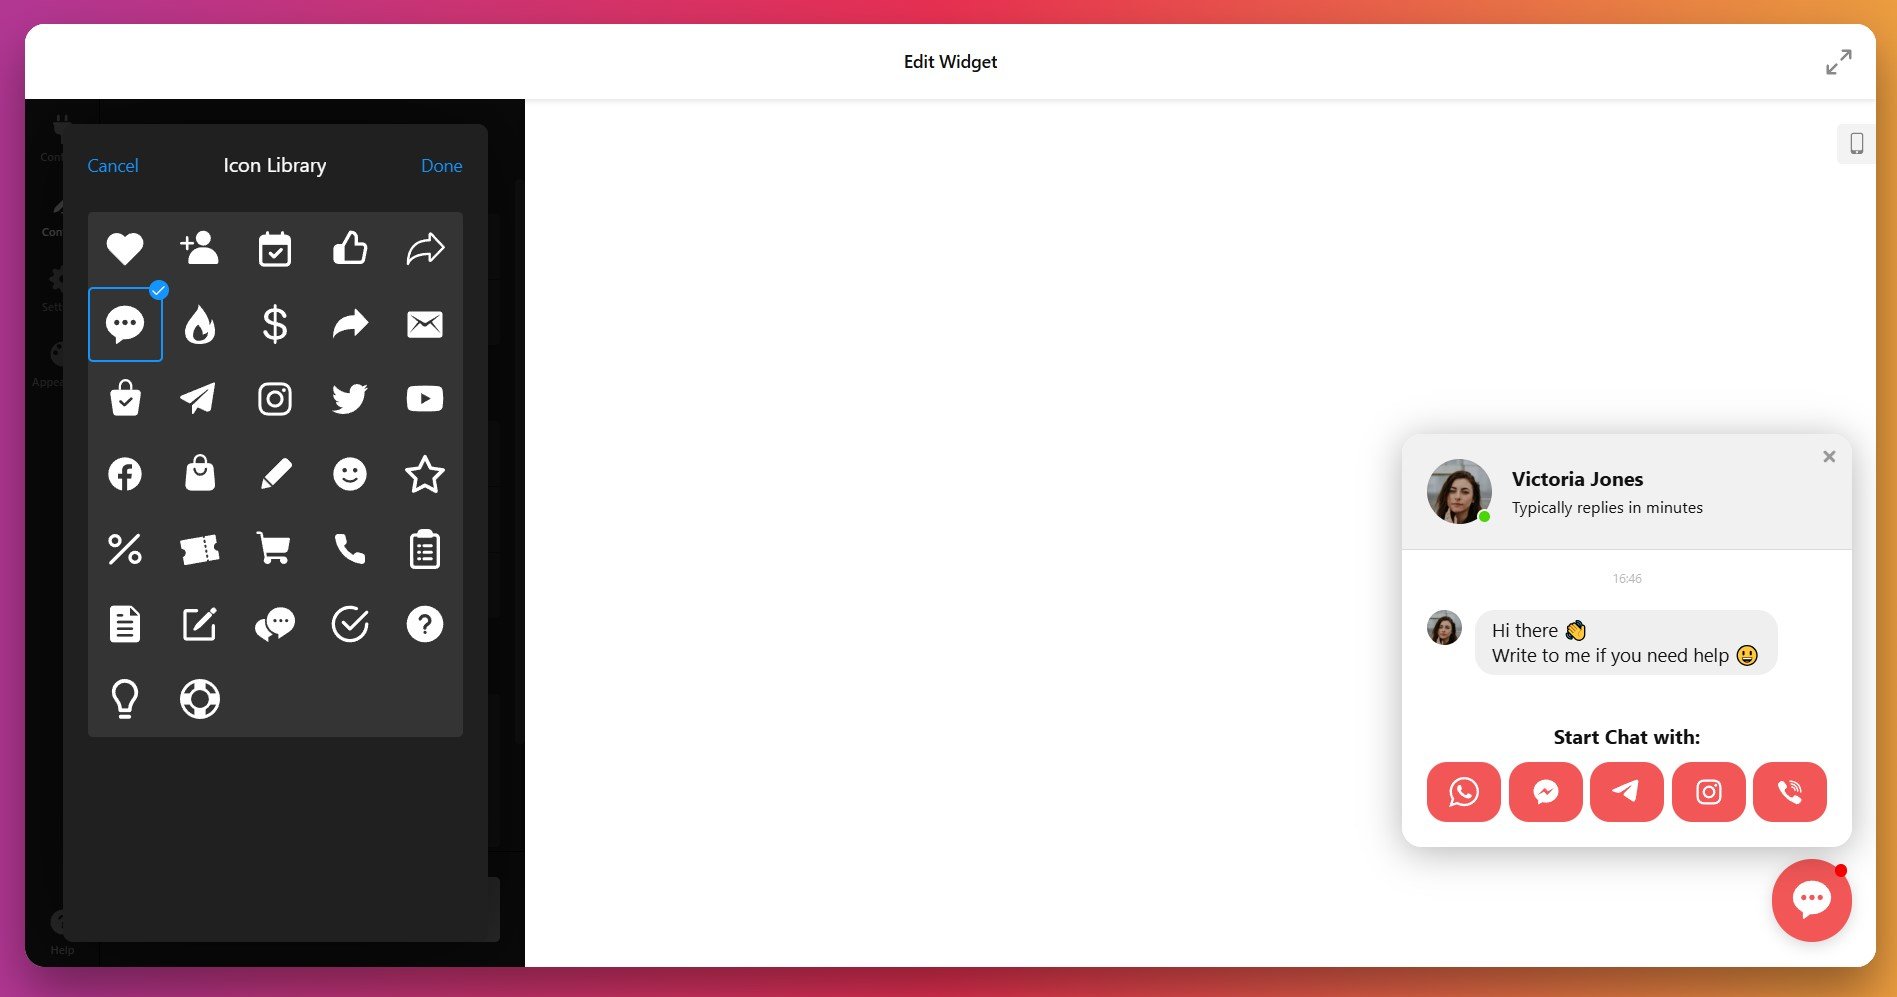
Add optional Bubble Text that appears next to the icon (e.g., “Chat with us!” or “Need help?”) to encourage interaction.
5. Configure display triggers and behavior
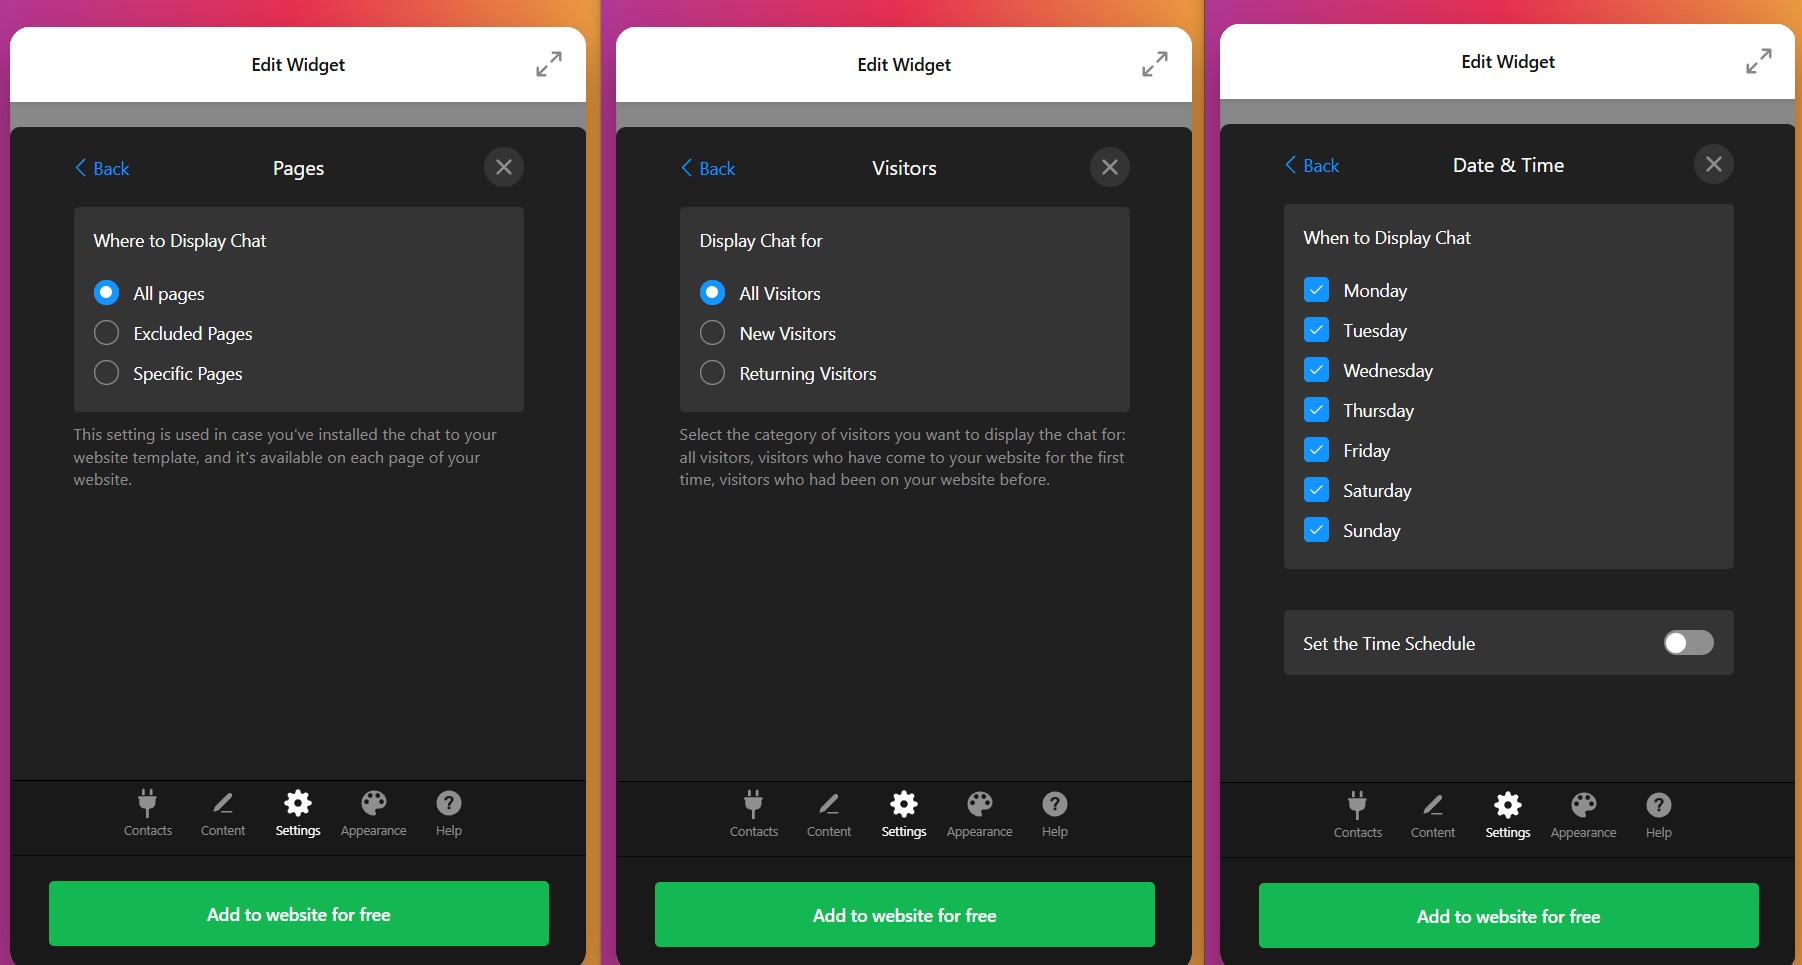
Navigate to the ‘Settings’ tab and open Chat Display Settings. Define when and where your widget appears using four powerful targeting options.
Pages
Choose “All Pages” for site-wide display, “Specific Pages” to show chat only on designated URLs (perfect for high-intent pages like pricing, checkout, or contact), or “Excluded Pages” to hide chat from certain areas. You can type “homepage” to specifically target or exclude your homepage.
Devices
Select desktop, mobile, or both to control which devices display the chat widget. Mobile-first businesses should ensure mobile optimization is perfect.
Visitors
Target “All Visitors,” “New Visitors” (first-time site guests), or “Returning Visitors” (users who’ve been to your website before) to personalize the chat experience based on familiarity.
Date & Time
Set a schedule for when chat should be visible – ideal for businesses with specific operating hours or time-zone-based support teams.
Under Open Chat Triggers, configure which visitor actions automatically open the chat window:
- On Page Load (immediately when page loads—use sparingly as it can feel intrusive)
- Time on Page (after visitor spends X seconds on current page)
- Time on Site (after visitor spends X seconds anywhere on your website)
- Scroll Position (when visitor scrolls to X% of page)
- Exit Intent (when visitor attempts to leave the page or close browser tab)
6. Choose your layout and positioning
In the ‘Settings’ tab under Position, select between Floating (chat bubble follows users as they scroll, remaining visible at all times) or Embed (static placement within page content).
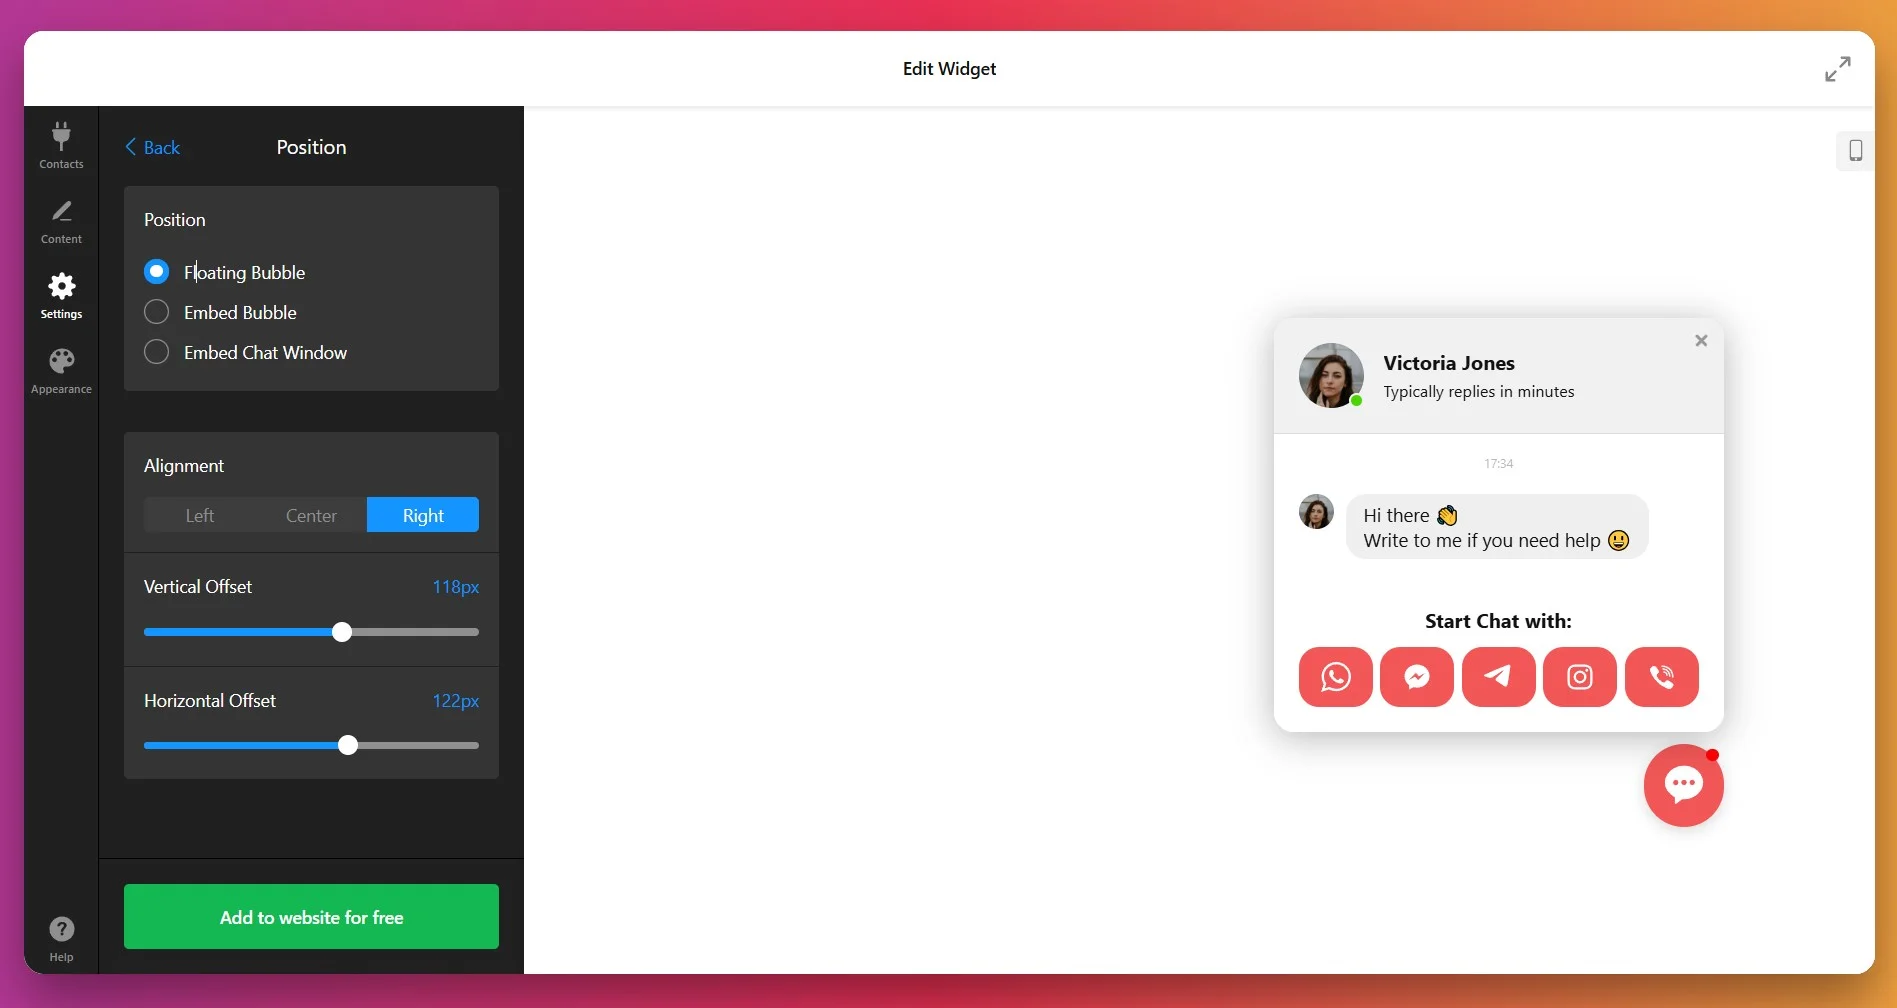
For floating layouts, choose corner position – bottom-right is the web convention and performs best in Western markets, while bottom-left can work for right-to-left languages or to avoid conflicts with existing website elements. Adjust the horizontal and vertical offsets to fine-tune exact positioning relative to screen edges.
7. Customize appearance and branding
Open the “Appearance” tab to match the widget to your website’s visual identity. Customize these elements:
- Chat Bubble: Adjust bubble background color, icon color, and the notification badge.
- Widget Header: Modify header background color, text color, and layout style.
- Widget Background: Set the background color or image for the main chat panel.
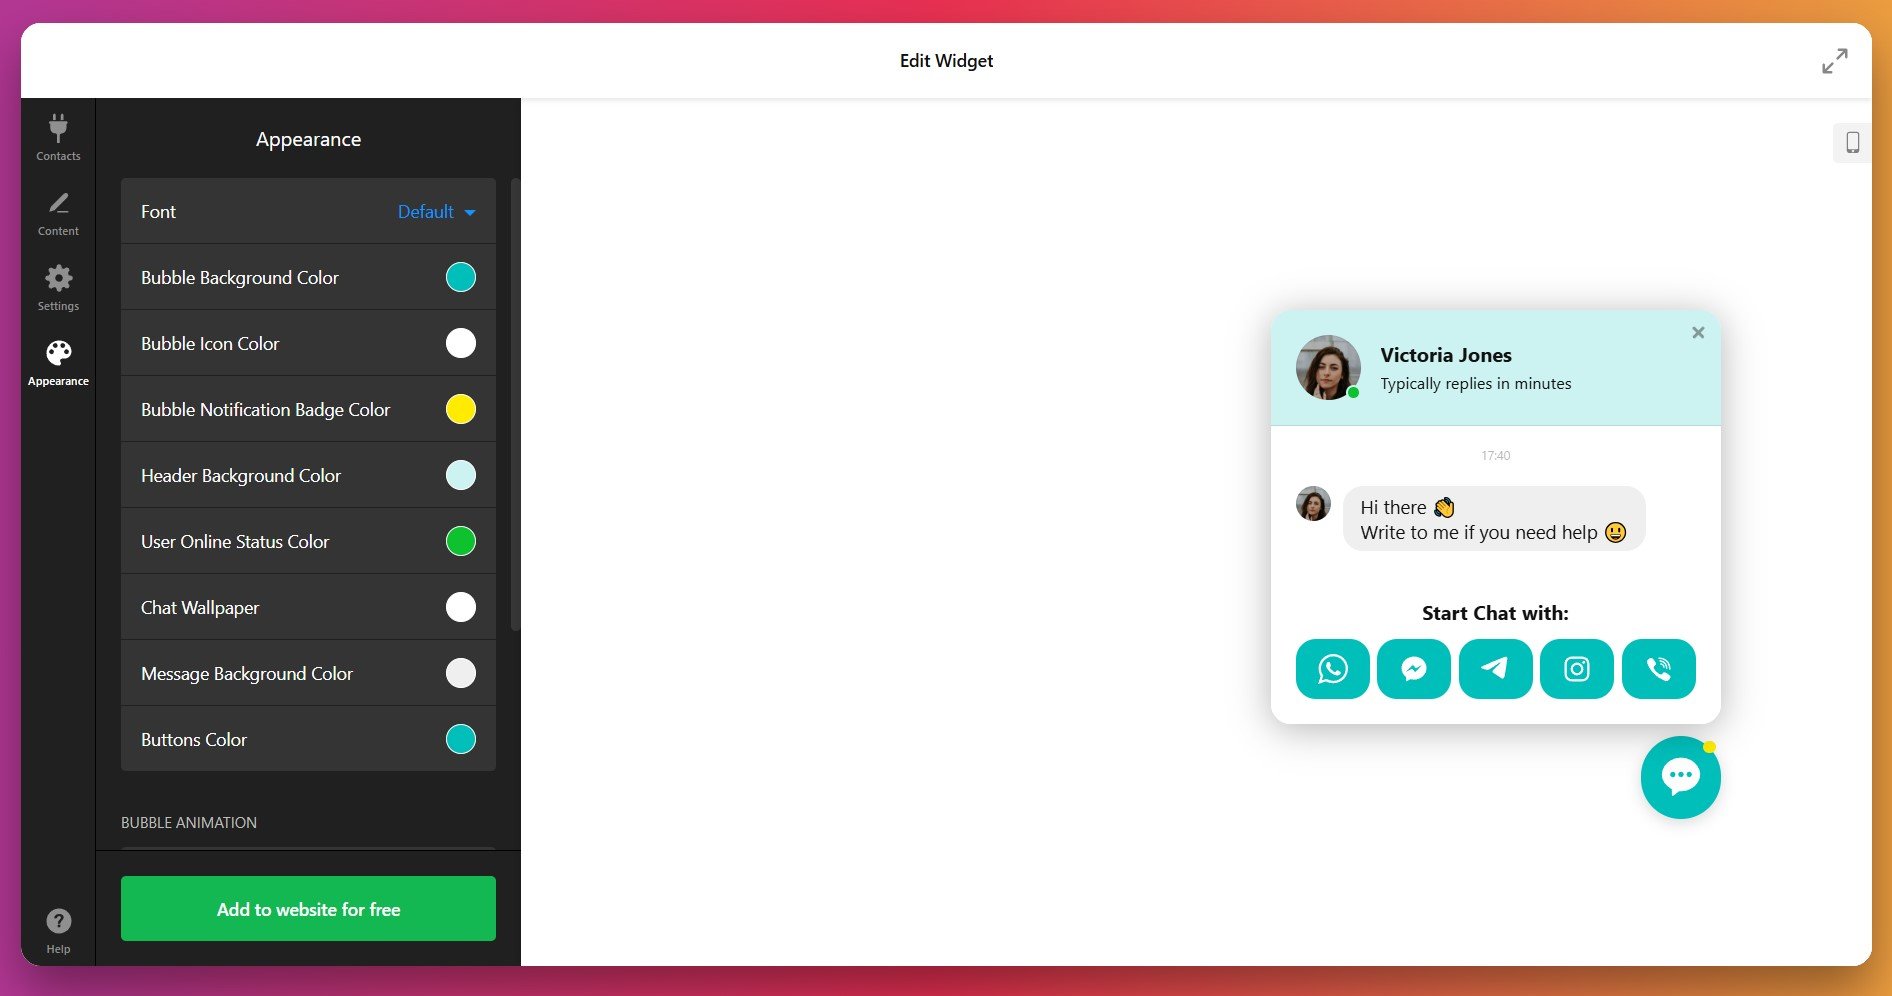
- Messenger Buttons: Customize individual channel button colors and styles.
- Typography: Select font families that match your website to maintain readability.
- Animations: Toggle the bubble’s attention animation on or off and set how often it replays.
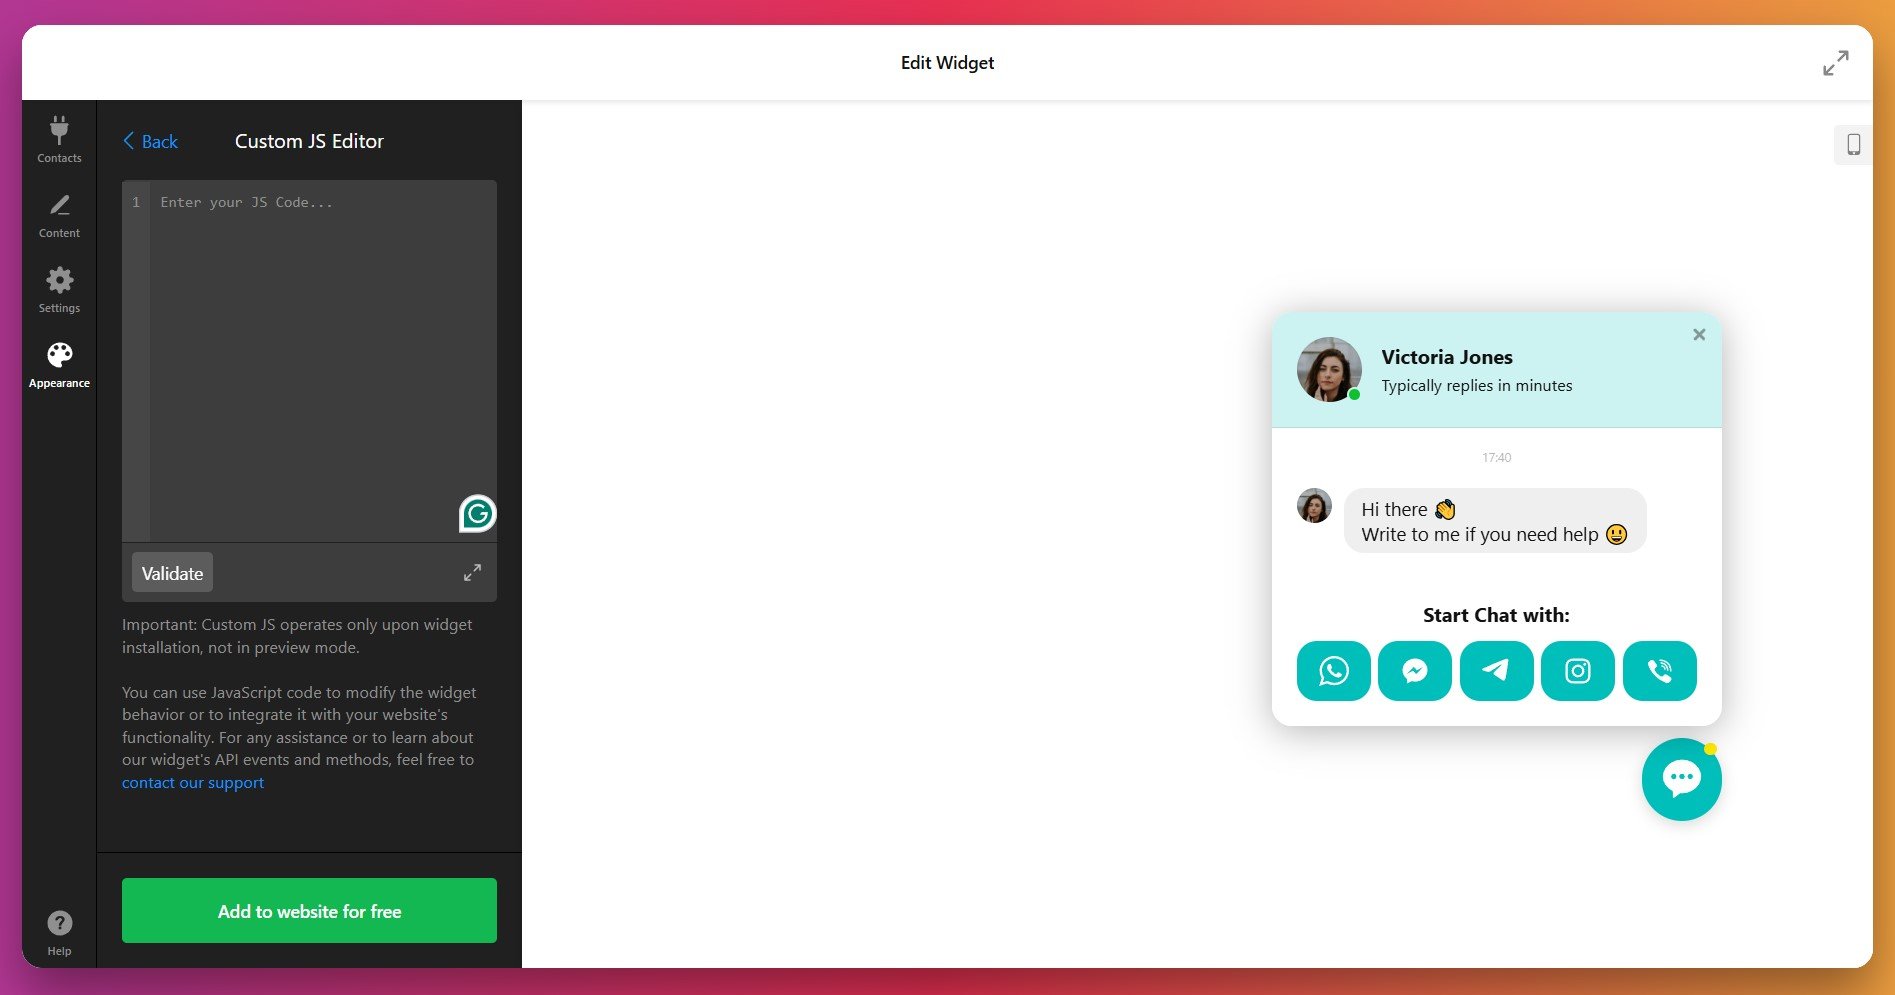
For advanced customization, use the Custom CSS field to apply precise styling rules, and Custom JavaScript to trigger custom events or integrate with other website functionality.
8. Enable tracking
Return to the “Settings” tab and scroll to Google Analytics. Add the “Widget Opened” event to track when visitors open your chat.
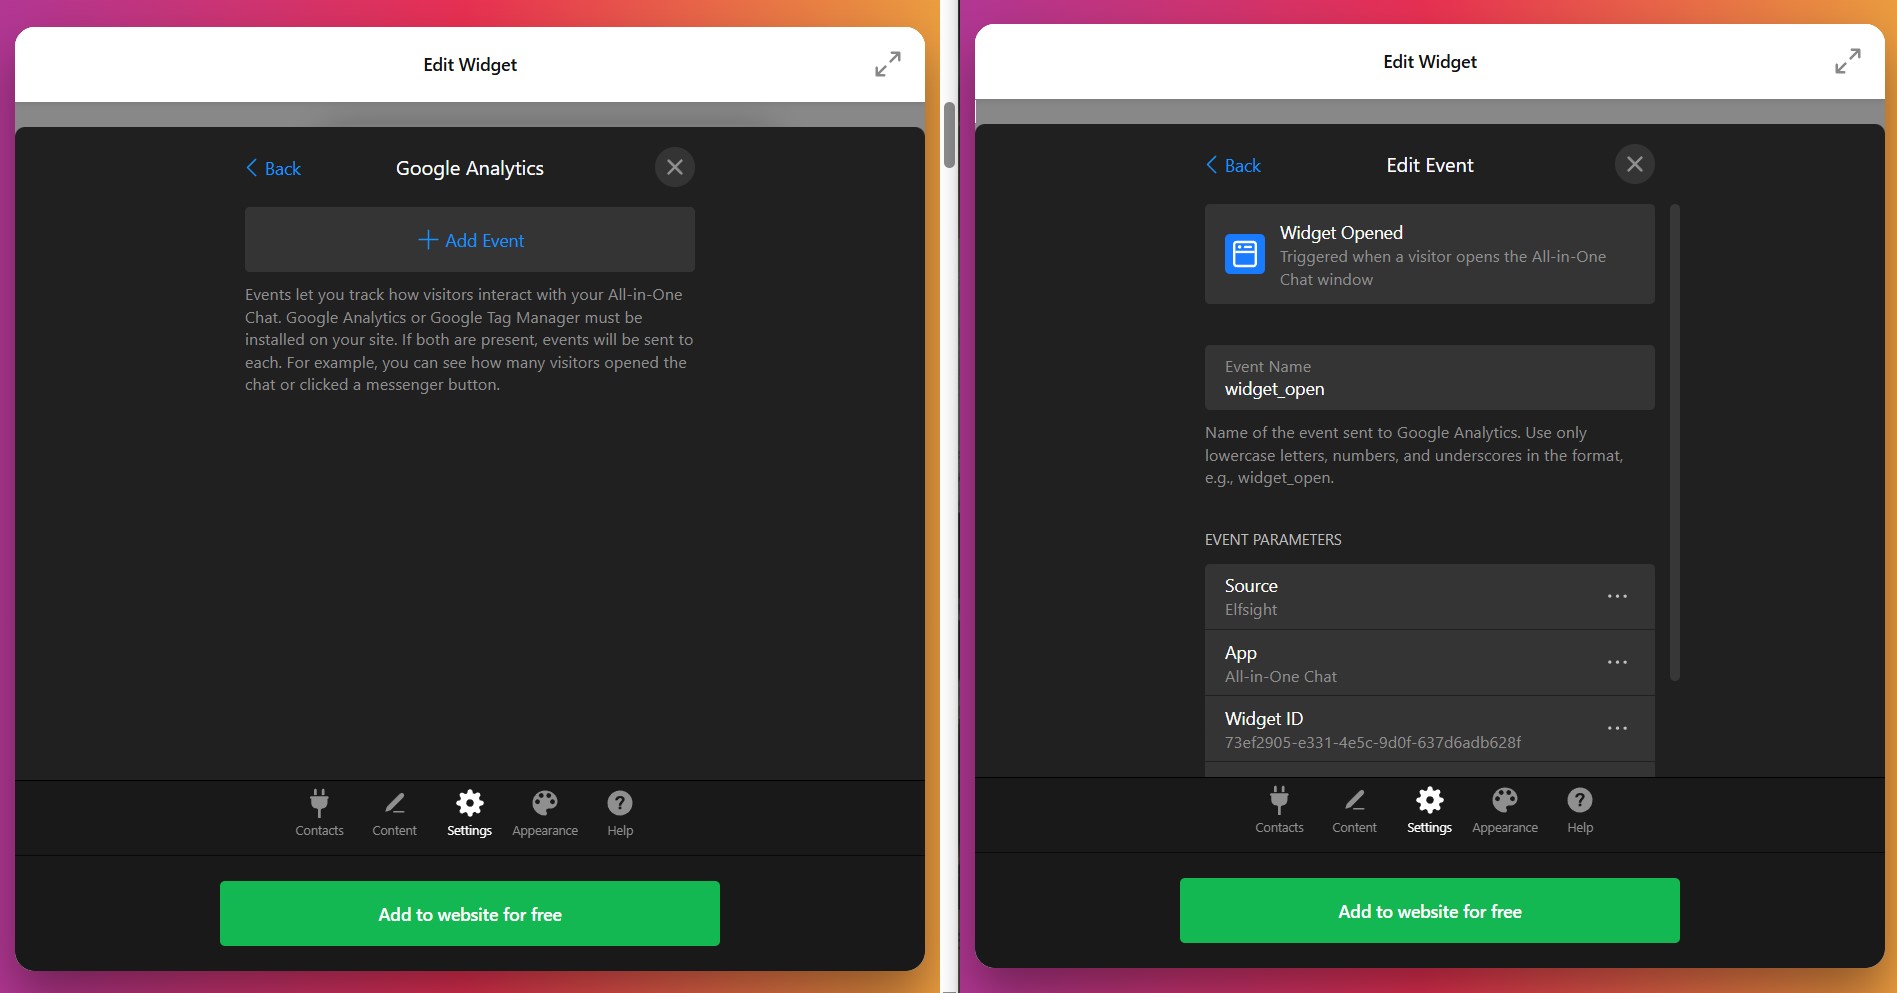
Note: Data flows to your own Google Analytics (or GTM) property. If you need channel-level attribution, use UTM-tagged Custom links or each messenger’s own analytics.
9. Embed the chat widget on your website
Click “Add to website for free” to generate your unique installation code. The widget integrates with all major CMS and website builders. For WordPress-specific steps, see how to add live chat to WordPress.
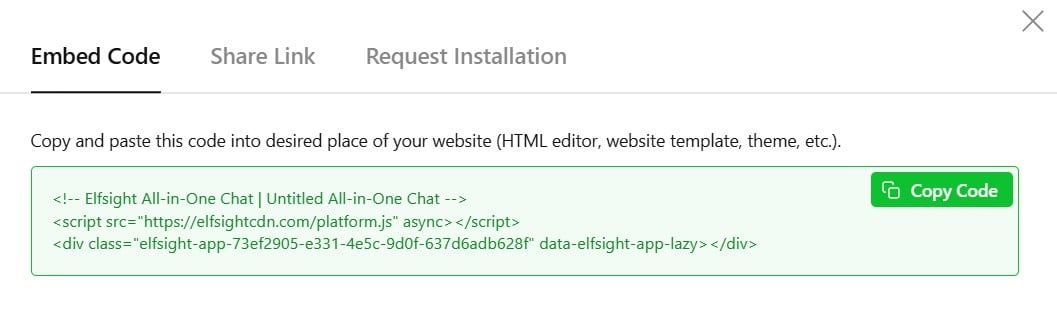
After installation, test thoroughly: verify chat appears on intended pages, test all messaging channel links to confirm they open correctly, check mobile responsiveness across devices, and ensure chat doesn’t overlap critical page elements or navigation.
Live chat optimization tips
Live chat can be a game-changer for customer engagement and conversions, but only if you set it up thoughtfully. Here are practical, no-nonsense tips to help you get the most out of your widget—clearer conversations, happier visitors, and better results.
- Order channels by who’s actually staffing them. Buttons appear in the order you add them, and the top one is the path of least resistance — lead with your fastest-answered channel.
- Always include a no-app fallback. Messenger buttons only work if the visitor has that app; otherwise the widget just shows an “install it first” notice. Add Email or Call so desktop visitors without WhatsApp/Telegram aren’t dead-ended.
- Tune “Remember Visitor” instead of leaving the default. Once someone closes the chat it won’t reopen for a set period (default 1 day). Shorten it on high-intent pages, lengthen it if the bubble feels naggy.
- Pre-fill the SMS default text. The SMS action lets you set default message text — seed it with context (product, page) so replies arrive already framed. It’s your one chance to pass context, since messenger buttons carry none.
- Budget for a little CSS. Bubble size, corner rounding, and shadow aren’t sliders — they’re custom-CSS tweaks. Plan a small snippet if your brand rules are strict.
- Schedule to your real hours and set an honest reply time. Use Settings → Date & Time to hide the launcher when nobody’s staffing it, and match the caption’s reply-time so you’re not implying instant answers at 2am.
- Give brick-and-mortar visitors a Get Directions button. Location is a top chat request; the Get Directions / Open in Google Maps action deflects it instantly without tying up an agent.
Frequently asked questions
How do I add the live chat widget to my website?
Can I connect multiple messaging platforms to one chat widget?
How do I customize the chat’s design and position?
How do I set up triggers for when the chat widget appears?
Can I create agent profiles and welcome messages?
How do I manage widgets for multiple websites or clients?
Final thoughts
That’s the full build. The thing to keep in mind: All-in-One Chat is a launcher, not a helpdesk — it gives visitors a tidy set of channels to choose from, then hands the conversation to the app they picked, where your team already works.
Choose your channels in Contacts, word your welcome message and reply time honestly, control who sees the chat and when in Settings, style it in Appearance, and embed the code. Deploy it with intent, and it quietly turns “I’ll email later” into a conversation that starts now.