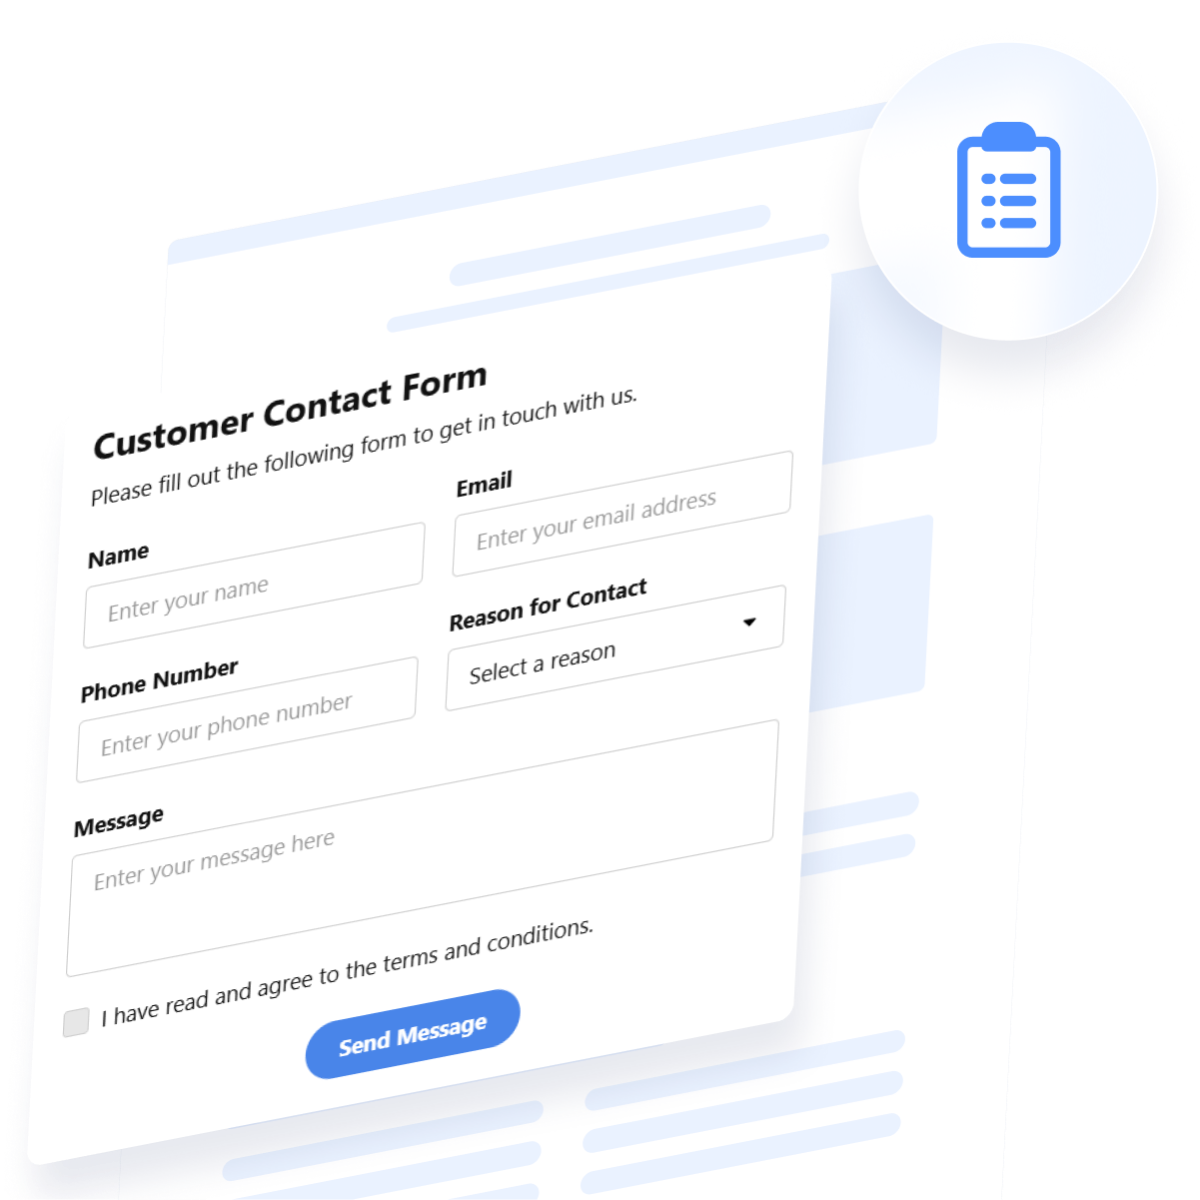
Adding a form to your website is one of the most effective ways to interact with visitors, collect valuable data, and convert traffic into leads. Whether you need a contact form, feedback form, or a custom inquiry form, using a form builder lets you do it all without writing a single line of code.
If you’re looking for a fast, flexible, and user-friendly way to create a form for your website, a Form Builder is exactly what you need. It helps you build an online form in minutes and makes it easy to manage submissions and user interactions from one place.
- Generate more leads and inquiries. Forms offer a direct way for visitors to reach out, ask questions, or request services, helping you capture more business opportunities.
- Collect user responses efficiently. A form centralizes data collection, saving you time and reducing errors compared to handling emails or messages manually.
- Improve engagement with responsive design. Mobile-ready and user-friendly forms make it easy for visitors to fill them out on any device.
- Enhance professionalism and trust. A polished, well-placed form gives your website a credible and organized appearance.
- Automate workflows and follow-ups. Integrated forms can trigger notifications, CRM entries, or emails, streamlining your communication process.
With these advantages in mind, let’s explore how to create your own form quickly using Elfsight’s solution.
How to Quickly Create a Website Form
Now that you know why a form is essential for your website, let’s see how you can create one using Elfsight’s Form Creator. The setup process is intuitive and doesn’t require any technical skills — you can build and publish your form in just a few minutes.
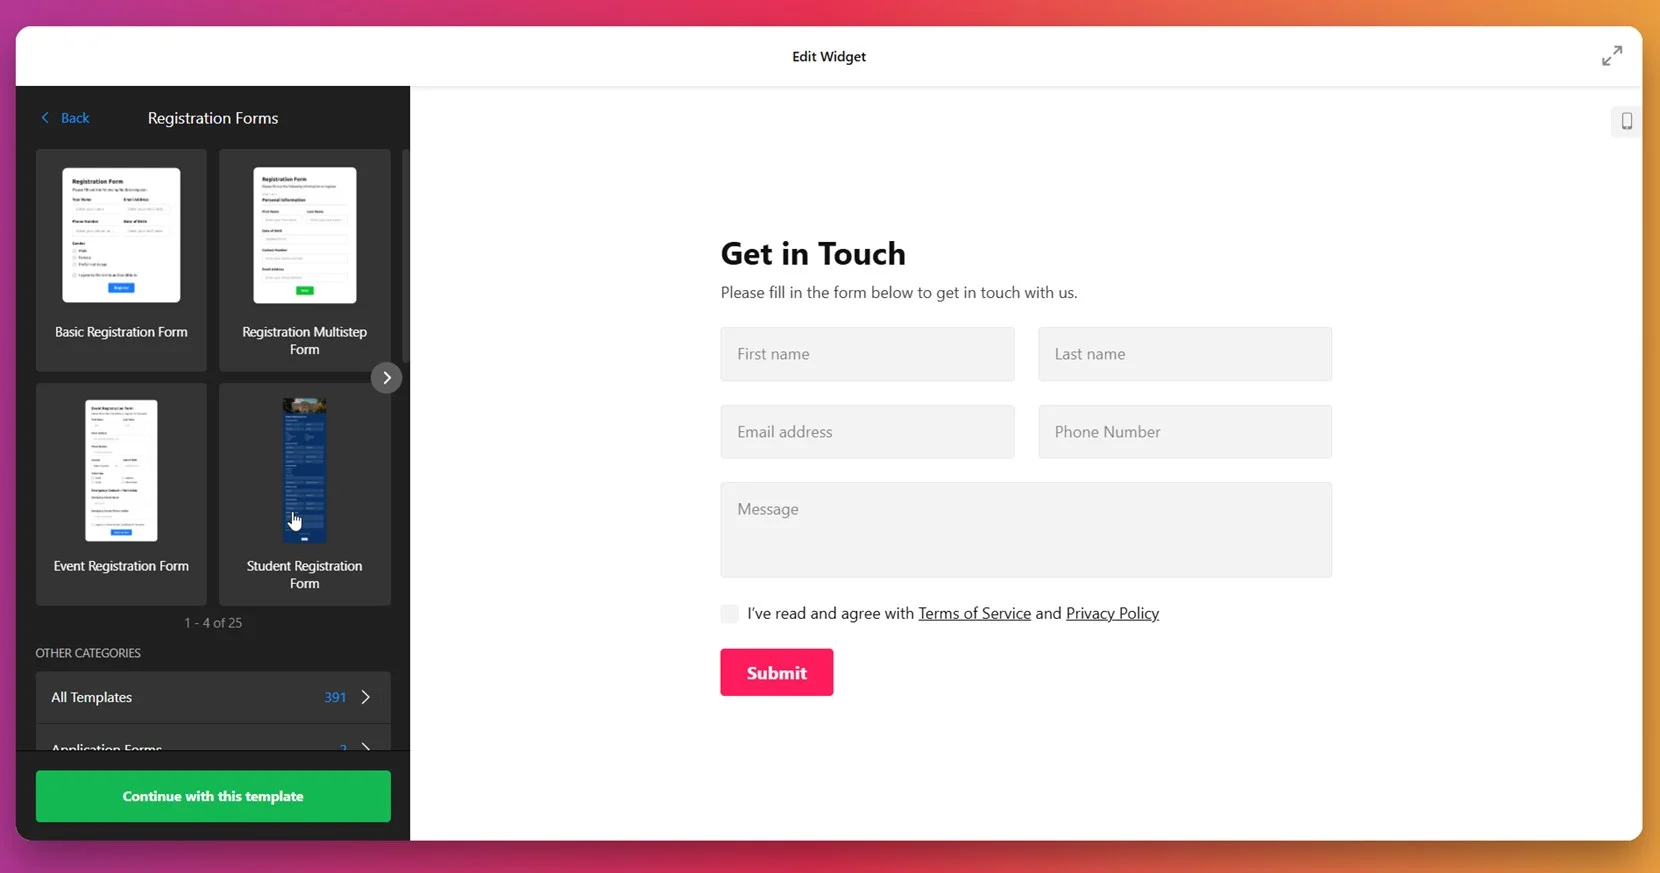
- Open the Elfsight editor and choose a template that fits your form’s purpose.
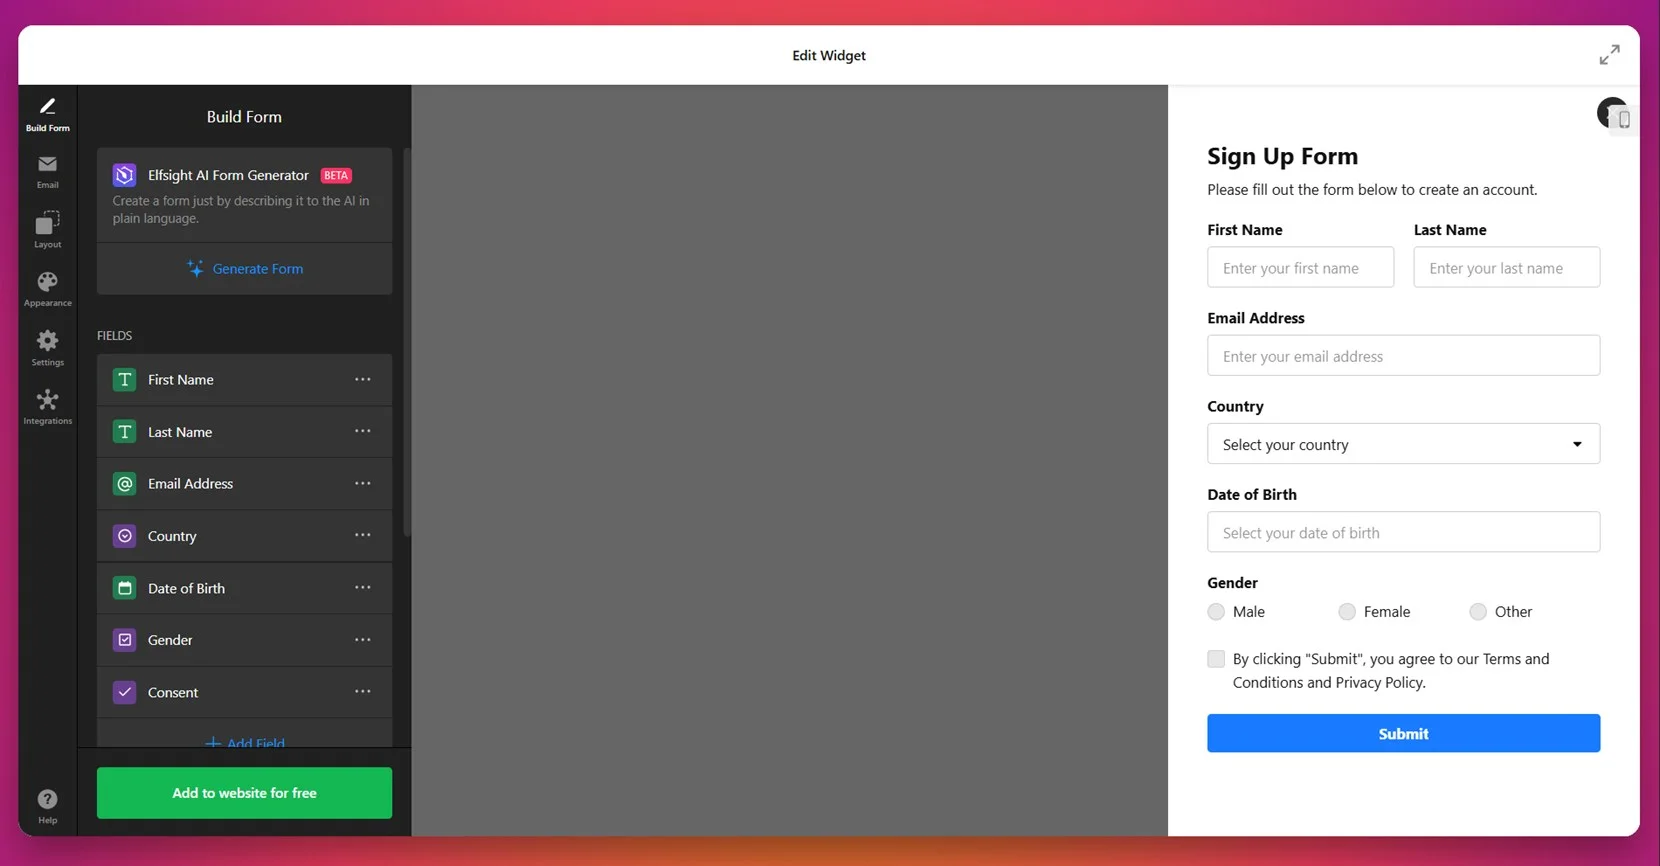
- Use the drag-and-drop builder to add fields, edit labels, and arrange them in your preferred layout.
- Customize the design: select colors, fonts, button styles, match your website branding.
- Click “Add to website for free“, copy the embed code, and paste it into your website’s backend.
This simple process allows anyone to create a fully functional, interactive online form without touching a single line of code. Whether you’re collecting feedback, generating leads, or handling support inquiries, Elfsight makes it effortless.
Build your own custom form right now — in just a few clicks!
Features of Elfsight’s Form Builder
Once you’ve seen how easy it is to create a form, it’s time to explore the key features that make Elfsight’s Web Form Widget stand out. This solution is packed with tools that let you customize every detail and make the form fit your website perfectly.
Here’s what you get when using Elfsight to create a custom form for your website:
- Drag-and-drop editor. Easily arrange fields, buttons, and sections in any order with a fully visual interface — no code required.
- Multiple form types supported. Choose from contact forms, surveys, feedback forms, registration forms, and more to match your specific needs.
- Custom design settings. Adjust colors, fonts, borders, and backgrounds to match your website’s branding and style.
- Seamless integrations. Connect your form with email platforms, CRMs, and other services to automate your workflow.
- Instant notifications. Get email alerts when someone submits a form so you can follow up without delay.
- Mobile-friendly layouts. Every form is fully responsive and looks great on smartphones, tablets, and desktops.
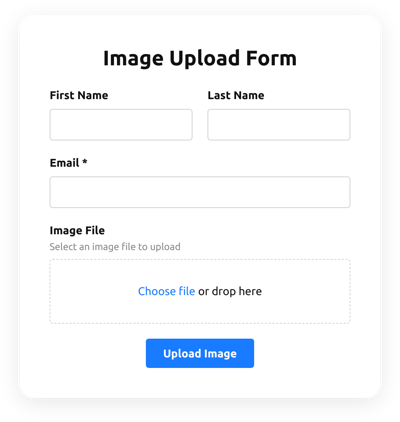
- Flexible field options. Use dropdowns, checkboxes, file uploads, calendars, ratings, and more to collect exactly the data you need.
These features allow you to build professional, high-converting forms tailored to your goals. Now let’s walk through the complete setup and installation process step by step.
Step-by-Step Guide to Web Form Creation
Once you’re familiar with the benefits and features of Elfsight’s widget, it’s time to build and launch your form. Below is a full walkthrough that covers every step — from selecting a template to embedding the final form on your website.
- Pick a suitable form template. Open the Form Builder and choose from ready-made templates. Click “Continue with this template” to proceed.

- Add and configure your form fields. Use the “Build Form” section to drag in the necessary fields such as name, email, country, and gender. You can rename, rearrange, or delete any item from the list as needed.

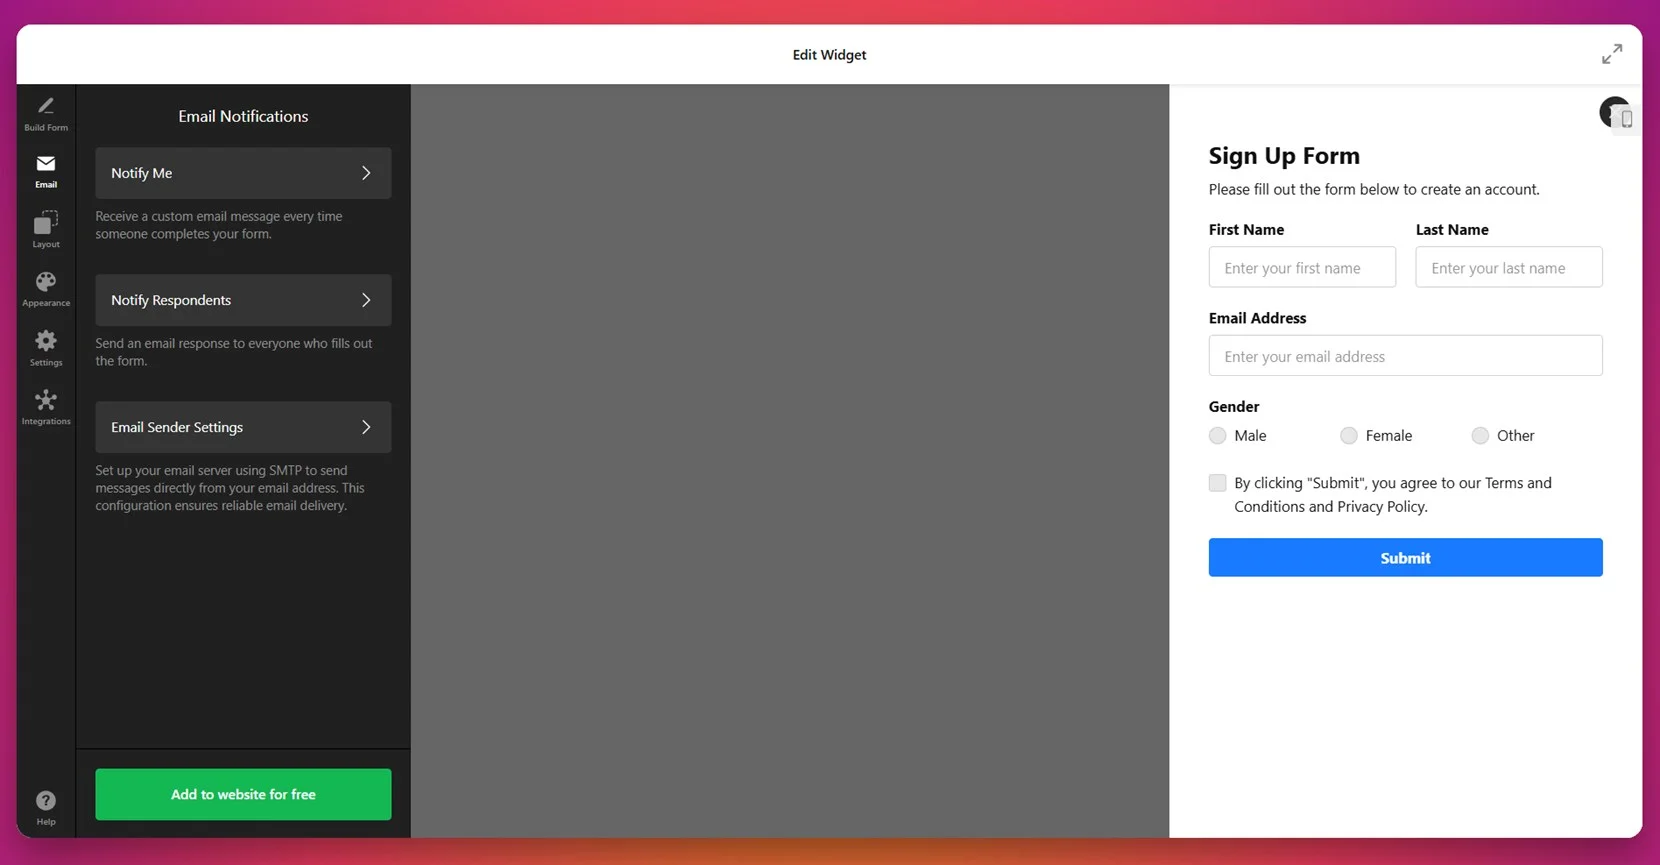
- Set up notifications. Navigate to the “Email” tab to define who gets notified when someone submits a form. You can notify yourself, the respondent, or both, and even set up an SMTP sender.

- Adjust layout and structure. Go to the “Layout” section to choose between vertical, horizontal, or multistep forms. You can also tweak the form width and define how elements align visually on the page.

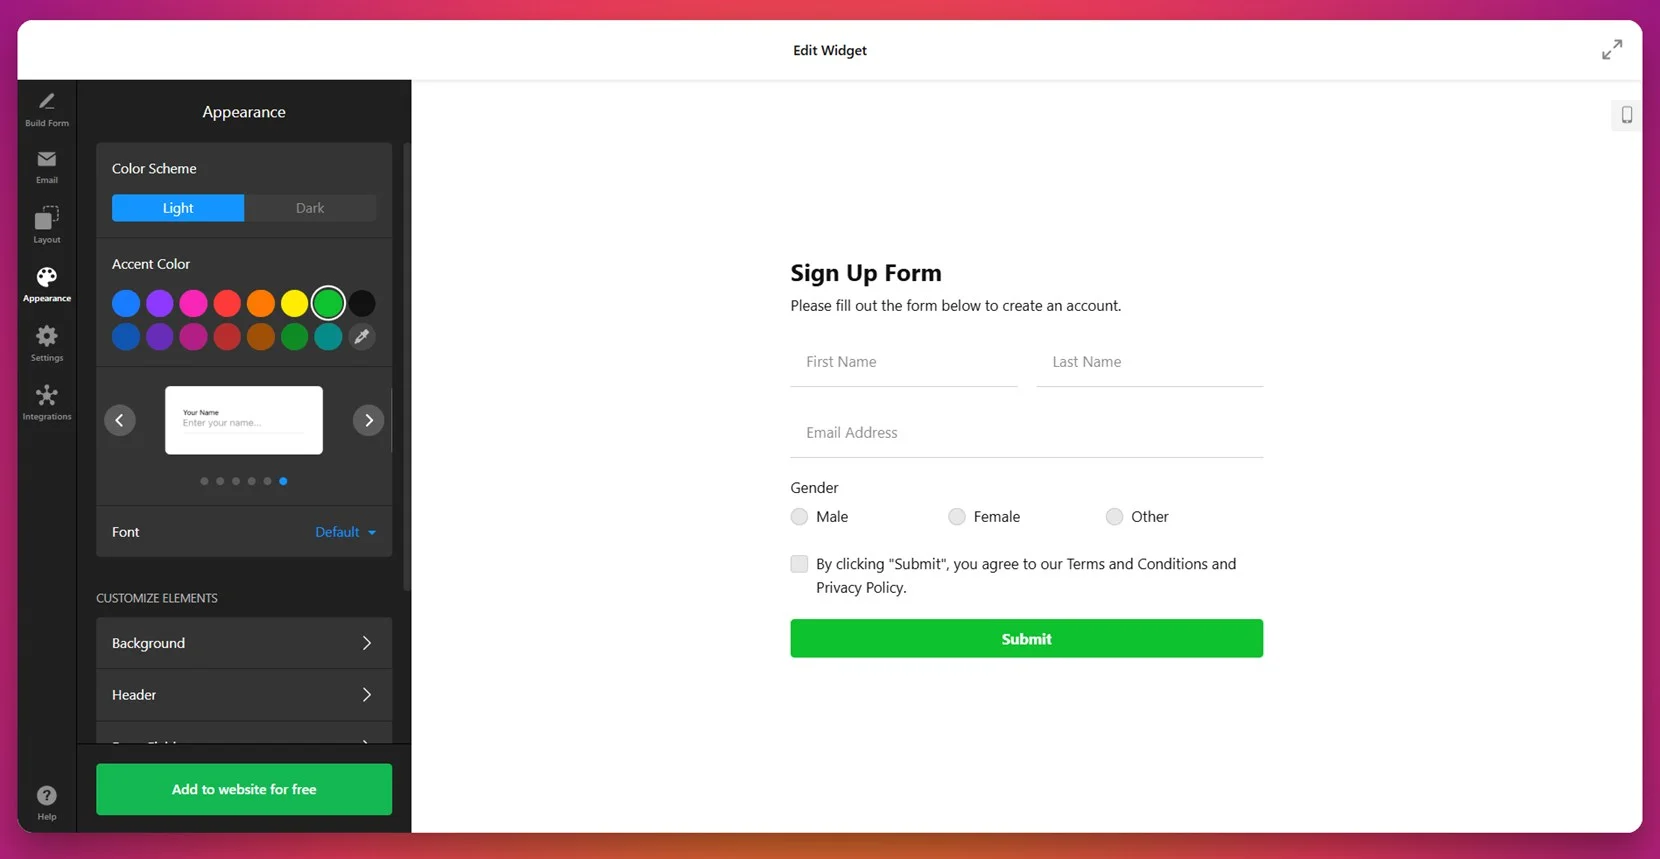
- Customize the appearance. In the “Appearance” tab, select a light or dark color scheme, choose an accent color, font style, and refine background, headers, and button designs for a seamless look.

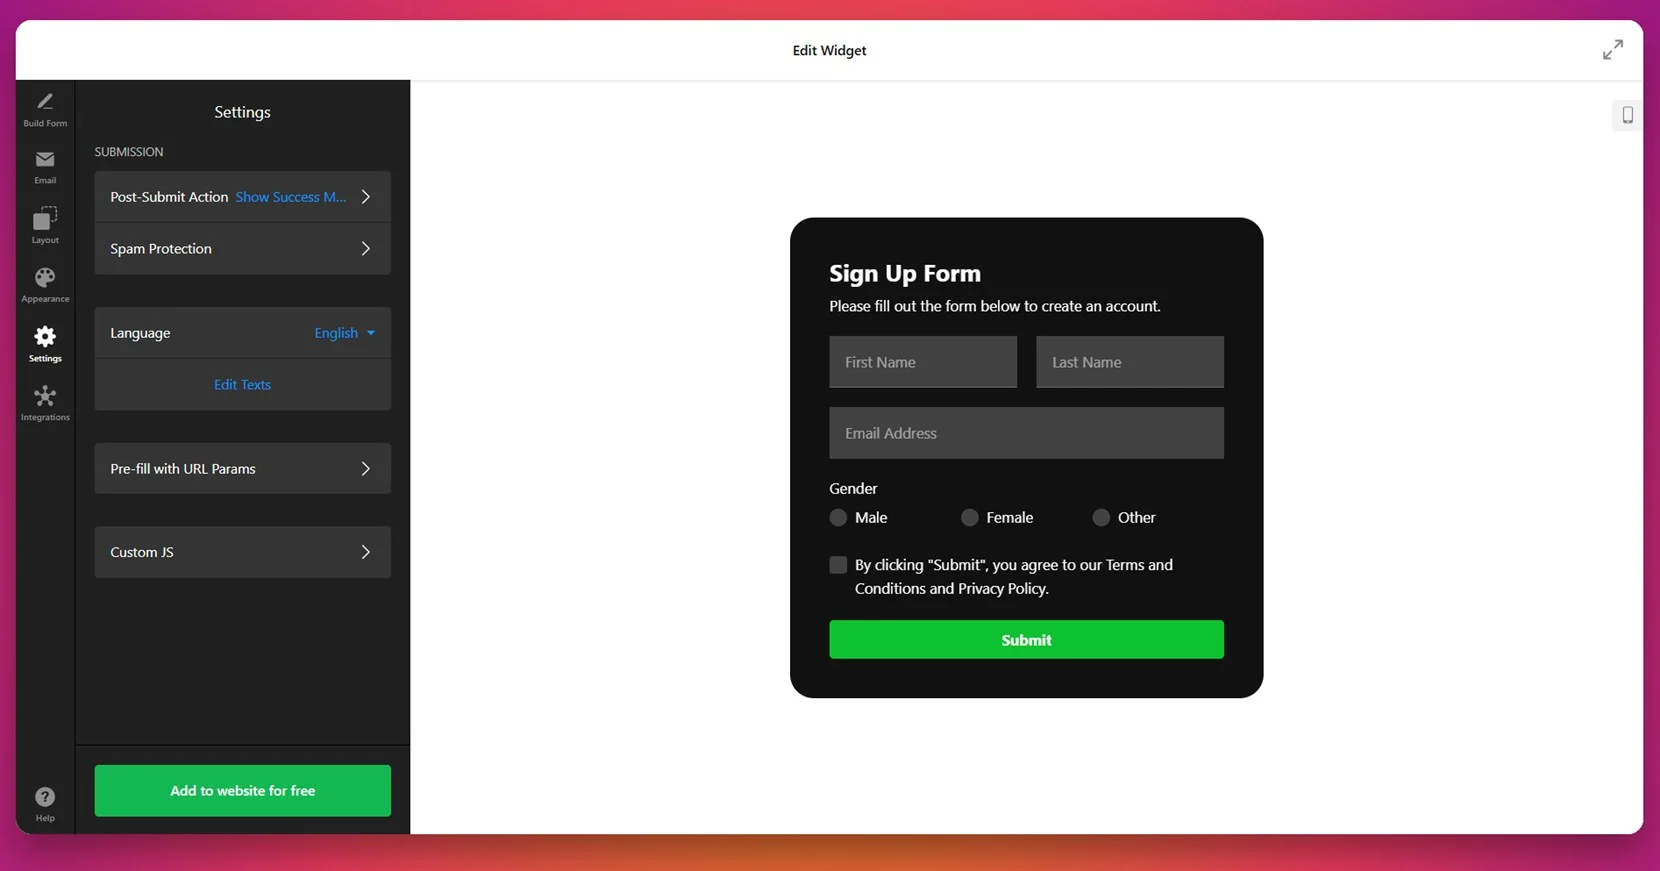
- Configure form behavior and language. Under “Settings”, define post-submit actions, enable spam protection, and set your language preferences. You can also use pre-fill parameters and custom JS if needed.

- Connect integrations. In the “Integrations” tab, sync your form with external services like Mailchimp, Google Sheets, or Zapier for real-time data transfer and automation.

- Embed the form into your website. Once everything is ready, click “Add to website for free”, copy the embed code, and paste it into your website builder.


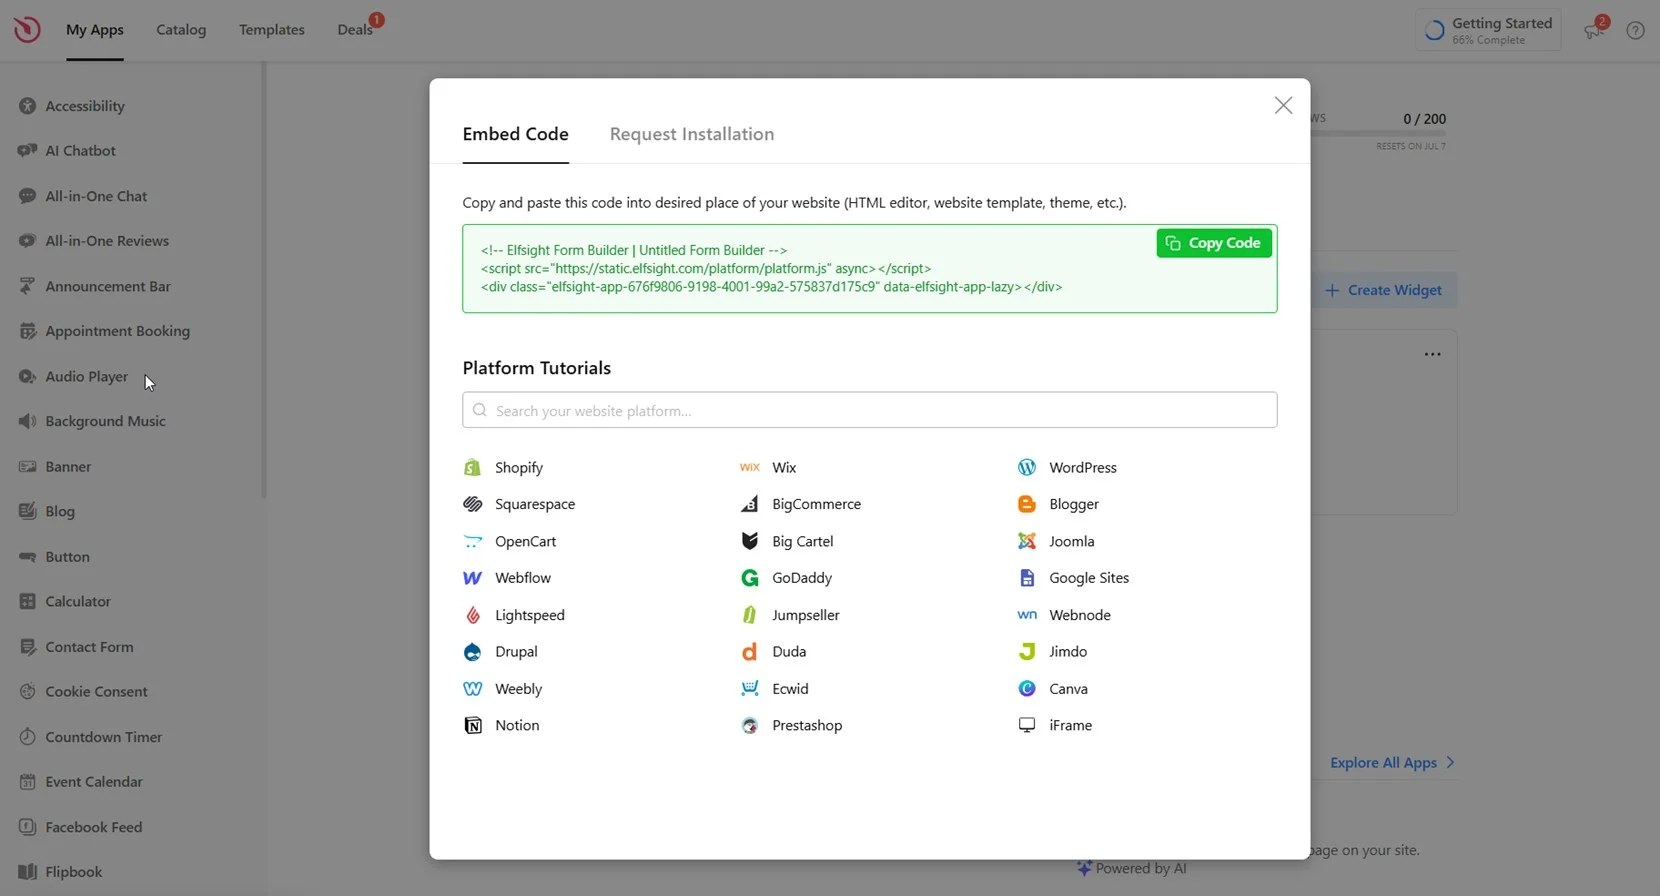
Elfsight forms can be embedded on almost any popular platform — WordPress, Shopify, Wix, Squarespace, Webflow, custom HTML websites, and more. The widget generates a universal code that works seamlessly with most content management systems and builders.
Now that you know how to install the widget, let’s look at other ways to create and manage online forms for your website.
Other Ways to Make Forms for Website
Aside from using Elfsight, there are two widely supported methods that allow you to create and embed forms on virtually any website. These approaches include manually coding a basic HTML form and creating a form that connects to your own API or server-side script. They are flexible, platform-agnostic, and fully under your control if you’re comfortable working with code.
Method 1: Embed a Manual HTML Form
This method involves writing a basic HTML form and placing it directly into your website’s code. It doesn’t require a backend server and sends user responses through the browser’s mail client. It’s ideal for small-scale or temporary form needs.
- Open your website builder or source code editor. Access the admin interface or HTML source of the page where you want the form to appear. Most platforms like WordPress, Wix, Webflow, or Squarespace allow you to insert custom HTML using an “Embed” or “Code” block. If you’re using a static website, open the relevant HTML file using a code editor such as VS Code or Sublime Text.
- Paste the HTML code into the page. For example, to create a basic “General Inquiry” form where users can enter their name, email, and a message, use the following HTML snippet:
<form action="mailto:you@example.com" method="post" enctype="text/plain">
  <label>Full Name:</label> <input type="text" name="name" required><br>
  <label>Email Address:</label> <input type="email" name="email" required><br>
  <label>Your Message:</label><br>
  <textarea name="message" rows="5" cols="40" placeholder="Type your message here..." required></textarea><br>
  <input type="submit" value="Send">
</form> - Save and publish the page. Once the HTML is added, save the changes and publish or update the page so the form becomes publicly available on your website.
- Test your form. Visit the published page, fill out the form, and click the “Send” button. Your device’s default email client should open automatically with a prefilled draft email directed to your inbox. Make sure the submitted data appears correctly and that you receive the message.
This method doesn’t require a database or server but is limited in customization and reliability. It’s most suited for minimal setups or testing purposes.
Method 2: Create a Form with a Custom API
This method involves using a server-side script to handle form submissions securely. It gives you full control over data processing, validation, email delivery, and storage. It’s ideal for developers or anyone managing a backend system.
- Write a server-side script to handle submissions. You can use PHP, Node.js, Python, or another language. Below is a basic PHP script example:
<?php
if ($_SERVER["REQUEST_METHOD"] == "POST") {
  $name = htmlspecialchars($_POST['name']);
  $email = htmlspecialchars($_POST['email']);
  $message = htmlspecialchars($_POST['message']);
  $to = "you@example.com";
  $subject = "New Contact Form Submission";
  $headers = "From: $email";
  mail($to, $subject, $message, $headers);
}
?> - Upload the script to your web server. Use cPanel, FTP, or your hosting dashboard to upload the script (e.g., form-handler.php) to a public directory such as /public_html or /htdocs.
- Create the HTML form that connects to your script. Here’s an example of the form code:
<form action="https://yourdomain.com/form-handler.php" method="post">
Name: <input type="text" name="name" required><br>
Email: <input type="email" name="email" required><br>
Message:<br><textarea name="message" required></textarea><br>
<input type="submit" value="Send Message">
</form> - Embed this HTML into your website. Place the form snippet into a custom HTML section within your page editor.
- Test the setup. Submit the form and confirm the message is received at your target email address.
This solution offers full backend control and the ability to customize your form logic, spam protection, and delivery channels. It works with any CMS, hosting provider, or custom stack.
Compare All Form Installation Methods
Below is a comparison of all major options you can use to embed a form on your website. While each has its use case, Elfsight stands out by offering an all-in-one approach with no coding required.
| Method | Pros | Cons |
|---|---|---|
| Elfsight Form Builder | Cross-platform, user-friendly editor with powerful styling and integrations. | Requires embedding a code snippet into your website backend. |
| Manual HTML Form | Quick to implement with no backend or server setup needed. | Very limited functionality and depends on user email clients to send messages. |
| Custom API Form | Full control over processing, integrations, and backend logic. | Requires developer knowledge and server-side scripting for proper setup. |
While both alternatives give you control over form behavior, they also require more setup time and technical skill. Elfsight delivers the same results faster — with fewer limitations and no coding headaches. In the next section, we’ll explore how to customize your widget design to make it look exactly the way you want.
Tips for Customizing Your Website Form
This section covers essential tips for adjusting the layout, design, and behavior of your form to match your website’s style and meet your goals. Whether you’re building a feedback form, lead capture form, or a simple contact form, thoughtful customization makes it more effective and user-friendly.
- Use only relevant fields to avoid user fatigue. Keep your form concise by including only necessary input fields — this improves completion rates and makes the form feel faster to fill out.
- Apply consistent branding. Match the form’s font style, color palette, and button shapes with your website design for a cohesive user experience. Use brand colors for the submit button to draw attention.
- Optimize for mobile interaction. Ensure your form layout is fully responsive. Use vertical stacking for input fields, large tap targets for mobile, and test on multiple screen sizes.
- Label fields clearly and use placeholders wisely. Labels should always be visible outside input fields to avoid confusion. Use placeholders for examples or short prompts only — not as a substitute for labels.
- Enable real-time validation. Show users which fields need correction before submission using inline error messages or colored borders. This improves form usability and reduces frustration.
- Consider conditional logic for a cleaner experience. Use conditional fields to display extra inputs only when needed — for example, showing “Company Name” only if the user selects “Business Inquiry”.
- Design an engaging submit button. Use action-oriented text like “Send Message” or “Join Now” instead of generic labels like “Submit.” This encourages completion and clarifies what happens next.
- Include a clear success message or redirect. After submission, guide users with a thank-you message or redirect them to a confirmation page. Avoid silent refreshes that leave users unsure if their form worked.
- Protect your form from spam. Add CAPTCHA, invisible honeypots, or email verification to block bot submissions while keeping the experience smooth for real users.
Once your form is styled and functional, the next step is choosing the right type for your use case. Let’s look at the most common form types you can create.
Form Types You Can Build with Elfsight
This section showcases real examples of online form widgets that users can build using Elfsight’s pre-designed templates. These form categories serve different business goals — such as applications, multistep processes, or interactive quizzes — and can be easily adapted to fit a wide range of industries and website types.
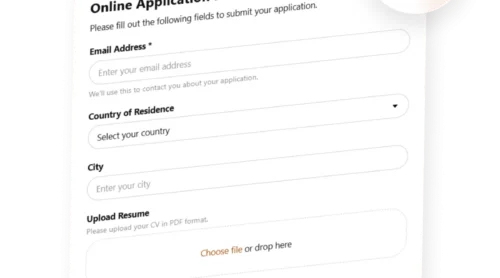
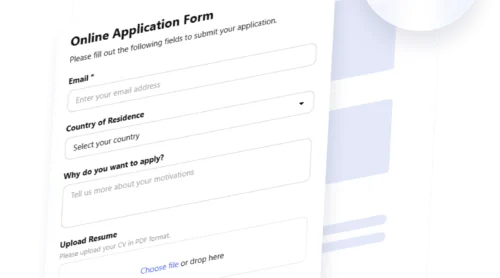
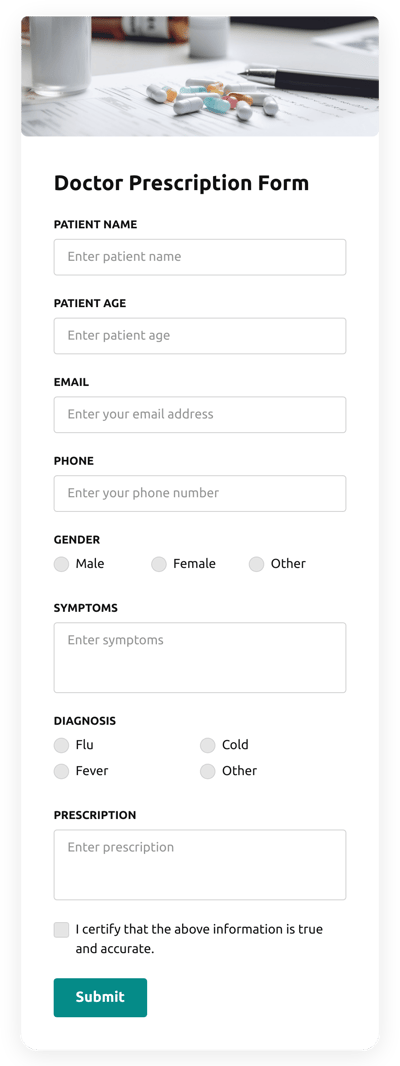
Application Forms 📝
Application forms are used to collect detailed submissions for a specific purpose. Elfsight offers a range of templates under this category, including the student application form, job application form, and rental application form. These widgets are structured to capture essential data like personal details, experience, availability, and supporting documents. Businesses and organizations benefit from these forms by automating intake, filtering qualified applicants, and storing submissions in a centralized place.
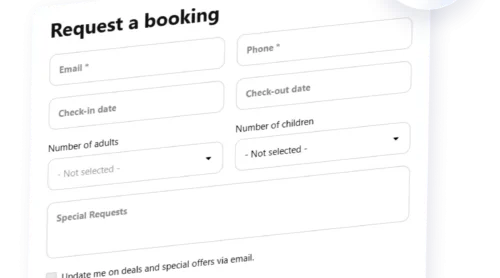
Multistep Forms 🧩
Multistep forms improve user experience by breaking long forms into smaller, digestible sections. This format is ideal for consultations, bookings, complex surveys, or any scenario where users need to provide information across different categories. Elfsight provides templates like the multistep registration form and conditional logic order form that support this layout. By using multiple screens, these forms reduce perceived length, minimize drop-offs, and guide users more clearly through the process — especially on mobile devices where scrolling long forms can be tedious.
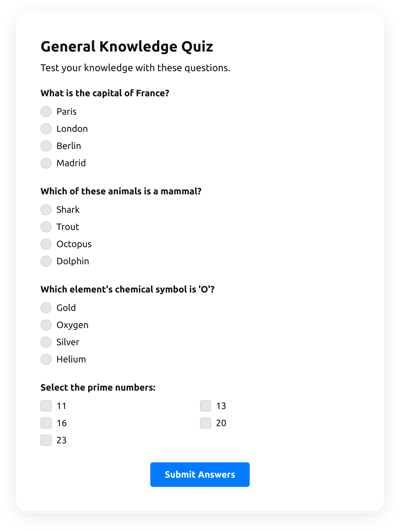
Quiz Forms ❓
Quiz forms combine functionality with engagement, making them perfect for interactive content like personality quizzes, product recommendations, or knowledge tests. These widgets work well on marketing pages, educational websites, or ecommerce platforms. Elfsight’s quiz templates allow you to create a sequence of multiple-choice questions with custom scoring, feedback, or redirect options based on results. These forms not only capture leads but also boost session duration and user interaction.
These form categories address a variety of goals — from collecting applications to boosting engagement. In the next section, we’ll walk through possible issues users may encounter when adding forms to their website and how to resolve them effectively.
See 300+ website form templates Elfsight offers — find your perfect fit!
Explore 300+ Form Builder templates


Common Issues and How to Fix Them
This section addresses frequent problems users may face when embedding or managing an online form on their website. From display errors to delivery failures, these are the most common technical or setup-related difficulties and how to resolve them.
Why is my form not showing up on the website?
Why isn’t the form submitting anything?
mailto:, ensure the visitor has a configured default email app. If you’re using a backend script, double-check that the server accepts POST requests and the script is hosted at the correct path.
Why does my form break on mobile devices?
How can I prevent spam form submissions?
What should I do if form emails aren't arriving?
mail() or SMTP credentials) are correctly configured. If you’re embedding a widget like Elfsight’s Form Generator, ensure notification settings are active and that the destination email address is valid and verified.
Why do I see raw code instead of the form on the page?
Understanding these common challenges helps ensure your form functions smoothly across all devices and platforms.
Final Thoughts
Creating a form for your website doesn’t have to be complex. Whether you’re building a simple contact form, a multi-step application, or an interactive quiz, you now have a clear path to follow. From manual HTML setups and custom APIs to Elfsight’s user-friendly form builder, the options suit every skill level and business need. With proper customization and form logic, you can ensure a smooth user experience that encourages submissions and captures the right data.
If you’re looking for a no-code way to create forms that are mobile-ready, customizable, and easy to integrate into any website, Elfsight provides an all-in-one solution. The web form widget allows you to build, style, and launch your form in minutes — without needing a developer. Whether you’re after efficiency, design control, or platform flexibility, Elfsight helps you get there faster.
Looking for More Help?
We hope this guide gave you everything you need to get started with building your own online forms. If you need additional support or ideas, don’t hesitate to reach out — our team is here to help you launch your perfect form. At Elfsight, we’re committed to making web integrations simple and accessible for everyone — no coding required.
You’re also invited to join our growing Community, where users share feedback, use cases, and feature ideas. Want to suggest a new feature or improvement? Drop your thoughts in our Wishlist — we’re always listening.