

If you manage a Weebly website, you probably want it to feel like something more than just a static set of pages. At Elfsight, we know that one of the easiest ways to add more life to your website is by bringing in your socials. Showing fresh posts and visuals makes visitors stick around longer while giving them a clear window into what your brand is up to.
The Instagram Feed Widget takes care of the hard part. It pulls your posts automatically, lets you adjust the look so it blends with your design, and saves you from messing with code. In this guide, we’ll walk through the process of adding Instagram
- A detailed walkthrough to embed Instagram feed on Weebly without coding
- Ways to adjust layout, colors, and post filters to match your website design
- Pros and cons of using a third-party widget vs native alternatives
- Troubleshooting advice and useful tips to help your widget run smoothly
How to add Instagram to Weebly quickly
Here’s your two-minute shortcut to adding Instagram posts to Weebly:
- Open Elfsight’s editor and pick a template.
- Customize your Instagram feed widget.
- Click “Add to website for free” and copy the code.
- Paste it into your Weebly website’s backend.
Create your own Instagram Feed widget in the free editor!
Features that make a difference
You’ve got a sense of how it works. Now let’s take a look at the features that make this widget stand out: from flexible layouts to auto-updates that keep your feed fresh without hitch.
| Key feature | Why it matters |
|---|---|
| Display content from accounts, hashtags, or locations | Show the exact Instagram posts you want, so your visitors always see the most relevant and inspiring content. |
| 50+ customization options with grid, slider, and gallery layouts | Easily match your Instagram feed to your website’s style for a seamless and professional appearance. |
| Shoppable feeds with unlimited call-to-action buttons | Turn every post into an opportunity by linking images directly to your product or service pages. |
| Automatic real-time content updates | Keep your website fresh with the latest Instagram posts, with no manual updates needed. |
| Interactive pop-ups, follow and share icons | Boost visitor engagement with features that invite users to explore, follow, and share right from your website. |
These are just a few useful features of the Instagram Feed Widget that will help you showcase your brand’s latest posts and guide visitors to take action. For the full list, check out the Features Page. With primary features covered, it’s high time we walk through each integration step.
Embed an Instagram Feed on Weebly step by step
This section breaks down every step for creating, customizing, and embedding your Instagram feed on a Weebly website, including some practical tips for better use.
1. Choose a template
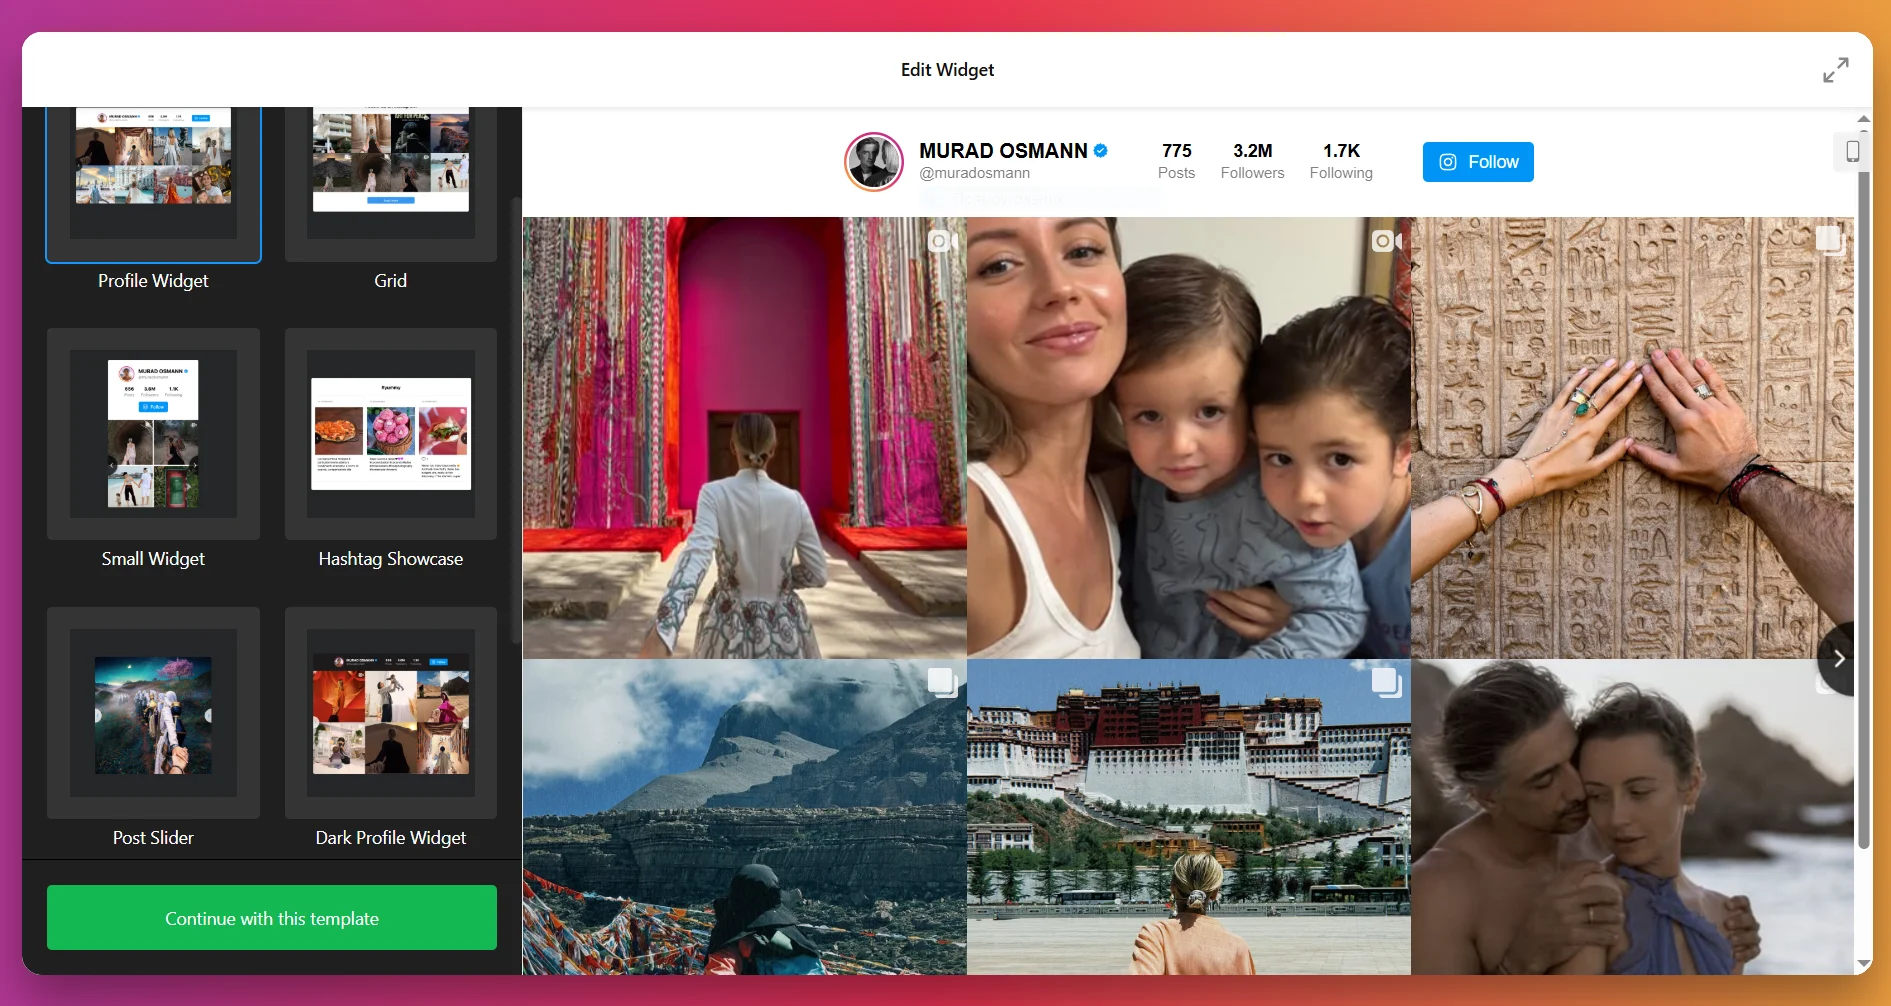
When you open the widget editor, the first thing you’ll do is pick a template. Each template sets the starting look of your Instagram Feed – whether it’s a clean gallery grid, a sleek slider, or a bold highlight style.
Click “Continue with this template” once you find one that feels right.
2. Add the content source
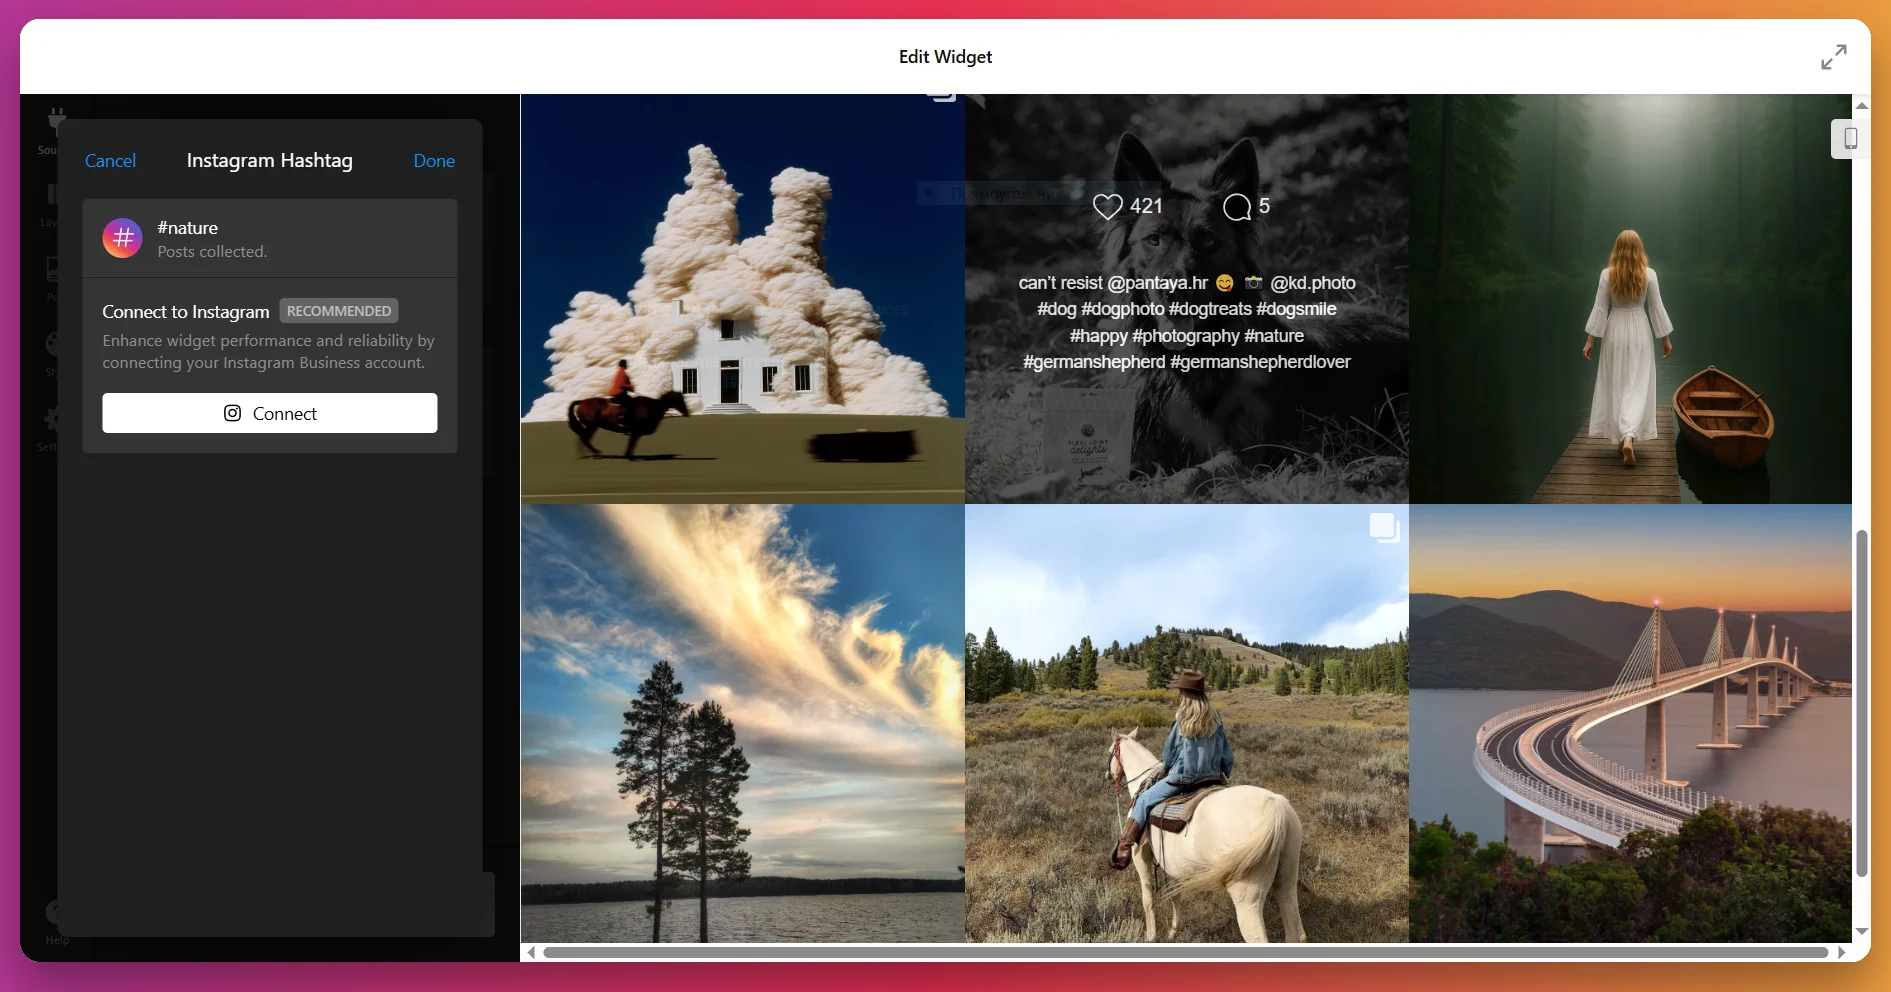
The next step is to tell the widget where to pull content from. Click “Add Source” and connect your Instagram account or set up a hashtag feed. You can add multiple accounts and hashtags at once to combine different types of content into one feed. Filters let you control what shows up, so you can hide posts with certain keywords or limit content by media type.
3. Configure the layout
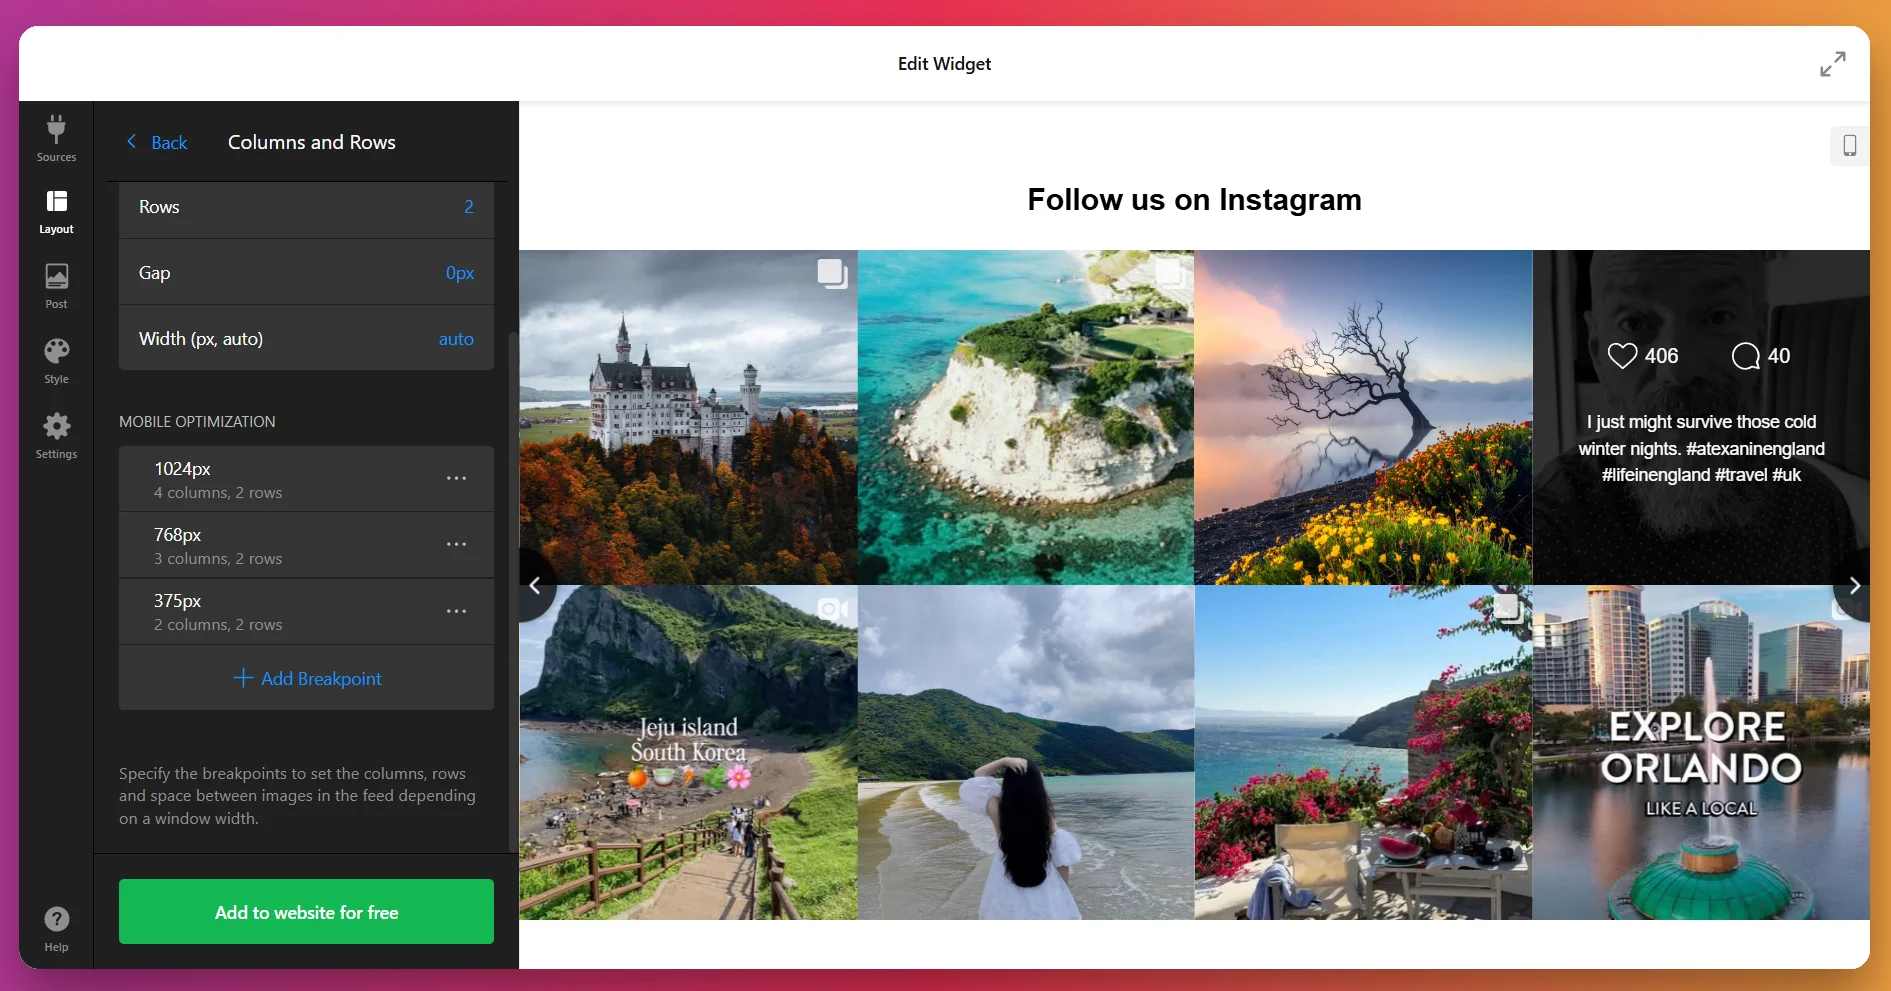
At this stage, you decide how your posts will be arranged in the feed. The Layout tab gives you several options:
- Grid: Posts appear in neat rows and columns.
- Slider: A carousel with navigation (arrows, swipe, or dots) and optional autoplay.
- Masonry: A Pinterest-style grid where posts adapt to their image size.
- Highlight: One post takes center stage, with others placed around it.
You can also adjust the number of rows and columns, set mobile vs. desktop layouts, and add a custom feed title if you’d like.
4. Customize post display
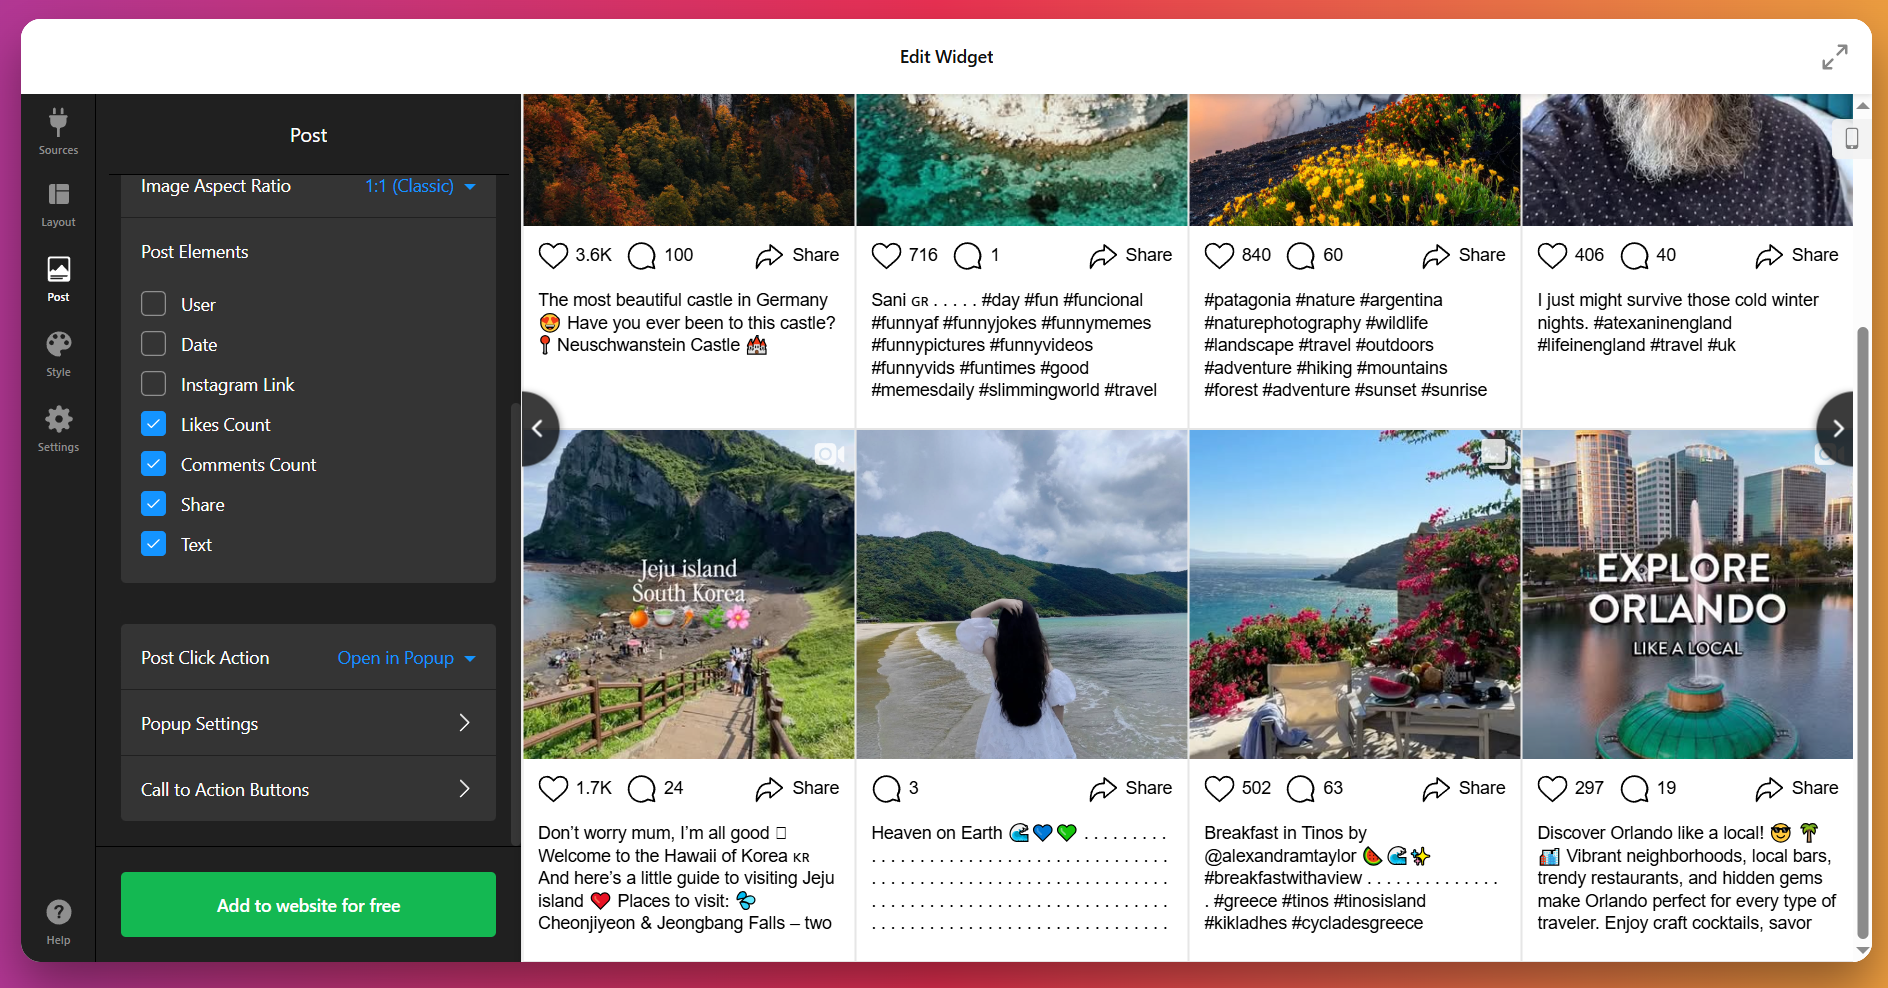
In the Post tab, you control how individual posts look. You can set the aspect ratio, decide whether to show details such as usernames and likes, and choose what happens when someone clicks a post – open in a popup, link to Instagram, or stay static.
You can also decide whether more posts should load automatically as users scroll, or only when they click “Load More.”
5. Adjust the style
This is where you make the feed look like part of your website. Under the Style tab, you can select a preset color scheme (light, dark, or custom), tweak button shapes and hover effects, adjust padding and spacing, and style the popup viewer.
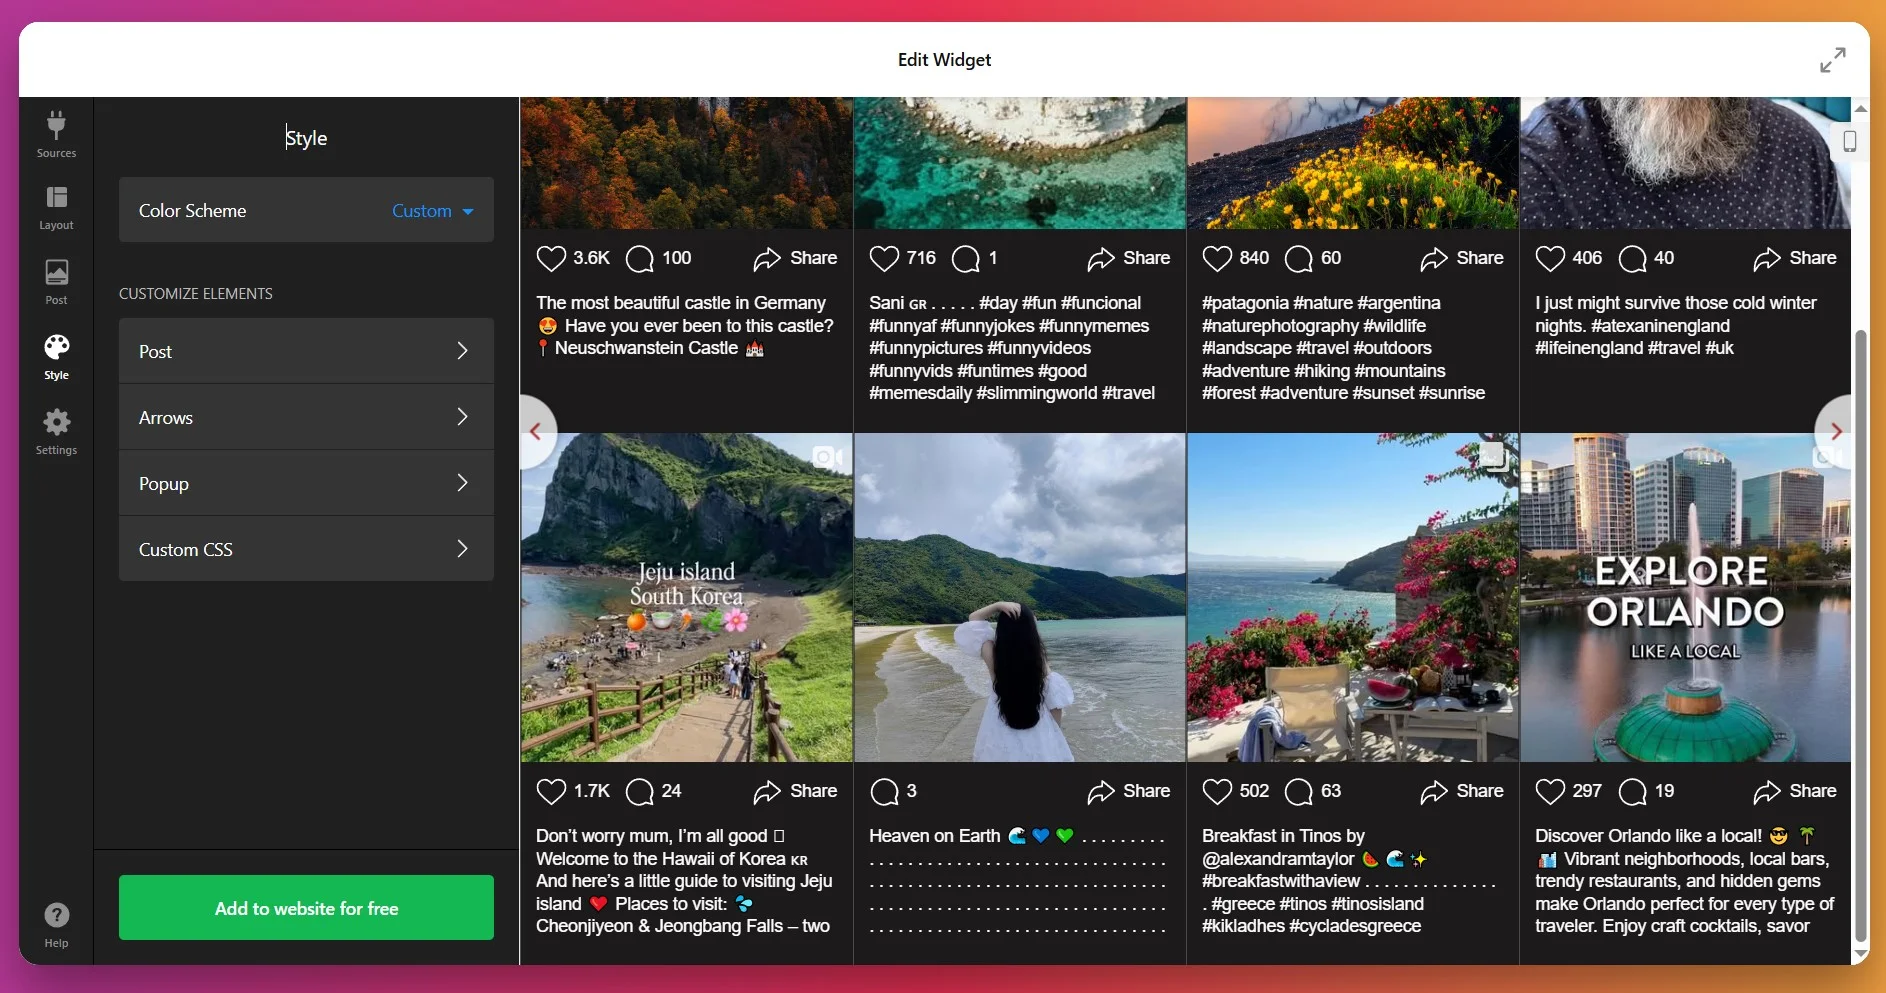
For full control, use the Custom CSS option – it’s perfect if you need to follow strict brand guidelines or want to make advanced design tweaks.
6. Configure the settings
The Settings tab is where you finalize details. Choose your widget’s language and enable lazy loading for faster performance.
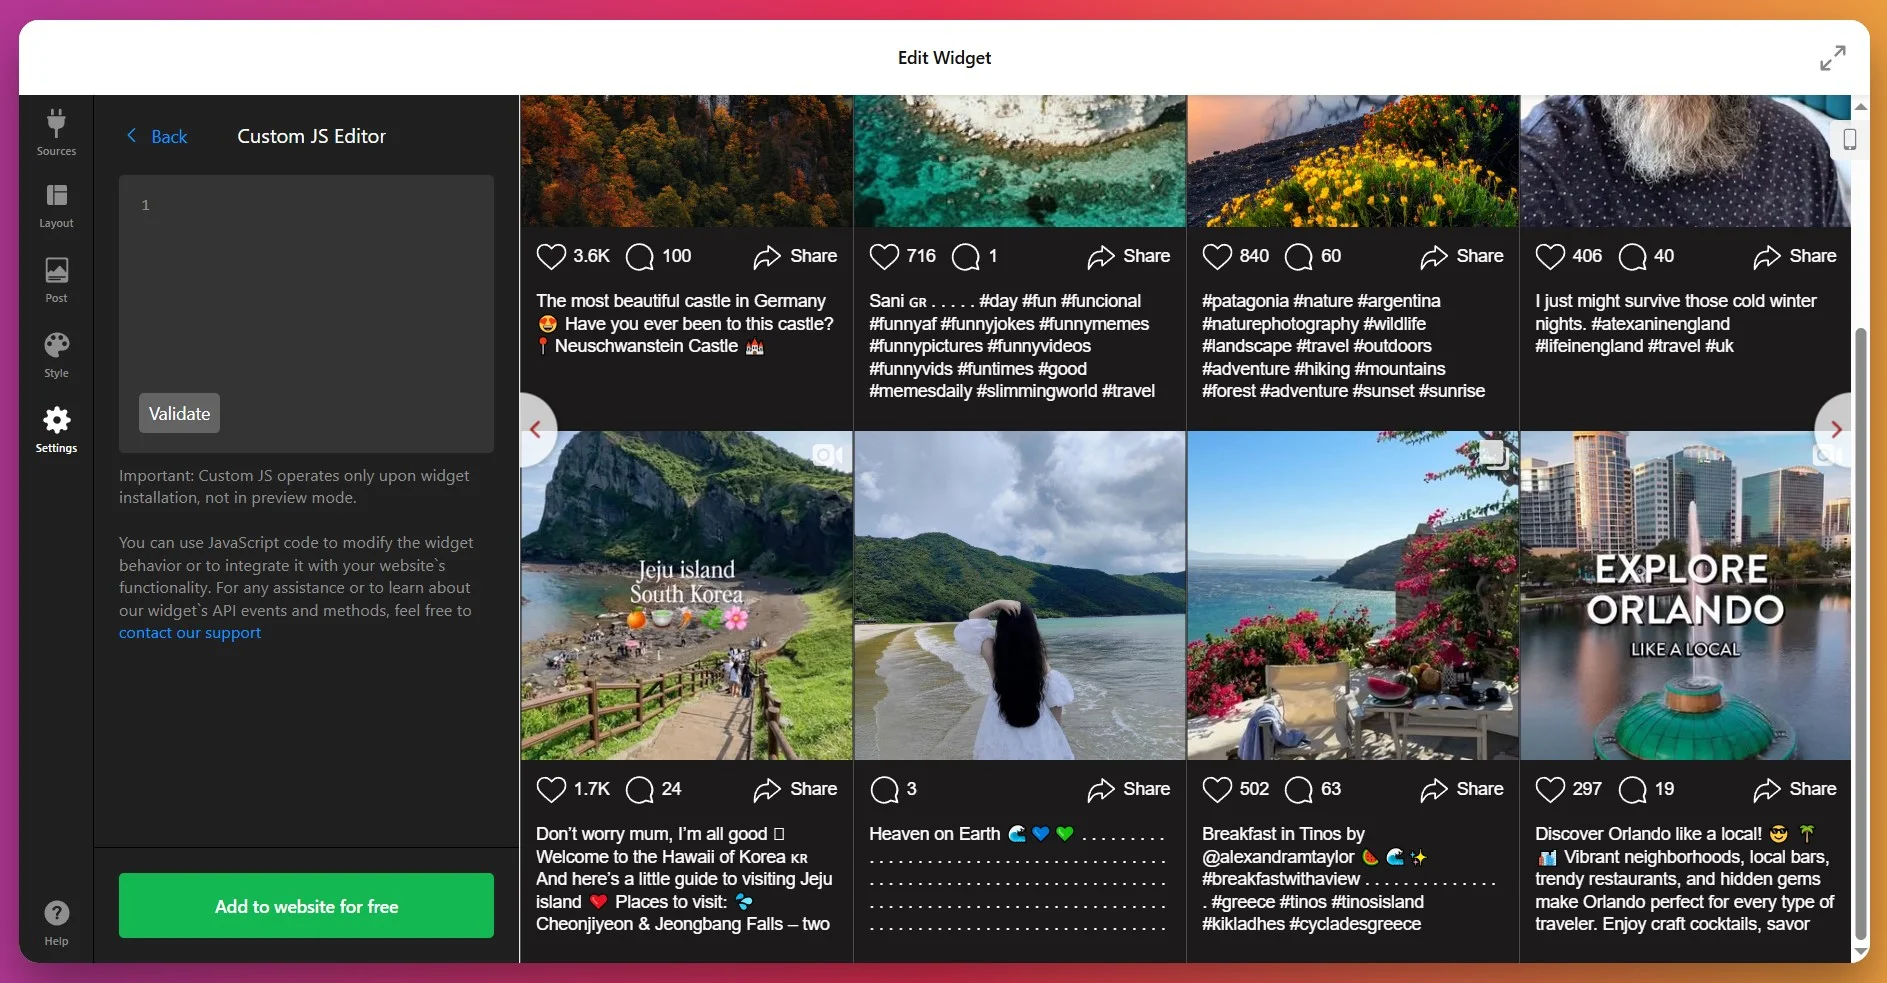
If you need advanced behavior for your widget, you can always add custom JS or CSS.
7. Get the installation code
When you’re satisfied with the results, click “Add to website for free.” This generates your personal installation code.
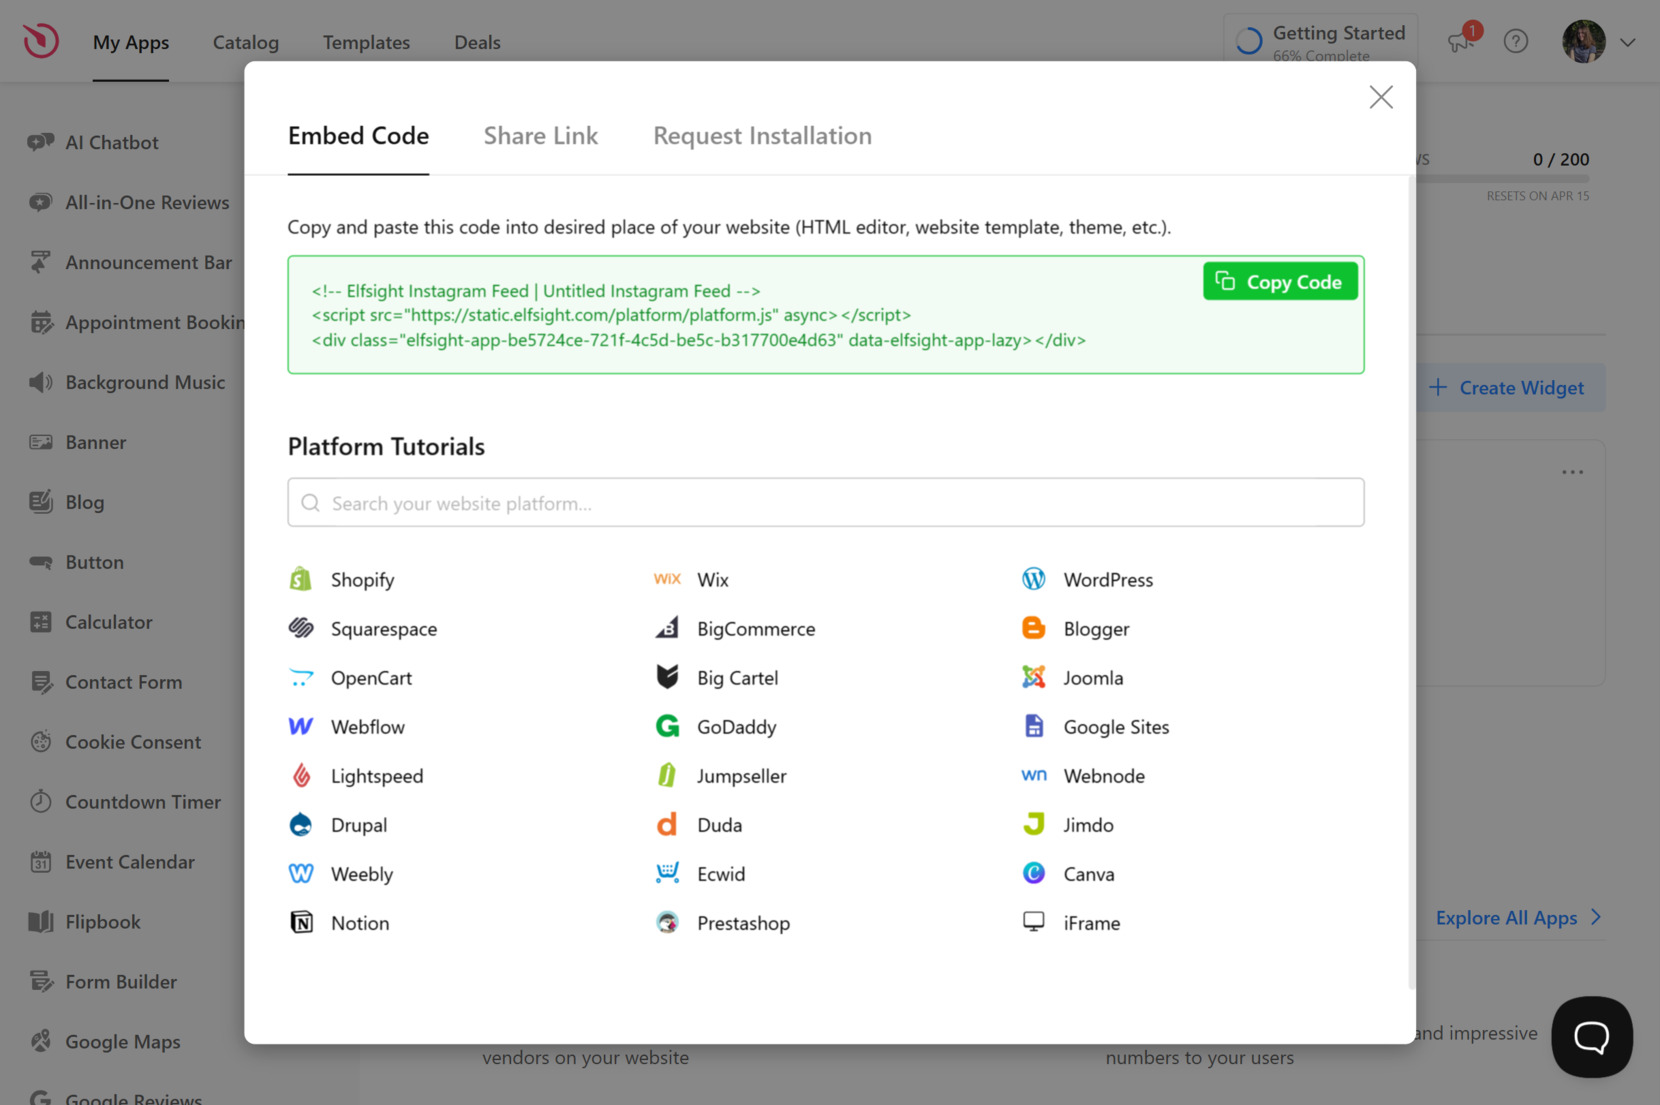
Click “Copy Code” to save your snippet – you’ll need it to embed the widget on your website.
8. Embed the widget on Weebly
At this stage, you actually place the Feed on your website. Here are the four available embedding options:
Option 1: Static widget on a specific page
- Log in to your Weebly account → select your website → click Edit site.
- Drag the Embed Code element (left-hand menu) to the chosen widget spot.
- Click Edit Custom HTML → paste your Elfsight code.
- Click Publish in the top-right corner to make the widget visible on your website.
Option 2: Static widget on all pages
- Go to the Weebly dashboard → click Edit site.
- Open the Theme tab in the top bar → choose Edit HTML / CSS (left-hand menu).
- In a list of files and folders, look for
header.htmland, if available:no-header.html
Paste your Elfsight snippet right after the closing tag (or another spot if needed). - Save changes, then publish your website.
Option 3: Floating widget on a specific page
- Log in to Weebly → click Edit site.
- Drag and drop the Elfsight snippet into the desired spot for your floating widget.
- Click Edit Custom HTML, paste your Elfsight embed code.
- Publish the website to apply changes.
Option 4: Floating widget on all pages
- Log in → click Edit site.
- Go to Theme → choose Edit HTML / CSS.
- Among files, pick and open
header.html(or equivalent) andno-header.html - Paste your Elfsight code just before the closing tag.
- Save your edits → publish to see the floating widget live across all pages.
The best part is that you can adjust the widget at any time in the editor, and changes will be reflected automatically on your Weebly website without needing to re-embed the code.
Native Embedding Methods for Weebly
There are a few reliable native methods of adding Instagram content to your Weebly website, though each comes with some notable trade-offs.
Embed individual posts
You can add a single Instagram post or video directly by using Instagram’s official embed feature.
- Open the Instagram post. Find the Instagram post you want to add and click the three dots.
- Copy the embed code. Select “Embed” and copy the provided HTML code.
- Edit your Weebly page. Open the Weebly editor and go to the page you want to update.
- Add an embed block. Drag the Embed Code element to the chosen spot.
- Paste and save. Paste the Instagram embed code into the field, then publish your changes.
You can find Instagram’s official instructions for embedding posts on its Help Center page.
Weebly’s native Instagram Feed App
Weebly’s own Instagram Feed integration allows you to display your account’s latest posts.
- Go to the Weebly App Center. Open the App Center from your dashboard.
- Search for the Instagram Feed app. Find Weebly’s official Instagram integration.
- Install the app. Add it to your website.
- Connect your account. Log in with your Instagram credentials when prompted.
- Place the feed. Drag the Instagram Feed element to the preferred section on the page.
More details are available on the Weebly App Center page.
Instagram API via Custom HTML
If you’re comfortable with code, you can integrate Instagram content using the official Instagram Graph API.
- Register as a Facebook developer. Set up your Facebook App and get the correct API permissions.
- Generate an access token. Authenticate and obtain a valid token for your Instagram account.
- Write or use JavaScript code. Create a script to fetch and display posts using the API.
- Add code to Weebly. Insert the script via an Embed Code block in your Weebly editor.
- Publish and test. Check that the feed loads and updates as expected.
If you want to explore further, Meta provides detailed documentation on the Instagram Graph API page.
How do these methods compare?
| Method | Major pro | Major con |
|---|---|---|
| Elfsight | User-friendly, customizable, combines multiple sources | Use of a third-party widget. |
| Instagram Embed Code | Official, very easy for one post | Only one post at a time, no feed or automatic updates. |
| Weebly’s Native Instagram App | Simple for showing your own posts | Only supports one account, no hashtag or mention integration, and very limited customization. |
| Instagram API via Custom HTML | Highly flexible if coded from scratch | Requires developer skills, frequent updates, and manual troubleshooting for API changes. |
It really comes down to control versus upkeep. The native app and embed code are quick but capped — one account or one post. The API lifts every limit but adds developer effort and maintenance overhead. A dedicated widget lands in between: a customizable, auto-updating feed with no code to babysit. Pick based on how hands-on you want to be.
Checklist of best practices
From the Elfsight team’s experience, we’ve learned what really makes the Instagram Feed widget perform well for our users. Here are our go-to tips for setting it up in the best way possible:
- Decide what to show first. A feed can pull posts from accounts, hashtags, or locations. Pick the one that matches your goals: hashtags work well for community content, while a single account highlights your brand story.
- Keep it lightweight. Too many posts at once can slow down the page. Start with 6–9 posts in a grid, then let visitors load more if they want.
- Place it where it matters. On homepages, it builds trust at a glance. On product pages, it shows real-life use. On blogs, it adds a personal touch. One size doesn’t fit all.
- Use captions wisely. Long captions can overwhelm the design. Show just the first few lines, and let users click through if they want the full story.
- Check mobile first. Many visitors will only ever see your feed on a phone. Test layouts like slider or compact grid to make sure posts don’t get cut off.
- Link posts where it counts. If you use shoppable feeds, link to products or booking pages, not just your Instagram. It makes the widget part of your sales funnel.
Salon business using the Instagram Feed
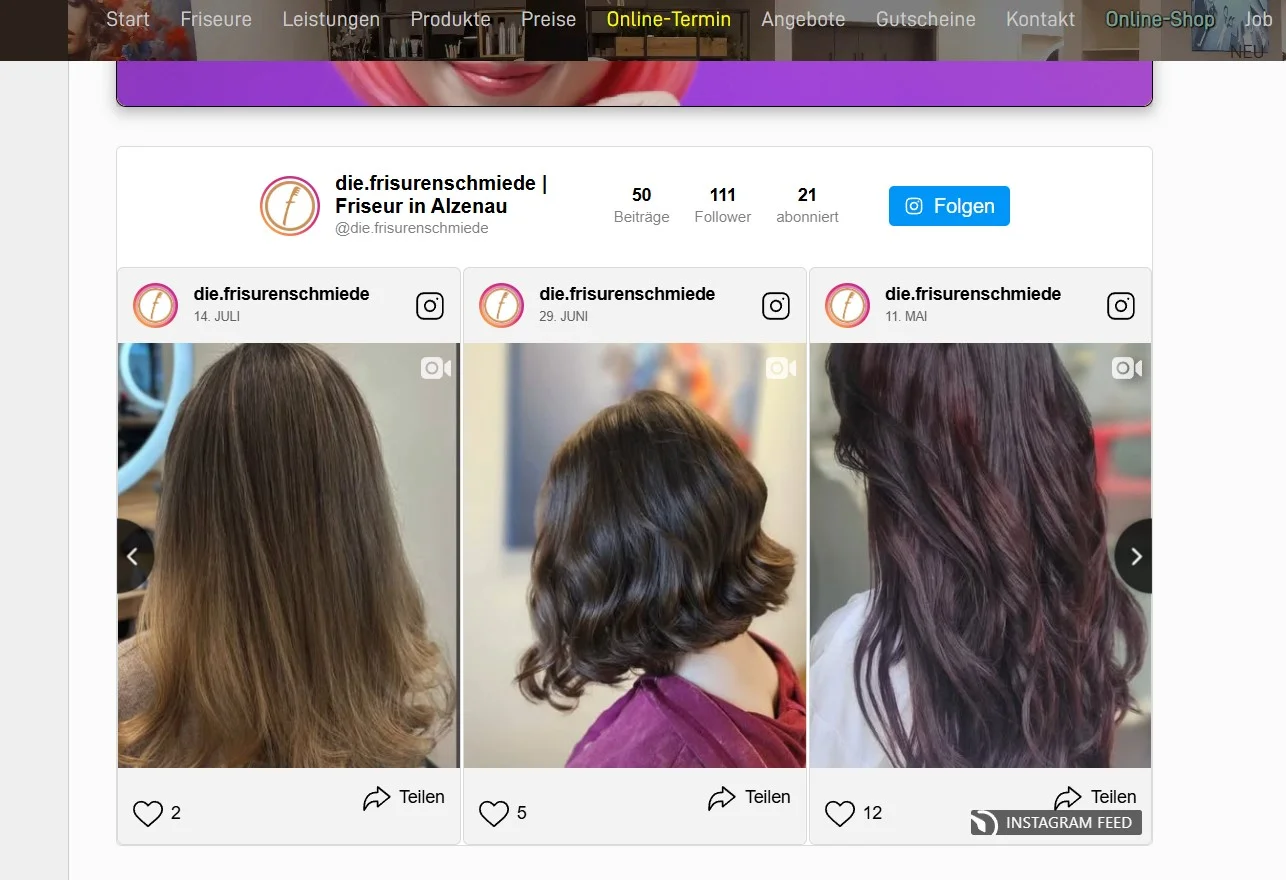
Frisurenschmiede is a modern hairdressing salon in Germany run by Sina Fehringer. Alongside other Elfsight integrations, the Instagram Feed plays a central role in showcasing fresh visuals, salon updates, and customer transformations on their website, helping the business stand out in a competitive field.
Before using Elfsight
Originally, the salon’s website looked static and struggled to turn visitors into bookings. Without dynamic content, potential clients had no visual aid to catch their attention; the brand blended in with competitors.
- Low online engagement and visibility
- Trouble attracting new clients through the website
- Lack of interactive and visual content to build trust
With the Instagram Feed
“Hairdressing lacks interactivity. I chose a different path and gained many new clients.” – Sina Fehringer, Frisurenschmiede
By embedding the Instagram Feed, the salon brought in a steady stream of authentic visuals right from their social profile. Hairstyles, salon sneak peeks, and customer looks appear automatically, giving the website a fresh feel without manual edits. When combined with other Elfsight widgets, the feed helps convey the salon’s style and personality in ways that static photos could not.
Results
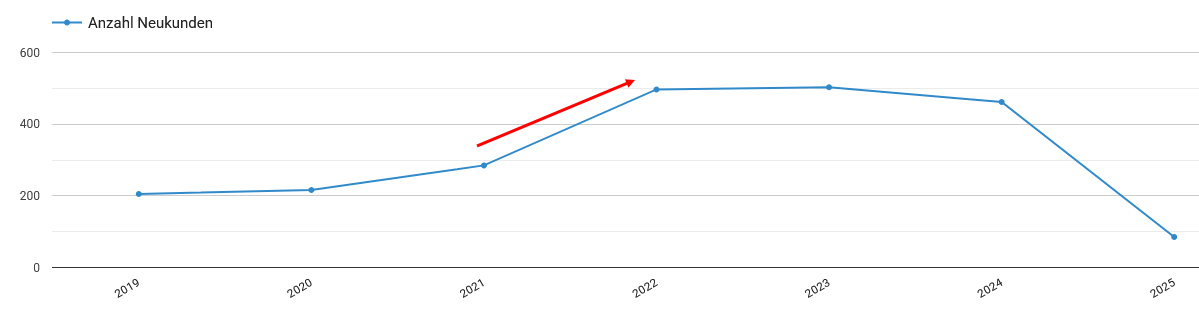
Since adding the Instagram Feed and other Elfsight widgets in 2022, Frisurenschmiede has grown its customer base by 1.5x. Many visitors now convert directly into clients without the salon relying on ads or heavy promotions.
Other widgets in use
Apart from the Instagram Feed, Frisurenschmiede uses All-in-One Reviews, AI Chatbot, Photo Gallery, and more. Together, these create a website that builds trust, answers client questions instantly, and makes the brand feel more approachable.
What’s more, Sina shared that widget customization led her to custom CSS and to discovering our supportive Community.
Frequently asked questions
Why isn’t my Instagram widget displaying on Weebly after installation?
How do I fix layout or responsiveness problems after embedding the feed?
What should I do if the widget installation code gets removed?
Can browser extensions block Elfsight widgets from loading?
How to solve issues with CSP blocking external scripts?
Questions or ideas?
Adding Instagram to your Weebly website really comes down to how much control and upkeep you want. Instagram’s own embed code is fine if you only ever need to show a single post. Weebly’s native app handles your own latest photos. The Instagram Graph API gives you full flexibility, but only if you’re prepared for the developer setup and the maintenance that comes with it.
For most people, the Instagram Feed widget lands in the practical middle: a live, auto-updating feed drawing from accounts, hashtags, or locations, styled to match your site, with no code to write or babysit. Whichever route you take, the payoff is the same — turning static Weebly pages into something that stays fresh and gives visitors a reason to come back.