Creating urgency is one of the most effective ways to drive action – whether it’s promoting a sale, launching a product, or collecting sign-ups. People browse, compare, and often leave postponing their decisions, especially when there’s no clear reason to act now. The challenge is that Squarespace doesn’t offer advanced countdown functionality out of the box.
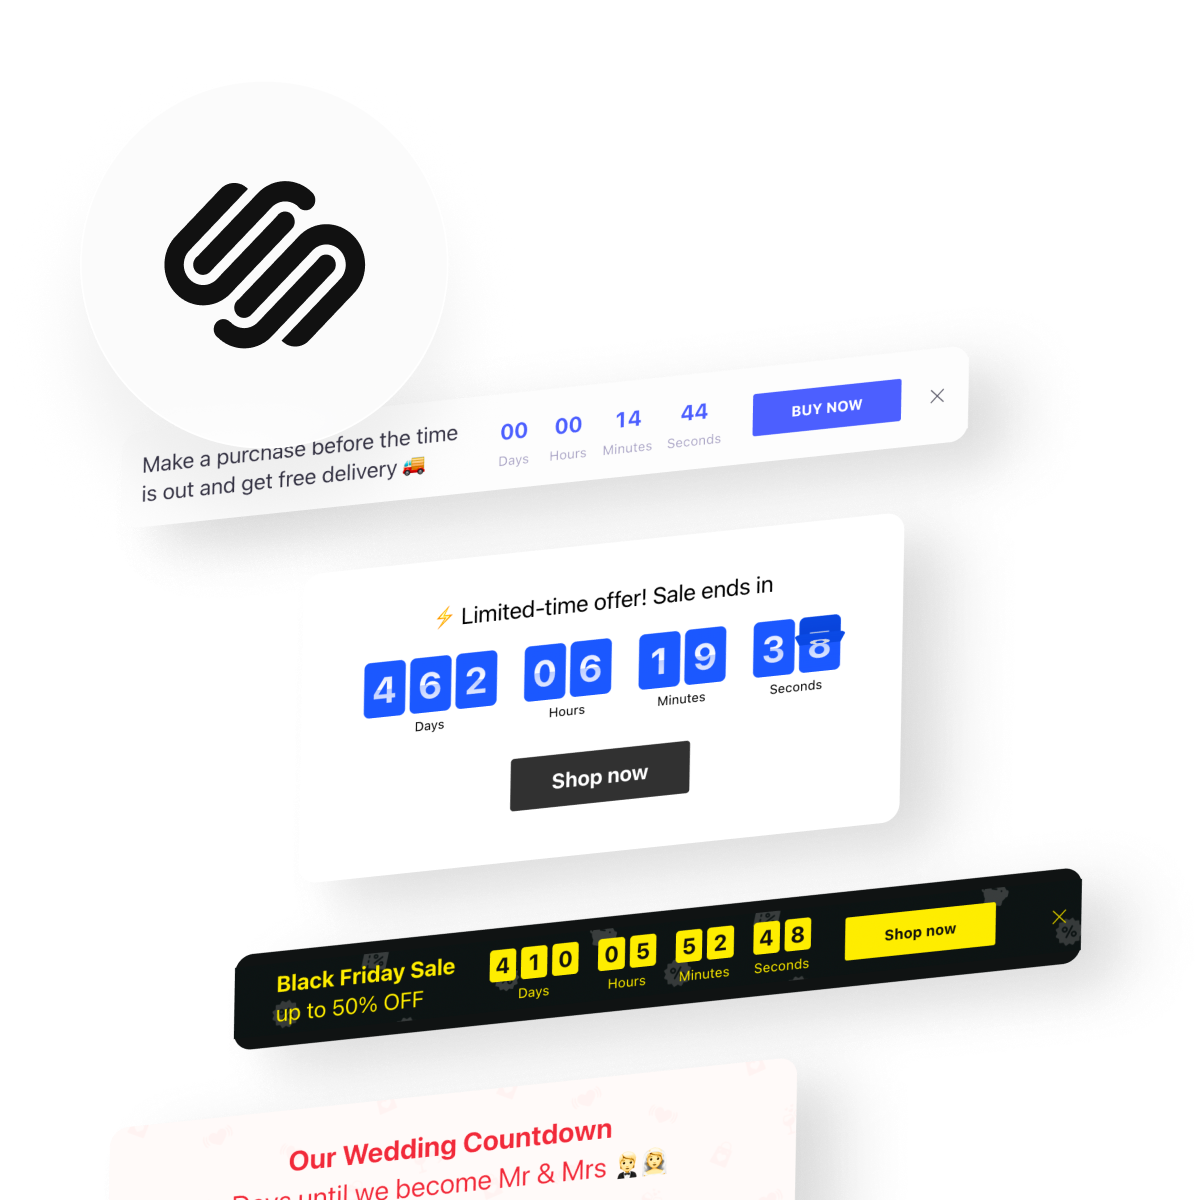
The Elfsight Countdown Timer makes it easy to add a Countdown Timer to Squarespace without coding. You can create visually engaging timers, customize their appearance, and embed them anywhere on your website.
- A quick way to add countdown timer to Squarespace without coding
- Why countdown timers increase urgency and conversions
- Alternative methods and their limitations
- Optimization tips to maximize performance and impact
Quick Start: Add Countdown to Squarespace
If you’re looking for a straightforward way to add countdown timer to Squarespace, you can set everything up in just a few steps:
- Open the Elfsight editor and choose a template
- Set your countdown date, time, and behavior
- Click “Add to website for free” to generate the embed code
- Paste the code into your Squarespace page using a Code Block
Launch your Countdown Timer in minutes with the live editor!
Why Add Countdown Timer to Squarespace
Adding a countdown directly influences how visitors perceive your offer. When used strategically, it becomes a powerful behavioral trigger rather than just a visual element.
⏳ Turn passive browsing into immediate action
Most visitors don’t act on their first visit. A countdown introduces a clear deadline, which reduces procrastination and encourages users to make decisions while the opportunity is still available.
📈 Strengthen conversions across key pages
Placing the Countdown Timer near product sections, pricing blocks, or sign-up forms can significantly increase clicks and purchases. It removes uncertainty and gives users a reason to act now instead of later.
🎯 Make promotions and launches more effective
Countdown timers are especially useful for limited-time offers, seasonal campaigns, or product launches. They highlight urgency in a way that static text simply can’t, making your campaigns feel more dynamic and time-sensitive.
🔄 Add movement and freshness to your content
Unlike static elements, a countdown is constantly changing. This subtle motion draws attention and makes your website feel more active, which helps keep visitors engaged for longer.
🧠 Reinforce perceived value and scarcity
A visible timer signals that something is limited – whether it’s time, availability, or access. This increases perceived value and makes your offer feel more exclusive.
⚡ Guide users through the decision process
By combining urgency with clear messaging, Countdown Timer helps users move from consideration to action more quickly. Instead of leaving your website to “think about it,” they’re more likely to complete the intended action immediately.
With the Elfsight Countdown Timer, you can shape user behavior and create a stronger, more action-driven experience across your website.
Core Features of Countdown Timer Plugin
Before you add a Countdown Timer to Squarespace, it’s important to understand how the plugin goes beyond a simple ticking clock. The right features allow you to control not just the timer itself, but how it influences user behavior and fits into your website experience.
Below is a breakdown of the key capabilities and how they apply in practice:
| Feature | Practical Use |
| Countdown modes | Choose between timer types based on your goal – set a fixed deadline, create a personalized countdown, or count up/down between values |
| Multiple display formats | Show timers as inline sections, banners, or floating or static bars, depending on placement |
| Custom time settings | Control time zones, start/end triggers, and expiration behavior |
| Call-to-action integration | Add buttons directly within the timer to drive clicks and conversions |
| Flexible positioning | Place the countdown anywhere on your Squarespace website or display it globally |
| Visual customization | Adjust colors, fonts, labels, and layouts to match your branding |
| Device responsiveness | Ensure the timer looks and works properly across desktop, tablet, and mobile |
| Behavior controls | Decide what happens when the timer ends (hide, redirect, or display message) |
These features allow you to use the Countdown Timer in different ways across your website. For detailed characteristics of the plugin, visit the features page.
Now let’s move on to the full setup process and see exactly how to embed it on a Squarespace website step by step.
Full Guide: How to Add a Countdown Timer to Squarespace
Here is the full guide to set it up and place it on your Squarespace website where it can create the most impact.
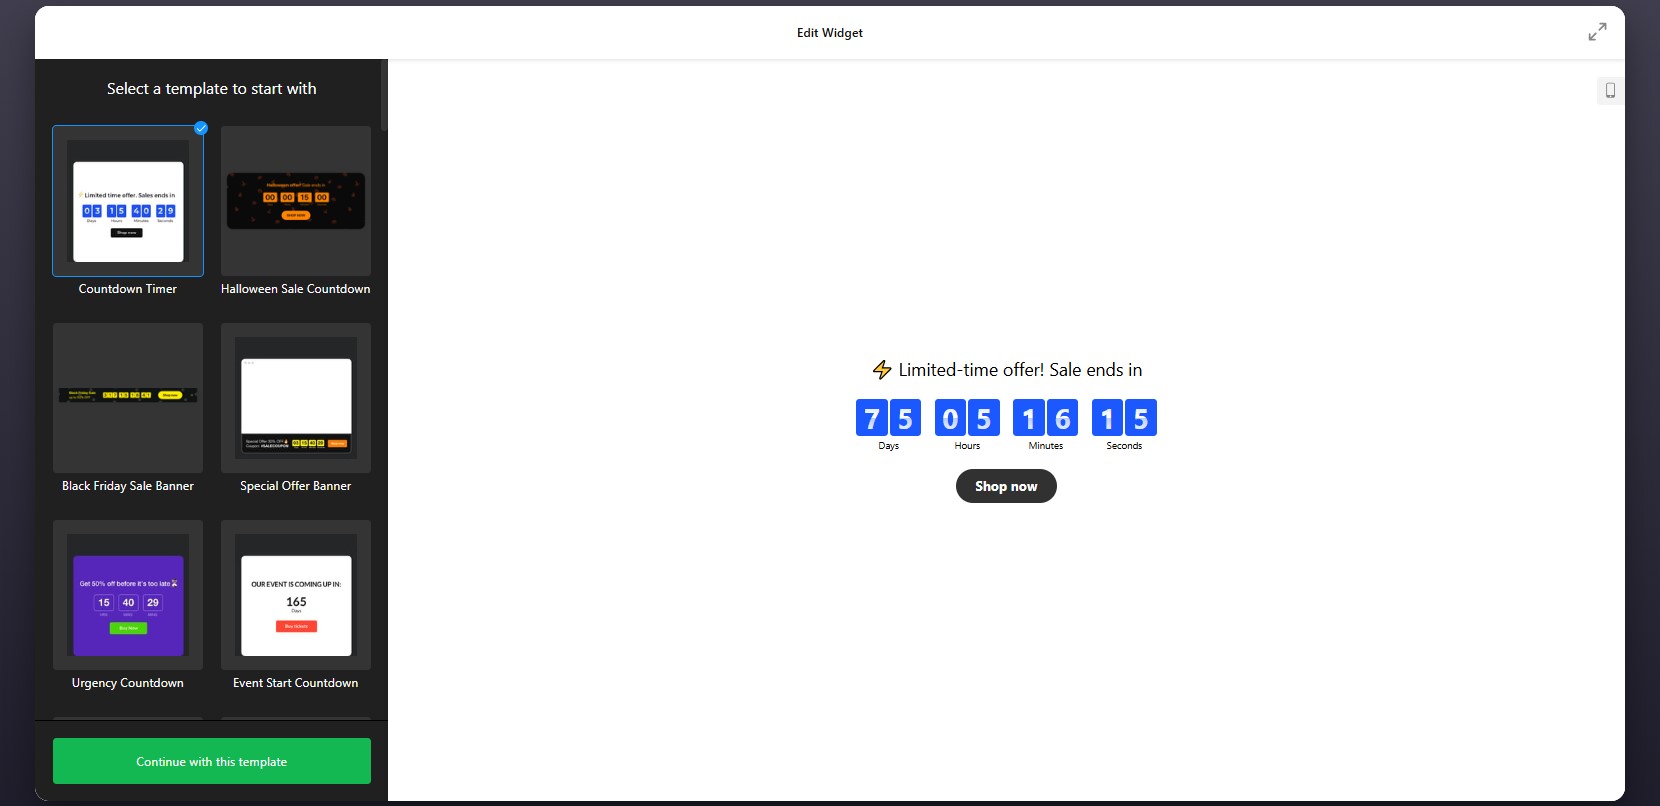
Step 1: Select a Template
Start by opening the Countdown Timer editor. Inside, you’ll find a variety of pre-designed templates tailored for different use cases such as promotions, announcements, or lead generation.
Focus on choosing a layout that fits your goal. This initial choice defines how the countdown will integrate into your Squarespace layout, but you’ll still be able to adjust all details later.
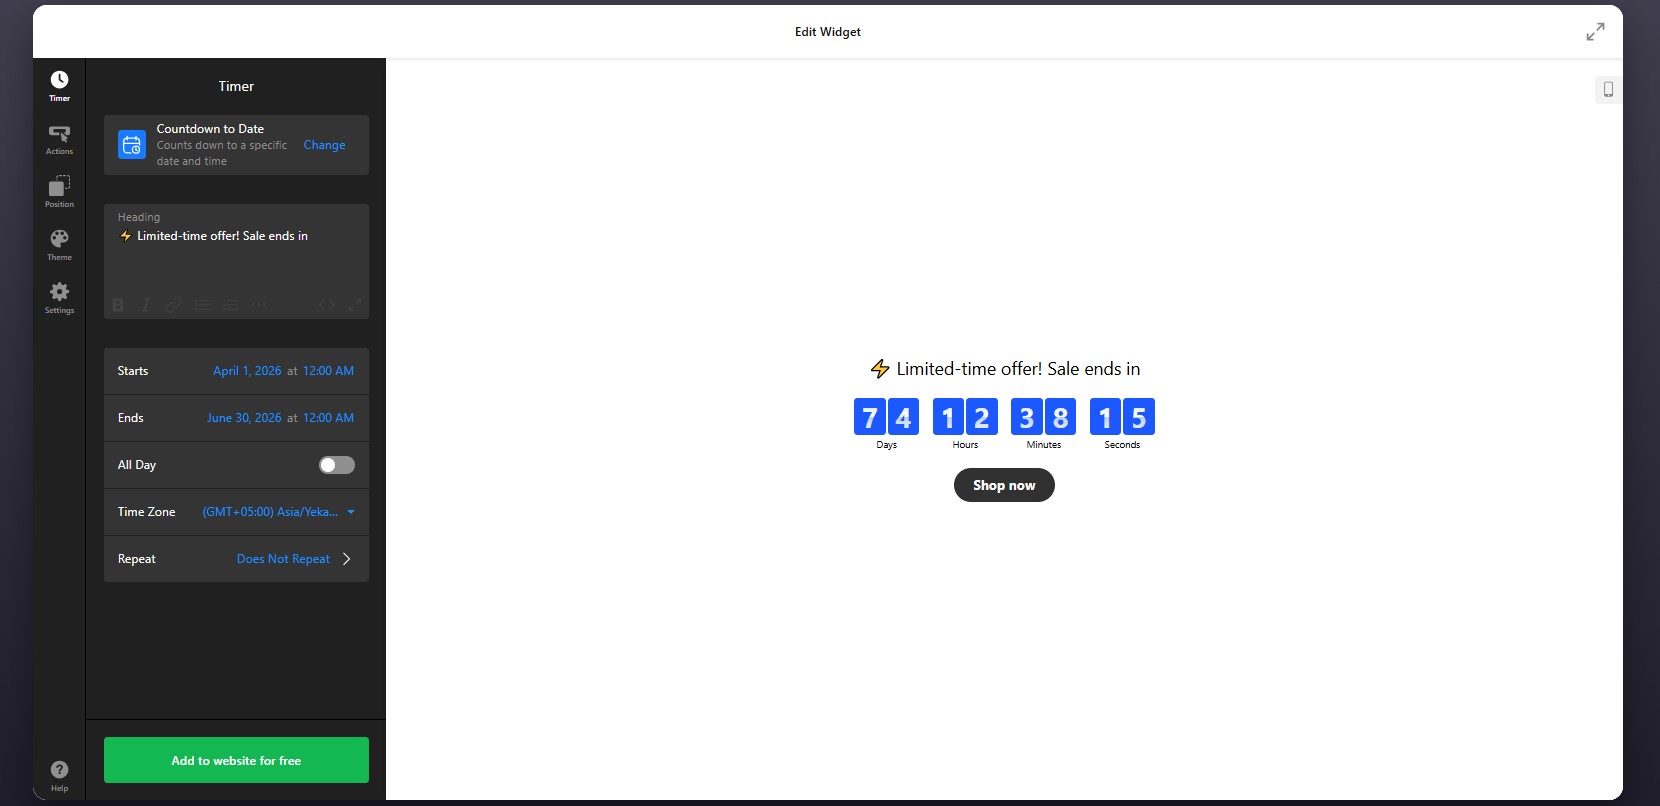
Step 2: Set the timing
You can define a fixed deadline for events like sales or launches, or create a personalized timer that starts individually for each visitor. You also have control over time zones to ensure accuracy across different regions.
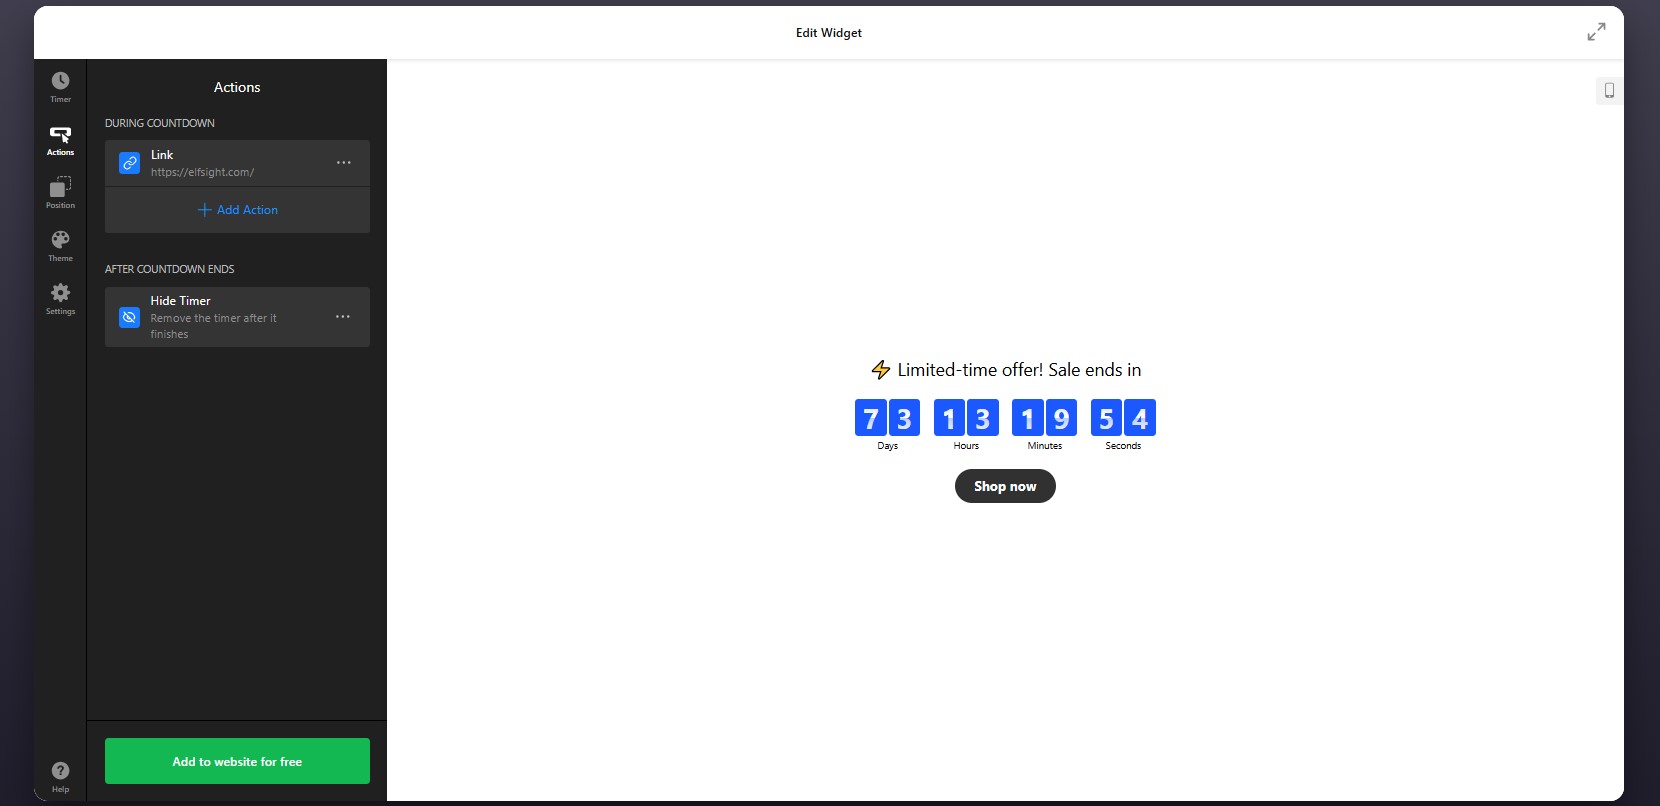
Step 3: Configure Actions
After setting the timer, move to the Actions tab, where you define what happens during and after the countdown – whether the timer disappears, displays a message, or redirects users to another page.
This step is essential if your countdown is tied to a campaign or user flow.
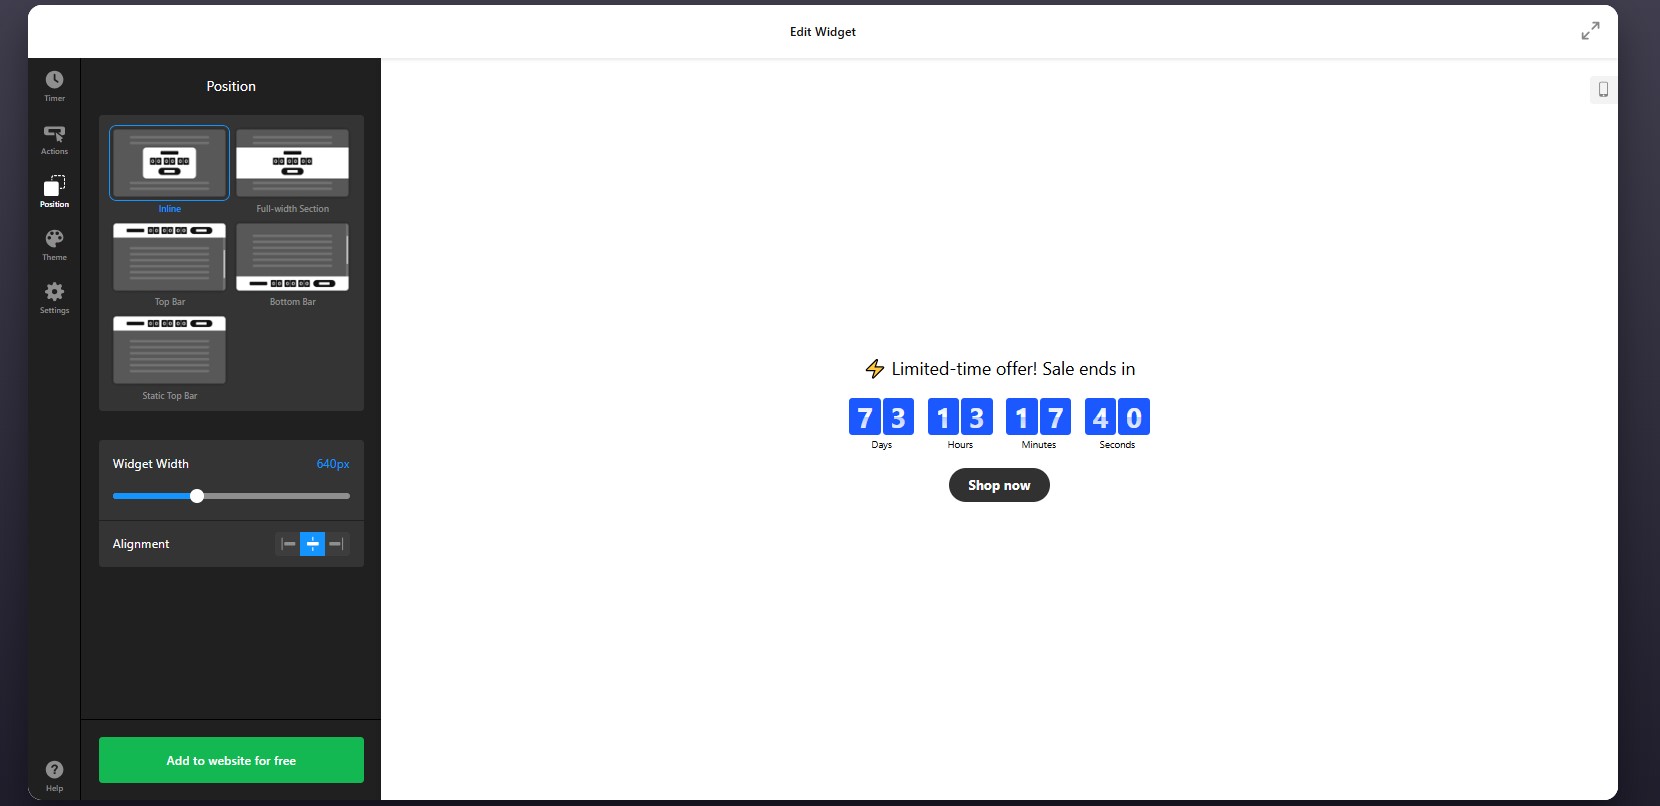
Step 4: Set Position and Display Rules
Go to the Position tab to control where and how the plugin appears on your website.
to ensure the timer appears exactly where it has the most impact – without disrupting the layout.
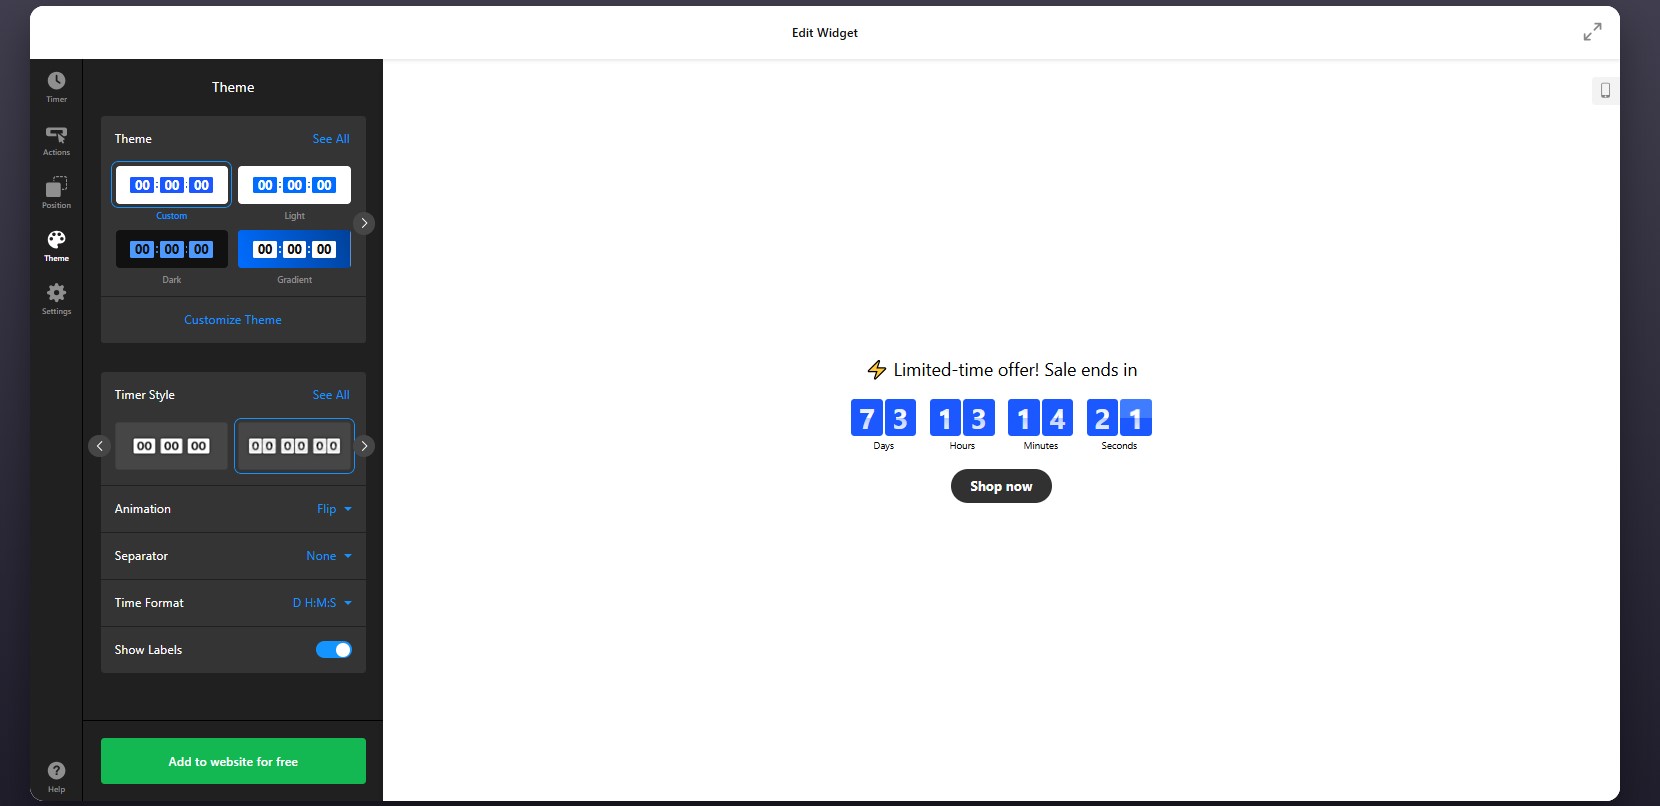
Step 5: Customize the Visual Design
Refine the appearance of the timer so it matches your Squarespace branding. In the Theme tab, you can customize timer style and layout, animation effects, and time format.
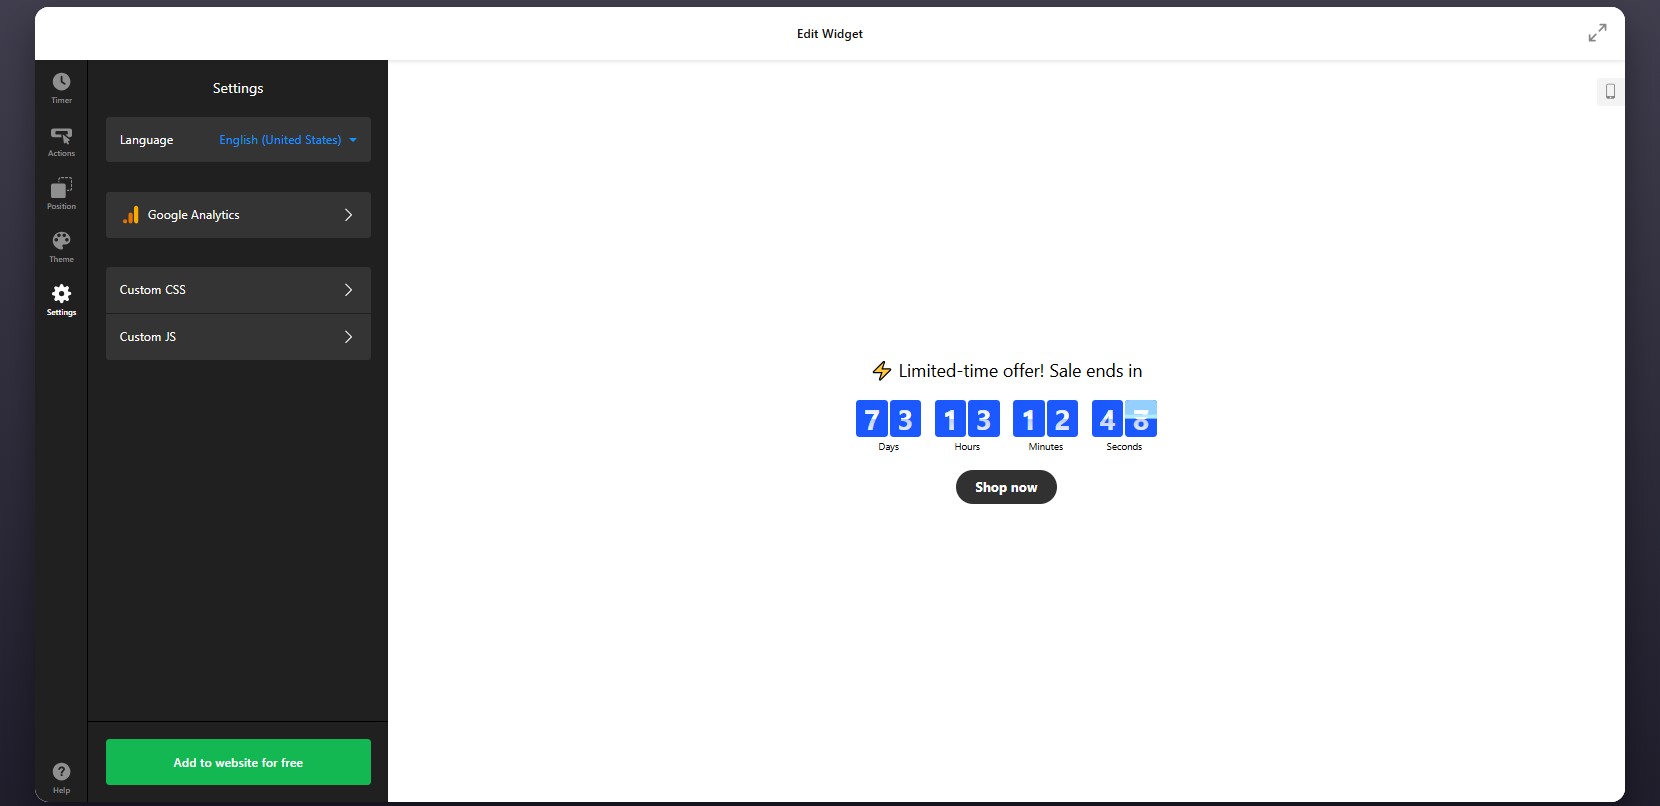
Step 6: Configure Settings
Open the Settings tab to adjust additional options.
Here you can:
- Set the plugin language to localize your timer.
- Connect Google Analytics for tracking interactions and measure its performance.
Step 7: Generate the Embed Code
When your countdown timer is fully configured, click the “Add to website for free” button to generate your embed code.
Copy the entire code snippet exactly as provided. This code contains all the settings and configurations you’ve just applied.
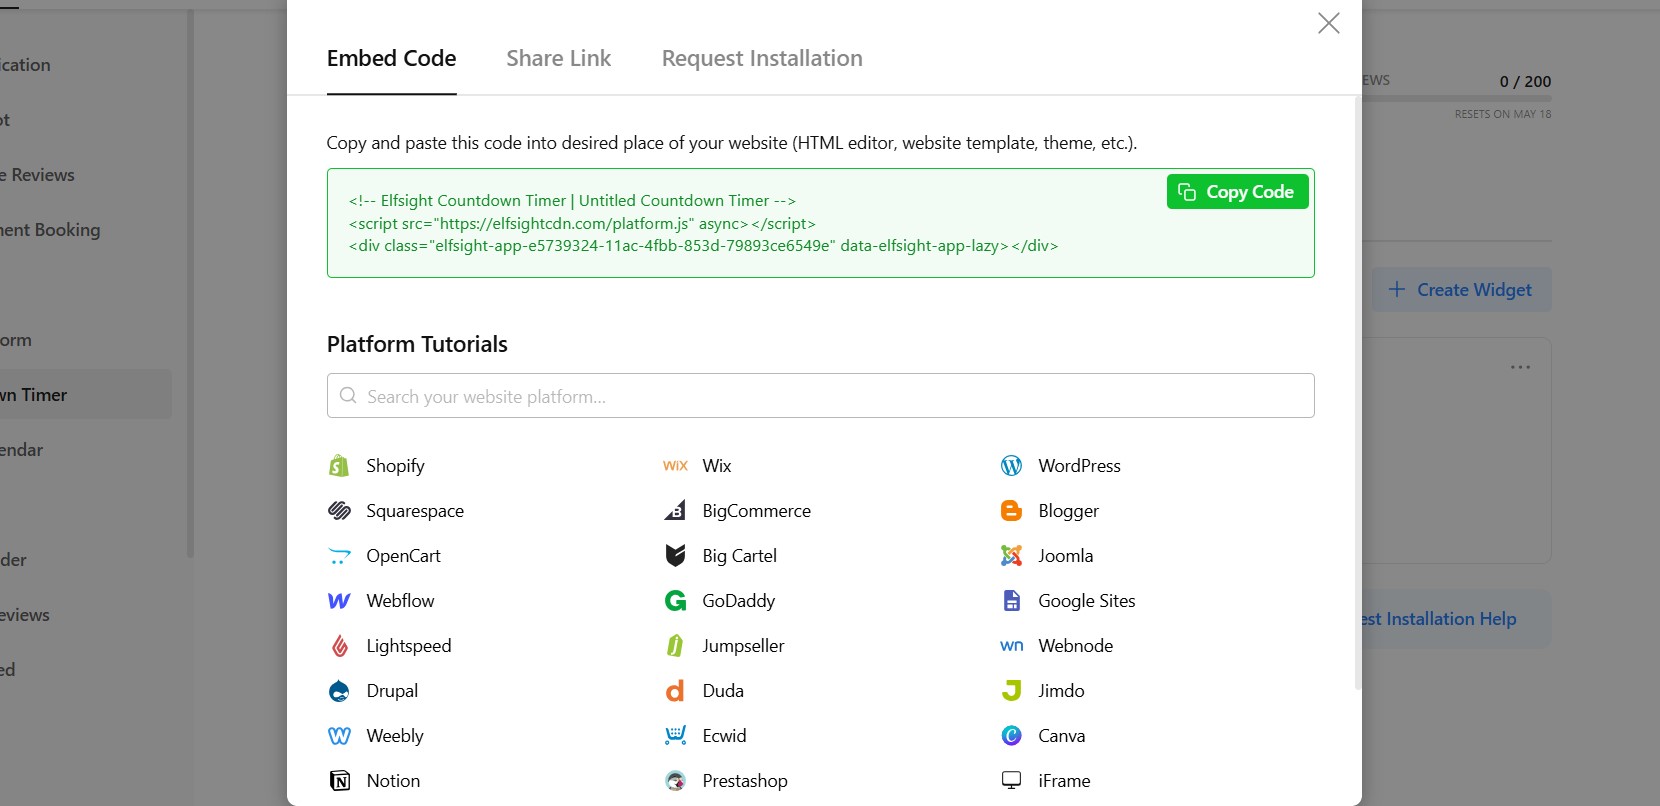
Step 8: Add Countdown Timer to Squarespace
Finally, open your Squarespace editor and navigate to the page where you want the timer to appear.
Insert a Code Block in the desired section of your page and paste the embed code into it. Once you save and publish your changes, the countdown timer will be visible on your live website.
After publishing, check how the timer looks within your layout. Make sure it appears in the right position and aligns well with surrounding content.
- If the timer doesn’t appear, ensure the code is pasted into a Code Block and the page is published.
- If the timing looks incorrect, review your time zone settings.
- If layout issues occur, adjust the container width or placement within your page structure.
By following these steps, you can successfully integrate a countdown timer into your Squarespace website, customize its appearance, and position it where it creates urgency and drives action.
Alternative Ways to Add Countdown Timer to Squarespace
Squarespace doesn’t include a built-in countdown timer feature, which means most solutions rely on external tools or custom implementations. While there are several ways to add a countdown clock to a Squarespace website, they differ significantly in terms of flexibility, ease of use, and long-term maintainability.
Squarespace Announcement Bar (Native Workaround)
Squarespace offers an Announcement Bar that can be used to display time-sensitive messages like “Sale ends soon” or “Limited-time offer.”
To implement this, you enable the announcement bar in your website settings and manually update the message as needed.
This approach works for simple notifications, but it doesn’t provide a real countdown experience.
- No dynamic timer or automatic countdown
- Requires manual updates
- Limited visual customization
Custom JavaScript via Code Injection
You can build or integrate a countdown timer using custom JavaScript and place it in a Code Block or through header/footer code injection.
This gives you full control over how the timer behaves and looks, especially if you’re comfortable editing scripts or working with developers.
However, this method is more technical and requires ongoing maintenance.
Third-Party Countdown Scripts
Another option is to use pre-built countdown scripts from external providers and embed them into Squarespace using a Code Block.
This method is quicker than writing custom code and doesn’t require deep technical skills.
However, most scripts are limited in functionality and customization.
- Basic design and layout options
- Limited control over behavior and triggers
The table below highlights the key differences so you can decide which solution best fits your Squarespace website.
| Method | Best For | Requirements |
| Elfsight Countdown Timer | Scalable, customizable timers with no coding | Copy-paste embed code |
| Squarespace Announcement Bar | Simple time-based messages or basic urgency | Built-in feature, manual updates |
| Custom JavaScript (Code Injection) | Fully custom behavior and advanced control | Coding knowledge or developer support |
| Third-Party Scripts | Quick setup for basic countdowns | Embed external script |
Squarespace offers only limited native options for countdown timers. While some approaches are quick to implement, they may lack automation or customization, while others offer more control but require additional effort.
Elfsight offers the solution that balances usability with flexibility without introducing unnecessary technical overhead.
Optimization Tips for Your Countdown Timer
Once your timer is live, small adjustments in placement, messaging, and behavior can significantly improve how users respond to it and make decisions.
- Place the timer where decisions happen: Add it near CTAs, pricing sections, or booking forms so users see urgency at the exact moment they’re considering action.
- Clearly explain what the Countdown is for: Pair the timer with a short message like “Offer ends in…” or “Booking closes in…” so visitors instantly understand its purpose.
- Use realistic and relevant deadlines: Timers work best when they reflect real constraints. Overly long or unclear countdowns reduce urgency and impact.
- Choose the right countdown mode: Use fixed timers for global campaigns and personal timers for user-specific offers to match your conversion goals.
- Keep the design noticeable but balanced: Use contrast to make the timer visible, but avoid overly aggressive colors or animations that distract from your content.
- Limit distractions around the timer: Keep surrounding elements clean so the Countdown Timer stands out and remains easy to understand.
- Test different placements and formats: Try banners, inline timers, or popups to see which format performs best for your audience and page layout.
- Monitor performance and adjust: Use analytics to track clicks and conversions, then refine timing, messaging, or placement based on real user behavior.
Real-World Example: Dental Website Uses Countdown Timer to Drive Appointments
David Drew runs a dental practice website where keeping content fresh and encouraging patients to take action quickly were ongoing challenges. Like many service-based businesses, he needed a way to clearly communicate availability and motivate visitors to book appointments without constant manual updates.
Before using Elfsight
Frequent need to update website content manually
Difficulty displaying dynamic reviews and maintaining SEO-rich content
No clear way to communicate urgency around appointment availability
With the Countdown Timer plugin
“We now keep the website live:
- Instagram Feed, it constantly feels fresh, and is now updated automatically.
- All-in-one reviews ensure we have got rich search results.
- Countdown banner ensures our CTA has a clear deadline.”
David implemented a countdown alongside other widgets to highlight time-sensitive calls to action. Instead of relying on static messaging, the countdown created a visible deadline that encouraged visitors to book appointments sooner.
At the same time, other widgets like Instagram Feed and All-in-One Reviews kept the website automatically updated, reducing the need for manual content changes and making the website feel active and current.
The result
The website became easier to manage and more effective at guiding users toward action. Elfsight helped introduce urgency into the booking process, while the overall setup reduced time spent on updates.
Frequently Asked Questions
Can I show different timers on different pages?
Can I track how users interact with the Countdown Timer?
What happens when the countdown reaches zero?
Can I use the Countdown Timer for recurring campaigns?
Conclusion
Adding a countdown timer to your Squarespace website is one of the simplest ways to introduce urgency and guide visitors toward action. Instead of leaving decisions open-ended, you give users a clear reason to act now, whether it’s booking an appointment, making a purchase, or signing up for an offer.
The Elfsight Countdown Timer plugin makes it easy to implement this without technical complexity. You can choose different countdown modes, customize the design to match your branding, and control how the timer behaves – all from a single interface. If you’re looking for a reliable countdown clock to add to your Squarespace website, this approach gives you the flexibility to adapt your timer to different campaigns while keeping everything easy to manage.