Did you know? More than 175 million people message a WhatsApp Business account every day, according to Meta.
You have a “Contact Us” page nobody clicks and a form that collects dust. Meanwhile, WhatsApp sits on your customers’ phones — familiar, trusted, and checked constantly. Integrating WhatsApp into a website means meeting people where they already communicate, not sending them through a support portal. Adding a WhatsApp chat button to your website lets them reach you the way they’d text a friend.
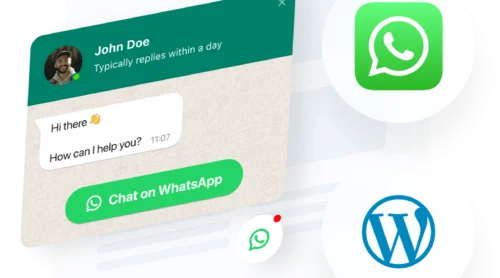
A basic “message us” link works for simple messaging, but gives you no control over appearance, welcome messages, or timing. A dedicated WhatsApp Chat widget lets you embed WhatsApp chat in a website without code — pre-filled replies, display scheduling, triggers, and branding included. You can also do this with a manual wa.me link or the WhatsApp Business API. This guide covers all three.
- Three methods compared: widget, wa.me link, and WhatsApp Business API
- Pre-filled message templates for six business types
- How to configure display scheduling, triggers, and offline behavior
- When WhatsApp is the right tool (and when to pick another)
Quick Start: Add WhatsApp Chat to Your Website
If you want to skip the theory and get a working WhatsApp chat button on your website right now, here’s the fastest method:
- Open the WhatsApp Chat editor and choose a template.
- Enter your WhatsApp phone number and set a welcome message.
- Click “Add to Website” to get the embed code.
- Paste the code into your website’s backend and publish.
Create your own WhatsApp chat widget in the live editor below ↓
How to Integrate WhatsApp: Your Options
There’s more than one way to embed WhatsApp chat in a website, and the right one depends on how much control you need. Here’s how the three main methods compare.
| Method | Difficulty | Customization | Business hours | Pre-filled messages | Cost |
|---|---|---|---|---|---|
| Elfsight WhatsApp Chat widget | No code | High (position, colors, welcome message, agent profile, triggers, scheduling) | Yes (show/hide by schedule) | Yes (configurable in settings) | Free plan, paid from $5/mo |
| wa.me link / WhatsApp button | Low (HTML link) | Minimal (link text/icon only) | No | Yes (via URL parameter) | Free |
| WhatsApp Business API | High (developer) | Full (you build everything) | Yes (if coded) | Yes (template messages) | Meta charges per conversation |
The wa.me link works for a simple “message us” link on a contact page – no tools or setup required. A widget is better if you want a branded floating button with welcome messages, triggers, and scheduling without coding. The API is built for high-volume operations needing automation, CRM integration, and multi-agent routing, with developers to maintain it.
Prefer watching? Here’s the full setup in under 3 minutes:
WhatsApp vs. Chatbot vs. Live Chat vs. Form: Which One Fits
Before diving into setup, it’s worth spending a minute on whether WhatsApp is actually the right contact method for your business. Each option sets different expectations with your visitors — pick the wrong one, and you’ll either overwhelm yourself or frustrate your customers.
| Contact method | Best for | Response expectation | Availability | Cost to run |
|---|---|---|---|---|
| WhatsApp Chat | Local businesses, service providers, and e-commerce with personal touch | Async — customer expects reply within hours, not seconds | Your business hours (or async anytime) | Free (your time only) |
| AI Chatbot | Any business wanting 24/7 instant responses | Instant — customer expects an answer immediately | 24/7, automated | Widget cost + setup |
| Live Chat | SaaS, support teams with dedicated agents. Multiple-messenger coverage | Near-instant — customer expects a human in minutes | Agent working hours | Agent salary + tool cost |
| Contact Form | Formal inquiries, quote requests, applications | Slow — customer expects reply within 1–2 business days | Always available, async | Free |
If your customers would rather text than fill out a form – restaurants, salons, local shops, freelancers, agencies – WhatsApp is usually the best fit. AI chatbots work best for 24/7 coverage, while live chat or forms are stronger for complex support workflows. Most businesses benefit from combining two: WhatsApp for quick conversations during business hours, plus a chatbot or form for after-hours coverage.
Use a WhatsApp Business account, not your personal number
A personal WhatsApp number works technically, but visitors see a phone number with no business context. WhatsApp Business is free and gives you a verified profile (company name, address, hours), plus catalogs, quick replies, labels, and away messages — none of which exist on a personal account.
If you’re already using a personal number for business, you can convert it to a WhatsApp Business account without losing your chat history. One important caveat — you can’t use the same number on both WhatsApp and WhatsApp Business simultaneously. Pick one.
Step-by-step: Setting up Your WhatsApp Chat
Now that you know which method fits and have your WhatsApp Business account ready, here’s how to configure the widget from start to finish. Each step covers not just what to click, but why the defaults might not be right for your business.
Step 1: Choose a template
The first thing you need to do is open the widget editor and pick a starter preset. For most businesses, the General template is the safest starting point — it’s the classic WhatsApp look with a floating chat bubble.
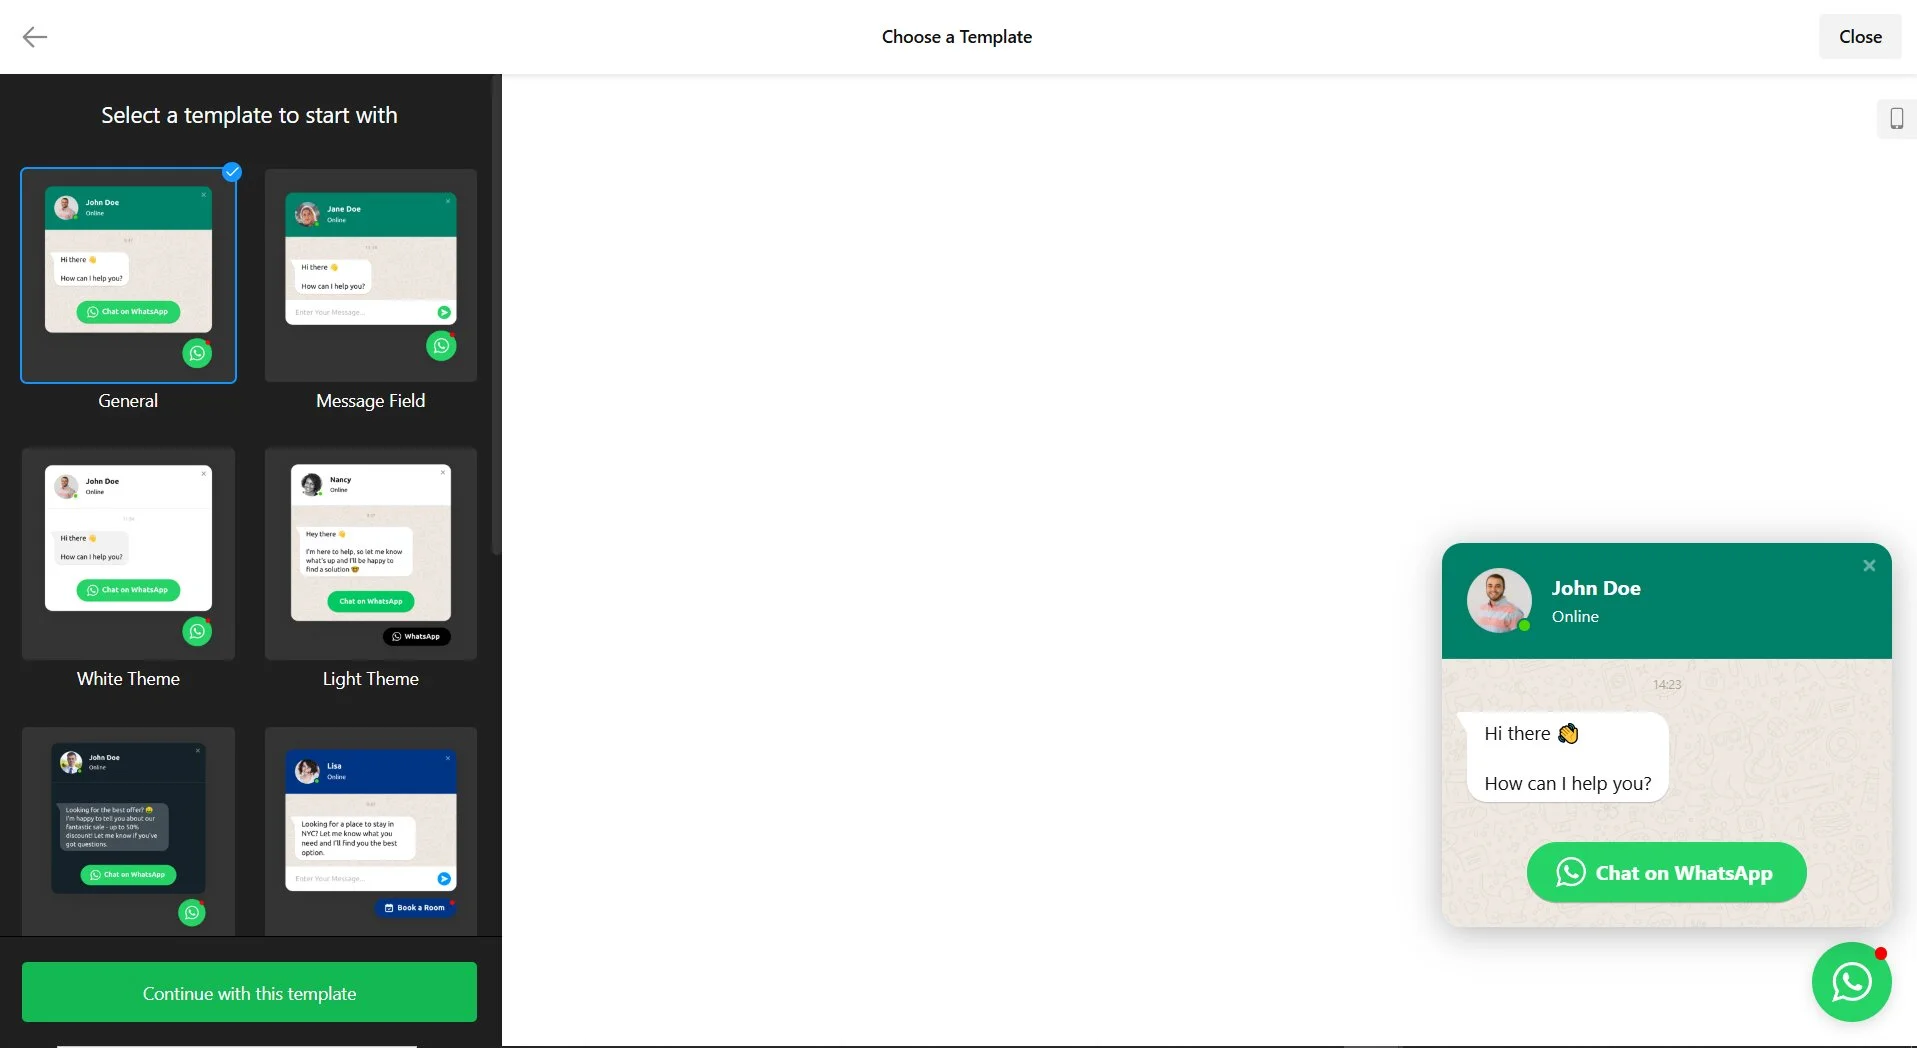
If you want visitors to type a message directly from the chat window (rather than just clicking a “Start Chat” button), choose Message Field instead. The use-case templates, like Booking or Consultation, come with pre-configured copy and icons that you can customize.
Step 2: Enter your phone number and agent info
In the Connect tab, enter your WhatsApp phone number with country code (e.g., +14155551234). Don’t start with 0 or 00 — use the + format. If you have a WhatsApp Business account, you can also paste your Business short link in place of your phone number.

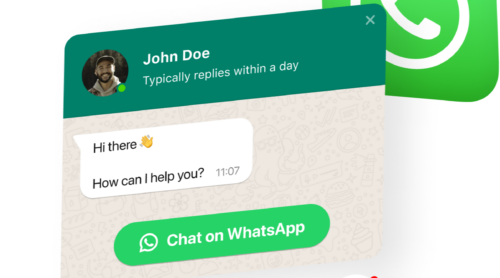
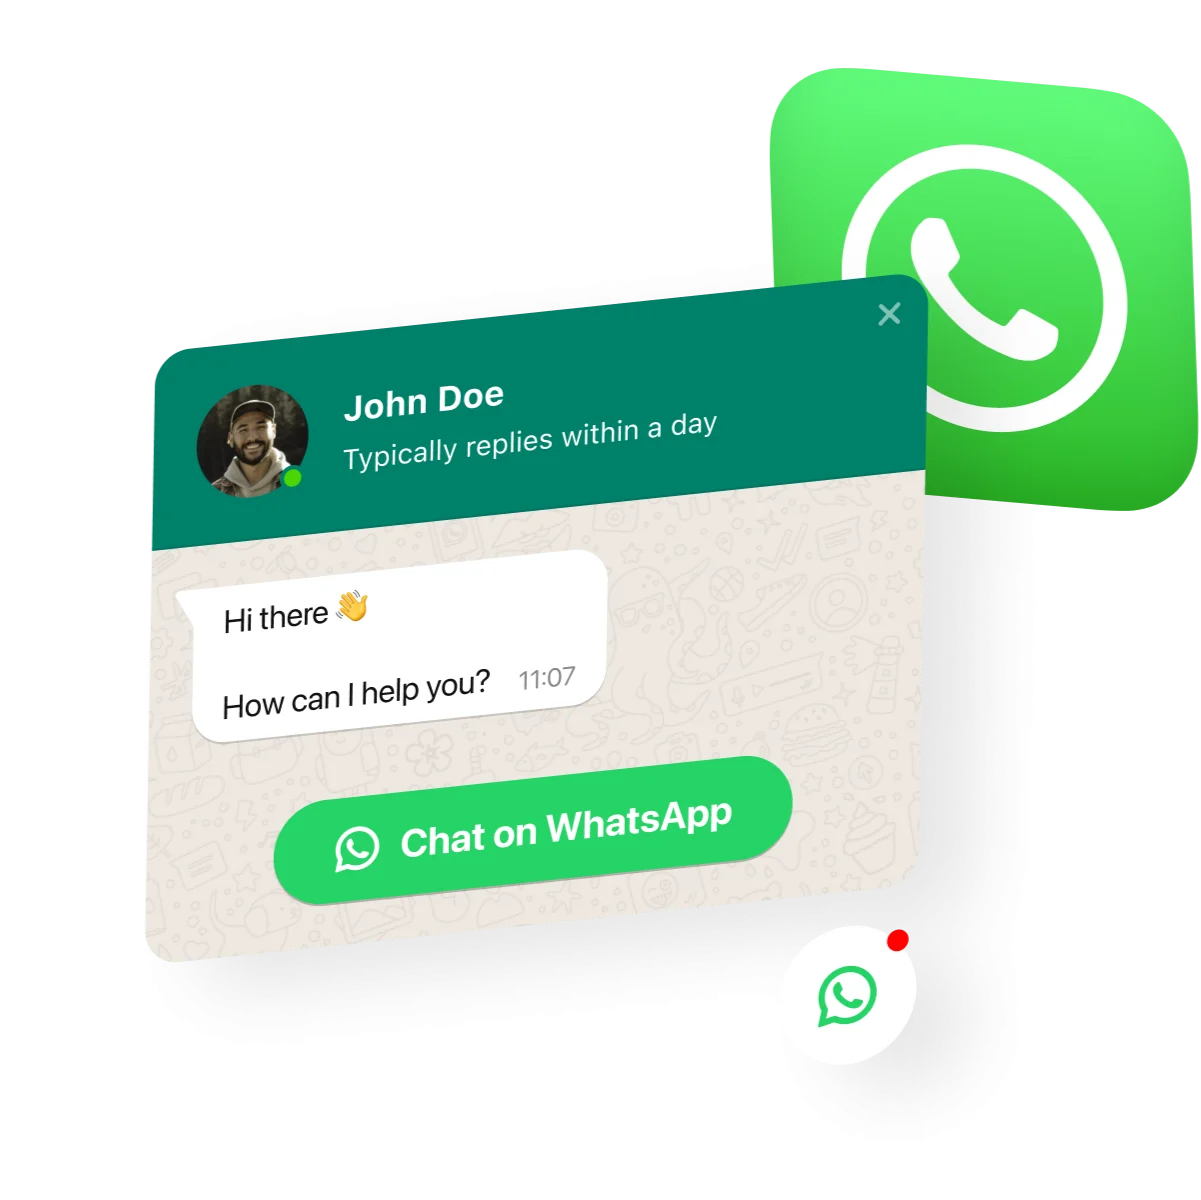
Then move to the Content tab to set up the chat window header: profile picture, name, and caption. This is what visitors see before they click — it sets the tone for the entire interaction.
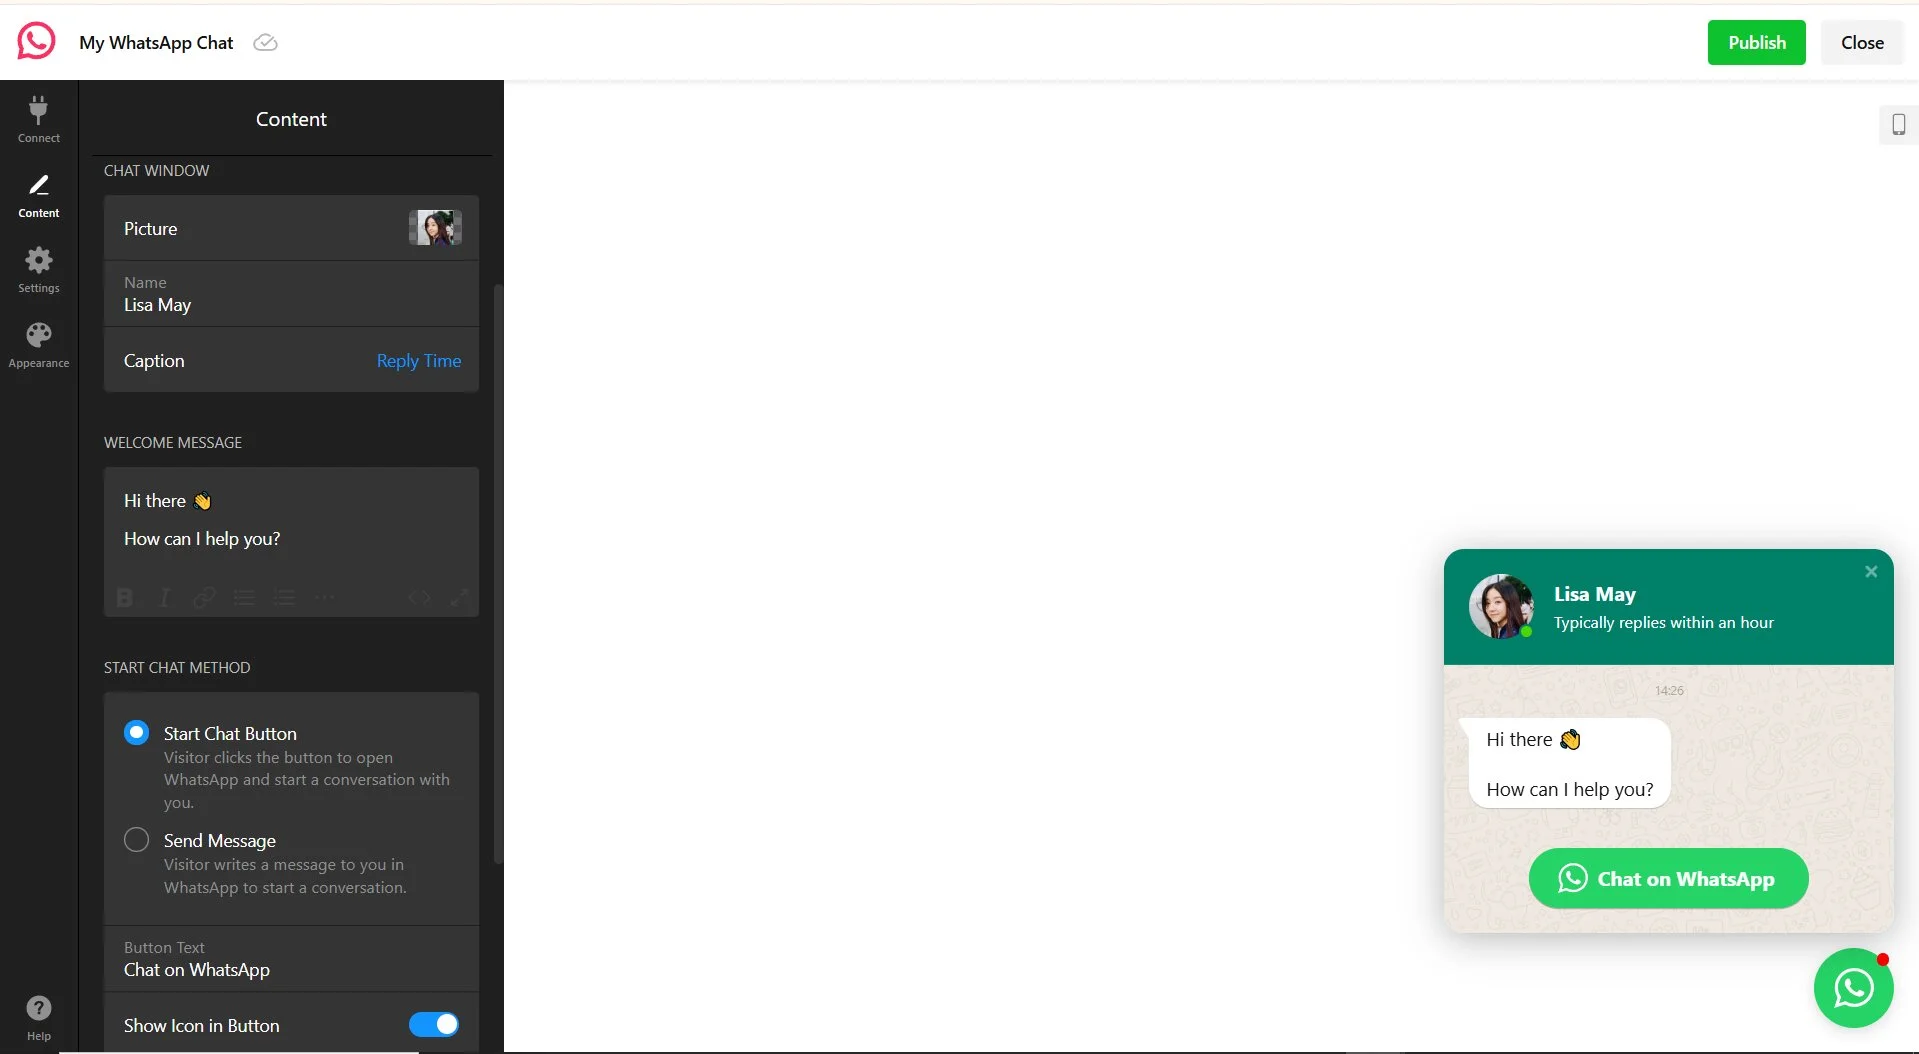
Use a real name and photo, not “Support Team” with a generic icon. People are more likely to message a person than a department or nameless agent. If you’re a solo operator, use your own name. If you’re a team, pick the person who actually responds to messages.
You can also configure:
- Profile picture — choose from the library, upload a custom photo, or use the default logo
- Name — displayed as the agent name in the chat header
- Caption — add custom text or choose from preset options like “Online” or “Replies within an hour.”
Step 3: Write your welcome message and pre-filled replies
The welcome message is the greeting visitors see when the chat window opens. The default is generic — customize it for your business. A good welcome message tells visitors what they can ask and sets expectations for response times.
The pre-filled message is different: it’s the text that auto-fills in your visitor’s WhatsApp when they click “Start Chat.” It can be used to tell the customer what to include in their question. The pre-filled message also supports the [page_url] placeholder, which automatically includes the URL of the page the visitor was browsing when they started the chat, so you know which product page triggered the conversation.
Examples
| Business type | Welcome message (what the visitor sees) | Pre-filled reply (what auto-fills in their WhatsApp) |
|---|---|---|
| Restaurant | Hi! Want to make a reservation or check today’s menu? | Hi, I’d like to book a table for [number] on [date] |
| E-commerce | Hey! Ask us about orders, sizing, or returns. | Hi, I have a question about order # |
| Real estate | Hello! Looking for property details or want to schedule a viewing? | Hi, I’m interested in the property at [address] |
| Service business (salon, plumber, etc.) | Hi! Need a quote or want to book an appointment? | Hi, I’d like to get a quote for [service] |
| SaaS / agency | Questions about plans or features? We’re here. | Hi, I need help with [feature/billing/setup] |
| Freelancer / consultant | Hey! Want to discuss a project? Drop me a message. | Hi, I’d like to discuss a project about [topic] |
Important: if you connected via a WhatsApp Business short link (rather than a phone number), the pre-filled message must be configured inside the WhatsApp Business app itself, not in the widget settings.
Step 4: Configure display scheduling
This is where most WhatsApp embed guides stop, and where setup quality diverges. The widget’s Date & Time settings (in the Settings tab) let you control exactly when the chat button appears on your website. You can set specific days, start and end times, and a timezone.
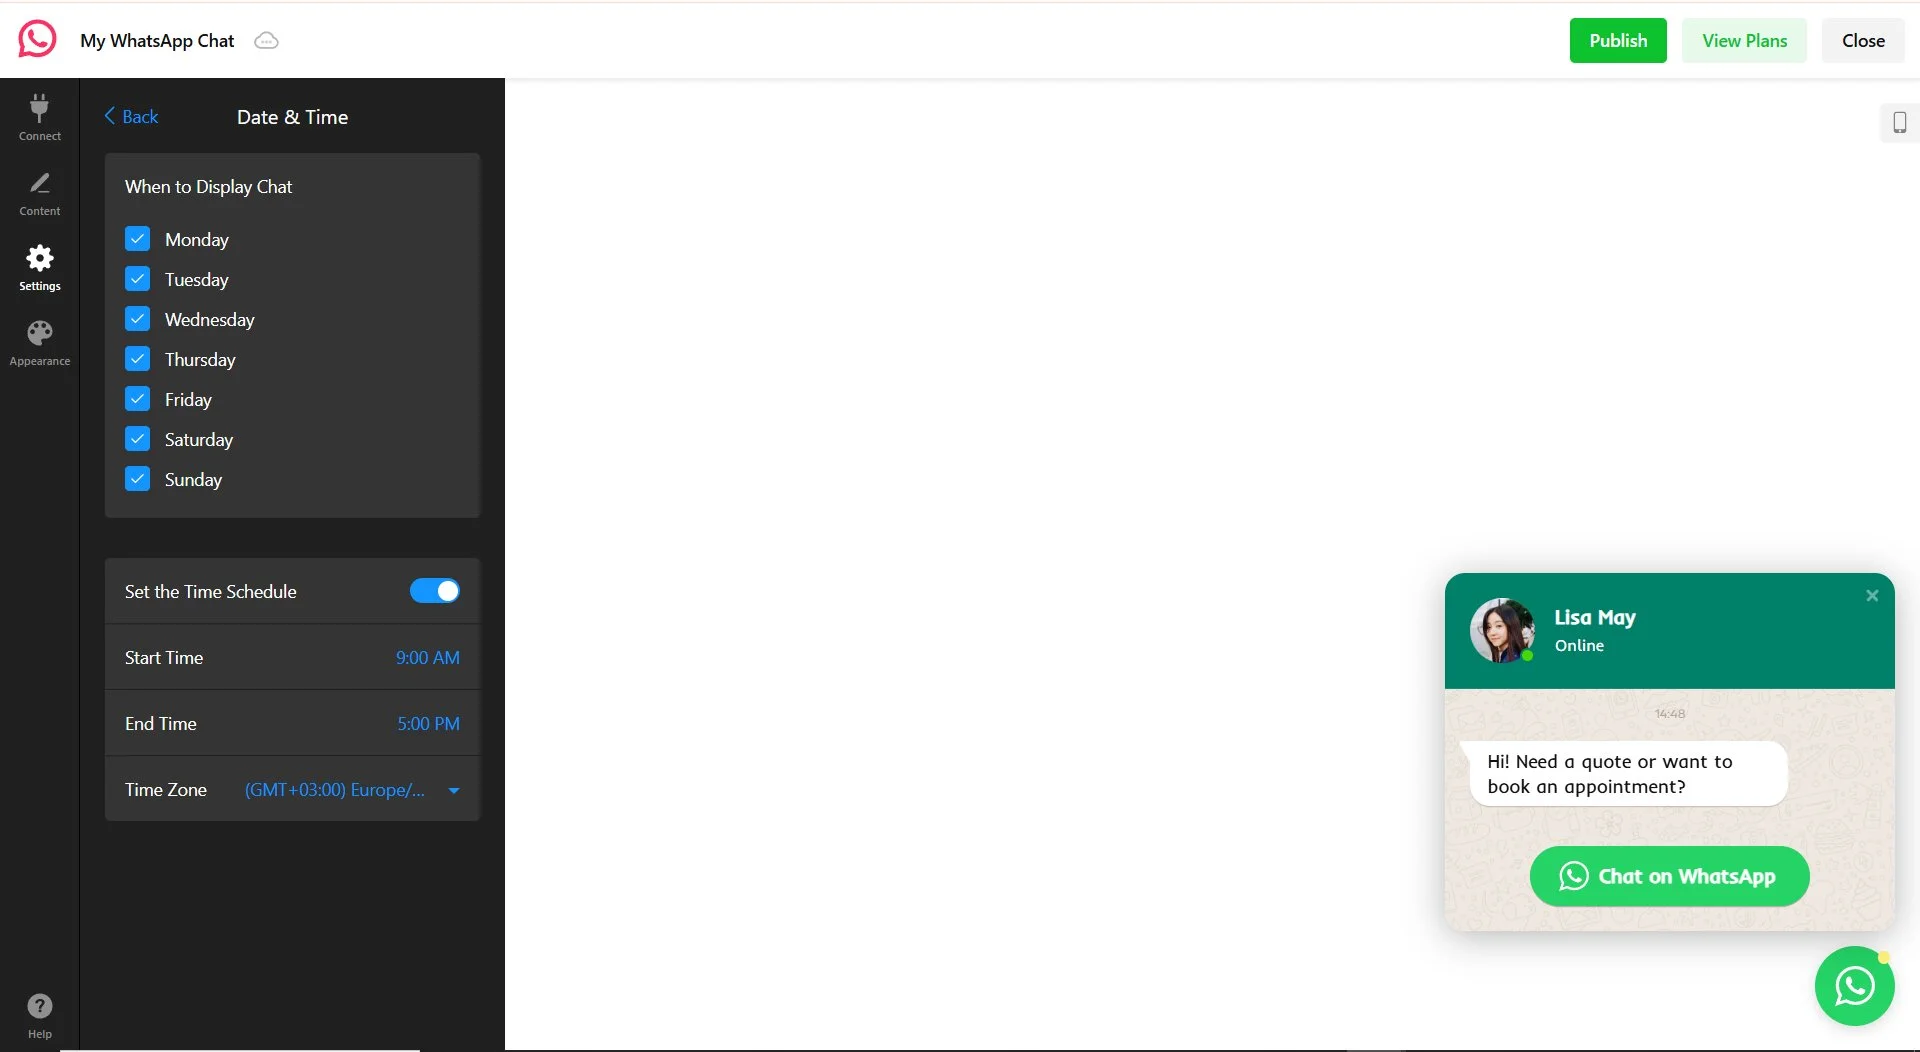
If you’re a business with defined hours — say, Monday through Friday, 9 AM to 6 PM — configure the schedule to match. Visitors outside those hours won’t see the WhatsApp button, which prevents the frustrating experience of sending a message and hearing nothing for 12 hours.
Step 5: Customize appearance and placement
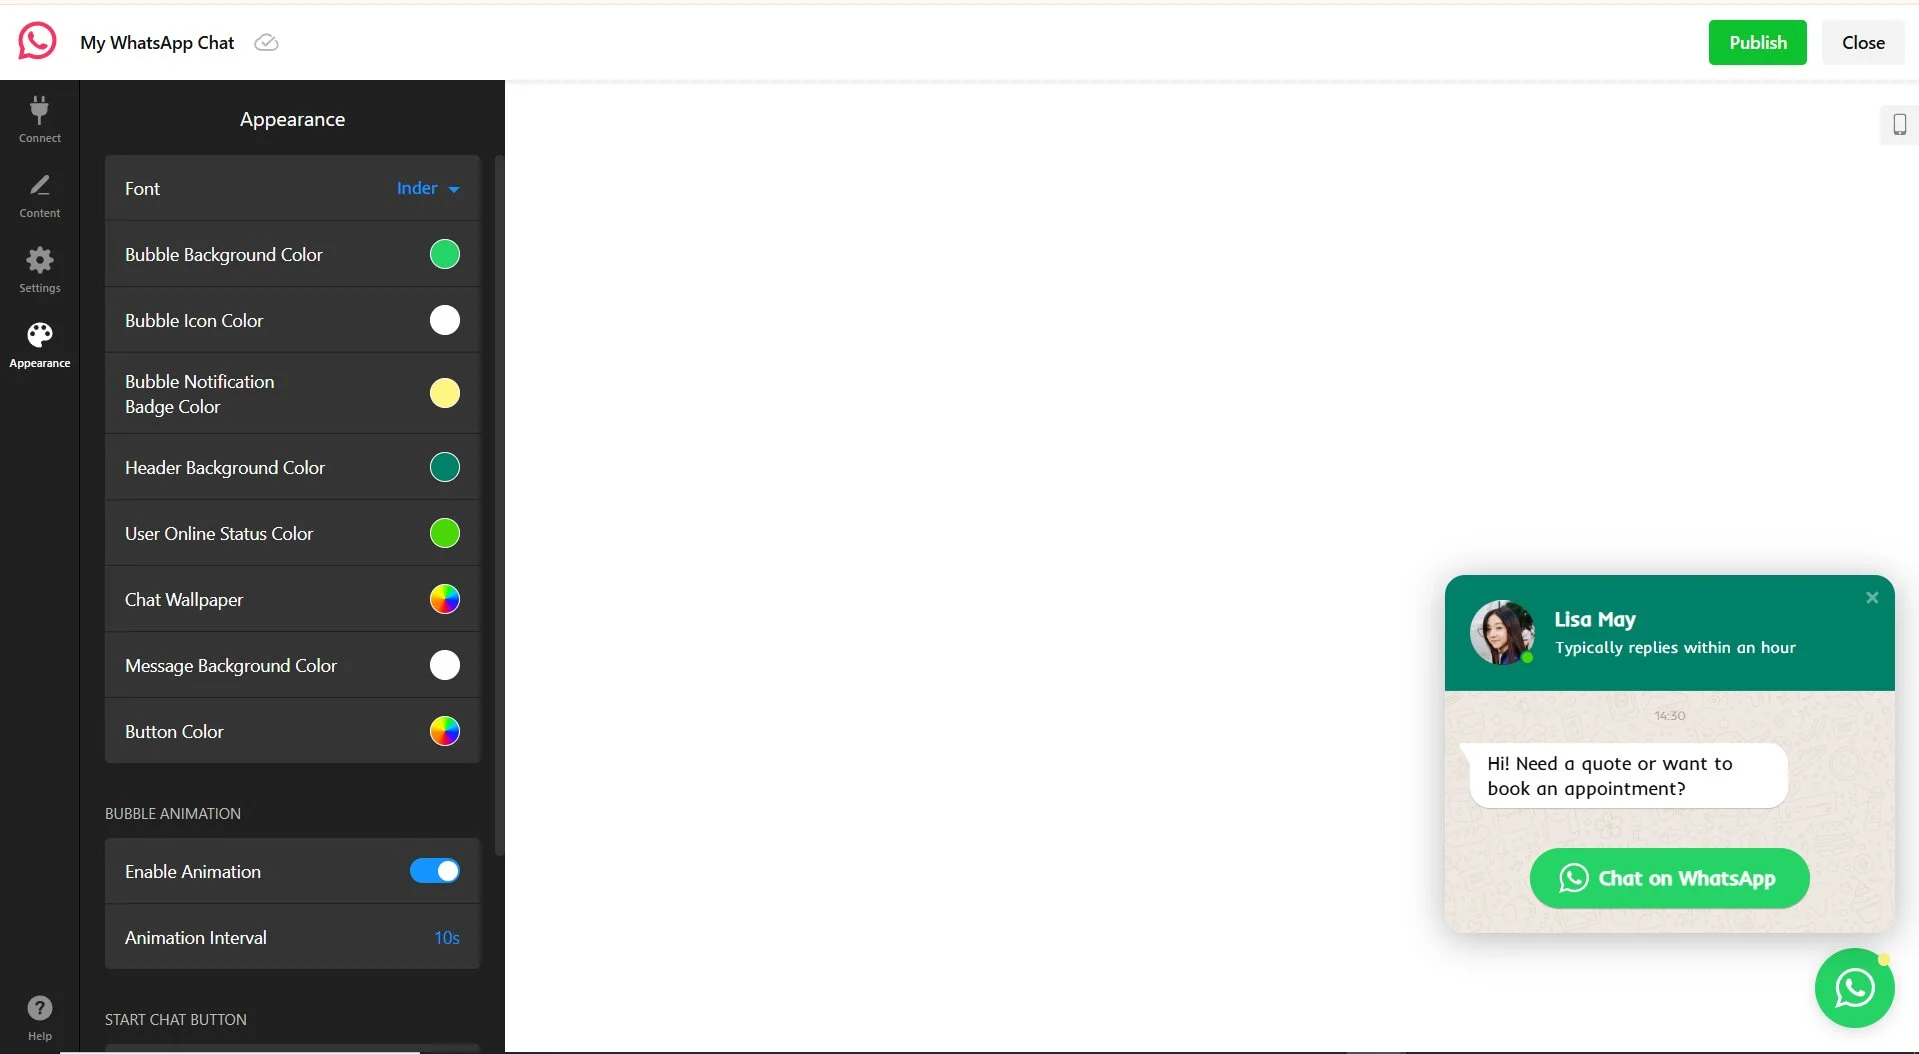
With this step, you customize the design and layout of your chat widget. The Appearance tab controls colors, the bubble icon, animation, font, and button shape. The Settings tab handles the widget’s position on the page. Here’s what you can tweak:
- Position comes in three modes: Floating Bubble (follows the visitor as they scroll), Embed Bubble (static within content), and Embed Chat Window (static open chat)
- Alignment lets you place your widget left, center, or right. Bottom-right is the convention for chat buttons.
- Offsets are adjustable vertically and horizontally. Use these to nudge the bubble away from other floating elements
- Bubble icon can be chosen from the built-in library, left at the default, or uploaded as a custom icon.
- Bubble animation — configurable on/off toggle with adjustable interval (default: 10 seconds)
- Colors — bubble background, icon, header, chat wallpaper, message background, button, notification badge, and online status are all independently customizable
You can control which pages show the widget in the Chat display settings: show on all pages, exclude specific pages by URL, or show only on specific pages. You can also target by device (desktop, mobile, or both) and by visitor type (all visitors, new visitors only, or returning visitors only).
Placement strategy by page type
- Homepage – floating bubble, bottom-right, always visible; your default entry point
- Product/service pages – floating bubble with a time-on-page trigger after 10–15 seconds (“Have a question about this product?”)
- Pricing page – consider a more prominent welcome message (“Need help choosing a plan?”)
- Checkout – pre-filled message referencing the product they’re buying
- Blog/content pages – only if your business model involves direct conversations from content
Step 6: Set up trigger behavior
Triggers control when the chat window opens automatically, without the visitor clicking the bubble. Five trigger types are available, and they can be combined (the first one triggered opens the chat):
- On Page Load — opens immediately when the page loads. Best for high-intent pages like pricing or checkout, but aggressive.
- Time on Page — opens after a set number of seconds on the current page. Good for product pages where visitors need a moment to browse before you offer help.
- Time on Site — opens after a set total time on the website. Useful for multi-page browsing sessions.
- Scroll Position — opens after the visitor scrolls a set percentage of the page. Works well for long-form content or landing pages.
- Exit Intent — opens when the visitor moves their cursor over the tab close button. Last-chance engagement — “Before you go, any questions?”

The Remember Visitor setting controls what happens after someone closes the chat: the widget won’t reopen automatically for a configurable period (default: 1 day). This prevents the annoying pattern where a closed chat keeps popping back up on every page.
If you don’t want the chat to open automatically at all — just sit there as a clickable bubble — disable all triggers and set time-based options to 0 seconds.
Step 7: Get the embed code and install
Click “Add to Website” to get your installation code. The code consists of two parts: a script tag that loads the Elfsight platform, and a div tag with your widget’s unique class. Copy the entire block.
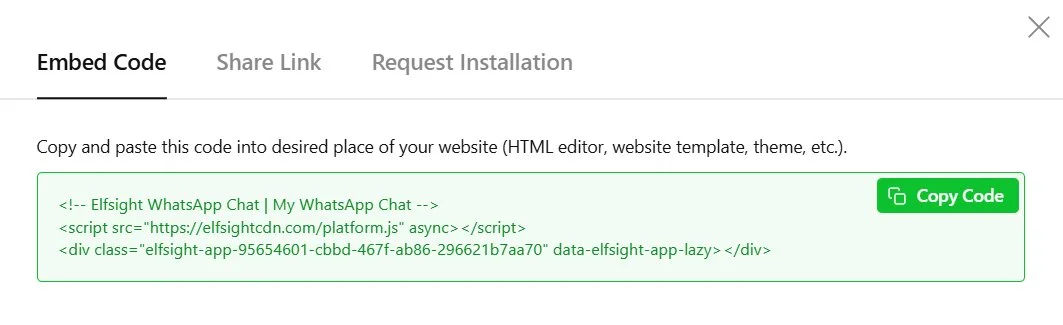
Finally, paste the code into a Custom HTML block on any page of your website. The widget is supported by most CMS and website builders, including WordPress, Squarespace, Wix, Webflow, and Shopify.
Troubleshooting quick check
- Widget not appearing? Check that the code is in a Custom HTML block, not a regular text block. Clear your website cache.
- WhatsApp opens, but no pre-filled message? Verify the pre-filled text in the widget settings. Special characters can break URL encoding. If you connected via a Business short link, the pre-filled message must be set in the WhatsApp Business app.
- Widget overlaps other elements on mobile? Adjust the widget’s vertical and horizontal offsets in the Position settings, or use the device targeting to hide it on mobile if you have another contact method there.
- “This phone number is not on WhatsApp” error? Confirm the number is registered on WhatsApp (not just a regular phone number) and includes the correct country code, without a leading zero.
Other Ways to Add WhatsApp Chat to a Website
The widget approach covers most use cases, but it’s not your only option. Here are two alternatives — one for simplicity, one for scale.
Add a WhatsApp link to your website with wa.me
A wa.me link opens a WhatsApp conversation directly from any browser. No widget, no JavaScript, no third-party tool. This is the simplest way to add a WhatsApp chat button on a website if you just need a basic “message us” link.
- Construct your link:
https://wa.me/[number-with-country-code]?text=[pre-filled-message]Example:https://wa.me/14155551234?text=Hi%2C%20I%27d%20like%20to%20know%20more%20about%20your%20services - Add it as an HTML anchor tag:
<a href="https://wa.me/14155551234?text=Hi" target="_blank">Message us on WhatsApp</a> - Style it with CSS or use an icon. Place it wherever you want — header, footer, contact page, or a floating CSS button you build yourself.
This is your WhatsApp embed code for a website in its simplest form. No dashboard, no configuration — just a link. If that’s all you need, it works.
How to add WhatsApp API to a website
The official WhatsApp Business API lets you build fully automated WhatsApp experiences: chatbots, template messages, CRM integration, and multi-agent routing. This is enterprise-grade infrastructure, not a plug-and-play widget.
- Apply for WhatsApp Business API access through a Business Solution Provider (BSP)
- Verify your business and phone number through Meta Business Manager.
- Build or configure your messaging flow: templates, webhooks, automation rules.
- Embed a custom chat interface or “click to chat” entry point on your website.
Optimization Tips for Your WhatsApp Chat
You’ve got the widget installed — now here’s what separates a setup that gets ignored from one that generates conversations.
🎨 Design and placement
Don’t stack floating elements. If you already have a chatbot, cookie banner, and back-to-top button, adding a WhatsApp bubble creates visual chaos on mobile. Audit your floating elements before adding another one. Use the widget’s offset settings or page-level visibility controls to avoid collisions.
Start with high-intent pages, not all pages. Show WhatsApp on product, pricing, and contact pages first. Check your GA data after two weeks — you’ll quickly see which pages actually generate conversations and can cut the rest.
💬 Message and responses
Use the pre-filled message to reduce friction. A blank “Hi” from a customer gives you nothing to work with. Pre-fill with context — “Hi, I’m interested in [product/service]” — and you save a round of back-and-forth. The [page_url] placeholder adds even more context automatically.
Set realistic response time expectations. If you can’t reply within minutes, say so in the welcome message: “We typically respond within 2 hours during business hours.” Unmet expectations hurt more than slow responses with a warning.
🔍 Tracking and coverage
Track widget interactions. The widget supports built-in Google Analytics event tracking (Settings tab) with two events: Widget Opened and Chat Started. Set it up if you have GA or GTM installed — you want to know which pages generate the most conversations and when inquiries peak.
Combine WhatsApp with after-hours coverage. WhatsApp is ideal during business hours when you can reply personally. For nights and weekends, pair it with an AI Chatbot that handles common questions automatically — visitors always get a response, regardless of the time.
Frequently Asked Questions
Is adding WhatsApp chat to a website free?
Do I need WhatsApp Business to add a WhatsApp chat button to my website?
Can I embed WhatsApp chat in WordPress, Shopify, or Wix?
Can I control when the WhatsApp widget appears on my website?
Can I have multiple agents on one WhatsApp chat widget?
Conclusion
You’ve seen three ways to add WhatsApp chat to your website — from a simple wa.me link to a fully configured widget with scheduling, triggers, and pre-filled messages. Whichever method you choose, the setup decisions that matter most are the ones visitors experience directly: a welcome message that tells them what to expect, a pre-filled reply that reduces friction, and display timing that matches when you’re actually available to respond.
If you haven’t tried the widget editor yet, start with the WhatsApp Chat widget — the free plan covers a basic setup, and you can customize everything before committing. And if you need 24/7 coverage beyond business hours, pairing WhatsApp with an AI Chatbot means visitors always get a response, whether you’re at your desk or not.