


You’ve got a custom-coded HTML website, an active Instagram account, and a gap between the two that shouldn’t be this hard to close. Instagram’s native embeds offer limited customization, while the Graph API requires token management, rate limits, and a custom frontend. Neither is ideal when you just want a clean, auto-updating feed on your site.
There’s also a no-code approach: a widget tool like the Instagram Feed pulls content from your account automatically and lets you configure layouts and styling in a visual editor. No API keys, no server-side logic – just a two-line snippet to copy-paste. Below is a walkthrough of all three methods so you can choose the best fit for your setup and maintenance needs.
- How to get a live, auto-updating Instagram feed on any HTML page in under 5 minutes
- Which feed layout works best for your type of website (portfolio, e-commerce, blog)
- The key differences between widget, native embed, and API approaches
- Practical tips for feed performance, filtering, and mobile optimization
If you already know what you want and just need the steps, the quick start below gets you from zero to published in under 5 minutes.
Quick Start: Embed Instagram in HTML
Here’s the fastest path — four steps, no coding background required.
- Open the Instagram Feed editor and select a template.
- Enter your username and customize the feed.
- Click “Add to Website” to generate your embed code.
- Paste it into your HTML file’s <body> and publish the changes.
Build your Instagram feed widget in the interactive editor below ↓
Three Ways to Embed Instagram on an HTML Website
There’s more than one way to get Instagram content onto an HTML page, and the right choice depends on how much control you need and how many posts you want to display.
| Method | Difficulty | Customization | Auto-Updates | Best For | Cost |
|---|---|---|---|---|---|
| Elfsight Instagram Feed widget | No code | High (layout, colors, filters, popup, CTA buttons) | Yes (every 48 hours) | Full feed display with design control | Free plan / paid tiers |
| Instagram native embed (single post) | Basic HTML | None (fixed Instagram styling) | No | Embedding 1–3 specific posts | Free |
| Instagram oEmbed API | Developer-level | Full (you build the frontend) | Yes (you manage refresh logic) | Custom-built feeds with full control | Free (requires Meta developer account) |
Bottom line: The widget approach covers most use cases with layout customization and auto-updating feeds — no backend code required. Native Instagram embeds work best for single posts or Reels, while the API route is better suited for custom apps that need full programmatic control but require ongoing maintenance, such as token renewal and rate-limit handling.
Choosing the Right Template for Your Instagram Feed
Before configuring the feed, decide what role it should play on the page. A product-page social proof feed needs a different setup than a visual portfolio or hashtag feed.
| Template | What It Includes | Layout | Best For |
|---|---|---|---|
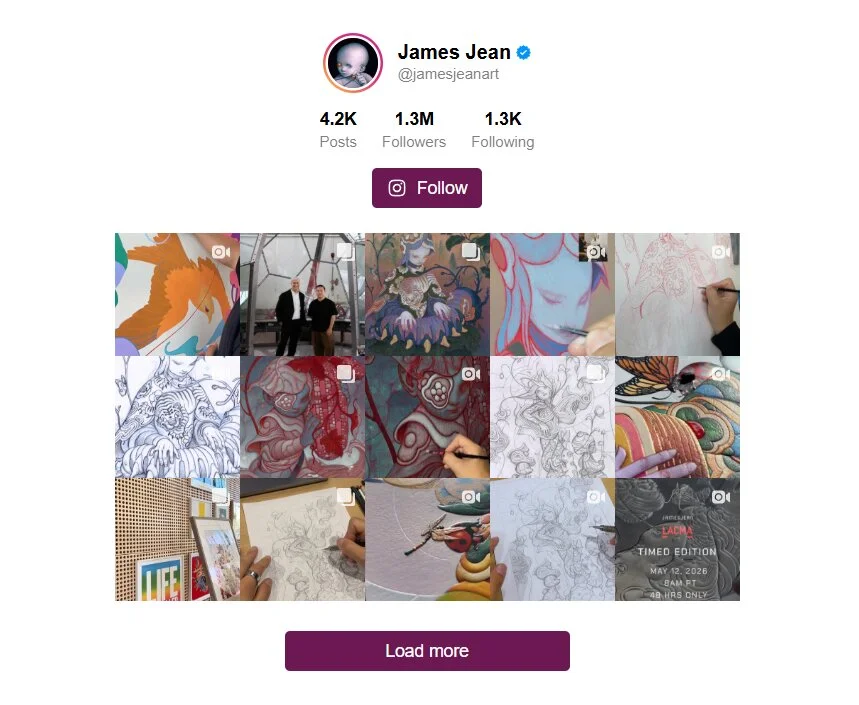
| Profile Widget | Full profile header (avatar, name, post/follower/following counts, Follow button) + post grid with slider navigation | Slider | Brand pages, “About Us” sections, influencer portfolios — anywhere you want to establish a full Instagram identity |
| Grid | “Follow us on Instagram” title header + multi-row grid with Load More button, no profile stats | Grid | Dedicated Instagram pages, footer social sections, visual portfolios — when the content matters more than the account |
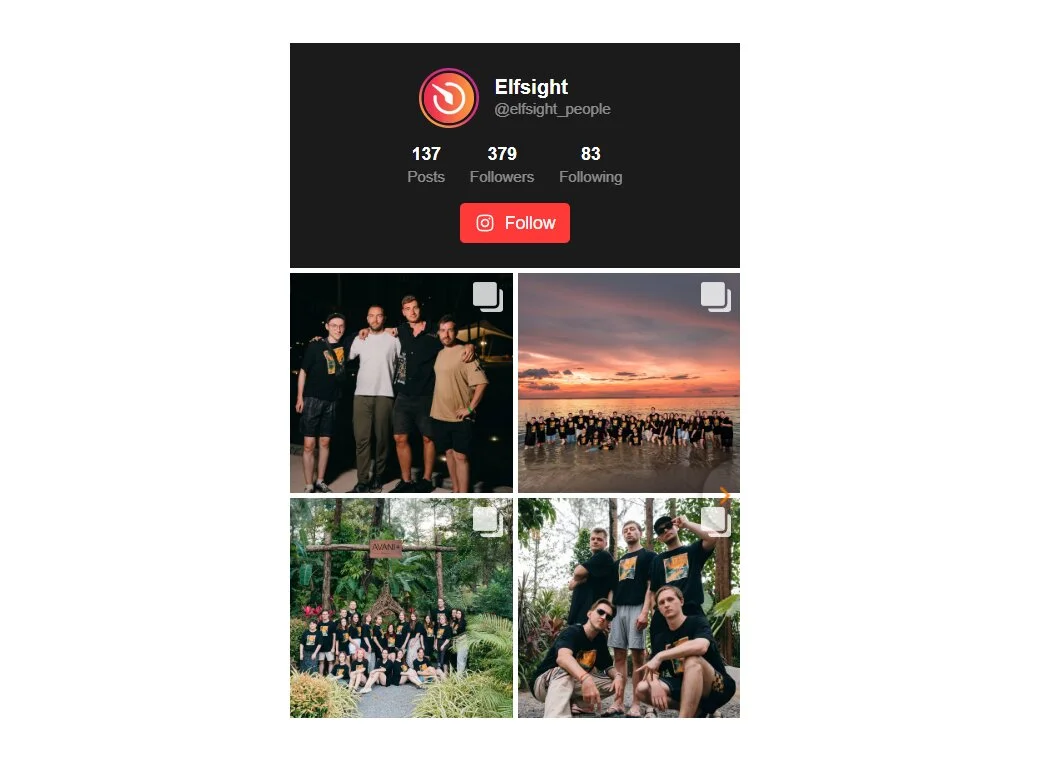
| Small Widget | Centered compact header (avatar, name, stats, Follow button) + 2×2 grid with arrow navigation | Slider (compact) | Sidebars, narrow content columns, small footprint placements — fits tight spaces without losing the profile context |
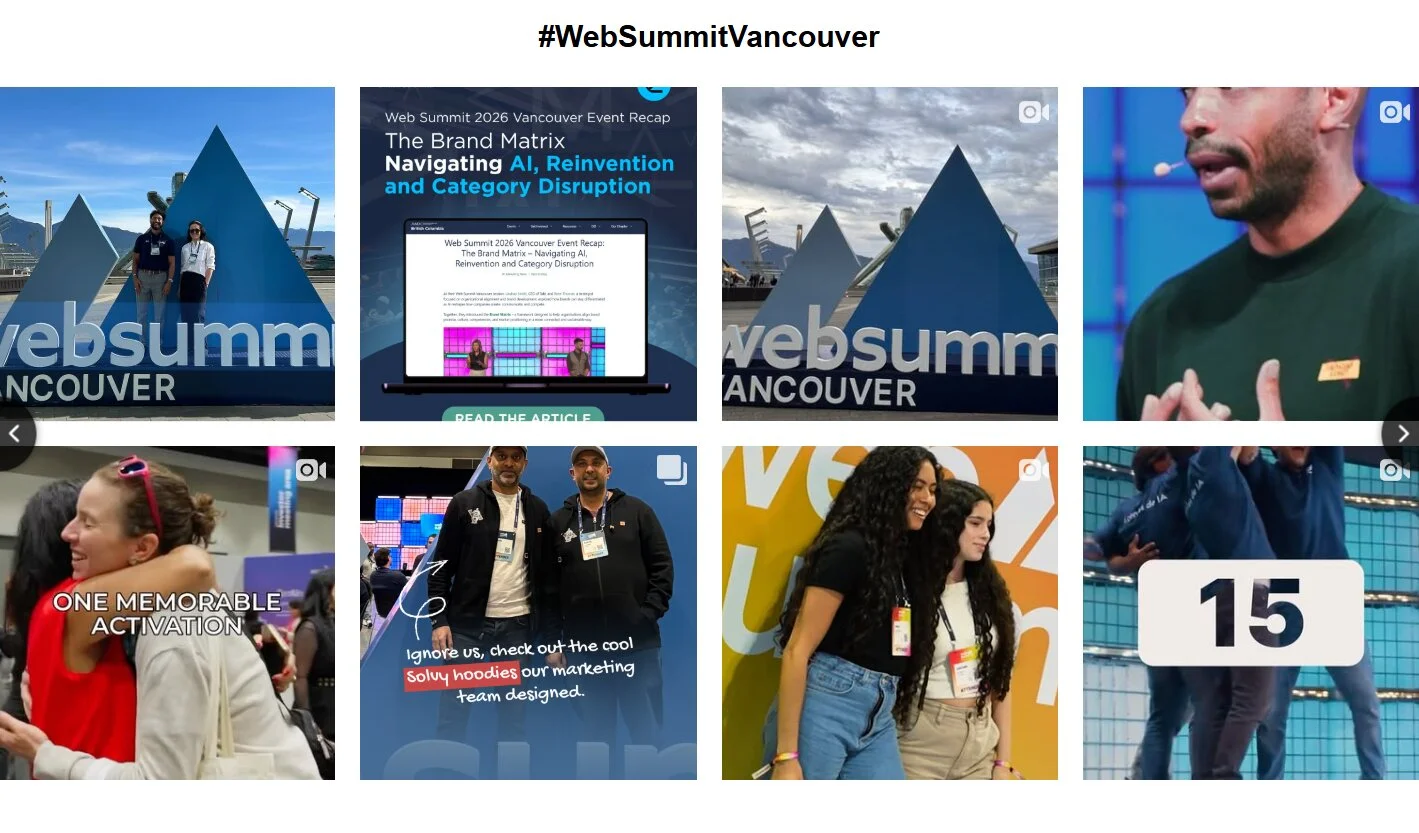
| Hashtag Showcase | Hashtag title as header + slider layout, no profile information | Slider | Campaign pages, UGC galleries, event highlights — shows posts by topic rather than by account |
| Post Slider | Profile header + single large post with arrow navigation (one post visible at a time) | Slider (single) | Hero sections, featured content spotlights, blog sidebars — high-impact display for fewer posts |
Matching the template to your website type
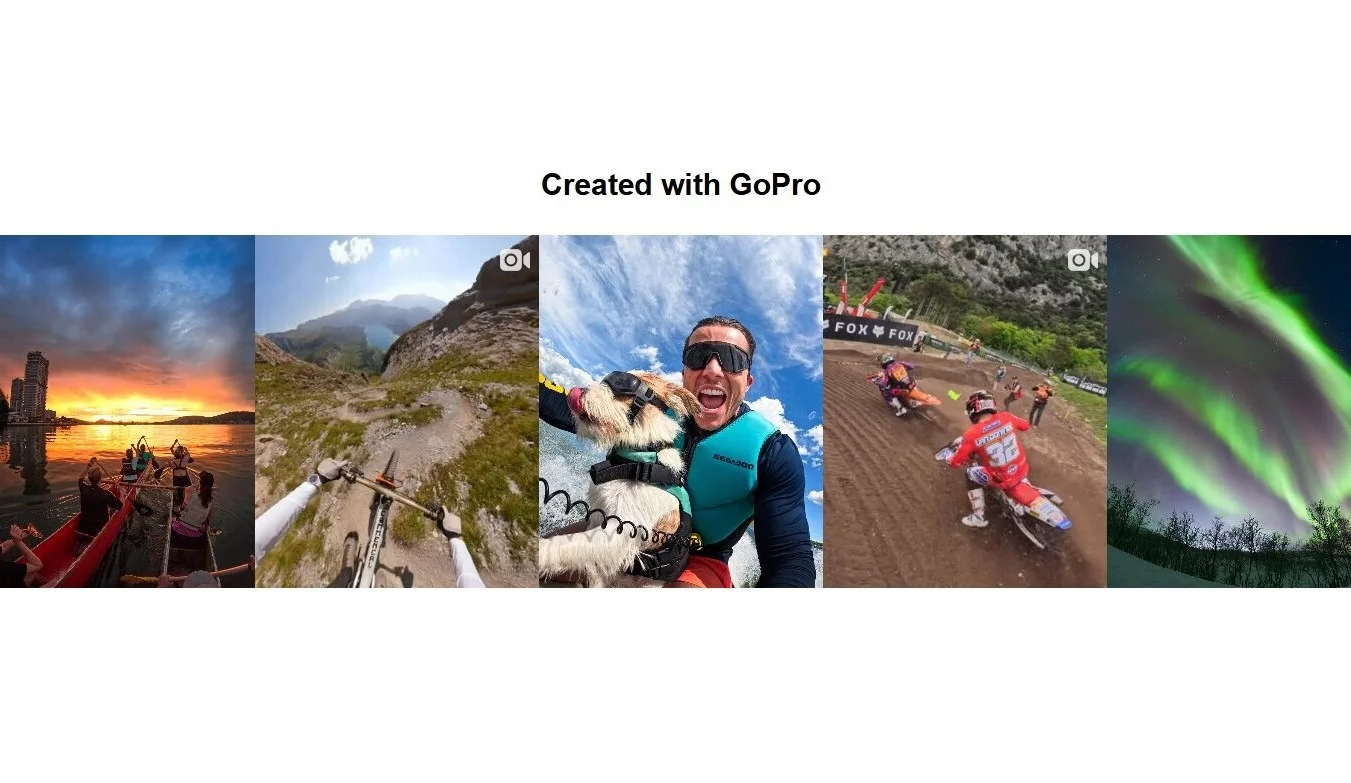
E-commerce and product pages
Go with Hashtag Showcase or Grid. A hashtag-sourced feed near the product description acts as visual social proof — real customers using the product, not studio shots. According to Emplifi’s Q3 2025 benchmarks, social posts featuring user-generated content drove conversion rates 10× higher than non-UGC posts. Use the Tile post template to keep the focus on imagery, and set up CTA buttons to link directly to product pages.
Portfolios and creative websites
Profile Widget or Grid. The Profile Widget serves as a mini Instagram profile on your page — a full header with follower count and a Follow button that gives visitors a reason to subscribe. Grid without the header works better on dedicated gallery pages. Set image ratio to 1:1 for a clean grid, or Portrait for vertical-heavy content like fashion photography.
Blogs and content websites
Small Widget or Post Slider. Small Widget tucks into a sidebar without overwhelming written content. Post Slider works as a hero element, spotlighting one post at a time in large format. Both keep the feed compact enough to complement the article rather than compete with it.
Event and campaign pages
Hashtag Showcase. Set the source to your event hashtag, and the feed becomes a wall of attendee content that refreshes every 48 hours. Effective for conferences, product launches, and community initiatives — visitors see real engagement instead of marketing copy.
Full Integration Guide: Setting Up Your Instagram Feed on an HTML Website
Now that you know which layout fits your page, let’s build the actual widget. The editor walks you through each tab in order — sources, layout, post display, styling, and settings.
Step 1: Choose a template
Open the Instagram Feed editor, and you’ll see a template selection screen. Templates are starting points — they pre-configure the layout, header style, and post display settings so you’re not building from scratch.
As noted above, there are five main options available. Pick the template closest to what you want — you’ll be able to change every setting afterward.
Step 2: Add your Instagram source
After selecting a template, you’ll land on the Sources tab. This is where you tell the widget which Instagram content to display.
You have two source types to choose from:
- Account — enter a public Instagram username or URL. The feed will display that account’s posts. The profile must be public — private, age-restricted, or country-restricted accounts won’t work.
- Hashtag — enter a hashtag to display posts tagged with it. Useful for branded campaigns or user-generated content collections.
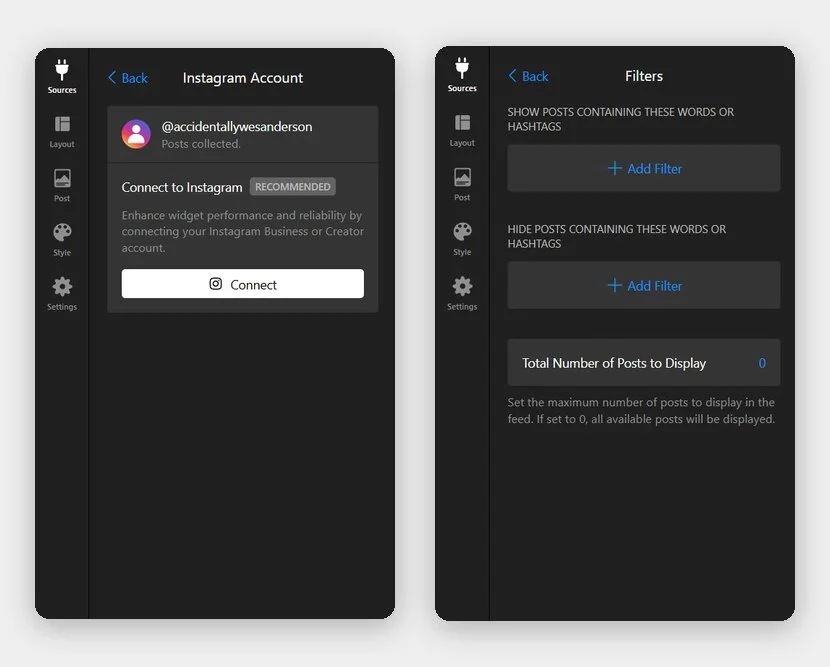
Under the same tab, you can set filters to show or display certain posts, determine their maximum number, and sort them by publication date or source list position.
Step 3: Choose your layout
Switch to the Layout tab to configure how posts are arranged on the page. You’ll see two layout options – Grid and Slider – along with settings for columns, rows, the header, and the feed title.
If you followed the recommendations in the layout section above, this is where you put them into practice. A few practical notes:
- Columns and Rows can be set to Auto (responsive, adapts to screen size) or Manual (you define exact numbers). Manual gives you more precision, but Auto handles mobile adaptation without extra work.
- Header controls whether the profile avatar, name, bio, follower count, and follow button appear above the feed. Turn it on for standalone Instagram sections; turn it off when the feed is embedded within other content.
- The Slider Settings section (visible when Slider is selected) lets you configure navigation arrows, pagination, and autorotation speed.
This step takes the longest — spend a minute experimenting with column counts at different widths. What looks good at 1200px wide might feel cramped at 768px, and Auto mode handles that gap better than you’d expect.
Step 4: Configure post display
The Post tab controls what visitors see on each post thumbnail and what happens when they click it. You have two display styles to pick from: Classic (showing date, caption, likes, etc.) and Tile (photo-only display with hover overlay).
Under Post Elements, toggle which details appear on the thumbnail overlay:
- Likes Count — shows engagement numbers on hover
- Comments Count — same, for comments
- Text — displays the caption preview on the thumbnail
The same can be done with popup settings to show or hide individual elements (username, follow button, likes count, comments, and more.
Post-click action
This dropdown determines what happens when a visitor clicks a post. “Open in Popup” is the default — it shows a full-size image/video with caption, likes, date, and CTA buttons without leaving the page.
Call to action
The CTA Buttons section lets you add custom buttons linking to product pages, booking forms, or any URL — these appear inside the popup alongside the post content.
Step 5: Customize the feed style
The Style tab is where you match the feed to your website’s visual identity. Instead of a one-size-fits-all color scheme, the widget offers per-element color control.
Start with the Color Scheme dropdown — it applies a predefined palette across the hover overlay, popup, and navigation elements. If the default schemes don’t match your brand, expand each section to set colors individually:
- Header — background, text, follow button, follow button text
- Post — overlay background and overlay text colors
- Arrows / Load More — navigation button and text colors
- Popup — multiple individually customizable elements
All color fields support HEX input, so you can paste exact brand values. If you need styling beyond what the built-in controls offer — like custom font sizes, border radius on post thumbnails, or gutter adjustments — the Custom CSS editor at the bottom of this tab handles that.
Step 6: Adjust settings
The Settings tab covers two things: language and custom JavaScript.
Set the Language to match your website’s audience — the widget supports 33+ languages, and this controls the text for UI elements like the Follow button, Load More button, and popup labels.
The Custom JS field is for advanced integrations — event tracking, conditional behavior, or connecting the feed to other scripts on your page. For most setups, you won’t need to touch this.
Step 7: Add the widget to your HTML website
Click “Add to Website” at the top of the editor. You’ll get an installation code — a <script> tag for the platform loader and a <div> element with your widget’s unique identifier.
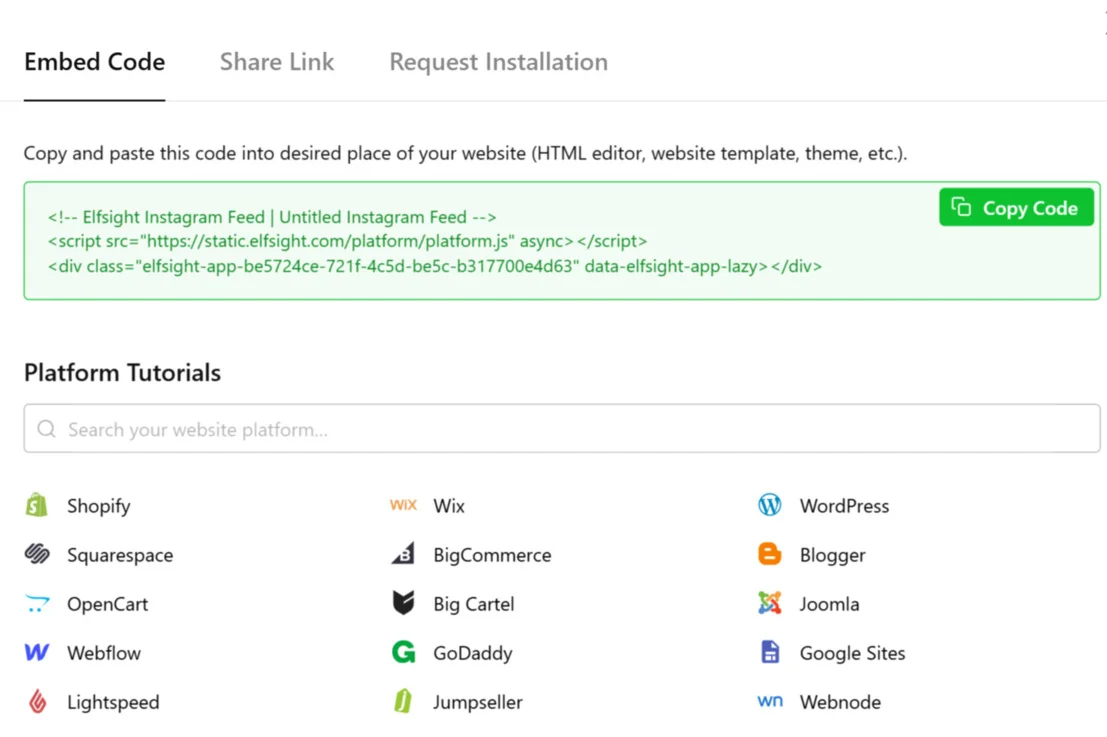
The only thing left to do is to paste the copied snippet into your code editor (VS Code, Sublime Text, Notepad++, or your hosting file manager):
- Open the HTML file of the page where you want the feed to appear.
- Find the spot within the <body> section where the feed should render.
- Paste the full installation code there. Save the file and upload it to your server.
For static widgets (a grid or slider embedded within the page content), paste the code at the exact position where you want the feed to appear.
For floating widgets, paste the code just before the closing </body> tag — the widget will float regardless of scroll position.
Troubleshooting quick check
- Feed not appearing: Verify that the code is placed inside the <body> tags, not inside <head>, <style>, or <script> tags.
- “No posts found” error: The Instagram account may be private, or the username may be misspelled. Double-check the source in the widget editor.
- Widget loads locally but not on the live server: Some widgets require an active internet connection. Testing via file:// protocol may not work — upload to your host or use a local server.
- New posts not showing up: The feed caches content and automatically refreshes every 48 hours. If posts still haven’t appeared after 48 hours, contact Elfsight support.
Other Ways to Embed an Instagram Content in HTML
The widget approach covers the broadest set of needs, but it’s not the only option. Here are two alternatives worth considering, depending on your requirements.
Option 1: Instagram native embed (single post)
Instagram’s built-in embed feature lets you copy an HTML snippet for any public post or Reel and paste it directly into your website. No third-party tools, no accounts to create — just three clicks on Instagram and one paste into your HTML file.
- Open Instagram on your desktop browser and navigate to the public post you want to embed.
- Click the three dots (⋯) in the top-right corner of the post and select Embed.
- In the popup, click Copy Embed Code.
- Open your HTML file and paste the code where you want the post to appear, inside the <body> section.
- Save the file and upload it to your server.
Option 2: Instagram oEmbed API
For developers who need programmatic control, Instagram’s oEmbed API endpoint returns the embed HTML for any public post URL. You send a GET request with the post URL and an access token, and the API responds with a JSON object containing the embeddable HTML in the html property.
- Set up a Meta developer account and create a Meta app to get an access token.
- Send a GET request to
https://graph.facebook.com/v19.0/instagram_oembed?url={POST_URL}&access_token={TOKEN} - Parse the html property from the JSON response and insert it into your page.
- Cache the response — the API has a rate limit of 200 calls per hour per user, so you shouldn’t call it on every page view.
This method makes sense when you need a custom feed that pulls content dynamically across multiple pages or integrates Instagram content into an existing application. If you’re exploring this route, our Instagram Graph API developer guide covers the full setup, including token management and rate limits.
Looking beyond Instagram content?
If your brand is active across multiple social platforms, an Instagram feed alone can start to feel limiting. Instead of stitching together separate Instagram, TikTok, and Facebook embeds, a Social Feed widget pulls everything into one unified content hub — keeping your pages cleaner while showcasing cross-platform social proof in a single place.
Optimization Tips for Your Instagram Widget
You’ve got the feed installed — now let’s make it work harder. These tips go beyond the basics and focus on getting more value from the content you’re already creating on Instagram.
- Curate what visitors see. The Sources tab includes Show/Hide filters — you can narrow the feed to posts containing a specific hashtag or keyword, or exclude posts that don’t fit the page context.
- Set up a call-to-action. Every post popup can include custom Call to Action buttons linking to product pages, booking forms, or landing pages. This turns passive browsing into active navigation and a direct path to conversion.
- Cap displayed posts. More isn’t always better. A tight, fresh grid looks more intentional than a sprawling archive — limit the feed to, say, your 6 or 9 most recent posts.
- Test the mobile view. If you’re using Manual column settings, configure the mobile value independently — what works as 4 columns on desktop often needs to drop to 2 on mobile.
- Keep your Instagram profile public and verified. The widget can only pull content from public profiles. If your account is toggled to private, new posts won’t appear in the feed until it’s public again and the cache refreshes.
Frequently asked questions
How do I embed an Instagram feed on a custom HTML website?
<body> section of your HTML file, at the position where you want the feed to appear. Save the file and upload it to your server. The widget loads automatically from Elfsight’s platform and displays your Instagram posts, photos, and Reels in the layout you configured. No server-side code or API keys are required.
Can I embed my Instagram feed in HTML for free?
Does the embedded Instagram feed update automatically on my HTML page?
Will an Instagram HTML embed work on mobile devices?
Can I display Instagram Reels and videos in an HTML embed?
Conclusion
You’ve now got a working Instagram feed on your HTML website — configured to match your layout, styled to your brand, and set to update itself every 48 hours without any manual intervention. Whether you went with the no-code widget approach or an alternative, the feed adds a layer of visual content and social proof that static images simply can’t replicate.
If you haven’t started yet, head to the Elfsight Instagram Feed widget, pick a template, connect your account, and paste the code into your HTML. The free plan gets you a working feed in minutes — customize the layout, colors, and filters from there to make it yours.