On a custom HTML website, every feature – from layout to functionality – has to be built or integrated manually. While this gives you full control, it also means elements like countdown timers require extra effort to implement. Without urgency, visitors often delay decisions, which can lead to lower engagement and missed conversion opportunities.
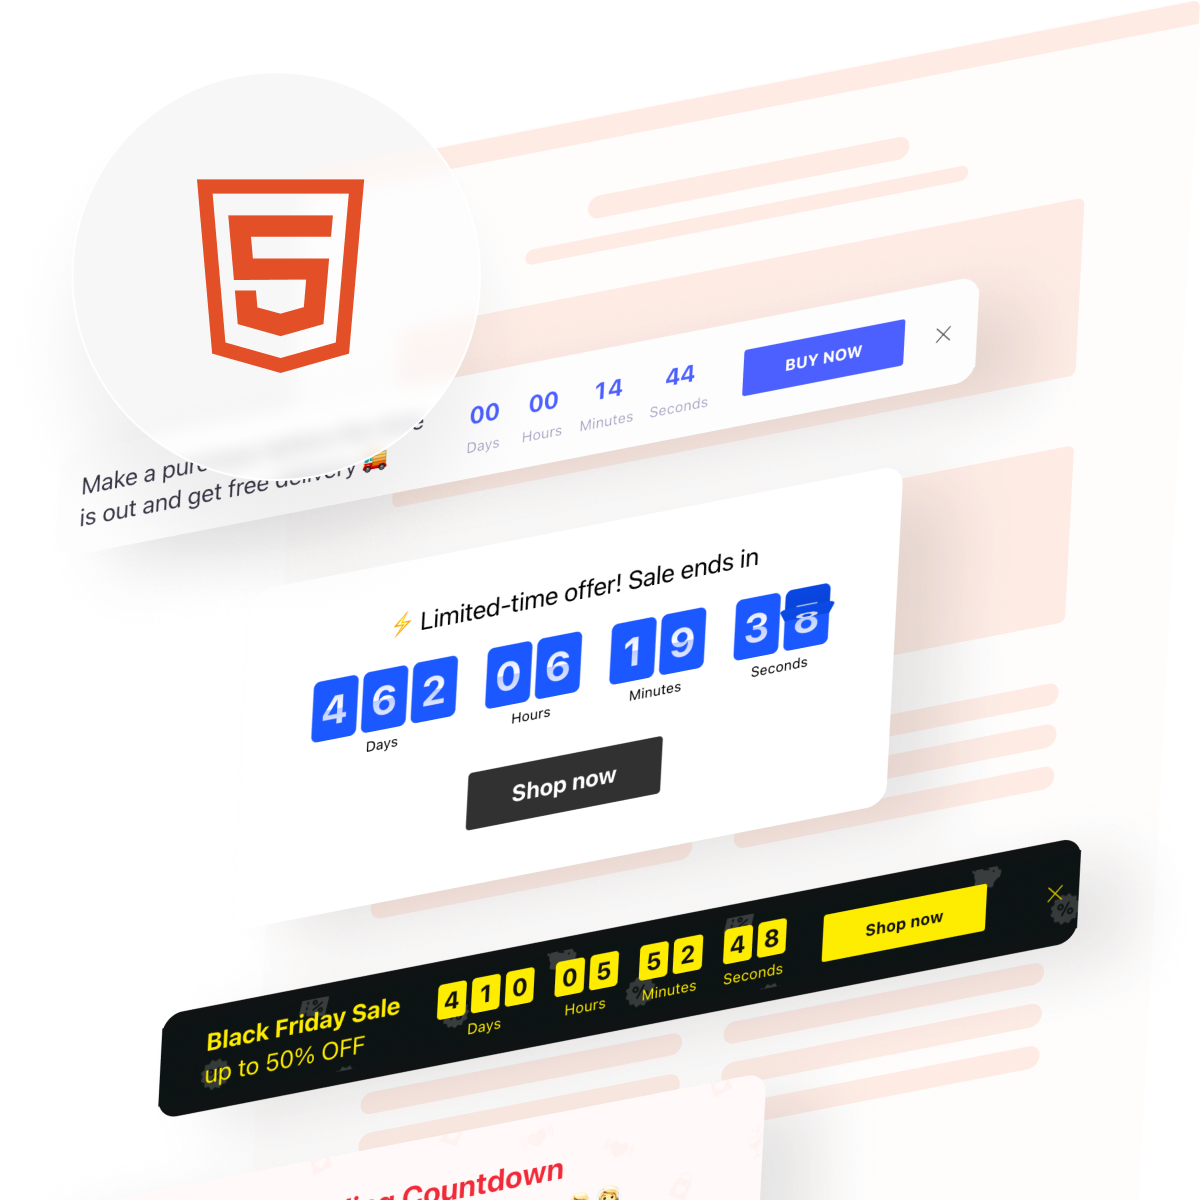
The Elfsight Countdown Timer widget provides a simple way to integrate a countdown into your HTML website without developing it from scratch. Elfsight lets you create, customize, and add a timer to your website in minutes, helping you introduce urgency and guide users toward faster action.
- A simple way to embed Countdown Timer on HTML without coding
- Why countdown timers increase urgency and conversions
- Alternative methods to add a timer and their limitations
- Optimization tips to improve performance and results
We’ll start with a quick implementation method so you can get your timer live immediately.
Quick Start: Add Countdown Timer to HTML
If you want a fast way to embed countdown timer on HTML, follow these simple steps:
- Open the Countdown Timer editor and choose a template
- Set your countdown type, time, and behavior
- Click “Add to website for free” to generate the embed code
- Paste the code into your HTML file where you want the timer to appear
Generate your Countdown Timer in our live editor and embed it instantly!
Why Embed Countdown Timer on HTML Website
Adding a countdown timer to a custom HTML website directly influences how users behave and how quickly they take action. Since HTML websites are often static by default, a countdown introduces a dynamic element that can significantly improve engagement and conversions.
⏳ Create a clear sense of urgency
Without a deadline, users tend to postpone decisions or leave your website to “come back later.” A countdown timer introduces a visible time limit, encouraging visitors to act before the opportunity expires.
📈 Improve conversion rates on key actions
Placing the timer near buttons, forms, or offers can significantly increase clicks and completions. It gives users a reason to act now instead of delaying.
🎯 Support campaigns and launches
Countdown timers are especially effective for promotions, product releases, or event registrations where timing matters. They make your campaigns feel more immediate and relevant.
🔄 Add dynamic behavior to static pages
HTML pages are often static and don’t change unless updated manually. A countdown introduces movement and real-time updates, making the page feel more interactive and engaging.
🧠 Reinforce scarcity and value
A visible countdown signals that something is limited—whether it’s time, availability, or access. This increases perceived value and makes your offer more compelling.
📍 Guide user attention and flow
Timers naturally draw attention due to their motion and ticking behavior. This helps guide users toward important sections, such as CTAs or promotional areas.
Core Features of Countdown Timer Widget
Before you start using a free HTML Countdown Timer embed widget, here’s what you can expect, the right set of features that allow you to control timing, appearance, and behavior:
| Feature | Practical Use |
| Countdown modes | Choose between fixed deadlines, personal timers, or number-based counters depending on your campaign |
| Flexible time control | Set exact dates, durations, and time zones for accurate countdown behavior |
| Multiple layouts | Display the timer as inline content, banners, or floating bars |
| Action triggers | Add buttons, links, or actions like redirects and form openings |
| Post-countdown behavior | Decide what happens when time ends (hide, show message, redirect) |
| Visual customization | Adjust colors, fonts, sizes, and styles to match your HTML design |
| Animation effects | Add subtle motion to increase visibility and engagement |
| Responsive design | Ensure the timer works across all screen sizes without extra coding |
| Easy HTML embedding | Insert the widget anywhere using a simple embed code |
| Analytics integration | Track clicks and interactions using tools like Google Analytics |
These features allow you to go beyond a basic timer and create a fully interactive element that adapts to different pages and goals. Instead of just displaying time, Elfsight helps you structure user behavior, guiding attention, reinforcing urgency, and helping visitors take action.
For more detailed characteristics, visit the features page.
Step-by-Step: How to Embed Countdown Timer on HTML
Now that the key features are clear, the next step is to configure your timer and place it into your HTML website where it can support clicks, sign-ups, or purchases most effectively.
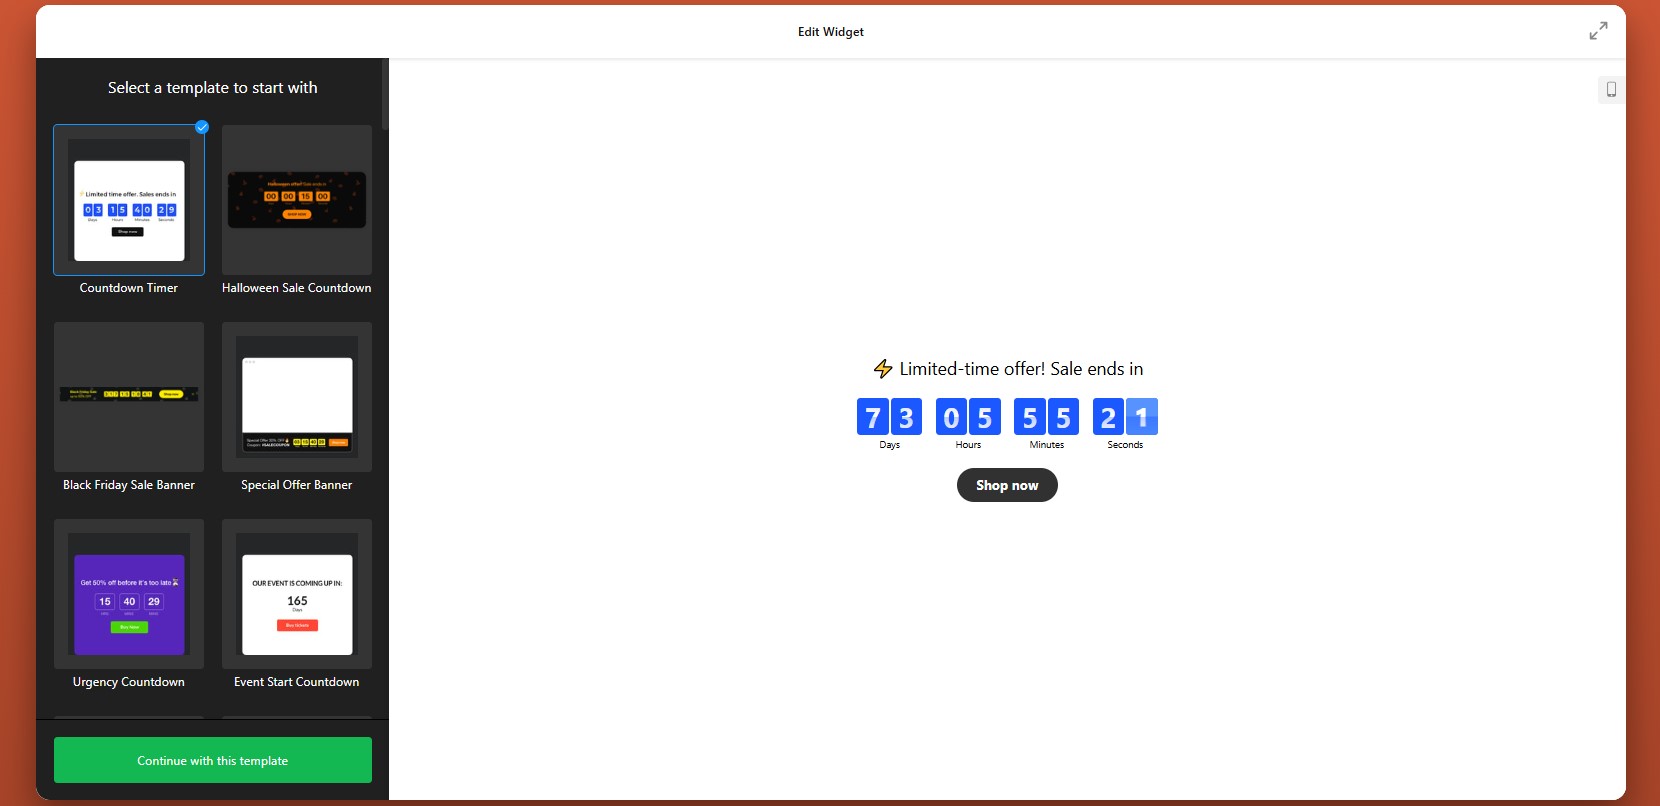
Step 1: Choose a Template
Open the Elfsight editor and choose one of ready-made templates designed for different goals and placements.
At this point, focus on choosing the structure that best matches your page layout and campaign objective. You’ll still be able to adjust the visuals and behavior later.
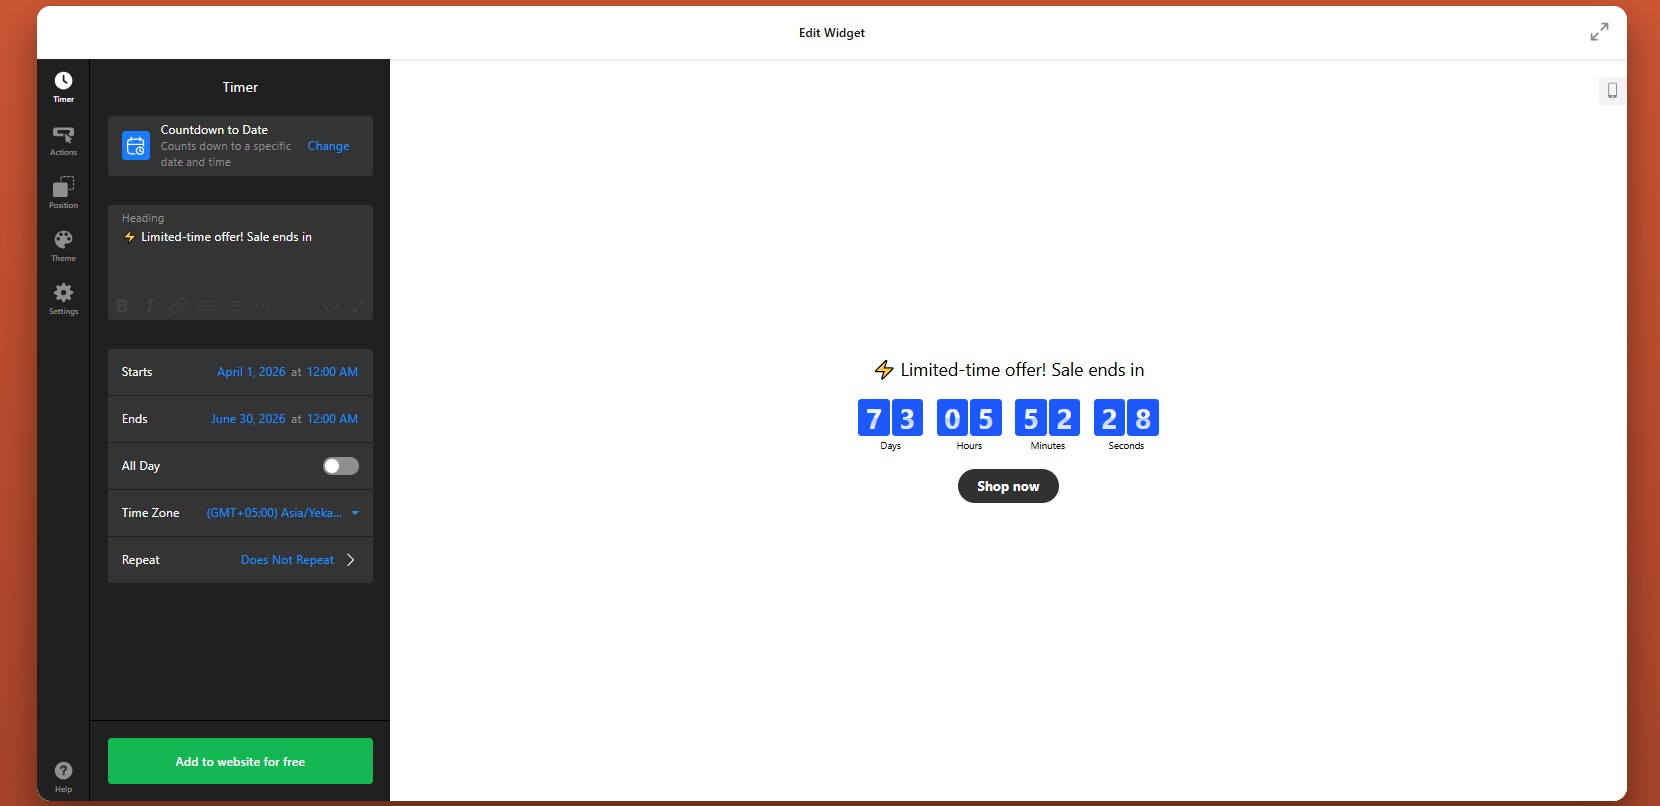
Step 2: Set the Timer Type and Countdown Logic
Once the template is selected, configure how the timer should actually work. This is where you decide whether the countdown is tied to a fixed deadline, personalized per visitor, or used as a numerical counter.
After choosing the mode, set the date, duration, and any time-related options such as time zone behavior. This step determines the urgency structure users will see when they open the page.
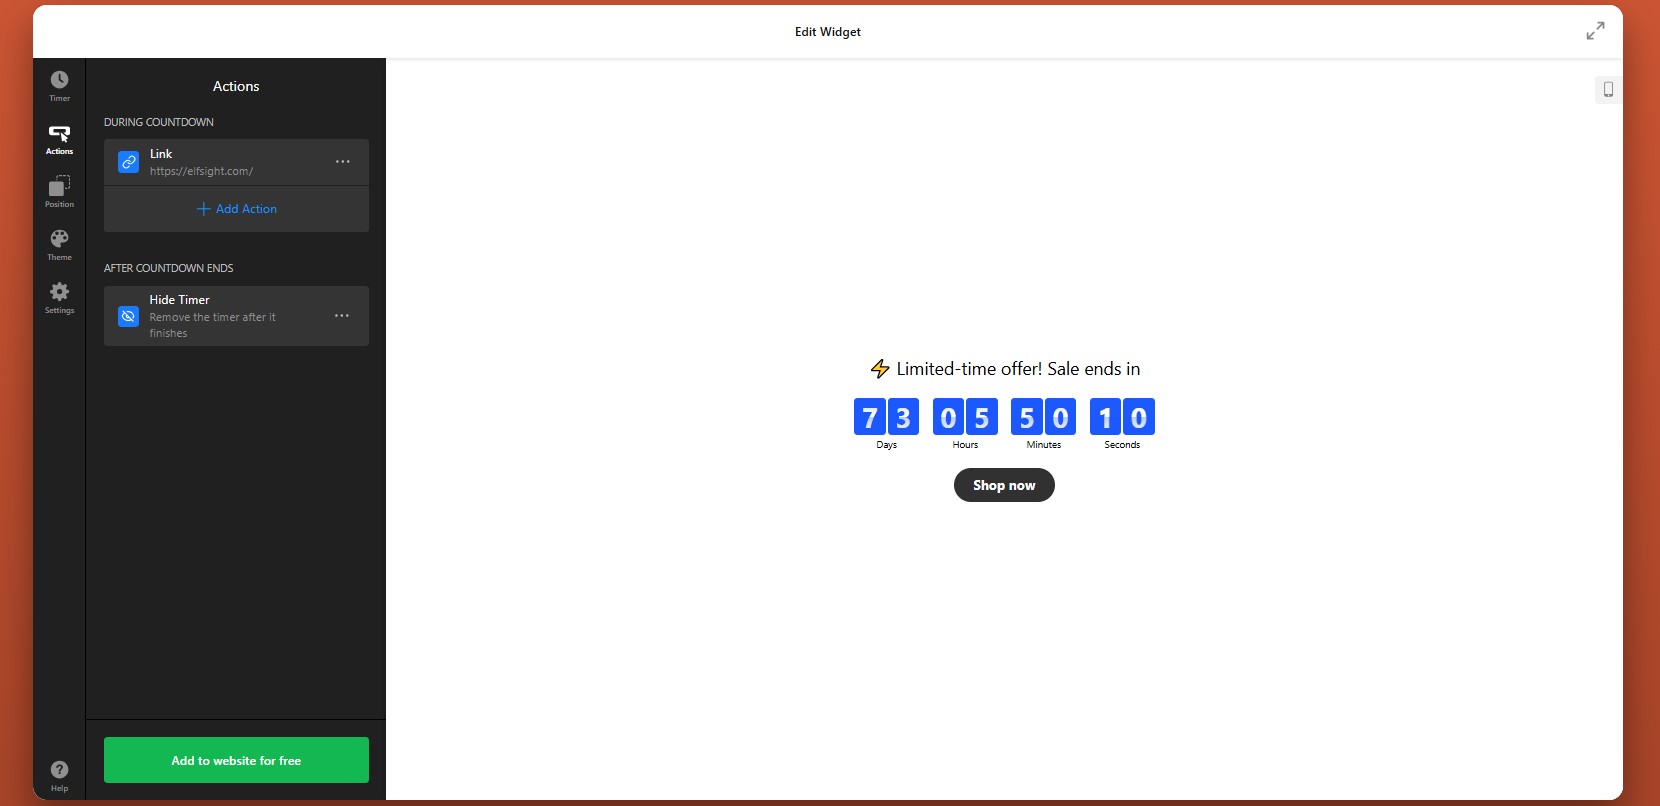
Step 3: Configure Actions During and After the Countdown
In the Actions tab, choose what the widget should do while the countdown is active and what happens when time runs out.
During the countdown, you can connect the timer to actions such as opening a form, sending users to a URL, or helping them add an event to their calendar. This is useful if the countdown is tied to a registration page, a booking flow, or a limited-time promotional page.
You can also define the post-countdown behavior. For example, when the timer reaches zero, you may want it to disappear, display a custom message, or redirect users to another page. This is especially helpful when an offer expires or when you want to change the next step automatically.
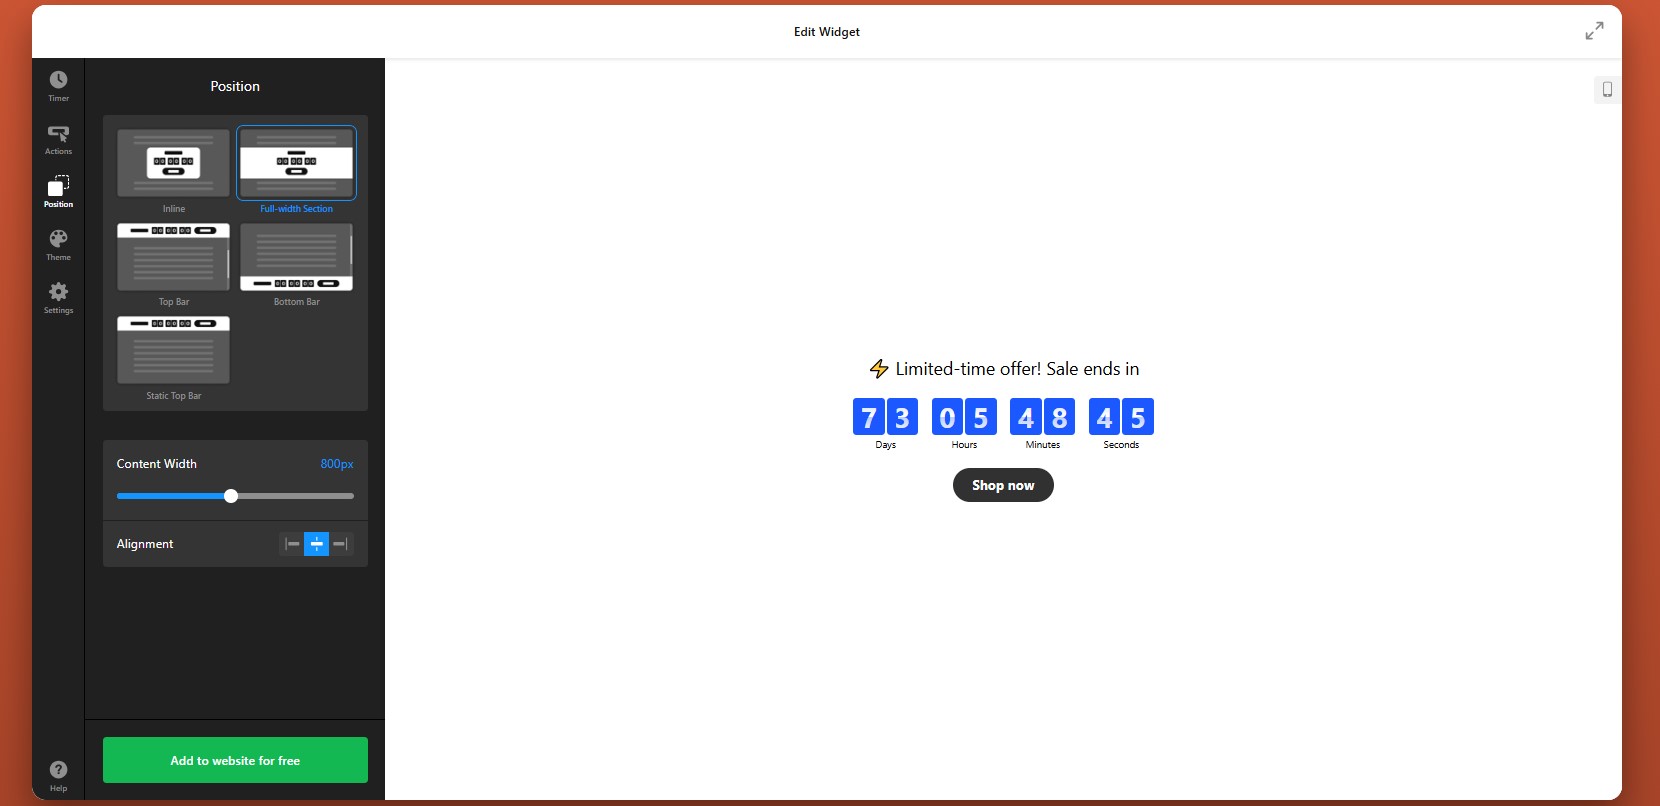
Step 4: Adjust Position and Display Rules
Next, open the Position tab to decide where the countdown appears and how it behaves within your HTML website. Think about where urgency matters most and make the countdown highly visible without making it intrusive.
You can also control whether the timer should show globally or only in selected sections of the website, depending on how your HTML structure is organized.
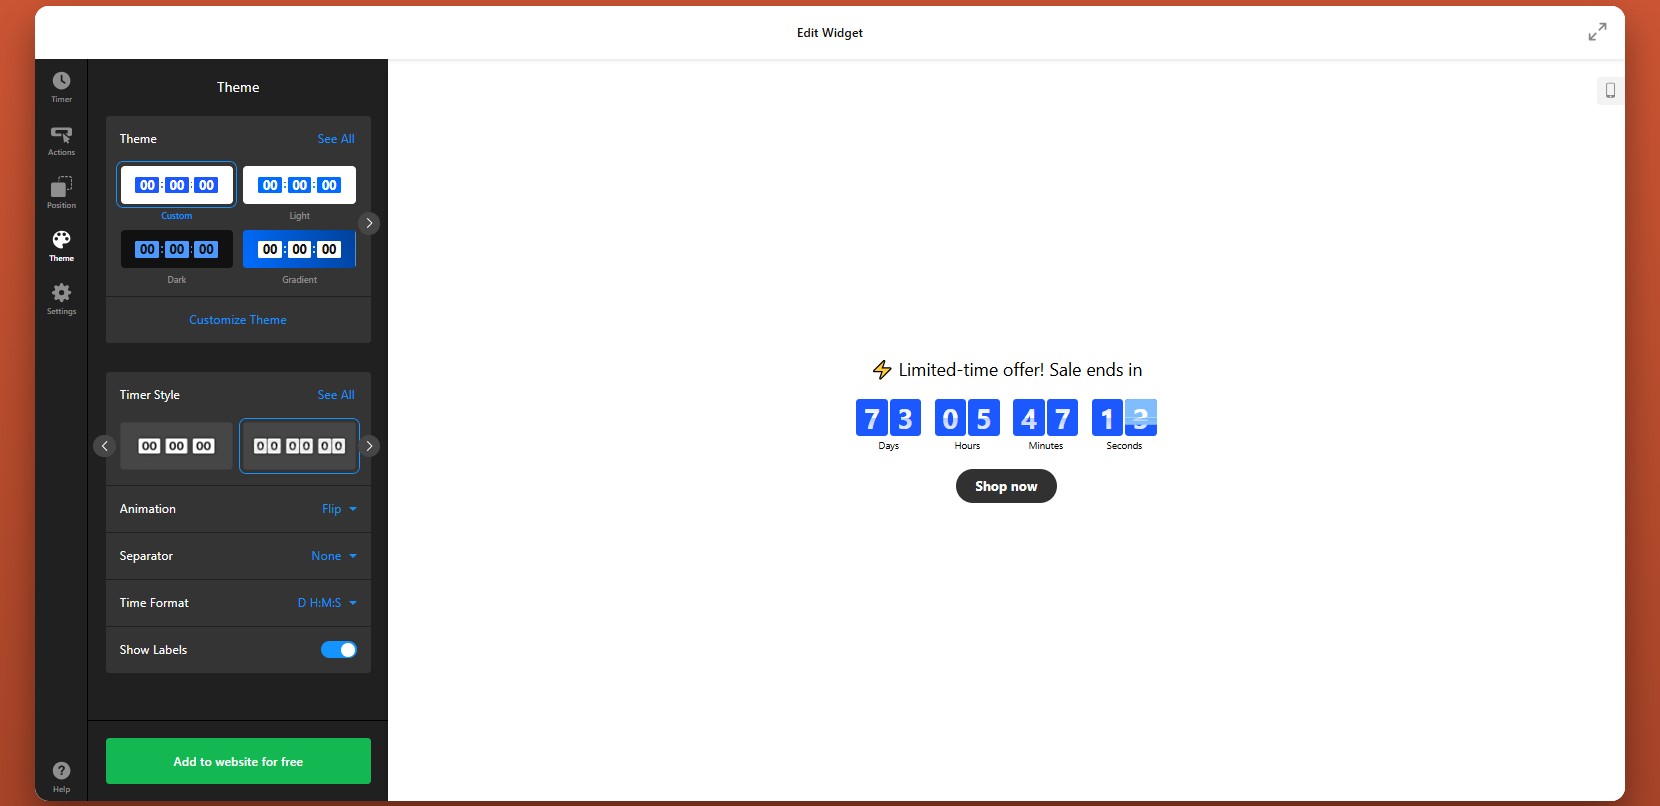
Step 5: Customize the Theme and Visual Style
Align the widget with your website design and make sure it stands out for the right reasons.
Animations can be useful here, but they should stay subtle. A small motion can draw attention to the timer, while aggressive effects may distract from the message itself.
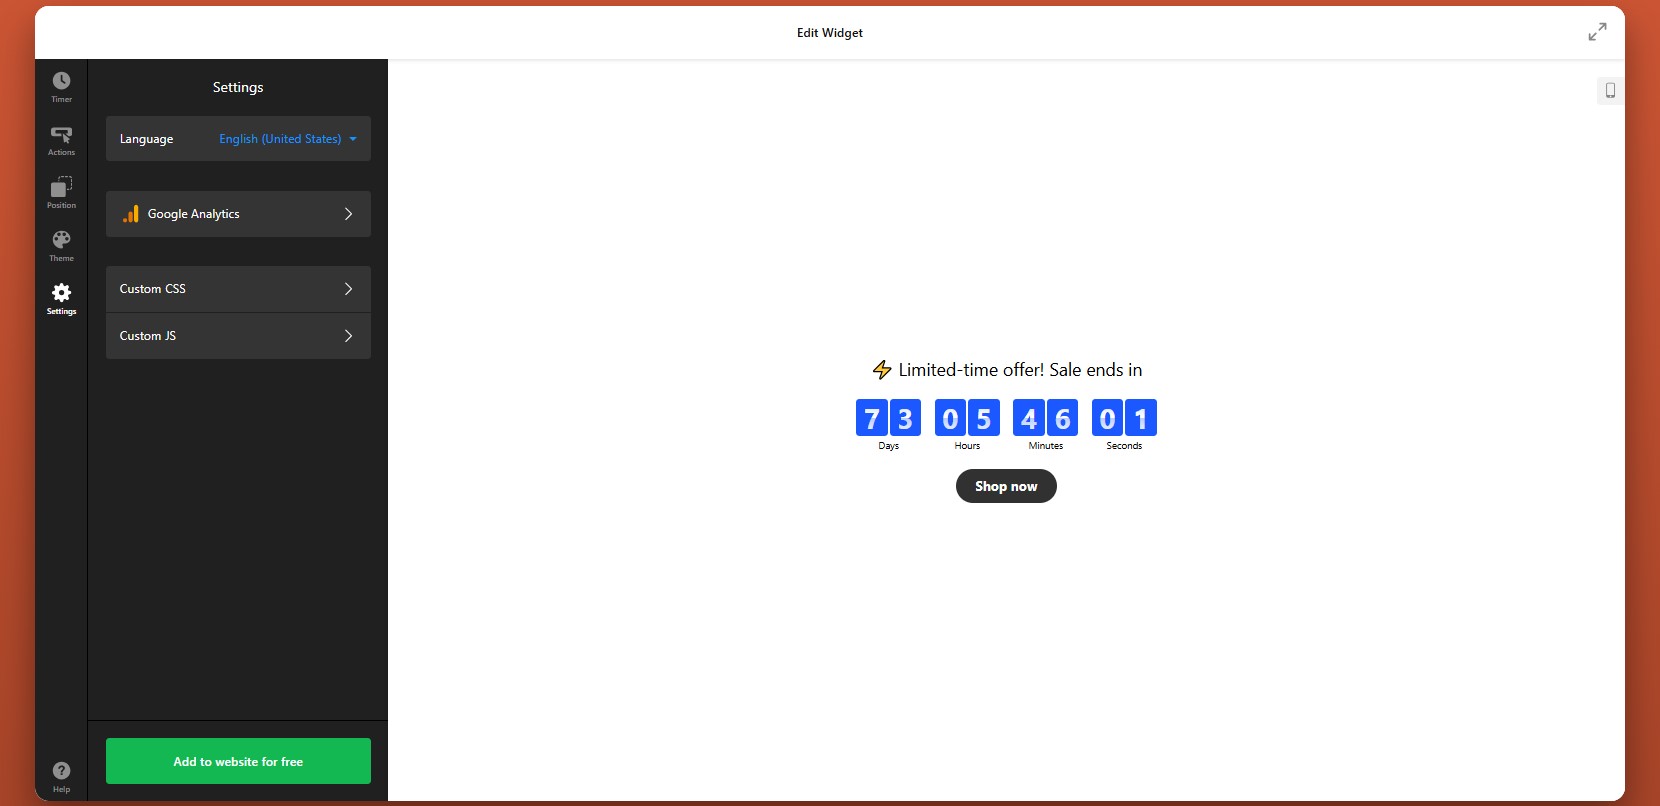
Step 6: Configure Additional Settings
Finally, go to the Settings tab to adjust the final options that affect usability and tracking.
If your website serves a multilingual audience, make sure the timer labels match the page language. If you want to measure performance, connect the widget with Google Analytics so you can track clicks and interactions.
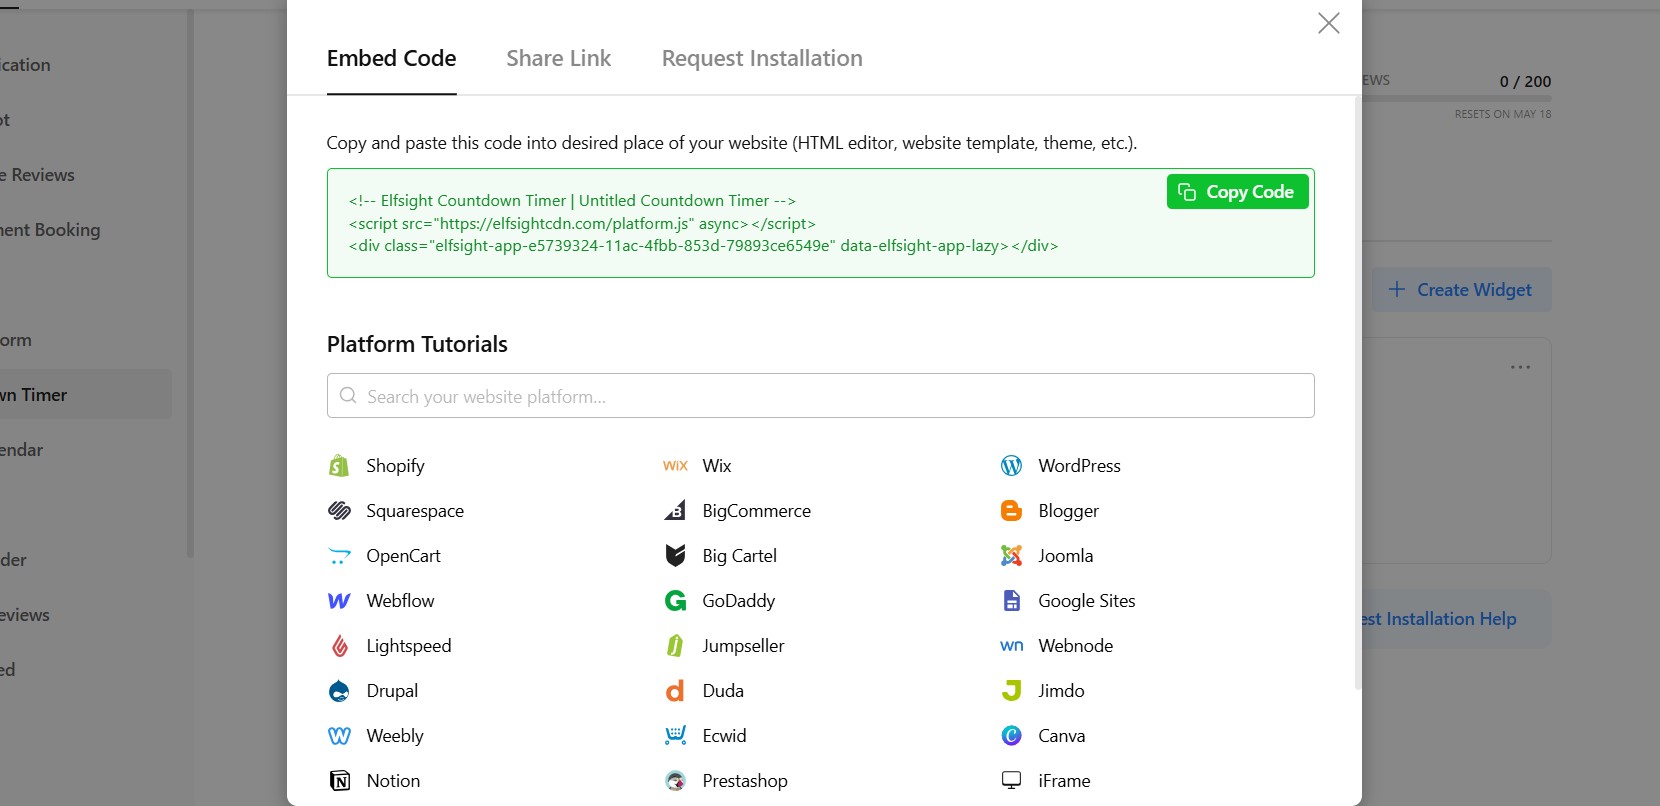
Step 7: Generate the Embed Code
Once your timer is fully configured, click “Add to website for free” to generate the embed code.
Copy the entire code snippet exactly as it appears. This code contains the widget loader and all the settings you’ve just applied. Your countdown is ready for installation.
Step 8: Paste the Code into Your HTML Website
Now add the countdown timer to your HTML file by placing the embed code in the correct location:
- Open your HTML file in your code editor.
- Locate the section where you want the countdown timer to appear (usually inside the <body> tag).
- Paste the embed code exactly where the timer should be displayed.
- Save your changes to the file.
- Upload the updated file to your server or publish it using your deployment workflow.
- Open the live page in your browser to verify that the timer appears correctly.
- Test the countdown on both desktop and mobile devices to ensure proper layout and functionality.
This approach gives you full control over placement, allowing you to position the timer exactly where it supports your content and conversion goals.
- If the timer doesn’t appear, confirm that the full embed code was pasted into the HTML file and that the updated file was uploaded correctly.
- If the time looks wrong, recheck your countdown mode and time zone settings.
- If the widget looks compressed, review the width of the surrounding container.
- If it behaves differently across devices, test the responsive layout and adjust nearby styling if needed.
By following these steps, you can add a fully functional Countdown Timer to your HTML website without building one from scratch, while still keeping full control over how it looks, behaves, and supports your campaign goals.
Other Ways to Integrate a Countdown into HTML
There are several ways to embed a countdown timer on HTML, but they differ in setup complexity, flexibility, and long-term usability. Below are the most common approaches, along with how to implement each one.
Custom JavaScript Countdown Timer
You can build your own countdown timer using JavaScript for full control over functionality and design.
To do this:
- Write or copy a JavaScript countdown script
- Add the script inside your HTML file (usually before the closing </body> tag)
- Create an HTML container where the timer will display
- Style it using CSS
- Requires coding skills
- Time-consuming to build and maintain
- Needs manual updates for changes
Open-Source Countdown Scripts
You can use pre-built countdown scripts from GitHub or other developer resources. These scripts can be copied and embedded into your HTML file.
This approach is faster than building from scratch and often provides basic functionality out of the box. But it still has some limitations.
- Limited customization without editing code
- May require debugging or adjustments
- No visual editor
Iframe-Based Countdown Tools
Some services provide countdown timers that you can embed using an iframe.
To implement it:
- Generate a countdown timer using an external tool
- Copy the iframe embed code
- Paste it into your HTML where you want the timer to appear
- Limited control over design and behavior
- Hard to fully match your website style
- May depend on external service performance
Each method can help you implement a countdown on your HTML, but they vary in effort and effectiveness. Here’s a feature-based comparison table to make the differences clearer and easier to scan.
| Feature | Elfsight Countdown Timer | Custom JavaScript | Open-Source Scripts | Iframe Tools |
| Ease of setup | Very easy | Hard | Medium | Easy |
| Coding required | No | Yes | Partial | No |
| Design customization | High | Very high | Medium | Low |
| Dynamic countdown | Yes | Yes | Yes | Yes |
| Countdown modes (fixed/personal) | Yes | Custom-built | Limited | Limited |
| Actions & triggers | Yes | Custom-built | Limited | No |
| Mobile responsiveness | Yes | Depends on code | Depends on script | Limited |
| Maintenance effort | Low | High | Medium | Low–Medium |
| Scalability | High | Medium | Medium | Low |
If you want a free Countdown Timer that combines ease of use with customization and reliable performance, Elfsight is the best option. It minimizes manual work while still fitting seamlessly into your website.
Optimization Tips for Your Countdown Timer
Once you’ve added your timer, a few strategic adjustments can make a significant difference in how users respond to it. A well-placed and well-configured countdown doesn’t just show time – it actively drives engagement and conversions.
- Place the timer near key actions: Position it close to buttons, forms, or pricing sections so users see urgency exactly when they’re about to decide.
- Clearly explain the purpose: Add a short message like “Offer ends in…” or “Registration closes in…” to give context and avoid confusion.
- Use the right countdown mode: Fixed timers work best for global campaigns, while personal timers are more effective for individualized offers.
- Keep the design clean and visible: Use contrast to make the timer noticeable, but avoid overly complex styles that distract from your content.
- Limit the duration strategically: Shorter countdowns typically create stronger urgency and encourage quicker action.
- Align the timer with your campaign: Make sure the countdown reflects a real deadline and matches the offer it supports.
- Test different placements: Try placing the timer in headers, inline sections, or near CTAs to see what performs best.
- Track performance and refine: Use analytics to monitor clicks and conversions, then adjust timing, messaging, or placement accordingly.
These optimizations help ensure the plugin actively contributes to better engagement and measurable results.
Real-World Example: Dental Website Improves Engagement and Clarity
David Drew runs a dental practice website where keeping information up to date and guiding patients toward booking decisions were key challenges. Like many service-based businesses, he needed a way to keep content fresh while clearly communicating availability and encouraging timely action.
Before using Elfsight
Frequent need to manually update website content
Difficulty pulling and displaying reviews dynamically
No clear, unified way to communicate appointment availability
With Elfsight widgets
“We now keep the website live:
- Instagram Feed, it constantly feels fresh, and is now updated automatically.
- All-in-one reviews ensure we have got rich search results.
- Countdown banner ensures our CTA has a clear deadline.”
David introduced multiple widgets to streamline content updates and improve communication. The Instagram Feed kept the website visually fresh without manual effort, while the All-in-One Reviews widget helped strengthen credibility through search visibility.
The Countdown banner helped clarify timing around key actions, making it easier for visitors to understand when they should book or respond.
The result
The website became easier to maintain and more effective at guiding users. Visitors could quickly access relevant information, see up-to-date content, and understand when to act – resulting in a clearer and more engaging user experience.
By combining dynamic content and time-based elements, David turned his website into a more structured and action-driven platform without increasing workload.
Frequently Asked Questions
Why does my countdown timer show different times for different users?
Can I use multiple countdown timers on one HTML website?
Can I track clicks and performance of my countdown timer?
What happens when the countdown reaches zero?
Can I localize the countdown timer for different languages?
How do I update or change an existing countdown timer?
Conclusion
Adding a Countdown Timer to an HTML website is one of the most effective ways to introduce urgency and make your pages more action-oriented. Instead of relying on static content, you create a dynamic element that encourages visitors to respond within a clear timeframe.
The Elfsight Countdown Timer widget simplifies the entire process. You can customize its appearance, control how it behaves, and quickly embed it on your website – all without building complex scripts or managing manual updates. This makes it an effective tool for boosting engagement and driving conversions.