What Is Contact Us Form Plugin?
The Elfsight Contact Form widget is a game-changing solution for entrepreneurs seeking innovative ways to enhance engagement and attract visitors to their WordPress websites. This powerful widget empowers you to seamlessly embed contact forms on various sections of your site, capturing your audience’s attention and compelling them to take action.
Customizing the Elfsight Contact Form to align with your website’s aesthetics is a breeze. You have the freedom to adjust colors, fonts, and sizes, ensuring seamless integration with your site’s design.
To add the Elfsight Contact Form plugin to your WordPress or Elementor website, follow these simple steps:
- Access the WordPress or Elementor plugin repository and locate the Elfsight Contact Form plugin.
- Click “Install Now” to incorporate the plugin into your website.
- Once activated, configure the settings and customize the appearance of the form to your preference.
Embedding the Elfsight Contact Form is now as easy as 1-2-3. Engage your audience by strategically placing the form on your homepage, product pages, or during special events. Your visitors will be enticed to contact us, creating a sense of interest and excitement as they explore your professional updates. Plus, we offer free tutorials and code snippets to help you make the most of this indispensable widget on your WP pages and more.
Take your website to the next level with the Elfsight Contact Form plugin!
How To Add Contact Us Form Plugin to WordPress: All Methods
Personalization is key! With this WordPress contact form widget, you have the power to adjust the color scheme, font, and layout of your forms to seamlessly integrate them with your website’s style. Furthermore, you can include detailed information such as headings, descriptions, dates, times, images, and links, providing your visitors with a comprehensive view of your requests and feedback.
And here’s the kicker – it’s a premium-quality WordPress plugin, but it’s absolutely free! You can integrate this plugin into your WordPress site without any cost. Installation is a breeze, enabling you to create your custom contact forms and feedback mechanisms right away.
By utilizing this WordPress contact form widget, you can ensure that your visitors stay engaged and connected without the need to navigate away from your site. It’s a game-changer for enhancing user interaction, whether you run a business or a blog.
In summary, the Elfsight Contact Form widget for WordPress is the ultimate free plugin for users. It’s user-friendly, highly customizable, and an excellent tool for showcasing your contact forms and feedback mechanisms. If you’re eager to take your WordPress website to the next level and engage your audience effectively, this widget is a must-have. Get started today and make your website a hub for seamless contact and communication.
Getting started is a breeze:
- Log in to your Elfsight account at Apps Elfsight, or create a new account if you don’t have one already.
- Navigate to the Applications dashboard and select the Elfsight Contact Form widget that you want to add to your website.
- Customize your WordPress contact forms to match your website’s style. You can include posts with titles, descriptions, dates, times, images, and links. Personalize the color scheme, font style, and layout to maintain a consistent design.
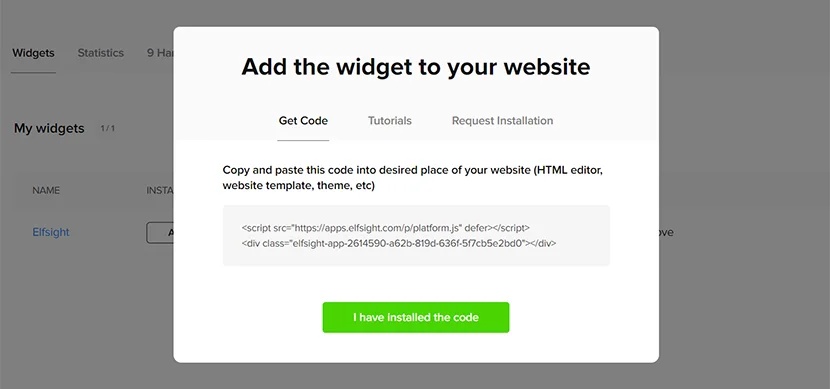
- Once you’re satisfied with your customized WordPress contact forms, click on the “Get the Code” button to copy the code for your contact form widget.
- Go to your WordPress website’s HTML editor and integrate the code where you want the contact forms to appear.
- Save your modifications and refresh your WordPress website to see your contact forms in action.
You’re all set! You’ve just acquired the installation code for the Elfsight Contact Form widget, tailor-made for your WordPress website. Now, it’s time to seamlessly add it to your WordPress pages. Here’s a quick guide on what to do next:
- First things first, log in to your WordPress website’s admin panel. Find the specific page where you’d like to incorporate your new Elfsight Contact Form widget.
- Now, hover your cursor over the exact spot where you envision showcasing your Elfsight Contact Form plugin on your WordPress website. Locate the Plus icon and give it a click.
- Look for the Custom HTML within the Formatting section and select it.
- Paste the installation code for your Elfsight Contact Form widget into the pop-up window. Once that’s done, hit the “Update” button to save all your modifications to your WordPress website.
Now, after successfully integrating your Elfsight Contact Form widget into your WordPress website, you might want it to grace all the pages of your site. This is particularly valuable for ensuring easy access to your contact forms throughout your site. Plus, considering the array of WordPress themes available, you may encounter various methods for displaying the widget on different pages, resulting in some appearance variations. Let’s explore four ways to achieve this:
Unlock the full potential of your WordPress website by seamlessly integrating the Elfsight Contact Form widget. It’s a versatile and user-friendly tool that streamlines the process of adding interactive contact forms to your site. Here’s a step-by-step guide to get you started:
- Begin by logging into your WordPress website and navigate to the “Appearance” tab on the left-hand menu. From there, click on “Theme Editor.”
- In the right-hand menu under “Theme Files,” find the “footer.php” file. Now, it’s time to add the Elfsight Contact Form widget code just before the closing tag. After doing so, click the “Update File” button to save your changes.
And just like that, you’ve successfully inserted the widget into all the pages of your WordPress website, making it easy for visitors to contact us effortlessly. While this is a versatile method, there are alternative approaches to integrate the widget. Let’s explore a couple of them for added flexibility.
If you’re looking to effortlessly integrate the Elfsight Contact Form widget into your WordPress website using the Widgets option, here’s a step-by-step guide to get you started:
- Begin by logging into your WordPress website’s backend and head over to the “Appearance” tab on the left-hand menu. Now, click on “Widgets.”
- Within the list of Available Widgets, locate “Custom HTML.” From the dropdown menu, select one of the Footers, such as “Footer One,” and then hit the “Add Widget” button.
- Now, it’s time to paste the installation code for your Elfsight Contact Form widget into the Content field. After pasting the code, simply click the “Save” button.
Congratulations! You’ve seamlessly added your widget to your WordPress website, making it a breeze for visitors to engage with your contact forms. While this method is incredibly versatile, there are alternative approaches to integrate the widget. For instance, you can insert the widget code into a WordPress post or page using the HTML editor. Another option is to employ a shortcode provided by the widget to create a dedicated contact form on a specific page. However, there’s one more method to explore for optimal flexibility on your WordPress website. Let’s delve into it.
For a seamless integration of the Elfsight Contact Form widget on your WordPress website, utilize the Customize option. Here’s a straightforward guide on how to get it done:
- Start by logging into your WordPress website’s admin panel. Head over to the “Appearance” tab located on the left-hand menu, and select the “Customize” option.
- Within the left-hand menu, locate and click on “Widgets.”
- To add the Elfsight Contact Form widget, select the “Add a Widget” option positioned at the bottom of the menu. From the options that appear, choose “Custom HTML.”
- It’s time to paste the installation code for your Elfsight Contact Form widget into the Content field. After completing this step, click the “Publish” button to save all the changes for your WordPress website.
Congratulations! Your plugin is now seamlessly integrated into your WordPress website. You can take advantage of this widget’s capabilities to enhance your website’s performance by embedding it on any or all pages of your site, ensuring a more interactive and user-friendly contact experience.
In this comprehensive tutorial, we’ll walk you through the process of seamlessly adding the Elfsight Contact Form widget to your WordPress Gutenberg editor, enhancing your website’s contact capabilities.
Let’s get started:
- Open your Gutenberg editor and locate the “Add Block” button positioned in the upper-right corner.
- In the search bar, type “Elfsight” to find the WordPress Contact Form widget among the available options.
- Once you’ve selected the Elfsight Contact Form widget, you can proceed to customize the settings, tailoring your contact forms according to your preferences. This includes creating unique forms and adjusting their appearance to match your website’s style.
- To finalize the integration, click “Publish” in the upper-right corner. Then, select “View Page” to see how your customized contact forms appear on your WordPress website page.
Congratulations! Your Elfsight Contact Form widget is now seamlessly integrated into your WordPress Gutenberg editor, offering you the freedom to create and insert tailored contact forms, thereby enhancing the overall contact experience on your website.
Unlock the power of effortless contact form integration using Elementor with the Elfsight Contact Form widget. Here’s a step-by-step guide to make it happen:
- Begin by logging into your Elfsight account. If you’re new, go ahead and create a profile to get started.
- Navigate to the application panel and select the Contact Form plugin of your choice.
- Customize the widget’s appearance and functionality to align seamlessly with your WordPress website design.
- Once you’re satisfied, receive a unique shortcode and copy it for the contact plugin installation.
- Head to your WordPress admin dashboard and choose a page where you’d like to add the contact form widget.
- Select “Edit with Elementor.”
- In the Elementor editing panel on the left side of the screen, find the “HTML” option.
- Drag and drop the HTML block into the text area on the right.
- Paste the copied shortcode from your setup form into the “HTML Code” field.
- Finally, hit the “Update” button to save your changes, and voilà! You’ve seamlessly installed the Contact Form within Elementor and WordPress simultaneously.
No steps missed – you now have your shortcode ready to embed, enhancing communication between you and your website visitors while elevating their user experience.
The Amazing Features of Elfsight Contact Form Widget
The Elfsight Contact Form widget is a versatile and responsive tool that redefines the way you interact with your audience. Its purpose? To offer a seamless, hassle-free experience for creating and embedding contact forms on your WordPress site. What sets it apart is its user-friendliness, making it accessible to anyone, regardless of their familiarity with HTML code.
This Contact Form Builder is loaded with an array of dynamic features, granting you absolute control over your forms. Tailor them to suit your specific needs, all with the help of our intuitive form maker. These customizable features encompass:
| Tailorable designs | Elfsight contact form creator offers an array of pre-designed templates to select from. These templates provide extensive options for personalization, allowing you to adapt them to harmonize seamlessly with your WordPress website’s aesthetics. |
| Personalization features | Within the contact form creator, you have the flexibility to personalize the visual aspects of your form block to align with your WordPress website’s identity. Elfsight’s creator presents a range of font styles, color schemes, and field placement alternatives, simplifying the process of tailoring your forms. |
| Connectivity | The Contact Form Builder empowers you to link your custom form with MailChimp, Google Sheets, and Zapier. This consolidation centralizes the gathered data, making it readily available for in-depth analysis and automation in marketing endeavors. |
| Multi-lingual support | Elfsight Form Builder extends its support to multiple languages, ensuring compatibility with multilingual WordPress websites. You can effortlessly select your preferred language through the form creator. |
| Data examination | The Contact Form Builder introduces the capacity to visually scrutinize the information collected from custom forms. This feature, courtesy of Elfsight Builder, enriches your understanding of customer behavior. |
| Adaptive layout | Elfsight Form Builder is meticulously designed to be responsive, ensuring a polished appearance on all devices. This adaptability makes it an ideal tool for capturing leads and providing an exceptional user experience to WordPress visitors, regardless of their device. |
| Enhanced security | Contact Form Builder by Elfsight offers advanced encryption and authentication features for heightened security. These features safeguard your forms against hackers and data breaches, effectively preventing spam submissions from automated bots. |
| Intelligent captcha | To counter spam submissions from automated tools, Elfsight Contact Form Builder includes an optional built-in captcha system, which can be effortlessly configured in the online creator. This ensures that only legitimate custom submissions are accepted. |
Elfsight Contact Form Widget: Usage Examples
You don’t need to possess advanced coding or design skills to tailor your WordPress website to your specific style. We provide a collection of creative templates that can seamlessly blend with your chosen design. Whether you want to showcase your contact form’s unique features, progress indicators, or opt for a minimalist look by turning them off, we’ve got you covered.
Discover six captivating widget templates suitable for any scenario, each serving as an excellent starting point for your creative journey. Say goodbye to the hassle of crafting an HTML contact form from the ground up and explore the array of options available to you:
- Engage
- Connect
- Communicate
- Interface
- Unity
- Harmony
Elevate your WordPress website’s contact experience with the Elfsight Contact Form widget and make a lasting impression with your audience. It’s about choice, creativity, and simplifying the process for you.
Sample 1. Streamlined Contact Form
Take a look at this straightforward and versatile contact form, perfect for receiving messages from your site’s users. It’s designed with simplicity in mind, offering only the essential fields for quick and hassle-free submissions. With its Classic styling, it exudes a clean and timeless appearance that can seamlessly blend with any website design. You have the freedom to customize it further by adjusting the button and icon colors to match your brand.
Sample 2. Email Us Form
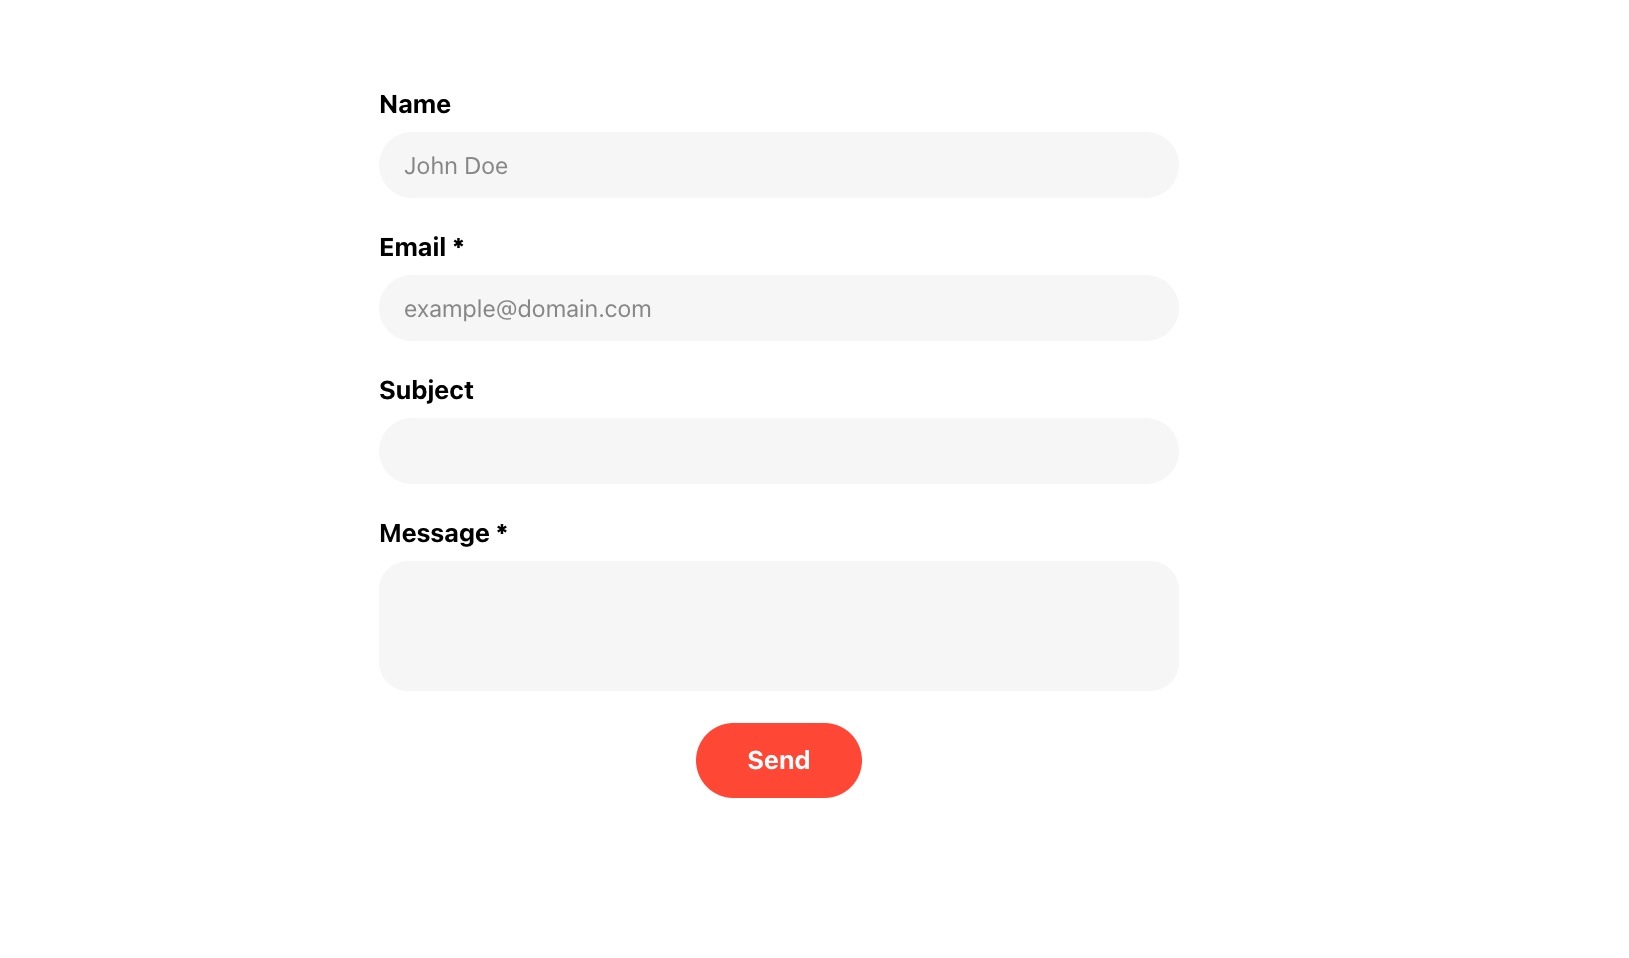
Presenting an Email Us form that exudes a sleek and polished look, thanks to the Flat Rounded style. This form streamlines the process of sending an email by including only the necessary fields, keeping the rest disabled. For a compact design, the fields are neatly arranged in a single column, with required fields marked by an asterisk (*). The eye-catching red color of the “Send” button ensures it grabs attention.
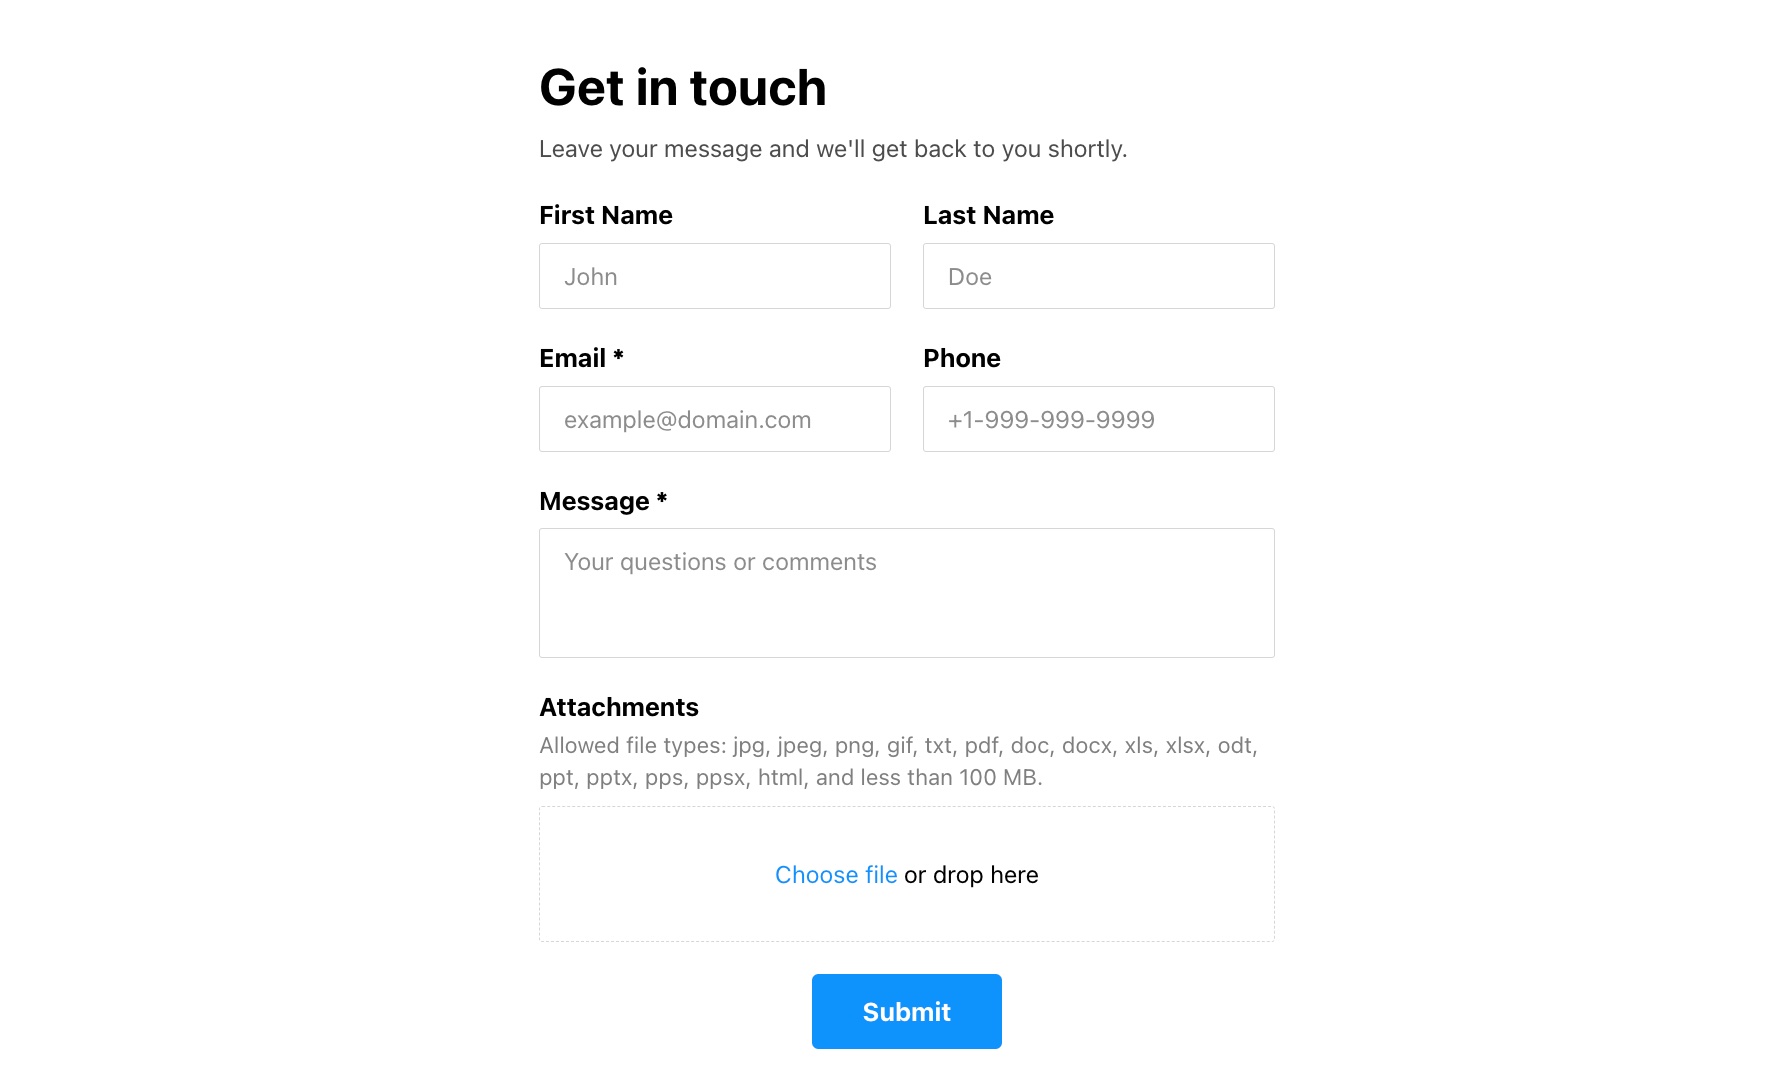
Sample 3. Comprehensive Contact Form
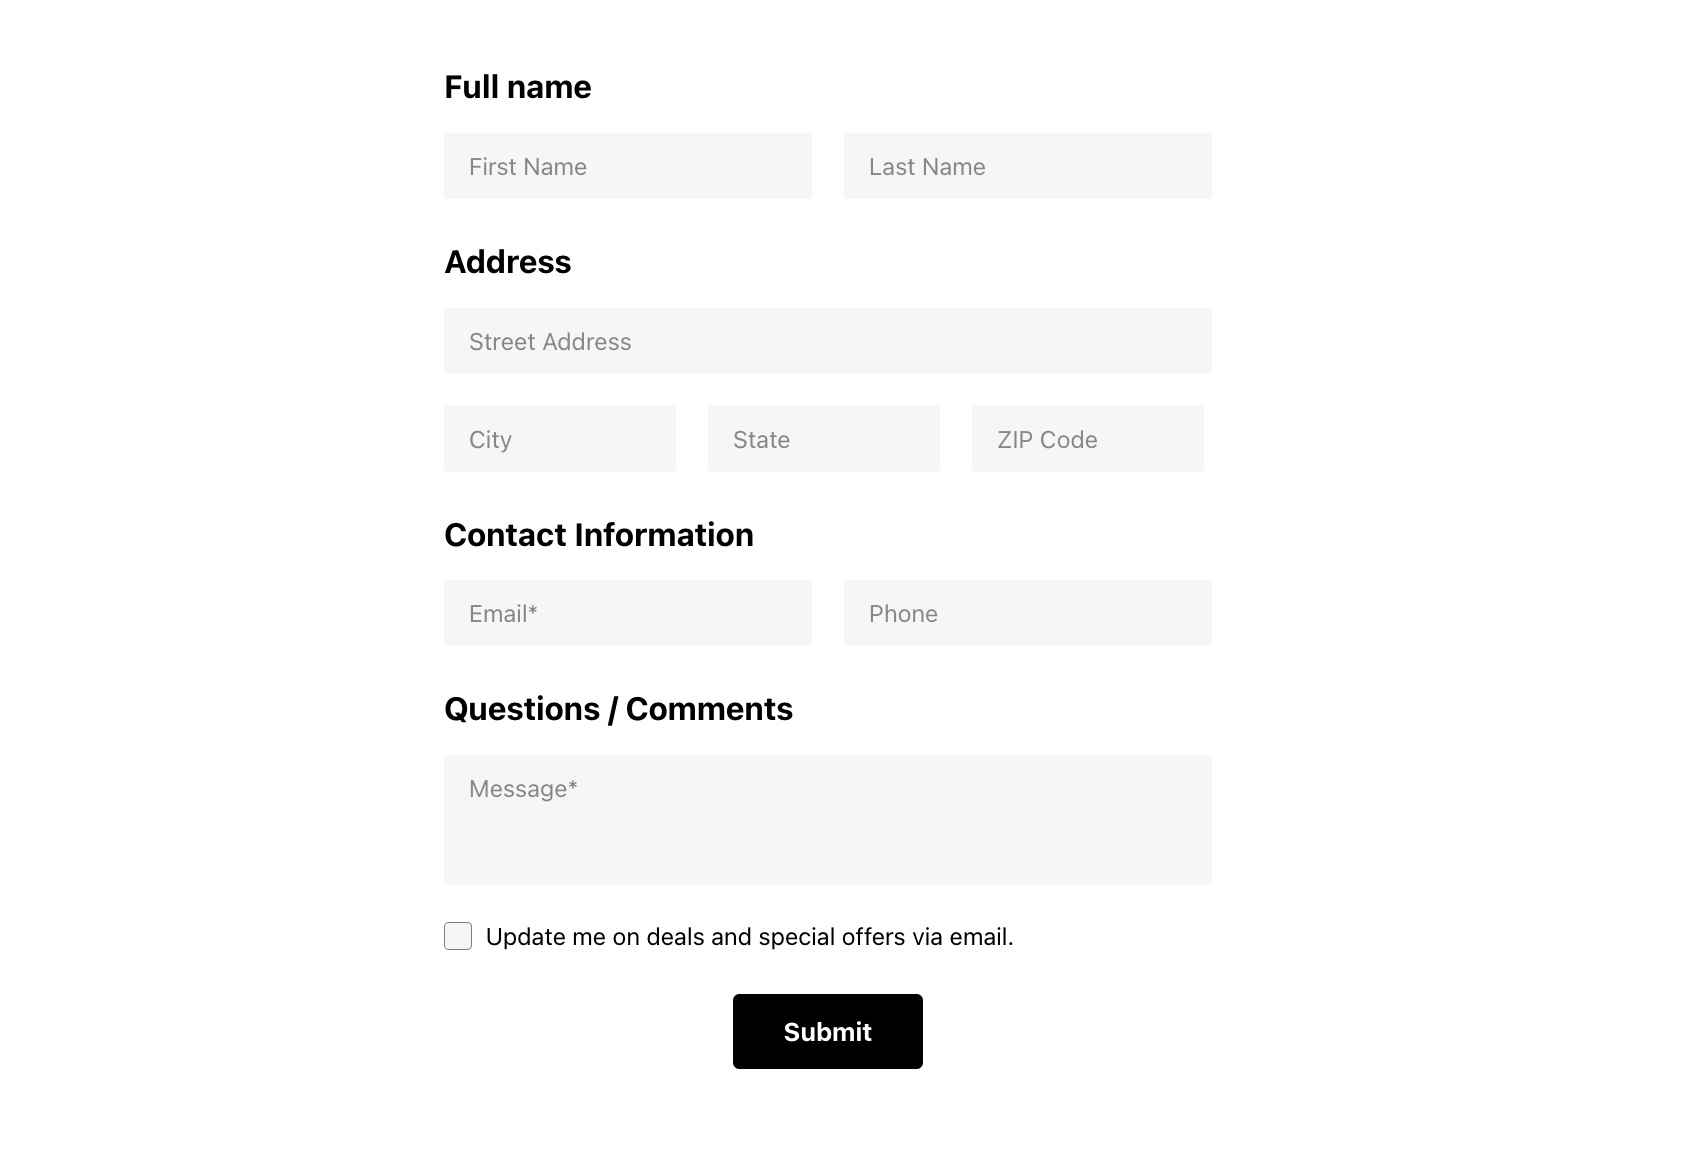
For more comprehensive inquiries, we offer an extended contact form. The Address section includes several fields, cleverly organized in a tiled layout to optimize space. This form also features a checkbox for subscribing to a newsletter and a text field for additional information. Customize the header with your own title and caption for a personal touch.
Sample 4. Floating Contact Form

Need a contact form that’s accessible on every page of your website? A floating layout is your solution. This form appears as a discreet bubble, following users as they scroll, and expands upon clicking. It’s a great alternative to live chats for receiving messages from clients. In this example, the floating form boasts an inviting title and three fields to kickstart the conversation with ease.
Sample 5. Support Request Form
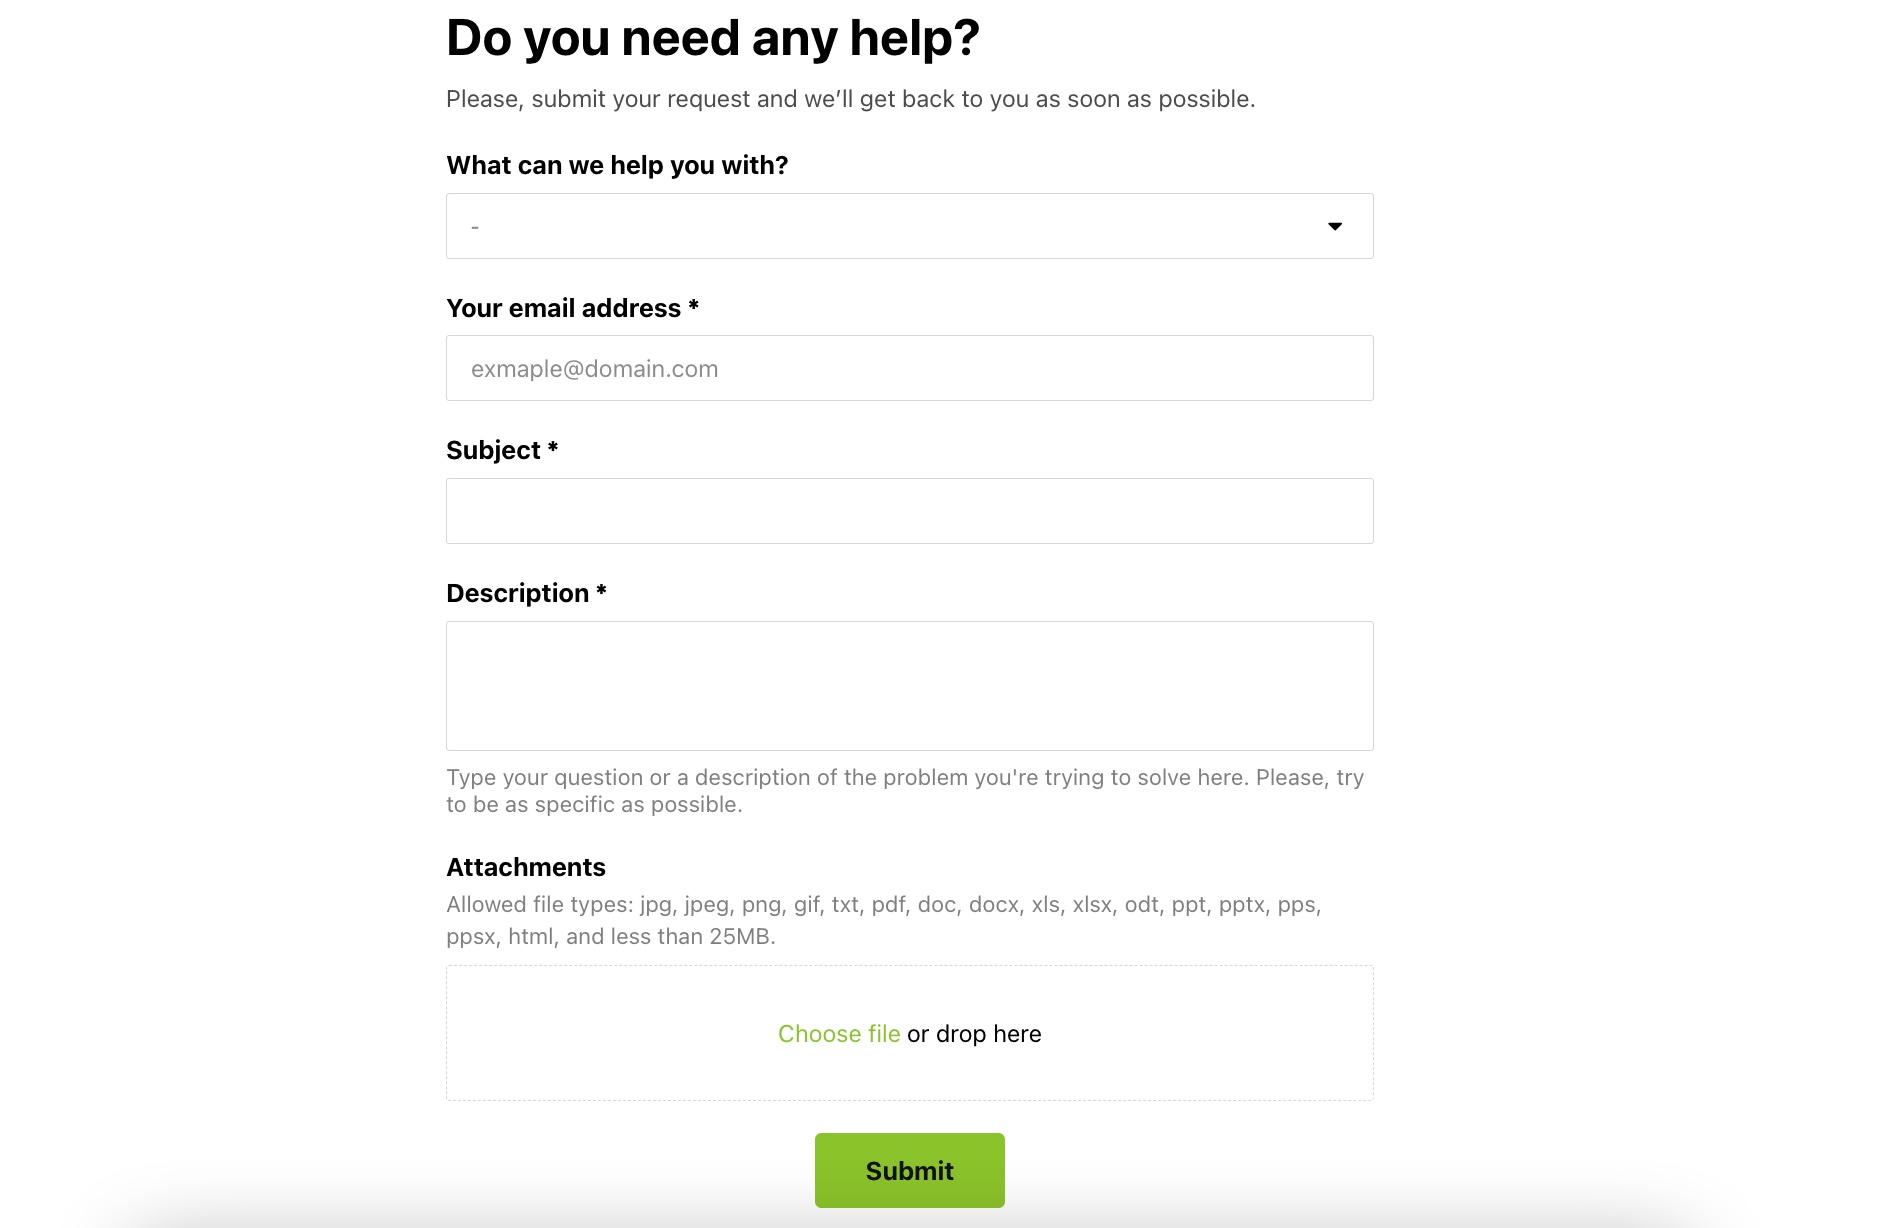
For users seeking support, we’ve tailored a contact form just for this purpose. A selection box enables users to specify the nature of their issue, while a text field allows them to describe it in detail. Users also have the option to upload a file to demonstrate the problem. With a Classic style, this form maintains a clean and professional appearance, complete with a themed icon in the header.
Sample 6. Request a Call Form
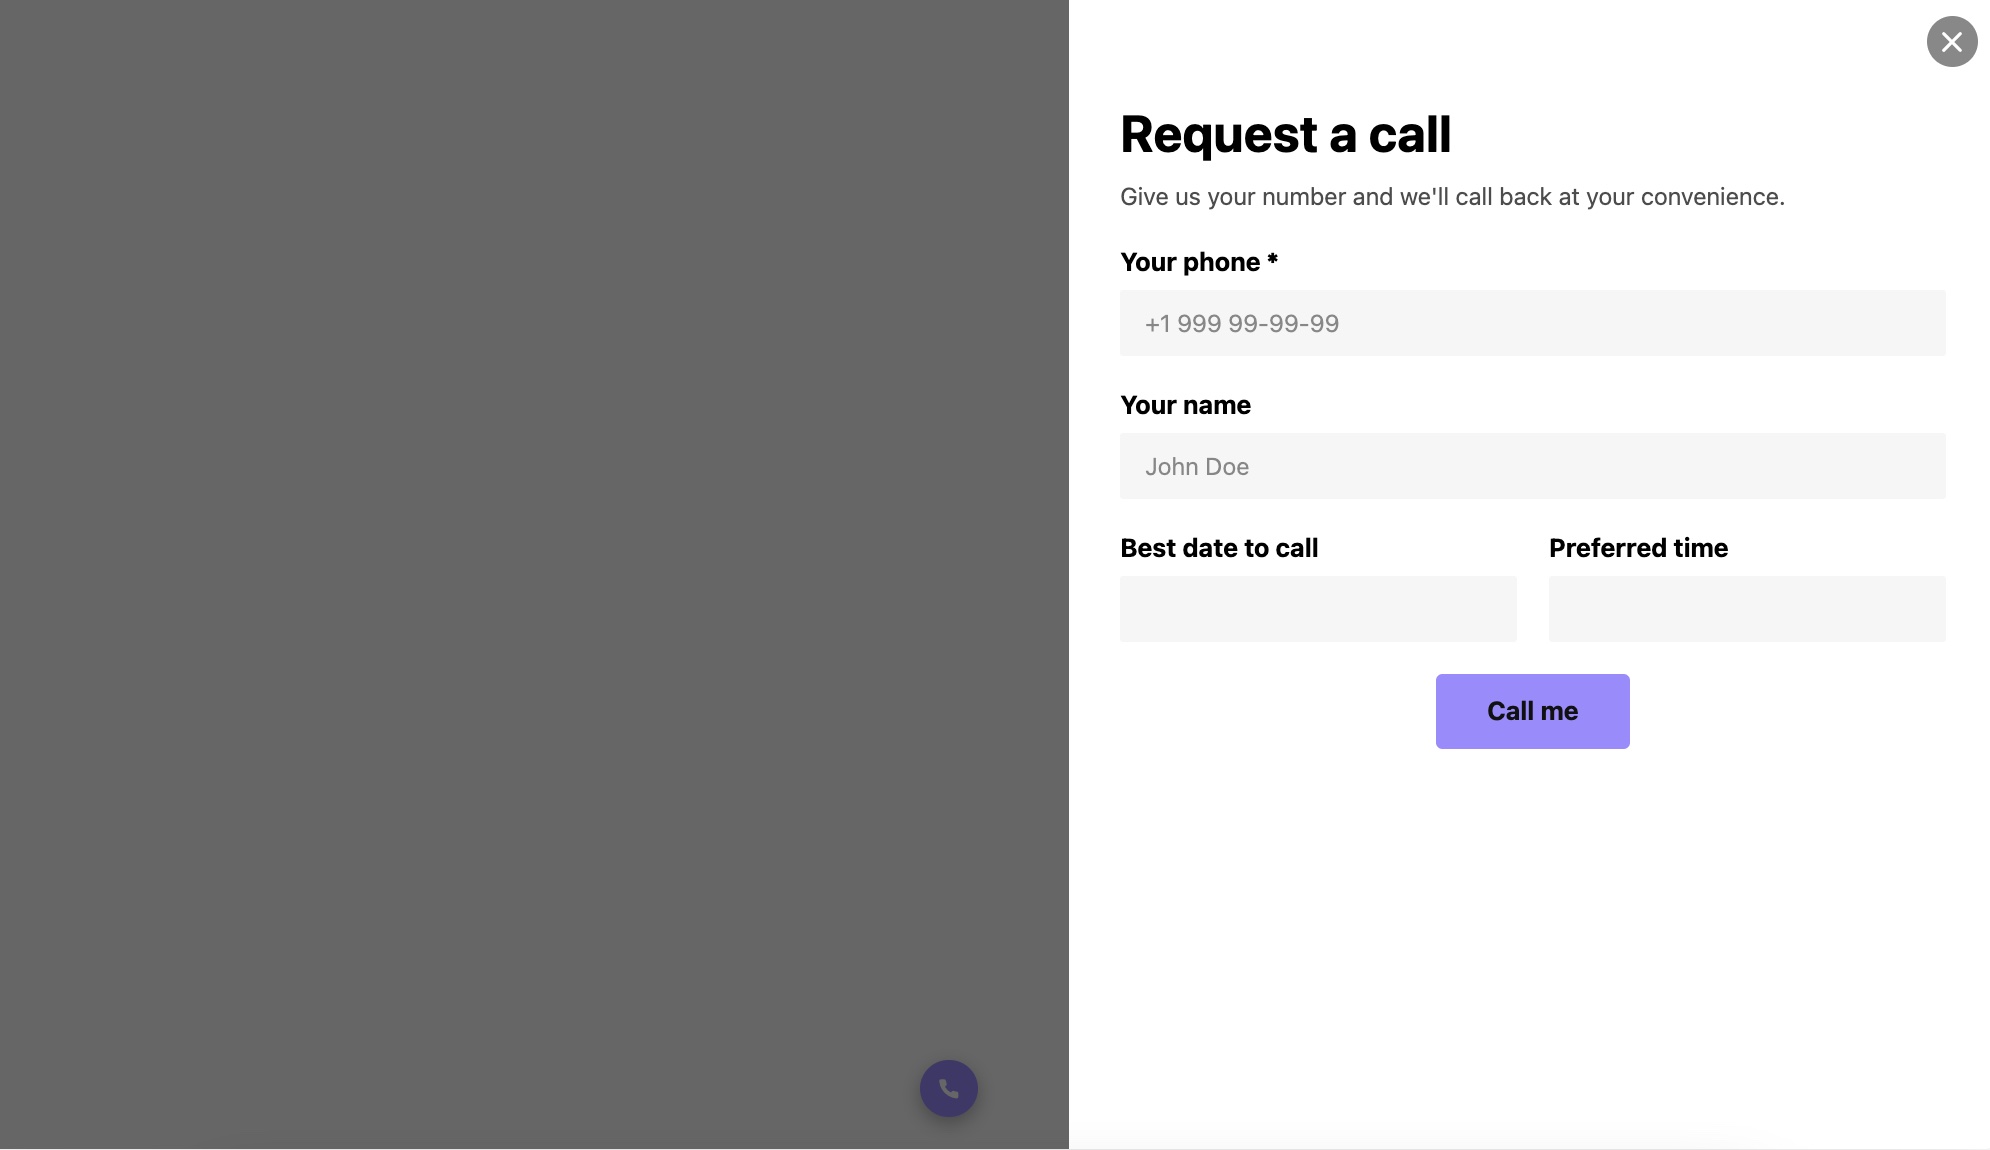
In this instance, our contact form serves as a tool for visitors to request a call from you. A floating icon opens the form, revealing essential fields: name, phone number, and preferred date and time for the call. The purple coloring of the icon and button can be effortlessly customized to suit your branding.
Sample 7. Blank Canvas Form

For those who crave complete control, here’s a solution to create a fully customized contact form from the ground up. There’s no need to tinker with existing templates – simply add the elements you require, adjust the size, select the style, and enjoy total creative freedom. Shape your perfect contact form to suit your unique needs!
How to Create High Converting Contact Forms
Are you seeking to supercharge your website’s conversion potential? The answer might just lie in optimizing your contact forms.
If your current contact forms aren’t delivering the desired results, it’s high time for a makeover.
On this page, we’re ready to equip you with a few valuable insights on crafting high-converting contact forms. Get set to enhance your contact form conversion rates and start making meaningful connections with your audience.
Let’s dive right in!
- User-Friendly Layout: To enhance contact form conversions, ensure a user-friendly layout with appropriately sized input fields that match the expected length of answers. Keep forms concise and label input fields clearly.
- Position Forms Above the Fold: Place contact forms strategically above the fold on your website to ensure visibility and attract user attention.
- Limit the Number of Fields: Simplify forms by limiting them to three or fewer lines, asking for essential information like first name, last name, and email address.
- Order Fields from Easy to Hard: Structure your forms by asking easy questions first, such as name and email, to keep users engaged. Gradually progress to more complex questions.
- Allow Autofill: Enable autofill to ease the completion of forms, as users frequently enter the same information on different websites.
- Use reCaptcha: Replace traditional Captcha with reCaptcha to enhance user experience. reCaptcha offers options like word or digit entry from an image or a simple “I’m not a robot” checkbox.
- Request Phone Number or Email: When designing contact forms, consider asking for both phone numbers and email addresses. This approach offers multiple ways to contact leads, accommodating their preferences.
Experiment, iterate, and perfect your contact form. Keep in mind that what’s effective for one small business caterer might not yield the same results for another. The previous 10 recommendations serve as a strong foundation for enhancing your contact page. Explore what resonates with your audience, and rigorously test until you witness a significant surge in contact page submissions.
How do you determine if your contact form and page have been finely tuned?
The answer lies in the numbers. Depending on your initial website conversion rates and the alterations made, achieving a 5 to 10 percent surge in submissions is a strong indicator of optimization. However, be vigilant for any signs of growth plateau, as that suggests you’re nearing an optimized contact page.
When your conversion rate surpasses 8%, it’s a clear sign that your website is well-optimized for engaging with visitors.
In Conclusion
The incorporation of a dynamic countdown clock can revolutionize your WordPress site, bringing forth an array of benefits. By seamlessly adding the Elfsight Countdown Timer widget, you have the power to evoke urgency, amplify user engagement, and stimulate action. This prominent countdown clock widget becomes a visual beacon for time-sensitive events, promotions, or product launches, guiding your visitors towards informed decisions.
The automated countdown process offered by this plugin is a time-saving boon, reducing errors and ensuring precise time displays. This level of convenience leads to enhanced user satisfaction, bolstering visitor retention rates. The sense of urgency kindled by this feature also magnetizes new customers, ultimately magnifying your revenue streams.
Moreover, the integration of the Elfsight Countdown Timer enriches the online presence of your WordPress site, facilitating user interactions and conversions. Personalize the countdown clock’s appearance to perfectly align with your website’s design, ensuring a seamless brand experience for your audience.
Whether you’re operating an e-commerce store or any other type of business website, the Elfsight Countdown Timer is a priceless addition. Simplify your operations, amplify your website’s effectiveness, and stimulate conversions with this feature-rich plugin.
Should you require further guidance on the Elfsight Countdown Timer, rest assured: