Testimonials Slider widget for Webflow
Create your Testimonials Slider widget
Screenshots


Embed Testimonials Slider on Webflow with the Elfsight widget
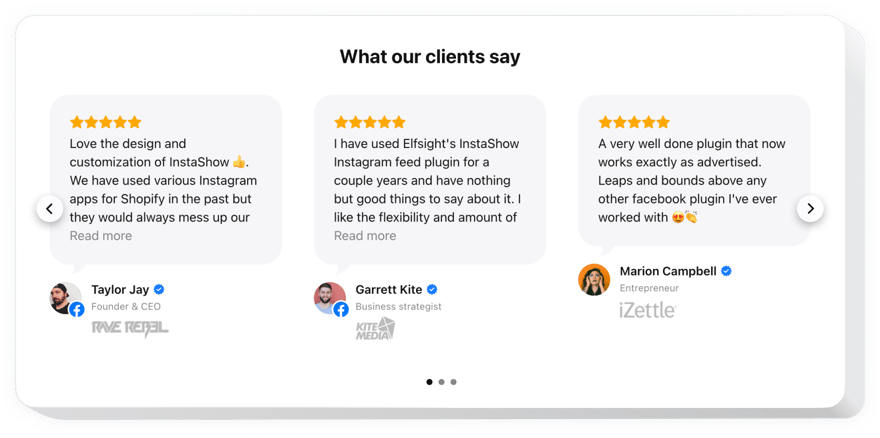
Testimonials Slider is an easy widget for revealing feedback of your customers on your personal website. You are free to use all types of social proof to make testimonials trustworthy: author’s name, photo, logotype of the organization and even a link to the website.
Raise confidence in your service by showing to your readers honest and frank feedback about it.
- Motivate users to act.
Demonstrating true user reviews with happy story motivates visitors to share this experience and stimulates them to act and increase your conversion level. - Multiply trust to your site.
Display testimonials of your customers on the website and demonstrate examples of good client experience to grow trust to your enterprise. - Show an authoritative opinion.
Do you have customers, whose opinion will have a powerful effect on the rest of readers? Construct comprehensive testimonials with information about the author and increase sales level.
Main features of the Testimonials Slider widget
The prominent traits, which transform our Testimonials Slider into an irreplaceable widget for any Webflow site.
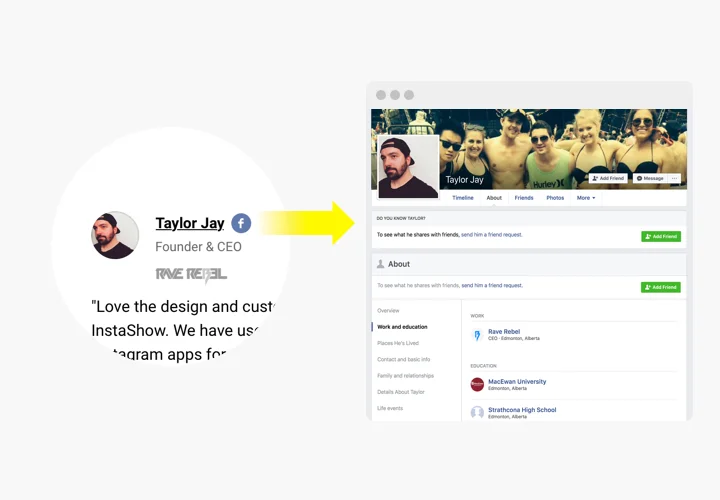
- Increase credibility with a link to author’s website;
- Place a link to author’s website to create a solid image;
- Add the logo of the author’s company to make the info look trustworthy;
- To add reliance, show the logo of the author’s company.
How to add Testimonials to Webflow website
Our widget is maximum easy in terms of installing and doesn’t require any abilities in web-developing. Fulfilling of the instructions will only take you not more than 3 minutes.
- Design your custom-made Testimonials Slider.
With the help of our free editor, assemble a widget with preferable look and functions. - Get the code for widget integration.
After widget creation, receive the code for Testimonials widget from the appearing notification on Elfsight Apps. - Place the widget on Webflow site.
Embed the widget into the desired spot of the page and apply the edits. - Done!
Visit your Webflow site, to see your widget.
Experience any issues while installing or configuring the widget? Look into the extensive instruction on embedding of Testimonials Slider to Webflow or contact our Support Center.
How to add Testimonials Slider to my Webflow website without coding skills?
Elfsight provides a SaaS solution that lets you create a Testimonials Slider widget yourself, see how easy the process is: Work directly in the online Editor to create a Testimonials Slider widget you would like to see on your Webflow website. Pick one of the premade templates and adjust the Testimonials Slider settings, add your content, change the layout and color scheme without coding skills. Save the Testimonials Slider and copy its installation code, that you can effortlessly embed in your Webflow website without buying a paid subscription. With our intuitive Editor any internet user can create Testimonials Slider widget online and easily embed it to their Webflow website. There’s no need to pay or enter your card credentials in order to access the service. If you face any issues at any step, please feel free to contact our technical support team.