Google Calendar is a powerful way to manage and display upcoming events, meetings, or schedules directly on your WordPress website. Whether you’re a business owner, educator, or event organizer, embedding a calendar ensures that your visitors always stay informed.
If you’re looking for a seamless solution to showcase important dates and manage scheduling, integrating calendar widget into your WordPress setup is exactly what you need. It’s efficient, reliable, and easy to maintain — even without technical skills.
- Keep your audience informed in real time. Events update automatically when you change them in Google Calendar, saving you from manual edits.
- Centralize your scheduling process. Manage all appointments and public events in one place while keeping your website updated automatically.
- Enhance user experience with clarity. Visitors can easily see availability, deadlines, or important dates without navigating away.
- Ensure cross-device compatibility. The embedded calendar is fully responsive, offering a consistent experience across desktop and mobile.
- Save time with automated syncing. Any changes you make in your Google Calendar reflect instantly on your website — no need to edit content manually.
Now that you know why Google Calendar is a valuable addition to WordPress, let’s take a quick look at how you can get started with sharing events on your website with the Elfsight solution.
Quick Way to Add Google Calendar to WordPress
Embedding Google Calendar into your WordPress website doesn’t have to be complicated. With Elfsight, you can do it in just a few steps — no coding or special tools required. Here’s a quick overview of how to create and customize your calendar widget using the Elfsight editor:
This method is perfect for users who want to share upcoming events, business hours, or schedules in a visually appealing format. The widget syncs with your calendar and automatically displays real-time updates on your website.
- Open the editor and choose a template. Connect your public Google Calendar account.
- Select the layout and calendar view — monthly, weekly, or agenda — and fine-tune display settings.
- Customize colors, fonts, spacing, and other design elements to match your branding.
- Click “Add to website for free“, copy the generated code, and paste it into your WordPress backend.
In just a few clicks, your calendar will be live and working. It’s a fast, intuitive solution that helps keep your visitors updated without manual edits.
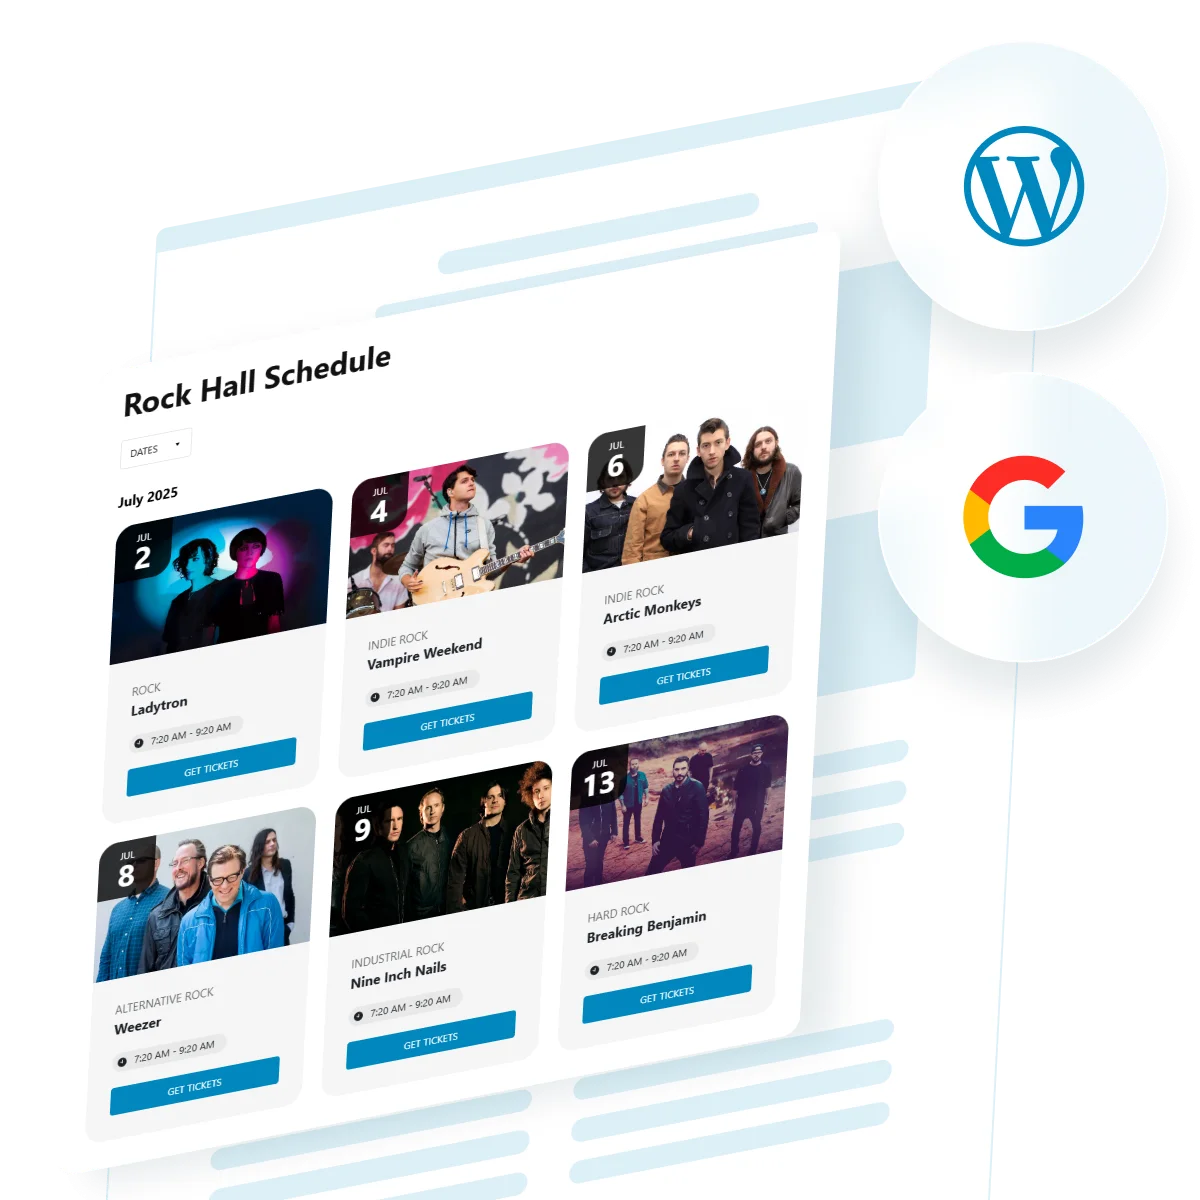
See the widget in action – build your own Google Calendar in minutes!
Benefits of the Elfsight Plugin
Once you’ve seen how easy it is to create a Google Calendar widget with Elfsight, it’s time to explore what makes this solution stand out. Elfsight goes beyond simple embedding — it offers design flexibility, powerful integrations, and automatic updates that help you deliver a smooth user experience.
Here are the key features and benefits of using the Elfsight plugin to display your calendar on a WordPress website:
- Automatic sync with Google Calendar. The widget updates in real time, so changes made in your Google Calendar appear instantly on your website.
- Multiple layout options. Choose between month, week, list, or agenda views to match your content style and visitor preferences.
- Color-coded events and custom tags. Highlight different types of events with visual labels to make the calendar easier to scan.
- Fully customizable appearance. Adjust fonts, colors, spacing, and layout elements to seamlessly fit your website design.
- Event popups and detailed views. Visitors can click on events to see full descriptions, links, and additional information.
- Recurring and multi-day event support. Perfect for regularly scheduled meetings, workshops, or multi-day conferences.
- Mobile-responsive design. Your calendar looks great and functions smoothly across all devices and screen sizes.
With all these built-in features, the Elfsight plugin offers more control and flexibility than most manual embed options. Now let’s walk through a detailed step-by-step guide to help you install and configure your widget on WordPress.
Google Calendar WordPress Integration: Step-by-Step
Once you understand the benefits of the Elfsight widget, it’s time to build your Google Calendar and embed it into your WordPress website. The process is simple and visual, with all configurations done through an intuitive editor. Here’s a complete walkthrough to help you set it up.
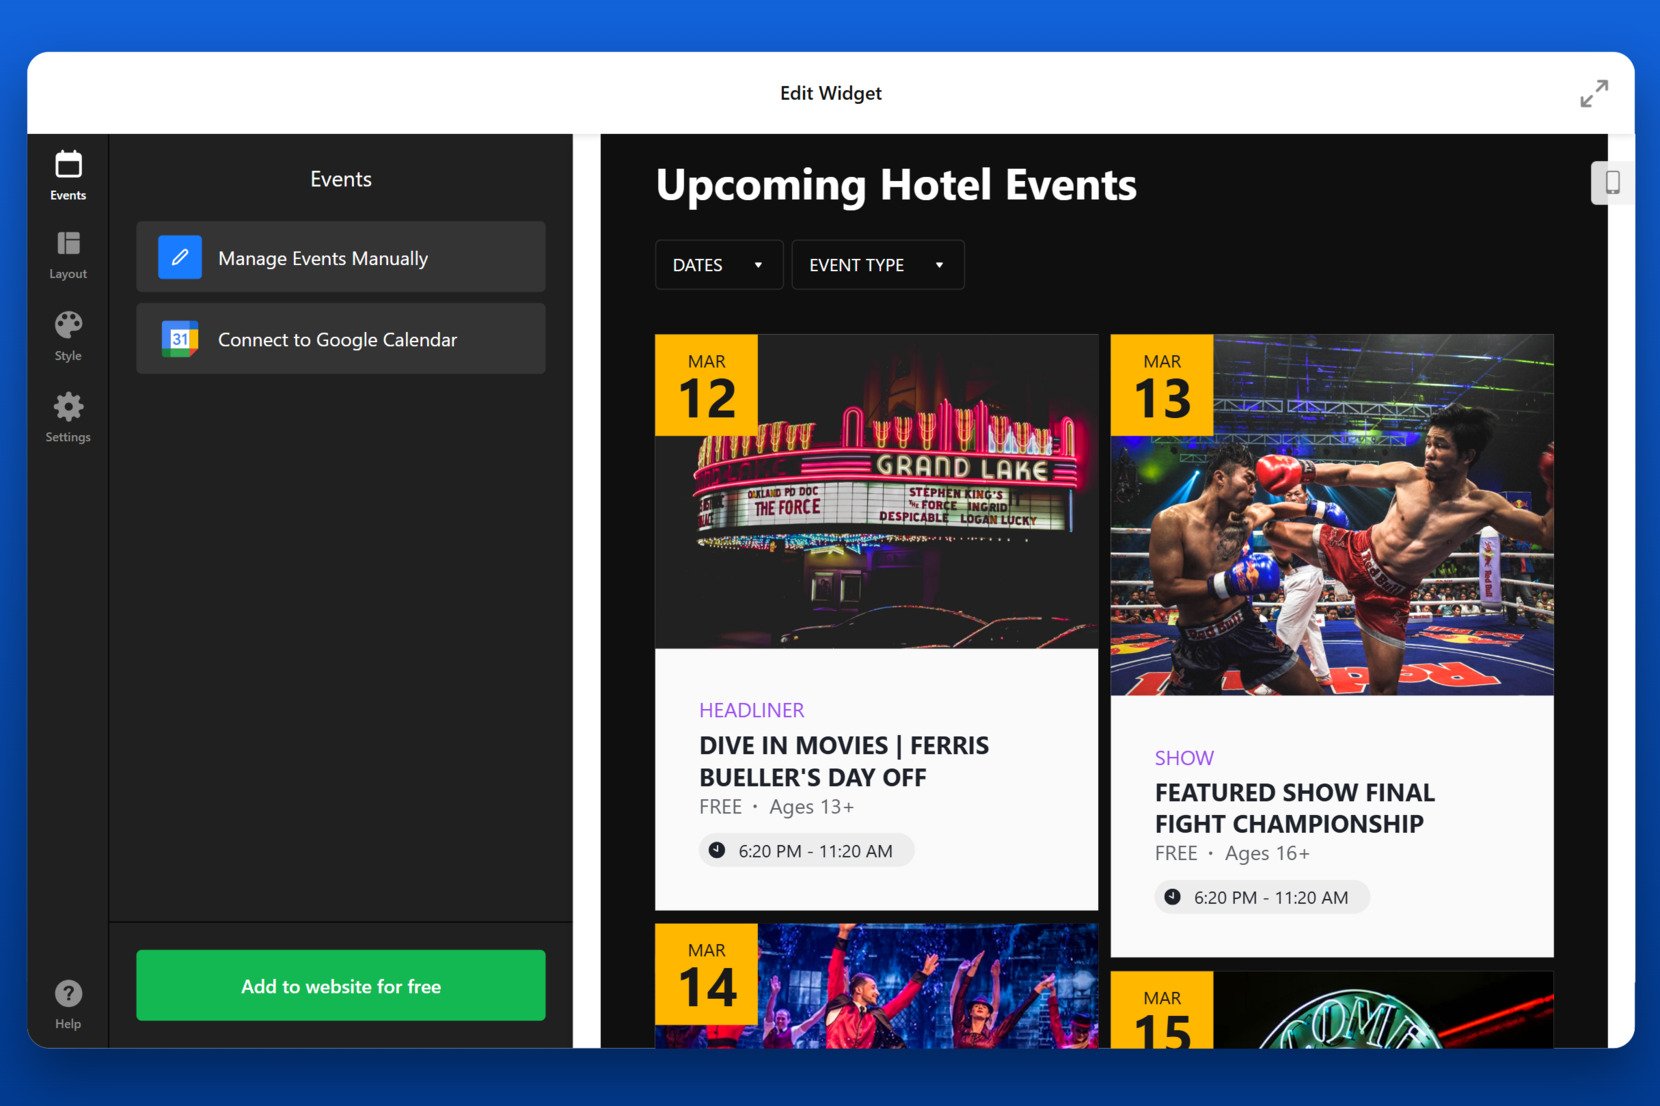
- Choose a Template. In the Elfsight editor, start by selecting a calendar template that fits your goals — from team schedules to webinars or university events. Click “Continue with this template” to begin editing.

- Connect Your Calendar Source. In the “Events” section, choose to either manage events manually or connect directly to your Google Calendar. This enables real-time synchronization with your existing calendar events.

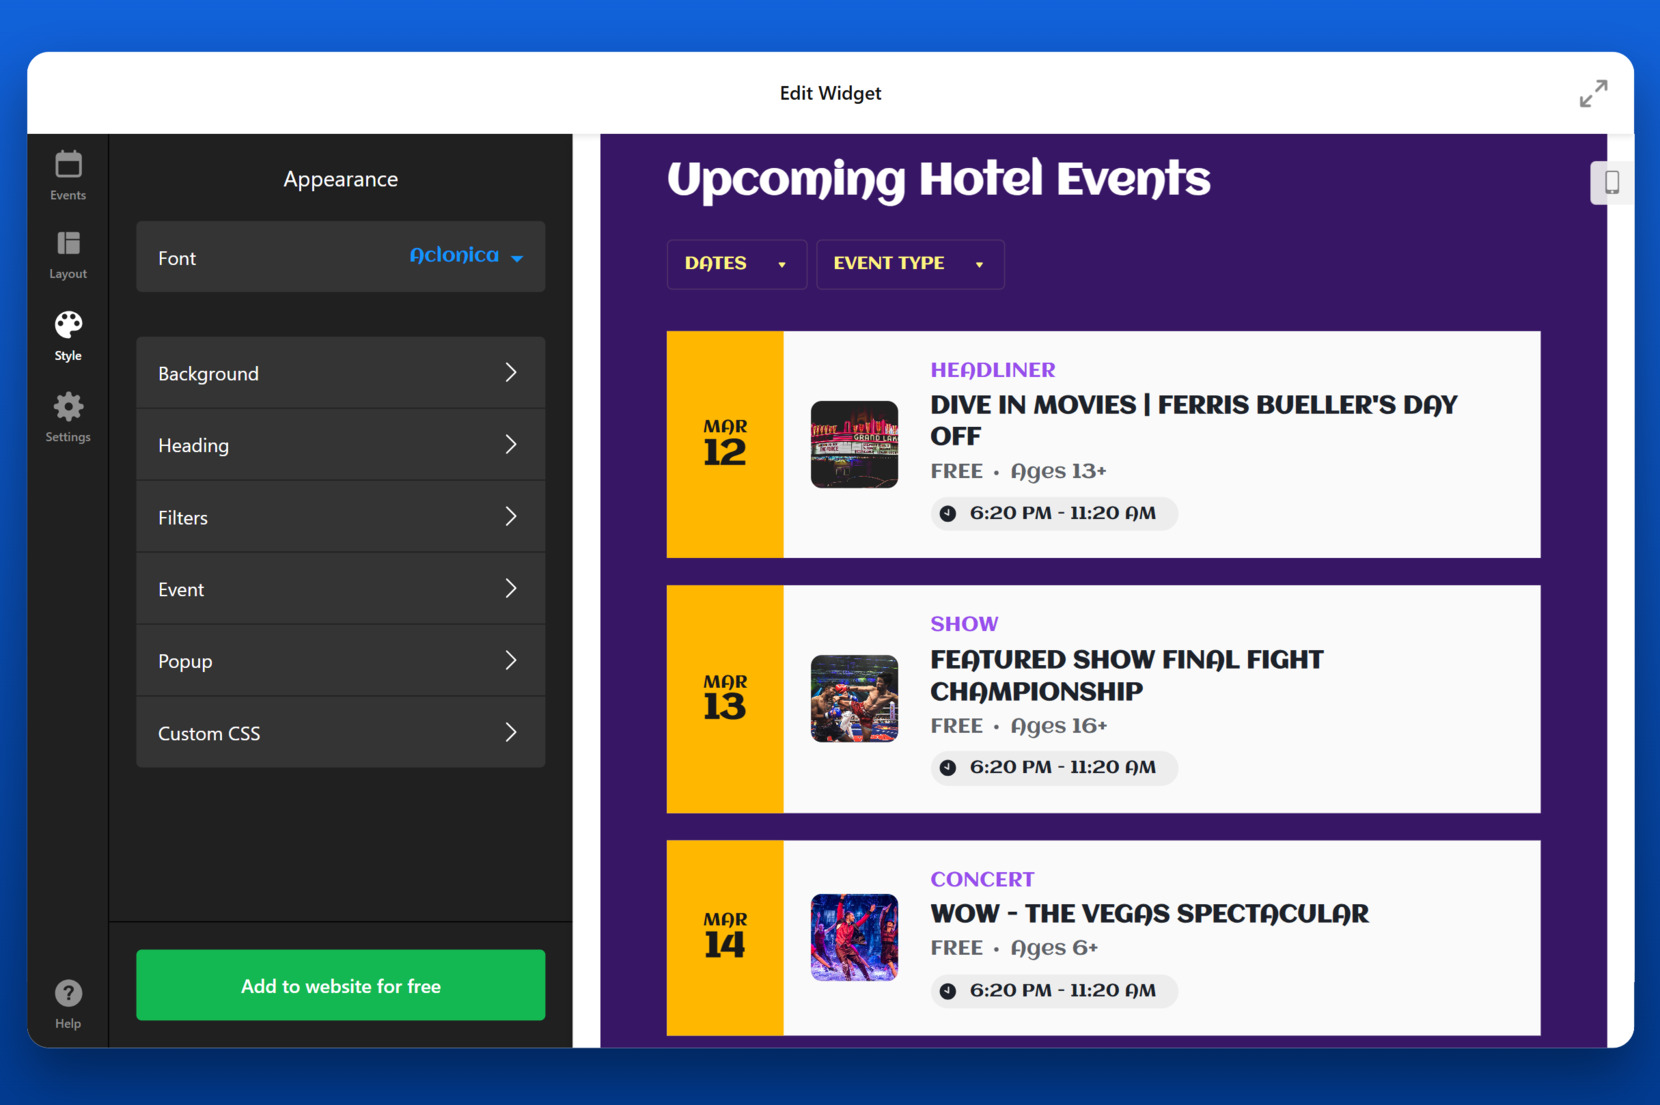
- Adjust the Layout Settings. Navigate to the “Layout” tab and select how you want your events to be displayed — list, grid, week, month, or day view. Choose the layout that best presents your information to visitors.
- Style the Widget to Match Your Branding. Open the “Style” section to customize fonts, background colors, text styles, and more. Tailor every visual element to match your website’s design and tone.

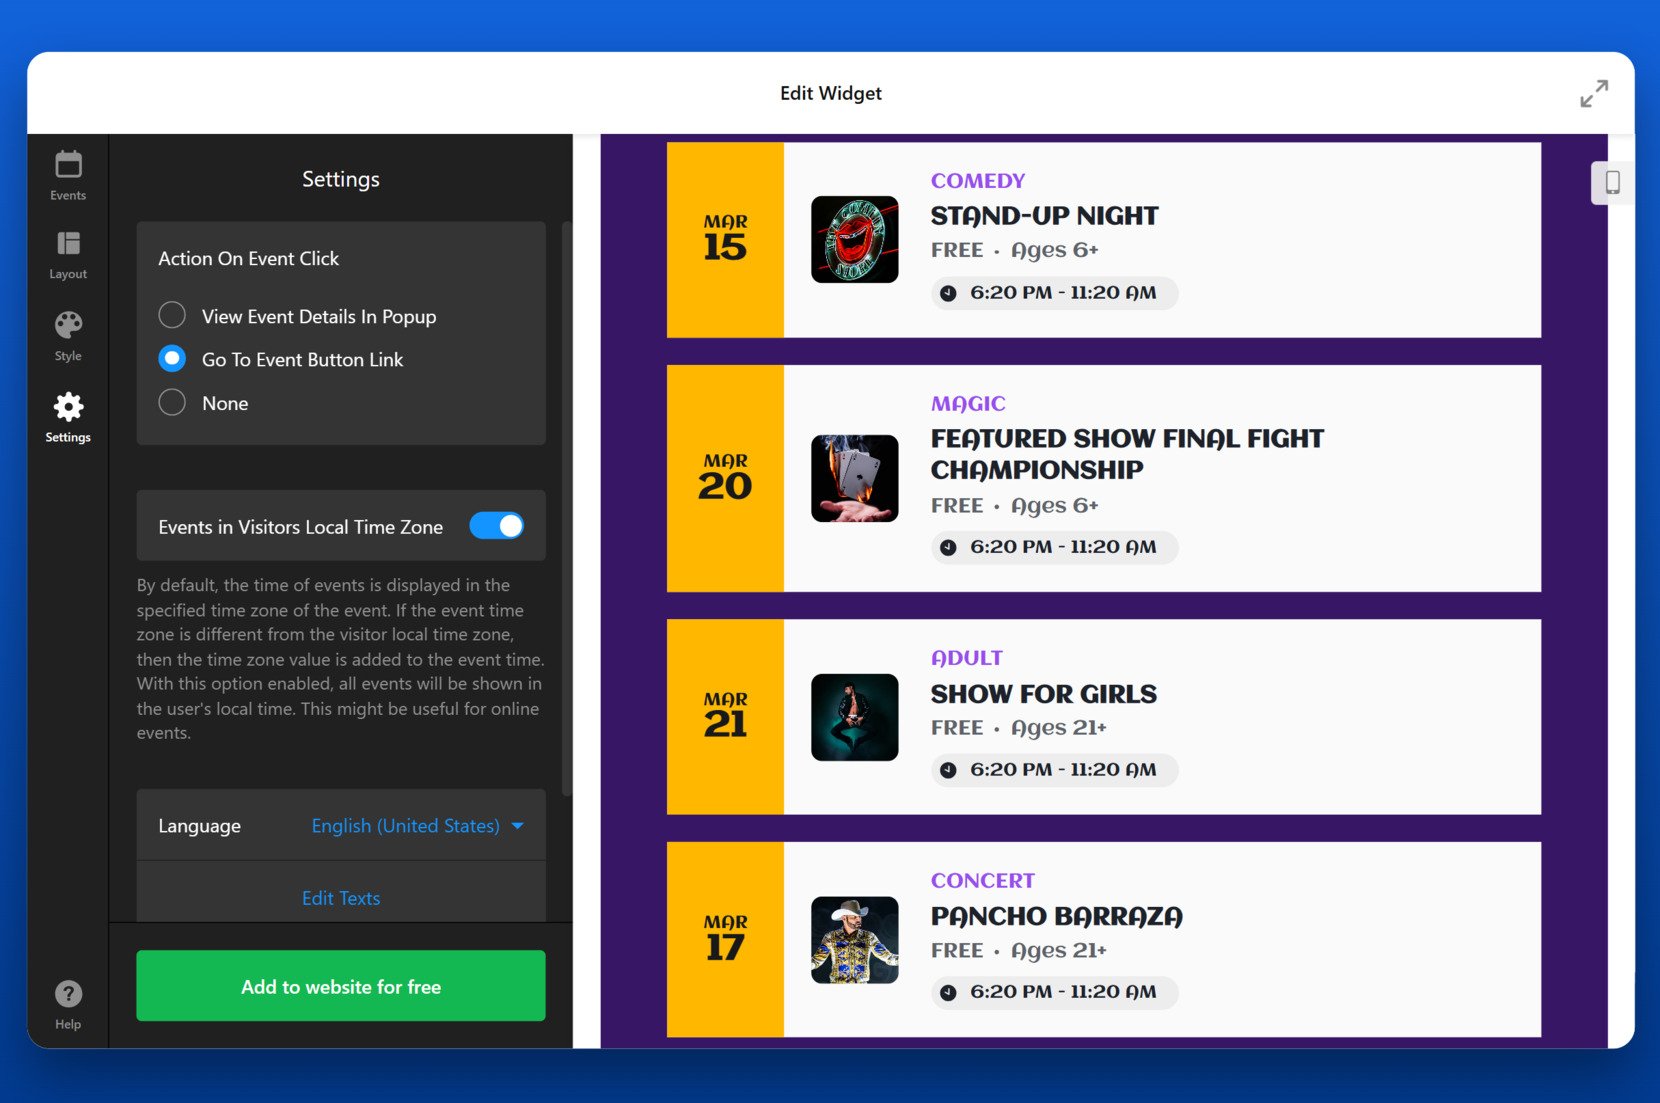
- Configure Event Behavior and Time Zones. Under “Settings”, decide what happens when a visitor clicks an event — either show a popup or redirect via a button link. You can also enable automatic adjustment to the visitor’s local time zone.
- Embed the Calendar on Your Website. Click “Add to website for free”, copy the generated code, and paste it into the HTML block of your WordPress backend. Save your changes and publish the page.


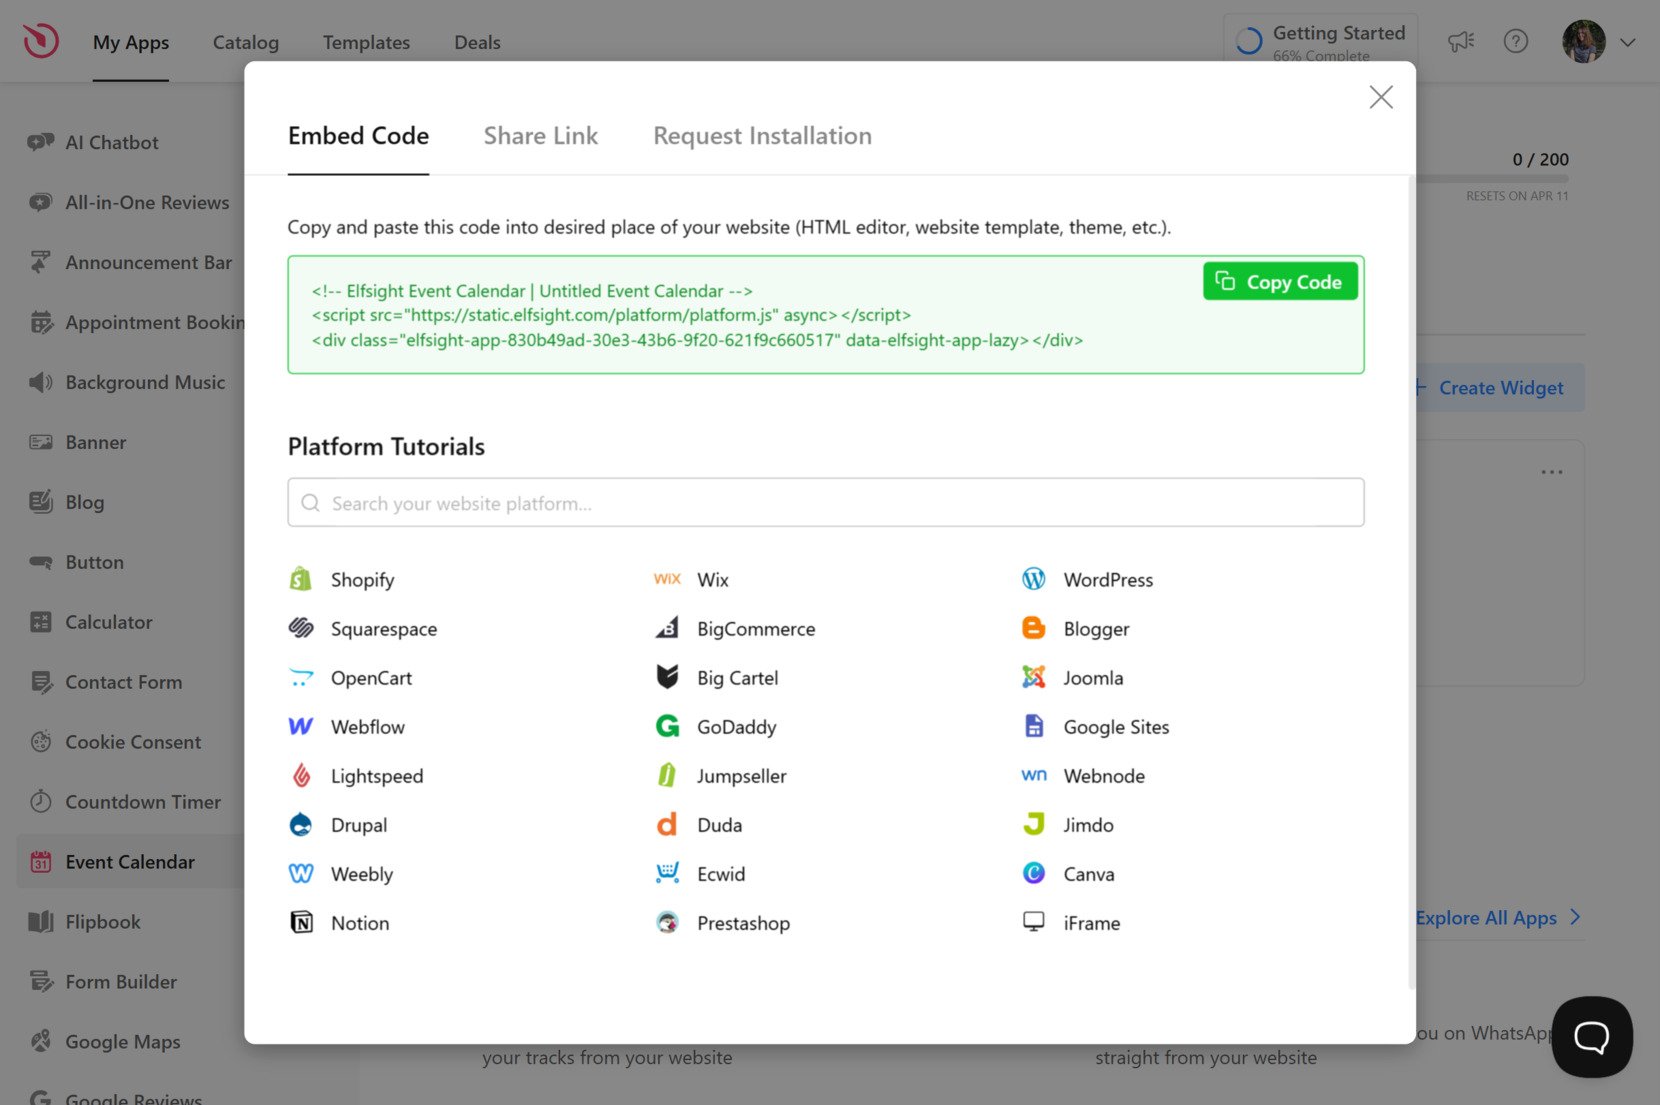
To add the Elfsight Google Calendar widget to WordPress, you’ll need to insert the embed code into a block that supports custom HTML. You can do this by opening the WordPress editor, selecting the page or post where you want the calendar to appear, and adding a “Custom HTML” block. Paste the code you copied from Elfsight, save your changes, and update the page to make the widget live.
If you’re using a page builder like Elementor or WPBakery, just drag in an HTML or code widget and paste the embed code there — no extra configuration needed.
This setup ensures your calendar is always up to date and fully tailored to your audience’s needs. With just a few steps, you’ll have a powerful scheduling tool live on your website.
Now that your widget is fully customized and embedded, you’ve unlocked a powerful way to manage and display your schedule with zero ongoing maintenance. In the next section, we’ll explore alternative ways to integrate Google Calendar into your WordPress website without using third-party tools.
Native Solution to Connect Google Calendar to WordPress
If you prefer not to use external tools, you can also embed Google Calendar manually using a native integration method. This approach involves generating an embed code from your Google Calendar and placing it directly into your content via a Custom HTML block in the WordPress editor. It’s a quick and free way to get your calendar on your website, though it has certain limitations in customization and responsiveness.
Google Calendar’s native embed feature gives you a simple HTML iframe code that reflects all the events in your public calendar. This solution is ideal for static calendar display needs, but it doesn’t support visual customization, mobile optimization, or interactive design controls. Still, it remains a valid choice for straightforward, no-cost integration.
Manual Embed Using Google Calendar
This method is best for users who want a straightforward, no-frills display of a public calendar. It doesn’t require installing any plugins or third-party services. You’ll work entirely within your Google account and WordPress dashboard.
- Open your Google Calendar and access settings. Visit https://calendar.google.com, log into your account, and click the gear icon in the top-right corner. Choose Settings from the dropdown menu.
- Select your calendar and make it public. On the left-hand side under Settings for my calendars, select the calendar you want to share. Under Access permissions for events, check the box that says Make available to public.
- Copy the embed code. Scroll to the Integrate calendar section and locate the field labeled Embed code. Copy the HTML iframe code provided there — this is what you’ll paste into WordPress.
- Edit your WordPress page or post. Open your WordPress dashboard, go to Pages or Posts, and choose the content where you want the calendar to appear.
- Insert the HTML code. In the WordPress editor, click the + icon to add a new block, then select Custom HTML. Paste the copied embed code into the block and preview it to make sure it looks correct.
- Publish the changes. Once you’re satisfied with how the calendar appears, click Update or Publish to make it live on your website.
This approach gives you basic calendar functionality but does not offer advanced controls like layout customization, color adjustments, or mobile responsiveness.
Comparison of Google Calendar Integration Methods
The table below compares the native embed option and the Elfsight widget based on their flexibility, ease of use, responsiveness, and display quality.
| Method | Pros | Cons | Customization | Responsiveness | Ease of Use |
|---|---|---|---|---|---|
| Elfsight Widget | Combines real-time sync with full design flexibility for a professional display. | Requires creating an Elfsight account, but setup is beginner-friendly. | Offers deep design control: colors, layout, fonts, event popups, and more. | Fully responsive and mobile-optimized by default. | Visual editor with no coding required; quick to install and manage. |
| Native Google Embed | Quick and completely free using only your Google Calendar settings. | Very limited styling, poor mobile support, and no layout options. | Fixed iframe appearance with no support for style or layout changes. | Basic responsiveness; often breaks or overflows on mobile unless styled manually. | Simple for basic use, but lacks modern display features. |
While the manual embed method is useful for simple calendar displays, it’s limited by design constraints and lack of responsiveness. If you want a fully customizable and mobile-friendly experience, the Elfsight widget is the better choice. In the next section, we’ll share expert tips to make the most of your calendar integration.
Tips for Smooth Calendar Integration
Once you’ve added a calendar widget to your WordPress website, there are several best practices to follow to ensure it loads correctly, updates automatically, and displays well across all devices. These tips apply to any embedded calendar solution, regardless of the tool or method used.
- Always use a public calendar source. If your Google Calendar isn’t set to public, it won’t be visible to your website visitors. Make sure the calendar’s visibility settings allow external sharing and embedding.
- Check mobile responsiveness manually. Some embed codes and widgets may not scale well on smaller screens. After embedding, always test how the calendar appears on mobile and tablet devices using browser preview tools or real devices.
- Use full-width containers if possible. Place the calendar inside a content block that doesn’t have padding or column limits to prevent display cutoffs and layout issues.
- Keep event data updated at the source. Whether you use a plugin, iframe, or integration, your embedded calendar reflects what’s stored in your Google account. Regularly update your calendar events to avoid outdated information appearing on your website.
- Limit the number of displayed events. Displaying too many events at once can overwhelm visitors. Use list or agenda views when embedding calendars with frequent entries to improve readability and load speed.
- Include descriptive event titles. Make your calendar easy to scan by using clear titles for each event. Avoid vague labels like “Meeting” or “Event” when possible.
- Use caching with caution. If you’re using a caching plugin on WordPress, it may delay real-time updates from your calendar. Clear the cache after adding or updating embedded content to ensure visitors see the latest information.
- Label time zones clearly. If your audience is global, display time zone information on the calendar to prevent confusion. Alternatively, choose integrations that auto-adjust to the viewer’s local time zone.
By following these tips, you’ll ensure that your embedded calendar is not only functional but also user-friendly and visually aligned with your overall design. Whether you’re managing public events, internal schedules, or promotional timelines, a well-configured calendar makes a big difference.
Next, let’s take a look at who benefits most from adding Google Calendar to their websites.
Who Should Add Google Calendar to a Website?
Embedding Google Calendar in a WordPress website is more than just displaying dates — it’s about improving communication, saving time, and providing transparency. From schools to clinics to event-based organizations, many industries benefit from using a shared online calendar. Let’s explore how different sectors can apply this integration effectively.
Application in Education 🎓
Educational institutions can use Google Calendar to communicate academic schedules, holidays, exams, registration deadlines, and school events. Embedding it on the official website ensures students and parents always have access to the most recent updates, reducing the need for newsletters or manual reminders. Departments can also use separate calendars for personalized timetables.
To prevent confusion, administrators should clearly name events, avoid overlapping dates, and periodically verify visibility settings to ensure public access.
Application in Healthcare 🏥
Healthcare providers such as general practices, dental clinics, and specialists can embed calendars that display appointment availability, walk-in hours, or rotating doctor schedules. It’s a simple way for patients to understand when services are available without calling the clinic. Internal teams can also sync calendars for room usage or shift planning.
It’s important to never include patient names or private data in public calendars. General titles like “Reserved” or “Closed for maintenance” should be used instead to respect privacy standards.
Application in Events and Community Organizations 🎭
Organizations that host recurring events — like nonprofits, cultural centers, sports clubs, or coworking spaces — can benefit from embedding calendars that list upcoming activities. Whether it’s yoga classes, volunteer signups, gallery openings, or game nights, a centralized calendar on the website ensures everyone is informed and engaged.
For dynamic schedules, consider combining Google Calendar with an email newsletter or notification system to keep audiences updated across channels.
By embedding a live, accessible calendar on your website, you build trust, reduce friction, and streamline communication. Now, let’s look at some common issues you may run into when embedding or syncing your calendar — and how to solve them efficiently.
Explore 30+ Event Calendar templates


Fixing Common Issues
Even with a straightforward tool like Google Calendar, embedding or syncing it with your WordPress website can occasionally lead to problems. Below are common questions and troubleshooting tips to help you handle issues quickly and maintain a reliable integration.
Why isn’t my Google Calendar showing on my website?
Why is my calendar not syncing in real time?
Why is the calendar layout broken on mobile devices?
Can I show multiple calendars at once?
Why is the time zone incorrect in my embedded calendar?
What should I do if my calendar is displaying outdated information?
Knowing how to identify and fix common issues will save time and ensure your embedded calendar always works as intended.
Conclusion
Integrating Google Calendar into your WordPress website is one of the most effective ways to streamline scheduling, communicate availability, and keep visitors informed. Whether you choose to embed a public calendar manually or use a flexible widget solution, the result is a more organized and professional online presence that supports real-time updates and easy access to important dates.
For those looking for a quick and polished solution, the Elfsight Google Calendar widget offers advanced design options, responsive layouts, and automated synchronization — all without writing a single line of code. From education and healthcare to events and community work, it’s a powerful tool that adapts to a wide range of needs. No matter your industry, making your calendar public and accessible directly on your website boosts efficiency and user trust.
Looking for More Guidance?
We hope you found this guide valuable and easy to follow. If you’d like to explore more ways to integrate a calendar with your WordPress website, contact us — our team at Elfsight is here to help. We’re committed to offering no-code widget solutions that save time and improve website functionality.
Join our vibrant Community to share ideas, tips, and feature suggestions. If there’s something you’d love to see next, don’t hesitate to submit it to our Wishlist — we’re always eager to grow together with our users.