

Want to embed a Twitter (X) feed on your website? Showing live tweets directly on your pages is a powerful way to add social proof, boost visitor engagement, and keep your content fresh without extra effort. Whether you share brand news, customer feedback, or industry updates, an X feed can help you display updates in real time, building trust through authentic content.
The Twitter Feed widget makes it easy to display X content on any platform – no coding required. You can add posts from profiles, hashtags, or mentions and customize the design to match your exact website theme. Once installed, the feed updates automatically, so you never have to copy and paste posts manually again.
- Complete setup tutorial. How to add Twitter feed to your website from scratch.
- Integration options. Alternatives to consider (native blocks, HTML embeds or CMS plugins).
- Expert checklist. Key settings and tweaks to optimize design and performance.
- Simple troubleshooting tips. Quick solutions for the most common embedding issues.
To keep things straightforward, the next sections break the process down into clear, manageable steps: from a quick start to a full customization workflow – so that you find the perfect approach to embed X feed on your own.
Getting Started: Embed Twitter Feed on Website
Here’s your two-minute shortcut to add a Twitter feed to your website fast:
- Open Elfsight’s editor and pick a template.
- Customize your Twitter (X) Feed widget.
- Click ‘Add to website for free’ and copy the code.
- Paste it into your website’s backend.
Get your X Feed running now. Click to try the demo!
Features Behind an Effective Twitter Feed
Now that you’ve seen how easy it is to display a Twitter Feed on your website, let’s take a closer look at the key features that make it work:
| Key Feature | Why it Matters |
|---|---|
| Live posts from profiles, hashtags, or testimonials | Keep your website content fresh and interactive with real-time updates. |
| Twitter actions (like, retweet, share, reply) onsite | Motivate visitors to engage with your social presence directly from your website. |
| Multiple layouts, header styles, flexible sizing | Fit the feed perfectly anywhere, from a sidebar to a full-width section. |
| Full customization of colors, visible elements, details | Present tweets in a way that matches your brand and adapts to your design. |
| Testimonial mode with author, text, and ratings | Build trust by showing off authentic customer feedback with every detail displayed. |
These are just a handful of smart functions that can help upgrade your website’s look and performance. For a deeper dive, visit the X Feed Features Page. Now let’s walk through each step individually and explore how to add a Twitter widget to your website with Elfsight.
Integrate Twitter Feed Into Website Step-by-Step
This section guides you through each step of creating, customizing, and embedding your Twitter feed on your website, with practical tips for various use cases.
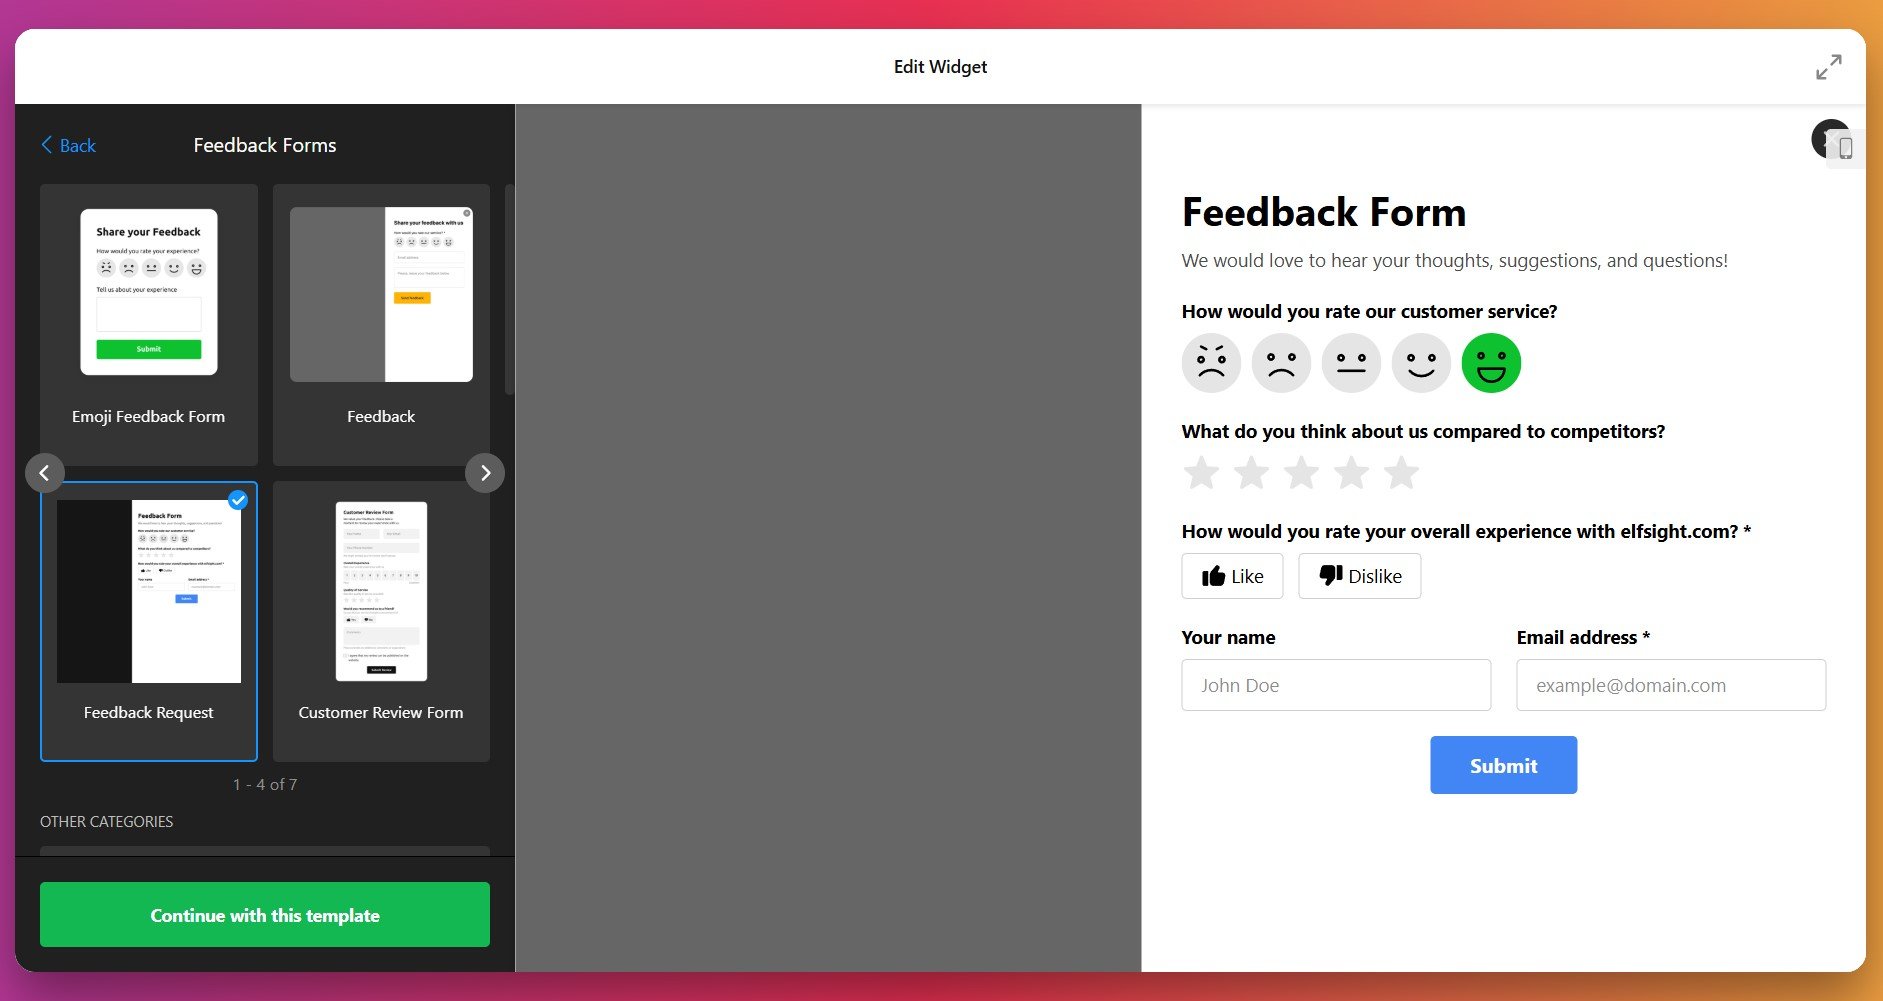
1. Choose a Template
When you open the Twitter (X) Feed widget editor, the first step is selecting a template. Templates define the initial layout of your feed — whether it’s a simple Sidebar widget, a Grid, a Hashtag Feed, or a complete Profile Timeline. There is also a ‘Testimonials’ preset if you want to highlight you clients’ feedback.
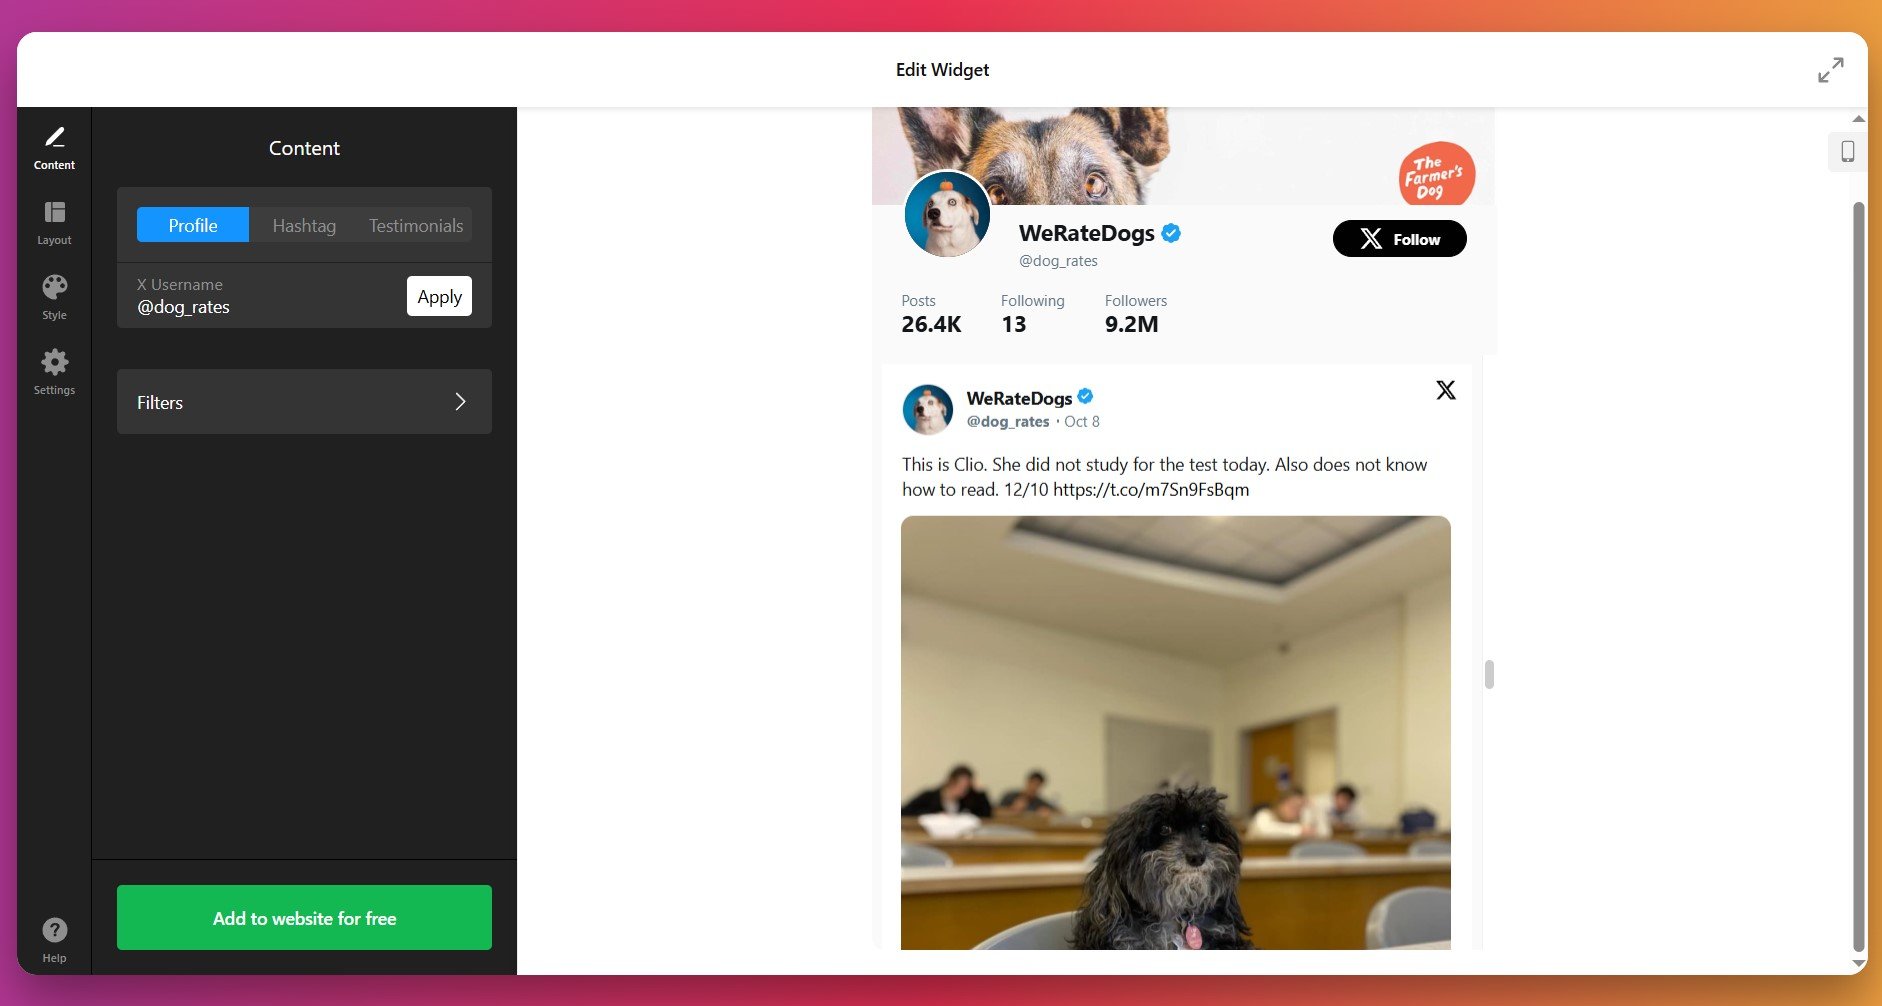
2. Connect a Content Source
Now we need to link the widget to your source on X. There are three source types that let you embed your Twitter profile, hashtag feed, or selected posts on your website:
- Usernames – embed tweets from specific profiles using their @username
- Hashtags – display posts by topic using one or multiple X hashtags
- Post URLs – hand-pick specific tweets such as client reviews
Click “Apply” to connect your Twitter content – the live feed will instantly load inside the preview panel.
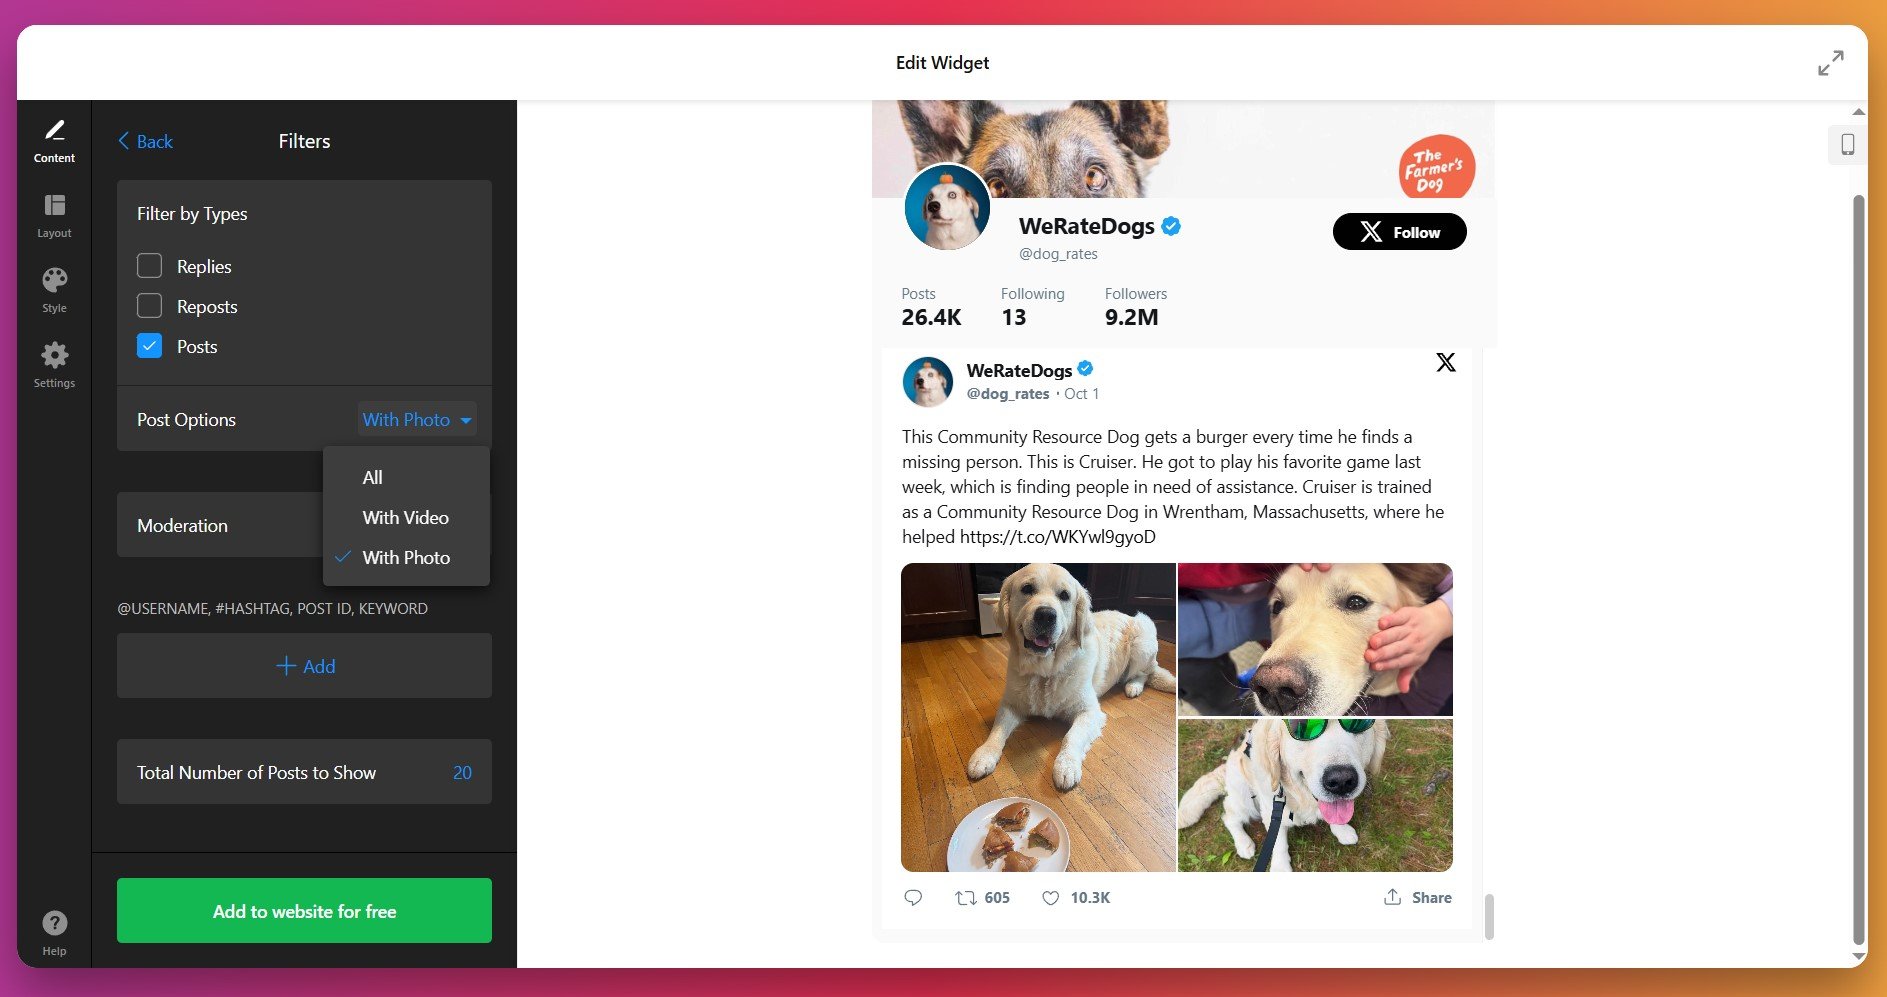
3. Filter and Moderate Content
Once your source is in, do not rush to leave the Content tab. Under ‘Filters’, you can control which tweets appear in your feed:
- Filter by Types: Hide retweets & replies to keep the feed brand-focused and clean
- Check Post Options: Show only tweets with images/videos or all posts via dropdown menu
- Moderate Content: Include or exclude certain posts by @username, #hashtag, post ID or keyword
- Limit Tweet Display: Decide on the total number of posts to show for vast or compact layouts
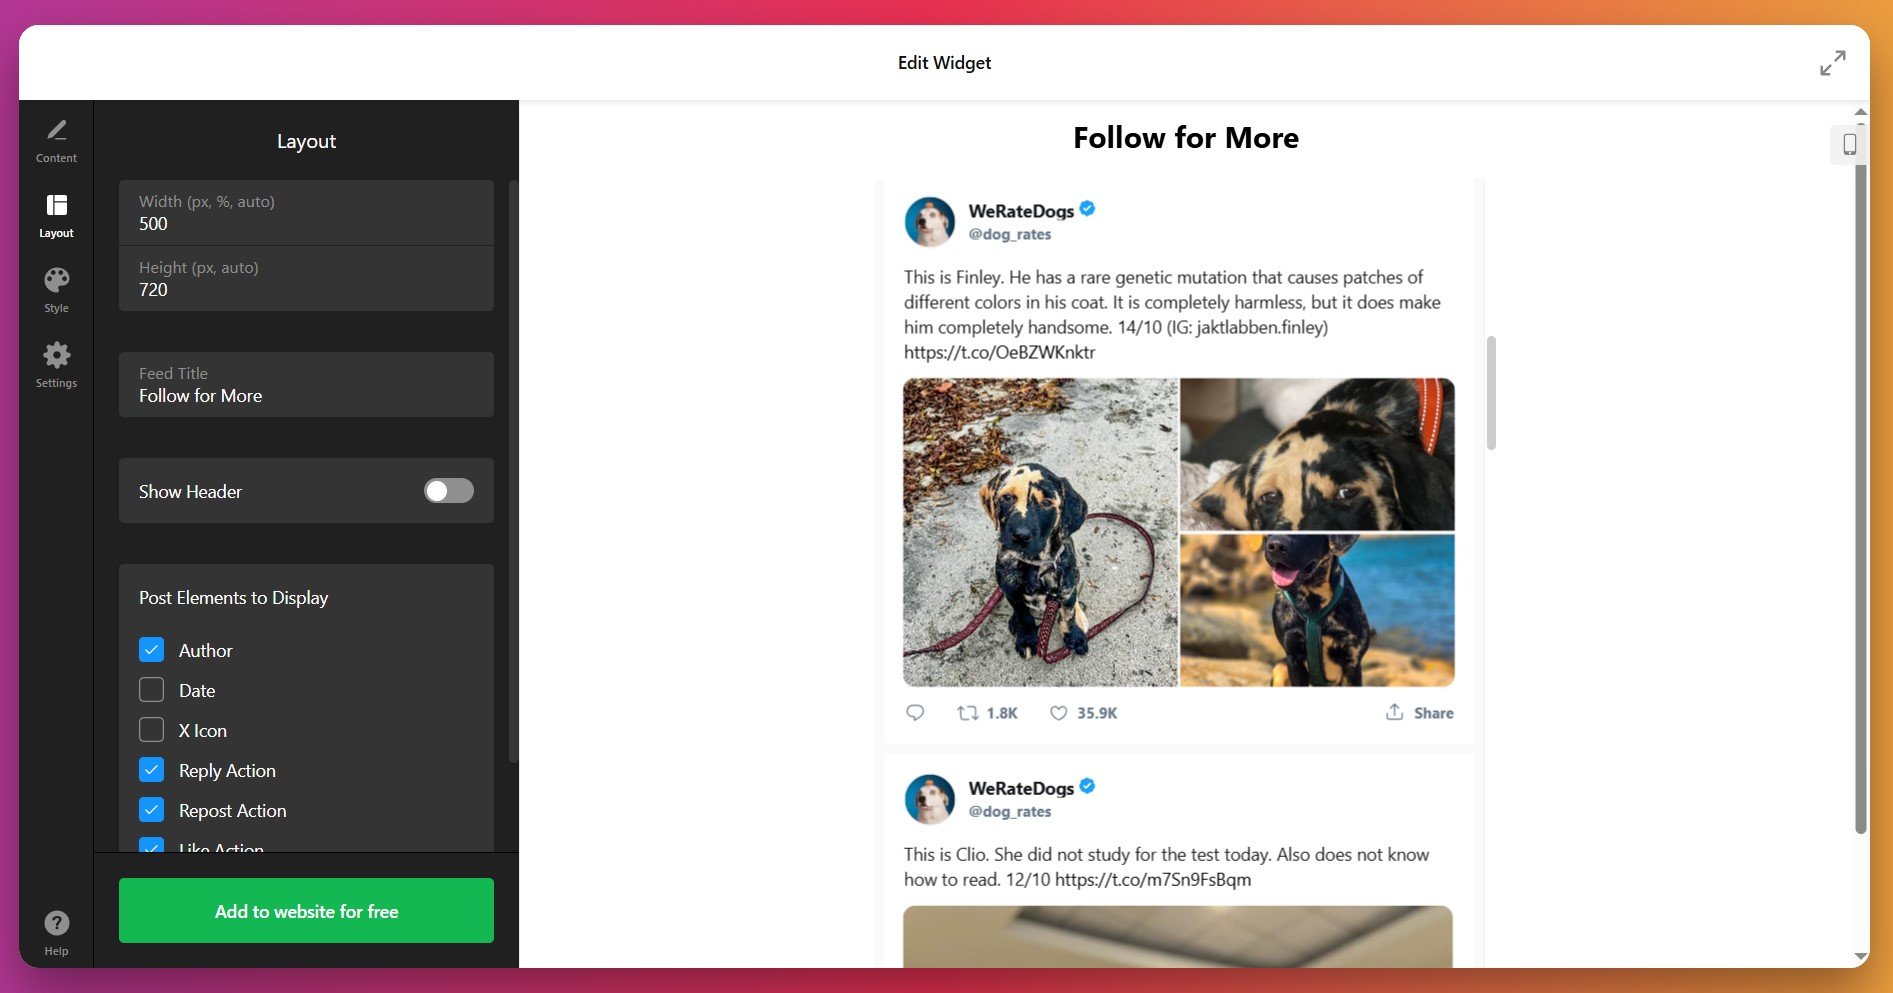
4. Configure the Layout
Switch to the Layout tab to control how tweets are displayed on your website:
- Set the widget’s width and height
- Add a Feed title or leave it blank
- Show or hide your X Feed header
- Display author info, date, and post interactions
You can skip this step entirely (the widget automatically checks all the boxes), though for minimalistic setups we recommend hiding some elements to reduce visual noise.
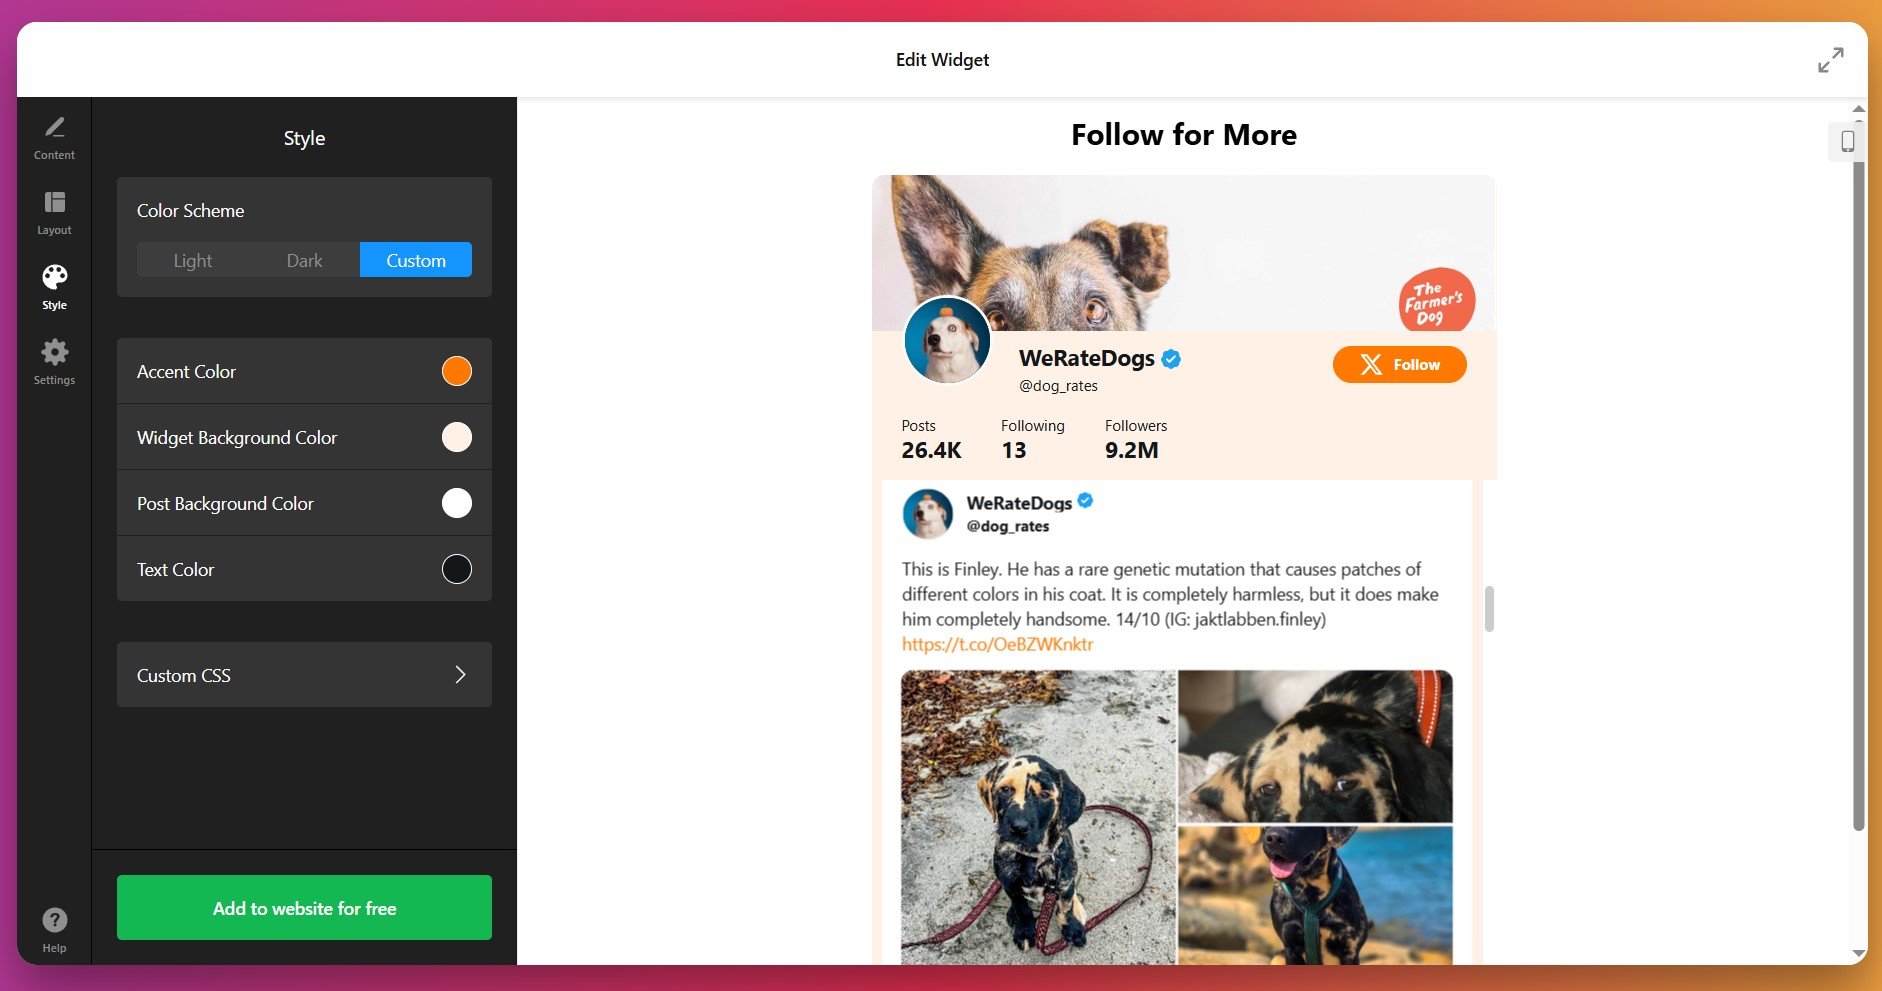
5. Customize the Style
Under the Style tab, match the feed to your website theme. You can change:
- Overall Color Scheme (light, dark, or custom)
- Accent Color for signature buttons and links
- Backdrop of the widget itself and posts
- Text Color to ensure readability
For convenience, we’ve added an ‘Explore the Forum’ button right in the editor – it will take you to Community discussions with ready-made Custom CSS from other Elfisight users.
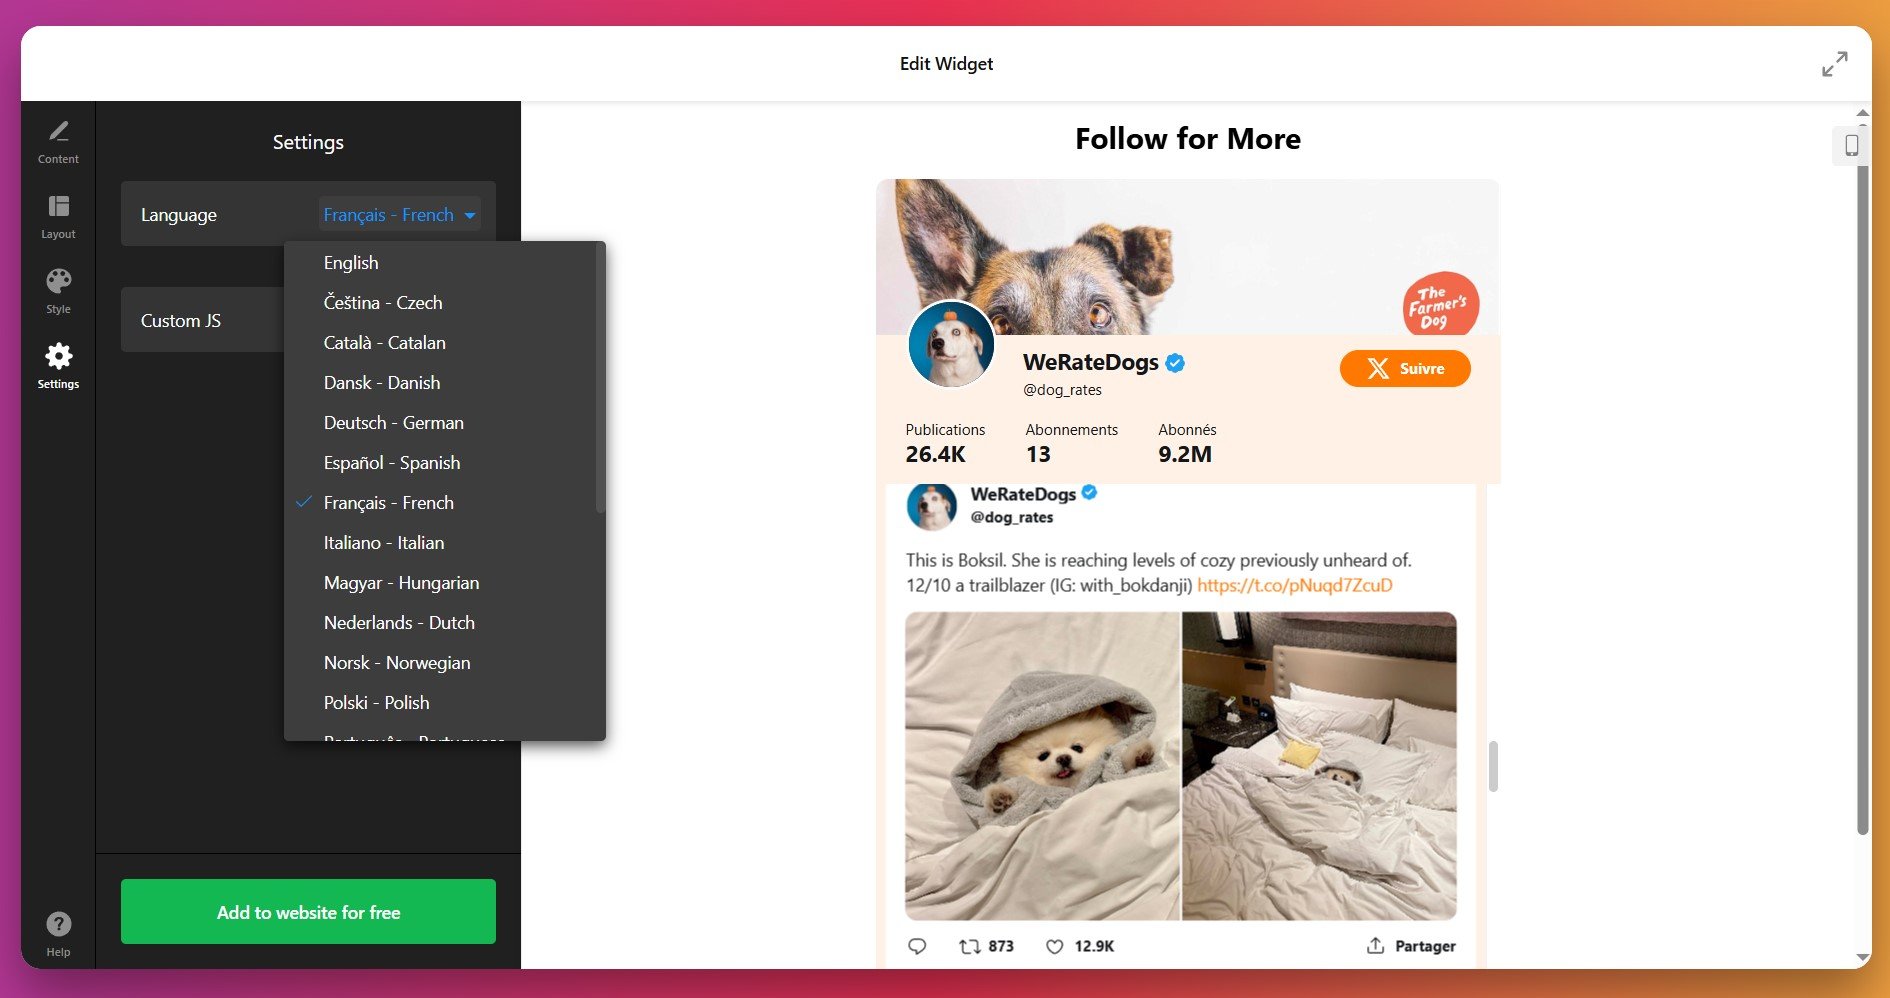
6. Configure Settings
Finally, open the Settings tab to choose your widget’s interface Language and experiment with Custom JS if needed.
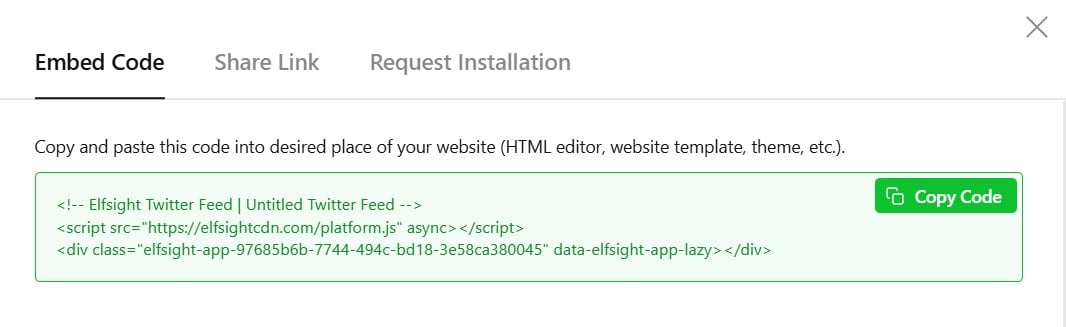
7. Get the Installation Code
Once your widget is ready, click “Add to Website” – a popup will appear with your installation script. Copy the snippet, you’ll use it to place the widget on your website.
8. Add Twitter Widget to Website
With your widget fully configured and the installation snippet copied, the final step is to embed it on your website. Below are the three most common installation methods that work with almost any website platform.
Option 1: Embed on a specific page
Quick workflow: Page Editor → Add HTML block → Paste code → Save
- Open your website Page Editor
- Add an HTML or Embed block (sometimes “Custom code”)
- Paste the Elfsight installation snippet into the code block
- Save and preview the page for results
Place the feed near testimonials or social proof sections to increase trust and engagement
Option 2: Add feed globally to all pages
Quick workflow: Theme/Header settings → Global code injection → Paste code → Publish
- Go to your website’s Theme or Global settings
- Find Custom Code / Global Embed area
- Paste the installation snippet before </body>
- Save and refresh your website
Use this method if you want the Twitter (X) feed displayed in your website footer or sidebar across all pages.
Option 3: Floating feed (always visible)
Want a floating widget that stays visible at the bottom or side of your page? You can enable Floating Layout inside the widget’s Layout → Positioning settings, then install normally.
- Open widget settings → Layout → Position
- Select Floating placement
- Choose corner position (left or right)
- Save and install the widget snippet
If the feed doesn’t appear, make sure you:
– Pasted the full code
– Disabled ad-blockers during testing
– Cleared website + browser cache
– Reconnected Twitter source if blank
If you prefer a different workflow or want to explore more ways to integrate Twitter feed into your website, the following section explains alternative methods.
Other Ways to Add Twitter Feed to Your Website
There are a few alternative methods for displaying Twitter content on your website, though each comes with certain limitations compared to a dedicated all-in-one solution.
Twitter’s Official Embedded Timeline Widget
Twitter provides a native embed tool that lets you display tweets directly from your account or a specific list.
- Access Twitter Publish. Visit the Twitter Publish page on the official platform.
- Enter your profile URL. Paste the link to the Twitter account you want to embed.
- Choose timeline format. Select between embedded timeline or button display options.
- Customize appearance settings. Adjust height, theme, and language preferences as needed.
- Copy and paste code. Insert the generated code snippet into your website HTML.
The native widget offers minimal design flexibility and lacks advanced filtering capabilities.
More details are available on the Twitter Developer documentation page.
Manual HTML and CSS Embedding
Website owners with coding skills can manually build a Twitter feed display using custom HTML and CSS.
- Create HTML structure. Build a container element to hold your Twitter content.
- Style with CSS. Add custom styles to match your website design and branding.
- Add Twitter content manually. Copy and paste individual tweet embed codes into your structure.
- Update content regularly. Manually replace old tweets with new ones as needed.
This method demands ongoing maintenance and lacks automatic content synchronization.
More information can be found in standard web development resources and forums.
Using Your Website Builder’s Native Integration
Some website platforms include built-in social media integration features that support X content display.
- Check platform features. Look for social media widgets in your website builder dashboard.
- Add Twitter block. Insert the Twitter or social feed block into your page.
- Connect your account. Authenticate your Twitter profile through the platform interface.
- Configure display settings. Adjust the number of tweets and basic appearance options.
Features vary significantly between platforms and may not work after switching website builders.
More details are typically found in your website builder’s help documentation section.
How Do These Methods Compare?
| Method | Major Pro 👍 | Major Con 👎 |
|---|---|---|
| Elfsight | Offers extensive customization options, automatic updates, and works across all website platforms without coding. | Requires third-party widget use and account log-in for editor access. |
| Twitter’s Official Widget | Free to use and comes directly from the platform itself. | Provides very limited design control and lacks content moderation or filtering options. |
| Manual HTML/CSS | Gives complete control over every visual aspect of the display. | Requires technical expertise and constant manual work to keep content fresh and updated. |
| Website Builder Integration | Already included with your platform subscription at no extra cost. | Often provides basic functionality only and stops working if you migrate to another platform. |
Now that you’re familiar with available options and setup steps, you might want to look through the list of our best-practice tips before publishing.
📝 Twitter Feed Widget Checklist
From the Elfsight team’s experience testing dozens of widgets, we know the Twitter Feed Widget stands out when you set it up with your audience and website goals in mind. These tips come from real-world installs and what we see working best for engagement.
- Select the right feed type. Profile feeds work best for brand storytelling, hashtag feeds boost campaign reach (#YourBrand), and mentions help showcase testimonials and social proof. Choose what supports your current marketing goal.
- Limit tweet volume for faster loading. Displaying too many tweets can slow page load. Set a reasonable post limit and use “load more” options for smoother performance.
- Only display elements that matter. Remove clutter like timestamps or reply counts if they’re not useful. Keep tweets clean and focused on what drives value—testimonials, visuals, or key messages.
- Cross-promote with Twitter widget. In case your website setup doesn’t limit your design freedom – utilize interaction buttons. With all Twitter actions available right in the feed, you have a new way to promote your profile.
- Align colors with your brand. Use the widget’s color theme controls to match your website’s palette, creating a unified, professional look.
- Showcase testimonials for trust. Create a feed of customer shoutouts or reviews using brand mentions. Highlight your strongest testimonials and set star ratings to boost credibility instantly.
- Preview on every device. Check the widget’s responsiveness on desktop, tablet, and mobile. Adjust sizing or layout if tweets get cut off or overlap.
- Add a call-to-action above the feed. Guide users with a CTA like “Follow us on X for updates” or “See what people say about us” – this increases click-through and conversions.
To ensure smooth integration and optimal performance of your Twitter Feed widget, it’s essential to address any potential issues that may arise during setup.
Twitter Feed Issues & Solutions
Some users might face difficulties when adding Twitter feeds to their website. Common issues include the feed not updating, widgets not displaying, or errors due to plugin conflicts:
Why is my Twitter feed not updating on my website?
How do I fix a Twitter widget that isn't displaying on my website?
What if my Twitter feed widget shows an error message like 'Unauthorized'?
Why are images or media not appearing in my Twitter feed?
Why is my Twitter feed showing 'Nothing to display' or staying empty?
Can browser extensions block Twitter widgets from loading?
How do I solve issues with Content Security Policy blocking external scripts?
If you still encounter issues after checking these basics, below are useful links to contact support, request features, or explore community solutions.
Need Help or Have Ideas?
We hope this guide gives you a solid foundation for bringing your Twitter content directly to your website. Stay connected with the Elfsight team on X, Facebook, and LinkedIn for the latest updates, tips, and discussions.


