Did you know that 76% of consumers who search for local businesses on their mobile devices visit the physical location within 24 hours?
For businesses with physical locations – service providers, retail stores, restaurants, or offices – displaying maps on your website isn’t optional anymore. When you add Google Maps to your website, you’re creating a bridge between your digital presence and physical operations. A properly implemented Maps Widget transforms a static address into an interactive navigation tool that helps visitors find you, build confidence in your business legitimacy, and decide whether to visit.
- Quickest method to embed interactive Google Maps on your website (no coding required)
- Complete setup workflow for location markers and contact information
- How different implementation approaches compare
- Best practices for maximizing visibility and customer engagement
The following sections walk through the entire process: from embedding a map in minutes to advanced customization that strengthens your location visibility and customer trust.
Quick Start: Add Maps to Your Website in Minutes
Here’s your shortcut to integrating Google Maps on your website regardless of your CMS:
- Open the Maps editor and set your location details.
- Configure content and customize the map appearance.
- Click ‘Add to Website’ and copy the embed code.
- Paste the code into your website’s backend.
🚀 See how your Google Maps widget will look in the interactive editor!
Why Adding Google Maps to Your Website Matters
Before we dive into detailed configuration, let’s see why embedding Google Maps drives measurable business results.
📍 Transform location into a competitive advantage
Most consumers conduct their location searches on mobile devices. When you display Google Maps on your website, you’re eliminating a critical friction point in the customer journey. Visitors no longer need to copy your address and switch apps—they can build a route from their current position directly on your page.
💼 Build trust through transparency
Businesses that display their locations prominently signal legitimacy and accountability. When customers can verify your exact address on Google Maps, complete with photos, reviews, and opening hours, they’re significantly more confident in doing business with you.
🏪 Capture “near me” searches automatically
When you display your location on your website alongside Google Maps integration, you’re positioning yourself to capture high-intent local searches. Every visitor searching for “dentists near me” or “coffee shops near me” sees your business when you’re properly positioned in local search results.
📱 Reduce support requests and inquiry volume
When customers can easily see your location, hours, phone number, and directions through an interactive map, fewer people contact you asking “Where are you located?” or “Are you open today?” An interactive map widget answers these frequent questions automatically, freeing your team to focus on higher-value customer interactions.
Google Maps Widget: Standout Features That Make It Work
Elfsight’s Google Maps widget for websites provides substantially more functionality than a basic static map. Understanding available features helps you optimize your location display for specific business goals:
| Feature | Business Impact |
|---|---|
| Detailed info windows and descriptions | When visitors click markers, they see phone numbers, addresses, opening hours, and custom descriptions. Complete information reduces bounce-backs and support calls. |
| Locations panel with searchable list | Visitors can scan all your locations as an organized list and click to highlight each on the map. This is especially valuable for multi-location businesses. |
| Automatic route suggestions | Visitors can click directions buttons to generate routes from their current position to your location using Google’s navigation system. |
| 50+ marker icon types and colors | Differentiate multiple location types (office, retail, warehouse, delivery point) with distinct icons. Visual hierarchy makes maps easier to understand at a glance. |
| Multiple map layers | Enable traffic view, bike routes, transit options, or satellite imagery depending on user needs. Advanced controls give visitors information options. |
| Street View and zoom controls | Let visitors explore your location visually using Google Street View directly from your map. Immersive previews build confidence before visiting. |
For more information on available functionality, visit the Google Maps Widget page.
Setting Up Your Location Map: From Configuration to Launch
This section guides you through each phase of creating and embedding your Google Maps widget on your website, with practical examples for different business scenarios.
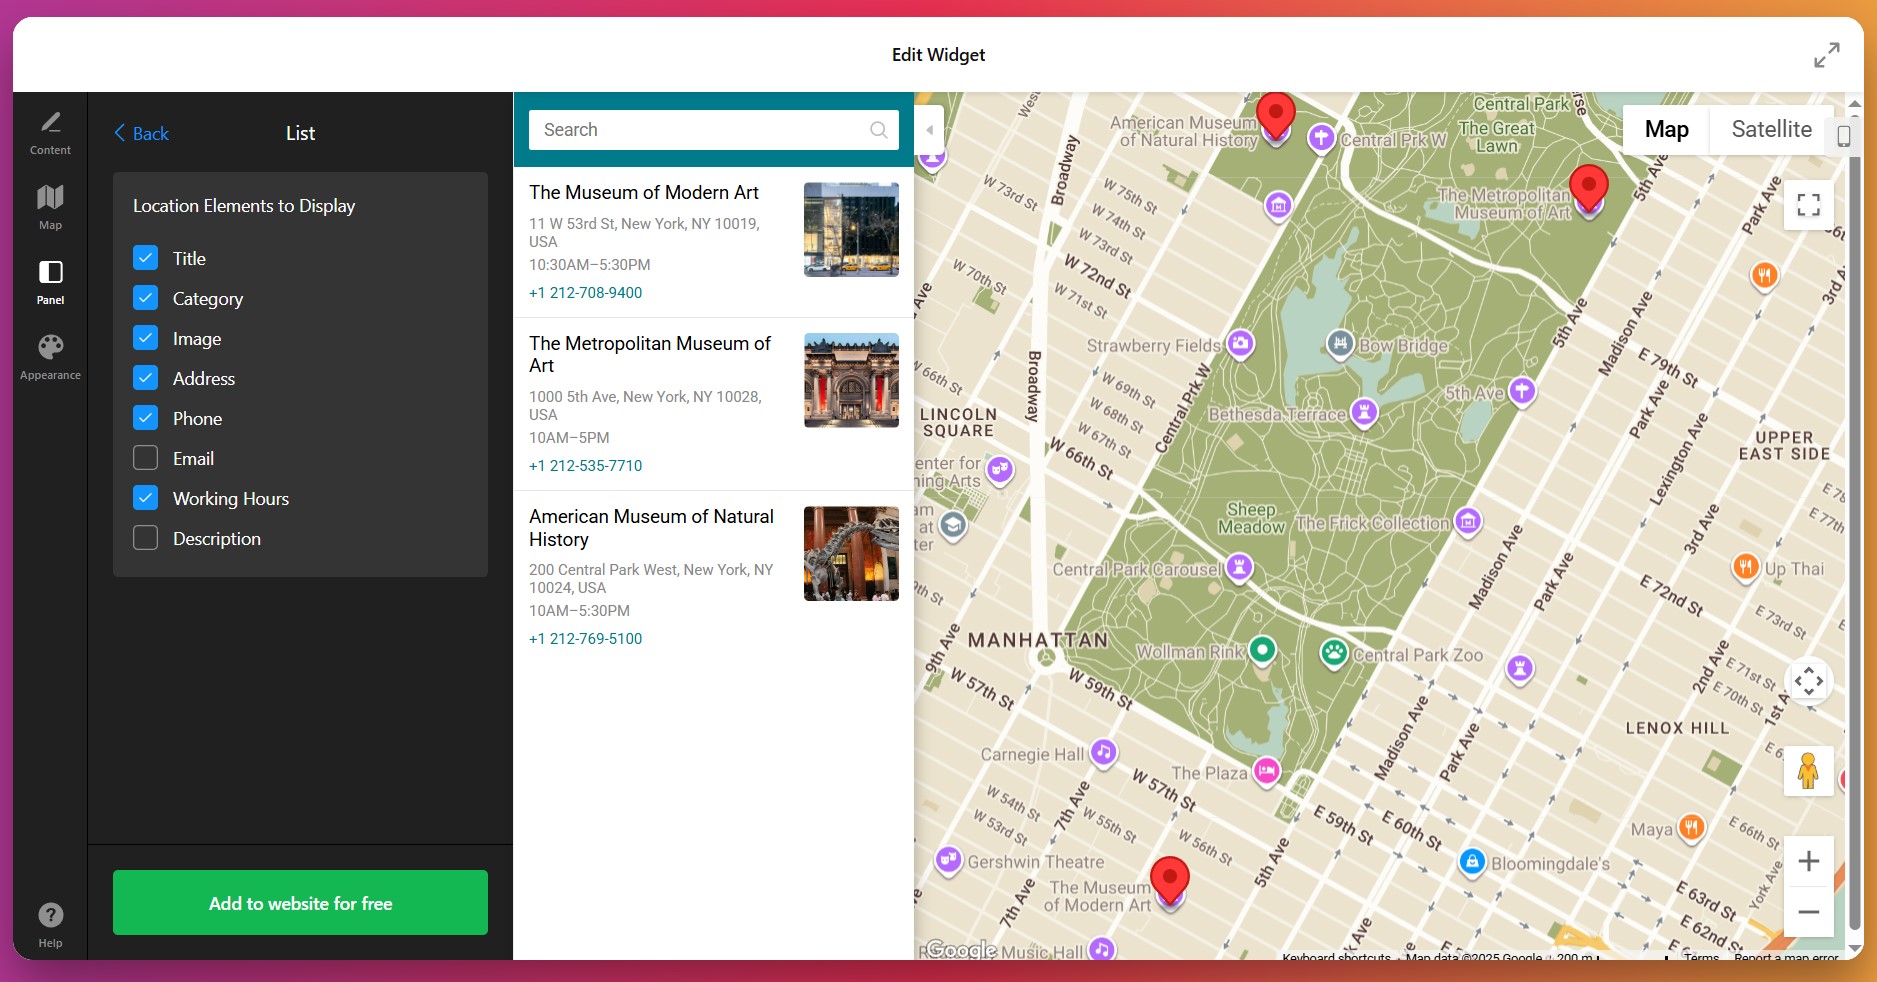
Step 1: Initialize Your Google Maps Widget
Start by opening the editor and choosing one of the predesigned templates. Some of the options include a ‘Multiple Locations’ map, ‘Single Location’, ‘Dark Map’ and ‘Infrastructure’. The default map displays a center point with basic navigation controls.
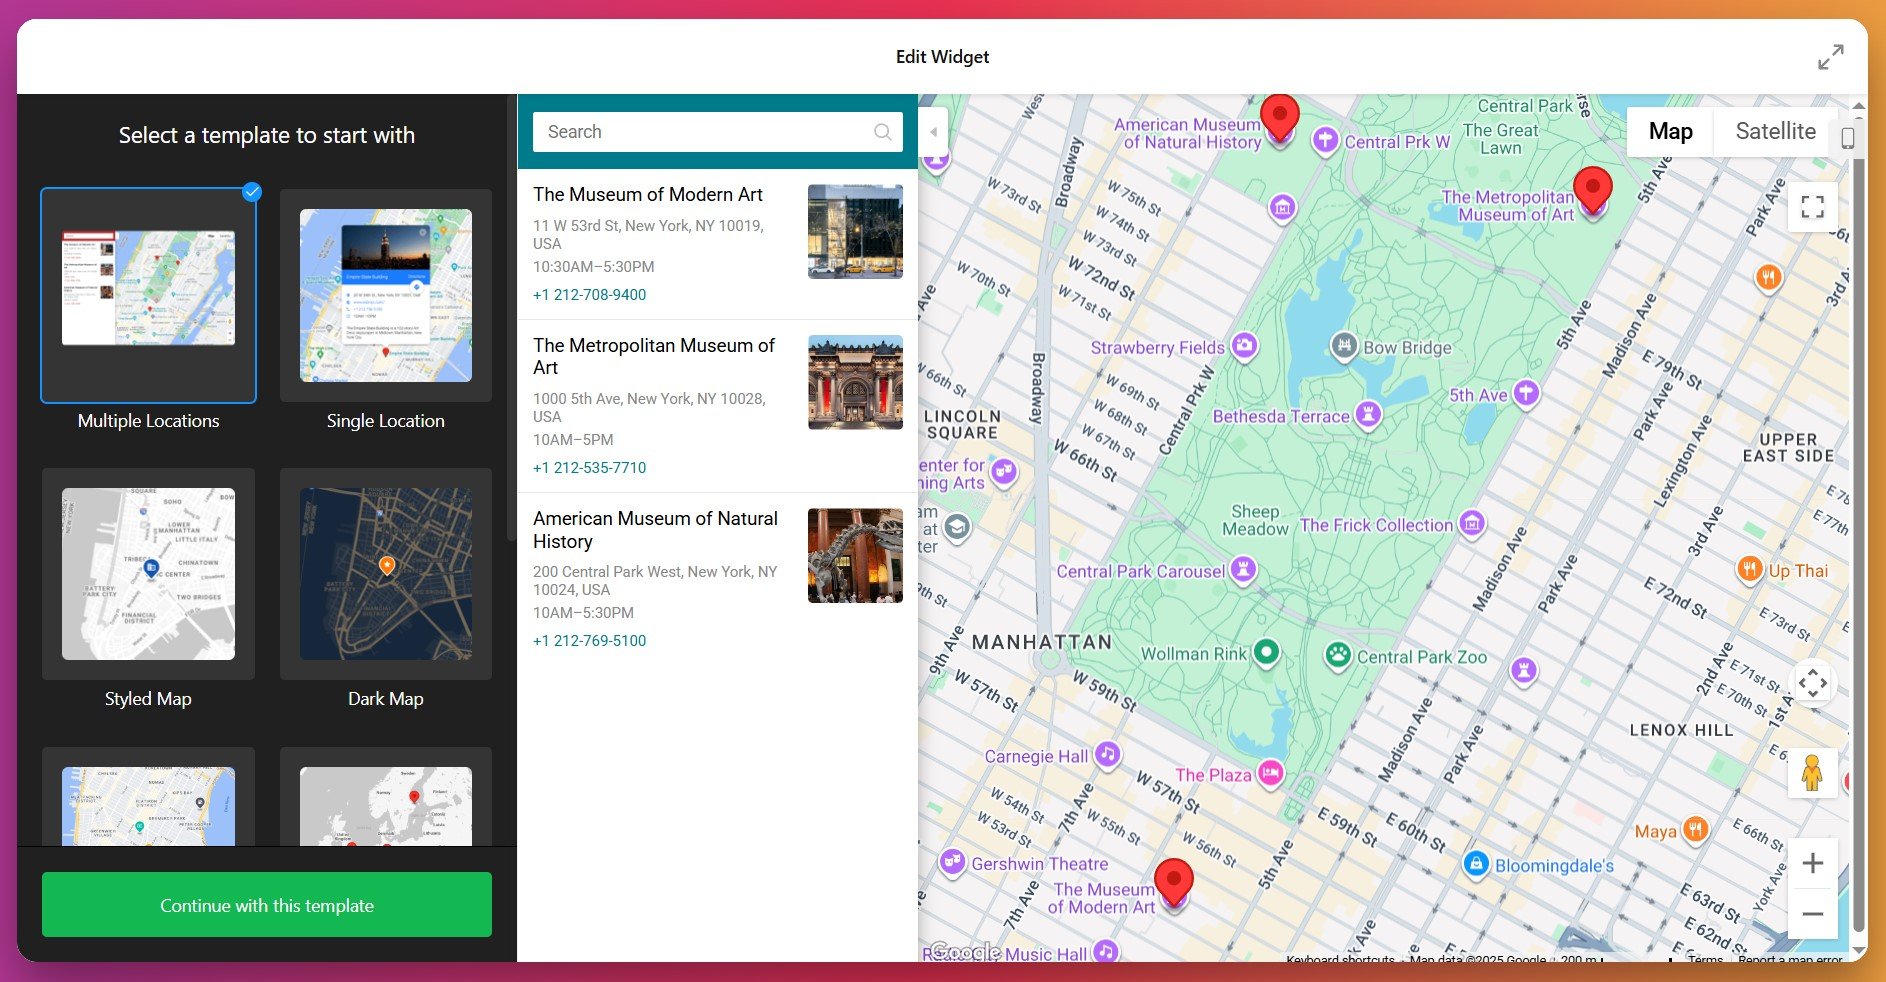
The editor displays your preview map on the right and configuration panels on the left. All settings sync in real-time—changes you make instantly appear in the preview, so you always see exactly how your final embedded map will look. For now, click the “Continue with this template” button to proceed.
Step 2: Add Your Business Location
Navigate to the ‘Content’ tab and click “Add Location.” You have two methods to specify your address:
- Search by Address – Type your street address (e.g., “123 Main Street, Seattle, WA 98101”) and the editor automatically matches it to the correct geographic coordinates.
- Search by Coordinates – Paste latitude/longitude values directly if you need extreme precision or have complex address formats.
Once you’ve entered your address, the map automatically centers on your location and adds a default marker. At this stage, you can also choose an icon for your location from the library or upload your own.
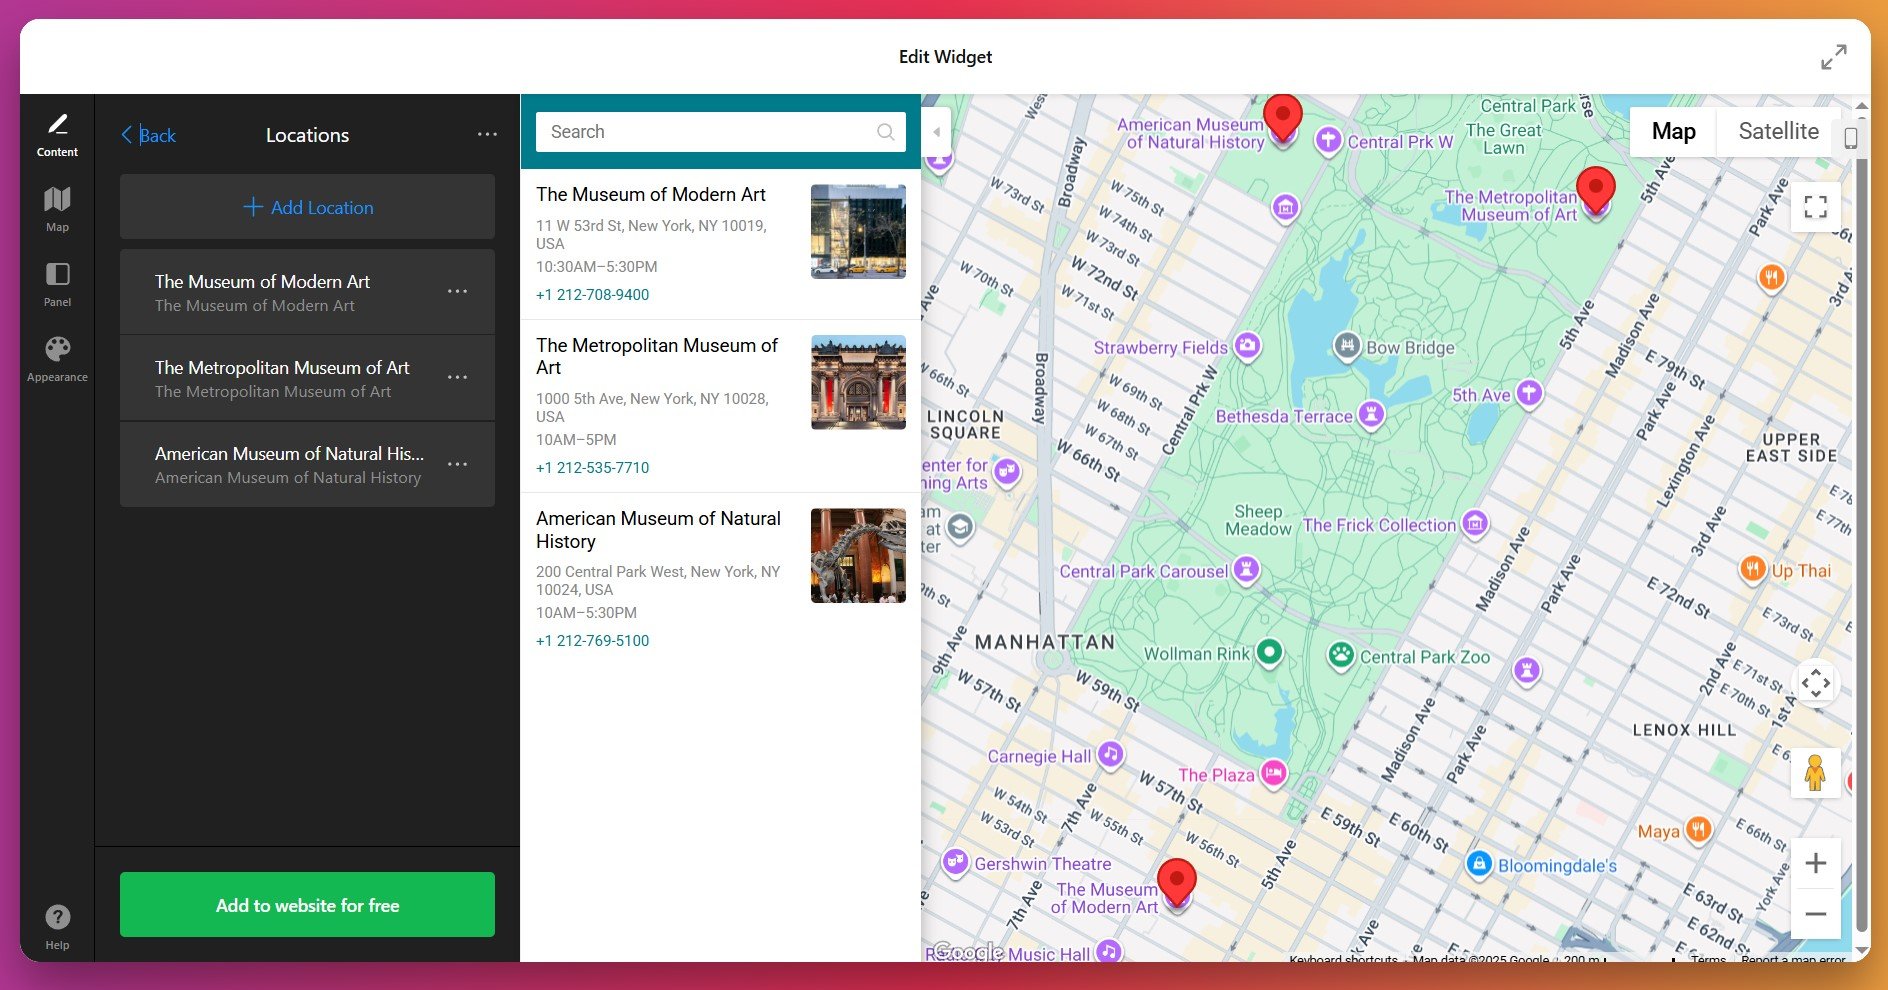
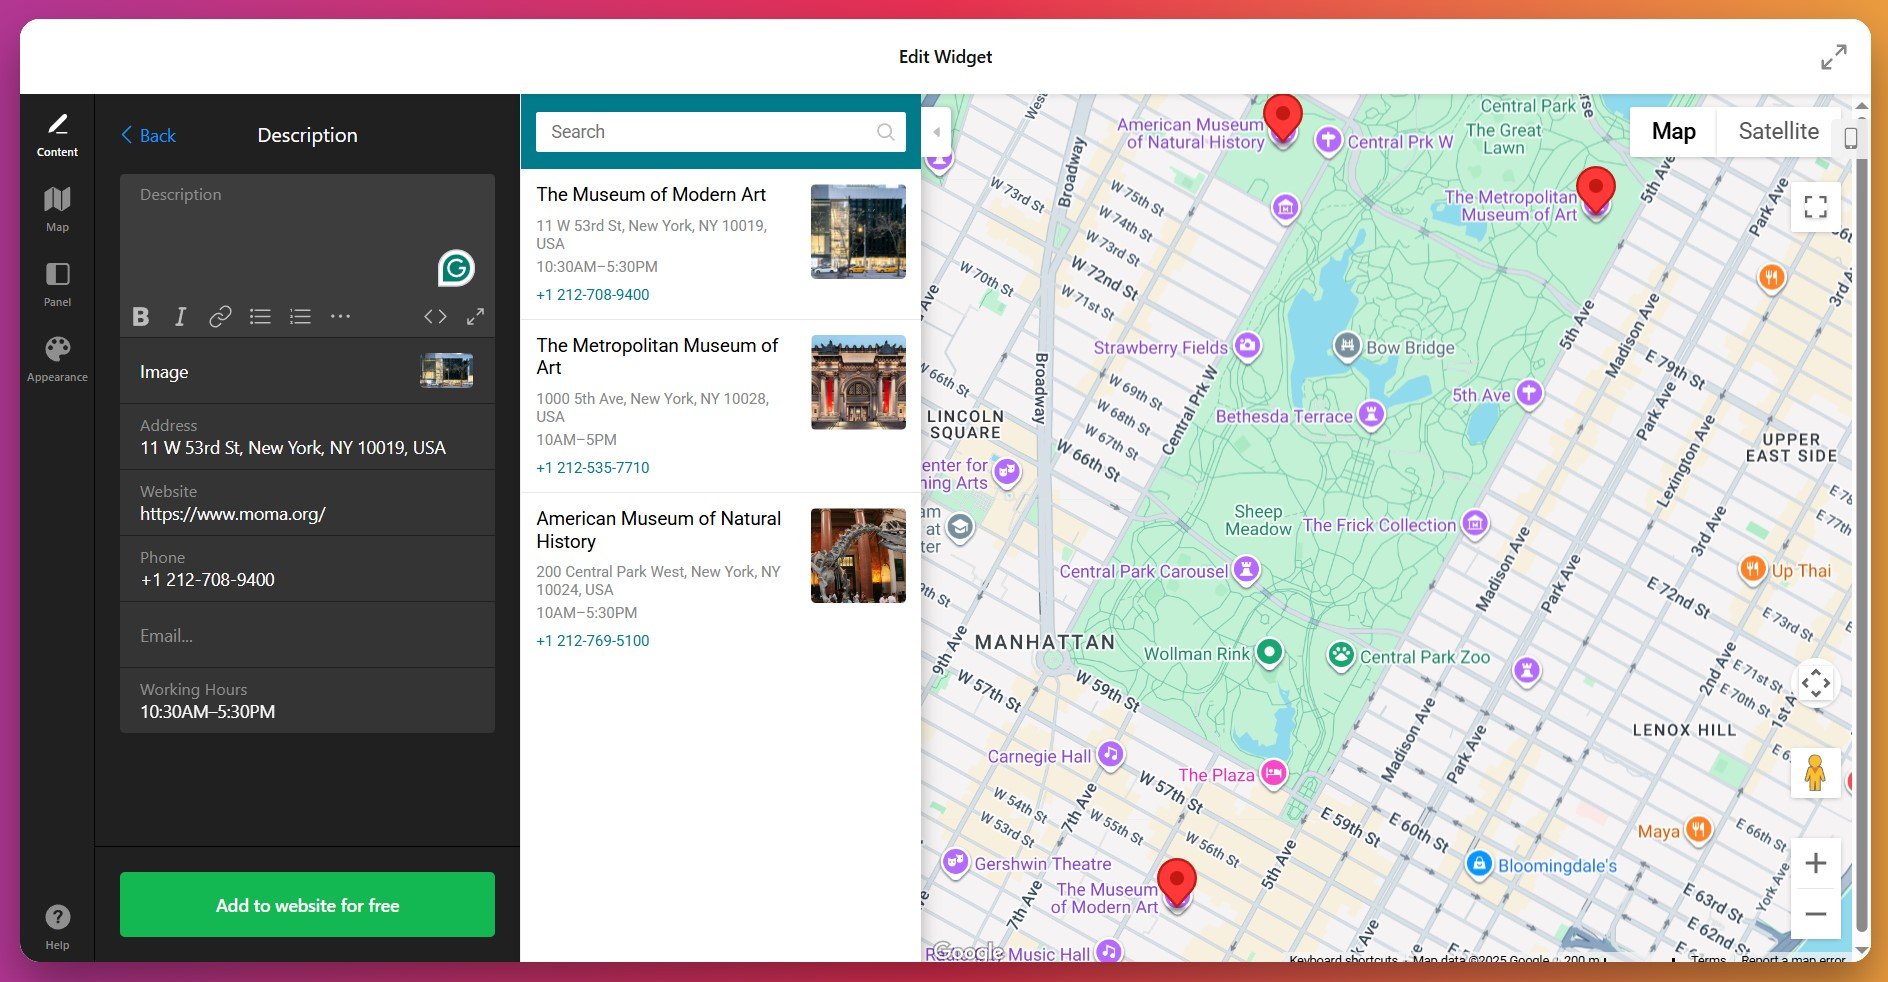
Step 3: Configure Detailed Location Information
Each marker can display comprehensive details when visitors click on it. In the editor, find your location in the locations list and click the edit icon. Fill in the following information fields:
- Location Name – How this branch appears in your locations list (“Main Office”, “Downtown Showroom”, “North Service Center”, etc.)
- Street Address – The complete mailing address for customer reference.
- Phone Number – Click-to-call link on mobile; tap-to-dial on desktop.
- Email Address – Click-to-email link that opens the visitor’s mail client.
- Website – A hyperlink to a location-specific page (e.g., branch website or local landing page).
- Opening Hours – Format hours by day of week (Monday 9 AM-5 PM, etc.). Visitors see “Open now” or “Closed” status in real-time.
- Description – 200-300 characters describing what makes this location unique (e.g., “Flagship retail location featuring all products” or “Express service center”).
Step 4: Configure Map Display Controls
In the Settings tab, choose which controls and features visitors can interact with:
- Zoom Control – Allow or disable the zoom buttons, letting visitors adjust map magnification.
- Scroll Zoom – Enable scrolling to zoom (can cause accidental zooms on mobile; consider disabling).
- Streetview – Include a Street View icon so visitors can see your location from the street.
- Map Type Control – Let visitors switch between standard map, satellite view, and hybrid view.
- Traffic Layer – Show real-time traffic conditions around your location (useful for urban areas).
- Initial Zoom Level – Set how zoomed-in the map appears when loaded. Level 13-15 typically works well for city/neighborhood context.

Under this tab, you will also set localization and adjust the map’s width & height.
Step 5: Enable the Locations Panel
The Locations Panel is especially valuable for multi-location businesses. It displays an organized list of all your locations beside or below the map. Visitors can scan the list and click any location to highlight it on the map, center the view, and display its details.
- Show/Hide Panel – Enable the panel if you have 2+ locations.
- Panel Position – Choose right side (default) or bottom placement depending on your page layout.
- Search Function – Enable location search within the panel (useful for businesses with 5+ locations).
- Panel Height – Set scrollable panel height or auto-expand.
Step 6: Customize Marker Icons and Appearance
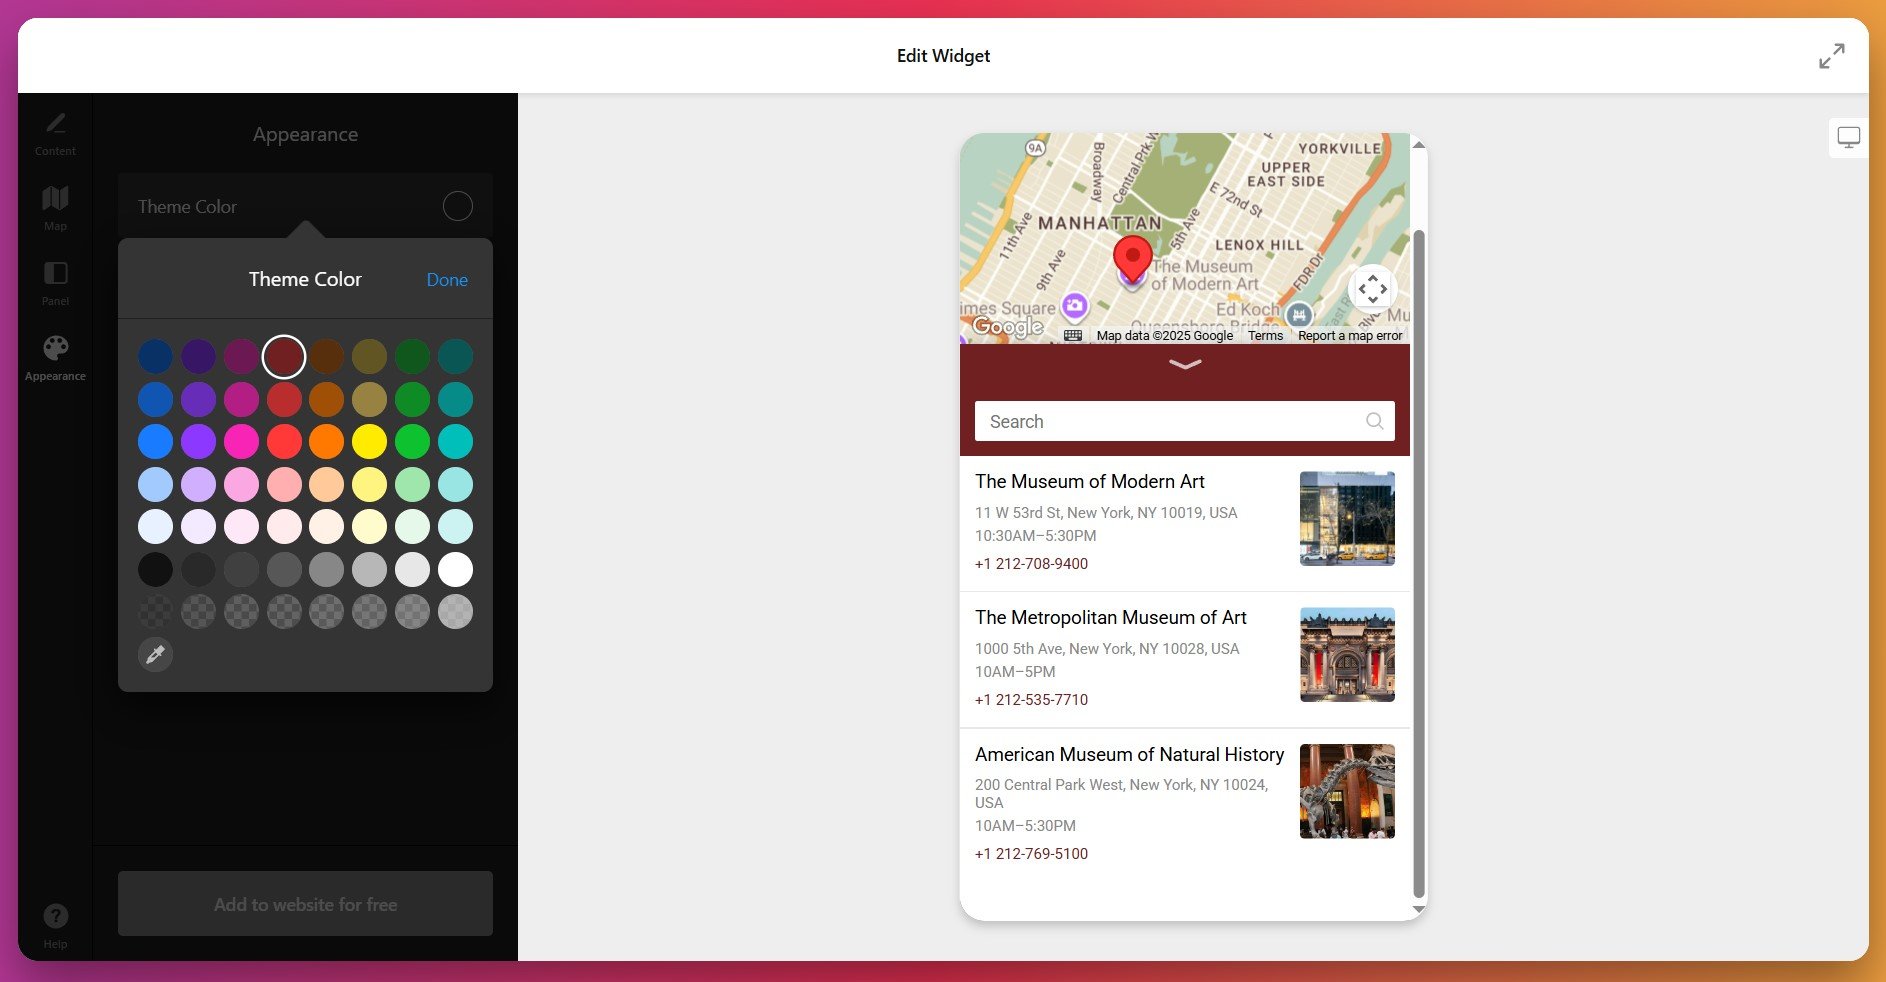
Visual consistency strengthens brand recognition. In the Style tab, customize how your map looks and feels:
- Marker Color – Change the marker color to match your brand palette. For multi-location maps, assign different colors to different location types.
- Map Theme – Select from preset color schemes (Light, Dark, Retro, Silver, Custom) that establish the overall visual mood.
- Custom Color Override – Fine-tune individual map elements like roads, water, parks, and labels to align with your brand.
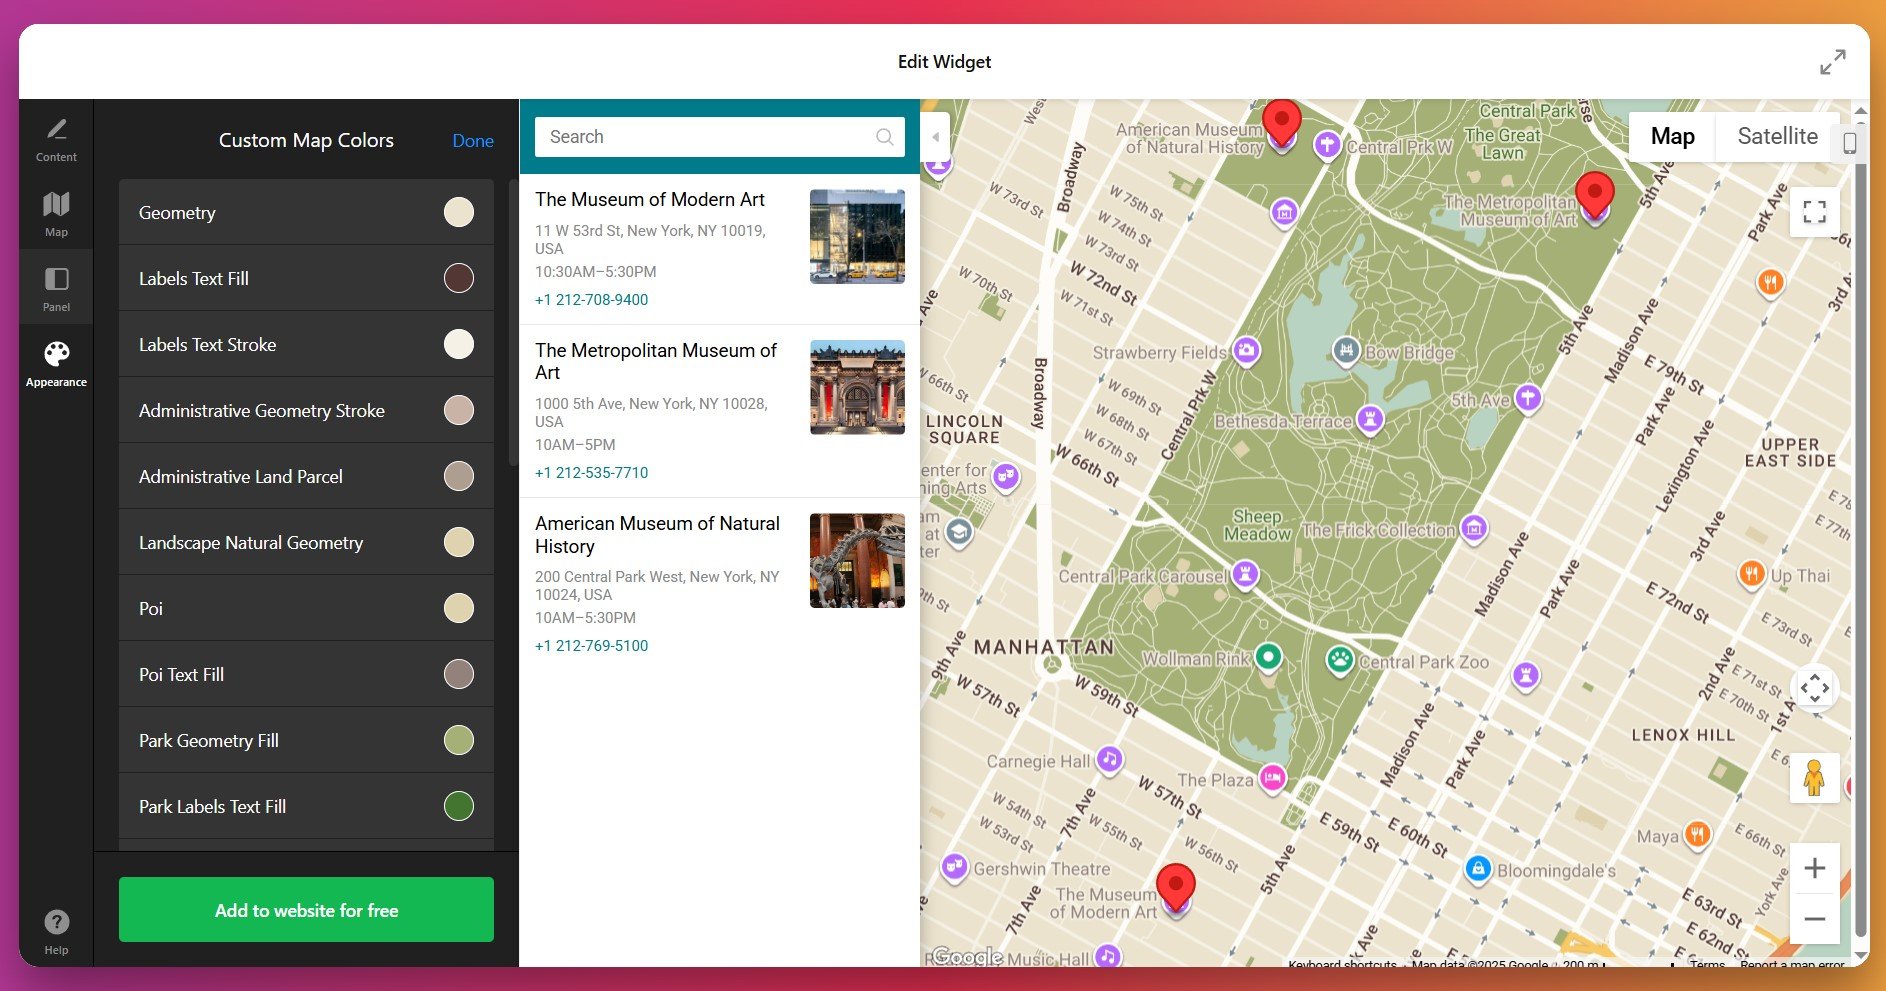
For more control, advanced users may add custom CSS or JS codes. Both options are available under ‘Appearance’.
Step 7: Preview on Different Devices
Before publishing, verify your map displays correctly across devices. Use the preview controls to see how your map looks on desktop, tablet, and mobile screens. Over 60% of website visitors access maps from mobile devices, so mobile optimization is critical:
- Verify markers display clearly without overlapping
- Confirm the locations panel doesn’t obscure essential map content on small screens
- Test that tap controls work smoothly on touchscreens
- Check that info windows appear correctly when clicking markers
Step 8: Generate and Copy Your Installation Code
Once your Google Maps widget is fully configured and previewing correctly, click “Add to Website” — a popup displays your unique installation code. Copy this entire code snippet to your clipboard. This code is what actually embeds your interactive map into your website.
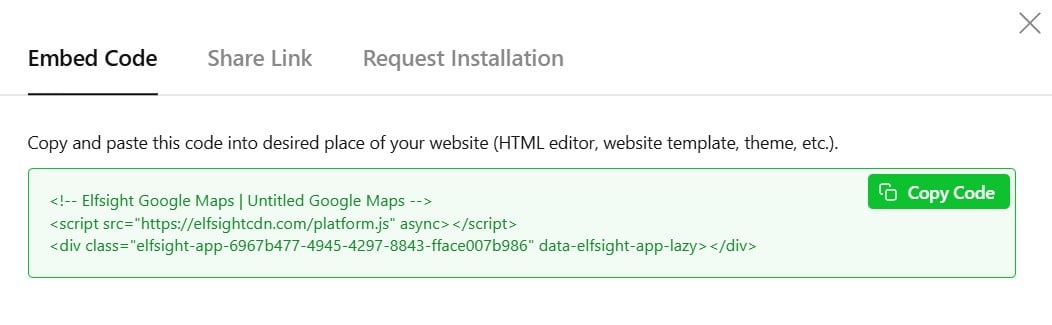
This code is platform-agnostic—it works on WordPress, Squarespace, Wix, Shopify, Webflow, or any website that supports custom code. The code is just a few lines of JavaScript that securely loads your map from Elfsight’s cloud servers.
Step 9: Embed Your Map on Your Website
With your installation code copied, you’re ready to add your Google Maps widget to live pages. Here are the three most common approaches to integrate location maps into your website:
Method 1: Add Map to a Dedicated Contact or Locations Page
Best for: Providing a central location hub where customers find all your branches and visit information.
- Open your website page editor and navigate to the page where you want the map (typically “Contact Us”, “Locations”, or “Visit Us”)
- Add a new content section by clicking + or Add Section
- Select the Custom HTML, Code, or Embed block option (varies by platform)
- Paste your Elfsight Google Maps installation code into the block
- Click Publish or Update to save changes
Method 2: Display Your Map in Website Footers or Sidebars
Best for: Making location information accessible from any page on your website.
- Navigate to your website’s widget or sidebar management area (process varies significantly by platform)
- Find the footer widget area or sidebar where you want your map to appear
- Click Add Widget and choose Custom HTML or Code
- Paste your installation code into the widget
- Click Save and your map appears in that location across your entire website
Method 3: Embed Map as a Floating Widget
Best for: Making your location “always available” while visitors scroll, without consuming page space.
- In your Google Maps widget editor, navigate to Layout → Positioning
- Enable Floating Position and select corner placement (bottom-right, top-left, etc.)
- Save your changes and copy the updated installation code
- Paste into your website as usual — now your map stays visible while users scroll
- Adjust floating position if it conflicts with other site elements
With your Google Maps widget now embedded and live on your website, explore the next section to understand how your approach compares to alternative embedding methods.
Native Solutions to Display Google Maps on Your Website
While Elfsight offers powerful customization for displaying Google Maps on your website, alternative embedding approaches exist. Each has distinct strengths and tradeoffs worth understanding when selecting your maps solution.
Google Maps Embed API (Iframe Method)
Google provides a free, simple embed method using iFrame code – perfect for adding a quick, basic map to any website.
- Find Your Location: Go to Google Maps and search for your business address.
- Access Share Menu: Click the Share button below the map.
- Select Embed Option: Click “Embed a map” (not “Share a link”).
- Copy HTML Code: Google generates an iFrame code snippet. Click Copy HTML to capture the code.
- Paste Into Website: Paste the code into any Custom HTML block on your website.
- Adjust Size (Optional): Edit the width and height values in the code to match your page layout (e.g., width=”100%” for full-width maps).
Google My Maps (Custom Map Creation)
Google My Maps lets you create custom maps with multiple markers, custom icons, layers, and detailed information – then embed them on your website.
- Create Account: Visit Google My Maps and sign in with your Google account.
- Create New Map: Click “Create a new map” and give it a title.
- Add Markers: Click “Add marker” and search for each location you want to add. Customize marker icons and colors.
- Add Details: For each marker, click to add descriptions, images, and custom information.
- Share Settings: Make the map public and set sharing permissions.
- Get Embed Code: Click the menu (three dots), select “Embed on your website,” and copy the iFrame code.
- Paste Code: Add the code to your website’s Custom HTML block.
For a comprehensive walkthrough, check the official Google My Maps documentation.
WordPress Native Map Display (For WordPress-Powered Websites)
If you run a WordPress website, you can embed maps using the native block editor.
- Edit Page/Post: Open the page where you want the map in WordPress block editor.
- Add Custom HTML Block: Click the + button, search for “Custom HTML,” and add the block.
- Paste Google Maps Embed Code: Paste your Google Maps iFrame code into the Custom HTML block.
- Preview: Use the preview function to see how your map displays.
- Publish: Click Publish to make the map live.
Comparison: Which Map Solution Works Best for Your Website?
Let’s examine these methods side-by-side to see which of the four best suits your website goals:
| Approach | Setup Time | Customization | Features | Best for |
|---|---|---|---|---|
| Elfsight Google Maps Widget | 5-10 minutes | Extensive – styles, themes, markers, info panels | Unlimited markers, location list, directions, hours, contact info | Professional location display with brand consistency and visitor engagement |
| Google Maps Embed (iFrame) | 2-3 minutes | Minimal – only size adjustments via code | Basic map, limited zoom control | Simple single-location maps with minimal customization needs |
| Google My Maps | 10-15 minutes | Moderate – custom markers, layers, info boxes | Custom icons, multiple markers, descriptive overlays | Map-focused content or complex route/territory visualizations |
| WordPress Native Method | 3-5 minutes | Low – paste and resize only | Standard Google Maps features via iFrame | WordPress websites wanting minimal setup without additional tools |
Now that you understand your options, let’s explore best practices that maximize effectiveness when you display Google Maps on your website.
📝 Optimization Practices for Maximum Location Impact
From our experience with thousands of active map installations, certain setup choices consistently drive better engagement, foot traffic, and customer actions. These practices apply whether you’re displaying a single office, multiple retail locations, or service area coverage.
- Keep location information completely accurate and current. Incorrect addresses, phone numbers, or hours frustrate customers and damage trust. Review your business information on Google Business Profile quarterly and sync those same details into your embedded map. Update hours seasonally and for holidays.
- Add complete opening hours for every location. Visitors check hours before deciding whether to visit. Specify hours by day (Monday-Sunday) and mark holidays explicitly. When hours differ by season, update them proactively. The “Open now” indicator in real-time shows current status, saving customer support inquiries.
- Choose marker icons that communicate location type clearly. Use different icons for different location types (retail store vs. service center vs. warehouse). Consistent, recognizable icons help visitors quickly understand what each location offers.
- Include a prominent phone number and clickable call button. Mobile visitors should be able to call you directly from the map. Make phone numbers clickable (tel: links on mobile) to reduce friction and increase direct customer contact.
- Position your map on pages where location matters most. Feature maps prominently on Contact Us pages, footer sections, and service area pages. Consider floating placement for businesses where location drives decision-making (real estate agents, delivery services, clinics).
- Optimize map zoom level for immediate context. Set zoom to show your immediate neighborhood (levels 13-15). Too zoomed out confuses visitors; too zoomed in makes context unclear. Test on mobile to ensure markers don’t overlap.
Common Questions About Embedding Google Maps
Here are the most frequently asked questions from businesses implementing Google Maps on their websites:
Do I need a Google Maps API key to use Elfsight's Google Maps widget?
Can I display multiple business locations on a single map?
What happens if I change my business address or move to a new location?
Will adding a Google Maps widget slow down my website?
Can visitors get directions to my location directly from the embedded map?
How does my embedded Google Maps widget appear on mobile devices?
Can I customize the map colors to match my brand?
Location Maps in Action: A Dental Practice Success Story
The Dental Barns, a multi-location UK dental practice, demonstrates how strategic location mapping transforms customer navigation and business credibility. Their implementation showcases practical benefits that apply across many industries.
📍 Before Adding the Google Maps Widget
The Dental Barns initially listed their practice location only as text on their website. Potential patients couldn’t easily verify the location, estimate travel time, or understand how to find them. This friction point deterred first-time patients who wanted to know exactly where they were going before committing to a visit.
- Location appeared only as text on the website—no visual confirmation
- Patients couldn’t check directions or estimate travel time without leaving the website
- No way to display hours, phone numbers, or other critical location details prominently
With Google Maps Widget Implemented
“We use Elfsight to keep the website looking fresh — we wanted a single point of updates for our online activity (Instagram, via Sprout), and so with the widgets, the website is caught up in those updates — which wouldn’t have been possible previously.”
David Drew, The Dental Barns
The Dental Barns embedded Elfsight’s Google Maps widget on their location page, displaying their practice address with complete contact details, opening hours, and directions functionality. Patients could now verify location, check hours, call directly from the map, and get navigation—all without leaving the website.
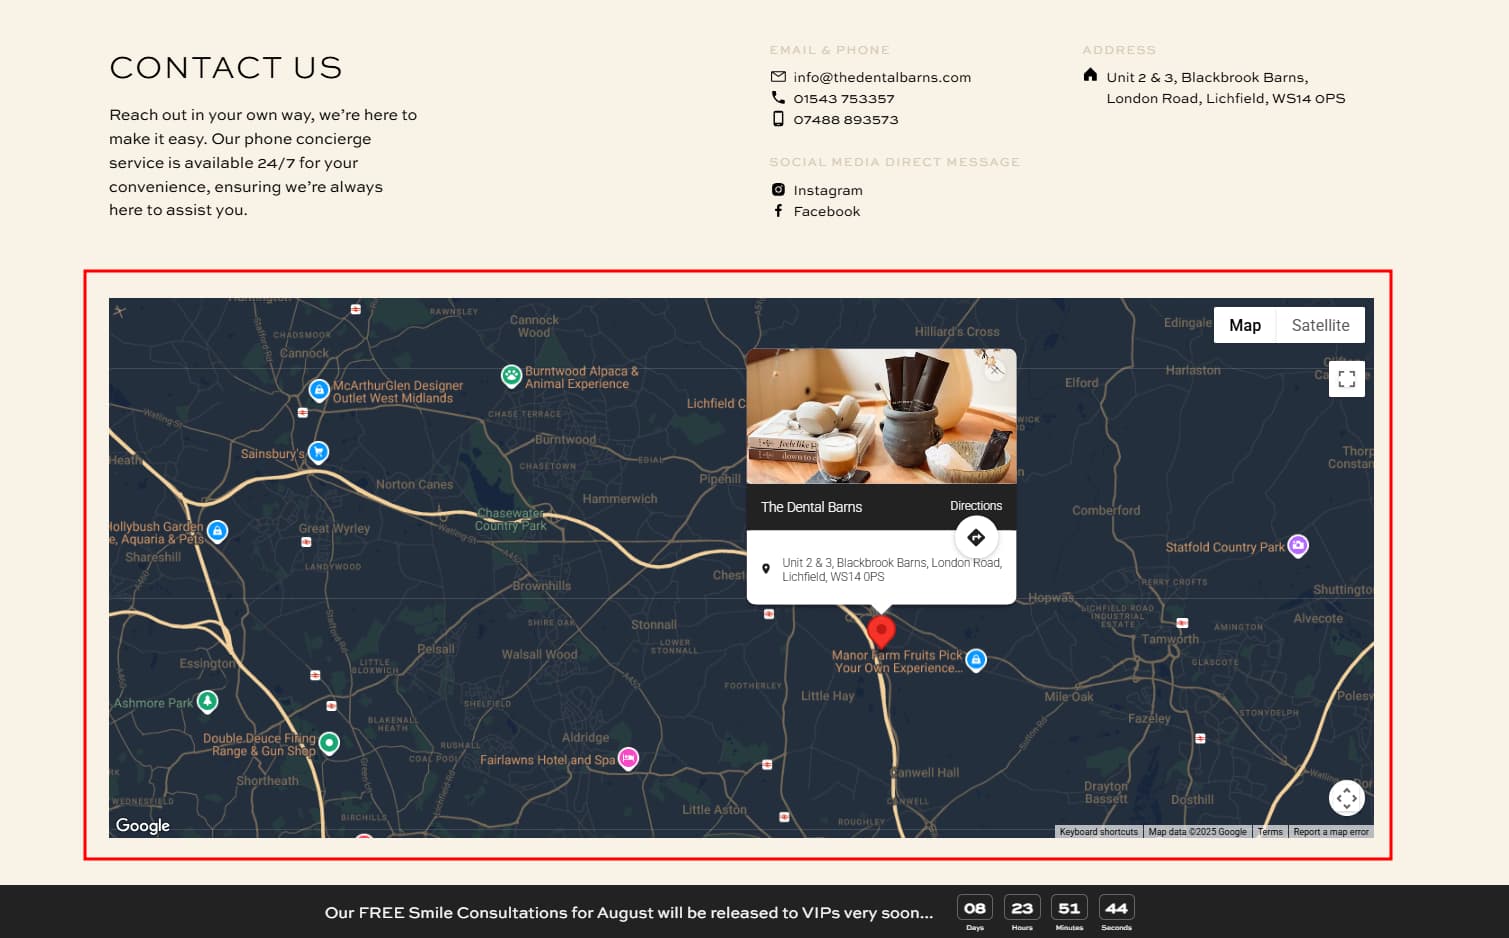
The embedded map became a trust-building tool. Combined with other Elfsight widgets – All-in-One Reviews to display patient testimonials, Instagram Feed for social proof, and Photo Gallery for before/after treatment visuals – the map contributed to a professional, comprehensive online presence that encouraged new patients to schedule appointments.
Start Displaying Your Location Today
Whether you operate a single location or manage a multi-branch organization, displaying your maps prominently signals accessibility and builds visitor confidence. For detailed guidance, community solutions, or technical help, connect with Elfsight via our forum and support resources.
Cited source: Google Maps SEO Statistics