Ever tried adding a YouTube video to your website and ended up stuck with clunky plugins that just won’t fit your design? You’re not alone: many website owners struggle to keep embedded media consistent, responsive, and visually aligned with their setup. A well-placed video section featuring product demos, reviews, or behind-the-scenes clips can help visitors understand your offer faster and stay on your website longer.
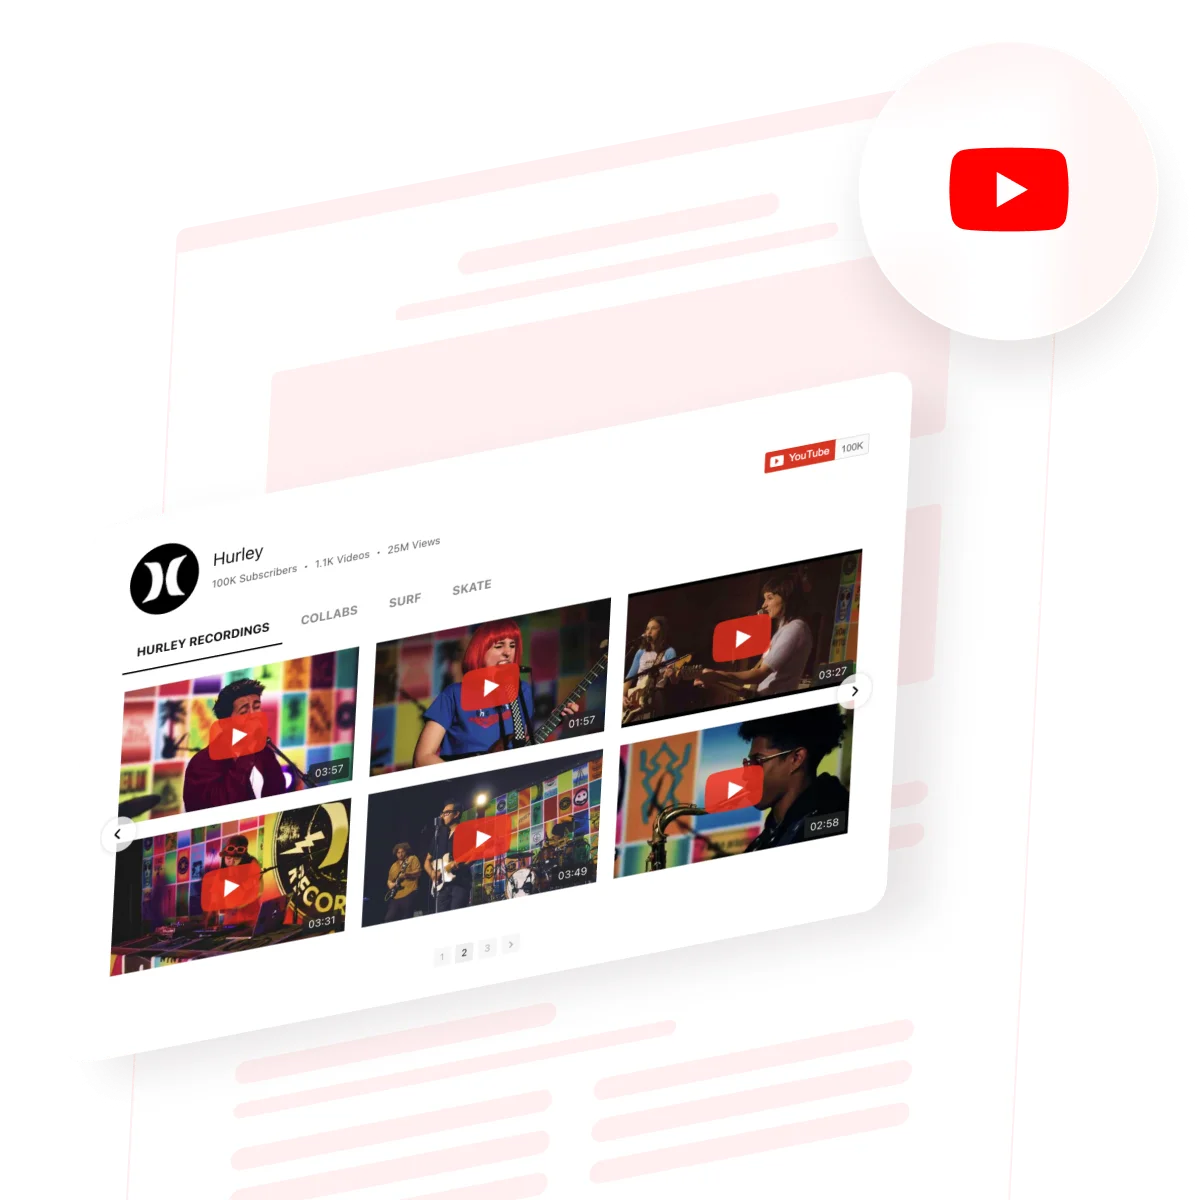
If you want to embed a YouTube channel, playlist, or single video without the hassle of manual setup or styling issues, the easiest way to do it is with the YouTube Gallery widget. It updates automatically with your latest uploads, adjusts to any website layout, and matches your brand’s design, keeping your pages fresh and dynamic without you touching a line of code.
- Turn your YouTube content into an on-site experience that drives clicks.
- Keep your YouTube Feed on-brand with fully customizable video galleries.
- Optimize your widget for best results: from layout tweaks to display settings
- Solve common embed issues that slow you down or break the layout.
This guide includes two setup options: a fast 4-step quick setup to get your YouTube Gallery running right away, and a full step-by-step walkthrough for those who want more guidance and pro tips. Let’s start with instant setup:
Embed YouTube on Website in 5 minutes
Ready to see the widget in action? Here’s how to add a YouTube video to your website in just a few clicks:
- Open Elfsight’s editor and pick a template.
- Customize your YouTube widget.
- Click ‘Add to website for free’ and copy the generated code.
- Paste it into your website’s backend.
Try the YouTube Gallery now – add your first video feed in minutes!
Top Features That Bring Your YouTube Feed Widget to Life
With your first YouTube widget live, it’s time to see what makes it shine. These built-in features turn a simple embed into a dynamic, on-brand video experience:
| Key Feature | Why it Matters |
|---|---|
| Display any YouTube content, grouped and labeled | Show the most relevant channels, playlists, or videos in a way that’s easy for visitors to browse. |
| Three preview builds and switchable playback modes | Control how people watch your videos, with options for pop-up, inline, or native YouTube playback. |
| Custom style presets and colors for every element | Match your gallery’s design to your brand or website with a few clicks. |
| Flexible gallery layout and navigation controls | Organize videos in columns and rows, add search, and let visitors find what interests them fast. |
| AdSense integration for direct monetization | Earn ad revenue by showing videos right on your website’s gallery. |
These are just a few of the perks that help your widget boost user engagement and keep your video content organized. For the full list, check out the YouTube Gallery Features Page.
How to Embed a YouTube Channel on Your Website Step by Step
Now that you know what the widget can do, let’s put those features to work. Follow this detailed walkthrough to build and customize your YouTube Gallery from start to finish.
1. Choose a Template
The first thing you’ll see in the YouTube Gallery editor is the choice of three main layout styles:
- The Grid shows videos in rows
- The List stacks them vertically with more room for descriptions
- The Slider displays them in a swipeable carousel
The Slider layout allows you to embed a YouTube playlist of your choice instead of displaying the whole feed. For minimalistic setups, there’s also an option to simply add a YouTube Subscribe button or a single video – a recent product launch, brand introduction, or newest customer testimonial.
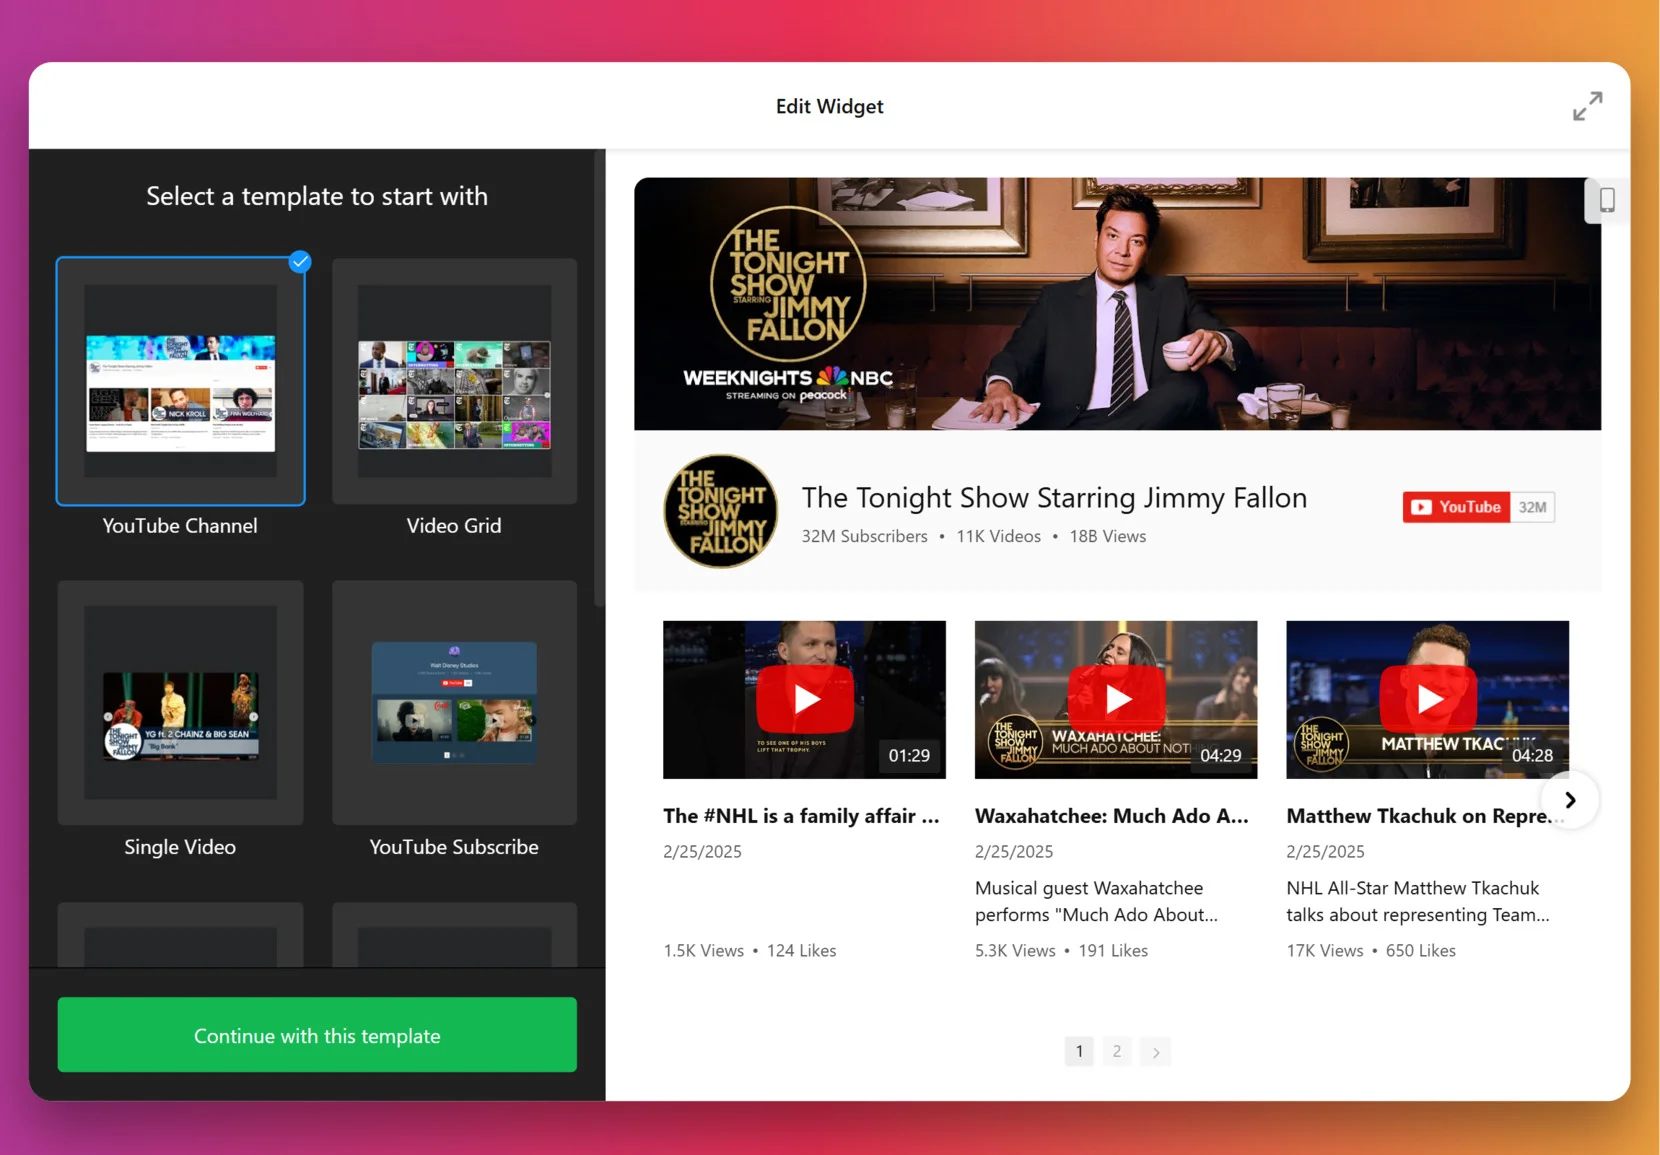
Once you’ve selected a layout you like – click “Continue with this template“.
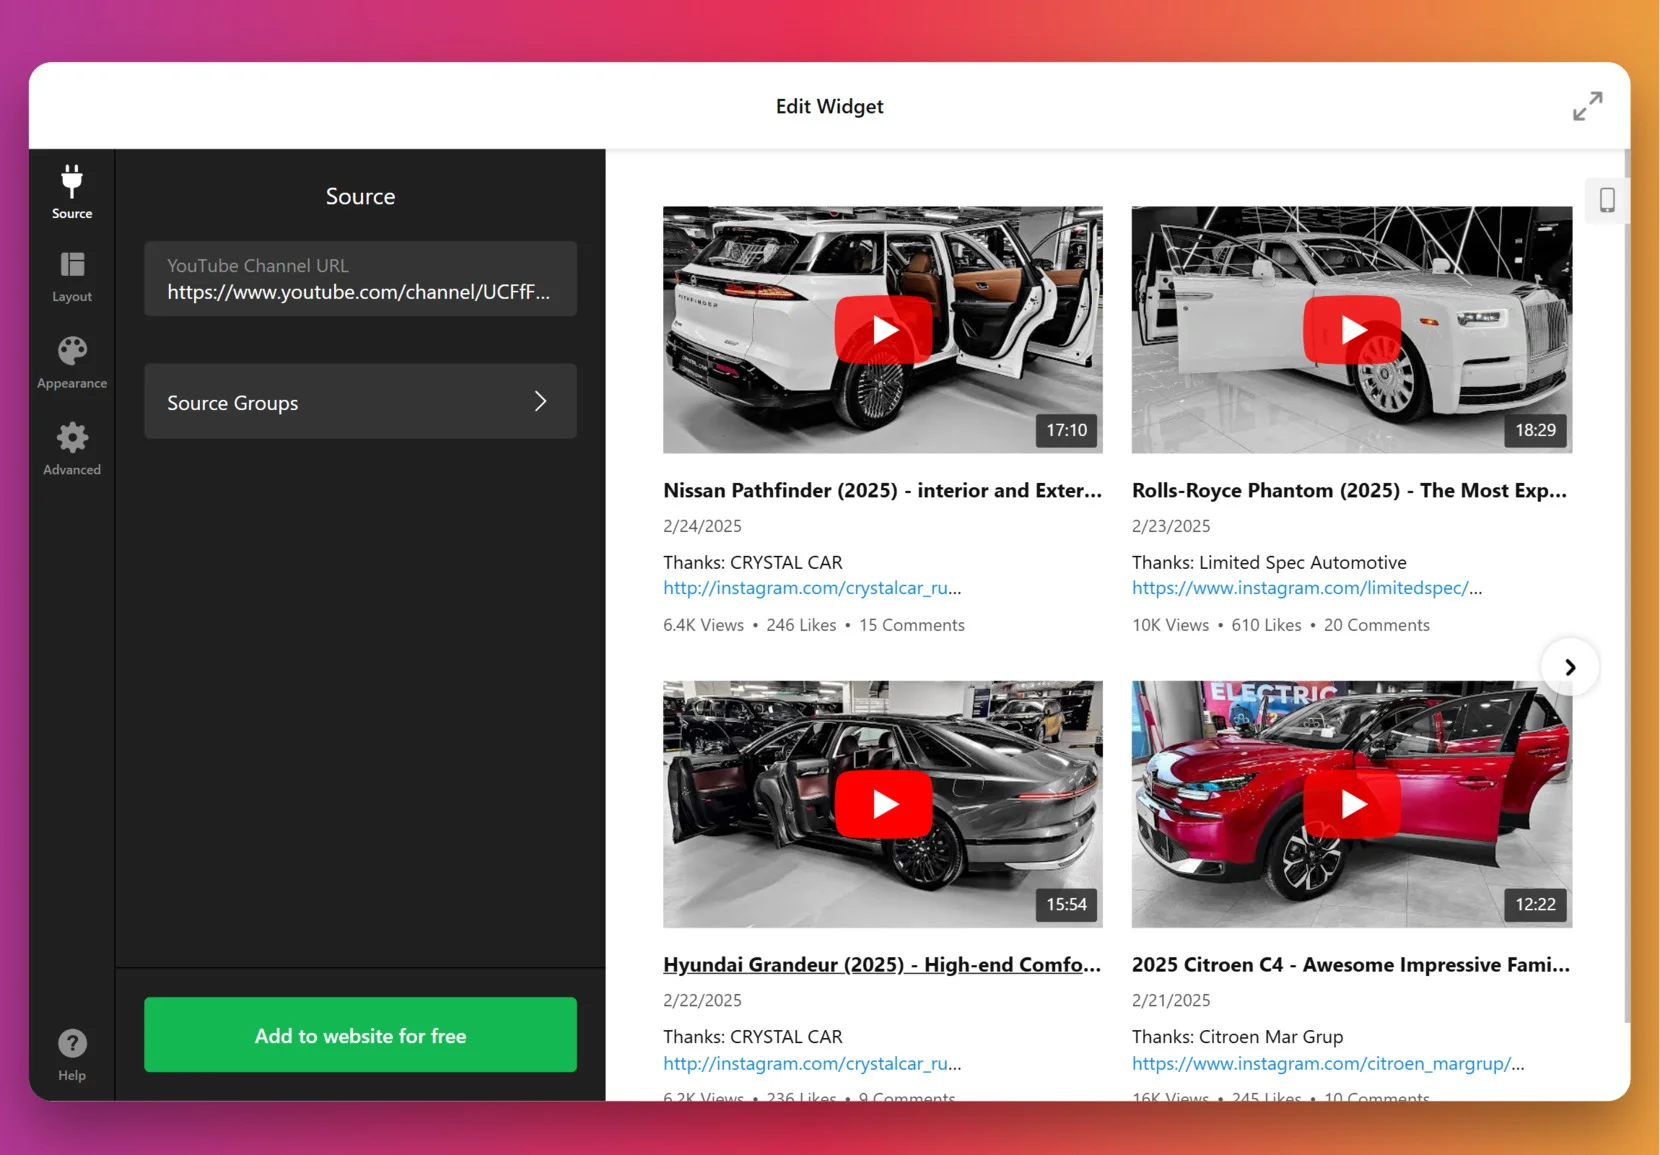
2. Add the Source
This step defines what your visitors will see in the gallery. Open the “Source” tab in the left panel and add a link to a YouTube video, playlist, or your full channel — whichever fits your goal best. Want to keep things organized? Create Source Groups like “Tutorials” or “Testimonials” to add clean, clickable tabs that make browsing your videos effortless.
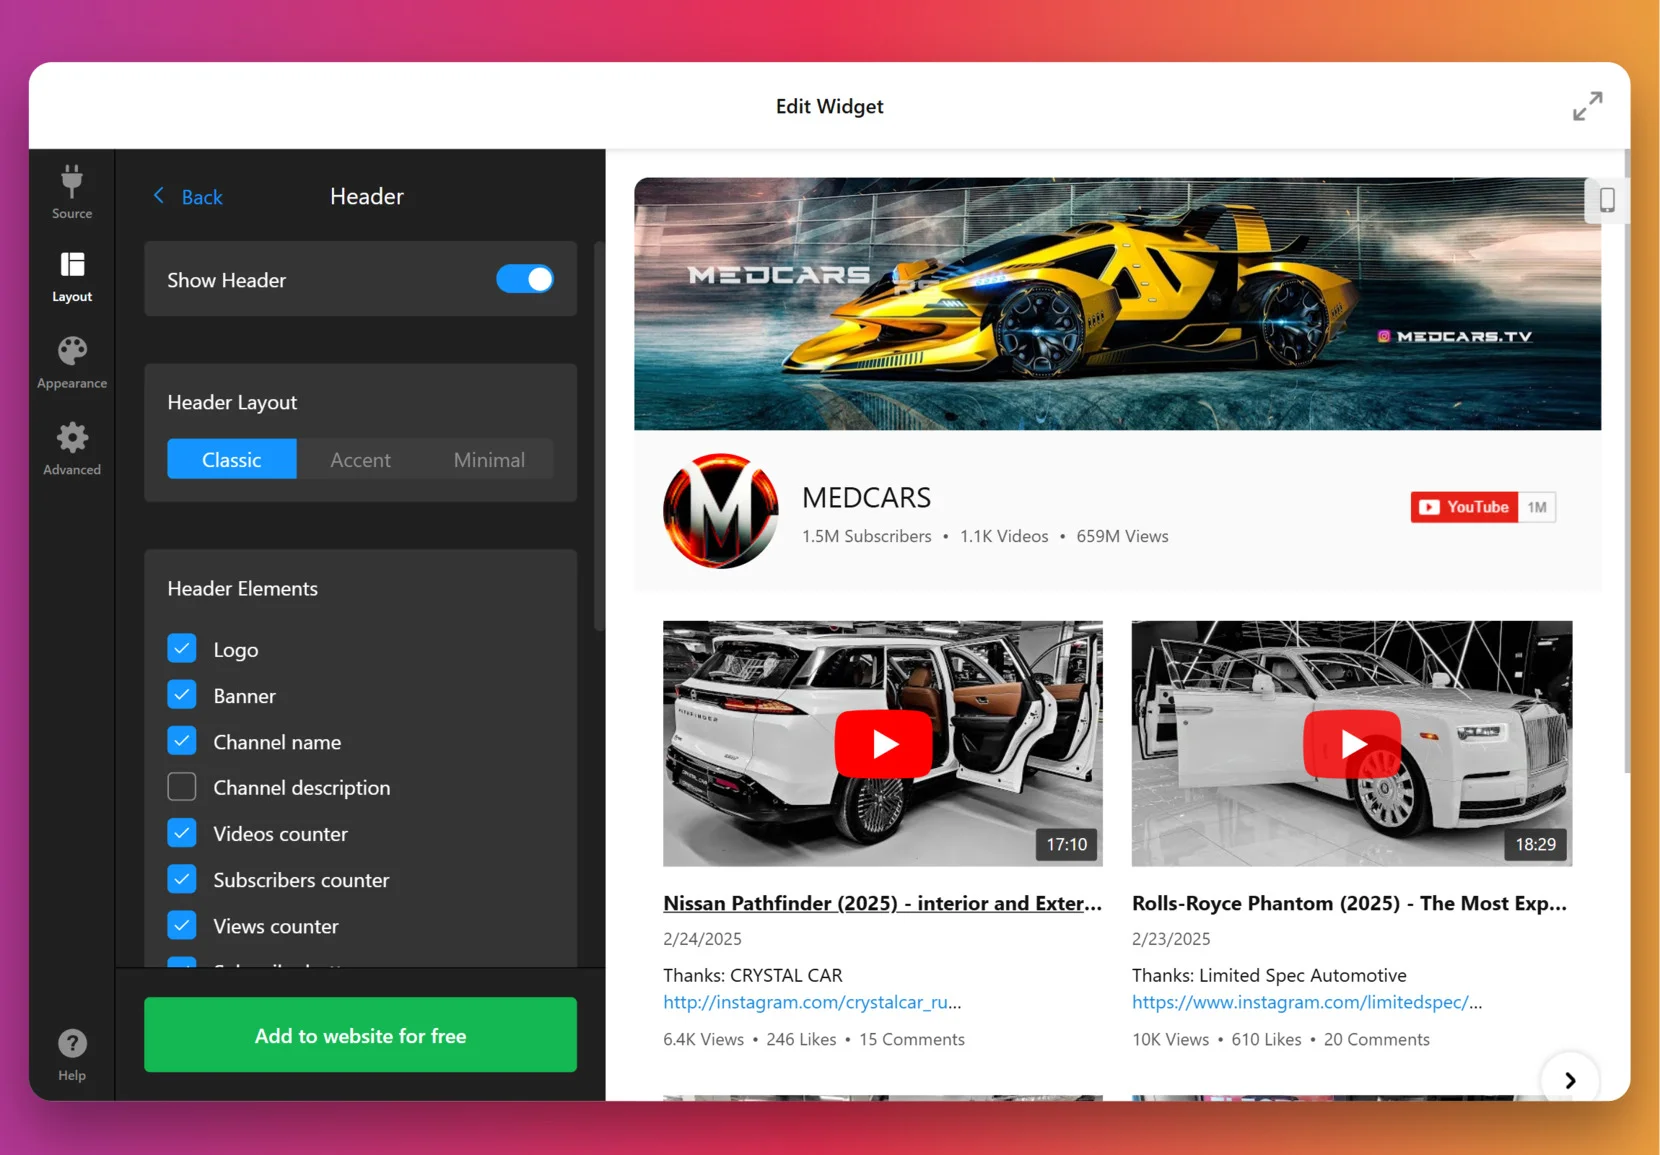
3. Customize the layout
Now that your videos are in, it’s time to shape how they appear on your website. Choose whether to display channel info and video details, and decide how viewers will watch – Inline (right on the page), in a Popup lightbox, or directly on YouTube. You can also fine-tune Navigation for sliders with arrows, swipe, dots, or scroll options to create a smooth, intuitive viewing experience.
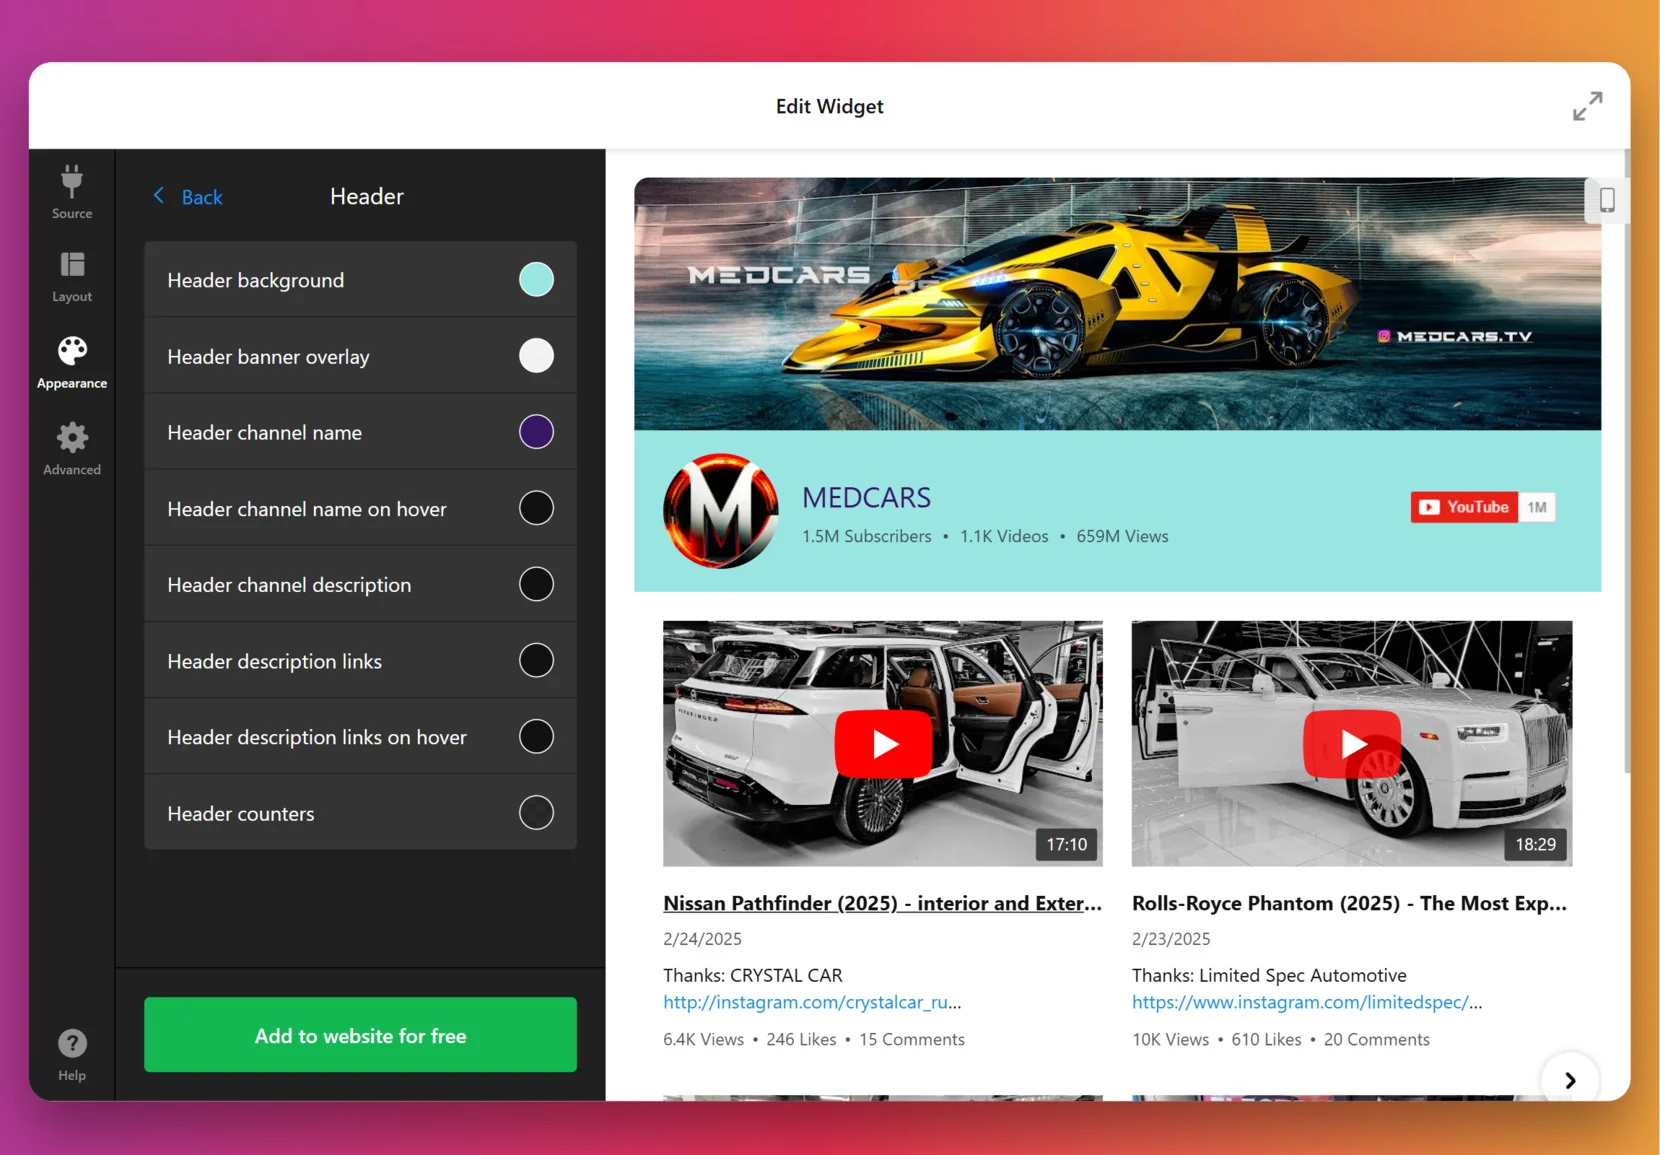
4. Set the design
Now it’s time to make the widget feel like a natural part of your website. In the “Appearance” tab, start with a preset Color Scheme or set a Custom palette. You can then fine-tune colors for the Header, buttons, text elements, and backgrounds to perfectly align with your brand’s style.
For full control, the editor allows you to paste your own CSS code. For example, you could make thumbnails larger or align text differently. Feel free to explore our Forum for ready-made code from other users.
5. Finalize your widget
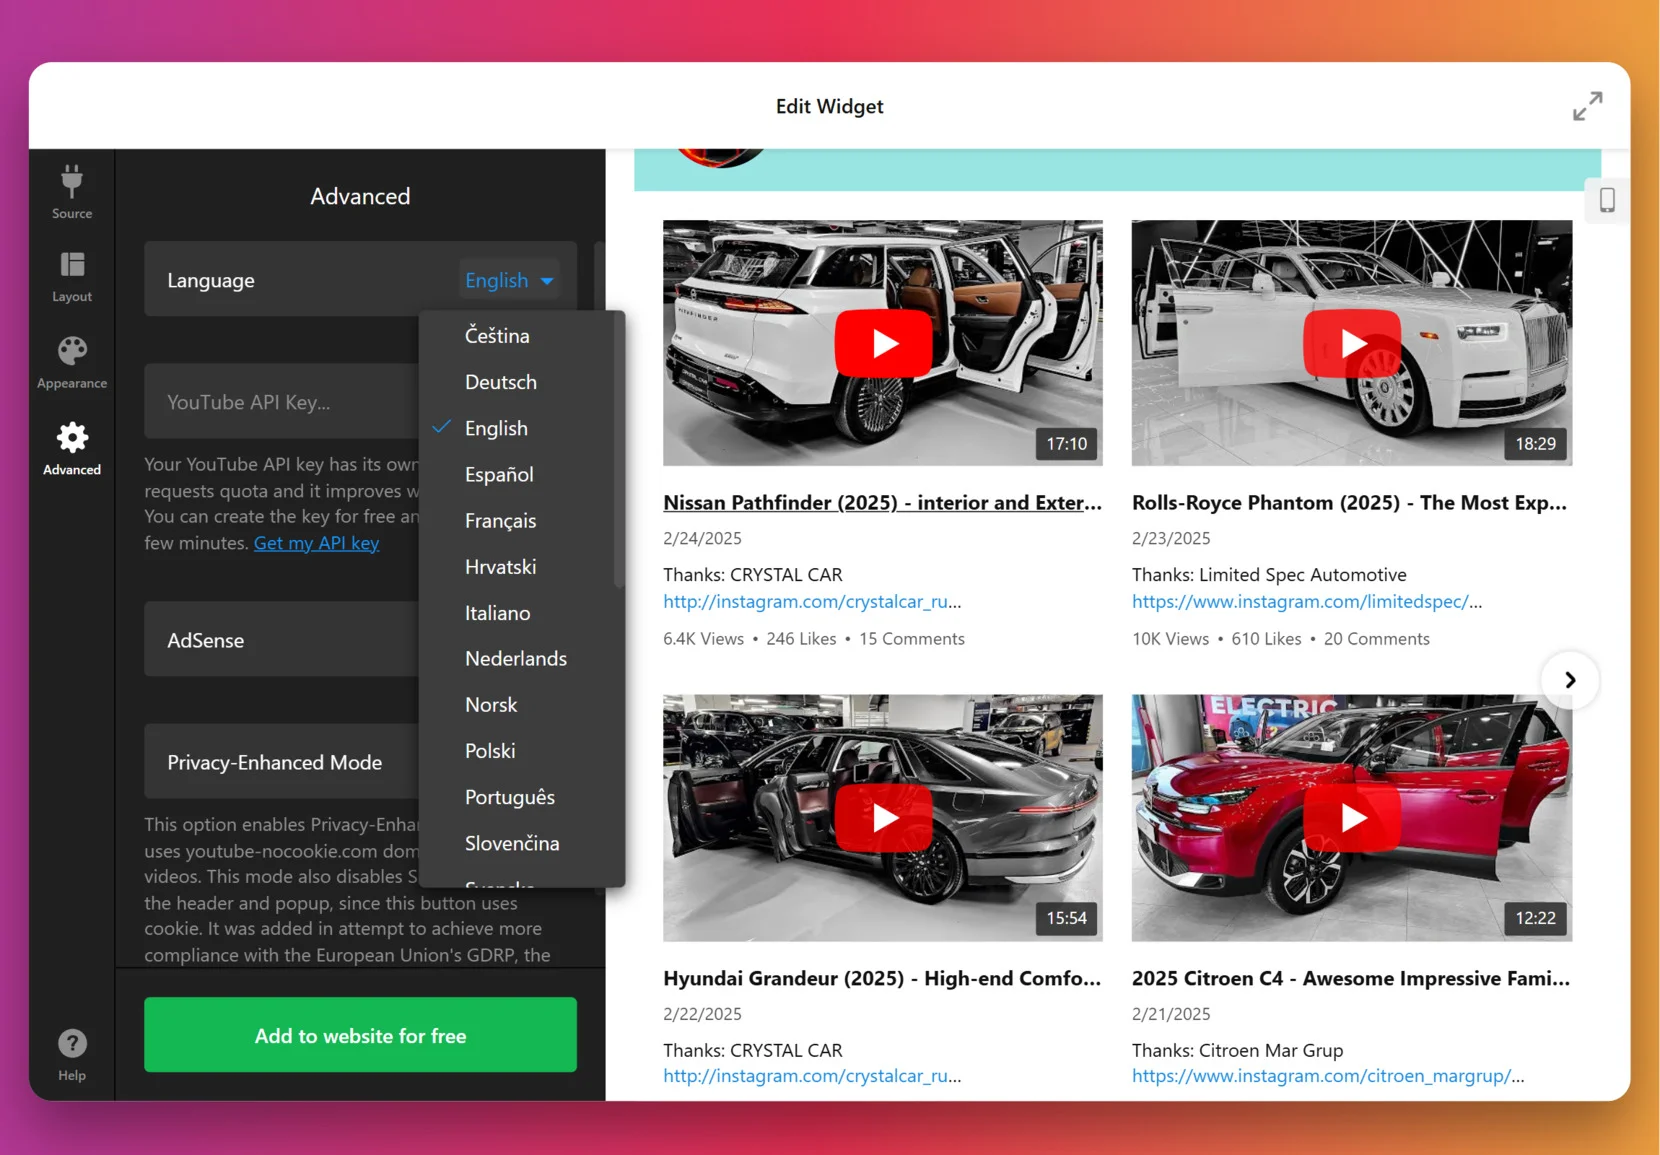
Before you publish, a few optional but powerful settings are worth checking. By default, the widget uses Elfsight’s key to fetch videos, but for many videos or heavy traffic you can add your own YouTube Data API key from Google Cloud Console. Click Get my API key for detailed instructions.
At this stage, you can also enable Privacy-Enhanced Mode to play videos using youtube-nocookie.com domain and keep your visitors’ data safer, and set the widget’s language by selecting one from the drop-down menu at the top.
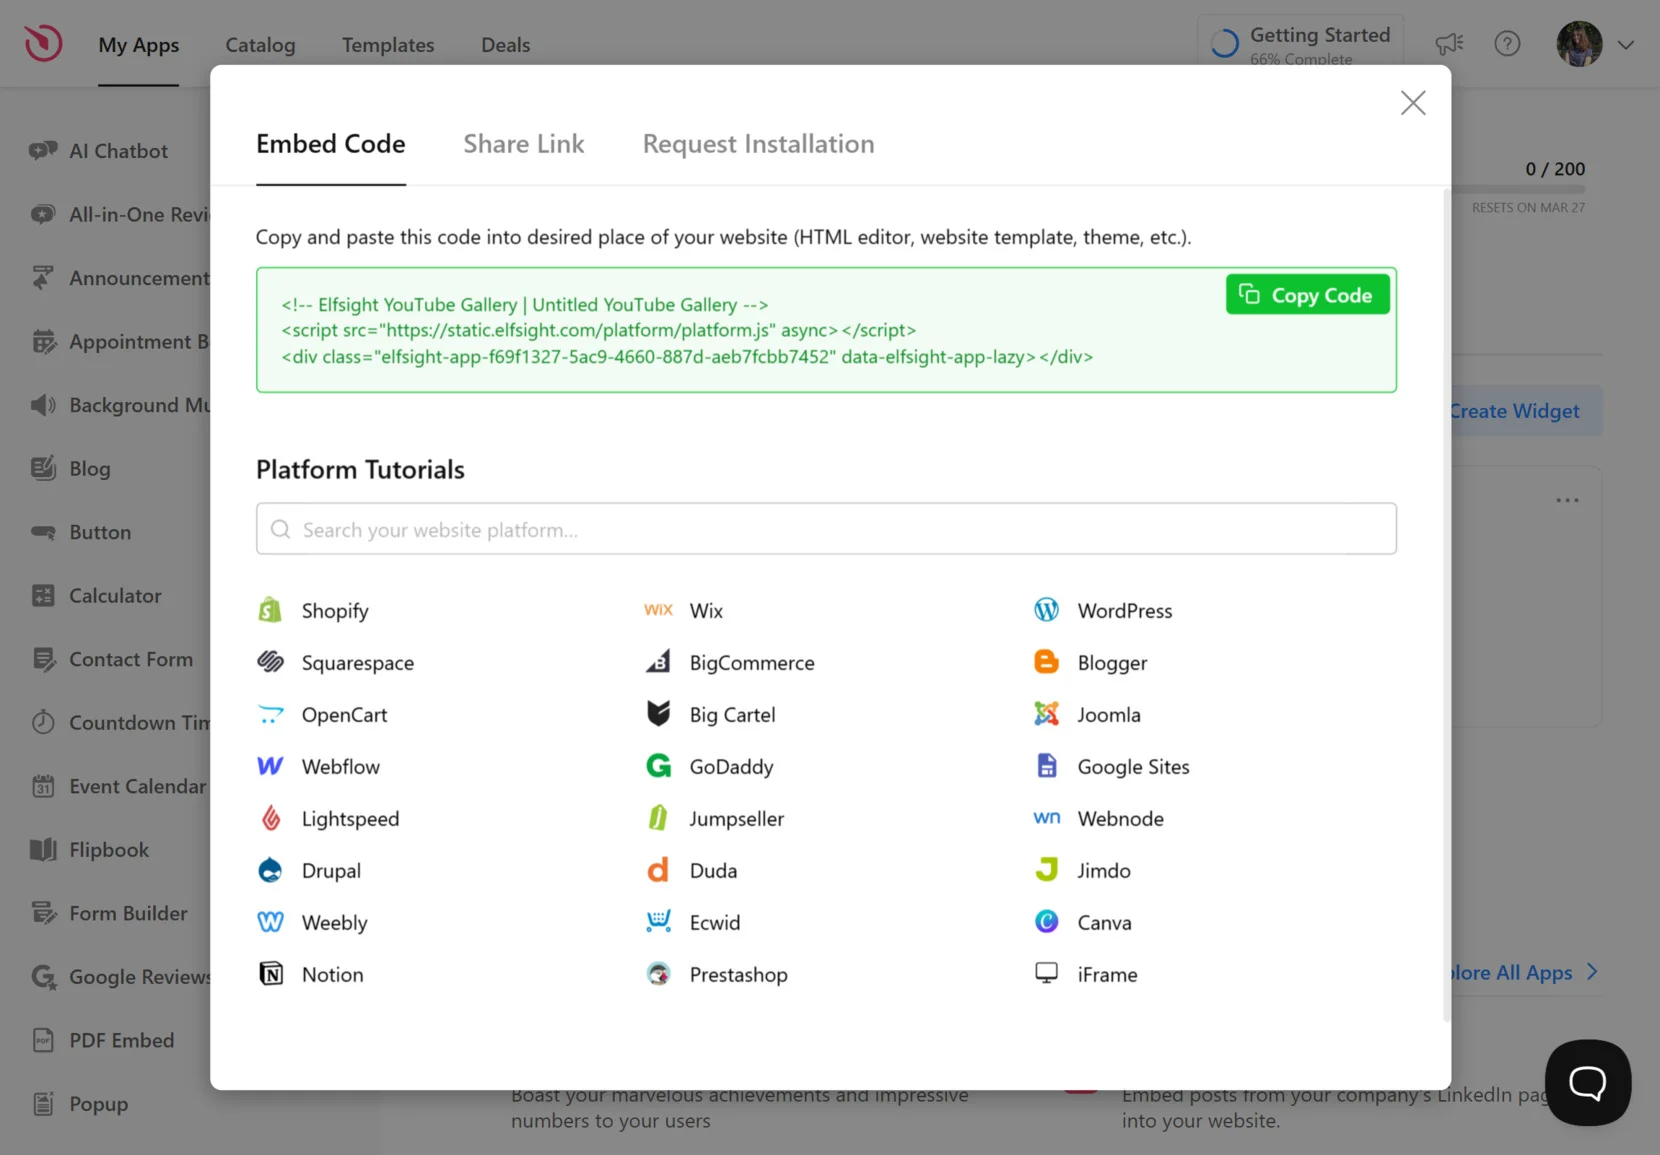
6. Get the Installation Code
When your widget design feels complete, click “Add to website for free.” to generate your unique installation code. Simply copy the snippet – you’ll paste it into your website’s backend in the next step to bring your video gallery to life right on your pages.
7. Add YouTube Feed to Website
With your YouTube Gallery customized and the installation code copied, the final step is to embed it on your website. Below are the three most common installation methods that work with nearly any platform — from Shopify and Wix to WordPress and Squarespace.
Option 1: Embed on a specific page
Quick workflow: Page Editor → Add HTML block → Paste code → Save
- Open your website’s Page Editor
- Add an HTML, Embed, or Custom Code block
- Paste the YouTube widget installation snippet into the code area
- Save and preview the page to check placement and responsiveness
We recommend placing your gallery near product demos, tutorials, or testimonial sections to maximize engagement and drive visitors deeper into your brand story.
Option 2: Add widget globally to all pages
Quick workflow: Theme/Header settings → Global code injection → Paste code → Publish
- Go to your site’s Theme or Global Settings
- Find Custom Code or Embed Site-wide option
- Paste the installation snippet before </body> tag
- Save and refresh your site
This method ensures your YouTube content is visible across all pages — ideal for sticky headers, footers, or brand promotion sections.
Option 3: Floating video gallery (always visible)
Want your YouTube gallery or single video to stay visible while users scroll? Enable Floating Layout inside the widget’s Layout → Positioning settings, then install as usual.
- Open widget settings → Layout → Position
- Select Floating placement
- Choose corner position (left or right)
- Save and paste the installation snippet on your site
If your videos don’t appear, make sure you:
– Pasted the full code (no missing symbols)
– Disabled ad-blockers during testing
– Cleared browser + site cache
– Reconnected your YouTube source if feed is blank
Which YouTube Setup Fits You Best? Let’s Compare
Elfsight makes embedding effortless — but it’s not the only option. Let’s quickly compare alternative ways to add YouTube videos so you can find your perfect setup.
Embedding Directly Using YouTube’s HTML Code
- Find the YouTube Video. Open the video you want to add.
- Click Share and Select Embed. Click the Share button below the video and choose Embed.
- Copy the Embed Code. Copy the HTML code YouTube generates.
- Paste in Website Editor. Add a custom HTML or code block and paste the embed code.
- Save and Publish. Save your changes and publish your website.
You can’t remove YouTube branding, ads, or related videos, and have very little control over the player’s appearance.
More details are available on YouTube’s official Help Center.
Using a Drag-and-Drop Website Builder Block
- Open Website Editor. Go to your website builder’s editor.
- Add Video Block. Select the YouTube or video block from the menu.
- Paste Video Link. Paste the YouTube video URL into the block.
- Arrange and Resize Block. Move or resize the block as needed on the page.
- Publish Changes. Save and publish your website.
Most native blocks only let you add single videos, not full galleries or playlists.
More details are available on your website builder’s support documentation.
Embedding a YouTube Channel or Playlist
- Go to Channel or Playlist. Find the channel or playlist you want to embed.
- Click Share and Select Embed. Use the Share button and pick Embed.
- Copy Embed Code. Copy the HTML code provided.
- Add to Website. Paste the code into a custom HTML block or similar area.
- Save and Publish. Save changes and publish your website.
You cannot customize how the playlist or channel gallery looks or functions beyond basic YouTube settings.
More details are available in YouTube’s embed guides.
How Do These Methods Compare?
| Method | Major Pro 👍 | Major Con 👎 |
|---|---|---|
| Elfsight Widget | Fully customizable galleries with no YouTube branding. | Requires a separate account and may have usage limits. |
| Direct YouTube Embed | Quick to set up with official YouTube player. | No control over branding, ads, or related videos. |
| Website Builder Block | Easy for beginners to add single videos. | Cannot create galleries or playlists with flexible layouts. |
| Channel/Playlist Embed | Automatically updates with new channel videos. | Gallery appearance and functionality are fixed by YouTube. |
No matter which method you choose, small tweaks can make a big difference. Here’s our proven checklist for optimizing your YouTube Gallery to perform at its best.
📝 YouTube Gallery Checklist: Optimize for Success
From the Elfsight team’s experience helping thousands of websites embed engaging YouTube galleries, we know small details make a big difference. Here are our top recommendations for getting the most from your YouTube Video Widget setup.
- Clarify your video selection strategy. Decide whether to showcase a channel, playlist, or individual videos to match your website’s goals and audience interests.
- Group and label video collections. Use clear group labels and logical organization so visitors can quickly find what interests them in your gallery.
- Test multiple preview layouts. Switch between grid, carousel, and list layouts in the live editor to see which format best fits your page structure and user experience.
- Limit initial video count. Start with 6–9 visible videos and let users load more. This keeps the widget lightweight and improves page speed.
- Customize colors for branding. Adjust header, group, and video colors using presets or custom options so the gallery matches your website’s palette.
- Optimize for all devices. Use responsive controls to set columns and width for desktop, tablet, and mobile. Preview on each device to avoid cut-off content.
- Enable search and navigation controls. Add a search bar or navigation arrows for easier browsing, especially with larger video galleries.
- Integrate AdSense for monetization. Connect your AdSense account within the widget settings to earn revenue from embedded video traffic.
- Use the live editor for fine-tuning. Make incremental adjustments and check the instant preview before publishing to ensure every element looks right.
Now that you’ve set everything up, let’s see how the YouTube Gallery performs in practice. Here’s how one creator turned his widget into a traffic-boosting centerpiece for their website.
YouTube Gallery Impact: Real Result from Elfsight User
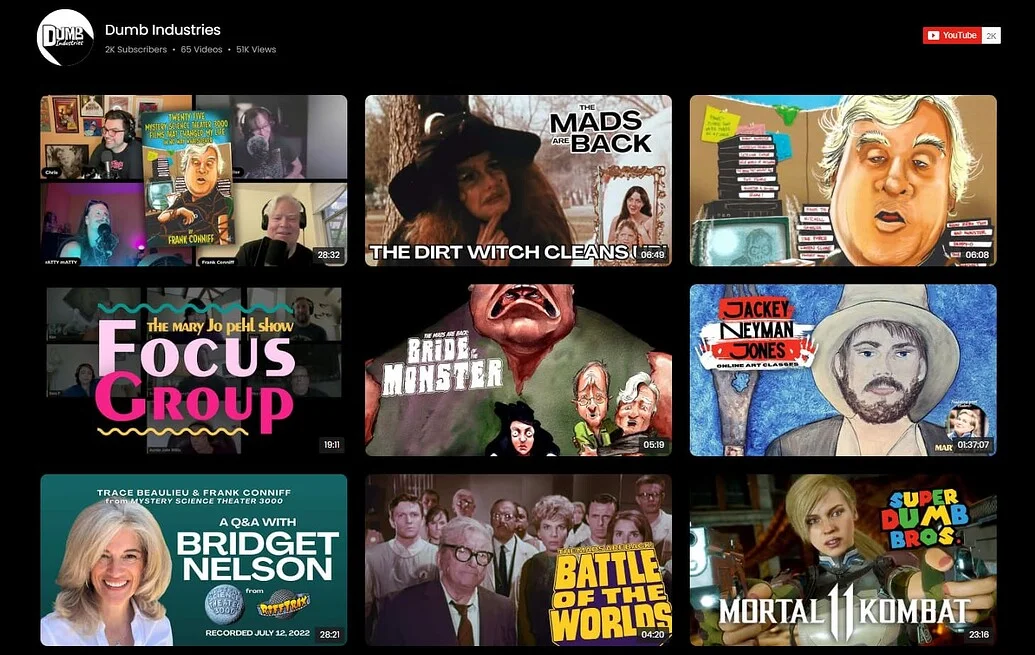
Dumb Industries produces comedy & art livestreams, including shows like The Mads Are Back, The Mystery Hour, and watch-alongs. Their website features an upcoming events calendar, membership content, replays, and merch. Though video is central to their brand, the way clips and livestreams were shown before felt fragmented.
Before using Elfsight
The default video display options left the content scattered across pages with no clear layout to scan recent shows or featured videos at a glance. Visitors had trouble finding the latest shows, and the website lacked a central hub to bring everything together.
- No single gallery to bring livestream replays and clips together
- Limited layout and playback options for YouTube videos
- A viewing experience that pulled visitors away from website
With the YouTube Gallery
“Elfsight’s widgets really help pick up the slack with quick and responsive setup that we can customize to our liking.”
Chris Gersbeck, Dumb Industries
Dumb Industries brought Elfsight’s YouTube Gallery onto their homepage, turning what used to be a jumble of embeds into a clean, central showcase. Visitors are now greeted with a grid of fresh episodes and standout clips. Playback happens inline, so audiences stay on the website while browsing. The styling options allowed them to match the gallery to the distinct voice of their existing design, which made it feel like part of the brand rather than a clunky add-on.
The YouTube Gallery didn’t just tidy up the layout, it changed how video works for both sides. Fans now have an easy way to catch replays and discover new shows, while the team saves time by letting fresh uploads appear automatically. The result is a website where video feels central and traffic trends show more people sticking around.
Alongside other Elfsight widgets like Social Feed, Event Calendar, FAQ, and Search, the gallery has become the centerpiece that keeps their audience engaged. Their traffic chart backs this up: after implementing Elfsight in September 2024, visits rose by more than 30% year-over-year.

A well-placed video gallery can turn fragmented uploads into a cohesive experience that grows traffic and strengthens brand presence.
Why Your Widget Might Not Be Working
Even the best setups hit a few snags now and then. Here’s how to troubleshoot common YouTube widget issues and keep your gallery running smoothly.
Why does my YouTube video not appear after embedding?
How can I make my embedded YouTube video responsive on all devices?
What should I do if my video widget looks misaligned or the aspect ratio is off?
Why does nothing happen when I use the YouTube widget with certain URLs or playlists?
Are there browser settings that can stop YouTube widgets from working?
Still need a hand? You’re not on your own — here’s where to find Elfsight’s best resources, community support, and expert advice for any setup.
Need Help or Inspiration?
You’re now ready to turn your YouTube content into a real on-site experience that keeps visitors engaged and exploring. Show us what you build – we love seeing creative setups from our users! Follow Elfsight on X, Facebook, and LinkedIn for new ideas and feature news.