
Answering questions fast builds trust, but when you’re jumping between WhatsApp, Messenger, Telegram, and email, it’s easy for messages to slip through the cracks. Missed pings, delayed replies, and scattered notifications can make your business seem unresponsive and cause warm leads to cool off before you even get the chance to help.
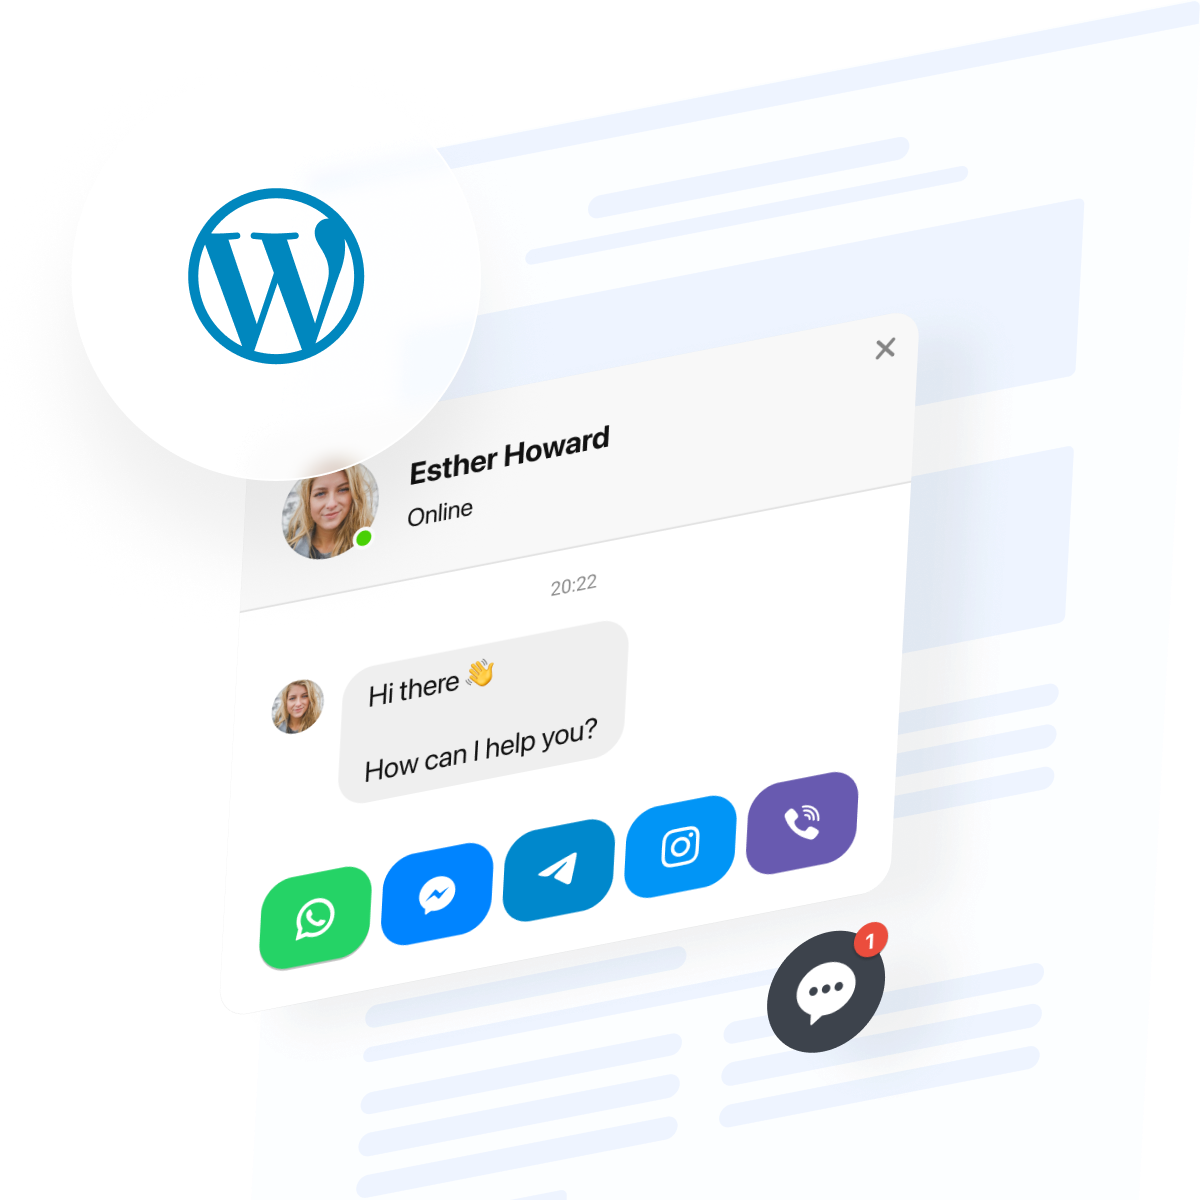
With the All-in-One Chat widget, you can put a single chat launcher on your WordPress site to let visitors reach you on whichever app they already use. It’s quick to install, adapts to your site’s design, and shows every channel in one window — no new inbox to babysit. Below, we’ll walk you through the setup process, troubleshooting tips, and alternative ways to add a live chat to your website.
- Add a live chat feature to your WordPress site without coding skills
- Choose between native options vs third-party chat integrations
- Apply practical tips to make your widget perform better on WordPress
- Troubleshoot common issues with widget embedding and chat display
Launch your WordPress live chat instantly
This is a quick workflow for anyone who wants to add live chat in WordPress in a few simple steps:
- Open Elfsight’s editor and pick a template.
- Customize your live chat widget.
- Click ‘Add to website for free’ and copy the code.
- Paste it into your WordPress website’s backend.
Build your own live chat widget in the interactive editor ↓
Everything the All-in-One Chat widget can do
Now that you’ve seen how easy it is to build and personalize your widget, here are the features that help live chat create real customer connections:
| Key feature | Why it matters |
|---|---|
| Messenger aggregation in one chat | Visitors choose their favorite messaging app, so every conversation starts in a familiar interface they’re comfortable with. |
| Smart triggers for chat windows | Chat boxes appear at just the right moment, helping you engage visitors and boost conversions without interruption. |
| Rich customization options | Match the launcher to your brand so it reads as part of the site, not a bolted-on tool — useful when brand guidelines are strict. |
| Responsive and flexible positioning | Set position and offset per device so the bubble never covers your cart button or mobile nav. |
| Targeted display rules | Show the chat to the right audience or on specific pages, so your team can focus on the contacts that matter most. |
These are just a few highlights of what the live chat widget can do for your business. For the full list, check out the widget’s Features Page.
Add live chat to WordPress step by step
This section breaks down every step for creating, customizing, and embedding live chat on your WordPress website, with practical hints for tailoring chat channels and appearance to your audience.
1. Choose a widget template
Start by opening the Elfsight editor and selecting a pre-made template that suits your website’s purpose. You can pick from presets like Booking, Support, Onboarding, Feedback Chat, etc. There are three available layouts you’ll be able to tweak later:
- Floating Bubble
- Embed Bubble
- Embed Chat Window
Each is optimized for different engagement styles. For now, let’s select an optimal starter template.
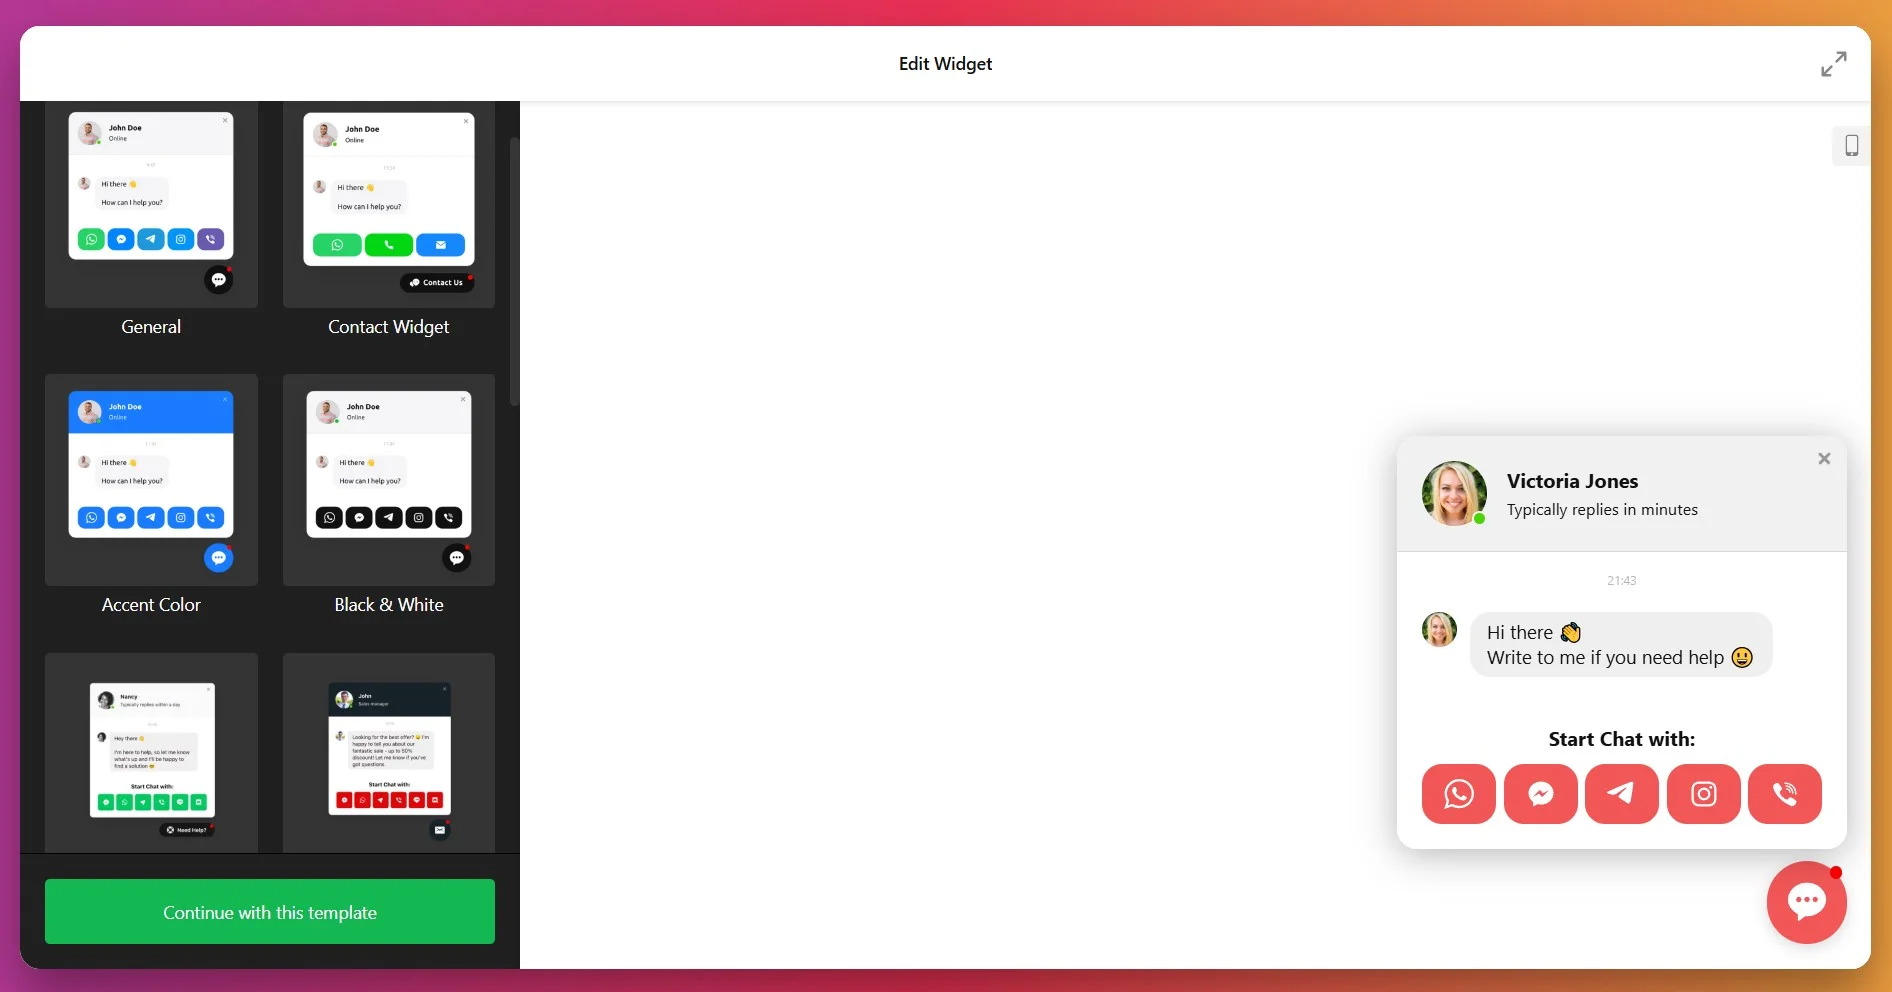
Once you’ve made your choice, click “Continue with this template” to proceed to setup and styling.
2. Add your chat channels
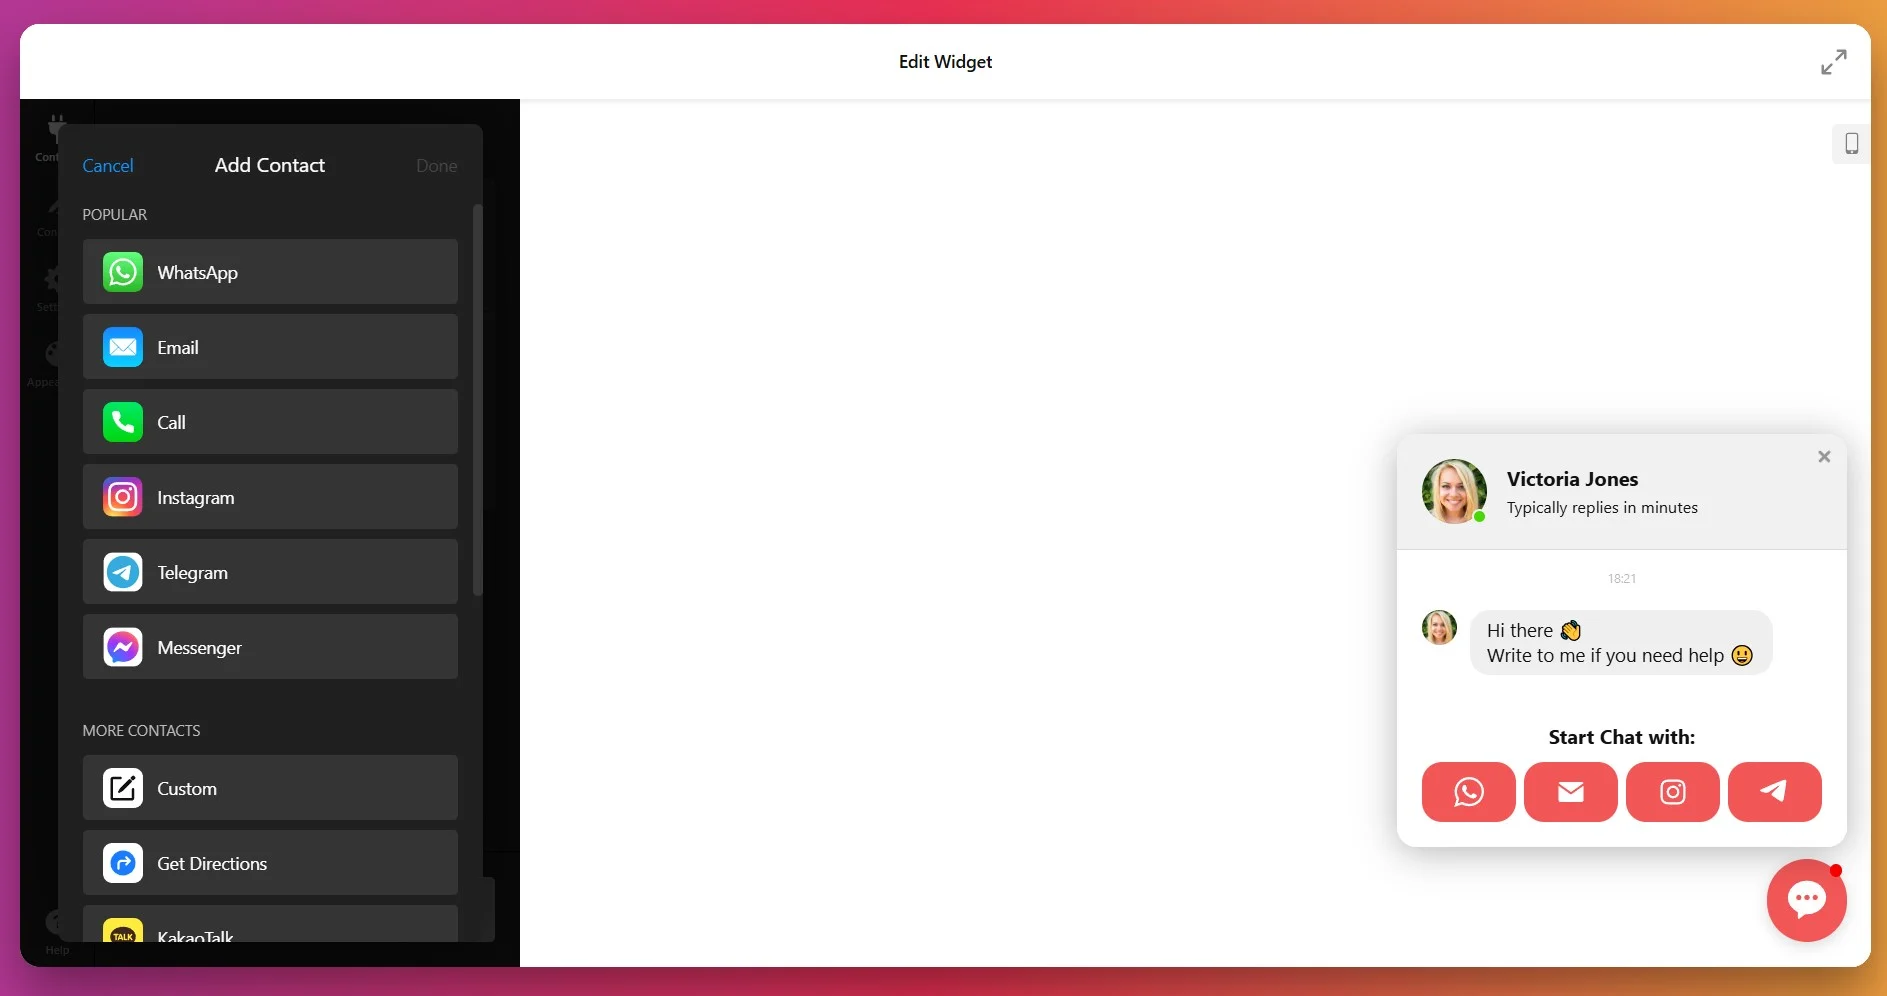
In the “Contacts” tab, connect your preferred messaging apps — like WhatsApp, Messenger, Telegram, Instagram, Viber, or even Email. You can link several platforms at once, letting visitors reach you through whichever channel they use most. Just click “Add Contact” to include more messengers.
3. Personalize agent info and messages
Next, open the “Content” tab to set your chat agent’s name, photo, and status (online, reply time, or custom). Add a friendly greeting or promo message that appears when users open the chat window — for example, “Hi there! Need help finding the right plan?” Personal, on-brand messages boost engagement and help users feel more connected.
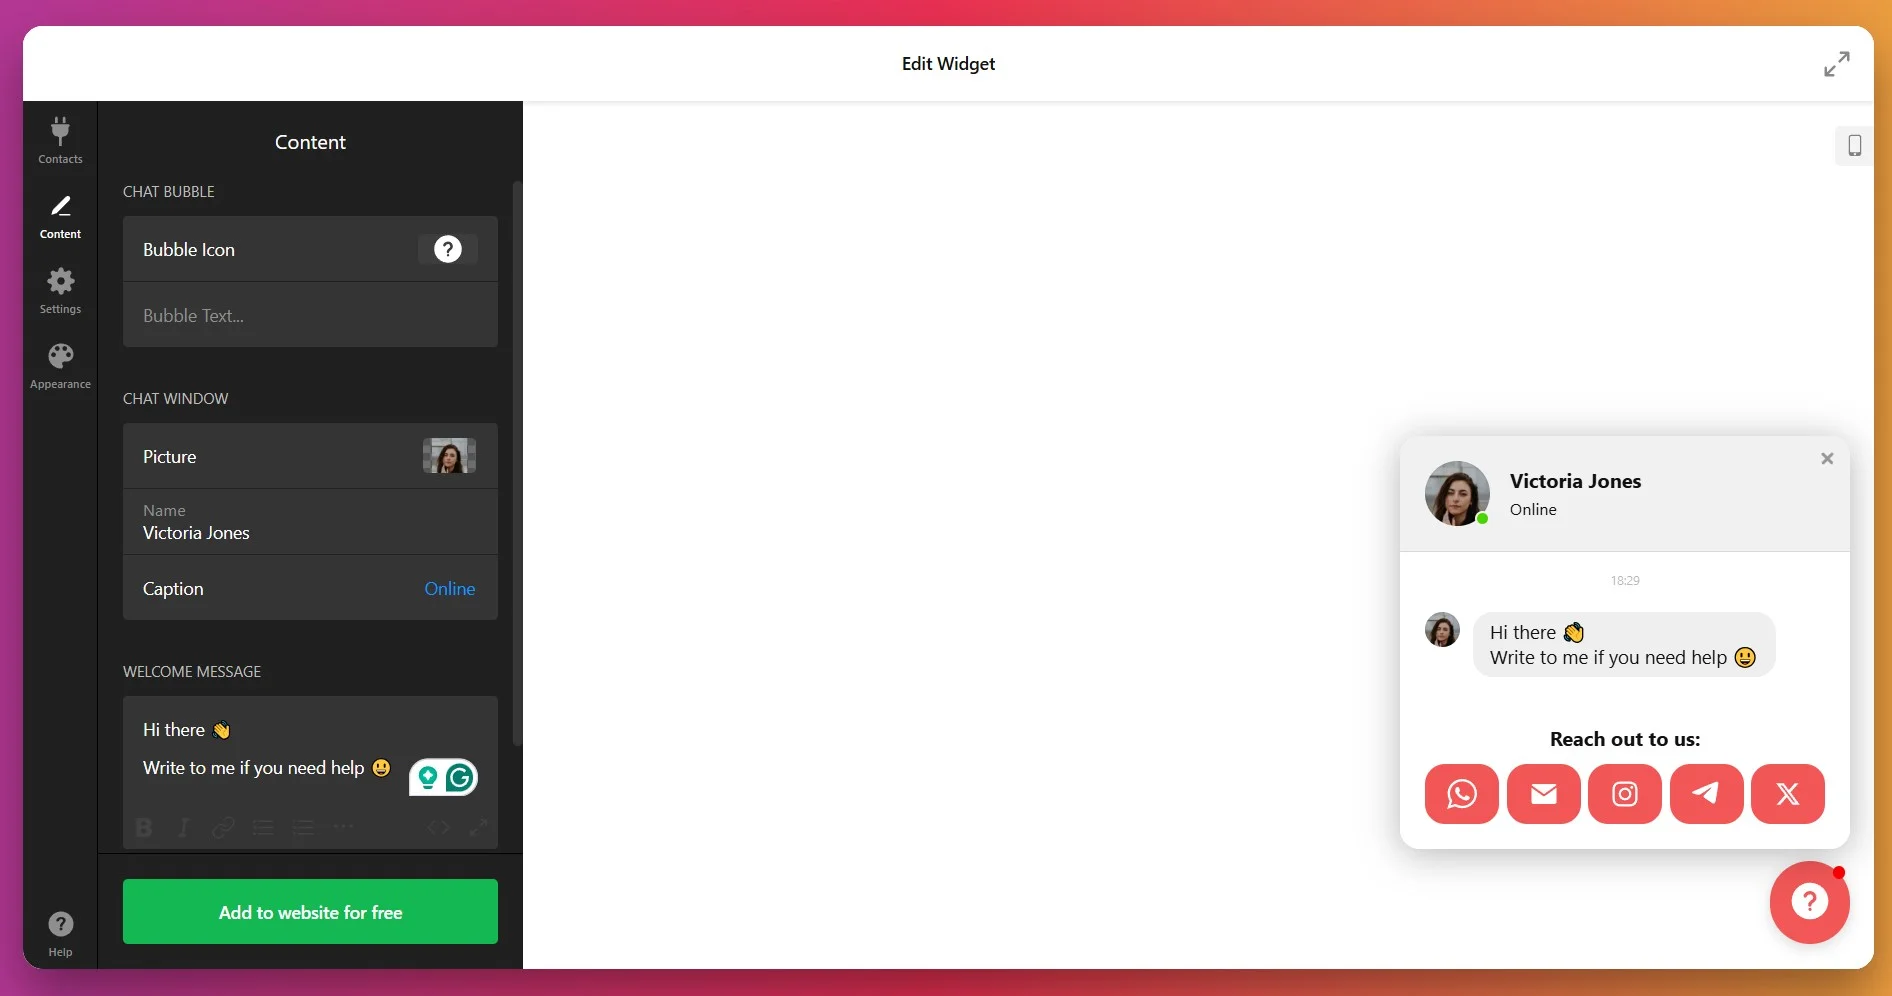
You can also update your chat bubble by choosing a fitting icon from the library or uploading your own.
4. Adjust chat behavior and display triggers
In the “Settings” tab, choose when and how your chat widget appears. You can trigger the chat bubble on page load, after a few seconds, on scroll, or based on user behavior. You can also choose which pages display the chat — ideal for targeting support or checkout pages.
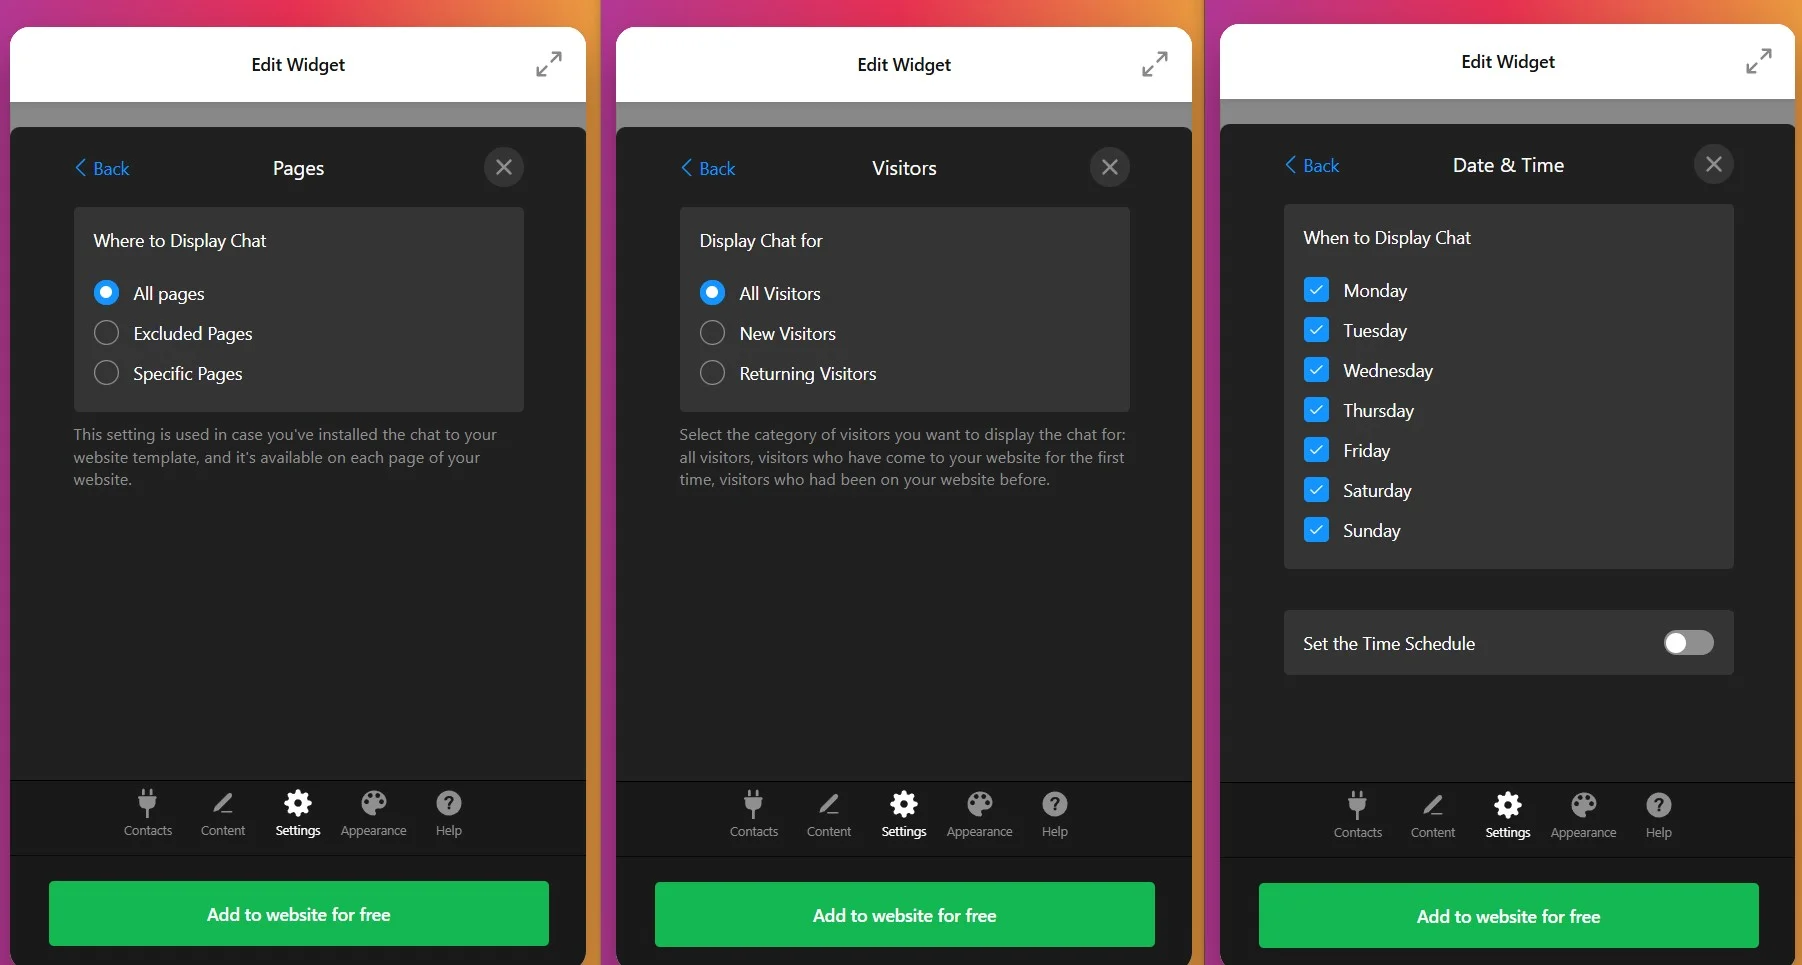
If your website has Google Analytics or Google Tag Manager installed, the Google Analytics section lets you add a “Widget Opened” event, so you can see when visitors open your chat.
5. Customize your chat widget’s style
Head to the “Appearance” tab to match the widget to your website design. You can edit the following elements:
- Chat bubble styling: Adjust the bubble’s background, icon, and notification badge colors.
- Header and background: Alter the widget’s backdrop to create a consistent, inviting look.
- Typography and motion: Choose message fonts and animation styles.
- Messenger buttons: Fine-tune the color of each button to ensure they’re visually distinct.
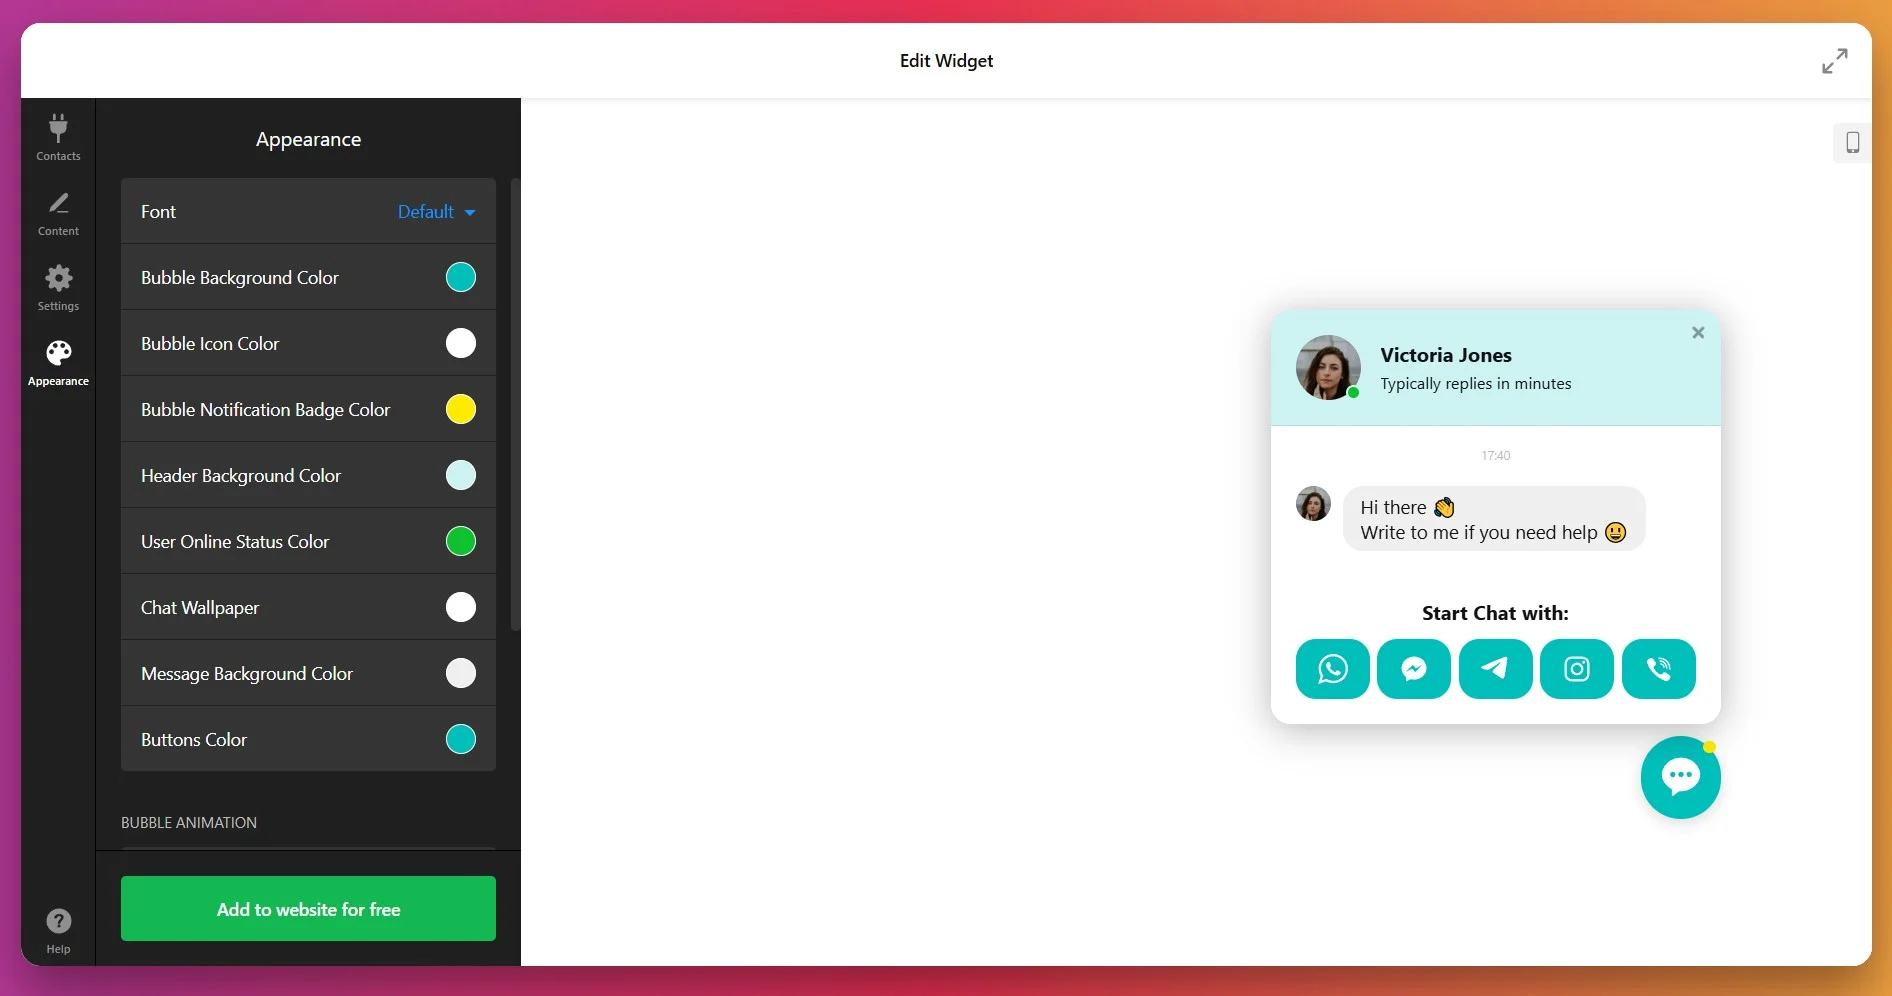
For more granular control, utilize the CSS and JS code fields – explore our Community for tips and ready-to-use code samples.
6. Add live chat to WordPress
Once your widget is fully configured, click “Add to website for free” to generate a unique embed code.
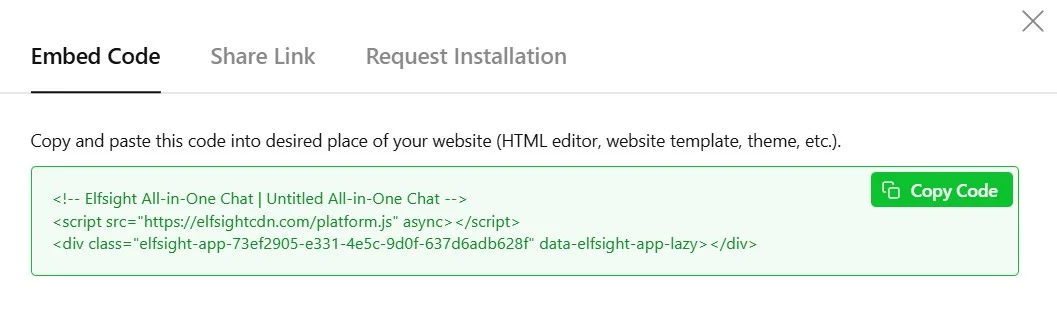
Below are three simple ways to actually embed your All-in-One chat on WordPress:
Option 1: Add chat inline on a specific page
Quick workflow: Page Editor → Add Custom HTML block → Paste code → Update page
- Open your WordPress dashboard and go to Pages → Edit the desired page.
- Click the “+” icon and select Custom HTML from the block list.
- Paste the All-in-One Chat embed code into the block.
- Click Update or Publish to save changes and preview your chat placement.
This method is best for contact, pricing, or support pages where chat access should feel contextual — not persistent.
Option 2: Display chat on all pages (site-wide)
Quick workflow: Appearance → Widgets → choose area → Custom HTML → paste → Save
- From your dashboard, go to Appearance → Widgets
- Pick a widget area that loads on every page (e.g., Footer).
- Add a Custom HTML widget to that area.
- Paste your All-in-One Chat embed code and click Save.
Prefer the Customizer? Go to Appearance → Customize, paste the code into the appropriate content field, then Publish. Both keep the launcher visible site-wide without touching theme files.
Option 3: Floating chat button (always visible)
Quick workflow: Widget Editor → Layout → Floating → Choose Position → Save
- Open your widget in the Elfsight editor.
- Go to Layout → Positioning and select Floating placement.
- Choose your corner position — bottom-right or bottom-left.
- Click Save and re-copy your updated code if needed.
- Paste and embed it on your site using one of the above methods.
This setup keeps your chat bubble visible as visitors scroll, encouraging spontaneous conversations without interrupting their browsing flow.
- Make sure the entire embed code is pasted (no missing tags)
- Disable caching or clear your browser cache
- Recheck placement (it must be before the closing tag for global display)
- Confirm your WordPress theme supports custom HTML blocks or injected scripts
If you’re exploring different ways to integrate chat functionality into your website, the following section outlines official and native methods.
How to add live chat to WordPress natively
There are a few native and platform-supported ways to enable real-time messaging on your website. While each comes with its own benefits, setup complexity and maintenance needs may vary.
Facebook Messenger (m.me link)
Meta discontinued its Facebook Chat Plugin in May 2024, so the old embeddable Messenger widget no longer works. What still works is a direct Messenger link:
- Build your link using the format:
https://m.me/<your-page-username> - Add it as a button or link anywhere on your site with standard HTML.
- Style it with CSS to match your brand.
- Paste into your site. Add the code to your website’s HTML just before the closing tag:
</body>
WhatsApp Business Click-to-Chat API
WhatsApp offers a Click-to-Chat API that creates direct message links or buttons to start a chat with your business.
- Create a link. Use this format to generate a direct chat URL:
https://wa.me/<your-number> - Embed in a button or link. Use standard HTML to add the link as a button on your site.
- Style with CSS. Customize the button to match your brand look.
Navigate to WhatsApp Help Center to find out more.
Telegram Web Widget
Telegram provides a native web widget that allows visitors to send messages directly to your Telegram account or bot.
- Create a Telegram bot. Use BotFather to generate an API token.
- Implement using the Telegram API. Use the official API to receive and respond to messages.
- Embed a link or button. Add a link like
https://t.me/your_botor use JS-based custom widgets.
Check out Telegram Widgets to see your options.
How do these methods of adding live chat compare?
| Method | Major Pro | Major Con |
|---|---|---|
| Elfsight All-in-One Chat | Combines WhatsApp, Messenger, Telegram, and more in one floating widget — no coding needed. | Account needed for dashboard access. |
| Facebook Messenger | m.me links still open Messenger directly. | Link-only, no on-site chat window. |
| WhatsApp Click-to-Chat | Fast, code-light method to start chats via link or button. | No built-in UI or widget styling; only works for WhatsApp. |
| Telegram API/Widget | Ideal for developer-focused integrations and bots. | Requires API configuration and lacks visual customization. |
If you want practical tips for making live chat work smoothly on your WordPress website, keep reading for the next set of hands-on suggestions.
Pro tips to get more out of All-in-One Chat
From the Elfsight team’s experience testing live chat widgets across diverse websites, we know the right setup turns casual visitors into engaged customers. Here’s our tried-and-true checklist for making your live chat widget seamless, personal, and conversion-ready.
- Order channels by who’s actually staffing them. Buttons appear in the order you add them, and the first one is the path of least resistance — put your fastest-responding channel at the top.
- Always include a no-app fallback. Messenger channels only work if the visitor has that app; if they don’t, the widget just shows an “install it first” notice. Add Email or Call so desktop visitors without WhatsApp/Telegram aren’t dead-ended.
- Tune “Remember Visitor” instead of leaving the default. Once someone closes the chat it won’t reopen for a set period (default 1 day). Shorten it for high-intent pages, lengthen it if the bubble feels naggy.
- Pre-fill the SMS default text. The SMS action lets you set default message text — seed it with context (product name, page) so replies arrive already framed. The widget passes nothing to messenger channels, so this is your one shot at context.
- Budget for a little CSS if brand rules are strict. Bubble size, corner rounding, and font size aren’t sliders — they’re custom-CSS tweaks. Plan a small snippet rather than expecting one-click controls.
- Schedule the launcher to your real hours and set an honest reply time. Use Settings → Date & Time to hide chat outside staffed hours, and set the Caption reply-time to match — don’t imply instant replies at 2am.
Next, let’s see a real-world example of how adding a live chat widget transformed customer engagement for one of our users.
All-in-One Chat at work
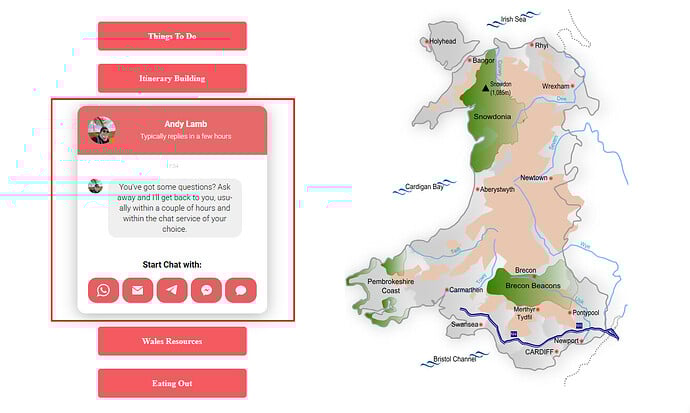
Wales Outdoors is a hiking and adventure tour business run by Andrew Lamb. With 10+ Elfsight widgets in use, the All-in-One Chat widget became a key communication tool for Andrew, helping convert website visitors into real tour bookings through instant messaging.
Before using Elfsight
Potential customers often had questions about routes, fitness requirements, gear, or availability. But asking meant filling out a contact form or sending an email, and waiting for a reply. That delay created friction, so people hesitated with bookings.
- No quick communication option on the website
- Missed leads due to delayed replies
- Hard to build trust without real-time conversation
With All-in-One Chat
“Elfsight has been a game changer with widgets that work, work well, and are visually attractive.” – Andrew Lamb, Wales Outdoors
By adding the All-in-One Chat widget, Andrew enabled instant communication via WhatsApp, Messenger, or Telegram directly from the website. Visitors can now ask quick questions and receive responses right where they’re browsing. This helped reduce hesitation and move customers faster toward booking.
Real results
That simple change led to a big shift in customer behavior. People who might’ve left without booking now reach out with questions — and end up securing a spot on a tour.
- More leads directly from the website
- Quicker response times = higher conversion rates
- Trust-building conversations that feel personal and reassuring
Other widgets in use
Wales Outdoors also uses All-in-One Reviews, AI Chatbot, Photo Gallery, Store Locator, and more. Together, these tools keep the website interactive, trustworthy, and focused on converting visitors into paying clients.
Have questions about setup or common chat issues? The next section covers frequently asked questions so you can get started smoothly and avoid common snags.
Frequently asked questions
Why isn't my chat widget showing?
</body> using a plugin like Insert Headers and Footers. Clear your browser cache and test in incognito mode to rule out local issues.Chat button is hidden or overlaps site elements — how to fix?
z-index: 9999;) so it stays on top. Check mobile and desktop views for layout issues.How do I add a live chat button in WordPress?
Can I show the chat only on my homepage?
How do I set up chat hours or schedule availability?
Where do I find my WeChat ID for the widget?
Final thoughts
That’s the whole setup. The key thing to remember: All-in-One Chat is a launcher, not a helpdesk — it gives visitors one tidy place to pick a channel, then hands the conversation off to the app they chose, where your team already works.
Configure your channels in Contacts, control when and where the bubble shows in Settings, style it in Appearance, and drop the embed code into a Custom HTML block. Do that, and you’ve turned “we’ll get back to you” into a conversation that starts on the spot.