
If you want visitors to trust your business and feel confident about reaching out, showing real customer experiences is key. You probably see Google Reviews everywhere, and for good reason: people rely on them to decide where to shop, eat, or book services. Displaying these reviews on your website attracts new visitors and encourages them to come back when they see recent, positive feedback from real people.
One of the easiest ways to embed Google Reviews in WordPress is with the Google Reviews Widget. It automatically pulls in new reviews from your Google profile, fits seamlessly with your website’s look, and saves you the hassle of manual updates. Users often appreciate how simple it is to set up, and how it helps boost engagement by showing authentic testimonials without extra work.
- Simple step-by-step setup. Follow a clear walkthrough to get Google Reviews live.
- Alternative methods explained. Compare the plugin option and manual embed approaches.
- Expert checklist. Review best practices to keep the widget working smoothly.
- Troubleshooting tips. Identify and solve common problems with reviews display.
To help you get started, the instructions are organized into easy-to-follow sections. Whether you want a quick setup or more advanced customization, each step is laid out so you can display Google Reviews on WordPress without any confusion.
Add Google Reviews to WordPress: Fast Tutorial
This is a quick guide for anyone who wants to show Google Reviews on WordPress right away in a couple steps:
- Open Elfsight’s editor and pick a template.
- Customize your Google Reviews widget.
- Click ‘Add to website for free’ and copy the code.
- Paste it into your WordPress website’s backend.
Build your own Google Reviews widget in the free editor!
Features that Put Google Reviews to Work for You
You’ve seen how easy it is to install the widget. Here are the features that help Google Reviews deliver real impact:
| Key Feature | Why it Matters |
|---|---|
| Real-time reviews with author details and links | Visitors see the freshest feedback along with reviewer names, photos, and direct access to full Google profiles. |
| “Write a review” button | Makes it simple for customers to leave new reviews, keeping your reputation active and growing. |
| Automatic updates for review content | Your website always shows the latest customer opinions without manual updates. |
| Filter by keywords or ratings | Highlight top feedback or hide less relevant reviews so you control what visitors see. |
| Customizable layouts and appearance | Easily match the widget to your website’s design for a seamless look and feel. |
These are just a few of the ways the widget helps you showcase your reputation and encourage new reviews. For a full rundown, take a look at the Google Reviews features page.
Step-by-Step Guide to Adding Google Reviews
Here we’ll break down every step for creating, customizing, and embedding Google Reviews on your WordPress website, including practical hints for different use cases.
1. Choose a Template
You begin in the widget editor by selecting one of the ready templates. Each offers a different visual style: Classic (Google’s original layout), Bubble (author info below the review text), or Spotlight (centered elements with more emphasis on the review content). Pick one you like and click “Continue with this template” to move on.

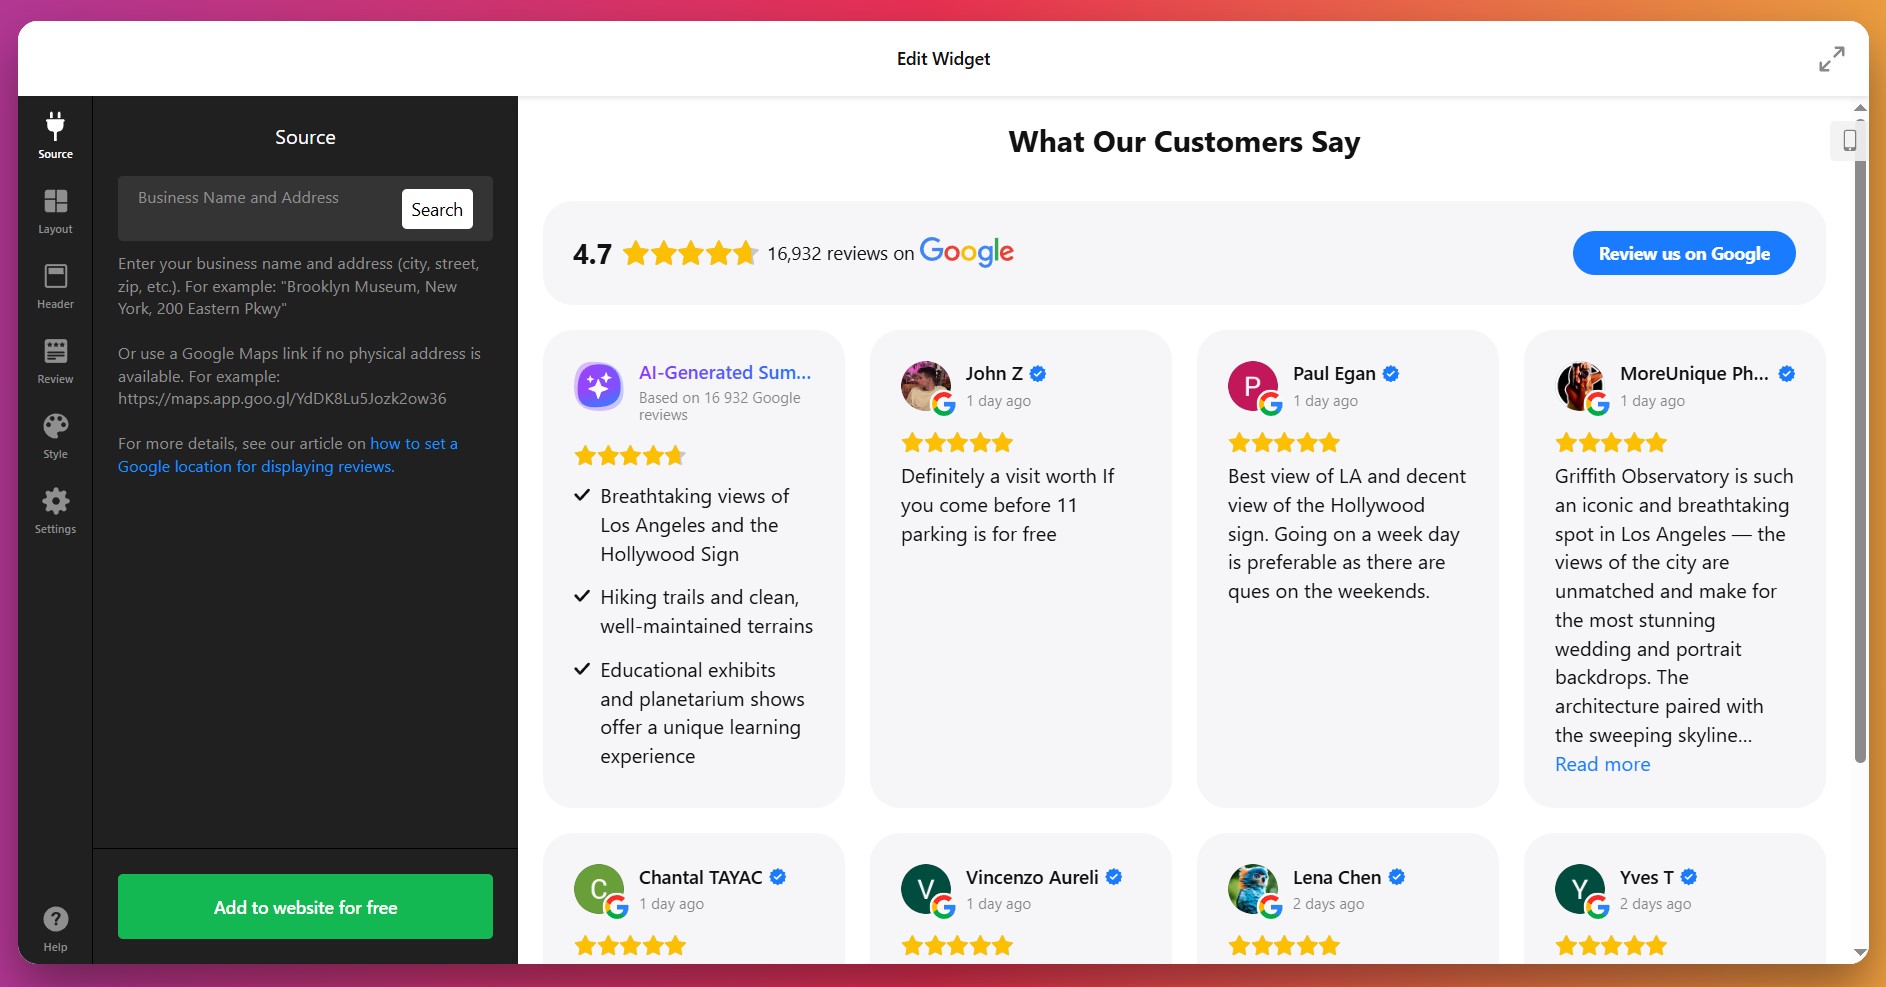
2. Connect Your Google Profile & Select Reviews
Next step: link the widget to your Google Business Profile. Once authorized, the widget can fetch reviews automatically. Then decide which reviews to display using filters: show only positive ones, exclude reviews with certain keywords, or limit the number of reviews.
3. Pick a Layout
In the Layout settings, choose how reviews appear. You’ll have several options:
- List: Reviews in a vertical stack, one after the other.
- Grid: Multiple reviews shown in a grid format.
- Slider (Carousel): Reviews scroll or slide through with arrows or swipe.
- Masonry: A dynamic layout that adjusts reviews based on available vertical space.
- Floating Badge: A small badge that floats on screen as user scrolls.
- Embeddable Badge: A compact version integrated neatly into your content.
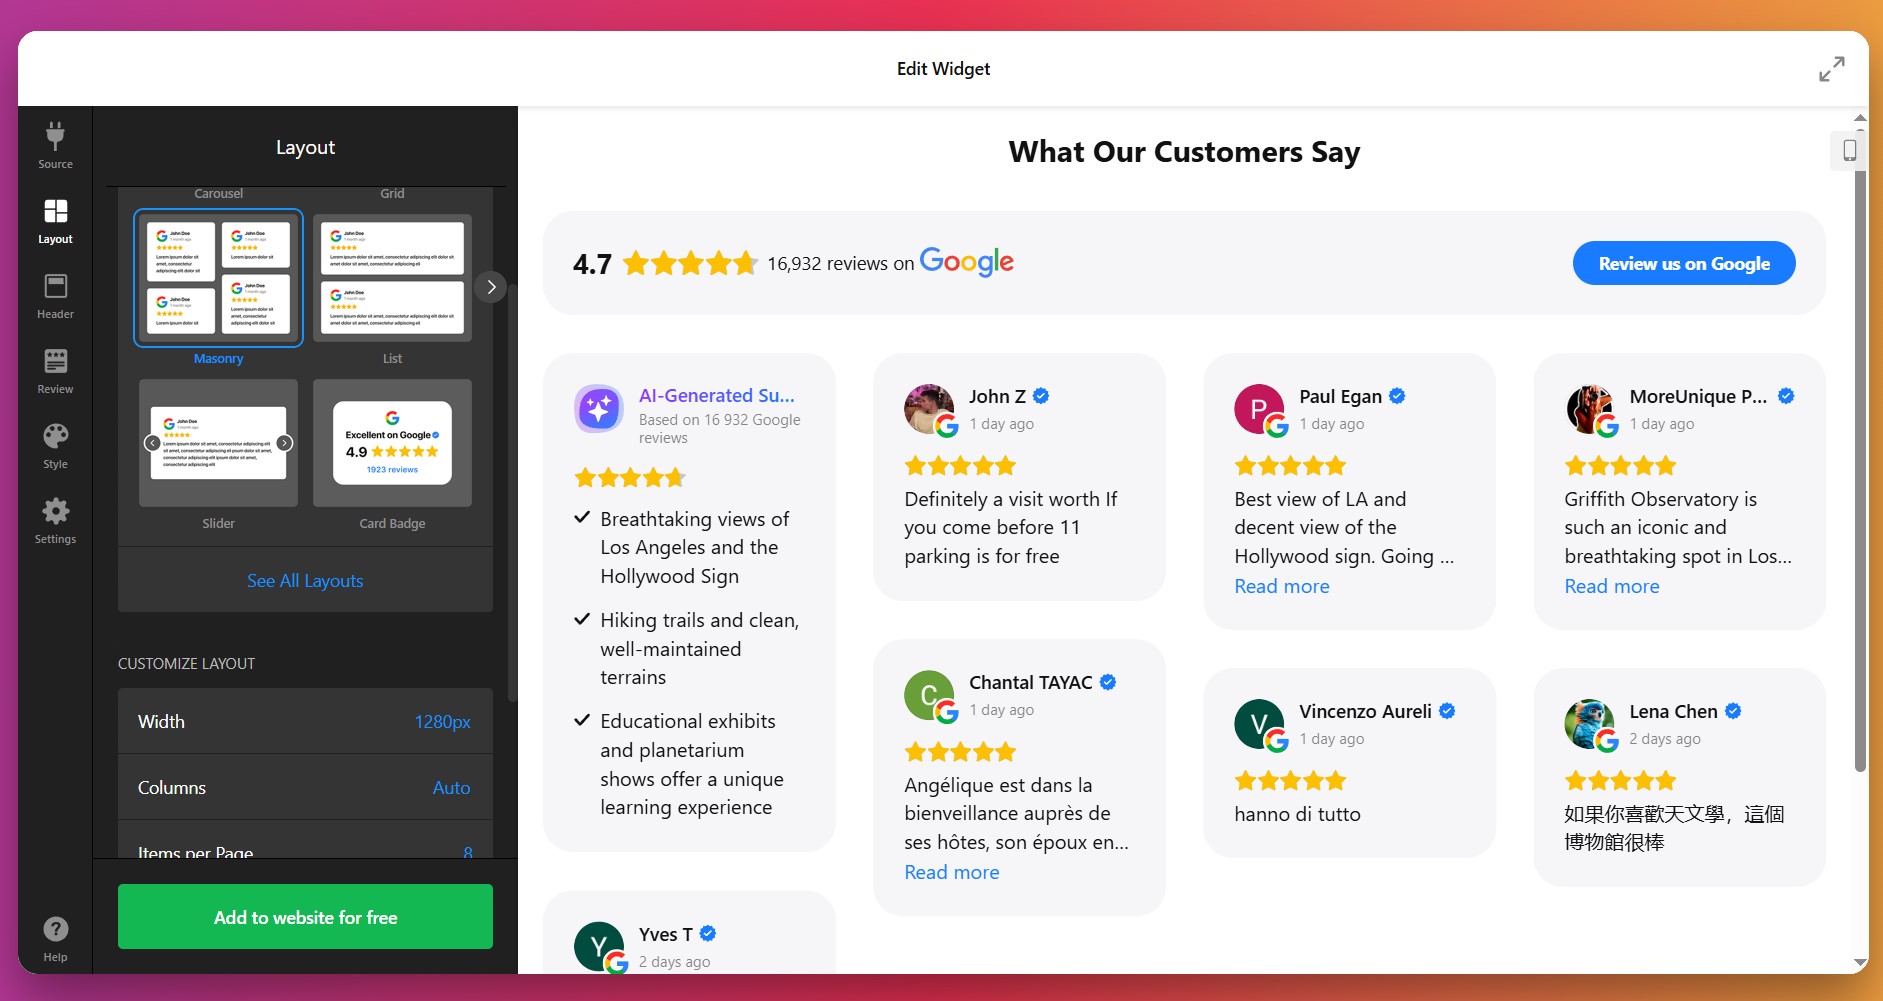
You can also set how many reviews show up per page, choose pagination or infinite scroll, and determine different layout settings for mobile vs desktop.
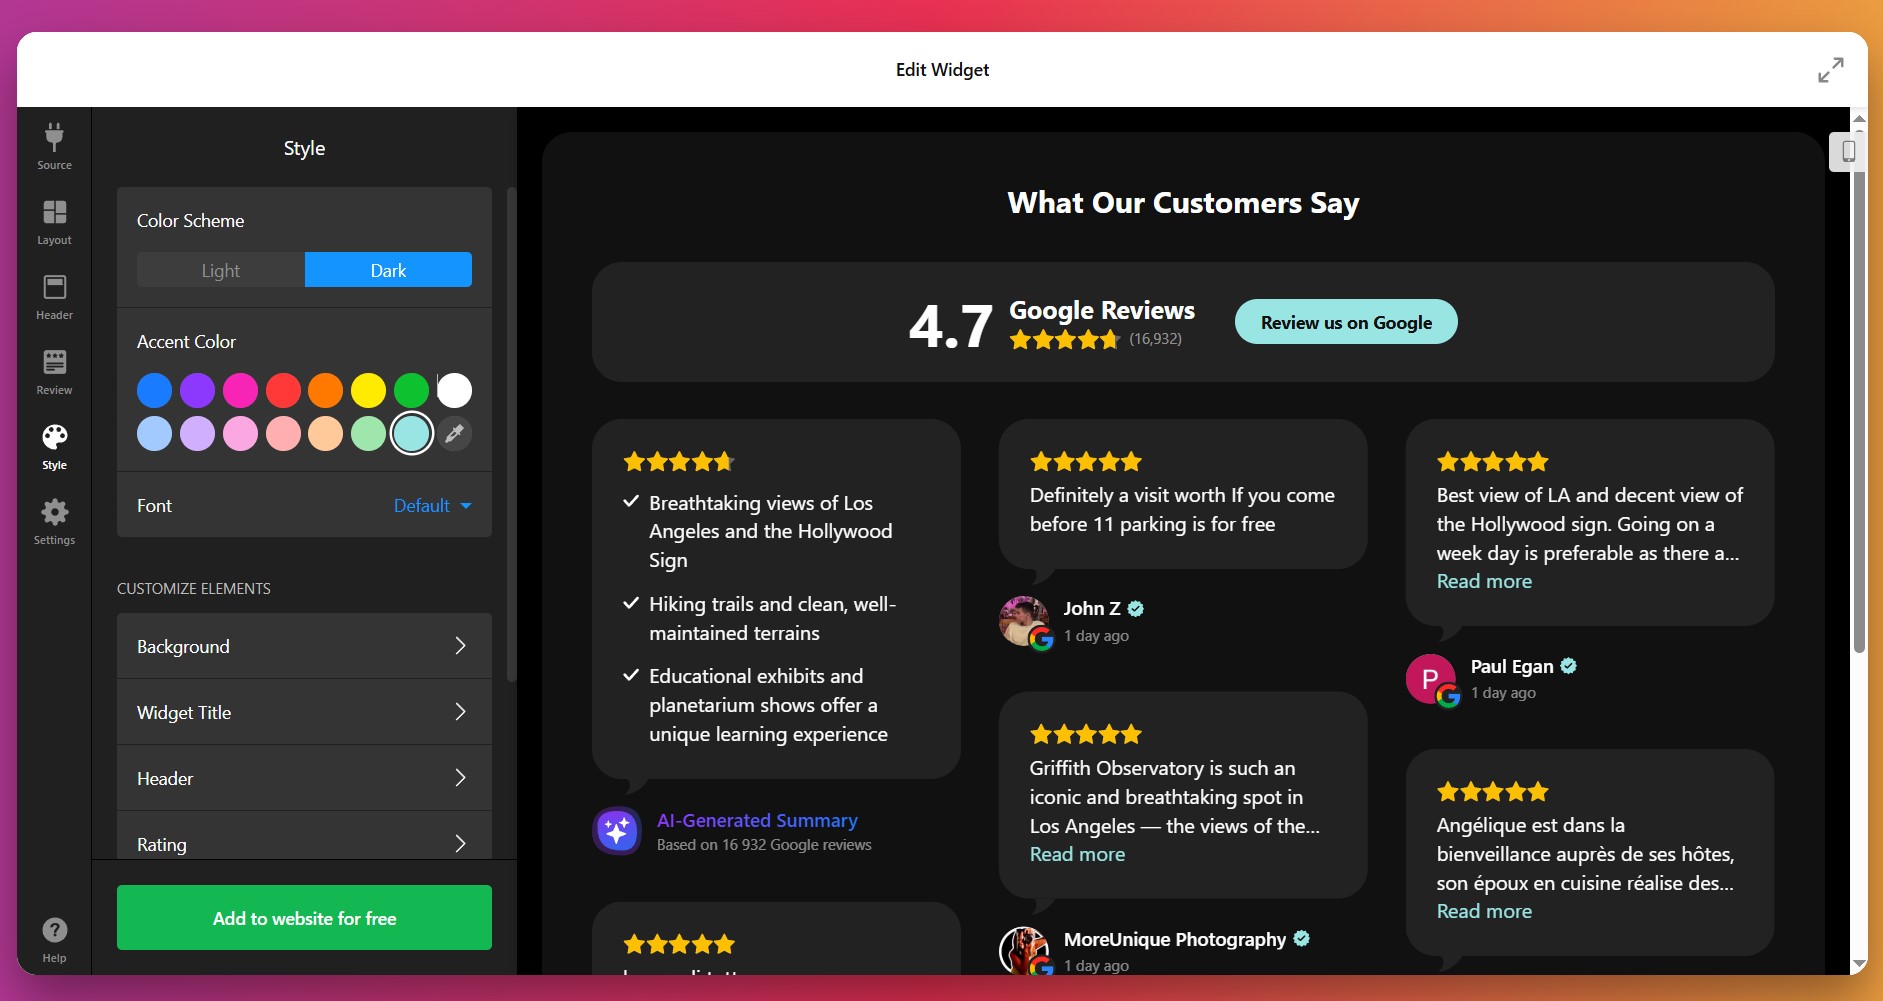
4. Style Review Details
In the Style tab, you customize visual elements so the widget blends with your website design. You can adjust:
- Fonts: sizes, weight (regular or bold), for title vs review text.
- Colors: five main elements can each have custom color – review text, background of review cards, links, star ratings, and the “Write a review” button.
- Review card spacing & padding.
- Optionally toggle on/off author picture, date, number rating, and review icons.
5. Configure Behavior & Settings
Now adjust how the widget behaves. Choose the widget header options: show/hide the overall star rating, number of reviewers, and photo of the latest reviewer. Customize the “Write a review” button – its label, whether “Yes/No” actions, or a redirect to your Google page. Set width/height so it fits nicely in your layout.

6. Get the Installation Code
Once you’re happy with how everything looks and behaves, click “Add to website for free.” The editor will generate your unique embed code. Copy that code – you’ll use it in your website to show the widget live.
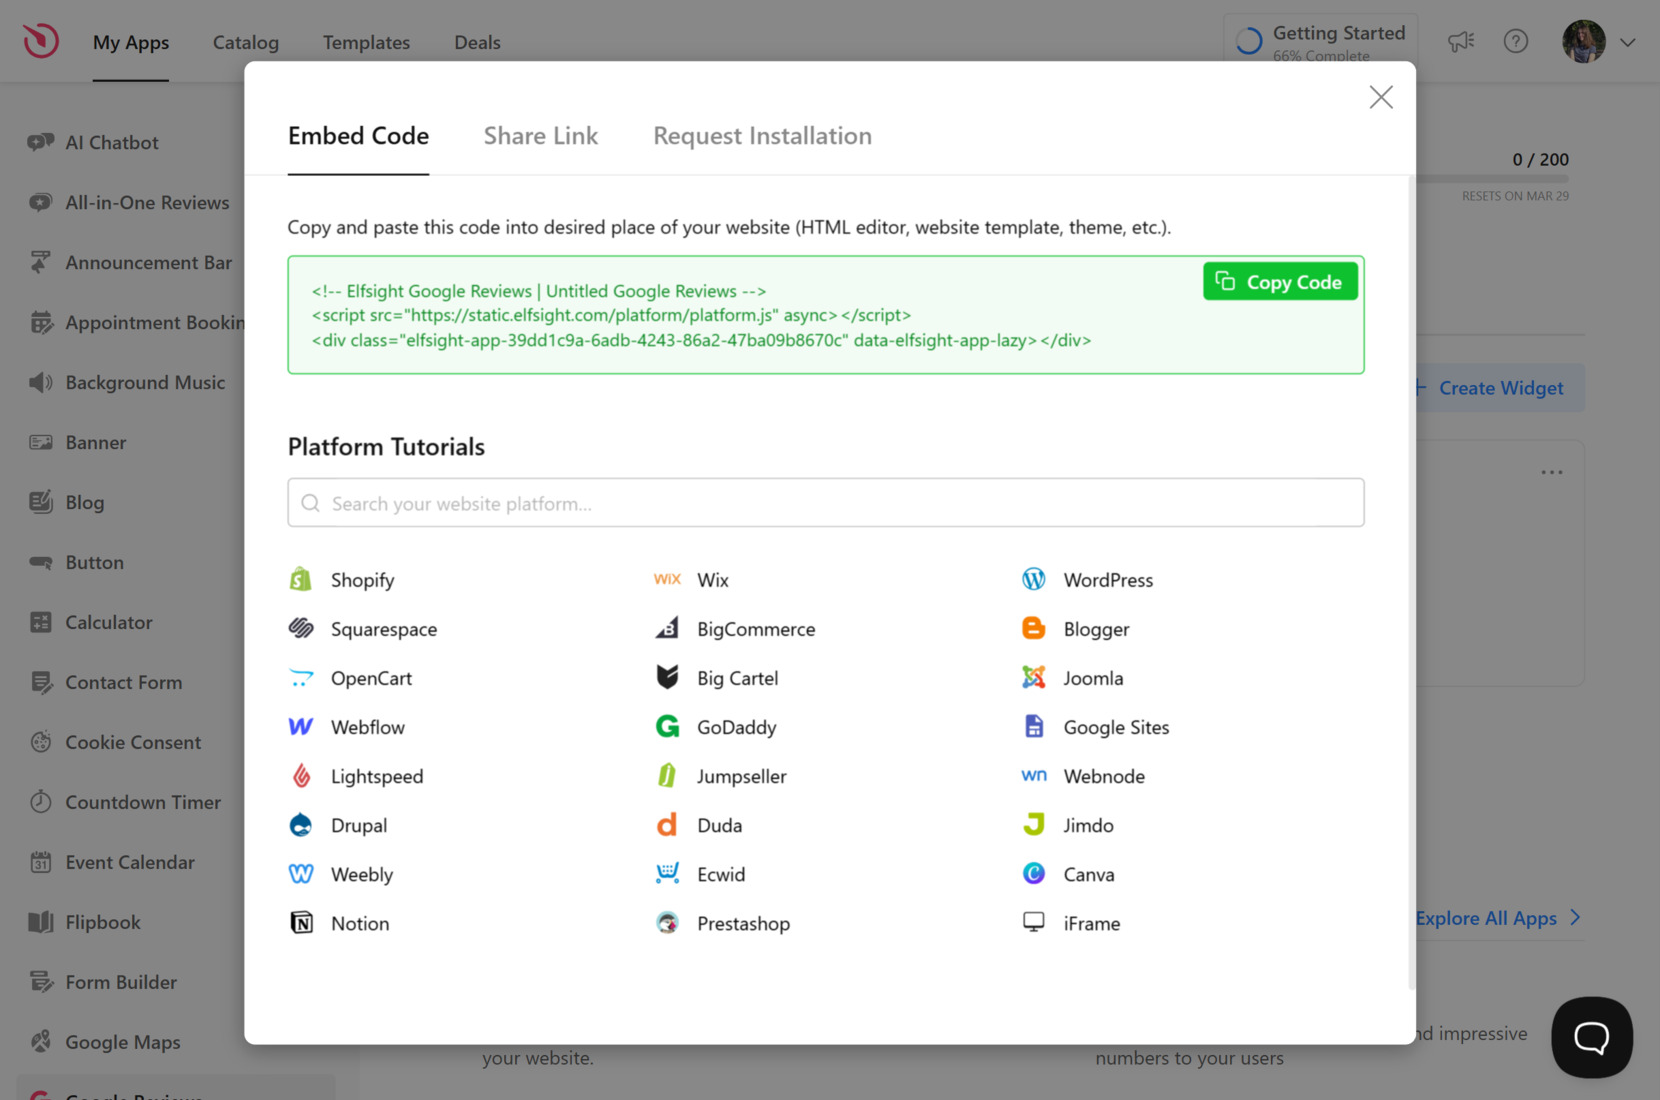
7. Add the widget to WordPress
Choose the method below that matches whether you want the widget on a single page or site-wide.
Install on a specific page
Method 1: Install via Themes
- In WordPress admin go to Appearance → Themes, find the theme to edit and click the action button (…)
- Open the page/template where you want to show the widget and click Add Block.
- Select Custom HTML, paste snippet into the popup and click Save/Update.
Method 2: Install via Pages
- In WordPress admin go to Pages and open the page you want to edit.
- Click Add Block in the editor and choose Custom HTML.
- Paste your embed code, then Save.
Install on all pages (site-wide)
Method 3: Install via Theme Editor
- In WordPress admin go to Appearance → Theme Editor.
- Open
footer.php(or equivalent template file) and the insert code before the closing tag. Click Update File.
Method 4: Install via Widgets
- In WordPress admin go to Appearance → Widgets.
- Open Custom HTML from Available Widgets, choose a Footer widget area and click Add Widget.
- Paste snippet into the Content field and click Save.
Method 5: Install via Customize
- In WordPress admin go to Appearance → Customize.
- Choose Widgets, click Add a Widget and select Custom HTML.
- Paste your Elfsight embed code, click Done, then Publish to apply changes.
If you want options beyond this embed method, the next section explores alternative ways to add Google Reviews depending on your preferred workflow.
Alternatives for Elfsight’s Google Reviews
There are a few official and native ways to add Google Reviews to a WordPress website, but each comes with some clear limitations compared to Elfsight’s widget.
WordPress Plugin: Widgets for Google Reviews
This is a popular free plugin that lets you display your Google reviews on your WordPress website.
- Install the plugin. Search for “Widgets for Google Reviews” in your WordPress plugins dashboard and install it.
- Activate the plugin. Click “Activate” once installation is complete.
- Connect to Google. Use your Google Business Profile to authenticate and fetch your reviews.
- Customize display settings. Choose your preferred layout, style, and filter options.
- Add the widget or shortcode. Place the reviews widget on your desired pages using a block or shortcode.
Only basic layouts and styles are available, with fewer advanced features.
More details are available on the official WordPress Plugin Directory Page.
Google’s Official Embedding Method
Google allows you to manually import Google Reviews to wordpress using Google Maps’ embed functionality.
- Find your business on Google Maps. Search for your business profile in Google Maps.
- Open the reviews panel. Click on the reviews to open the full reviews page.
- Copy share link. Select the “Share” button and choose the “Embed a map” option.
- Copy the embed HTML. Copy the iframe code provided by Google Maps.
- Paste on your website. Add the embed code to your WordPress page using a custom HTML block.
This method only embeds a Google Map, not individual reviews.
More details are available in Google Maps Help Documentation.
Google API: Custom Review Integration
You can use the Google Places API to fetch and display reviews, but this method requires coding.
- Get a Google API key. Register for a Google Cloud account and enable the Places API.
- Set up API credentials. Configure API access and restrict usage for security.
- Write display code. Use JavaScript or PHP to request reviews and render them on your website.
- Style the output. Customize the appearance using CSS.
- Maintain and update code. Monitor for API changes and quota limits.
This method is only practical for developers and is time-consuming to maintain.
More details are available in the official Google Places API documentation.
How Do These Methods Compare?
| Method | Major Pro | Major Con |
|---|---|---|
| Elfsight Widget | Highly customizable, easy to set up and update. | Not built solely for WordPress, but integrates smoothly. |
| Widgets for Google Reviews | Simple setup with basic customization. | Limited design flexibility and advanced features. |
| Google’s Embed Method | Completely official, no plugins needed. | Only shows map, not actual reviews. |
| Google API Integration | Fully customizable for unique needs. | Requires coding skills, ongoing upkeep, and API billing. |
If you want practical tips for making your Google Reviews look appealing and work reliably on your WordPress website, keep reading for the next set of practical tips.
📝 Checklist for Perfect Widget Setup
From the Elfsight team’s hands-on work with Google Reviews, we know the right setup brings out both trust and engagement. Here’s our go-to checklist to help you display reviews that boost your website’s credibility and look great in any context.
- Connect the correct Google location. Double-check you’ve linked your actual Google Business Profile so reviews display accurately and update in real time.
- Showcase the right reviews. Use keyword or rating filters to highlight feedback that aligns with your brand values or hides out-of-date or less relevant comments.
- Fine-tune the layout. Pick a display style, such as grid, carousel, or list, that matches your website’s content flow and keeps the reviews readable.
- Match your design. Adjust colors, fonts, and button shapes so the widget blends seamlessly with your existing branding and doesn’t distract visitors.
- Enable the “Write a review” button. Make sure the direct link to your Google review page is active so happy customers can leave new feedback easily.
- Summarize with AI-powered insights. Turn on review summaries to surface the most common positive themes or key points for visitors short on time.
- Prioritize mobile responsiveness. Test how the widget looks on different devices and tweak spacing or font sizes to guarantee every review is legible on phones and tablets.
- Limit the number of visible reviews if needed. Start with 5–10 recent reviews and let users click to see more, keeping the page uncluttered and fast.
- Position reviews for maximum impact. Place the widget near calls to action, product descriptions, or contact forms, where trust signals help drive conversions.
Let’s walk through a real example of adding Google Reviews to a business website, showing the impact on customer trust and engagement.
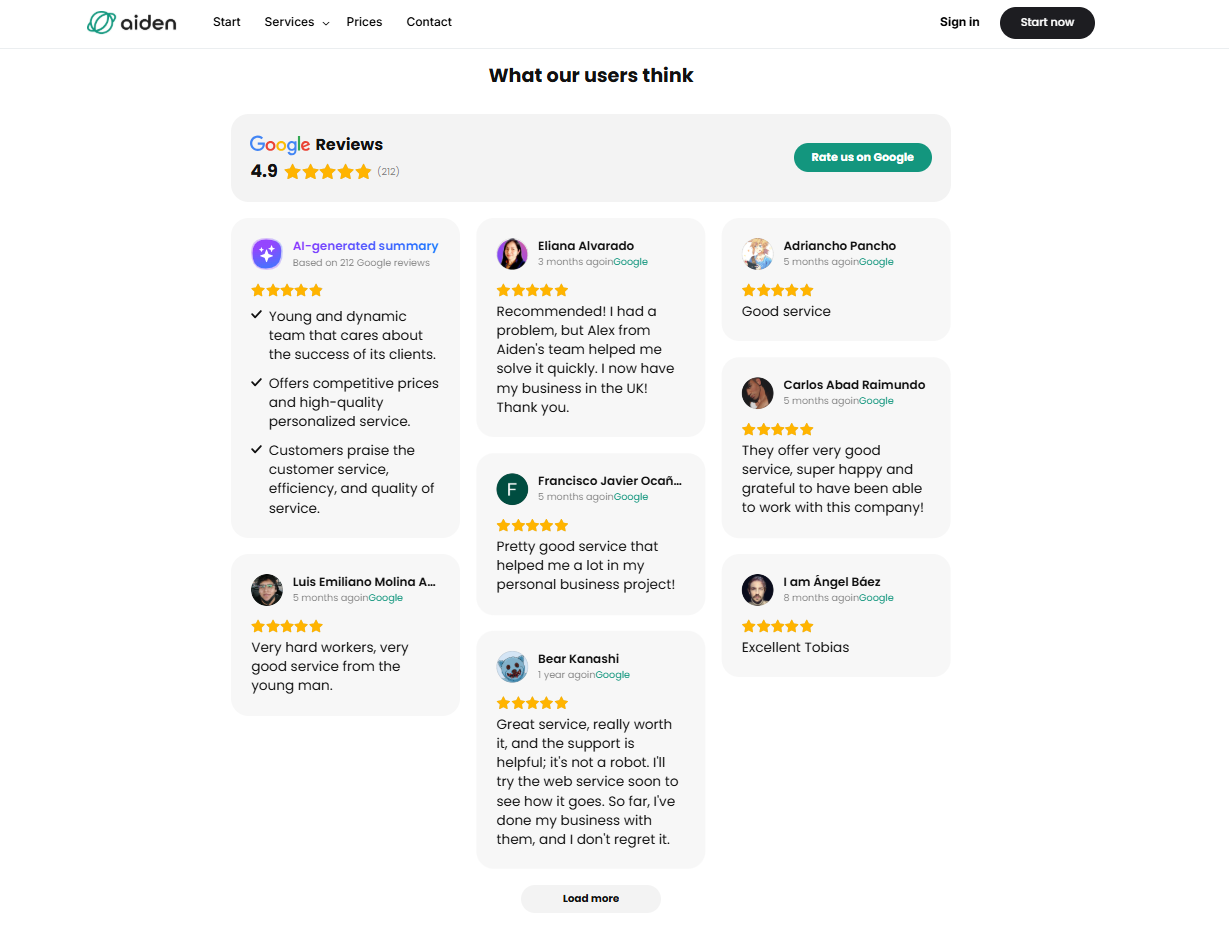
Google Reviews at Work: Accounting Business
An independent accounting firm turned to Elfsight to strengthen its online presence and build credibility. By showcasing authentic Google Reviews directly on their website, the firm managed to establish trust with new visitors and drive more client inquiries without heavy reliance on paid ads. Below is their story.
Before using Elfsight
The firm’s website was professional but static. Potential clients had no way to verify the quality of service apart from word of mouth. This lack of social proof meant missed opportunities to convert casual visitors into paying customers.
- No visible client feedback on the website
- Difficulty building trust with first-time visitors
- Lower-than-expected conversion rate from website traffic
With Google Reviews
“We’ve seen better engagement on landing pages, smoother mobile experiences, and an increase in lead conversions.”
Alejandro, Aiden Startup
By embedding the Google Reviews widget, the firm could automatically display up-to-date client feedback from their Google Business Profile. Positive reviews now appear directly on their service pages, helping potential clients see real, verified experiences without leaving the website. This authentic social proof made the website more persuasive and client-focused.
Results
After implementing Google Reviews, the accounting firm reported a clear boost in conversions. Visitors were not only spending more time on the site but were also more likely to book a consultation after reading positive testimonials. The widget helped reduce hesitation and provided the credibility boost needed to stand out in a competitive niche.
Other widgets in use
Alongside Google Reviews, the firm also uses Contact Form to capture leads, FAQ to answer common client questions, and Cookie Consent to ensure compliance. Together, these integrations create a client-friendly website that feels transparent, professional, and easy to navigate.
What’s more, the team customized the look of their widgets to fit neatly with their brand identity, showcasing just how flexible and impactful the widget can be when applied creatively to any industry.
Google Reviews bring authenticity and trust to a website, turning positive client feedback into a powerful tool for driving conversions – especially for service-based businessess.
While the setup process is straightforward, many teams have questions about how to get the most from their reviews. Here’s an overview of common questions and practical answers to help you get started easily.
Google Reviews Widget Issues & Solutions
Adding the Google Reviews widget to WordPress is usually simple, but real-world experience shows some recurring problems that can block or slow down your setup. Addressing these basics helps most users get reviews showing up reliably and looking sharp:
Why do my Google Reviews fail to display after installing the widget?
How can I resolve slow loading or performance drops after adding the reviews widget?
What should I do if the widget code doesn’t work or breaks formatting?
Why do my reviews disappear or revert to the default language after updating my website?
How do I fix API errors or connection issues with Google My Business?
If your Google Reviews widget still doesn’t work as expected, see below for official Elfsight help and troubleshooting resources.
Need More Details?
We hope this guide helps you feel confident about adding Google Reviews to your WordPress website. We genuinely care about making your setup smooth and your feedback visible. If you have any ideas, questions, or stories about using the widget, we would love to hear from you. Connect with the Elfsight team on X, Facebook, or Linkedin to share your experience and stay updated.