Did you know? 74% of marketers use forms and almost half of them say forms are their highest-converting lead generation tool, making them essential for capturing customer interest directly on your website.
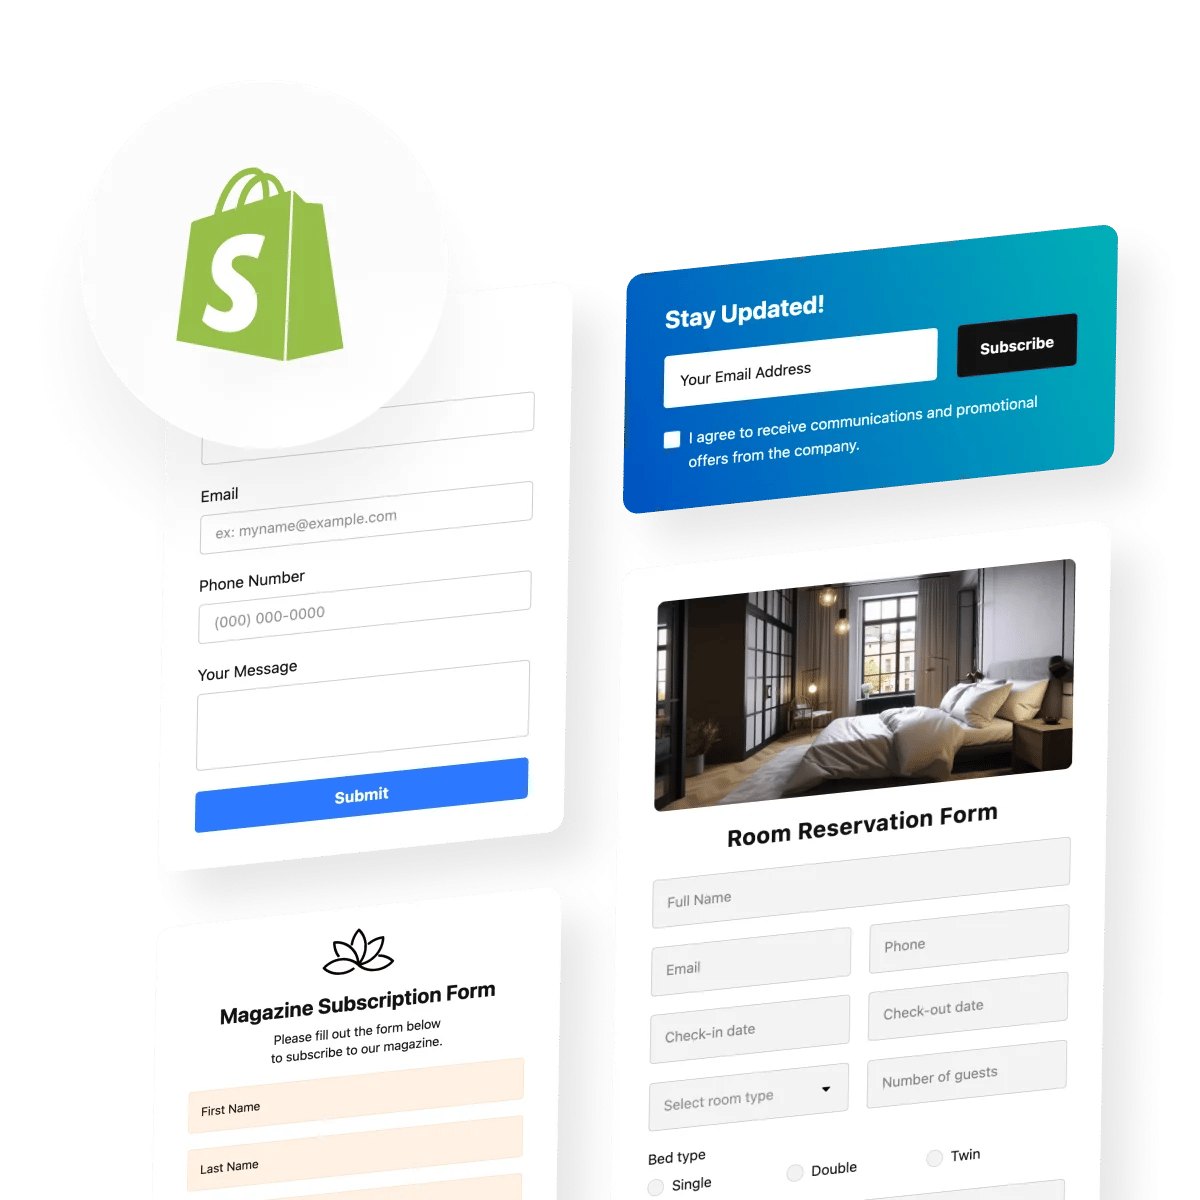
If you run a Shopify store, collecting customer information is just as important as selling products. Whether it’s inquiries, custom orders, or lead capture, forms play a key role in converting visitors into customers, especially on high-intent pages such as product pages, landing pages, or checkout sections.
However, Shopify’s built-in form options are quite limited. The default contact form works for basic use cases, but it doesn’t offer much flexibility for more advanced workflows, such as multi-step forms or conditional logic. The Elfsight Form Builder makes it easy to add a form to Shopify without coding. You can create fully customizable forms, embed them anywhere on your store, and start collecting data in minutes.
- How to add forms in Shopify quickly using a no-code solution
- How to customize form fields, logic, and design to match your store and use case
- What alternative methods exist and when they fall short for real business needs
- Best practices to increase form submissions
Let’s start with the fastest way to get your form live and start collecting responses right away.
Quick Start: Add Form to Shopify
If you want a fast way to add custom forms to Shopify, here’s the simplest process:
- Open the Elfsight editor and select a template that best meets your needs.
- Customize fields and form structure.
- Click “Add to website for free” to generate your embed code.
- Paste the code into your Shopify page or theme and publish.
Create your form now in the live editor!
Why Add Forms to Product Pages in Shopify
Adding forms isn’t just about collecting data – it directly affects how visitors interact with your store and whether they move forward or leave. When done right, forms become a key part of your conversion flow, helping you capture interest at different stages of the customer journey.
🛒 Capture leads directly on your store
Not every visitor is ready to buy immediately. Some need more information, want to ask questions, or are exploring custom options. Forms let you capture those opportunities instead of losing them. By placing forms across your Shopify website, you turn passive visitors into active leads without relying only on checkout actions.
📈 Increase conversions on product pages
Product pages are where most decisions happen—and also where doubts appear. When you add a form to a product page on Shopify, you give customers a direct way to ask questions, request variations, or clarify details without leaving the page. This reduces hesitation and keeps users moving forward instead of abandoning the session.
💬 Reduce friction in customer communication
Traditional contact methods, such as email links, require extra steps and effort. Forms streamline this process by allowing visitors to submit requests instantly. Everything happens within your website, which keeps the experience smooth and increases the likelihood that users will actually reach out.
🎯 Support multiple use cases across your store
Forms are highly flexible and can serve different purposes depending on your needs. You can use them for contact requests, product customization, booking inquiries, feedback collection, or even post-purchase surveys. Instead of adding multiple tools, a single form builder lets you manage all of these interactions in one place.
📱 Improve mobile experience and completion rates
A large portion of Shopify traffic comes from mobile users. Well-designed forms make it easy to complete actions quickly on smaller screens, with optimized fields and layouts. This reduces drop-offs and helps you capture more responses from users who are browsing on the go.
Core Features of the Form Builder App
Before setting up your form, it helps to understand what functionality is available and how it translates into real use on your Shopify website.
Below is a breakdown of the key features and how they support different business scenarios.
| Feature | Practical Use |
| Drag-and-drop form builder | Create and adjust forms visually without any coding |
| Multiple field types | Collect detailed input such as emails, phone numbers, selections, and files |
| Conditional logic | Show or hide fields based on user responses for more personalized flows |
| Custom styling | Match the form design to your Shopify theme for a seamless look |
| Email notifications | Get instant alerts when someone submits a form |
| Spam protection | Prevent unwanted or automated submissions |
| Multi-step forms | Break longer forms into steps to improve completion rates |
| Integrations | Send collected data to email tools, CRMs, or other systems |
For the complete feature breakdown, visit the app features page.
With a clear understanding of what Elfsight can do, you can now move on to setting it up and embedding it into your Shopify store.
Step-by-Step: How to Add a Form to Shopify
Now let’s go through the complete process of how to add a form to Shopify and embed it exactly where it supports your store, whether that’s a landing page, product page, or custom section.
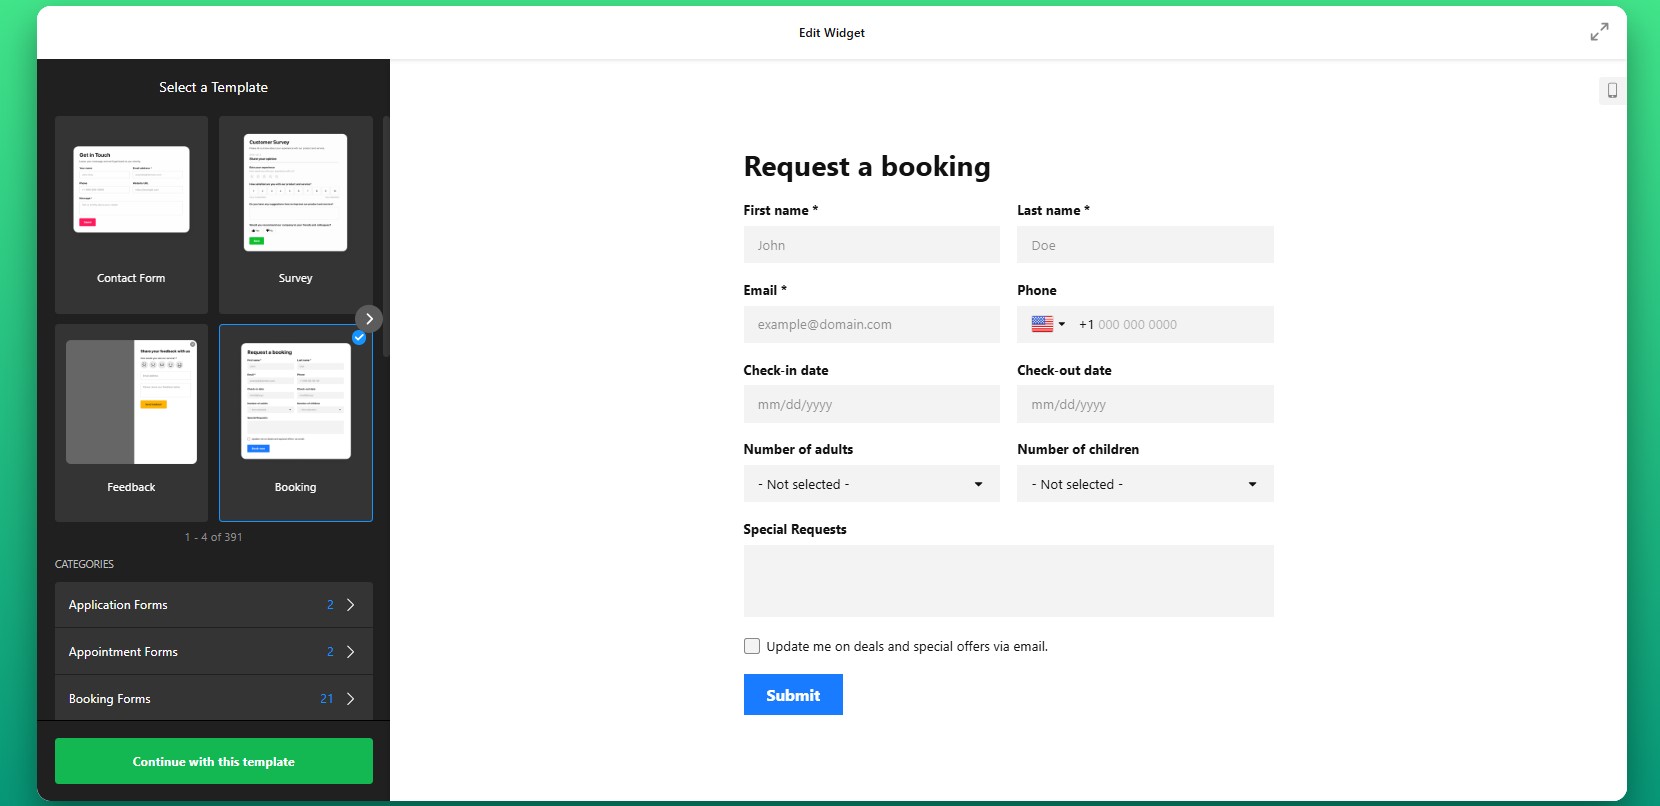
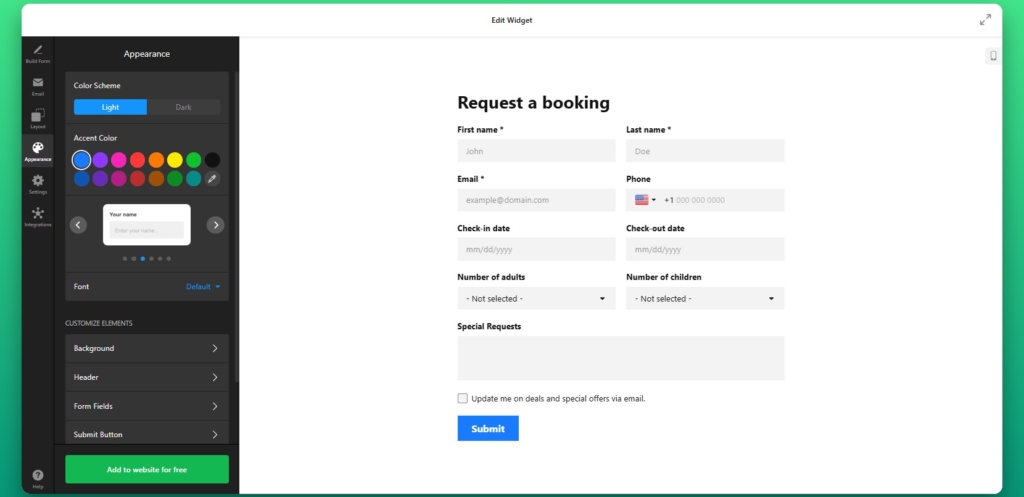
Step 1: Choose a Form Template
Start by opening the Form Builer app editor and selecting a template that fits your goal. There’s a wide variety of ready-made options designed for different use cases, such as collecting inquiries, handling booking requests, gathering feedback, or generating leads.
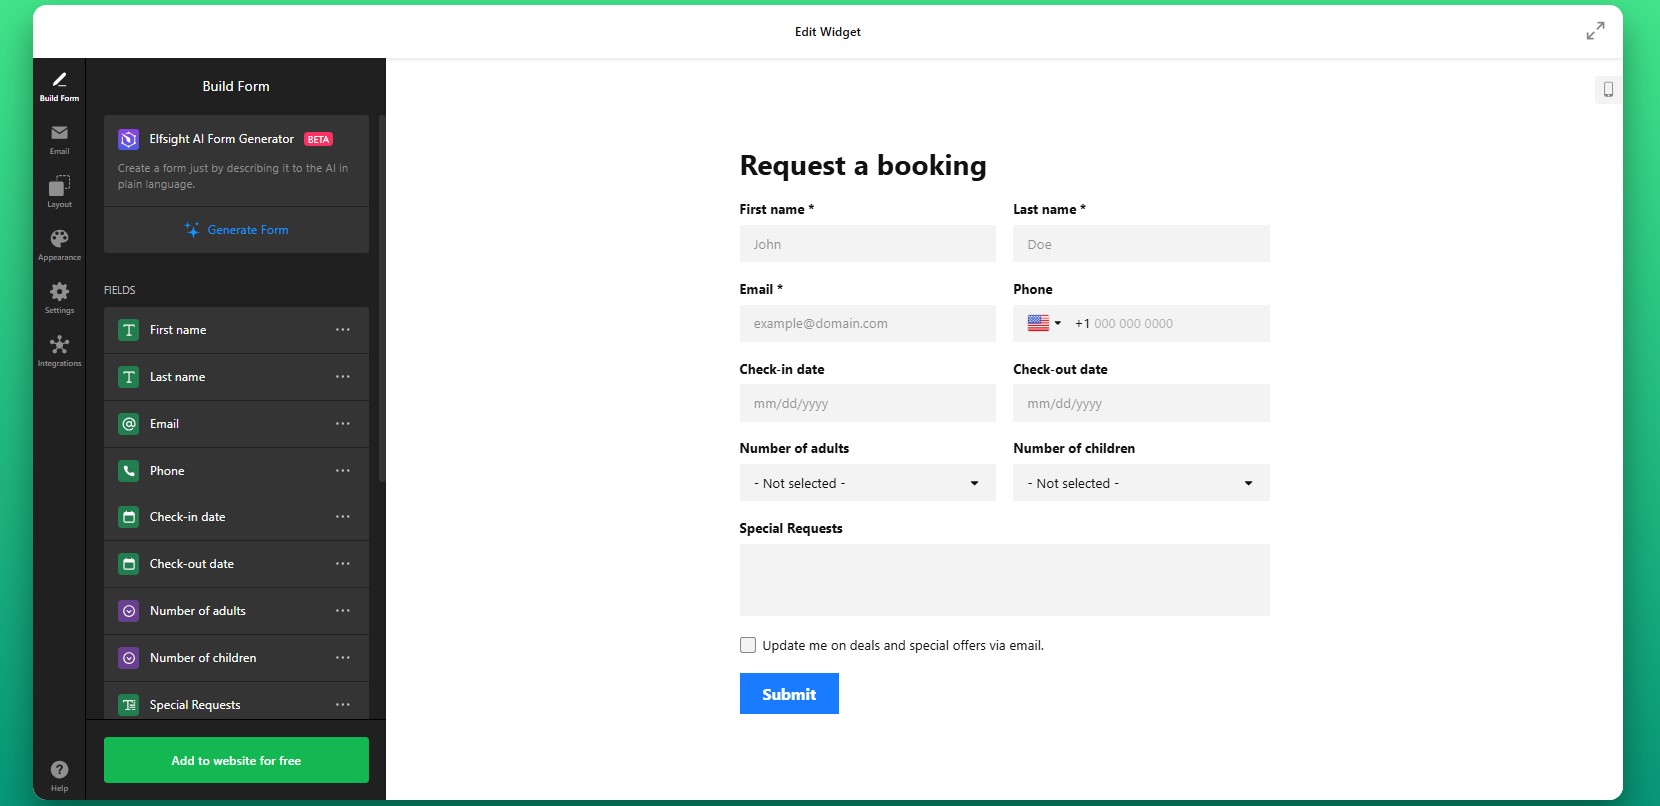
Step 2: Customize Form Fields
You can include simple inputs like names and email addresses, or create more advanced forms with selectable options, file uploads, and multiple-choice fields. The goal is to collect exactly the information you need – nothing more, nothing less – so the form remains easy to complete.
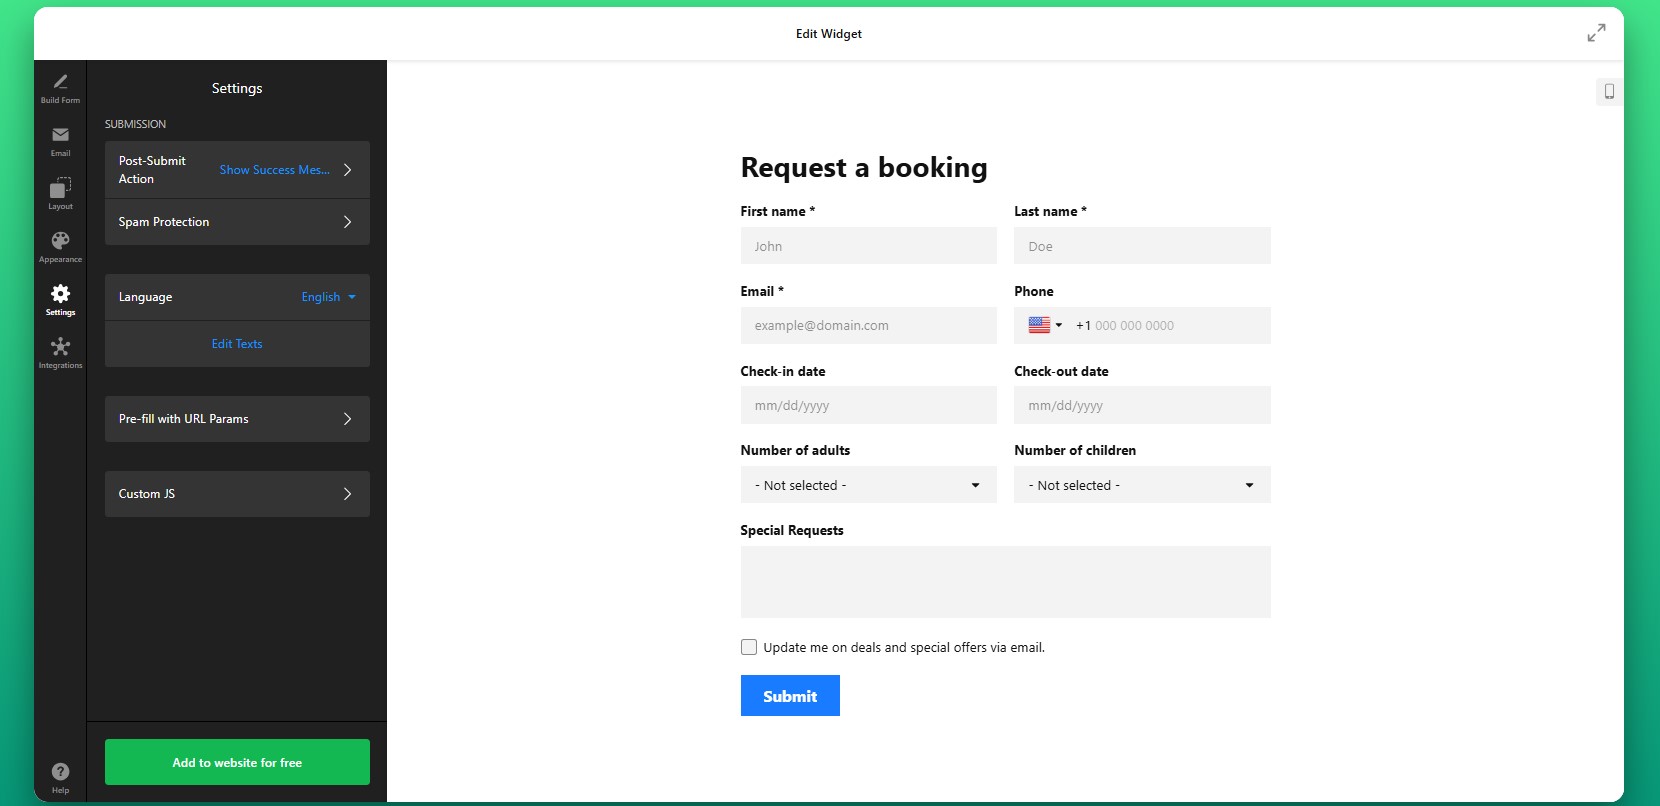
Step 3: Configure Form Behavior
Set how the form behaves after submission. You can define what message users see after submission, choose whether your visitors are redirected to another page, and set up notifications so you’re alerted whenever a new response comes in.
Step 4: Customize Design
Next, adjust the visual appearance of your form to align with your Shopify store’s design. You can refine colors, typography, spacing, and button styles to match your branding. This step is important because consistency builds trust and makes the form feel like a natural part of your website.
Step 5: Generate Embed Code
Once everything is configured, click “Add to website for free” to generate your embed code. This code contains everything needed to display the form on your Shopify store.
Copy the entire snippet as it appears to ensure the form loads correctly when added to your website.
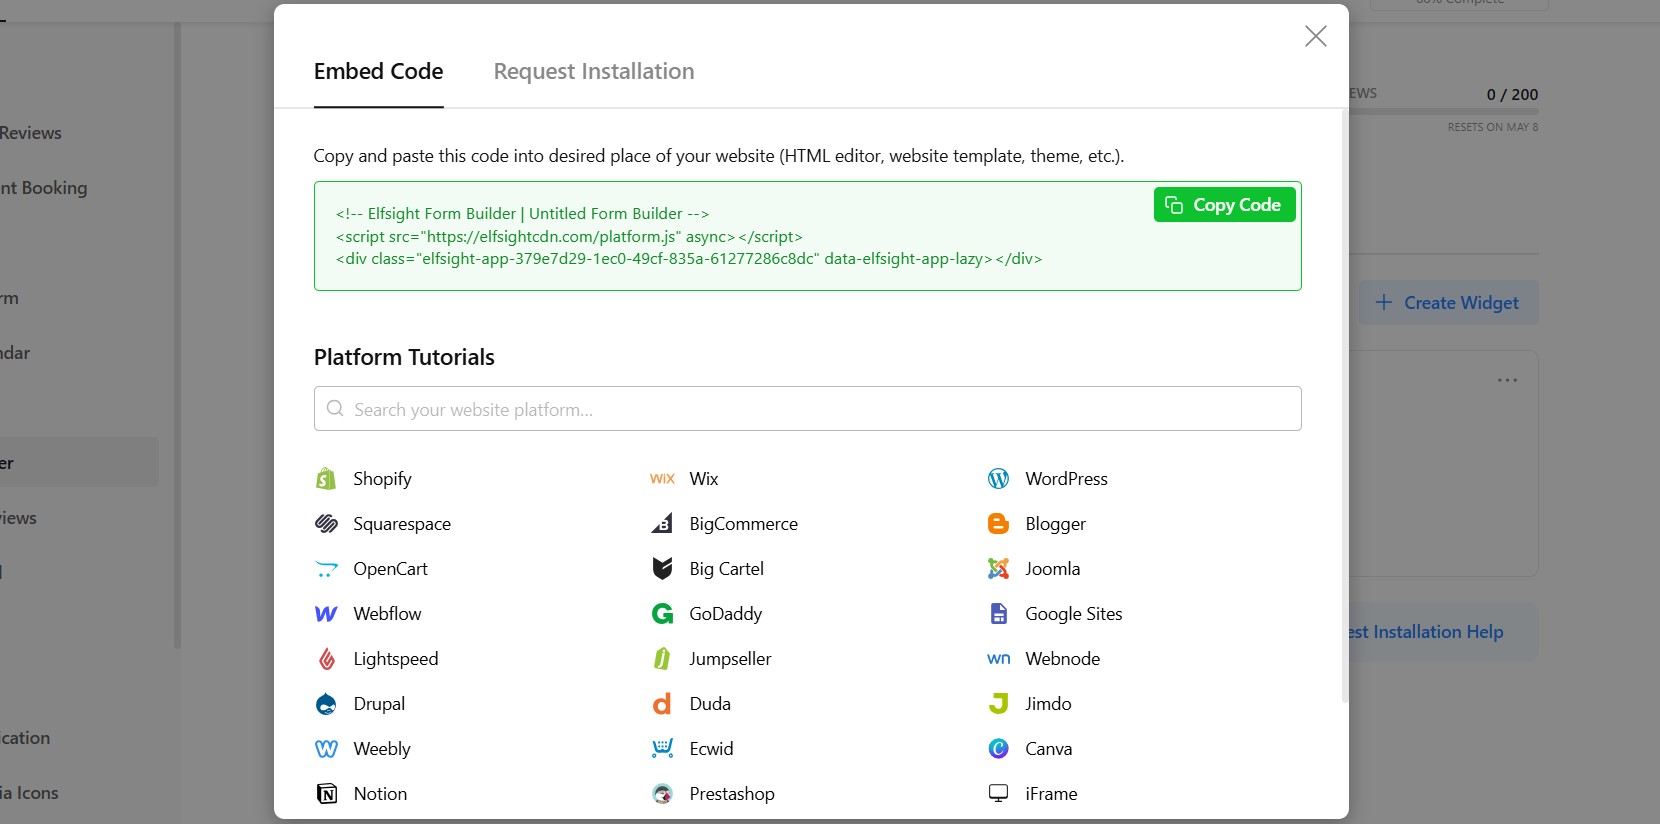
Step 6: Add Form to Shopify Page
To add the form to your Shopify page, go to your Shopify admin, open the page where you want the form to appear. Switch to the HTML or code view and paste the embed code into the desired section.
After saving your changes, the form will appear on that page and be ready to collect submissions.
If you want to add the form to your product page on Shopify, you can place the embed code directly into your theme or use a custom section that allows HTML content.
This approach is especially useful for handling product-specific inquiries, custom orders, or additional customer input directly within the buying experience.
- If the form isn’t visible, double-check that the embed code was pasted into the correct HTML section of your Shopify page.
- If the layout looks off, it may be caused by theme styling conflicts, which can be resolved by adjusting spacing or container width.
- If submissions aren’t coming through, review your notification settings to ensure emails are configured correctly.
- For mobile display issues, verify that the form layout is responsive and not restricted by its container.
Alternative Solutions to Embed a Form in Shopify
There are several ways to add a form to Shopify, but each approach comes with different levels of flexibility, effort, and long-term maintenance. Understanding these differences helps you choose the method that fits your store’s needs rather than running into limitations later.
Shopify Native Contact Form
Shopify includes a basic contact form that can be added through its default templates. To use it:
- Create a contact page template.
- Assign it to a page in your admin panel.
- Customize basic fields.
Manual HTML Form
Another option is to build a form manually in HTML and embed it directly into your Shopify theme. This approach gives you full control over the form’s structure and behavior, but it also requires technical knowledge.
- Write a custom HTML form.
- Add backend handling.
- Embed into theme.
Before deciding which approach to use, it helps to compare them side by side based on what matters most for day-to-day use.
| Feature | Elfsight Form | Shopify Native | HTML |
| Customization | High | Low | High |
| Ease of use | Easy | Easy | Hard |
| Logic & fields | Advanced | Basic | Custom |
| Maintenance | None | Low | High |
This comparison shows a clear trade-off: native solutions are easy but limited, while custom solutions are powerful but require effort. A widget-based approach balances both by providing flexibility without adding complexity.
Optimization Tips for Your Form Builder
Once your form is live, small improvements in placement, structure, and design can significantly increase the number of users who actually complete it.
- Place forms where users are already engaged:
Position your form near product descriptions, pricing sections, or call-to-action buttons so it appears when users are considering their next step. - Keep forms concise and focused: The more fields you add, the higher the chance users will abandon the form. Only ask for information that is essential for your goal.
- Make every field easy to understand: Clear labels and simple wording reduce confusion and help users complete the form faster without second-guessing their input.
- Ensure a smooth mobile experience: Since many Shopify visitors browse on mobile, forms should be easy to navigate, with properly spaced fields and simple input methods.
- Explain why the form matters: Adding a short message about what users get in return, such as a response, quote, or support, can increase completion rates.
- Test different placements and layouts: Moving your form higher on the page or changing its format can have a noticeable impact on how many users interact with it.
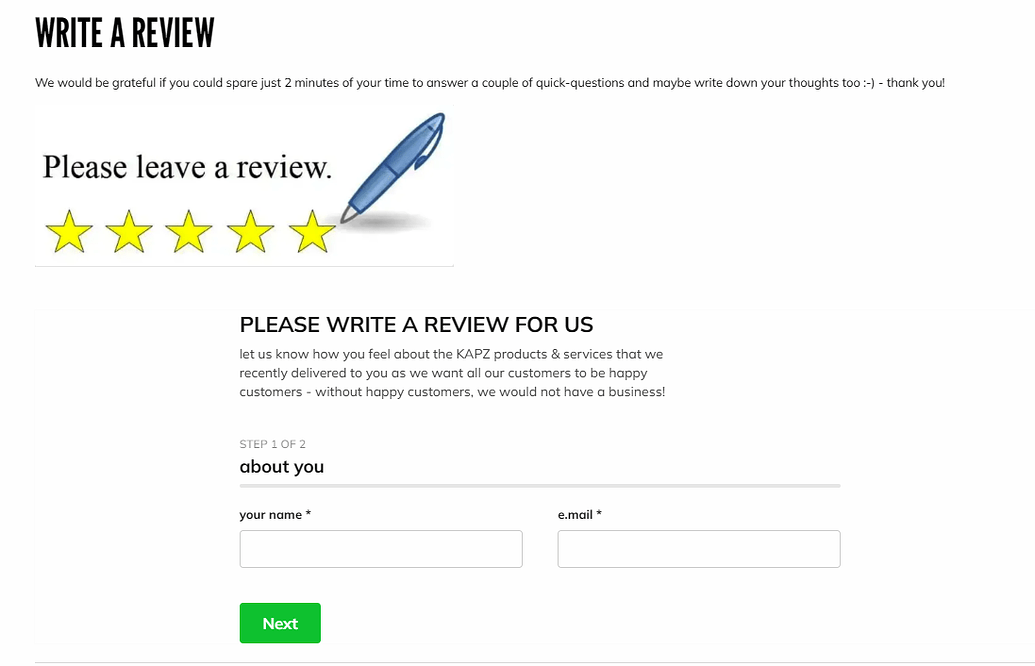
Real Use Case: Custom Bike Store Improves Customer Interaction with Forms
Khush runs Kapz, a custom bicycle parts online store, where personalization and customer communication are essential to the buying process. Since many products require custom design input, the website needed a clear and easy way for visitors to submit requests and interact with the business.
Before using Elfsight
Struggled with coding when building key elements like contact forms and banners
Limited ability to create visually appealing and functional sections
Needed a faster way to add interactive elements without technical complexity
With the Form Builder widget
“We were looking for a no-code widget solution for our website – the first one was an announcement bar and then it went from there.” – Khush
By adding a multistep form directly into the website, Khush created a smoother way for customers to leave their reviews right on the website. Also, instead of relying on external communication channels, visitors can now submit their contact information directly within the website.These forms were integrated alongside other interactive elements like galleries, sliders, and social feeds, creating a more dynamic and user-friendly experience.
The result: improved website functionality, faster deployment of new features, and smoother user experience across devices.
Frequently Asked Questions
Can I create different types of forms on my Shopify website?
Does the Form Builder support multi-step forms?
Can I customize what happens after a form is submitted?
Can I integrate form submissions with other tools like email or CRM?
Is there a way to generate forms faster without building them manually?
Conclusion
Adding forms to your Shopify store gives you more ways to capture leads, answer questions, and support customer journeys beyond standard checkout flows. Not every visitor is ready to purchase immediately; some need clarification, want to request custom options, or are simply exploring.
By embedding forms directly into your pages, you create opportunities for interaction exactly where users need them.