According to Rep AI’s analysis of 17 million+ shopping sessions, shoppers who engage with AI-powered chat convert at 12.3% compared to just 3.1% for those who don’t — a 4× increase in conversion rate.
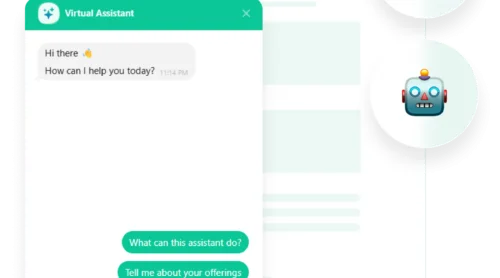
When a customer lands on your product page at 2 AM with a sizing question, a shipping concern, or a payment issue, that unanswered query often means a lost sale. An AI-powered chatbot solves this gap by providing instant, accurate responses 24/7 while simultaneously reducing your support workload.
A well-configured chatbot may recommend complementary products when prompted, answers technical questions instantly, and guides hesitant visitors through checkout – all while collecting valuable customer insights that inform your broader marketing strategy.
- How to add a chatbot to Shopify in under 10 minutes with zero coding
- Why an AI Chatbot drives measurable conversion improvements
- Complete configuration walkthrough from training to live deployment
- Alternative chatbot solutions with honest capability comparisons
- Proven optimization strategies from real e-commerce implementations
The sections below take you from initial setup to a fully operational AI assistant that handles customer inquiries, recommends products, and increases your store’s revenue.
Quick Start: Add an AI Chatbot in Shopify
If you prefer to test things in practice right away, here’s a simple 4-step process for adding a chatbot to your Shopify store:
- Open the AI Chatbot editor and select a template.
- Train the chatbot on your product catalog, policies, and FAQs.
- Customize the design and click “Add to Website” to get the embed code.
- Paste the code into your Shopify theme editor and publish.
🚀 Create your own AI chatbot in our live editor!
Why Add an AI Chatbot to Your Shopify Store
Before configuring your chatbot, understanding its strategic value helps you maximize return on investment. A well-implemented AI chatbot addresses multiple business challenges simultaneously.
💬 Instant responses eliminate purchase hesitation
The average online shopper expects responses within 10 seconds. Human support teams can’t match this expectation during high-traffic periods or outside business hours. An AI chatbot answers product questions, explains shipping policies, and resolves payment concerns instantly – precisely when customers are making purchasing decisions. This immediacy directly reduces cart abandonment rates.
💰 Higher conversion rates with lower support costs
Rep AI’s research shows that AI-engaged shoppers convert 4× as often as those who don’t interact with chat. Simultaneously, AI handles routine inquiries at $0.50–$2.00 per interaction versus $6.00–$15.00 for human agents. This dual benefit – increased revenue and decreased operational expense – makes Shopify chatbot integration one of the highest-ROI improvements for e-commerce stores.
🛒 Proactive product recommendations increase average order value
The chatbot responds to product inquiries by suggesting relevant items from your catalog when you’ve trained it with product information and configured recommendation instructions. For example, if a customer views running shoes, the chatbot can suggest matching socks, insoles, or accessories. These contextual recommendations feel helpful rather than pushy, increasing average order value by 15–25% according to industry benchmarks.
📊 Valuable customer insights inform business strategy
Every chatbot interaction generates data about customer concerns, product questions, and common objections. This intelligence reveals which product descriptions need improvement, which policies confuse customers, and which products require better photography or specifications. These insights inform everything from product development to marketing messaging.
🌍 24/7 global availability without timezone constraints
Shopify stores serve customers worldwide across all time zones. An AI chatbot provides consistent support whether customers shop during your business hours or at 3 AM. This global availability particularly benefits stores with international audiences or those testing new geographic markets without hiring multilingual support staff.
Core Features of Elfsight AI Chatbot
Understanding your chatbot’s capabilities helps you configure it for maximum effectiveness. Below is a breakdown of the widget’s core functionality and practical applications:
| Feature | Practical Use |
|---|---|
| Latest GPT-5 mini AI model | Understands complex customer questions, maintains conversation context, and generates human-like responses that build trust rather than frustration. |
| Unlimited chats and users | No artificial caps or per-conversation charges — engage countless customers simultaneously without worrying about hitting usage limits or unexpected costs. |
| Multiple training methods | Upload product catalogs (PDF, DOCX), add Q&A pairs for specific policies, paste FAQs as text blocks, or auto-scrape your Shopify pages via sitemap training. |
| Multilingual conversations | Automatically responds in whatever language customers write in — no separate configurations needed for serving international audiences. |
| Customizable visual design | Match your Shopify theme precisely through custom colors, fonts, chat bubble positioning, avatar uploads, and CSS editor for pixel-perfect brand alignment. |
| Email transcript delivery | Receive full conversation records in your inbox for follow-up opportunities and training improvement insights. |
| User response ratings | Visitors rate each AI reply as Good or Bad, providing direct feedback on response quality that helps you refine training data. |
| Mobile-optimized interface | Responsive design ensures perfect functionality whether customers browse on desktop, tablet, or mobile (where most Shopify traffic originates). |
For the complete feature breakdown, visit the AI Chatbot Features page. The training capabilities and customization options distinguish conversational AI from basic rule-based chatbots, as explored in our comparison guide.
Step-by-Step: Setting Up Your Chatbot on Shopify
This section guides you through complete chatbot configuration, from initial template selection through live deployment on your Shopify store.
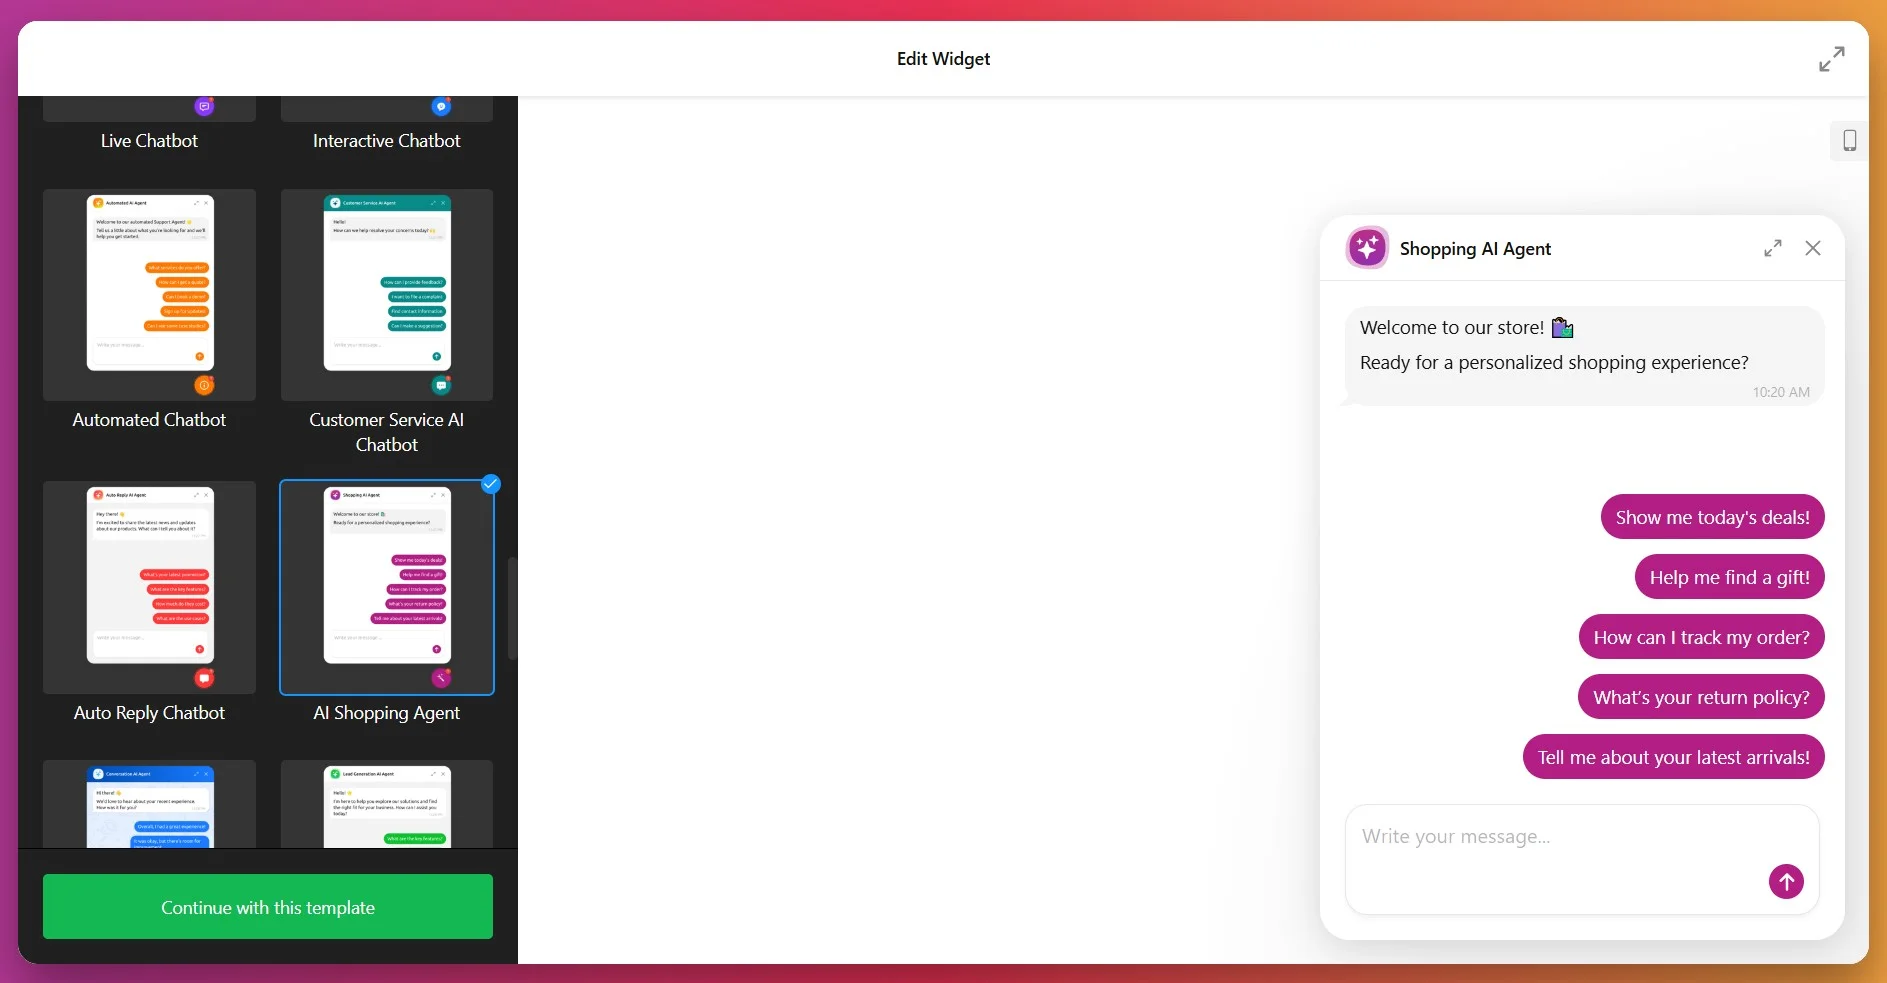
Step 1: Select an E-commerce Template
Navigate to the Elfsight AI Chatbot editor and browse available templates. For Shopify stores, choose templates designed specifically for e-commerce scenarios. For example:
- Customer Support Chatbot — Handles product inquiries, shipping questions, return policies, and order tracking
- AI Shopping Agent — Focuses on product recommendations, upsells, and guiding customers through purchase decisions
You can also opt for a general-purpose chatbot template, a blank canvas for custom configurations, and build your Shopify chatbot from scratch.
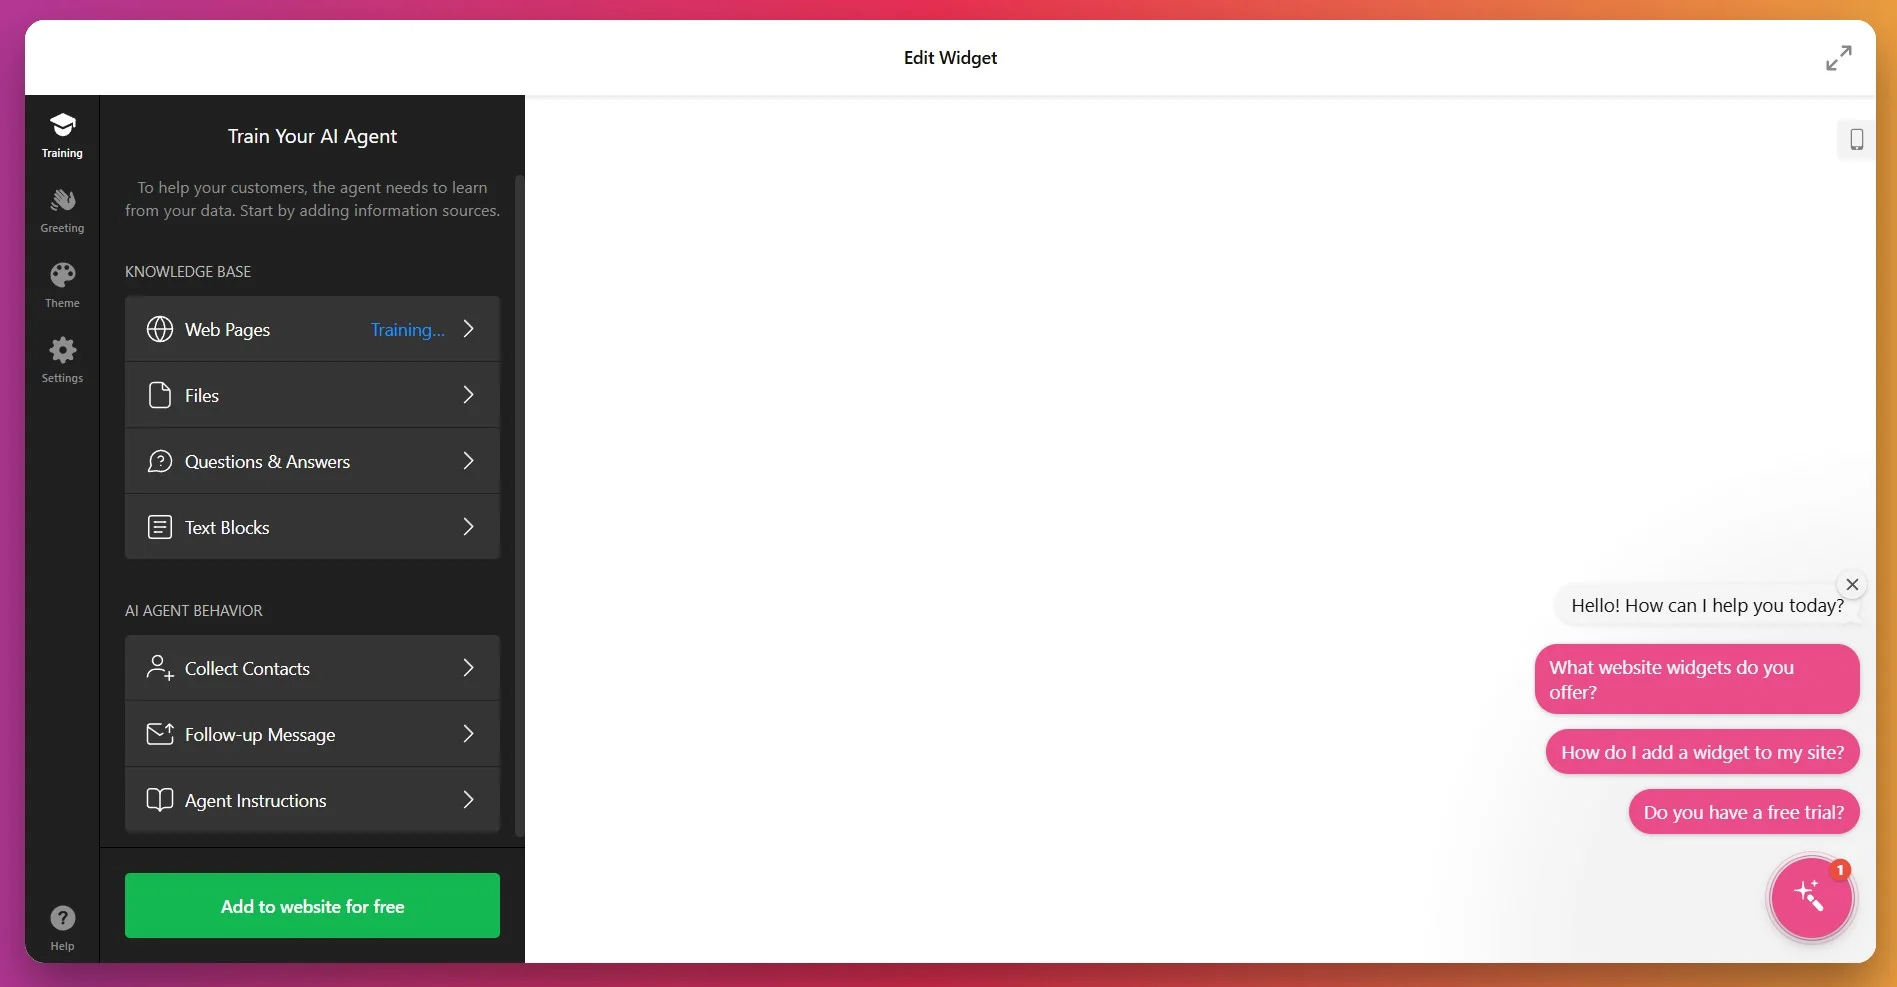
Step 2: Train Your Chatbot on Store Knowledge
After entering your website URL for AI analysis, you land in the Training tab. This is where you create the Knowledge Base for your chatbot, determining what your chatbot knows and how accurately it responds. Use multiple training methods for comprehensive coverage:
Method 1: Scrape Your Shopify Pages
- Enter URLs to pages with relevant information (About Us, shipping policy, etc.)
- Add up to 200 web pages for AI to process and store
- Add each subpage separately (they’re not crawled automatically)
Method 2: Upload Product Information
- Export your product catalog from Shopify as files
- Upload directly to the chatbot’s knowledge base
- Include product names, descriptions, specifications, pricing, and availability
Method 3: Add Q&A Pairs
- Manually create question-answer entries for policies and common inquiries
- Example: “What’s your return policy?” → “We accept returns within 30 days of purchase for unused items in original packaging. Customers pay return shipping.”
- Include FAQs about shipping, warranties, payment methods, and gift cards
Method 4: Paste Text Blocks
- Copy key information from your Shopify admin (About Us, policies, sizing guides)
- Paste directly into text block fields
- Useful for content that doesn’t exist as standalone pages
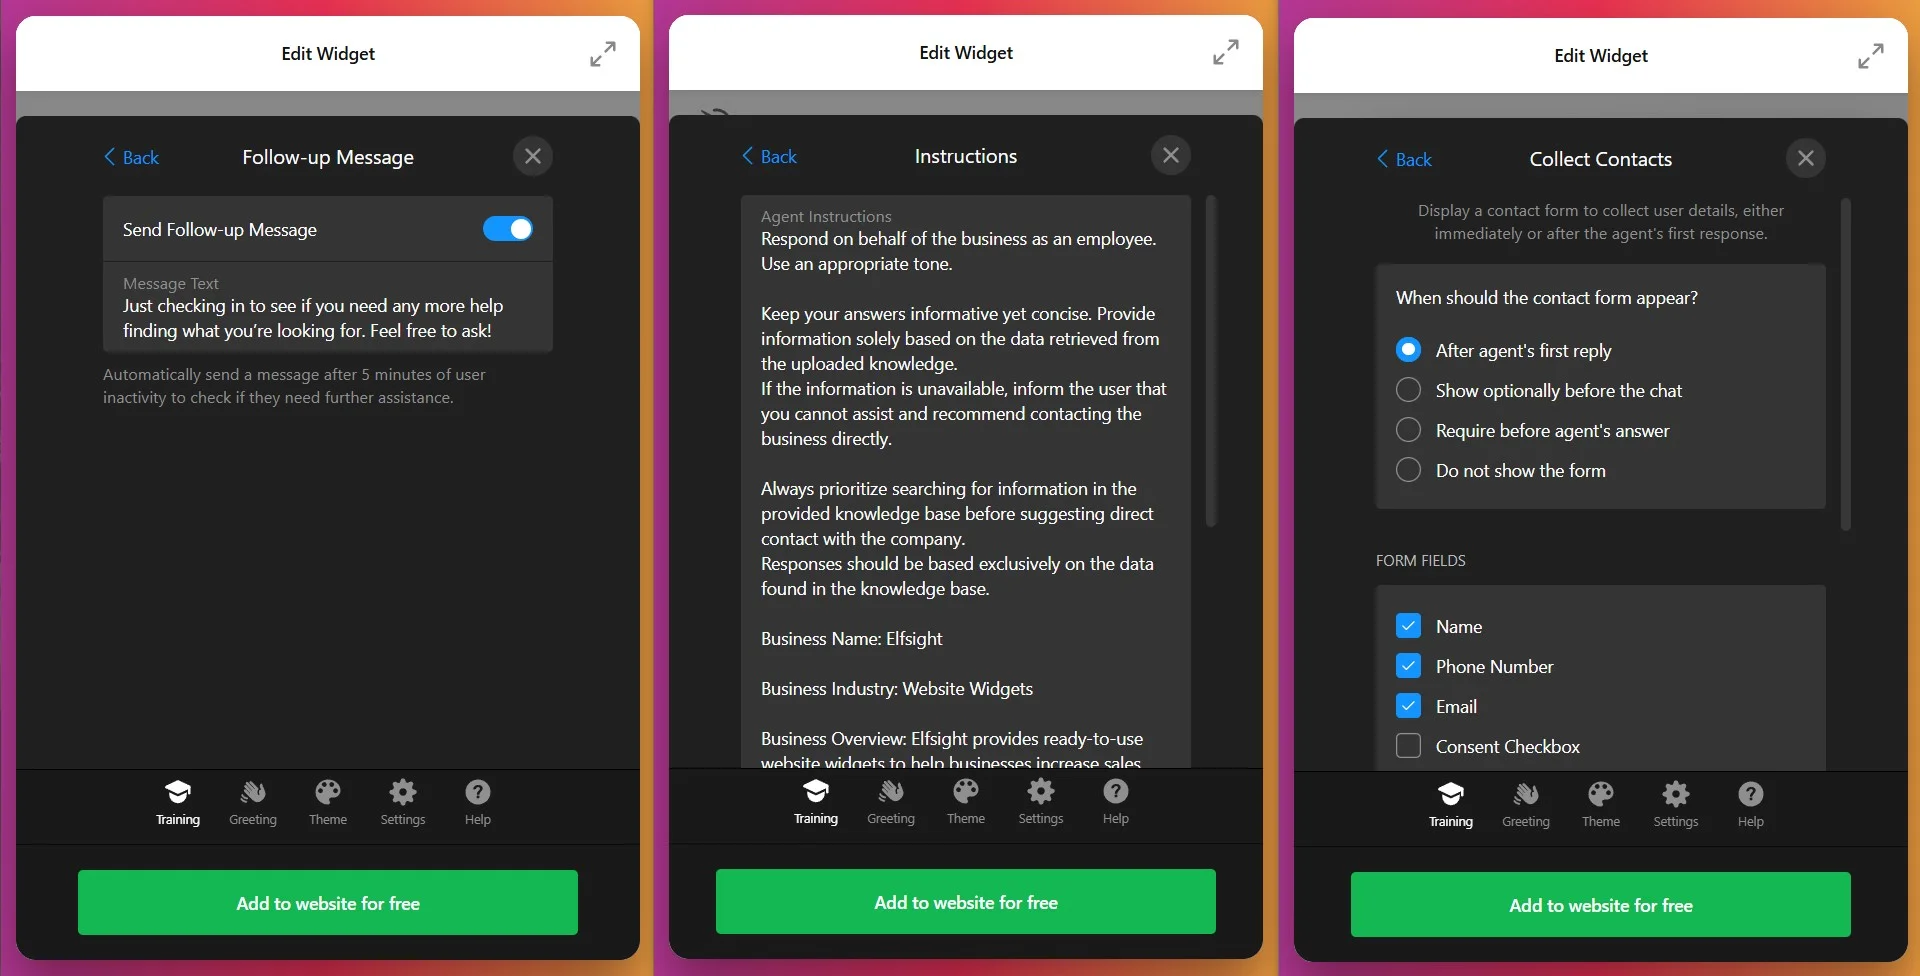
Step 3: Configure Instructions and Personality
The Assistant Behavior field defines your chatbot’s communication style, tone, and behavior. This is where you shape personality and establish response guidelines.
- Collect contacts: Allow your chatbot to gather user information (name, contact info)
- Set follow-ups: Automatically send a message after 5-min inactivity
- Edit chatbot instructions: Define your assistant’s behavior and tone (formal, friendly, professional, etc.)
Example instruction prompt for Shopify store:
You are Eva, the virtual shopping assistant for [Your Store Name]. Your role is to help customers find the right products, answer questions about shipping and returns, and provide excellent service.

Communication style:
- Friendly but professional
- Concise responses (2-3 sentences unless detailed explanation requested)
- Always prioritize searching the knowledge base before suggesting customers contact support

Product recommendations:
- When customers ask about products, suggest 2-3 relevant options from our catalog
- Include key features and price points
- Ask clarifying questions if needed (budget, size, use case)

Limitations:
- You cannot process orders or access customer accounts
- You cannot view images or uploaded files
- For account-specific questions (order tracking, returns processing), direct customers to [your support email or phone]

When mentioning products or pages, format as clickable links: [Product Name](https://yourstore.com/product-url)
Iterate on instructions based on chat transcripts. If customers frequently complain that the chatbot mentions “uploaded files” (impossible in the interface), add: “You are a text-only assistant and cannot view images, read files, or process uploads. Never suggest uploading anything.”
Step 4: Customize Visual Design
Switch to the Style tab to match your Shopify theme’s visual identity. Consistency signals professionalism and builds brand recognition.
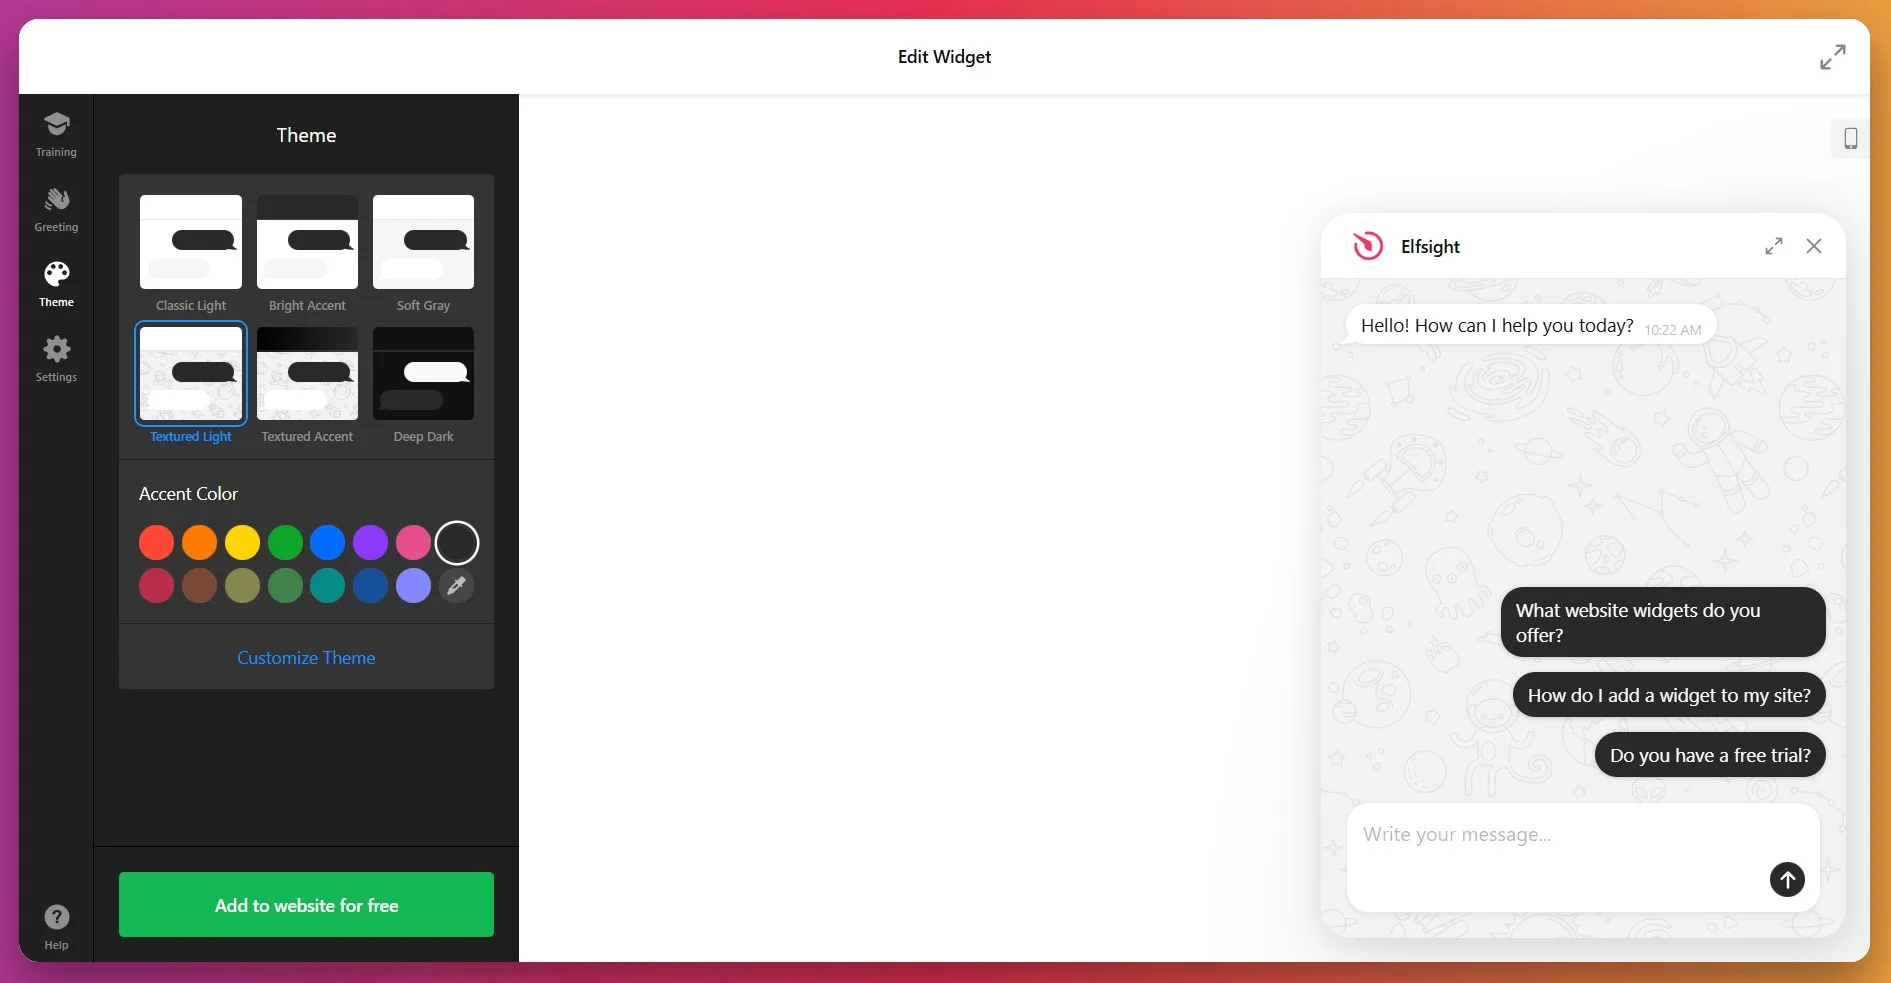
Color Customization & Font:
- Apply your primary brand color to the chat bubble, header, and buttons
- Set message bubble colors (visitor messages vs. bot responses)
- Configure background colors for the chat window
- Select font families that match your Shopify theme
Chat Bubble Icon & Positioning:
- Select the launcher button from the library or upload your own
- Choose size and corner position (bottom-right is standard for e-commerce)
- Set appropriate spacing from page edges
Avatar and Branding:
- Upload a custom avatar image (brand logo or character illustration)
- Set display name (e.g., “Eva” or “Shopping Assistant”)
- Add AI Agent Caption (e.g., “Online now” or “Available 24/7”)
For advanced users, the Custom CSS editor allows pixel-perfect styling control. Target specific elements with CSS selectors to adjust spacing, shadows, animations, or responsive breakpoints.
Step 5: Configure Settings and Preferences
The Settings tab handles interface language, advanced features, and developer options.
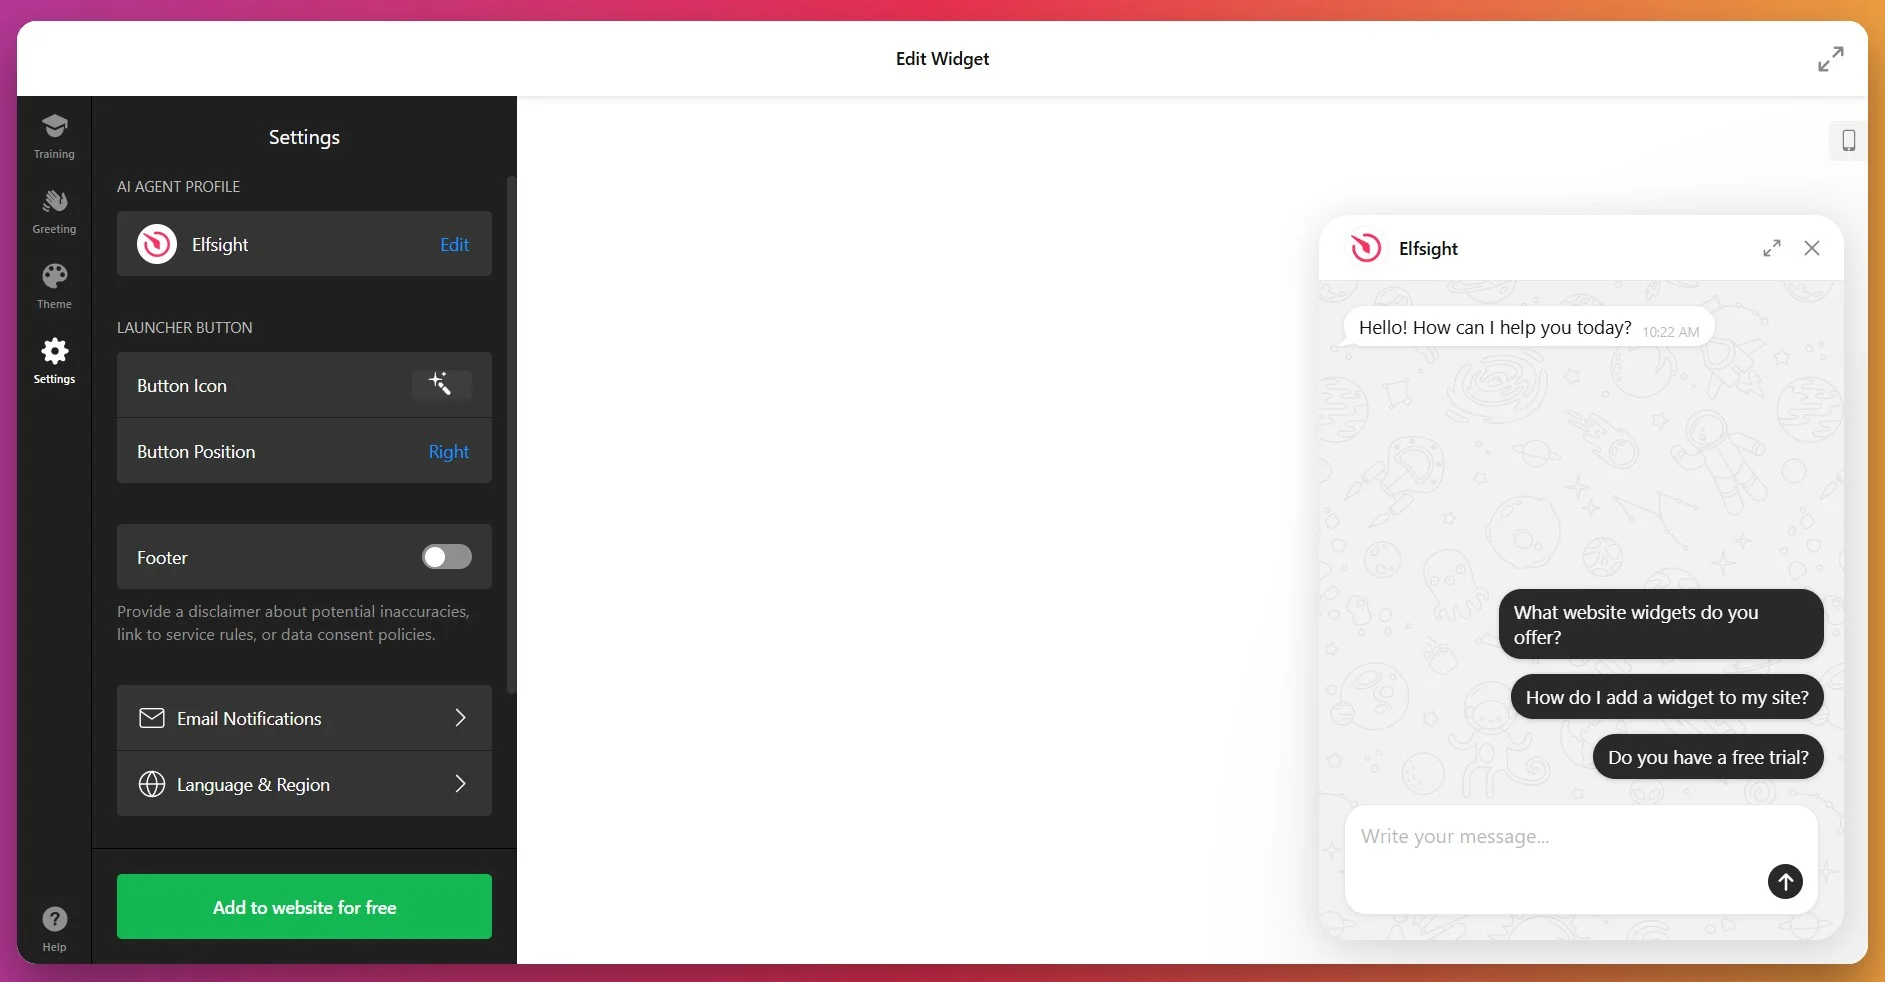
Key Settings:
- Footer toggle – Add a disclaimer about potential inaccuracies or link to your data consent policies, ensuring legal compliance
- Interface Language — Set to your primary customer language (affects widget labels and buttons, not AI responses)
- Email notifications — Automatically send a copy of the chat to the owner’s email
- Custom JavaScript — Add event tracking, conditional display logic, or integrations (advanced users only)
Step 6: Get Your Installation Code
Once your chatbot is fully configured, click “Add to Website” to reveal your unique installation code. This snippet embeds your chatbot into your Shopify store pages. Copy the entire code to your clipboard without modifying it.
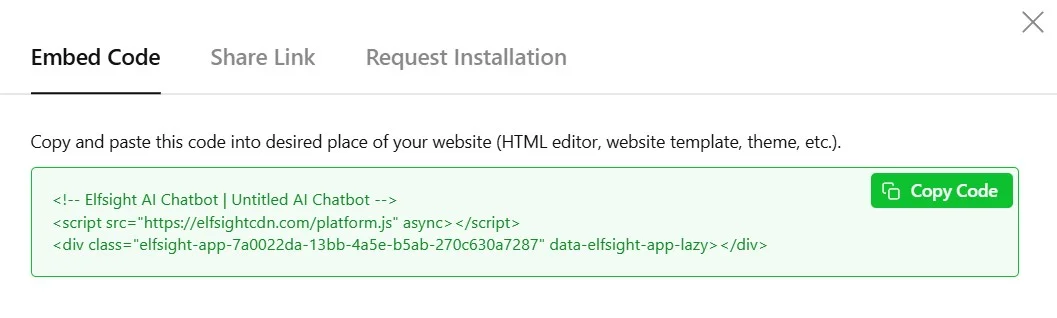
Step 7: Embed Your Chatbot on Shopify
With your installation code ready, choose the embedding method that best serves your store’s needs. Shopify Online Store 2.0 themes support all methods described below.
Method 1: Homepage or Specific Pages (Recommended)
Best for: Adding the chatbot to your homepage, product pages, or specific landing pages where customer questions are most common.
- Log in to your Shopify admin panel and go to Sales Channels → Online Store
- Click Customize to open the visual theme editor
- Use the page dropdown at the top to navigate to your target page (Home, Products, etc.)
- Click Add Section in the left sidebar
- Select Custom Liquid from the section list
- Paste your installation code into the Custom Liquid field
- Optionally adjust section padding in the right panel
- Click Save
Your AI chatbot now appears on that specific page. Repeat this process for multiple pages (common placements: homepage, collections, product pages, contact page).
Method 2: All Pages via Theme Code
Best for: Displaying your chatbot across your entire Shopify store with minimal effort.
- Go to Sales Channels → Online Store → click the … menu → Edit Code
- Under the Layout folder, open
theme.liquid - Scroll to the bottom and paste your installation code immediately before the closing tag
</body> - Click Save
Your chatbot now appears on every page of your Shopify store. This global placement maximizes availability but may not suit all store designs (consider customer experience on checkout pages).
Method 3: Product Pages Only
Best for: Stores where product-specific questions drive most customer inquiries.
- Navigate to Products in your Shopify admin
- Select the target product (or use Bulk Editor for multiple products)
- In the Description section, click the </> icon to open the HTML editor
- Paste your installation code at the desired position (typically at the bottom of the description)
- Click Save
This method embeds the chatbot directly in product descriptions. Works well for complex or technical products requiring explanation. For site-wide product page coverage, use Method 4 instead.
Method 4: Product Page Template
Best for: Adding the chatbot to all product pages without editing each product individually.
- Go to Sales Channels → Online Store → … → Edit Code
- Under Templates, locate and open your product template (often
product.liquidor similar) - Find the appropriate insertion point (typically near the product form or below the description)
- Paste your installation code
- Click Save
🔧 Troubleshooting Quick Check
- Chatbot not appearing: Verify you pasted the complete code without modifications. Clear your browser cache entirely (Ctrl+Shift+Delete on most browsers). Try an incognito/private window.
- Code visible as text: Ensure you used the Custom Liquid or HTML editor, not the visual rich text editor. Shopify’s rich text editor displays code as text rather than executing it.
- Chatbot appears but isn’t working: Check browser console for JavaScript errors (F12 → Console tab). Ensure no conflicting scripts or theme customizations interfere with widget loading.
- Styling issues on mobile: Test responsive behavior by resizing your browser window or using Shopify’s mobile preview. Adjust positioning settings if the chatbot overlaps critical UI elements.
- Chat transcripts not arriving: Verify your email address is correctly set in the Elfsight dashboard under widget settings. Check spam/junk folders.
Alternative Chatbot Solutions for Shopify
While Elfsight offers comprehensive customization and training flexibility, alternative approaches to Shopify AI integration exist. Understanding each method’s strengths and limitations helps you make informed decisions.
Shopify Inbox (Native Solution)
Shopify provides a built-in chat tool called Shopify Inbox that integrates with the Shopify admin panel.
- Install Shopify Inbox: Go to Apps in your Shopify admin → search for “Shopify Inbox” → click Add app
- Configure Chat Widget: Set business hours, automated greetings, and away messages
- Enable Chat on Store: Shopify automatically adds the chat bubble to your storefront
- Respond via Dashboard: Handle customer inquiries through the Shopify admin panel or dedicated iOS/Android apps
Tidio, Gorgias, or Zendesk Chat Apps
Third-party Shopify apps provide chat functionality with varying levels of AI automation.
- Browse Shopify App Store: Navigate to Apps → Visit Shopify App Store → search for your preferred chat provider
- Install the App: Click Add app and authorize permissions
- Configure Settings: Follow the app’s setup wizard to configure chat appearance, automated responses, and integration settings
- Train AI Features (if available): Some apps offer basic AI automation for frequently asked questions
Custom-Coded Chatbot Integration
Developers can build custom chatbot integrations using Shopify’s API and third-party AI services (OpenAI, Dialogflow, etc.).
- Set Up Development Environment: Configure local Shopify development environment with necessary API credentials
- Integrate AI Service: Connect to your chosen AI platform via API (OpenAI, Anthropic Claude, Google Dialogflow)
- Build Chat Interface: Develop custom frontend chat UI using JavaScript frameworks
- Deploy to Shopify: Add custom app to your store and embed chat widget in theme files
- Maintain and Update: Continuously monitor performance, train AI model, fix bugs, and update code as Shopify or AI platforms release changes
Shopify Chatbot Comparison
This comparison helps you evaluate which solution aligns with your store’s needs, budget, and technical capabilities:
| Solution | AI Automation | Setup Complexity | Monthly Cost Range | Best For |
|---|---|---|---|---|
| Elfsight AI Chatbot | Advanced GPT-5 conversational AI | Visual editor, no coding | $0–$80 (volume-based) | Stores wanting true 24/7 automation, brand customization, and multilingual support without technical complexity |
| Shopify Inbox | None — human-only | Quick Shopify admin setup | Free | Very small stores with low message volume and staff always available to respond |
| Tidio/Gorgias/Zendesk | Basic rule-based automation | Moderate — app-specific learning curve | $29–$500+ per month | Mid-size stores with existing support teams needing workflow management tools plus limited automation |
| Custom Development | Fully customizable AI | High — requires developers | $5,000+ setup + API costs + maintenance | Enterprise stores with unique requirements and dedicated technical teams |
The Elfsight solution balances powerful AI capabilities with ease of use, making advanced Shopify AI integration accessible to store owners without technical backgrounds or large support teams.
📝 Best Practices for Your Shopify Chatbot
From analyzing thousands of e-commerce chatbot implementations, certain strategies consistently deliver superior customer satisfaction and conversion results:
- Train on real customer questions from your existing support tickets. Export your most common inquiries from email, Shopify Inbox, or support tools. Add these as Q&A pairs to ensure your chatbot handles actual questions customers ask.
- Curate training data manually rather than relying solely on web scraping. SEO-optimized product descriptions and marketing copy often confuse AI models. Manually written Q&A entries and product summaries consistently outperform auto-scraped content for response accuracy.
- Place strategic limits in your instructions. Explicitly state what your chatbot cannot do: “You cannot process orders, access customer accounts, or track shipments. For these requests, direct customers to [your support contact].” Clear boundaries prevent customer frustration.
- Monitor chat transcripts weekly and iteratively improve. Email transcripts reveal which questions your chatbot answers poorly. Add new Q&A entries for frequent problem areas. Refine instructions when responses drift off-brand or become too verbose.
- Test mobile experience rigorously. Over 70% of Shopify traffic originates from mobile devices. Preview your chatbot on actual phones (iOS and Android) to ensure button sizes, text legibility, and positioning work perfectly on small screens.
- Avoid installing chatbots on checkout and cart pages. During the final purchase moments, any distraction increases abandonment risk. Disable your chatbot on ‘/checkout’ and ‘/cart’ URLs to keep customers focused on completing their transaction. Provide pre-purchase support on product and collection pages instead.
Frequently Asked Questions
Can the chatbot handle multiple languages for international customers?
How do I train the chatbot effectively on my product catalog?
Will adding a chatbot slow down my Shopify store?
How quickly do instruction changes take effect?
Can customers interact with my chatbot on mobile devices?
Can the chatbot process orders or track shipments?
Conclusion
You now have everything you need to successfully implement a Shopify chatbot that drives measurable business results. Whether answering product questions, recommending complementary items, or resolving shipping concerns, a well-configured AI chatbot transforms your Shopify store from a static catalog into an interactive shopping experience that mirrors in-store personalized service.
The competitive advantage compounds over time. As your chatbot accumulates conversation data, you gain insights into customer concerns, product confusion points, and common objections — intelligence that informs product development, marketing messaging, and operational improvements across your entire business.
Start with the Quick Start method above to deploy your chatbot in minutes, then iteratively improve based on chat transcripts and customer feedback. Visit the AI Chatbot widget page for additional templates and configuration options tailored to e-commerce scenarios.
Source cited: Rep AI – The Future of AI in Ecommerce: 40+ Statistics