Out of the box, a Shopify store is a vending machine: products in, payment out, no conversation. It won’t answer doubts, explain the premium, or give customers a reason to come back. That’s where a blog comes in. If you’re figuring out how to add a blog to Shopify, you’ve got two options: Shopify’s built-in blog or a no-code blog you build visually and embed wherever you like.
That second route is what an embeddable Blog widget provides. Instead of working inside your theme, where posts are locked to /blogs/ and styled by Liquid, you design the blog in a visual editor and paste a short code snippet onto any page: a landing page, a product page, the homepage. No theme code, no CMS wrangling. The native blog is still the stronger pick for some goals, so below we walk through both.
- When Shopify’s built-in blog is the right call — and when a widget fits better
- How to build and style a blog without touching theme code
- The full 7-step setup, from template to embed code
- Where each method stands on SEO, design control, and placement
Quick Start: Add a Blog to Your Shopify Store
The widget route skips theme editing entirely — you build the blog in an editor and drop one code snippet into Shopify.
- Open the Blog widget editor and pick a template.
- Add your posts, then set up categories and author(s).
- Click “Add to website for free” to get your embed code.
- Paste it into a Custom Liquid section and save.
Build your custom Shopify blog widget in the live editor below ↓
How to Add a Blog to Shopify: Your Options
There are three realistic ways to get blog content onto a Shopify store, and they’re genuinely different tools — not better-or-worse versions of the same thing. Here’s how they line up:
| Method | Setup | Design control | SEO | Placement | Cost |
|---|---|---|---|---|---|
| Shopify native blog | No code, built in | Tied to your theme | Server-rendered, full per-post meta & canonical control | Locked to /blogs/ | Included with Shopify |
| Elfsight Blog widget | No code, one snippet | Templates + visual styling, no Liquid | Indexable via Google’s JS rendering; no meta-tag control | Any page that accepts HTML | Free plan / paid tiers |
| Shopify App Store blog app | App install | Varies by app | Varies by app | Usually theme-integrated | Free + paid apps |
The native blog is the strongest tool if search traffic is your main goal, because it’s server-rendered with real per-post SEO settings. The widget wins on design freedom and the ability to embed a blog anywhere without theme code. App Store apps sit in between and vary widely, which is why there isn’t a single “best blog app for Shopify” – it depends on what you’re optimizing for.
Adding a Blog to Shopify: Native Blog or Widget?
Before you build anything, it’s worth being clear about why you’re adding a blog at all – because that single question decides which tool you should reach for.
Which businesses actually benefit
Blogging earns its keep for stores that have something to explain or a reason to keep customers coming back: skincare brands answering “which product for which skin type,” outdoor gear shops writing buying guides, course creators and service businesses building authority.
If you’re in that group, the value isn’t vanity — it’s giving buyers the context they need before they purchase, and giving Google something to index for the questions your customers actually type.
When native blog is the better choice
- Organic search acquisition: your main goal is ranking for buyer-intent keywords and pulling new visitors in.
- Metadata control: you want each post to have its own editable meta title, description, and canonical URL.
- Theme-native look: you’re fine with posts living under /blogs/ and matching your theme by default
When the Blog widget excels
- Design freedom: you want a blog that looks distinct from your theme without editing Liquid.
- Placement flexibility: you need posts elsewhere— on a landing page, a product page, or an About section.
- Audience-first content: you’re publishing updates, changelogs, or how-tos for existing customers (middle- and bottom-of-funnel) rather than chasing cold search traffic.
Step-by-Step: Setting Up Your Blog Widget for Shopify
If you’ve landed on the widget, here’s the full build — seven steps inside the editor, with Shopify only entering at the final one, so you can get the blog looking right before you ever touch your theme.
Step 1: Pick a template for your business type
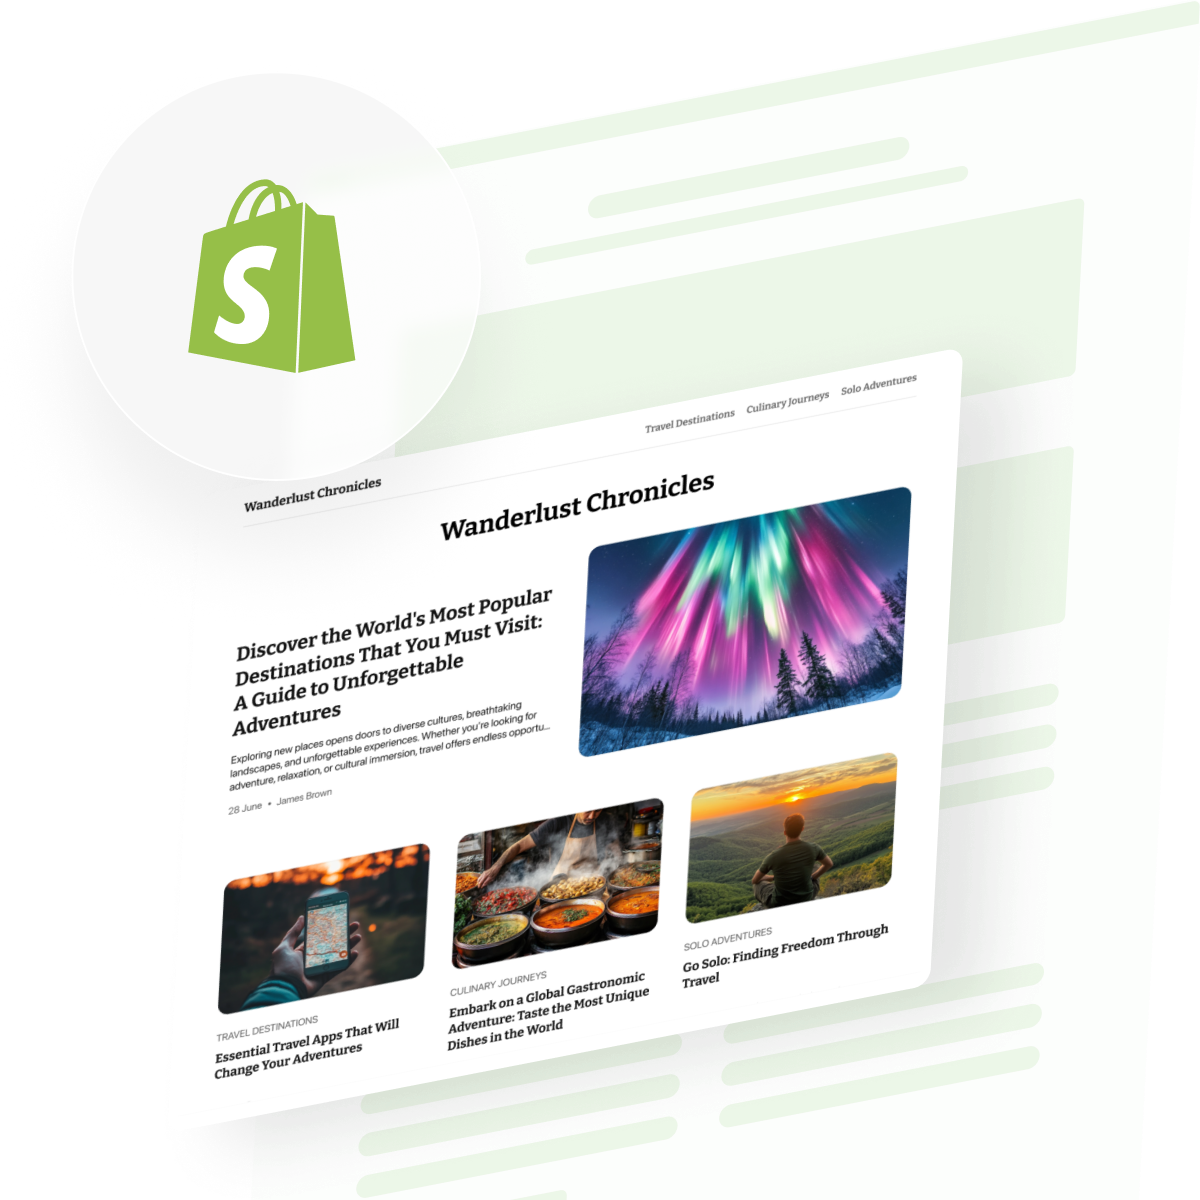
The editor opens on a diverse template gallery. There are 20+ industry presets — Business, Travel, Food, Health & Wellness, Tech, Fashion, Fitness, and more. Pick the one closest to your store’s niche; it sets a starting layout and styling you’ll customize next, not a permanent choice.
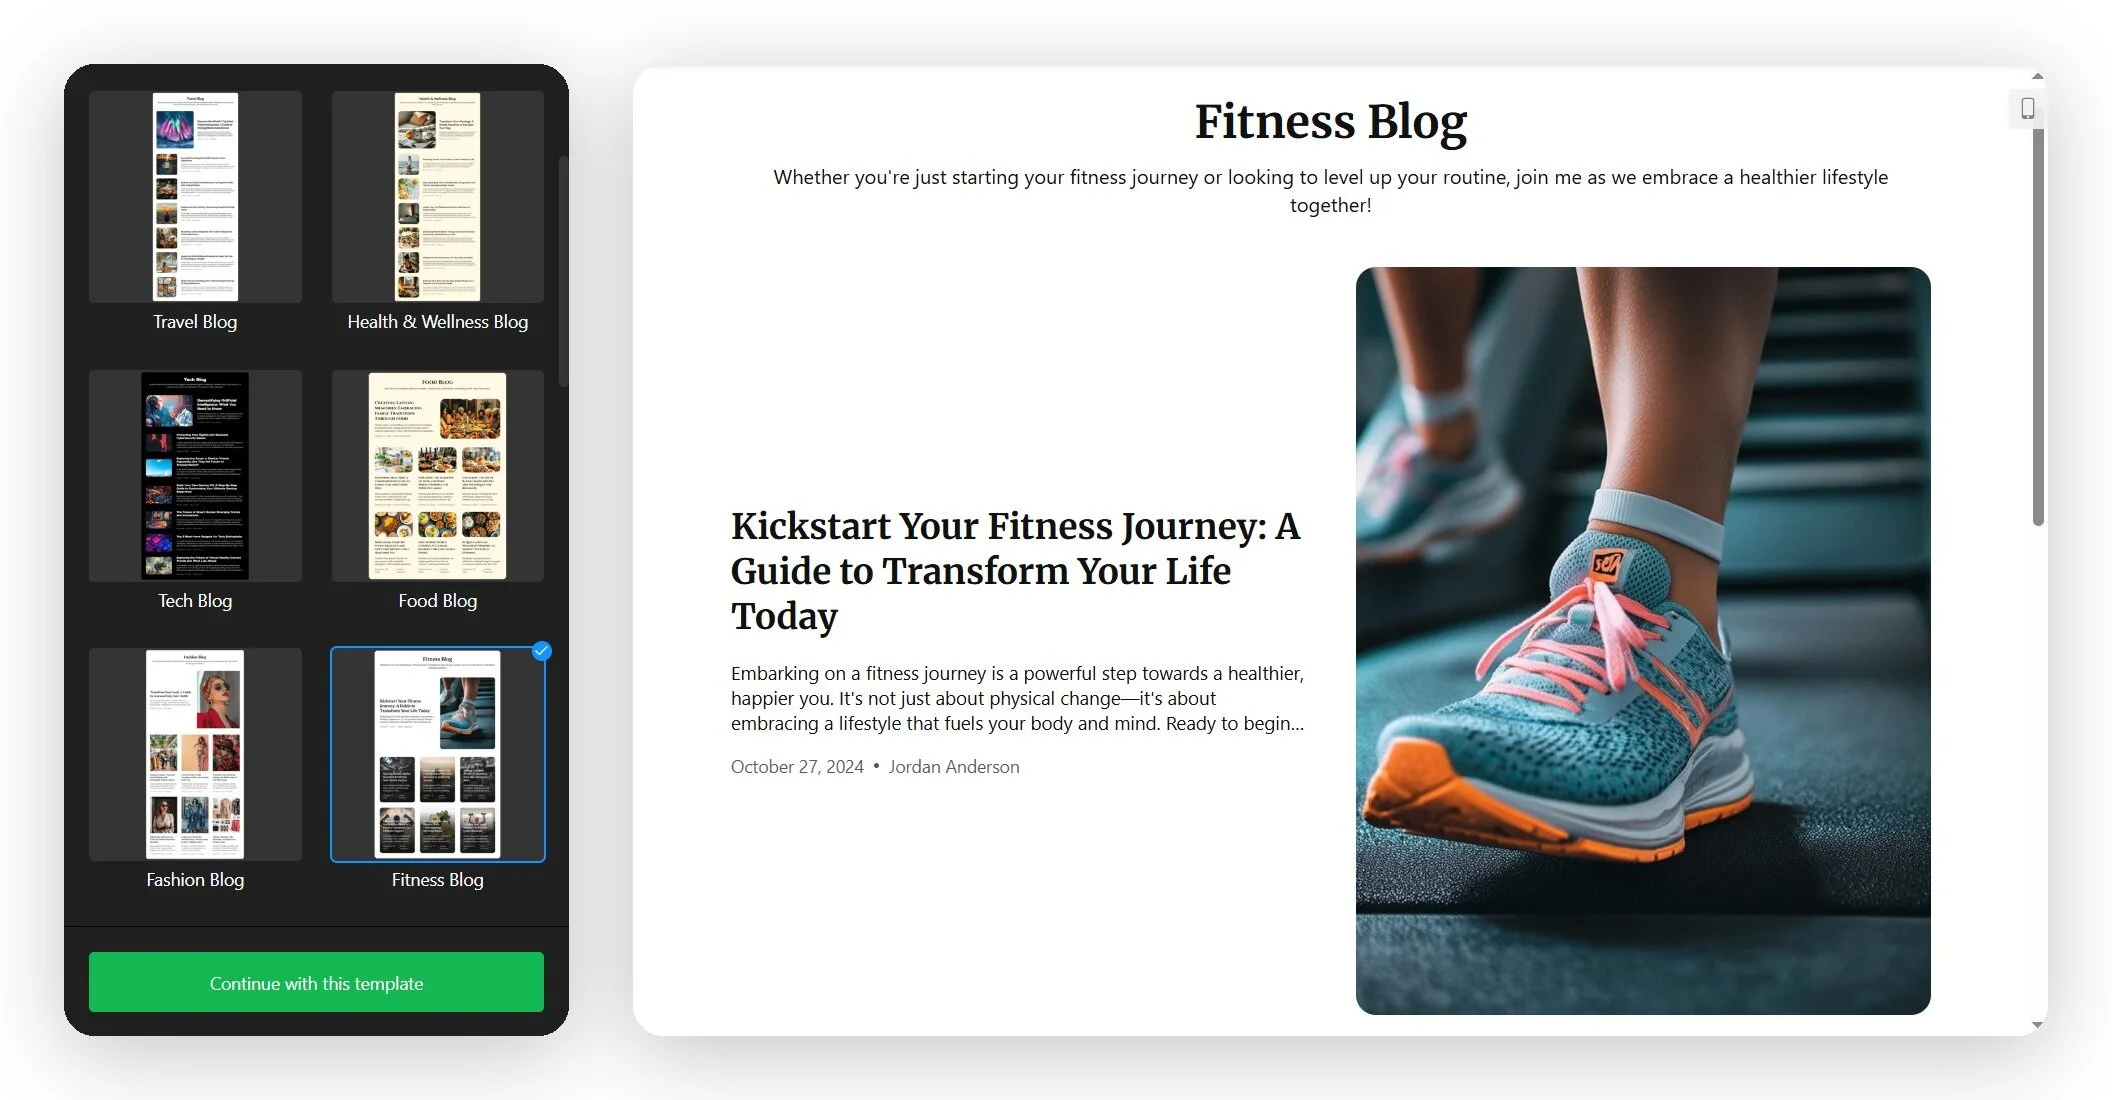
Don’t overthink this one. The template only seeds the design — every color, font, and layout setting is editable later, so the closest match is fine even if it’s not perfect. Click “Continue with this template” to move on.
Step 2: Add your posts
Open the Posts tab and click Add Post to fill your blog with content. Here’s how to add blog posts to Shopify within the widget:
- Create Manually — write in the block editor (more on that below).
- Generate with AI — the AI Writer drafts a structured, illustrated post from a topic, optional outline, tone, and length.
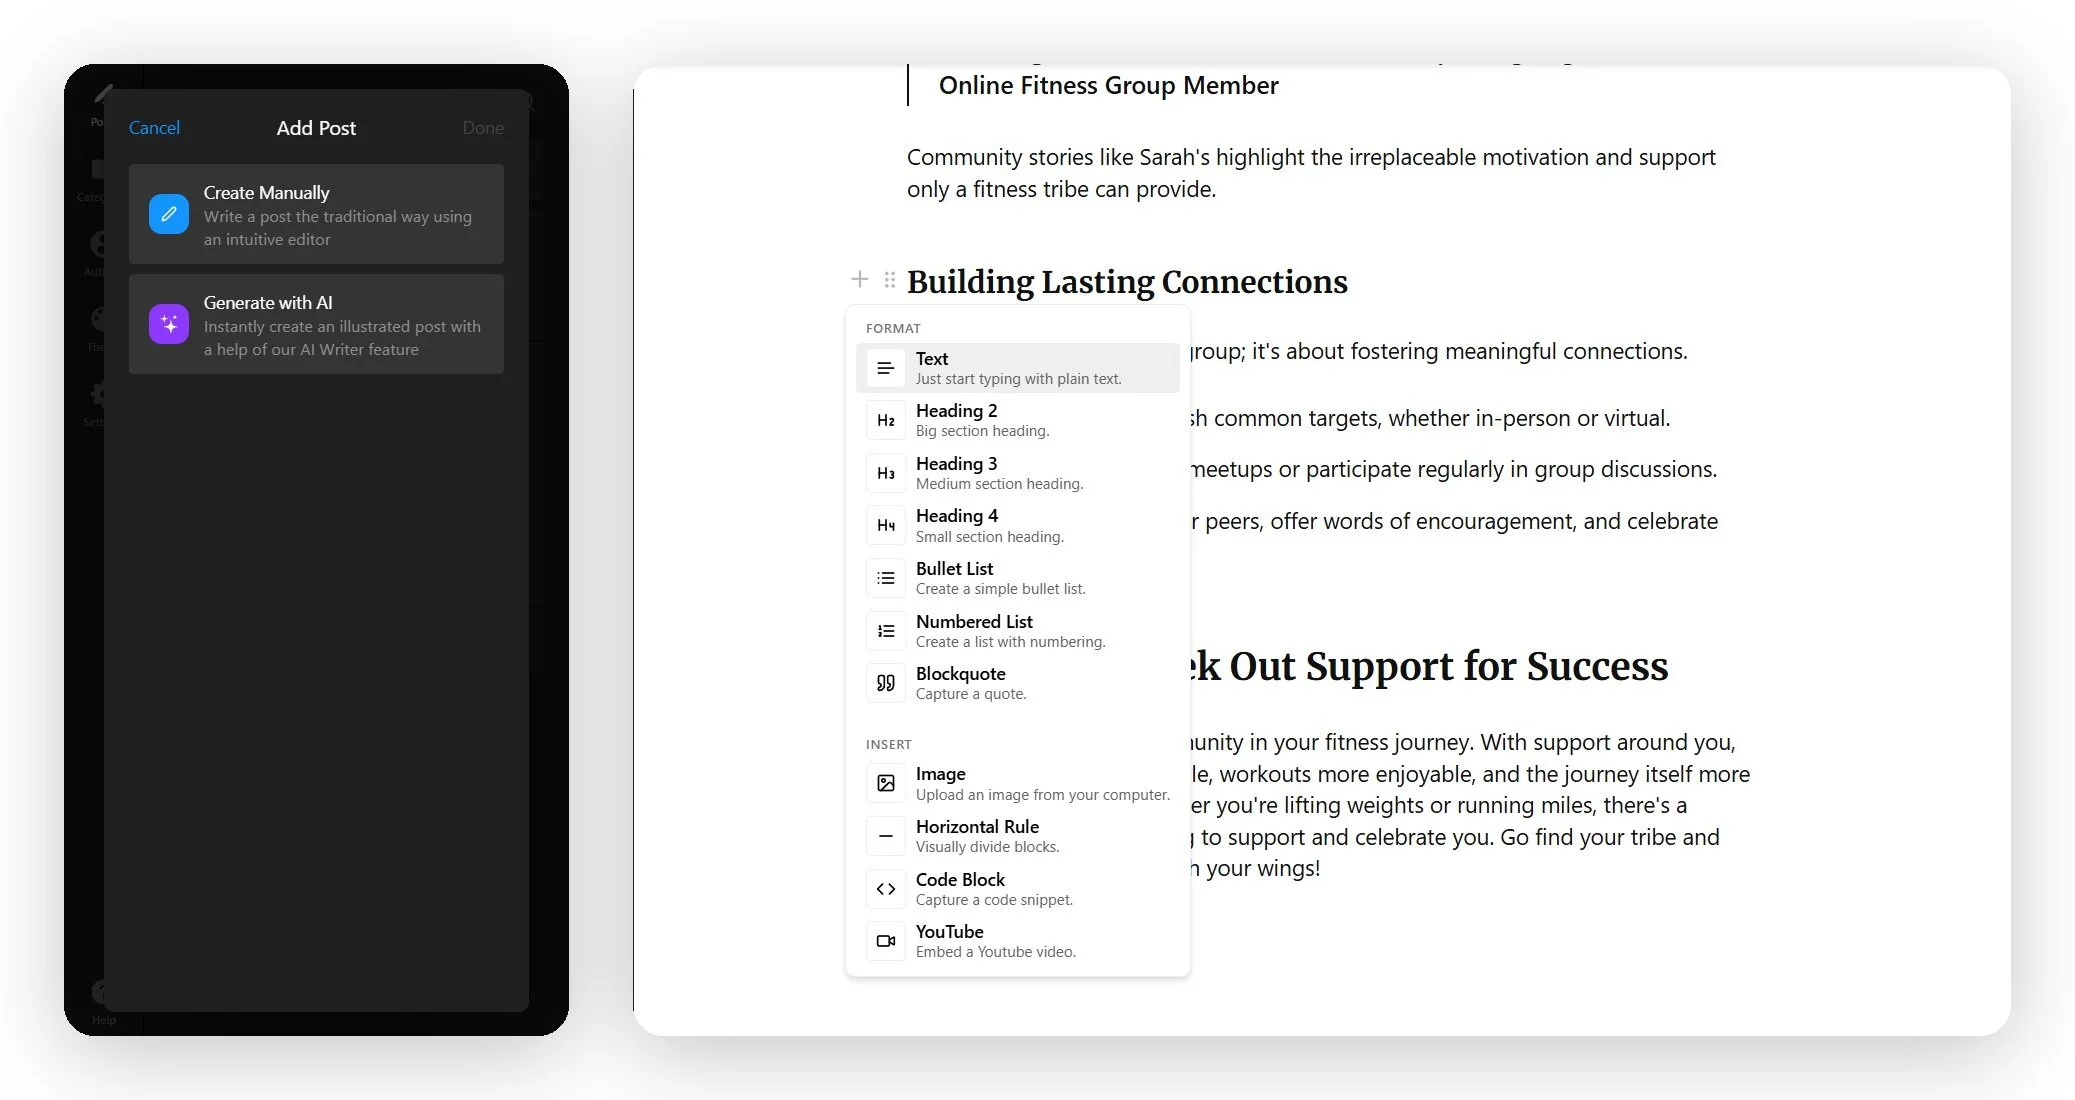
The editor itself is Notion-style: click + to open the block menu, which has 11 block types across Format (headings, lists, quotes) and Insert (images, videos, code, and dividers).
Notes on the editor
- Images are upload-only (no pasting in an image URL)
- Video works by embedding a YouTube link (you can’t upload a video file)
- Body headings start at H2 since the post title is the top-level heading
- Each post also has a featured image, a short intro field, and an editable URL slug
- You can set the publish date in the future to schedule posts
On the Pro plan, you can generate a structured first draft with AI, then rewrite it in your own voice before publishing. The output is fully editable — and for e-commerce, your product knowledge is what makes a post actually useful to a buyer.
Step 3: Organize posts with categories
Next, head to the Categories tab and click Add Category. Each category takes a name, an optional rich-text description, and a URL slug. They show up as filter tabs in your blog’s header, so readers can jump straight to “Guides” or “Product news” instead of scrolling through everything.
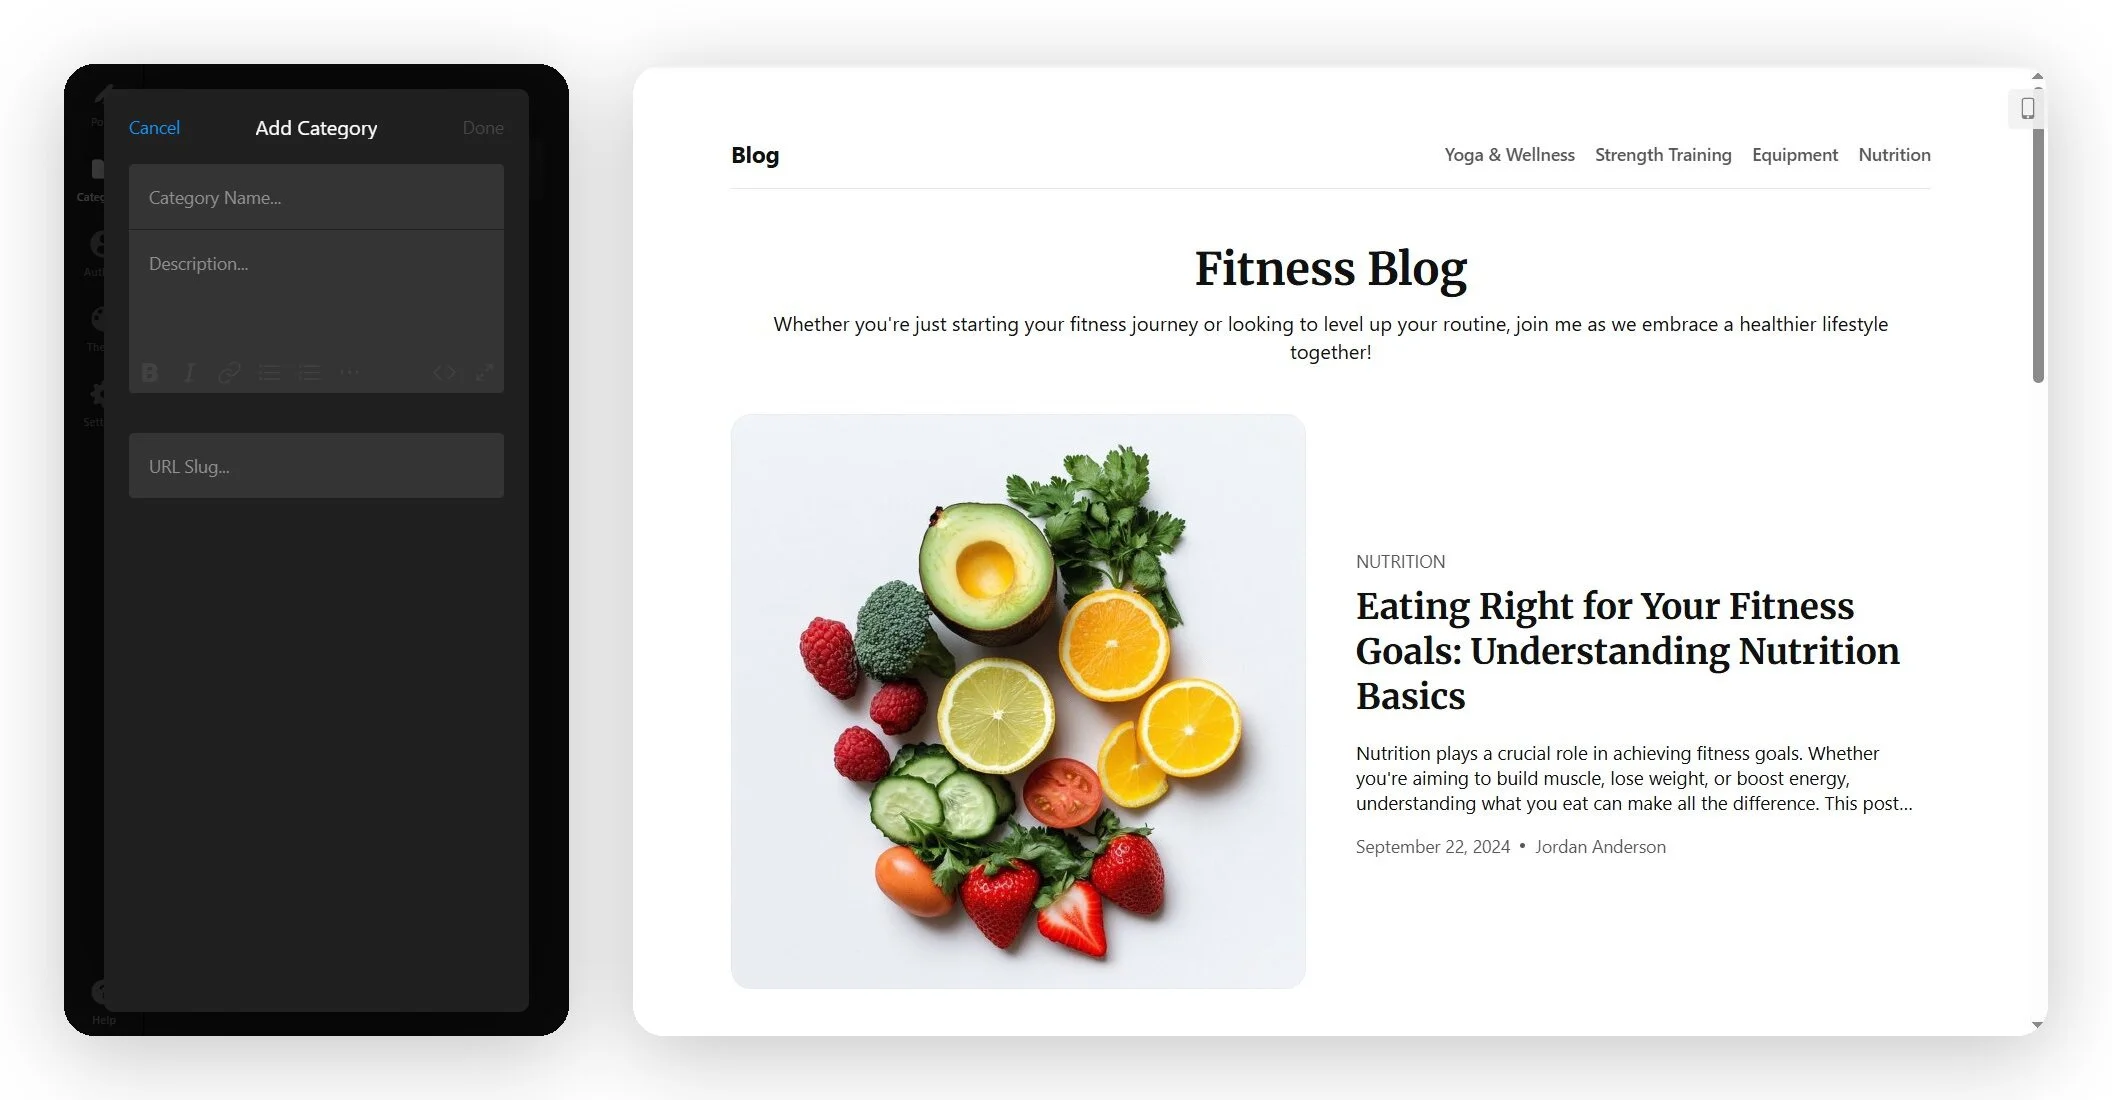
- Keep the list short — three to five categories is plenty for most stores; more just clutters the header.
- Name them by reader intent (“How-tos,” “Buying guides”) rather than internal labels.
- You can also attach tags per post for finer filtering, separate from categories.
Step 4: Add your blog authors
In the Authors tab, click Add Author to add a name and photo. Authors are unlimited on every plan, so you can credit a whole team or run a single house byline. When you create or edit a post, you pick the author from this list.
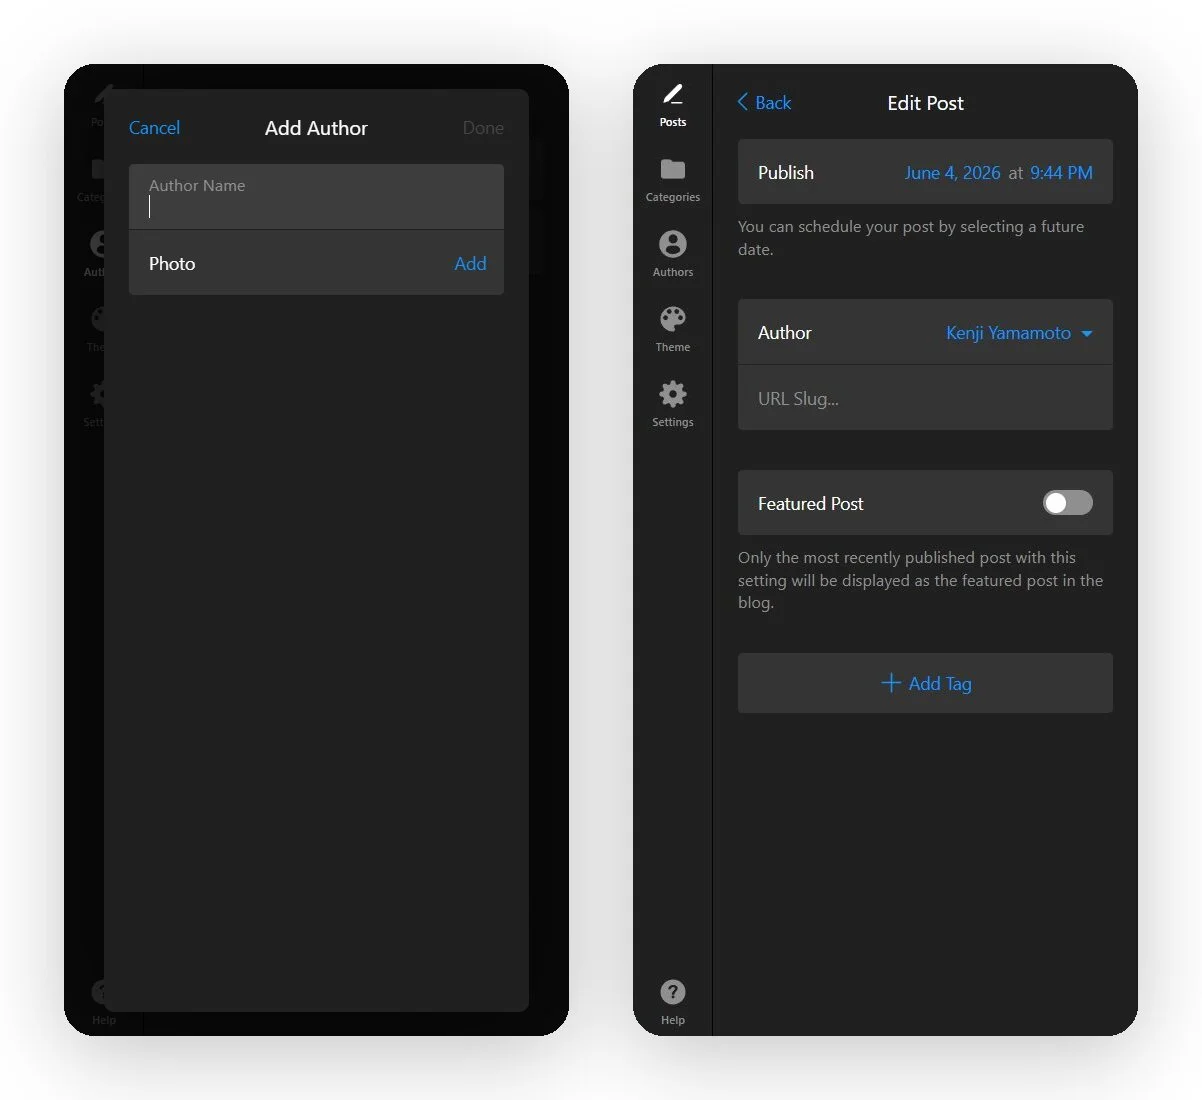
For a store blog, author bylines do quiet work: a real name and face on a buying guide reads as more trustworthy than an anonymous post, especially for advice-heavy niches like health, finance, or beauty.
Step 5: Customize the theme
The Theme tab is where the blog stops looking like a template and starts looking like your store. Three card styles sit at the top: a multi-image grid, a mixed grid with a side-thumbnail list, and a text-forward list — and below them are the controls that do the heavy lifting:
- Image Aspect Ratio — sets a consistent crop ratio (e.g., 1:1) so cards line up evenly.
- Post Corner Radius — square, rounded, or more rounded card corners.
- Post Elements — toggle the post intro, author name, publication date, and categories on or off.
- Heading Font and Text Font — set globally from the built-in font library.
- Background and Text Color — match your store’s palette with the color pickers.
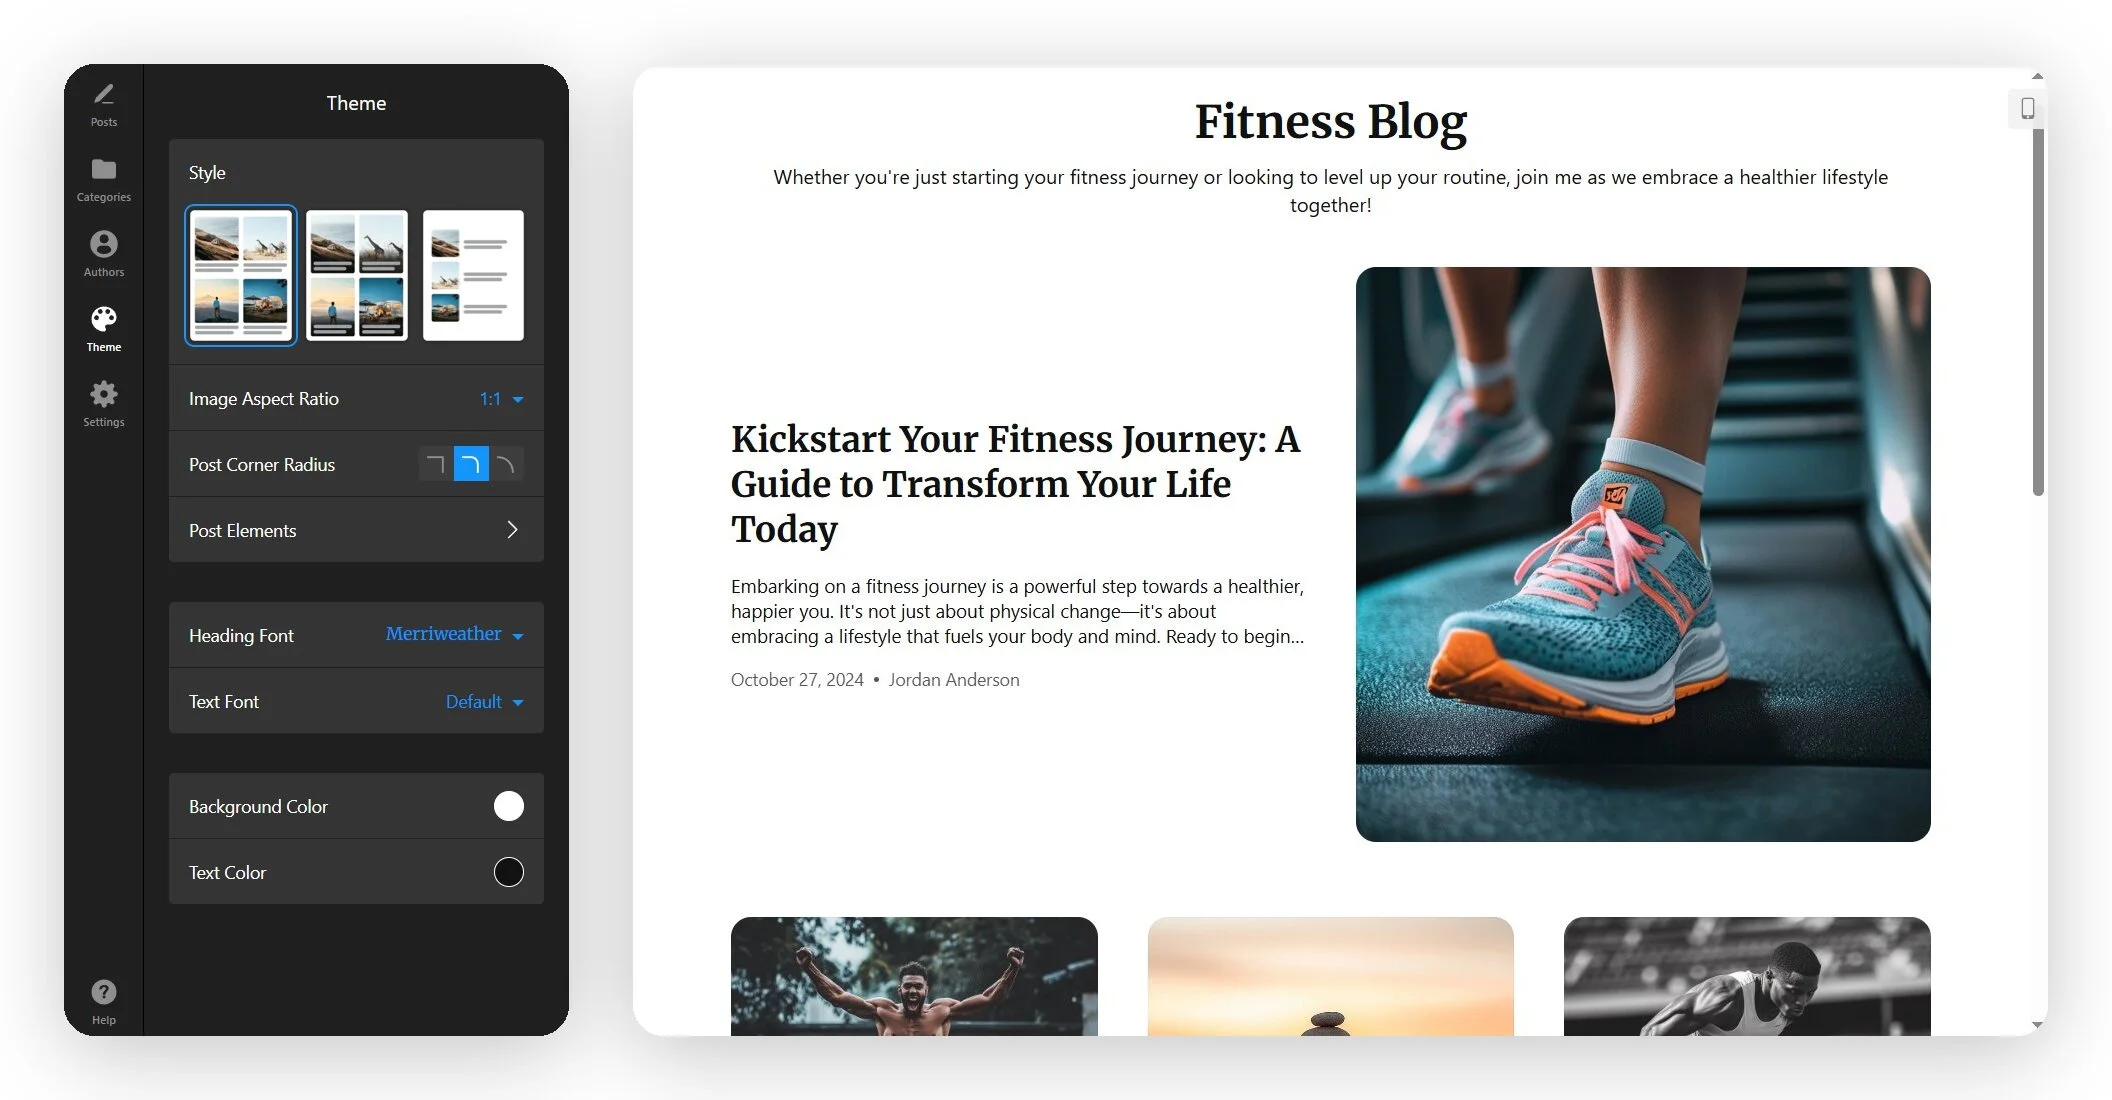
This is the step that takes the longest, and it’s worth it — getting the card style and aspect ratio right now saves you re-cropping later, since the widget can’t crop images after upload. Fonts are set for the whole blog at once rather than per element.
Step 6: Configure your settings
Open Settings to handle how the blog behaves. Here you decide:
- Your Blog’s name for easy navigation
- Homepage title visibility
- Description of your blog content
- Post view – whether articles display on page or in a popup
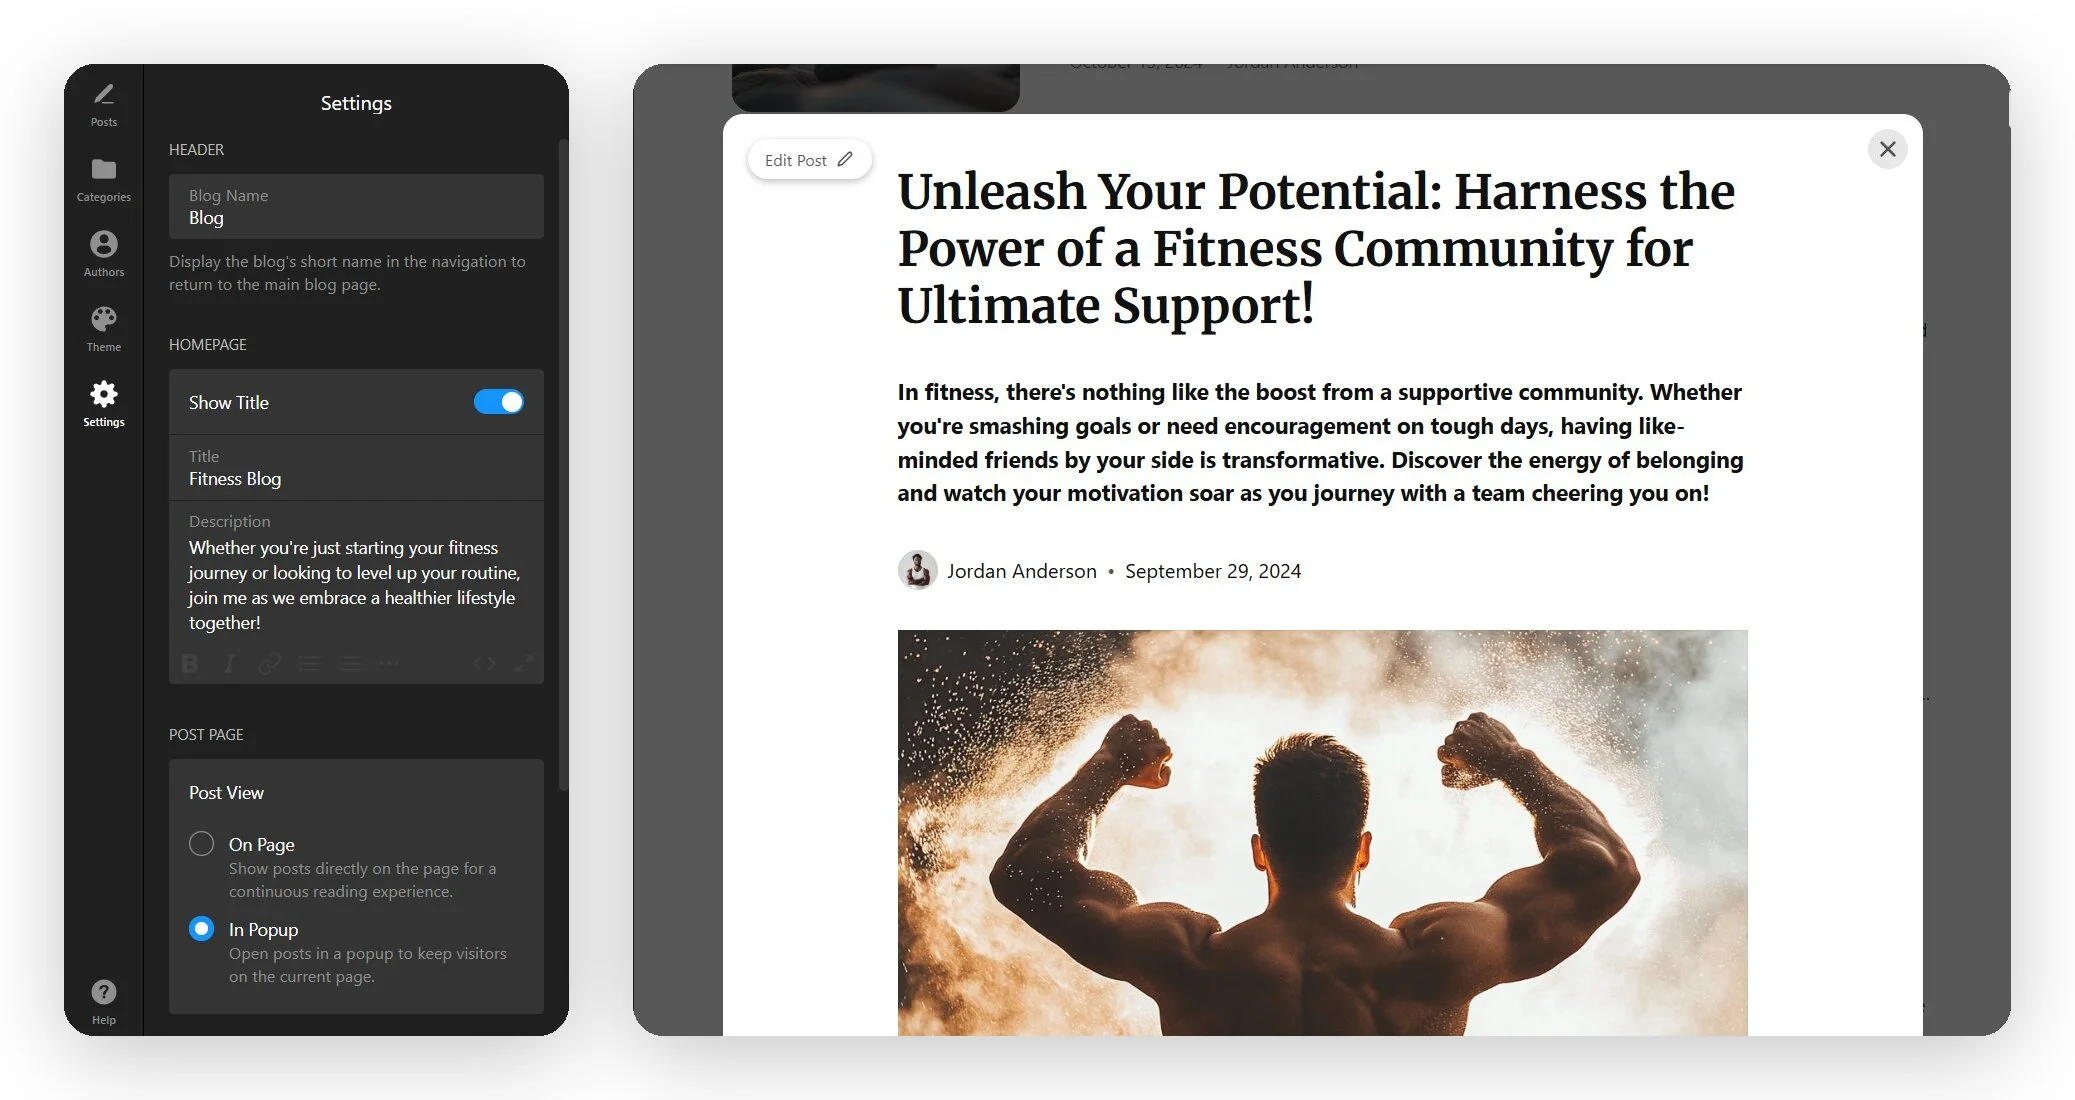
The inline (on-page) option ensures a continuous reading flow, which is best for a dedicated blog page. In contrast, popups keep visitors on the current page – a safer choice for homepage or product pages.
This tab also handles the interface language (with an Edit Texts option, localized for 70 countries), and the Custom CSS and Custom JS editors for anything the visual controls don’t cover.
Step 7: Copy the embed code and add it to Shopify
When the blog looks right, click Add to website for free to generate your installation code. Now switch to Shopify — for current Online Store 2.0 themes, the cleanest method is a Custom Liquid section:
- In your Shopify admin, go to Online Store and click Customize to open the theme editor.
- Use the page dropdown at the top to navigate to the page where you want the blog.
- Click Add section → choose Custom Liquid.
- Paste your Elfsight installation code into the Custom Liquid field, then click Save.
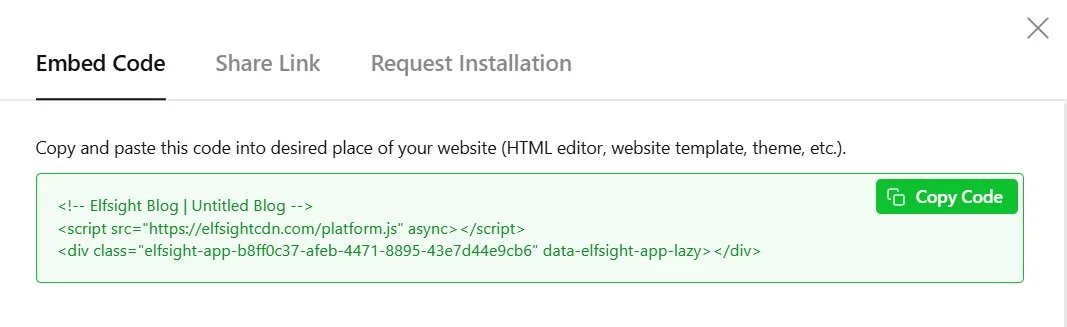
The same code works on any platform that accepts custom HTML — you can add this blog to WordPress, Wix, Squarespace, Webflow, and other CMS platforms the same way, with only the paste location changing. Editor changes sync with the live blog automatically, so you don’t have to re-embed every time you publish.
Troubleshooting quick check
- No “Custom Liquid” section in the editor: some themes don’t include it by default — add it through the theme code editor, or use the product-description HTML method instead.
- Blog only appears after a page refresh: themes with AJAX navigation may need the platform script placed in the
<head>— check Elfsight’s SPA troubleshooting guide. - Featured image looks blurry: it stretches to full width and up to 80% of screen height, so a small image will pixelate — re-upload at 1920×1080.
- Blog looks cramped on mobile: confirm Post View and card style, and let the responsive layout handle widths rather than forcing fixed sizes in Custom CSS.
Alternative Steps to Add a Blog to Shopify
If the widget isn’t the right fit, two other routes are worth knowing — starting with the one Shopify gives you out of the box.
Option 1: Shopify’s built-in blog
This is the official, server-rendered option, and it’s the right call when search ranking is the priority.
- From your Shopify admin, go to Content → Blog posts.
- Click Manage blogs to create a blog (your store starts with a default one called “News”), or click Create blog post to add a blog post in Shopify.
- Add your title, content, featured image, and (optionally) tags and an excerpt.
- Open the Search engine listing section to set the post’s meta title, description, and URL handle.
- Set visibility to Visible (or schedule it) and save.
/blogs/. Changing the look or moving the blog elsewhere means editing theme code — the trade-off for its stronger built-in SEO.Option 2: Blog app from the Shopify App Store
If you want features beyond the native blog without coding, a dedicated blogging app is the third route.
- In your Shopify admin, open the App Store and search for a blogging app.
- Compare options on rendering (server vs client-side), SEO controls, design flexibility, and price.
- Install the app and grant the requested permissions.
- Configure it inside its own dashboard, then place its block or embed on your store.
Optimization Tips for Your Shopify Blog
Once the blog is live, a handful of settings make a real difference to how it reads and performs — these go beyond the obvious “match your brand colors” advice.
- Feed the featured image the right size. It stretches to full width and up to 80% of screen height, so upload at 1920×1080. Small images blur badly when scaled up, and you can’t fix the crop afterward.
- Schedule a publishing cadence. Write in batches, then use the per-post publish date to drip posts out over weeks — a steady rhythm beats five posts in a day and then silence.
- Pin a hero post with the Featured Post toggle. Only the most recently published post with the toggle on becomes the featured one, so re-toggle when you want a different post up top.
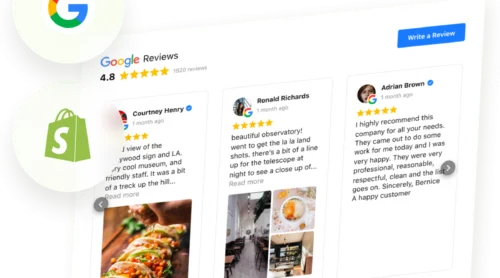
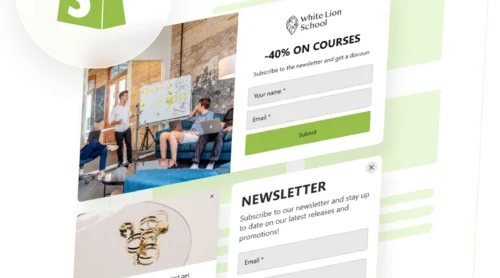
- Route blog readers toward action. Pair posts with a subscription form to capture emails, a newsletter popup, or a countdown timer that nudges content traffic toward product pages.
Frequently Asked Questions
Can I add a blog to my Shopify store without a separate app?
Does the embedded blog work on mobile?
How do I add a blog post on Shopify using the widget?
Will an embedded blog rank in Google search?
What's the best blog app for Shopify?
Conclusion
Adding a blog to Shopify comes down to one decision, not a tool hunt: Shopify’s built-in blog is the stronger choice for search acquisition thanks to server rendering and full per-post meta control, while an embeddable Blog widget gives you template-based design and the freedom to place posts anywhere on your store without touching Liquid.
If design control and no-code speed are what you’re after, build your blog in the Blog widget editor, style it to match your store, and paste it into a Custom Liquid section. You can have a live blog on the page of your choosing in a single sitting — no theme edits required.