An HTML event calendar generator is a tool that helps you create and export ready-to-use calendar code for your website. Whether you’re organizing events, managing workshops, or sharing availability, it offers a structured and visually clear way to present dynamic schedules online.
If you’re looking for a way to display events in a clean, customizable format without building everything from scratch, this is exactly what you need. It’s fast, efficient, and brings professional-looking results even if you’re not a developer.
- Keep your audience informed in real time. Show upcoming events, launches, or deadlines in a format that’s easy to scan and always up to date.
- Enhance user experience with visual clarity. Present a structured event layout that helps users quickly understand dates and details.
- Save time with reusable, exportable code. Once you configure your interactive calendar, you can easily embed it anywhere without repeating the setup process.
- Match your website’s style effortlessly. Customize colors, layout, and event details to maintain design consistency across your pages.
- Scale with ease as your event needs grow. Whether you’re adding weekly updates or managing large event calendars, this method adapts smoothly.
In the next section, you’ll see just how quickly you can generate a fully functional online HTML calendar for your website — no complicated steps involved.
Build an Event Calendar in Seconds
Now that you understand the value of having a calendar widget on your website, it’s time to see how easy it is to create one. Elfsight’s drag-and-drop interface makes the process fast and intuitive — even if it’s your first time working with embedded code.
- Open the Elfsight editor and choose a template that fits your goals.
- Import your events and set up display options like format, spacing, and date style.
- Customize colors, fonts, and visuals to match your website’s design.
- Click “Add to website for free”, copy the code, and embed it into your website’s HTML.
It takes less than a minute to design a fully functional calendar that looks great on all devices. No need for third-party scripts or complex styling — just set it up once and keep it running smoothly.
Build your Event Calendar now – it only takes a minute!
Top Features of Elfsight’s Calendar Generator
After seeing how easy it is to create your widget, let’s take a closer look at the functionality that makes Elfsight’s web calendar generator a powerful and flexible solution for any type of event-based content.
Here are the key features that make this calendar widget worth adding to your website:
- Multiple event display layouts. Choose from month view, list format, daily agenda, or card-based layout to present your events the way your visitors expect.
- Custom recurring events. Easily create repeating events like weekly classes, monthly meetings, or seasonal sales without re-entering data each time.
- Event filtering and categories. Organize your calendar with categories and let users filter events by type, location, or topic for faster navigation.
- Event badges and labels. Highlight key information like “Free”, “Online”, or “Limited” with color-coded tags and callouts to drive engagement.
- Seamless mobile experience. With a fully mobile-friendly interface, your calendar remains readable and functional across all screen sizes.
- Interactive pop-ups for details. Let users click on an event to view more info without leaving the page, keeping the browsing flow uninterrupted.
- Timezone and language support. Display times in the visitor’s local timezone and localize calendar content with custom language settings.
Together, these features turn a basic event panel into a robust, user-friendly solution. Next, we’ll walk you through how to set it up and embed it into your website in just a few steps.
How to Set Up Your Event Calendar
Once you’ve explored the features of the widget, it’s time to configure your own calendar display. With Elfsight’s intuitive editor, you can easily customize the layout, design, and event behavior to fit the needs of your audience. Follow these steps to build and install your Event Calendar widget using the HTML calendar generator.
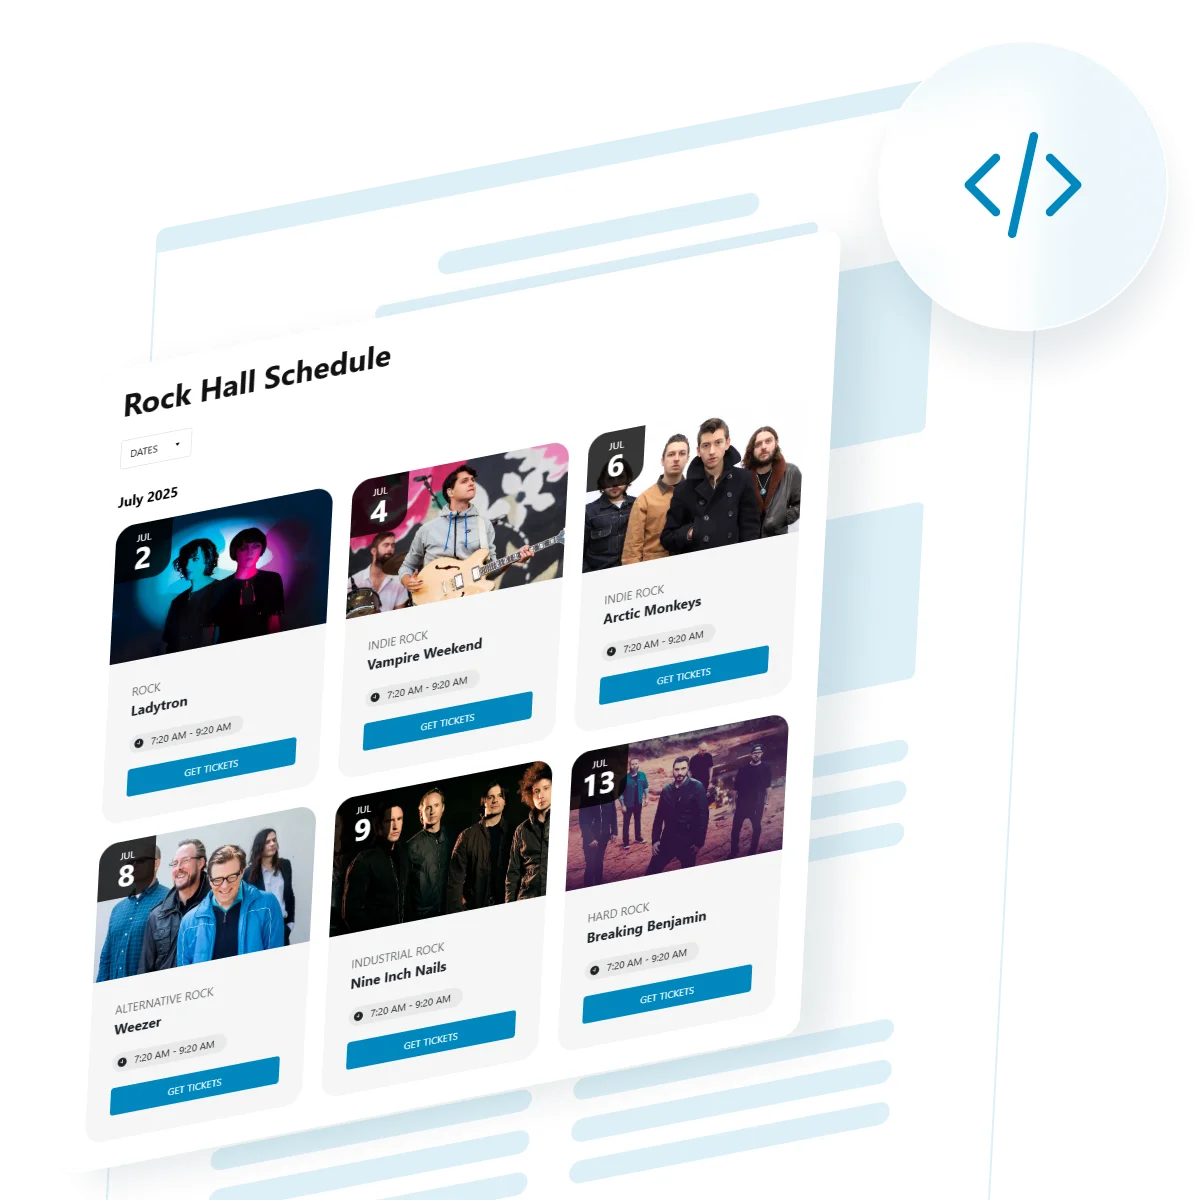
- Choose a Template. Start by opening the Elfsight Event Calendar widget editor. Browse the available templates, pick one and click “Continue with this template” to proceed.

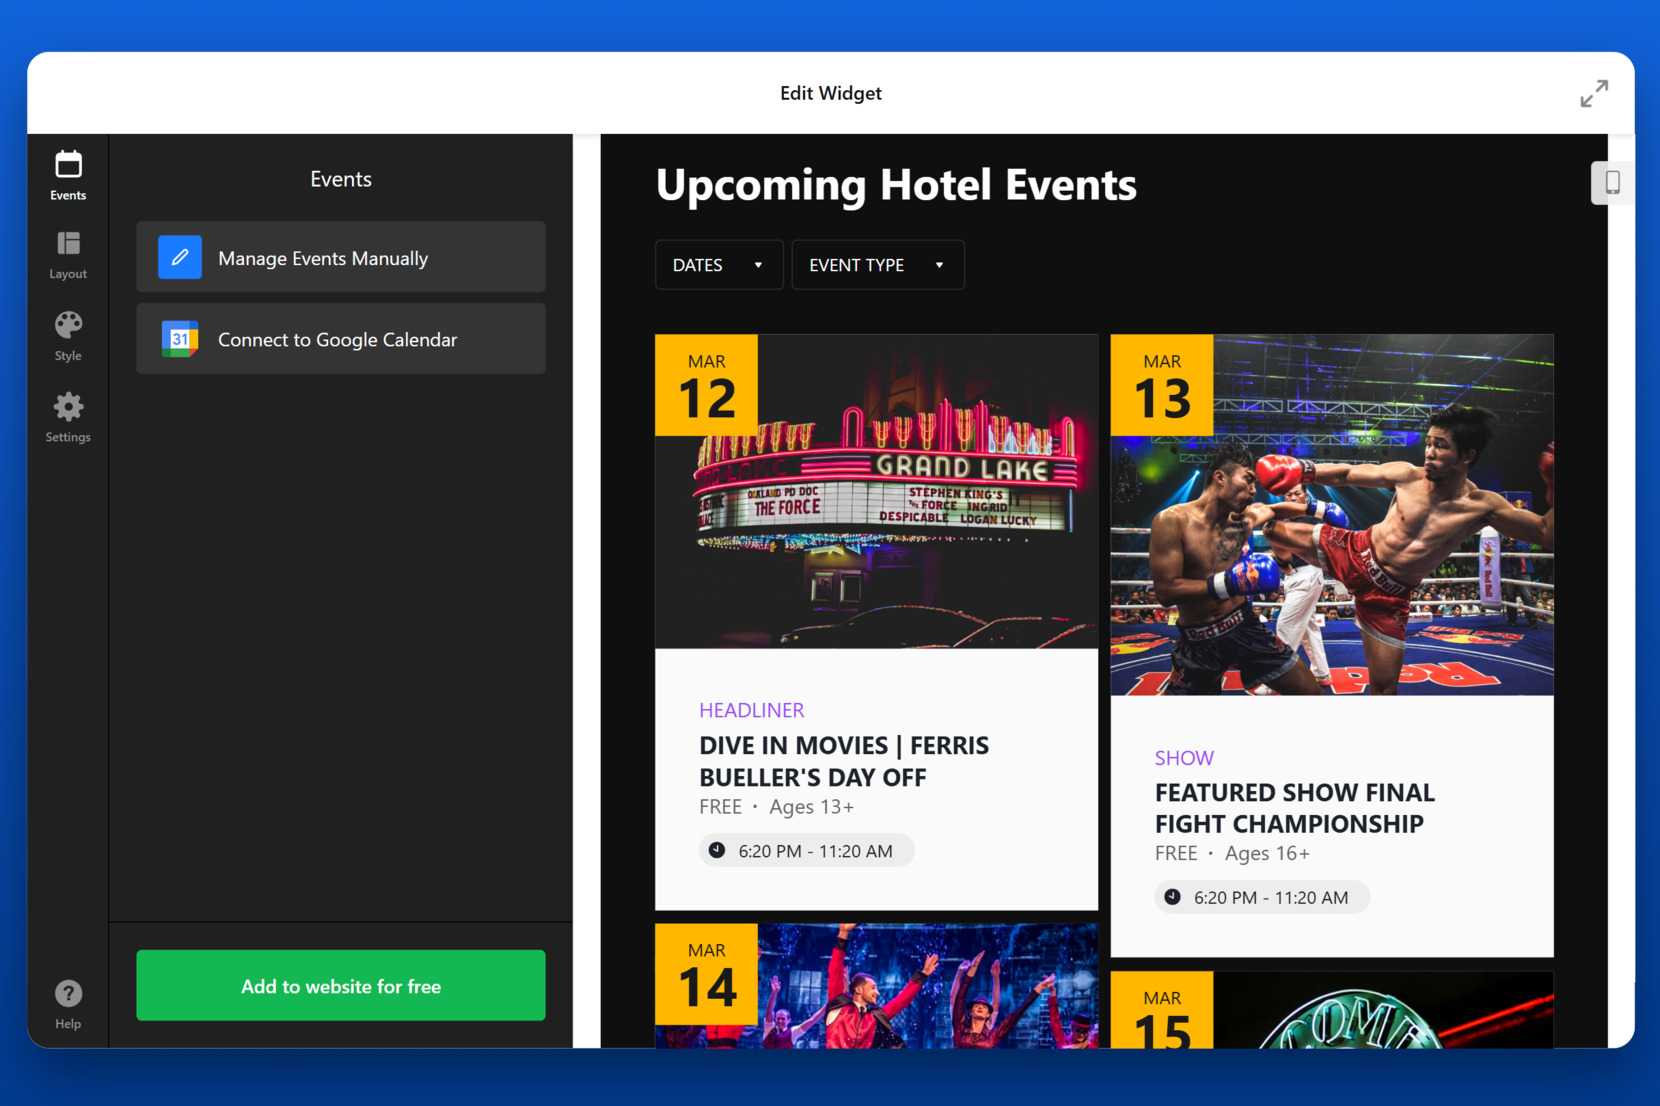
- Manage Your Events. In the “Events” tab, click “Manage Events Manually” or connect your widget to Google Calendar to sync your existing events automatically. This step determines how your data will be sourced and updated.

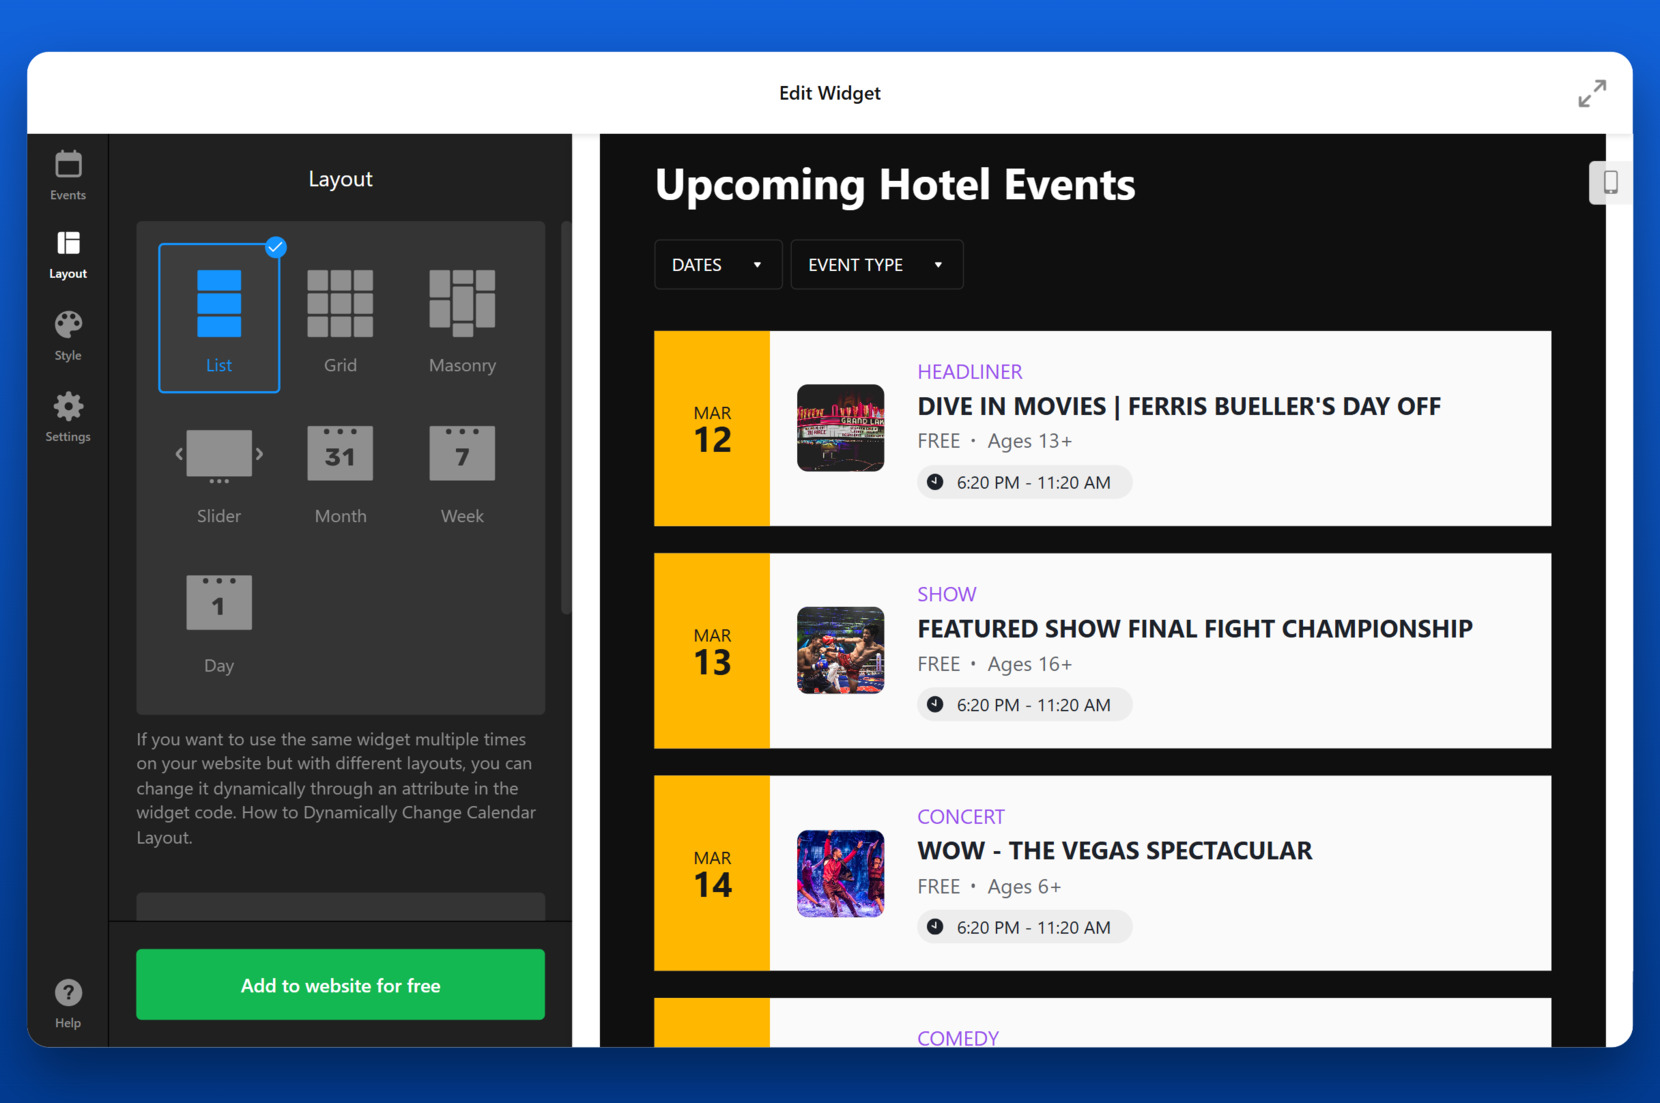
- Adjust the Layout. Go to the “Layout” section and pick a display format such as List, Grid, Month, Week, or Masonry. Each option changes how the event blocks appear across your pages and devices.
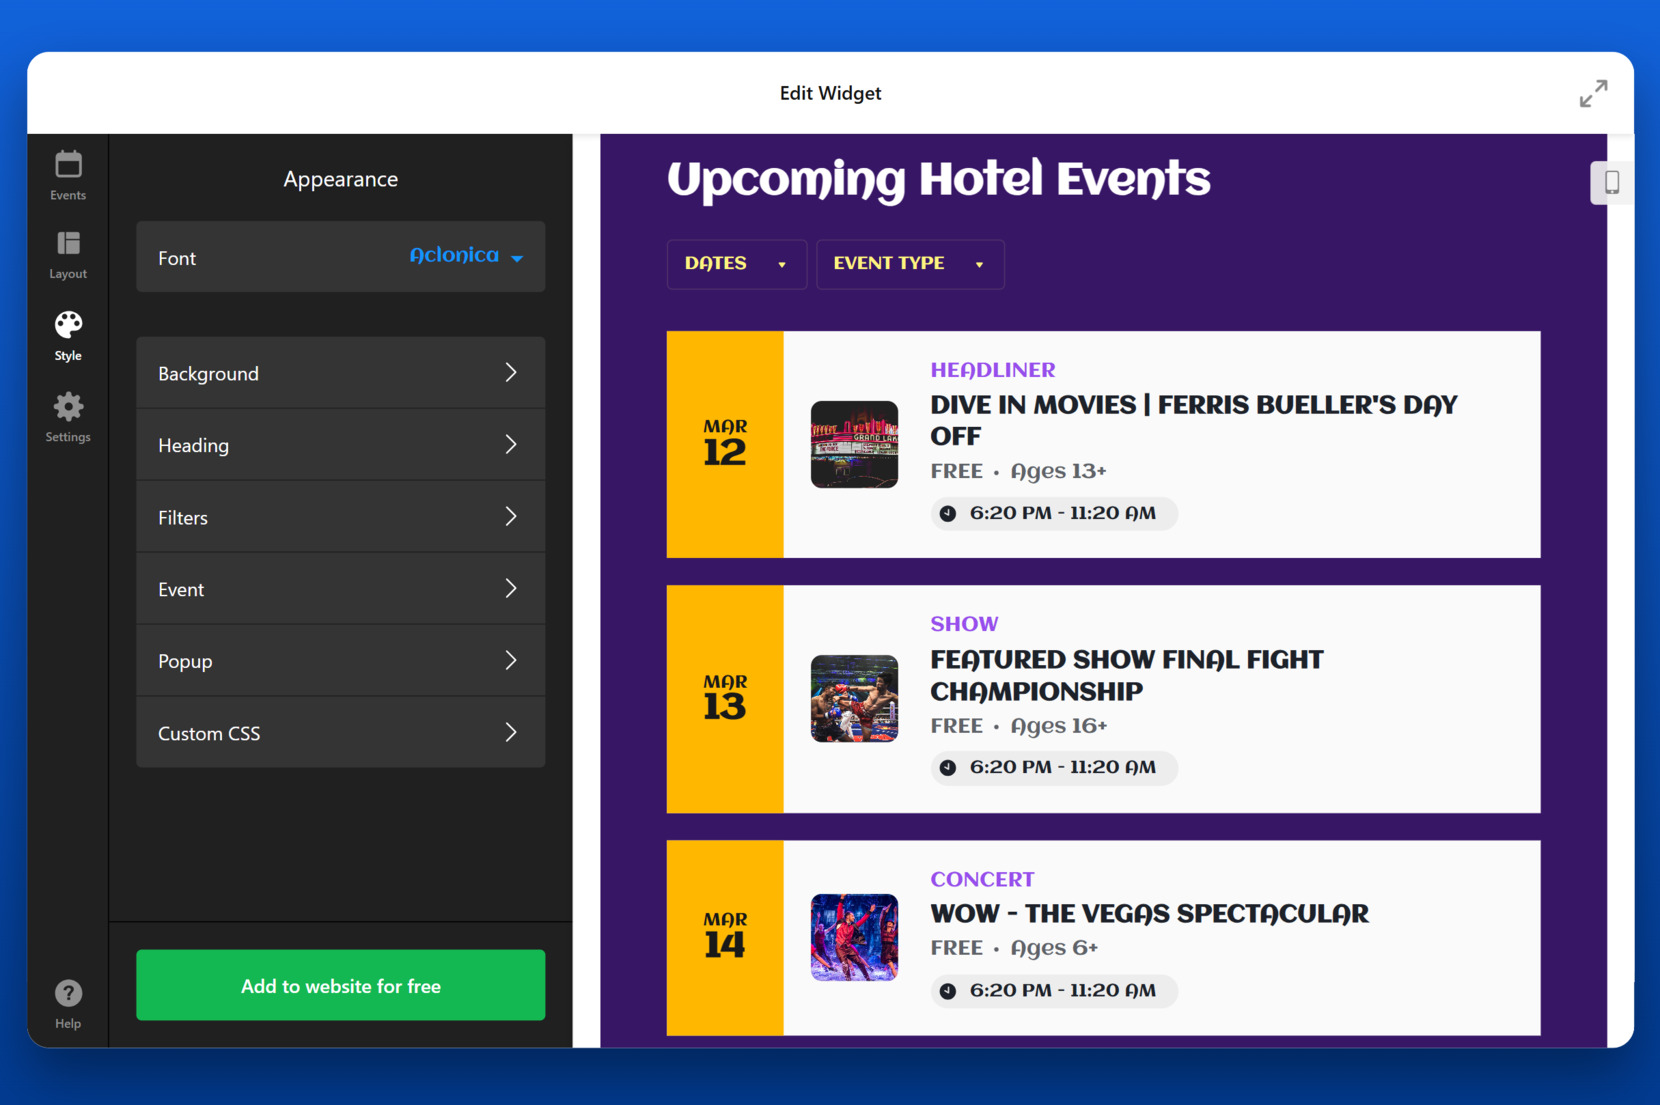
- Customize the Appearance. In the “Style” panel, modify visual elements such as fonts, background color, heading style, and popup appearance. These changes update in real-time so you can preview the final look instantly.

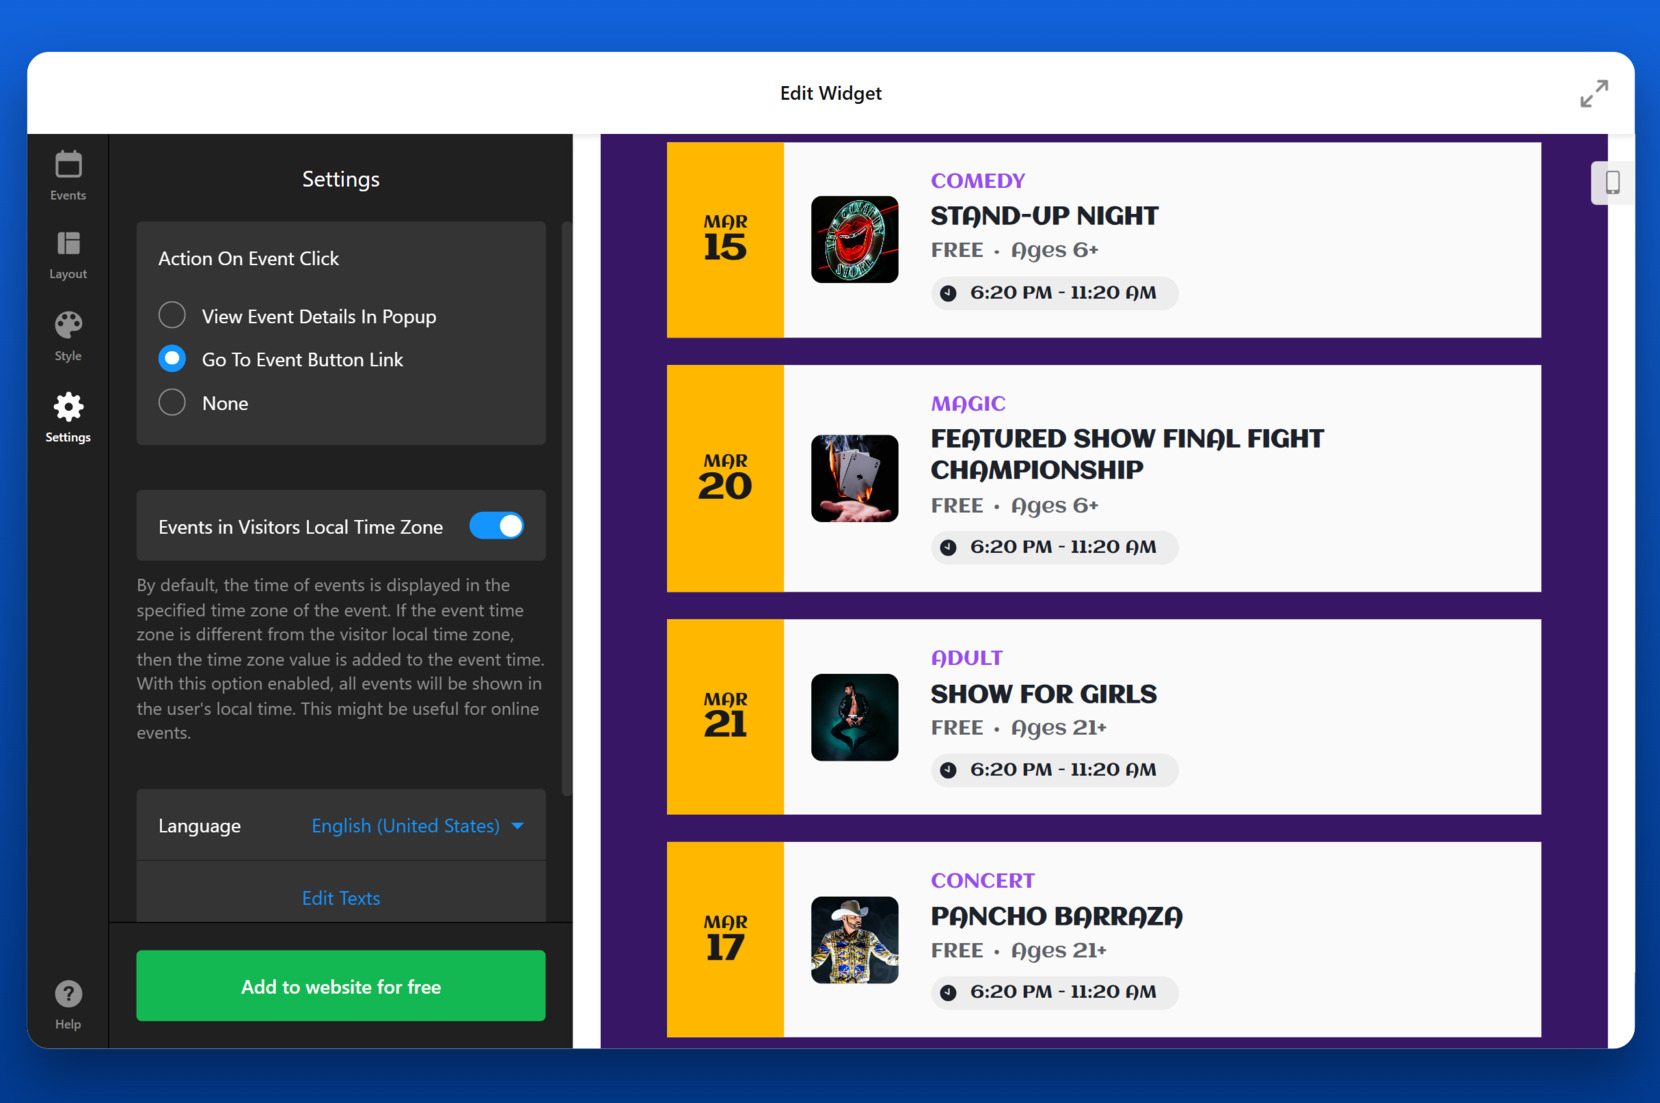
- Set Language and Time Preferences. In the “Settings” tab, enable the option to show events in the visitor’s local time zone. You can also select your preferred language and customize interface text as needed.
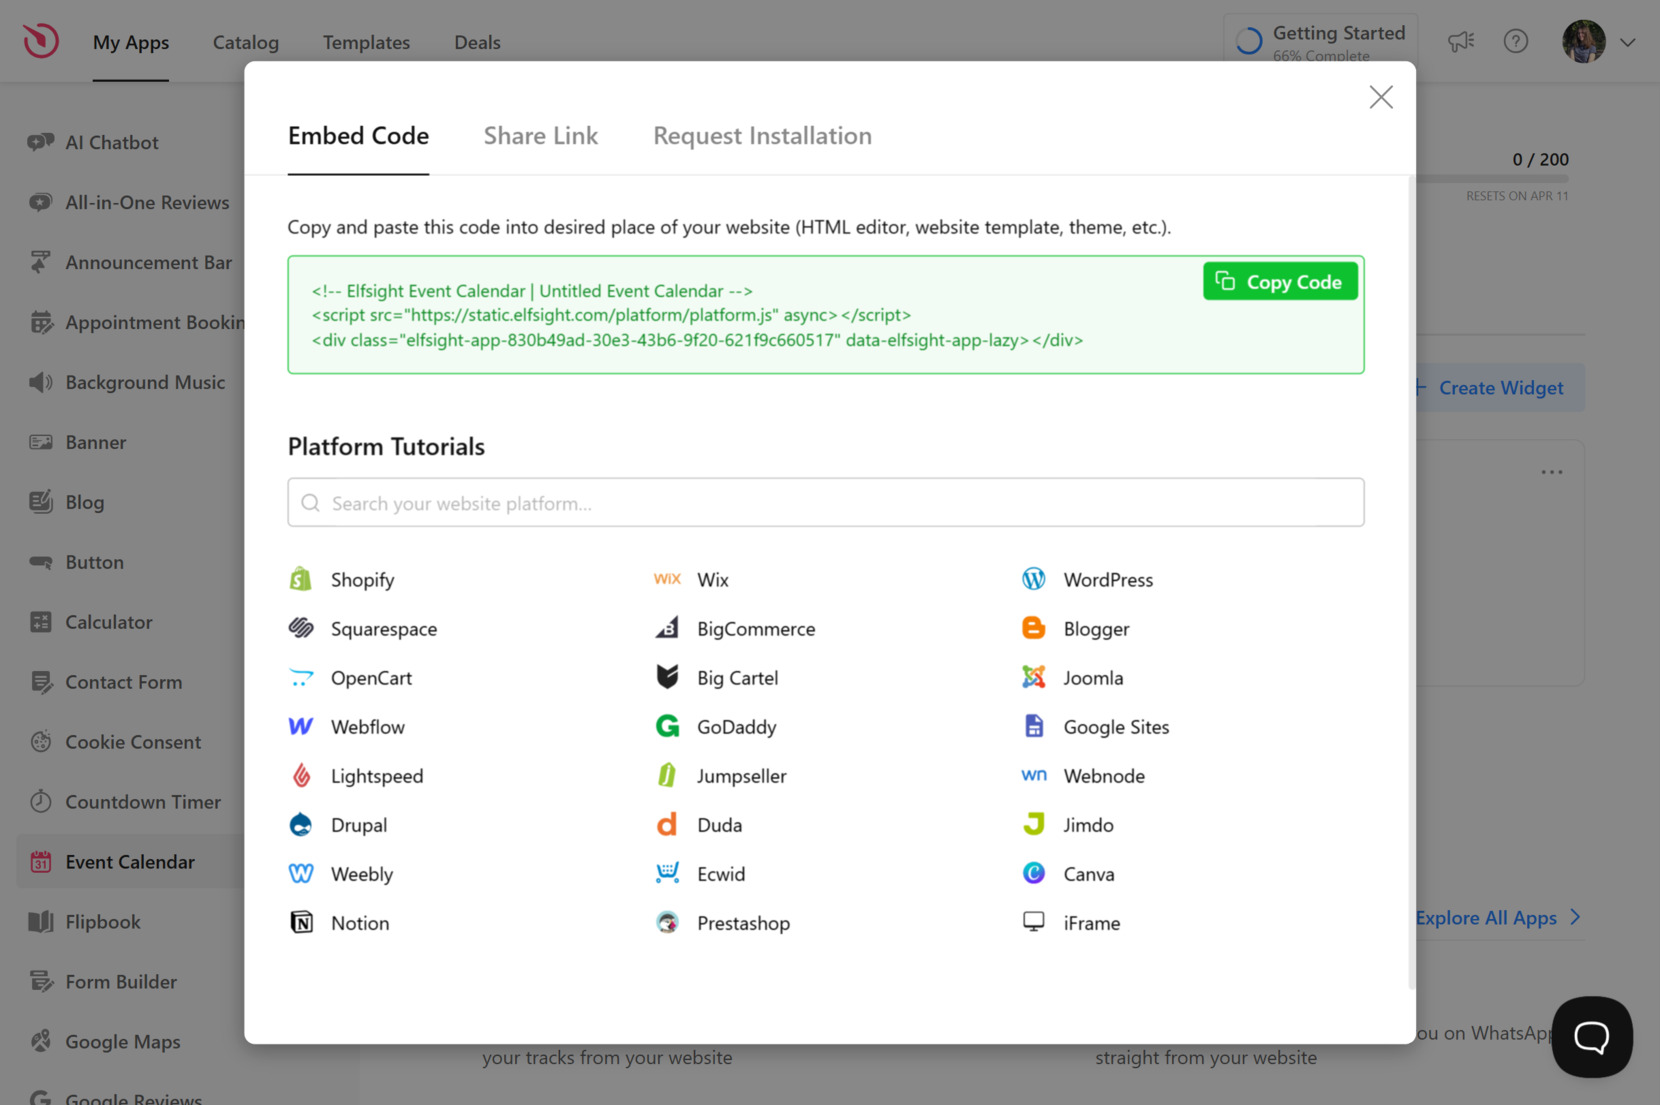
- Embed the Code on Your Website. Click “Add to website for free” and copy the generated code. Paste it into your website’s HTML where you want the calendar to appear. This is a simple copy-paste embed process that works with any platform.

In just a few clicks, you’ll have a fully personalized and visually appealing calendar widget ready to engage your audience directly on your website.
With your calendar widget fully customized and the embed code added, your event display is now live and functional. In the next section, we’ll cover where and how to embed your calendar widget across different website platforms.
Where on the Website Embed the Calendar
Once your calendar widget is customized and the embed code is ready, the final step is adding it to your website. You can insert the widget manually using HTML or through supported website builders. Here’s how to embed it effectively depending on your setup:
- Raw HTML Integration. Paste the embed code directly into your website’s HTML editor. Insert it within the <body> tag, exactly where you want the calendar to appear. Ideal for custom-coded websites or those using static HTML templates.
- WordPress. In the admin panel, go to the page or post where you want the calendar, switch to the “Custom HTML” block, and paste the code. For persistent display, add it to a widget area or footer using the “Custom HTML” widget under Appearance > Widgets.
- Webflow. Open the Webflow Designer, drag in an “Embed” element from the components panel, and paste the code inside. Position it inside any section or div for full layout control.
- Squarespace. Use a “Code” block within your chosen page section. Paste the embed code, apply changes, and make sure the “Display Source” option is disabled for a clean look.
- Shopify. Go to the admin dashboard, choose Online Store > Pages (or theme > sections), then insert the code directly into the HTML of the content area. Useful for highlighting events on landing pages or product-related announcements.
- BigCommerce. From the admin panel, go to Storefront > Web Pages or Script Manager. Choose to insert the code into a specific page or globally across the website by placing it in the footer or header scripts section.
You can also place the widget in sidebar panels, popups, or even on landing pages where events are tied to a marketing campaign. Avoid hiding it deep in navigation — visibility drives engagement.
Now that you’ve seen how flexible and platform-friendly the calendar widget is, let’s explore how to write your own embed-ready code manually — if you ever want full control or prefer to build it yourself from scratch.
Writing Event Calendar Code Manually
For developers or advanced users who want full control over how events appear on their website, writing the calendar code manually in HTML is a flexible solution. This approach lets you define every element, customize the structure, and apply your own styling without depending on external scripts. It’s best suited for simple event lists or minimalistic calendars that don’t require dynamic updating or third-party syncing.
Here’s how to create a basic event calendar manually using plain HTML:
- Create a wrapper container. Start with a <section> or <div> to hold the calendar. Add a heading and structure it in a way that aligns with your website’s layout.
- Insert individual event blocks. For each event, use a <div> with nested elements for the date, title, time, and location. You can use <h3> for event titles and <p> tags for supplementary info.
- Apply semantic class names. This makes the HTML easier to manage and gives you better styling control in CSS. Use classes like event-entry, event-date, event-details, etc.
- Organize the structure visually. You can format the calendar vertically like a list or split it into a two-column layout using CSS grid or flexbox if you want a more visual grid structure.
- Prepare to style with CSS. At this point, you’ll want to write a separate CSS file or embed styling within a <style> tag to make your calendar visually appealing and responsive.
Here’s an example of a simple HTML calendar with two sample events:
<section class="custom-calendar">
  <h2>Upcoming Events</h2>

  <div class="event-entry">
    <div class="event-date">March 12, 2025</div>
    <div class="event-details">
      <h3 class="event-title">Team Game: vs. Astros</h3>
      <p class="event-time">3:00 PM – 5:00 PM</p>
      <p class="event-location">AT&T Park, San Francisco</p>
    </div>
  </div>

  <div class="event-entry">
    <div class="event-date">March 13, 2025</div>
    <div class="event-details">
      <h3 class="event-title">Team Game: vs. Rangers</h3>
      <p class="event-time">3:00 PM – 5:00 PM</p>
      <p class="event-location">Petco Park, San Diego</p>
    </div>
  </div>
</section>
You can style this structure using CSS to create a timeline, calendar grid, or tabbed event list. Additionally, JavaScript can be added for features like expanding event details or filtering by category.
Manually writing the calendar gives you creative freedom, but it also requires maintenance — especially when adding, removing, or modifying events. If you’re looking for a faster, low-maintenance solution that still gives you styling options, a calendar code generator is worth considering. Let’s explore why it might be the smarter choice.
Why Use a Generator Instead of Coding?
Manual setup can work for developers, but for most users, an event calendar generator is the faster, smarter choice. It removes the technical barrier and offers a reliable, user-friendly way to embed a fully functional calendar on your website.
Here’s how a visual generator compares to writing code manually:
| Benefit | What It Means for You |
|---|---|
| Faster creation | Build a calendar in minutes without touching code — just configure and publish. |
| Visual editing interface | Make changes in a drag-and-drop editor with live previews instead of refreshing a browser after each edit. |
| Responsive by default | Calendars are fully mobile-friendly and adjust automatically across all screen sizes. |
| Error-free setup | Templates and built-in logic help eliminate syntax issues and visual glitches. |
| Built-in best practices | Widgets are optimized for performance, browser compatibility, and accessibility out of the box. |
| Centralized event management | Edit your calendar once in the dashboard — updates appear instantly on your website. |
| Simple cross-platform embedding | Copy one line of code and paste it into WordPress, Webflow, Shopify, or any other platform. |
| Low maintenance | No styling adjustments, patching scripts, or ongoing debugging. Your calendar just works. |
By using a calendar widget generator, you save hours of manual work and avoid the risks that come with editing raw code. But even with a ready-made embed code, you might occasionally run into small issues. In the next section, we’ll walk through common problems and how to solve them quickly.
On top of all that, the generator also gives you access to a wide range of pre-made templates tailored to specific use cases — saving even more time during setup. Whether you need a Webinar Schedule, Music Event Calendar, Church Events, or a Sports Team Schedule, you can start with a professionally designed layout that fits your content right away.
Explore 30+ Event Calendar templates


Fixes for Common Problems
Even though embedding a calendar widget is usually seamless, you may occasionally run into minor display or functionality issues. This section addresses the most common problems users encounter when adding the event display to their website and offers quick solutions.
Why isn’t the calendar appearing after I embed the code?
The calendar looks broken or misaligned on mobile. What should I do?
My website styles are affecting the look of the calendar. Can I fix it?
The calendar isn’t loading in preview mode. Why?
How can I troubleshoot conflicting scripts?
Addressing these common issues ensures your calendar widget displays consistently and performs well across all devices and platforms.
Final Thoughts
Creating and managing an event calendar no longer requires coding expertise or hours of setup. With an HTML event calendar generator, you can easily build a visually appealing, functional, and responsive widget tailored to your needs. From customizing layouts to embedding across platforms, everything can be done quickly and confidently — even if you’ve never edited code before.
Whether you’re looking to highlight key events, manage public schedules, or simply enhance your website’s functionality, this solution offers a seamless installation and a future-proof embed option. You’ll get consistent performance across devices, simple updates, and complete design control — all without the usual maintenance concerns that come with manual setup.
Need More Help?
We hope this guide gave you everything you need to build and embed your own event display. If you still have questions or want to explore the best way to generate a calendar for your website, feel free to reach out — our team is here to support you every step of the way.
At Elfsight, we’re committed to offering intuitive, code-free widget solutions that help your business grow. You’re also invited to join our Community, where you can exchange ideas and tips with others. Have an idea for a new feature? Add it to our Wishlist — we’d love to hear from you.