Add Poll to Blogger website
Create your Poll widget
Embed Poll into Blogger with an Elfsight widget
Easily add a personal Poll widget to your website to increase customer engagement and get insights. With just several steps, you can create interactive questionnaires including numerous question types like multiple choice and rating scales. Setting up your poll is quick and simple.
Making new polls takes just one click, and results are shown in real-time. With conditional logic, you can customize questions based on customer answers. The widget also integrates with widely used CRM and email tools, making it easier to organize your data and upgrade your services considering customer expectations.
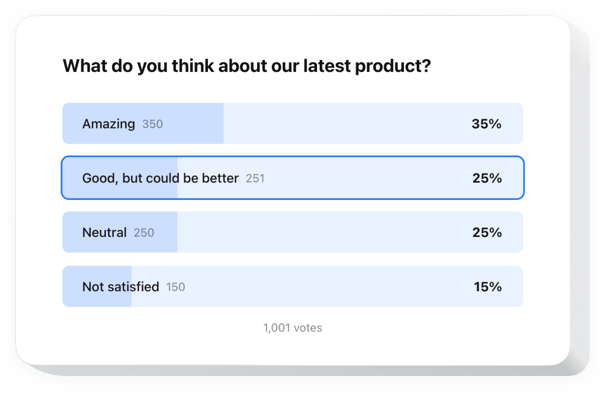
Create custom surveys quickly to find out what the customers expect from your brand!
These are just several of the rich widget features:
- Make your polls flexible with conditional logic. You can dynamically adjust upcoming questions, ensuring a more individual and reasonable survey experience.
- Create exciting polls in just a few clicks. Our user-friendly builder makes it easy to create engaging polls to gather responses and opinions with no hassle.
- Convert responses into real-time conversions. Understand customers’ needs instantly and suggest relevant solutions immediately, transforming responses into business opportunities.
- Use multiple types of fields and input data. Build your personal poll to gain the necessary data using text fields, checkboxes, radio buttons, dropdown lists, and many other elements.
- Begin with a perfect pre-designed template. Choose from a variety of professionally developed poll ideas, optimized for various survey types and business tasks.
The online editor can demonstrate you how the features and options function right on this page
How can I embed Poll into my Blogger website?
Here’s a simple way to set up the widget on your Blogger website. It is only going to take a few minutes and requires no coding.
- Build your individual Poll widget
Begin with any template in the editor, work with the convenient elements of the editor, and adjust the widget to your preferred design and options. - Obtain the personal code to embed the widget
Once you’ve built the widget, you’ll receive an individual HTML code in your dashboard. Copy this code which contains all the details about your settings. - Display the widget on your Blogger website
Define the areas of your website where you wish to present the Poll, and paste the code there. Save the changes.
Done! Now, check how the widget is performing on your website.
If you have any difficulties when you embed the widget into a website, just contact our customer support. We will be glad to consult you on adding and managing your Poll.