How to Install jQuery Instagram Feed InstaShow 2.0.0
Due to the current changes of Instagram API we’ve released a new update 2.0.0 for Instagram feed and prepared this new guide. It will describe in detail how to install jQuery version of our user-appreciated plugin InstaShow.
by
Andrey Kozinskiy
Share:
Share on Facebook
Share on X
Share on LinkedIn
Share on WhatsApp
Copy Link
New changes in Instagram API will come into force on June 1, 2016. By default, these changes strongly restrict users of Instagram plugins. You can learn more about it in our article Global Update of Elfsight Instagram Plugins 2016. We’ve prepared an important update for jQuery Instagram Feed InstaShow in order to guarantee that restrictions won’t apply to our customers.
Installation of jQuery Instagram feed InstaShow 2.0.0
1. Download and unzip the archive with InstaShow files
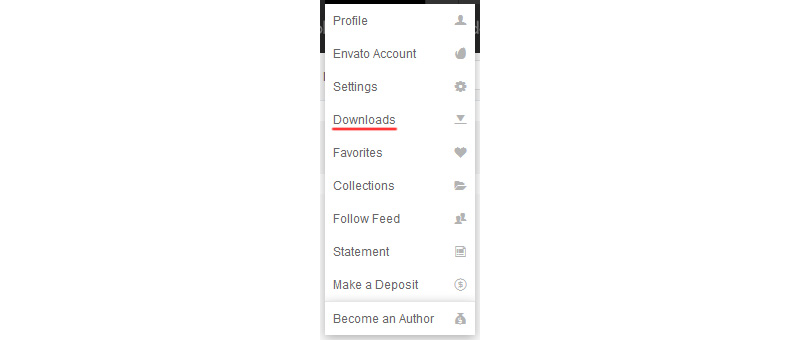
You have to visit Downloads page after purchasing InstaShow jQuery feed on codecanyon.org/downloads/.
Visit CodeCanyon Downloads page
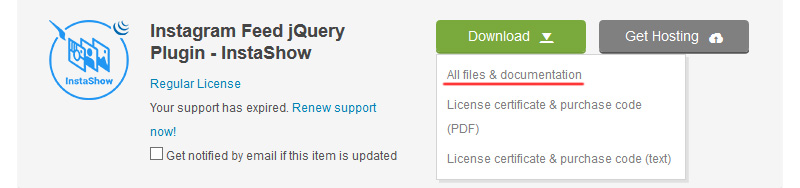
Download and unzip plugin’s archive.
Download InstaShow jQuery Files
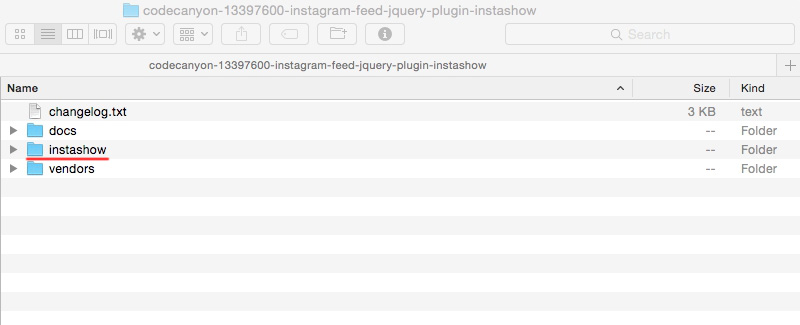
For plugin’s installation you need the instashow folder from the archive codecanyon-13397600-instagram-feed-jquery-plugin-instashow.zip.
Unzip InstaShow Archive
2. Upload InstaShow to Your Server
First of all, you have to upload the InstaShow folder to your server in order to install your Instagram plugin. For that FTP-clients (Total Commander, WinSCP, Filezilla, Cyberduck, Transmit and other) are usually used. You can upload the InstaShow folder to the root directory, any directory, where all plugins for your website are placed or any other directory.
3. Link Your Website with The InstaShow Files
After you uploaded the folder with the InstaShow files to your server, you have to link these files with your website. There are two ways to do it:
The first one (recomended) is adding a single packaged file which automatically load all dependencies.
If you uploaded the instashow folder to the root directory of your website, the code will look like:
If you uploaded the instashow folder to a non-root directory of your website, you need to set a correct path to the /instashow/api/ folder in the data-is-api attribute.
Tip 1: This case requires PHP 5.2+ version.
Tip 2: Be sure that the /instashow/api/ directory on your server is writable.
4.1. If Your Hosting Doesn’t Support PHP
If your hosting doesn’t support PHP, then you need to use Instagram Access Token and the data-is-access-token attribute instead of data-is-api attribute. Please, follow these steps:
Then specify the Access Token to the data-is-access-token attribute.
Note: In this case you can display only the latest 20 images from the username, which was added to Sandbox of Instagram API Console for this Client ID.
Info: dependence on PHP and Instagram access token restrictions are related to Instagram API changes. You can read more about these changes in an article Global update of Elfsight Instagram Plugins 2016.
Support Is The Answer
If you have any kind of questions concerning InstaShow installation, then reach us using Elfsight Support Center. We will make everything clear! Also, if you need some tips on how to embed Instagram Feed to your website, read our guide!