Want to make your website more interactive and boost engagement? Adding a quiz is a powerful way to encourage visitors to participate, learn, and take action — right on the page.
With the help of an easy-to-use quiz solution, you can build interactive questionnaires directly on your website — no coding or technical setup needed. It’s perfect for creating a dynamic user experience that educates, entertains, and converts.
- Increases user engagement. Visitors are more likely to interact with dynamic quiz experiences than static content, keeping them on your page longer.
- Improves lead generation. Quizzes can collect contact information in a fun, non-intrusive way, turning visitors into potential customers.
- Drives personalized experiences. Based on responses, you can offer tailored suggestions, making your content more relevant and valuable.
- Boosts content sharing. Quizzes encourage social sharing, helping to organically expand your reach and bring in new traffic.
- Delivers instant insights. Easily analyze responses to understand user preferences and refine your marketing or product strategies.
In the next section, you’ll see how simple it is to create your own quiz using Elfsight’s ready-to-use solution — no technical skills required.
Quick Guide to Creating a Quiz for Website
Now that you know why adding a quiz is a smart move, let’s go over how to get one up and running in just a few steps. Elfsight makes it easy to create a fully customizable online survey or interactive quiz in minutes — no coding needed.
- Open the Elfsight editor and choose the quiz template that suits your goals.
- Set up your questions, answers, scoring logic, and add custom messages or redirects based on results.
- Adjust the layout, colors, fonts, and other design settings to match your website’s style.
- Click “Add to website for free“, copy the embed code, and paste it into your website’s backend.
The setup is straightforward, and the interface is designed for speed and simplicity. Whether you’re building a lead capture form, personality test, or self-grading quiz format, everything you need is right at your fingertips.
Ready to launch your quiz? Create one with Elfsight’s editor in minutes!
Key Features of Elfsight’s Quiz Template
Once you’ve created your first quiz, it’s worth understanding what makes Elfsight’s solution stand out. This embeddable quiz maker is packed with practical features designed to improve interaction, appearance, and functionality on your website.
Here’s what you get when using Elfsight’s quiz template:
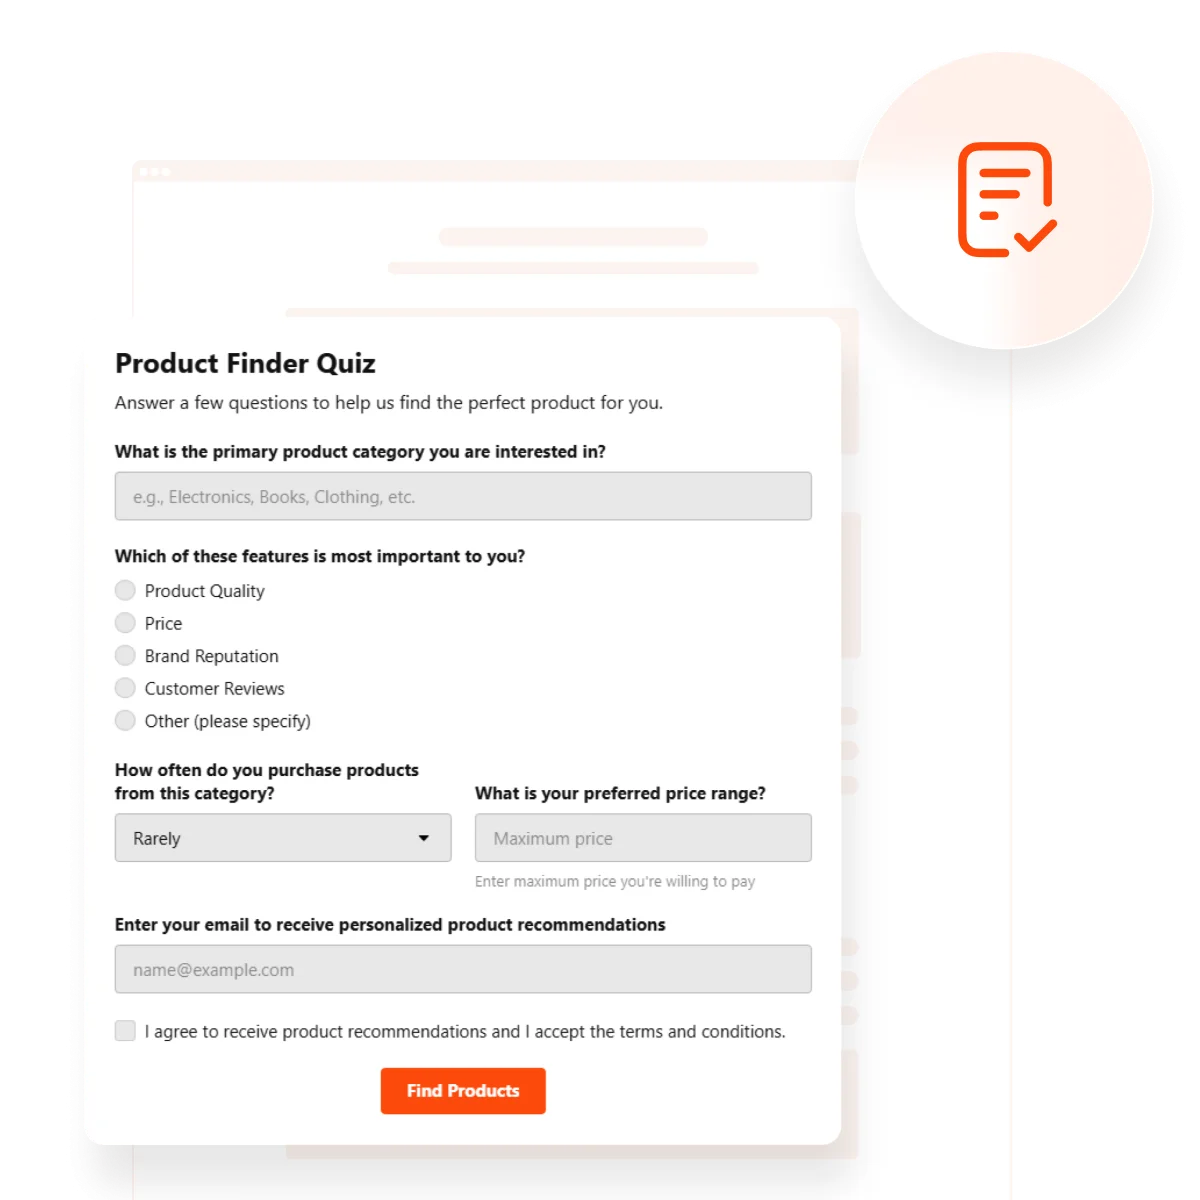
- Pre-designed templates for every purpose. Choose from ready-made layouts for trivia, feedback, product matching, and more — saving time while staying on brand.
- Fully responsive layouts. Every quiz looks perfect on desktop, tablet, and mobile screens, ensuring smooth user experience across all devices.
- Easy question branching. Show or hide questions based on previous answers to make your quiz feel smart, dynamic, and personalized.
- Flexible result display options. Instantly show scores, redirect users, or display custom messages depending on how they answered.
- Built-in styling controls. Modify fonts, colors, borders, and spacing directly in the editor to match your website’s design in just a few clicks.
- Visual content integration. Add images or icons to any question or answer to make your quiz more engaging and visually appealing.
With these powerful tools, your quiz becomes more than just a form — it’s an interactive experience. Next, let’s walk through the full process of building and embedding your quiz step-by-step.
Make and Embed Your Quiz: Step-by-Step
Now that you understand the value and flexibility of adding a quiz to your website, let’s go through the full process of creating and embedding it using Elfsight’s intuitive builder. This step-by-step guide walks you through selecting a template, customizing your layout, and connecting integrations — all without writing a single line of code.
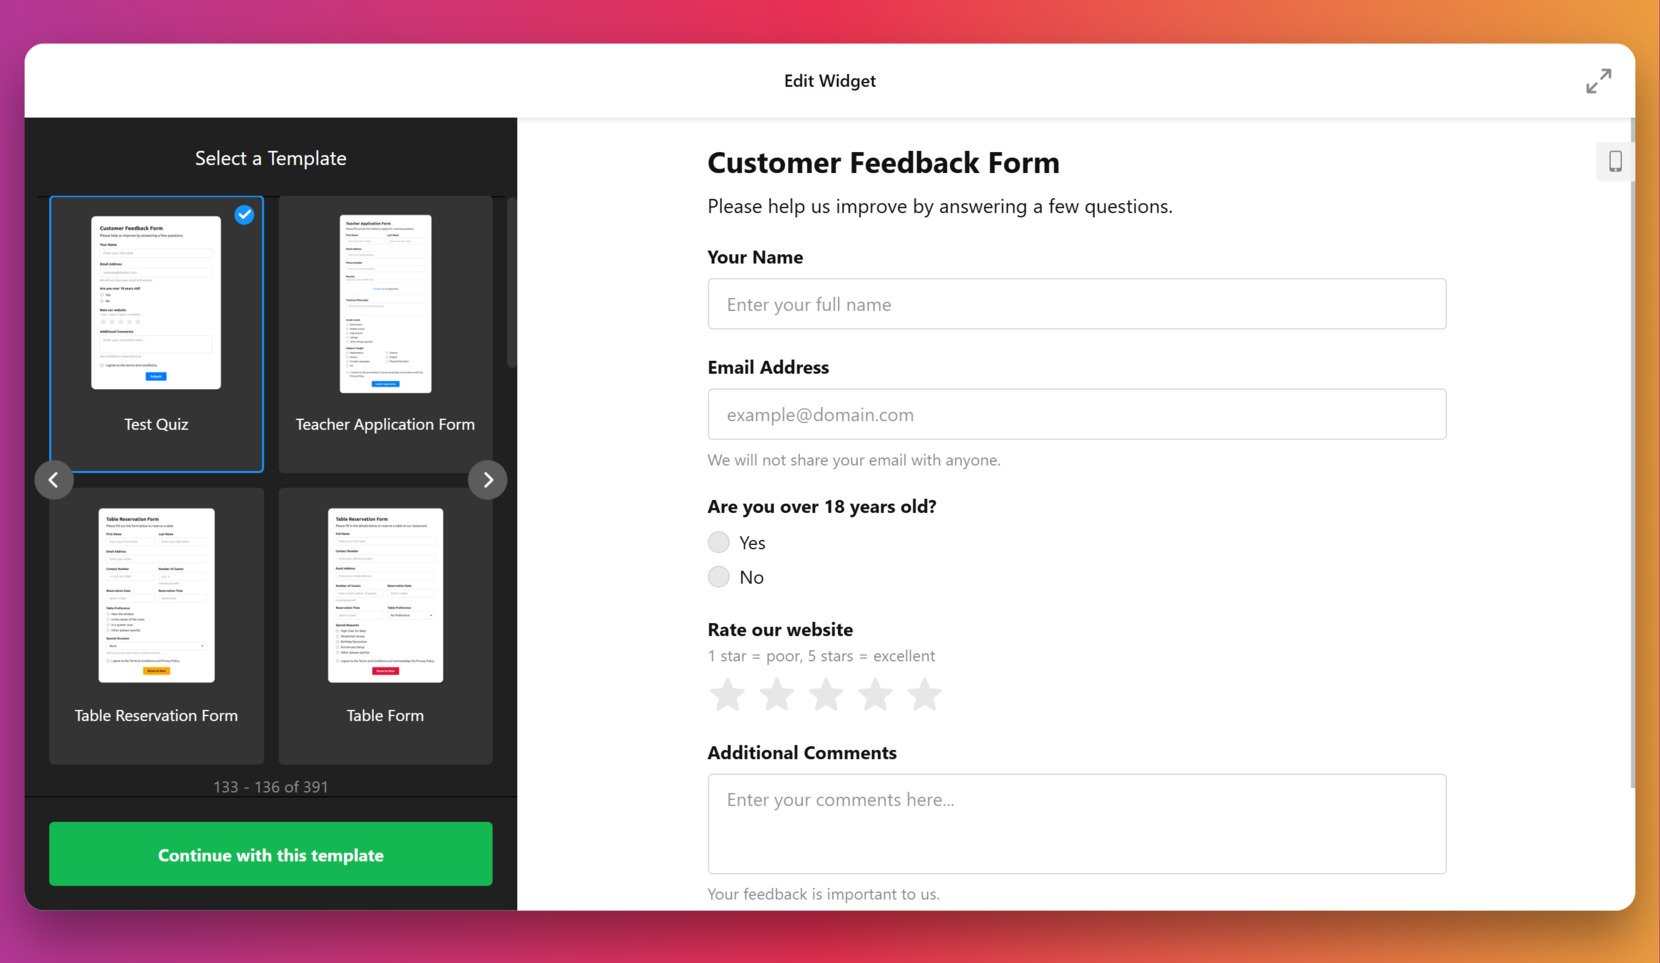
- Select a template to get started. Open the quiz editor and choose a template from the gallery — such as “Test Quiz” or “Knowledge Quiz”. Click “Continue with this template” to begin editing your selected format.

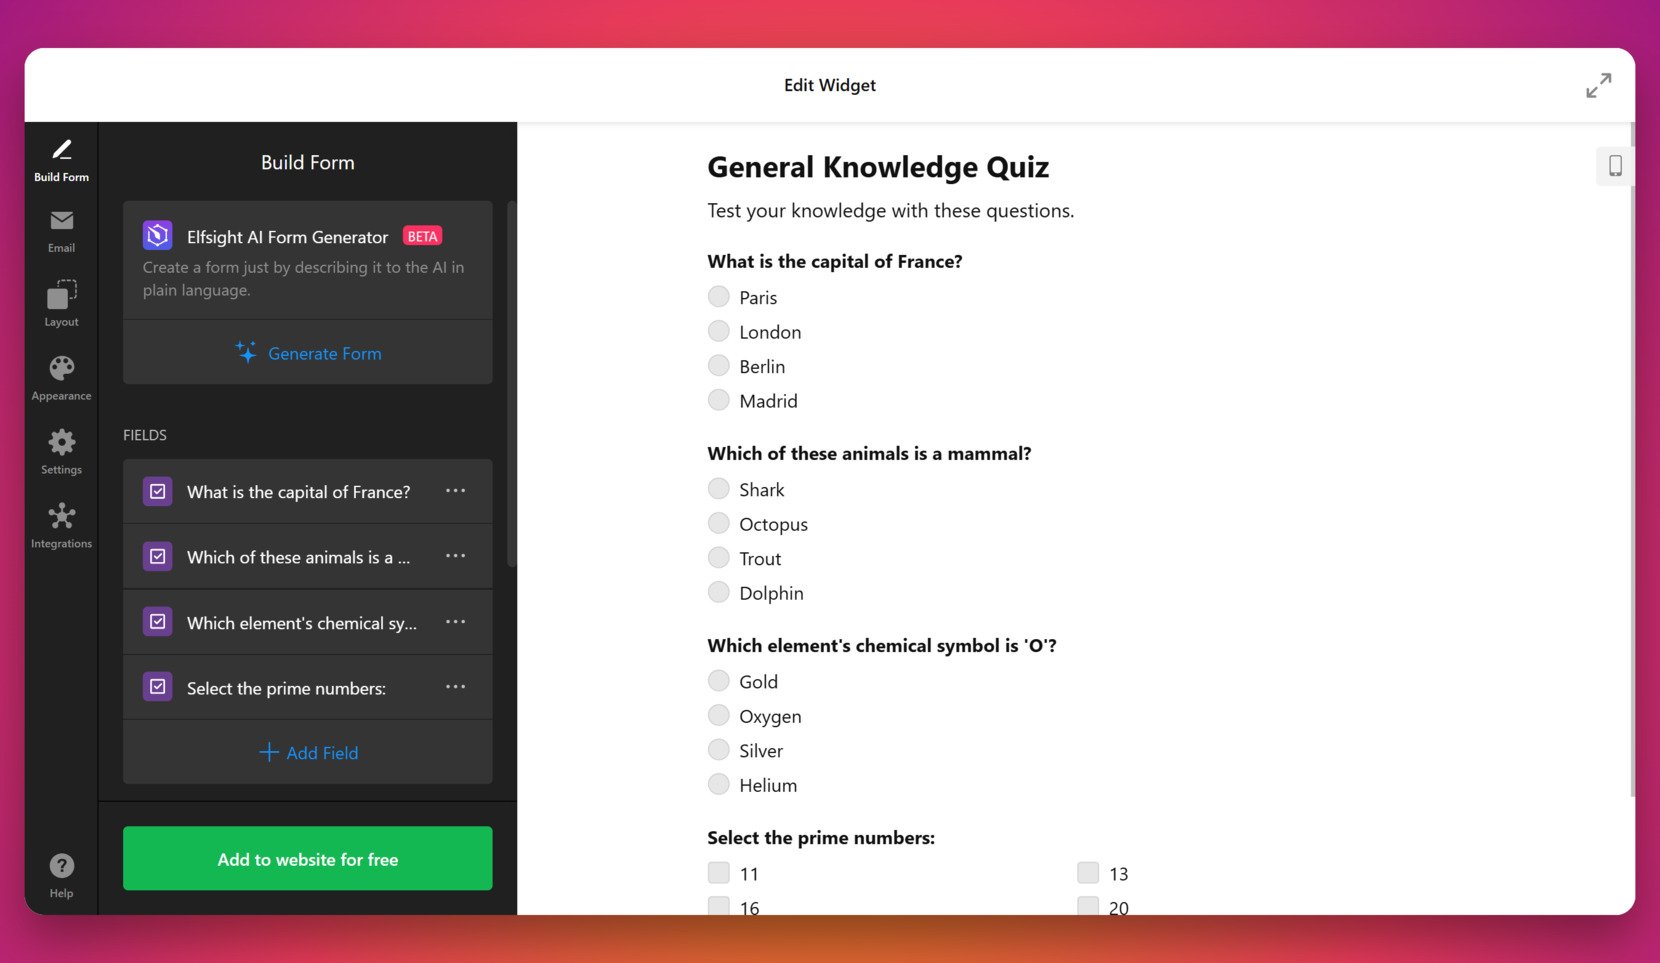
- Build your quiz using the drag-and-drop editor. In the “Build Form” tab, enter your quiz questions using field blocks like multiple-choice or checkbox. You can also use the AI Form Generator to generate quiz questions from a simple prompt.
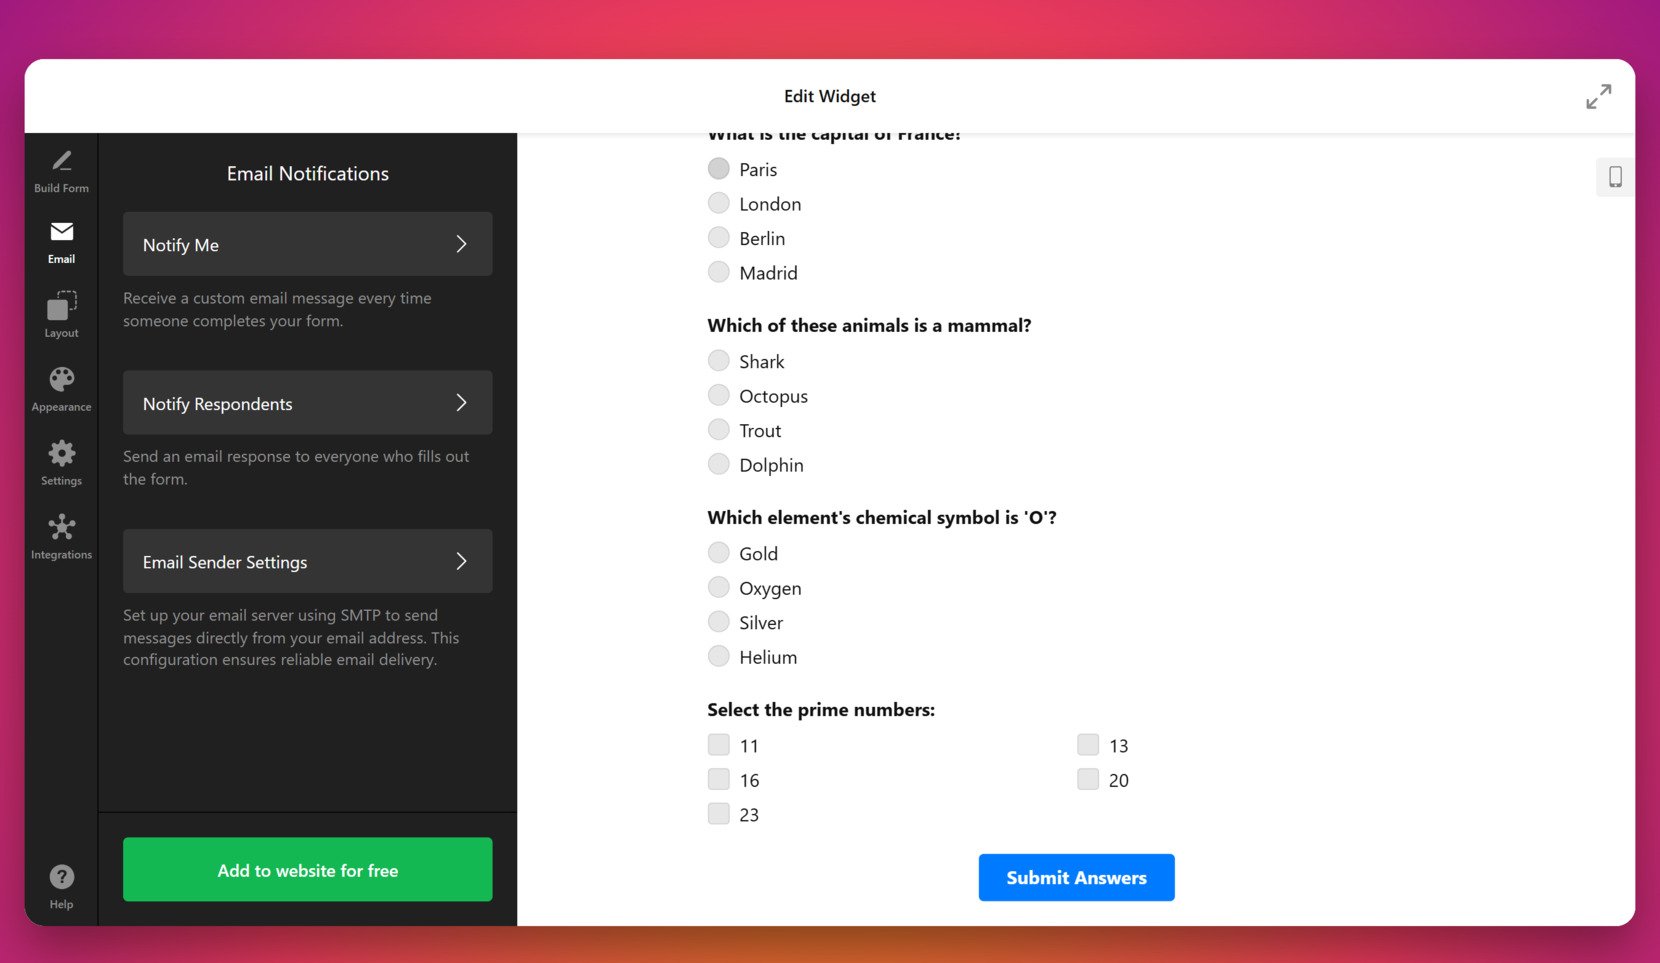
- Set up notifications and auto-replies. Go to the “Email” tab to configure who gets notified after a submission. You can enable notifications for yourself and automatic response emails for quiz participants. SMTP setup is also available for custom sender configuration.
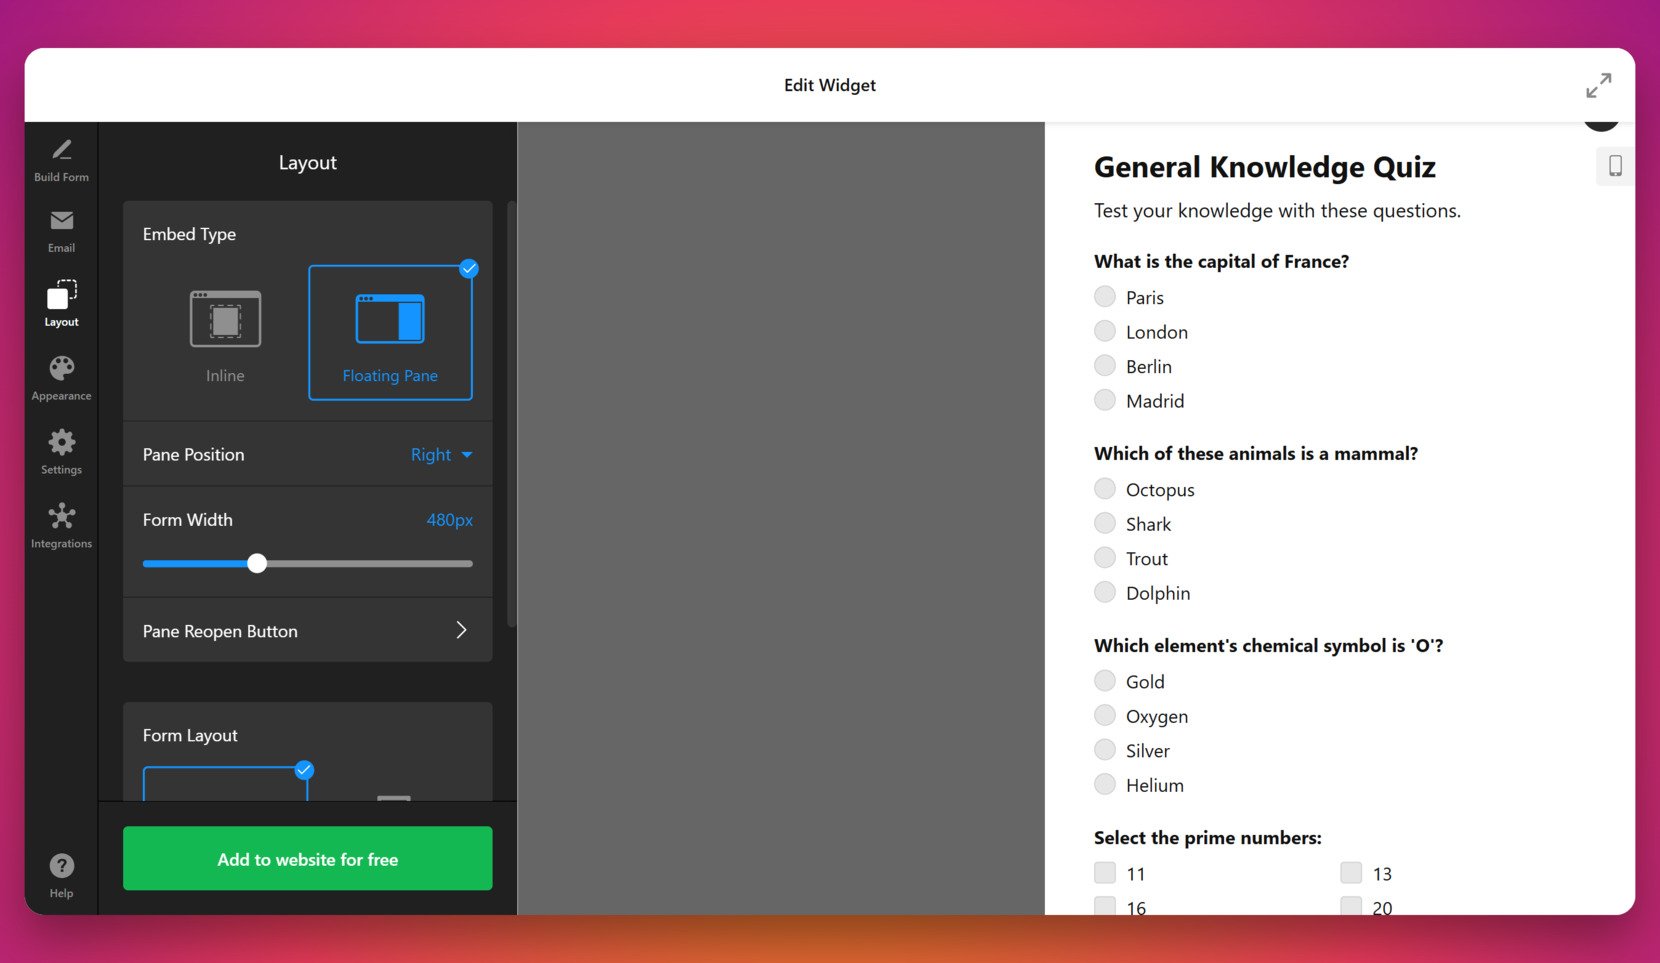
- Adjust the quiz layout and position. In the “Layout” tab, choose between Inline or Floating Pane embed types. You can also adjust the position of the pane, control form width, and configure how the quiz appears when reopened.
- Customize the visual appearance. Open the “Appearance” tab to pick a dark or light color scheme, select an accent color, and choose a font. You can also adjust styling elements like button shape and label presentation for full visual alignment with your website.
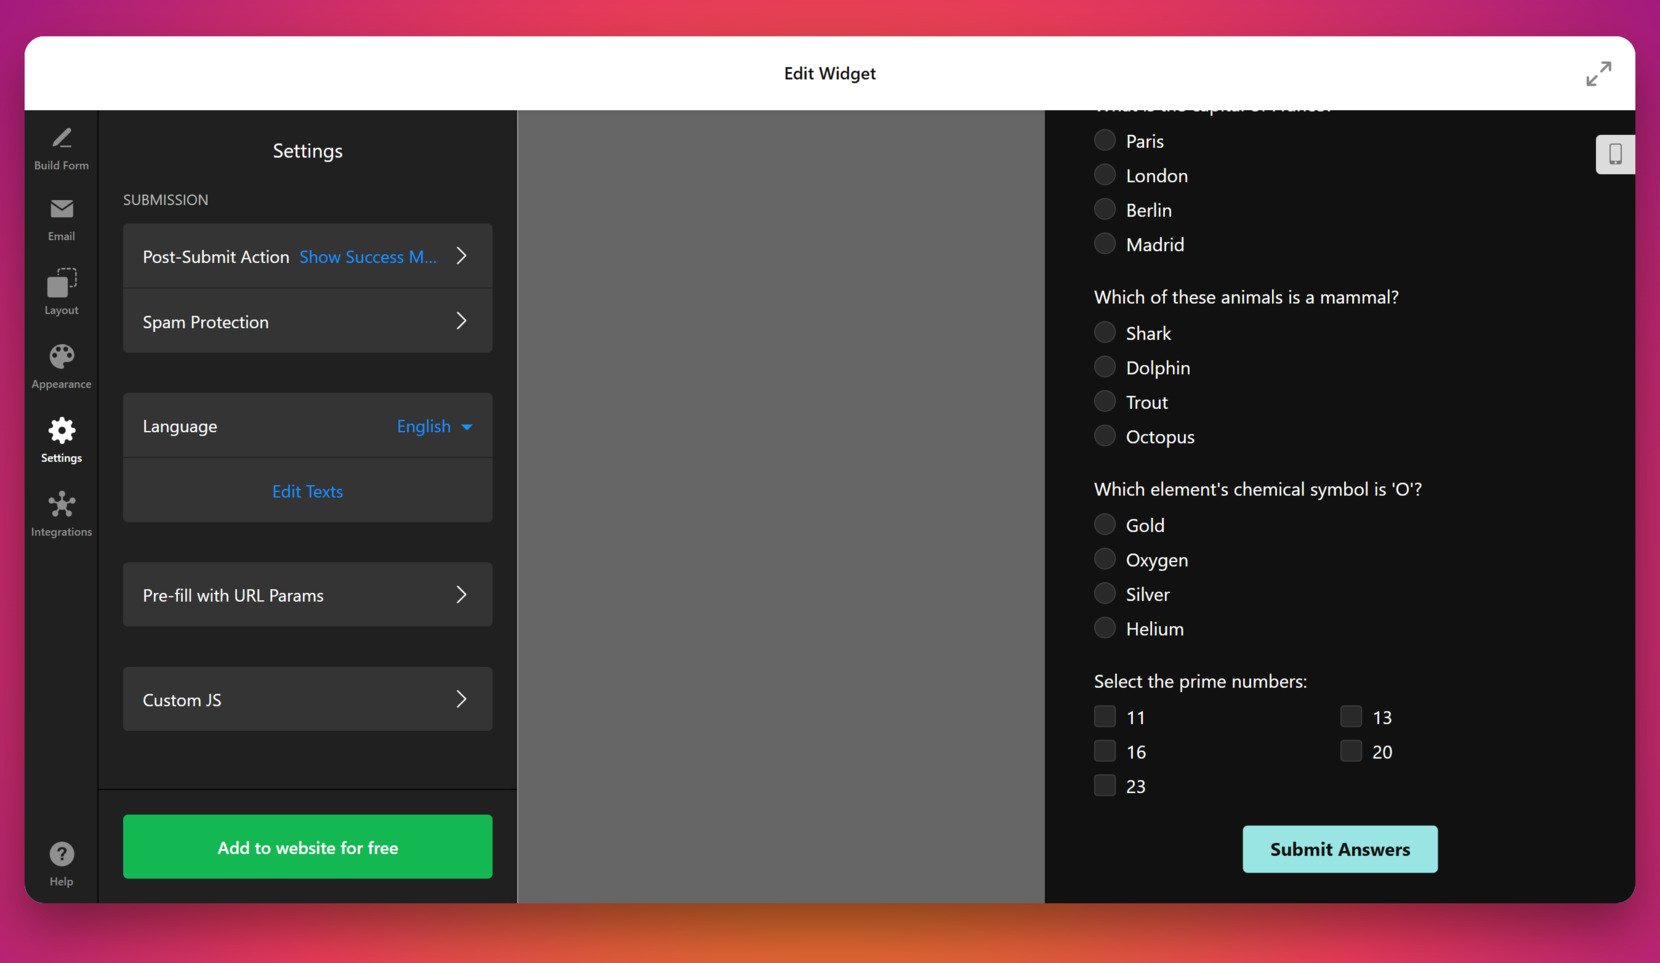
- Define quiz logic and user feedback behavior. Under the “Settings” tab, choose the post-submit action such as showing a success message, hiding the form, or redirecting to a URL. You can also enable spam protection, change language settings, and add custom JS or pre-fill values via URL parameters.
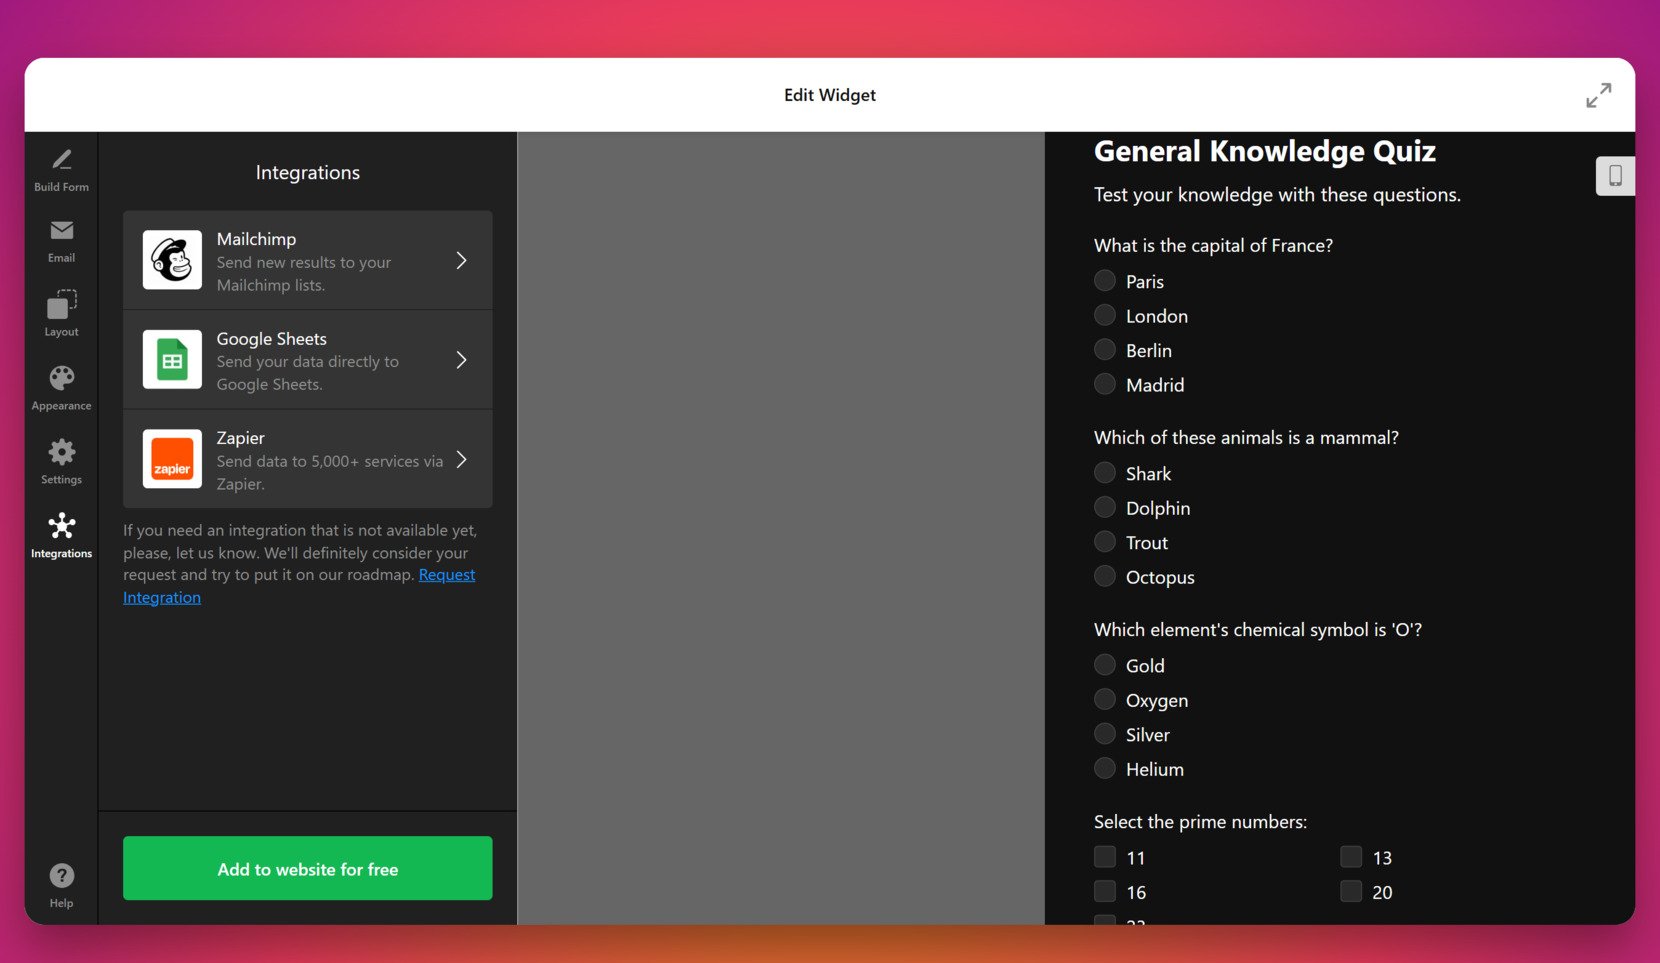
- Enable integrations with external platforms. In the “Integrations” tab, connect the quiz to Google Sheets, Mailchimp, or Zapier. This allows you to send responses directly to your CRM or marketing tools in real time.
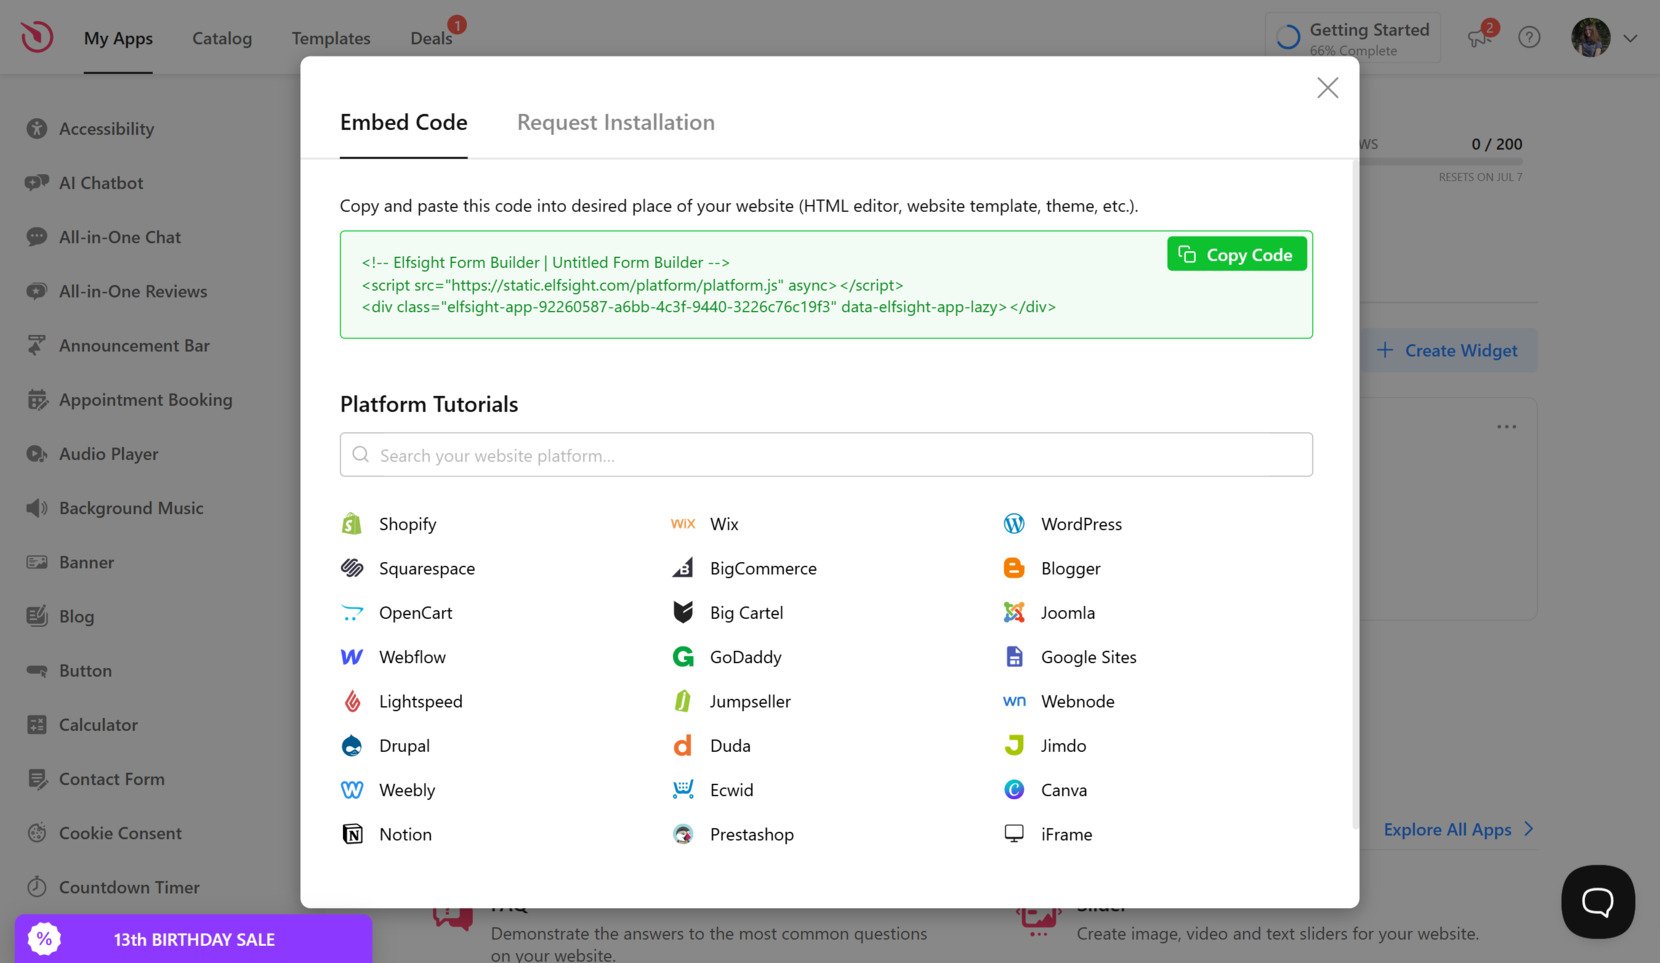
- Add the finished quiz to your website. Click “Add to website for free”, copy the generated HTML code, and paste it into your website’s editor or template. You can embed it in any HTML block, content section, or footer depending on your layout needs.

Once embedded, your quiz is live and ready to engage visitors. In the next section, we’ll take a look at other ways to create and install quizzes using native tools or custom code.
Other Ways to Add a Quiz to Your Website
Elfsight provides one of the easiest and most design-friendly solutions for embedding quizzes, but there are other valid methods you can consider. These include native tools like Google Forms and fully manual setup using HTML and JavaScript. Each approach serves different user needs — whether you prefer something fast and simple or fully customizable.
Google Forms (Native Method)
Google Forms is a free tool offered by Google that lets you build simple quizzes, collect responses, and even automate scoring. It’s a reliable choice for users who need basic quiz functionality without any special branding or design features. It’s especially useful for internal quizzes, customer surveys, or educational purposes.
- Go to Google Forms and start with a quiz template. Visit forms.google.com, click the blank form (+), then click the gear icon to open settings. Under the “Quizzes” tab, enable “Make this a quiz”. This switches the form into quiz mode.
- Add your questions and define answer keys. Use question types like multiple choice, checkboxes, or dropdowns. For each question, click “Answer key” to mark the correct option and assign points.
- Configure optional settings like grade release and answer visibility. You can choose to show missed questions, correct answers, and point values to users after submission.
- Customize the visual theme. Click the paint palette icon to add a header image, choose theme color, background, and font. Keep in mind, customization is very limited compared to other methods.
- Click “Send”, then choose the embed icon (<>). This generates an iframe embed code you can paste into your website. You can also adjust width and height values before copying.
- Paste the iframe code into your website’s HTML editor. Use a code block or embed section in your CMS to display the quiz on the page.
This solution is great for straightforward quizzes but doesn’t allow for much control over design or interaction.
Manual HTML + JavaScript Quiz
If you or your team has basic web development skills, building a quiz manually using HTML, CSS, and JavaScript gives you full control over structure, behavior, and design. This is ideal when you need a quiz that looks and behaves in a specific way or integrates tightly with your website’s features.
- Set up the HTML structure for your quiz. Use a form element with fieldsets or divs for each question. Add radio buttons or checkboxes for answers, each with appropriate labels and values. Group each question separately to control styling and scripting.
- Style the quiz using CSS. Write CSS rules to control layout, spacing, fonts, colors, hover states, and responsive design. You can also include animations or transitions for enhanced user experience.
- Write JavaScript to handle answer logic and results. Use JavaScript to capture form submission, loop through selected inputs, compare answers, calculate scores, and display feedback directly on the page without reloading. You can also set conditions or branching logic manually with if-else statements.
- Include validation and accessibility features. Ensure form inputs are labeled properly, tab-friendly, and include feedback for missing answers. Use ARIA roles where necessary to improve usability.
- Test thoroughly on multiple devices and browsers. Verify that the quiz functions as expected on desktop, tablet, and mobile screens, and check browser compatibility for all major environments.
- Insert the full code into your website’s HTML. You can place it within a dedicated section in your page’s HTML editor or include it as a standalone HTML file embedded via iframe.
This method gives complete creative freedom and flexibility, but it’s best suited for those comfortable writing and maintaining code.
Comparison of Elfsight and Other Methods
The following table summarizes the key strengths and limitations of each method. While every approach has its use case, Elfsight offers the best balance between customization, ease of use, and professional presentation for embedding quizzes into websites.
| Method | Pros | Cons |
|---|---|---|
| Elfsight | Offers full visual control, mobile responsiveness, and an intuitive builder made specifically for website embedding. | Requires account registration to access the editor and generate embed code. |
| Google Forms | Free to use with automatic scoring and a simple embed process that works quickly. | Includes Google branding and offers minimal styling control, which limits brand consistency. |
| Manual HTML + JS | Provides full design flexibility, advanced logic handling, and no dependency on external platforms. | Requires coding knowledge and ongoing maintenance with no built-in UI or editing tools. |
All these options can work depending on your technical background and design goals. However, if you’re looking for a streamlined, flexible, and visually polished quiz integration without code, Elfsight remains the most accessible and professional choice. Next, let’s explore some practical usage tips to help you make the most of your new quiz widget.
Helpful Tips for Better User Engagement
Once you’ve added an embedded quiz to your website, it’s important to fine-tune the experience for performance, accessibility, and visual clarity. The following tips apply to any quiz widget or embed method, ensuring it works smoothly and effectively across devices and content strategies.
- Place your quiz above the fold or near relevant content. Quizzes hidden at the bottom of a page are often missed. Place them where user attention is highest — within blog posts, landing pages, or after product descriptions.
- Keep the number of questions reasonable. Aim for 5–8 questions to keep visitors engaged without overwhelming them. Use progress indicators to inform users how much is left.
- Always test for mobile responsiveness. A responsive assessment layout is critical. Ensure all quiz elements adapt to various screen sizes, buttons are clickable, and no input fields overflow.
- Minimize distractions during the quiz. Reduce on-page clutter and avoid autoplay videos or popups that could pull attention away. Let the quiz be the focal point of the experience.
- Use visuals only when they enhance understanding. Adding images or icons can improve engagement — but avoid using them just for decoration. Each visual should serve a purpose or support the question context.
- Customize language and tone to fit your audience. Whether your visitors prefer formal language or playful messaging, make sure the quiz reflects your brand voice and user expectations.
- Set clear goals for your quiz. Whether you’re collecting emails, educating visitors, or providing product suggestions — knowing your end goal helps you design better questions and outcomes.
- Avoid embedding multiple interactive elements on the same page. If your page already contains maps, sliders, or videos, place your quiz on a separate page or isolate it within a dedicated section to prevent overload.
Following these tips ensures that your dynamic quiz experience feels seamless and performs well across all devices. Now, let’s look at who benefits most from adding quizzes to their websites and explore a few real-world use cases.
Examples of Quiz Use Cases
Quizzes can be effectively used by a wide range of industries to increase engagement, capture leads, and guide decision-making. Below are examples of how businesses in different sectors can apply embedded quizzes to enhance their websites.
Application in E-commerce 🛒
Online stores can use quizzes to recommend products based on customer preferences. These quizzes help users navigate a large catalog and find the right item faster. Common applications include skincare routines, fashion style finders, or home decor match quizzes. The interactivity turns shopping into a guided and enjoyable experience.
Application in Education and Online Courses 📚
Learning platforms and educational websites use quizzes for knowledge checks, onboarding new learners, or offering course placement suggestions. These quizzes create a feedback loop, allowing users to measure progress or get recommendations on what to study next.
Application in Marketing and Lead Generation 🎯
Marketing teams use quizzes to collect emails, segment audiences, or spark curiosity. Personality tests, industry readiness checklists, and ROI calculators are common formats. The results can be used to tailor follow-up campaigns and improve targeting.
These examples show how an interactive questionnaire can be more than just content — it becomes a conversion and engagement tool. Let’s now explore some potential issues that may arise when embedding quizzes and how to solve them.
Fixing Common Issues
Even though adding a quiz to your website is simple in most cases, there are a few challenges and technical considerations that users may encounter. Below you’ll find answers to common questions related to quiz integration, setup, and performance.
Why isn’t my embedded quiz displaying properly on mobile?
How do I track user responses or quiz performance?
Why does my quiz load slowly or lag during interaction?
Does embedding a quiz affect website speed or SEO?
Can quizzes be made accessible for all users?
With a bit of preparation, these challenges can be resolved quickly. Now that you understand how to make a quiz website work smoothly, let’s wrap up with some key takeaways and a final call to action.
Conclusion
Adding a quiz to your website is one of the most effective ways to boost engagement, gather client feedback, and personalize the user journey. Whether you’re using a drag-and-drop form creator, embedding a ready-made template, or building one from scratch with HTML, you now have a clear understanding of how to create a quiz for your website from start to finish.
From quick setup guides and alternative methods to best practices and troubleshooting tips, this article covered everything needed to launch a fully functional, visually integrated quiz. No matter your industry, an embedded quiz can help drive interaction, improve conversions, and deliver real value to your visitors.
Looking for More Guidance?
We hope this walkthrough gave you the clarity and tools needed to start building quizzes with confidence. If you’re interested in adding powerful features to your website without writing code or have additional questions — contact us, we’d love to support you. At Elfsight, we’re focused on delivering simple, effective widget solutions that help your business grow.
Join our friendly Community to exchange ideas and see what others are building. Have a feature in mind? Submit it to our Wishlist — we’re always listening and improving based on your feedback.