Did you know?
With 434 million active accounts globally, PayPal remains one of the most trusted digital payment methods for both consumers and merchants.
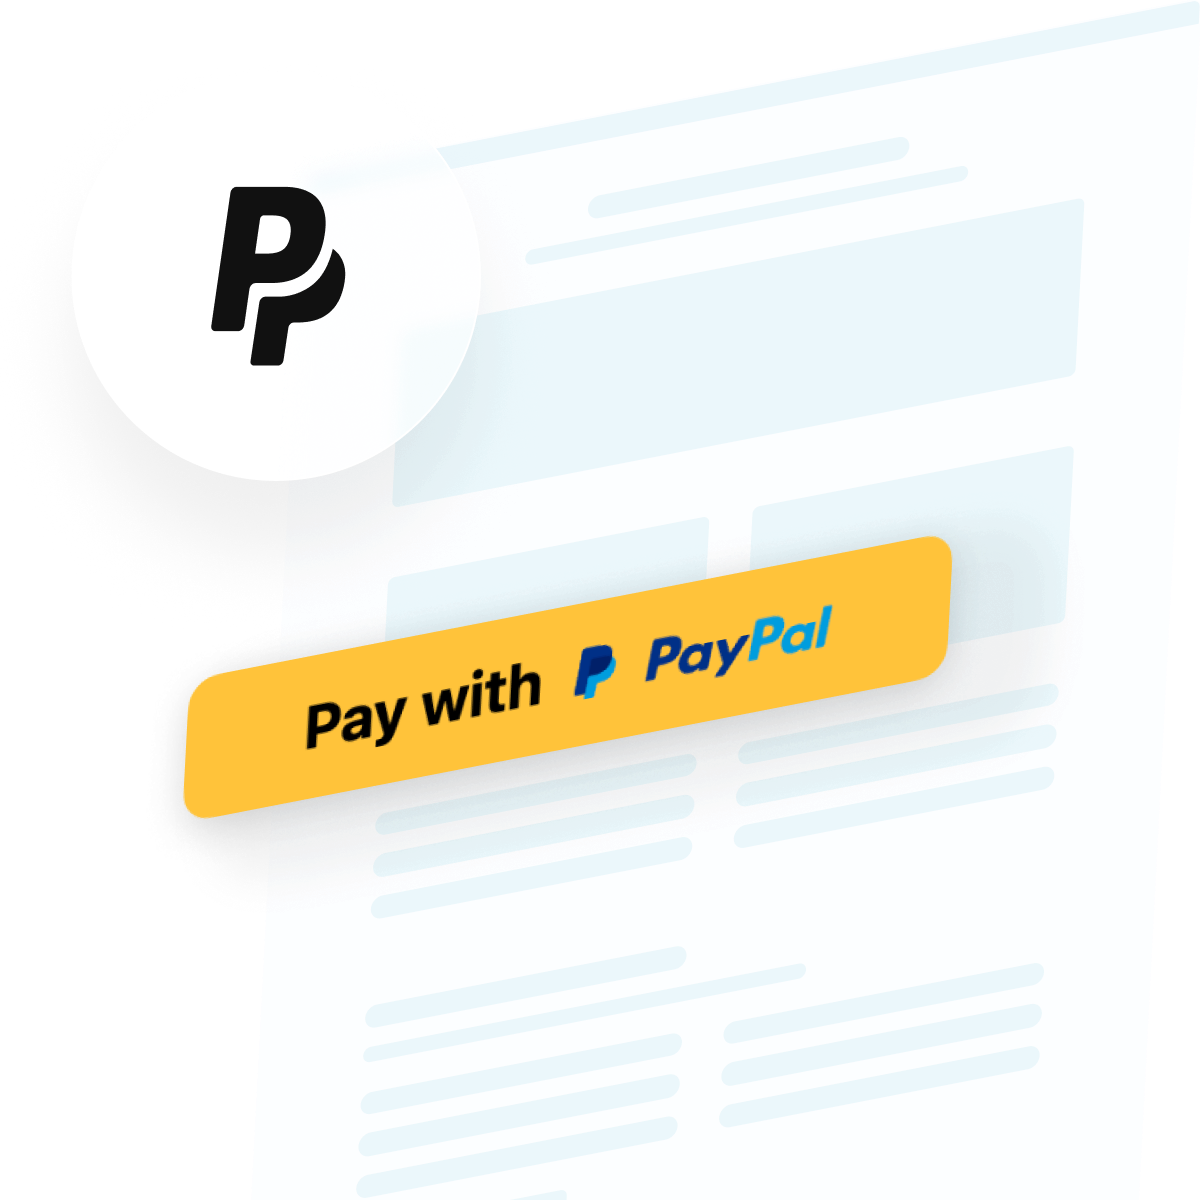
Accepting payments directly on your website removes friction from the buying journey. The fastest way to add a PayPal button to your website is with Elfsight’s PayPal Button Widget, which lets you create no-code checkout buttons, subscription payments, and donation forms in minutes. Visitors complete transactions securely through PayPal without ever leaving your page, boosting conversion rates while building trust through a globally recognized payment method.
- Add a PayPal button to your website without coding.
- Create checkout buttons, subscriptions, and donation forms with full customization.
- Compare PayPal’s official button method with a third-party solution.
- Optimize button placement and design for higher conversion rates.
Ready to get started? We’ve broken this down into two approaches: the express lane for those who want their payment button live today, and a comprehensive walkthrough for exploring every detail and customization option.
Get Your PayPal Button Live in 4 Steps
Here’s the fastest route to embedding a PayPal button on your website:
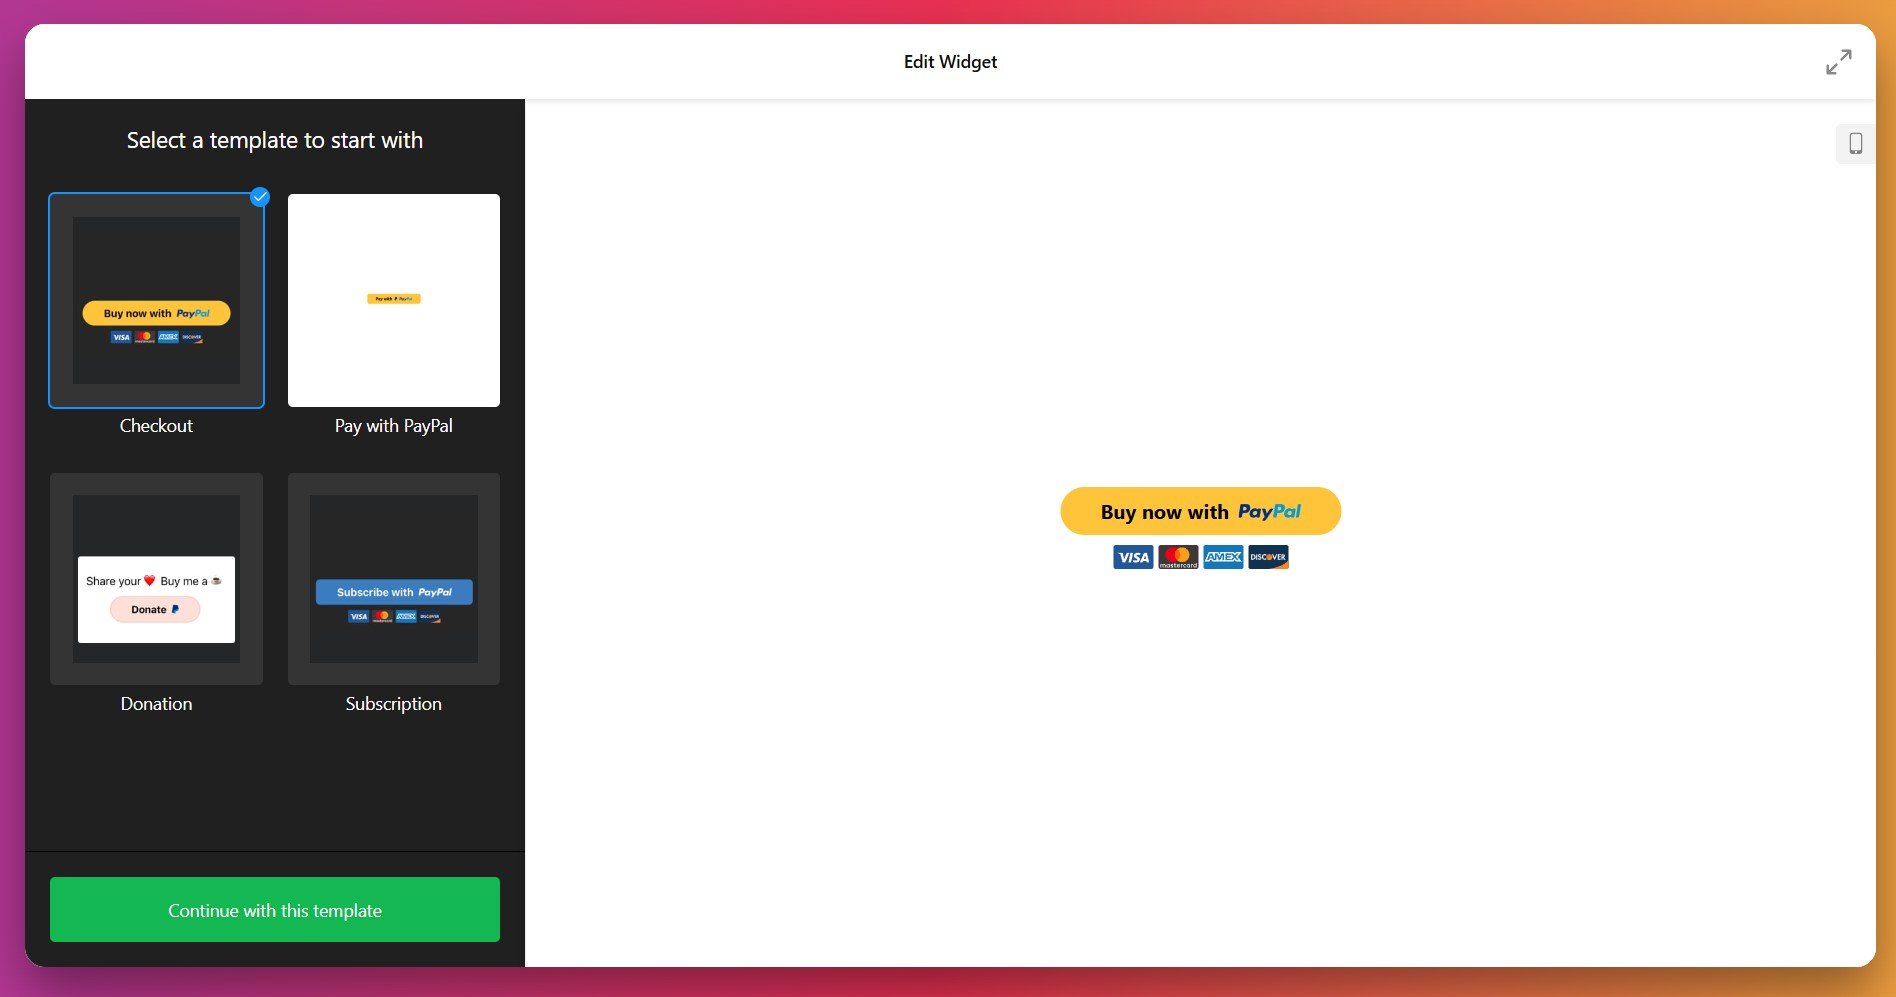
- Open Elfsight’s editor and select a payment type.
- Enter your PayPal seller email and set payment details.
- Customize the widget to match your brand.
- Copy your embed code and paste it into your website’s backend.
🚀 Create your first PayPal payment button now in the live editor!
What Makes This PayPal Solution Stand Out
Now that you understand the simplicity of this setup, let’s explore the key capabilities that set this PayPal widget apart from native options and other alternatives:
| Key Feature | Why It Matters |
|---|---|
| Three payment types in one widget | Create checkout buttons for one-time purchases, subscription buttons with flexible billing periods, or donation buttons with fixed or variable amounts—all from a single tool. |
| Built-in payment system icons | Display Visa, Mastercard, American Express, and Discover logos beneath your button. Seeing familiar payment options increases buyer confidence and checkout completion rates by signaling security. |
| Full style customization for your brand | Control button size, shape, color, text, border thickness, and PayPal logo appearance. Your payment button blends seamlessly with your website design instead of standing out awkwardly. |
| Multi-currency and localization support | Offer payments in 20+ currencies with localized checkout interfaces. Accept global transactions while customers see prices and payment screens in their native language. |
| Flexible billing options for subscriptions | Set billing intervals daily, weekly, monthly, yearly, or custom periods. Enable automatic recurring payments so subscribers stay active without manual intervention. |
| Tax and shipping configuration | Add taxes as a percentage or fixed amount, plus shipping fees directly in your button setup. The final price displays transparently on PayPal’s checkout page. |
| Post-purchase redirect option | Send customers to a thank-you page or special offer after successful payment. Track conversions more effectively and maximize upsell opportunities. |
Apart from these highlights, there are more capabilities for you to explore. For the complete breakdown of available functionality, visit the Features Page.
A Closer Look: Configuration and Customization
Want to fine-tune every aspect of your payment button? This section walks you through each configuration step, from selecting payment types to styling your button for maximum conversions.
1. Choose Your Payment Type
Launch the PayPal Button editor and select the payment model that aligns with your business:
- Checkout type processes one-time purchases with a product name, price, optional shipping, and tax settings. Ideal for selling products or services on a per-transaction basis.
- Subscription type sets up recurring payments at intervals you define (daily, weekly, monthly, yearly, or custom). Perfect for membership sites, software licenses, or recurring services.
- Donation type lets supporters contribute fixed amounts or choose their own donation sum. Works for nonprofits, creators, community projects, or content funding.
2. Enter Your PayPal Account Details
Navigate to the Payment tab and enter your PayPal seller email address. This is the account where payments will be deposited. Make sure you’re using a PayPal Business Account—personal accounts cannot accept payments through buttons.
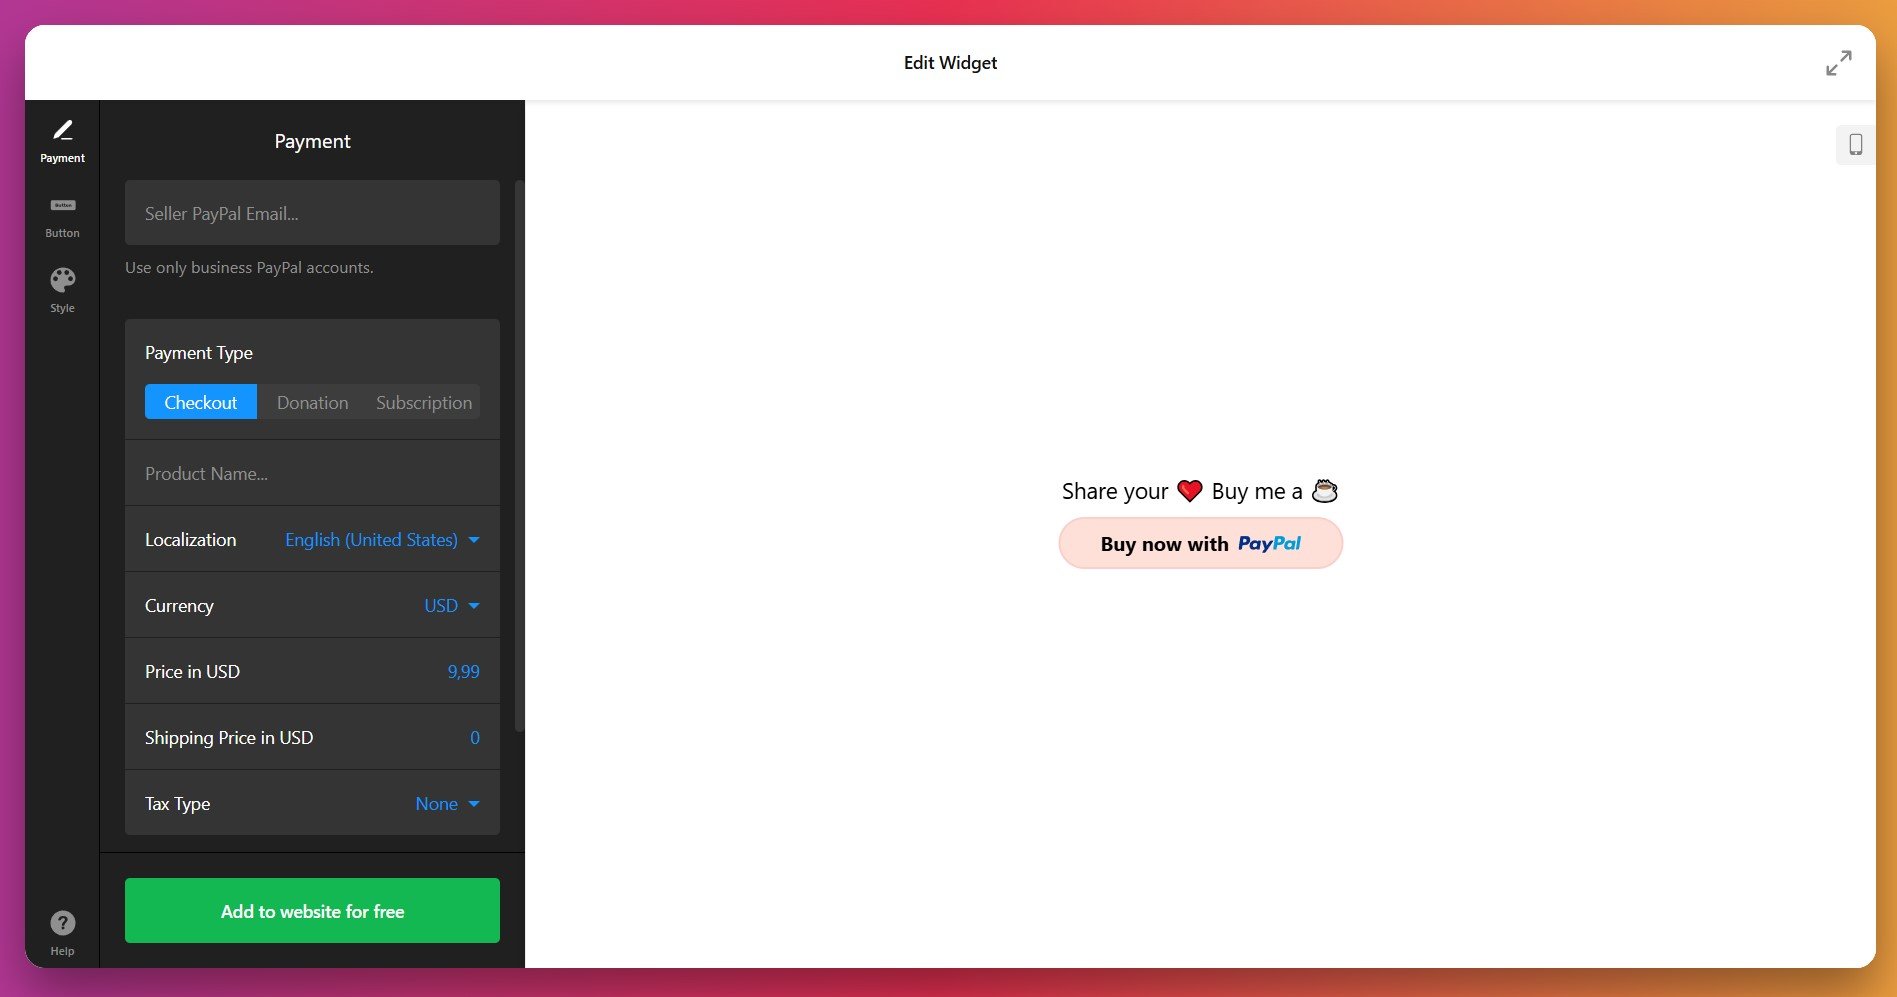
3. Configure Payment Details
For checkout buttons, enter these essential details:
- Product name – The item or service customers are purchasing (e.g., “Premium Course Access,” “Consulting Package”).
- Price – The payment amount in your chosen currency.
- Currency and localization – Select your country and payment currency (20+ options supported). This displays the checkout interface in the local language.
- Shipping price – Optional fee for physical goods. Leave blank if you offer free shipping or sell digital products.
- Tax type – Choose None, Percentage (calculated from total), or Fixed amount.
For subscription buttons, you’ll also set the billing interval and whether payments recur automatically. For donation buttons, decide whether donors choose their own amount or if you set a fixed sum.
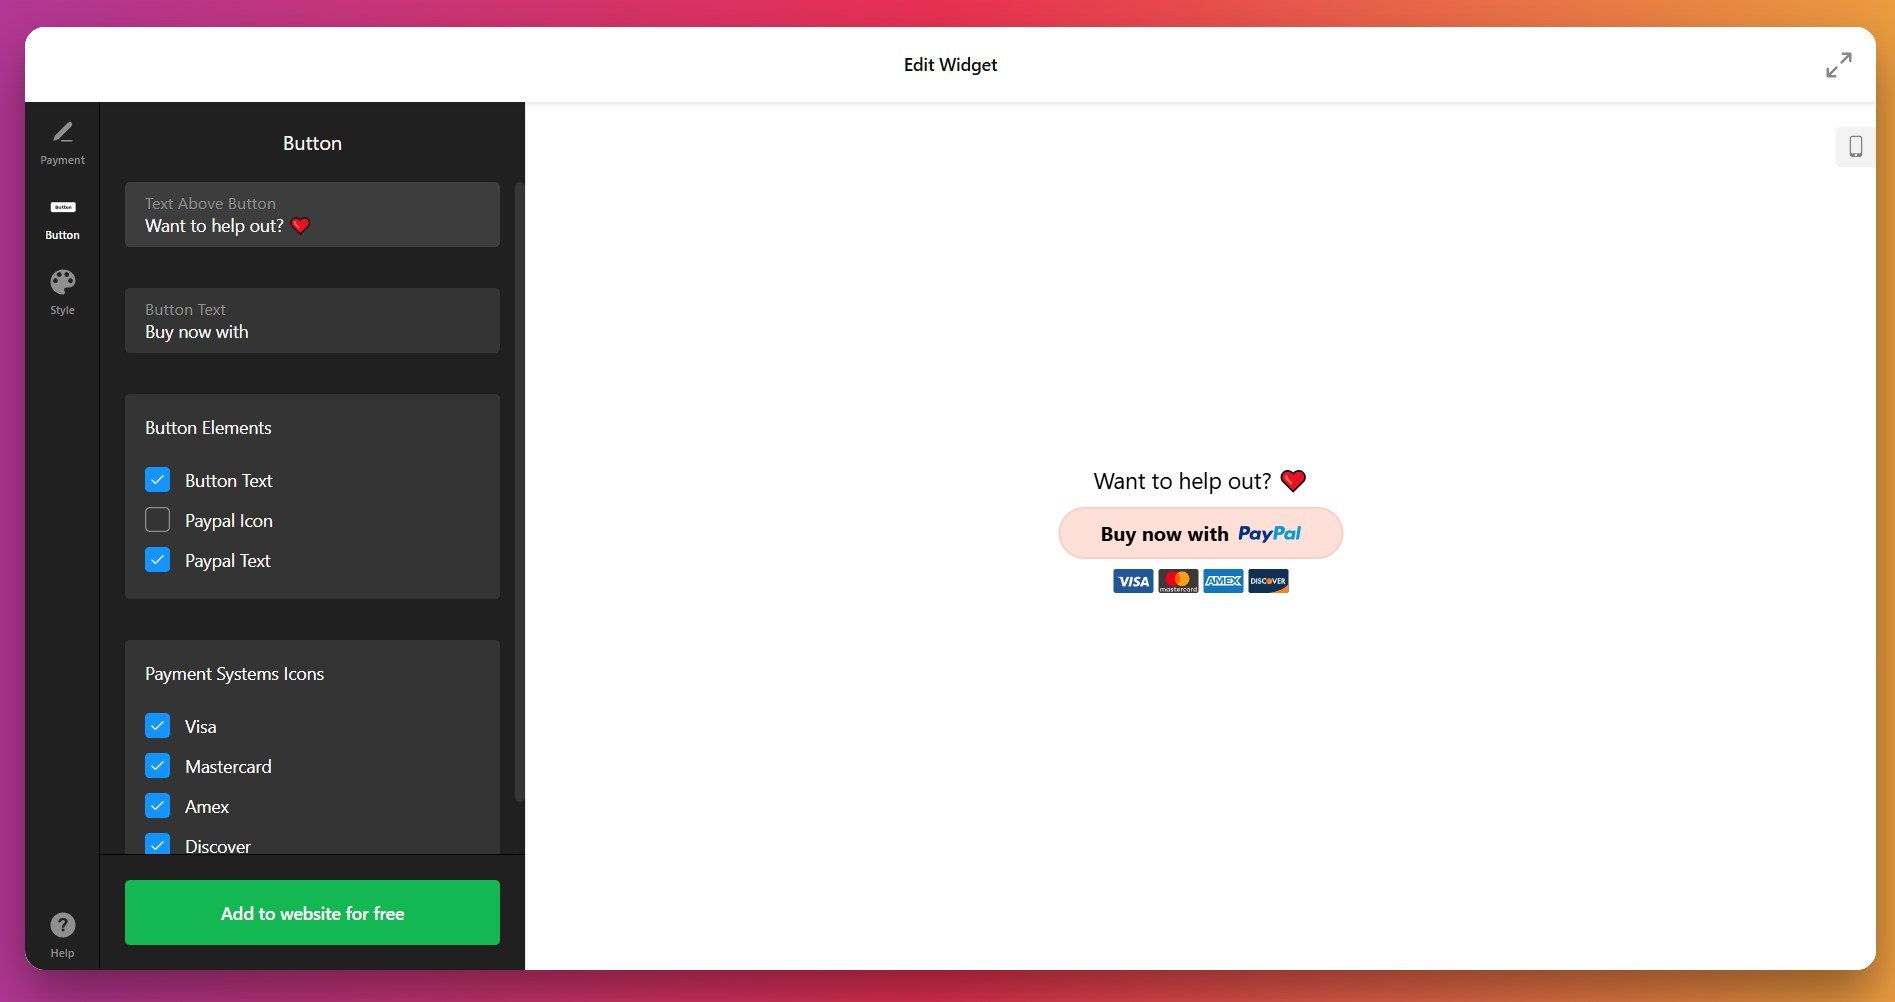
4. Customize Button Text and Elements
In the Button tab, decide which elements your PayPal button will display:
- Text above button – A headline or call-to-action above the payment button (e.g., “Ready to get started?” or “Support our mission”).
- Button text – The label on the button itself (defaults to “Buy Now,” “Subscribe,” or “Donate,” but you can customize it).
- Button elements – Toggle visibility of button text, PayPal icon, and PayPal branding text.
- Payment system icons – Show or hide Visa, Mastercard, American Express, and Discover logos below your button.
5. Style Your Button for Maximum Impact
In the Style tab, fine-tune your button’s appearance to match your website:
- Button width – Choose pixels, percentage of container, or autofill.
- Button size – Drag the slider from small to large. Bigger buttons get more clicks.
- Button shape – Rectangle, rounded corners, or fully rounded.
- Border thickness – Adjust from 0 to create a bordered button.
- Colors – Customize button color, text color, border color, and PayPal logo color independently.
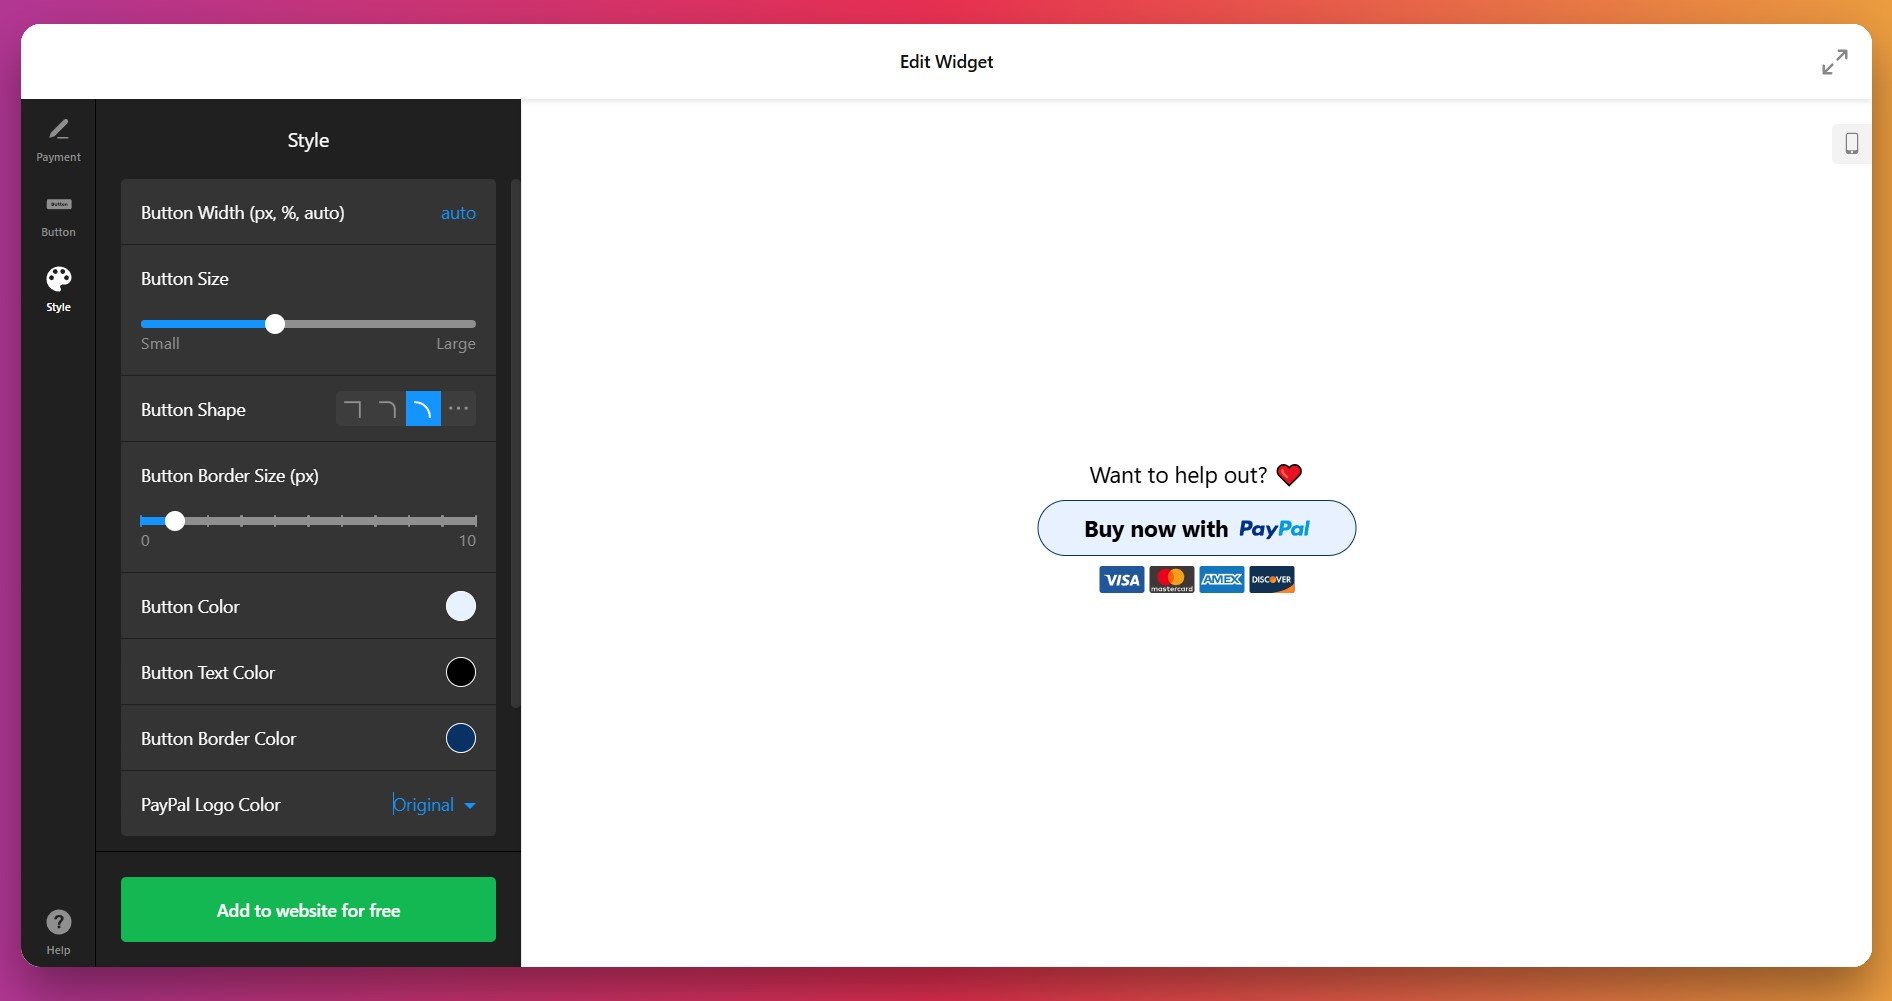
If default styling options aren’t enough, the Custom CSS field lets you make granular adjustments. For example, you can change fonts, adjust spacing, or apply hover effects. The Elfsight Community Forum provides ready-to-use CSS snippets if you’re not comfortable writing code.
6. Copy and Paste Your Embed Code
Once satisfied with your setup, click the green “Add to website for free” button. Copy the entire code block – you’ll need it to launch your widget.
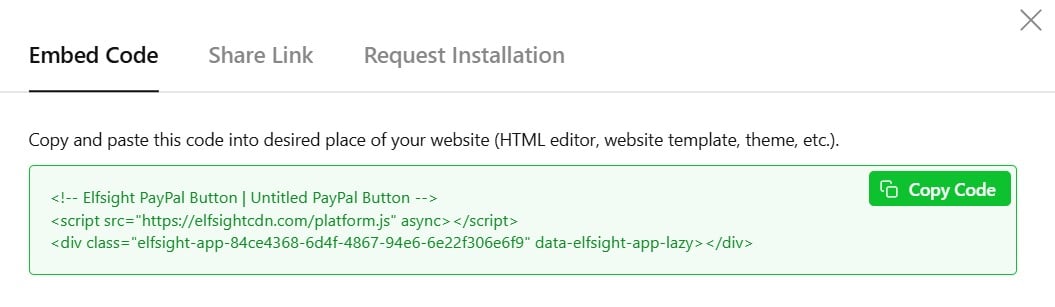
Paste your PayPal button code into your website’s backend. The exact process depends on your platform. For example:
WordPress (Gutenberg Editor – Block Editor)
- Navigate to the page or post where you want to add the button.
- Click the “+” icon to add a new block.
- Search for and select “Custom HTML.”
- Paste your Elfsight PayPal code into the Custom HTML block.
- Click “Update” or “Publish” to save your changes.
- Confirm you pasted the complete embed code—it should be several lines long, not truncated.
- Make sure you used a Custom HTML or HTML block, not a Text block.
- Clear your browser cache and refresh the page.
- Test in a different browser to rule out local issues.
- If still missing, check your browser’s developer console (F12) for JavaScript errors.
Beyond Elfsight: Understanding Your Payment Button Options
While Elfsight simplifies payment button creation, several other approaches exist for accepting PayPal payments on your website. Each has its own strengths, limitations, and ideal use cases. Here’s how they stack up:
PayPal’s Official Button Builder
PayPal’s native button tool lets you create payment buttons directly from your PayPal account without third-party tools.
- Log into your PayPal account. Go to “Tools” → “All Tools” → “PayPal Buttons” (or search “Create Payment Links and Buttons”).
- Select button type. Choose “Buy Now,” “Donate,” or “Subscribe” depending on your need.
- Configure payment details. Enter product name, price, currency, and any shipping or tax information.
- Copy the HTML code. PayPal generates embed code for your button. Copy the full snippet.
- Paste into your website. Insert the code into a Custom HTML block on your page, post, or website builder.
PayPal’s official buttons have minimal customization—you can’t change colors, text, or shape much beyond basic options. The button typically appears in PayPal’s standard blue, which may not match your brand. Style options are restricted compared to third-party solutions.
Full details are available in PayPal’s Developer Dashboard.
Stripe Checkout (Third-Party Alternative)
Stripe is another popular payment processor that competes with PayPal. It offers checkout buttons through Stripe’s payment links.
- Create a Stripe account. Sign up at stripe.com and verify your identity and bank account.
- Generate a payment link. Go to Products → Prices → Payment Links and create a new link for your product.
- Customize the checkout page. Add product image, description, and branding colors through Stripe’s interface.
- Copy your payment link. Get the URL and either embed it as a button or link on your page.
- Embed on your website. Paste as a standard hyperlink or use a Code block to embed a custom button pointing to your Stripe link.
Stripe checkout typically opens a new page or tab, taking visitors away from your website. This interrupts their browsing experience and can impact brand perception. Stripe’s fees are also similar to PayPal (2.9% + $0.30 per transaction in the US).
More information is available in Stripe’s Payment Links documentation.
WooCommerce (WordPress E-Commerce Plugin)
If you’re using WordPress and need a full e-commerce solution, WooCommerce is a popular plugin that integrates PayPal and other payment methods.
- Install and activate WooCommerce. Search for “WooCommerce” in WordPress plugins and activate it.
- Add products. Create product listings with names, descriptions, prices, and images through the WooCommerce admin.
- Configure PayPal integration. Go to WooCommerce Settings → Payments → PayPal Standard (or PayPal Commerce Platform for more features).
- Enter your PayPal email. Link your PayPal Business Account to your WooCommerce store.
- Customize your shop. Design product pages, set up shipping, taxes, and checkout flow.
WooCommerce requires installing a plugin, configuring products, and managing a full store backend. It’s powerful for large product catalogs but overkill if you just need a single payment button. Performance can also be impacted if your hosting isn’t robust.
More information is available in WooCommerce’s PayPal Integration Guide.
How Do These Methods Compare?
| Method | Best For 👍 | Main Limitation 👎 |
|---|---|---|
| Elfsight PayPal Button | Fully customized, branded buttons with minimal setup. Works on any platform. One-time payments, subscriptions, and donations all in one tool. | Requires a free Elfsight account; button code must be manually placed on each page where needed. |
| PayPal Official Button | Direct integration without extra accounts; zero setup fees; trustworthy as the official PayPal tool. | Limited design customization; buttons appear in PayPal’s standard style; fewer payment type options. |
| Stripe Checkout | Professional checkout experience; strong security and fraud prevention; detailed analytics. | Redirects visitors away from your site; higher fees in some regions; requires separate account setup. |
| WooCommerce | Complete e-commerce store with product management, inventory, shipping, and extensive customization. | More complex to set up and maintain; hosting requirements can be expensive; overkill for single-button use cases. |
📝 Strategic Tips for Maximum Conversion
The difference between a button that converts and one that doesn’t often comes down to placement, design, and surrounding context. Based on patterns we’ve seen with thousands of users, these practices deliver measurable results:
- Place buttons where they’re immediately visible. Position your payment button above the fold on desktop and prominently on mobile. Visitors shouldn’t have to scroll to find it—place it near relevant product descriptions or sales copy.
- Use clear, action-oriented button text. Instead of generic “Submit” or “Click Here,” use specific text like “Buy Now,” “Subscribe Today,” or “Donate $10.” Descriptive text increases click-through rates by setting clear expectations.
- Create contrast between button and background. Your button should visually pop off the page. Use a bright color (orange, red, or green) that contrasts sharply with surrounding elements. Avoid muted tones that blend in.
- Add a call-to-action headline above the button. Use copy like “Ready to get started?” or “Support our mission today” to emotionally prepare visitors. This bridges the gap between your sales message and the payment action.
- Display payment system icons prominently. Show Visa, Mastercard, and other accepted payment methods below your button. Familiar logos reduce purchase anxiety and increase conversions by up to 5-10%.
- Include trust signals near your button. Add testimonials, reviews, security badges, or money-back guarantees adjacent to your payment button. Trust signals reduce cart abandonment and increase payment confidence.
- Test button size on mobile. Ensure your button is at least 44-48px tall so mobile users can tap comfortably without accidentally clicking nearby elements. Test on real devices, not just browser preview.
- Set a realistic price and be transparent. Clearly show what customers are paying for. Surprise fees at checkout (even small ones) cause abandonment. If you charge tax or shipping, display the total before redirecting to PayPal.
- Offer multiple payment options when possible. Some customers specifically prefer PayPal, others want credit cards. Offering both PayPal and direct card payment increases conversion by up to 30%.
- Use post-purchase redirects strategically. Send customers to a thank-you page with next steps, bonus content, or upsell offers. This maximizes the customer experience and revenue per transaction.
FAQ: Troubleshooting and Common Questions
Here are answers to the most common questions from users about embedding PayPal buttons on their websites:
Do I need a PayPal Business Account to accept payments?
What payment types can I create with Elfsight's widget?
Can I add taxes and shipping to my PayPal button?
What currencies does the PayPal button widget support?
How do I know if a payment was successful?
Can I customize the button text and colors to match my brand?
What happens if a customer has an issue with their payment?
Can I use the PayPal button on mobile sites?
Is there a fee for using Elfsight's PayPal button?
Can I embed multiple PayPal buttons on the same page?
Ready to Accept Payments? Start Today
Whether you’re selling products, accepting donations, or setting up subscriptions, a branded, easy-to-use payment button keeps customers on your website and builds trust through a globally recognized payment method.
Questions along the way? Our Community Forum is full of real-world examples and solutions from users just like you. When you’re ready to launch, Elfsight support is here to help. Create your first PayPal button today and watch your conversion rates grow.