Adding a calculator to your website is a practical way to boost user engagement, provide real-time value, and improve conversion rates. Whether you need a pricing estimator, loan calculator, or any custom formula, a calculator widget for website usage helps visitors interact with your content meaningfully.
If you’re running a business or offering services online, an online calculator is exactly what you need. It gives your audience a quick and interactive way to make informed decisions — without ever leaving your page.
- Improves user engagement. Visitors are more likely to stay and interact when they can calculate values directly on your page.
- Boosts conversion rates. By helping users visualize outcomes or costs instantly, calculators reduce friction and build trust in the decision-making process.
- Supports better lead generation. Many calculators can be paired with forms, capturing data after interaction for future follow-ups.
- Reduces support queries. Users can get answers on their own, decreasing the need for live support or customer service inquiries.
- Fits seamlessly with your design. A visual calculator embed option can match your branding and layout without affecting load speed or responsiveness.
In the next section, we’ll walk you through the quickest way to embed a calculator to your website using Elfsight — even if you don’t have technical skills.
Add a Calculator to Website in 1-2-3
Now that you know why a calculator widget is a valuable addition to your website, let’s take a quick look at how to embed one using Elfsight. The process is beginner-friendly and doesn’t require any coding skills.
- Open the Elfsight editor and choose the template that fits your needs.
- Adjust layout settings like size, spacing, and alignment to match your website’s design.
- Pick colors, fonts, and styling elements to make the calculator visually consistent with your branding.
- Click “Add to website for free“, copy the code, and paste it into your website’s backend.
This streamlined setup gives you a fast and professional way to embed a calculator in your website without hiring developers or dealing with complex scripts. Everything is handled visually, and the final widget works flawlessly across devices and platforms.
See how easy it is – create your own calculator with Elfsight now!
Elfsight Calculator’s Features
Elfsight’s widget is designed to be flexible, intuitive, and powerful — making it easy for anyone to create a website calculator that’s professional-looking without writing a single line of code.
- Visual editor with no coding required. Easily build and customize your calculator using a drag-and-drop interface, perfect for non-technical users.
- Fully customizable design. Adjust colors, fonts, spacing, and layout to match your website branding effortlessly.
- Pre-made templates for fast setup. Start with ready-to-use templates designed for pricing, quotes, savings, and more — no need to build from scratch.
- Smart formula builder. Configure custom logic, multi-step calculations, and dynamic outputs tailored to your use case.
- Mobile responsiveness. The widget adapts perfectly to any screen size, ensuring a smooth experience on mobile and desktop devices.
- Data capture capabilities. Optionally connect the calculator with form inputs to collect emails, estimates, or user choices.
- Seamless embedding across platforms. Copy the code and embed it anywhere — WordPress, Shopify, HTML, and more — with full compatibility.
Now that you know what the widget can do, let’s go through a complete walkthrough of how to build and install your calculator step-by-step.
Embed Calculator to Website: Step-by-Step
Now that you’ve seen the powerful capabilities of the Elfsight calculator widget, it’s time to create and embed one on your own website. The setup process is intuitive and accessible to everyone — no need for any tech skills or developers.
Follow the steps below to build a fully customized calculator and publish it on your website:
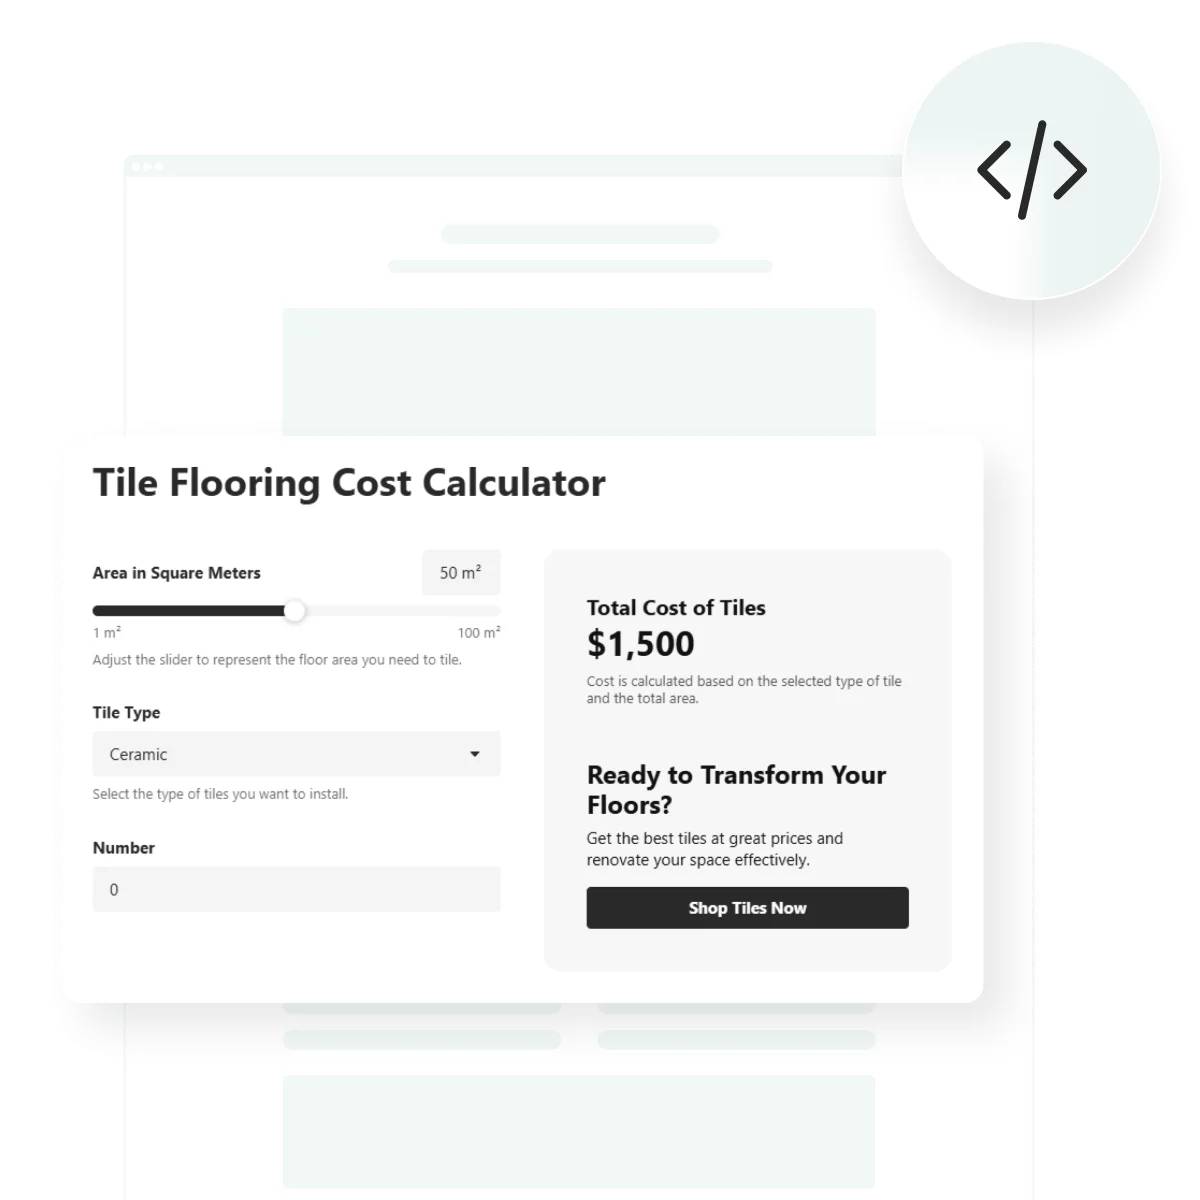
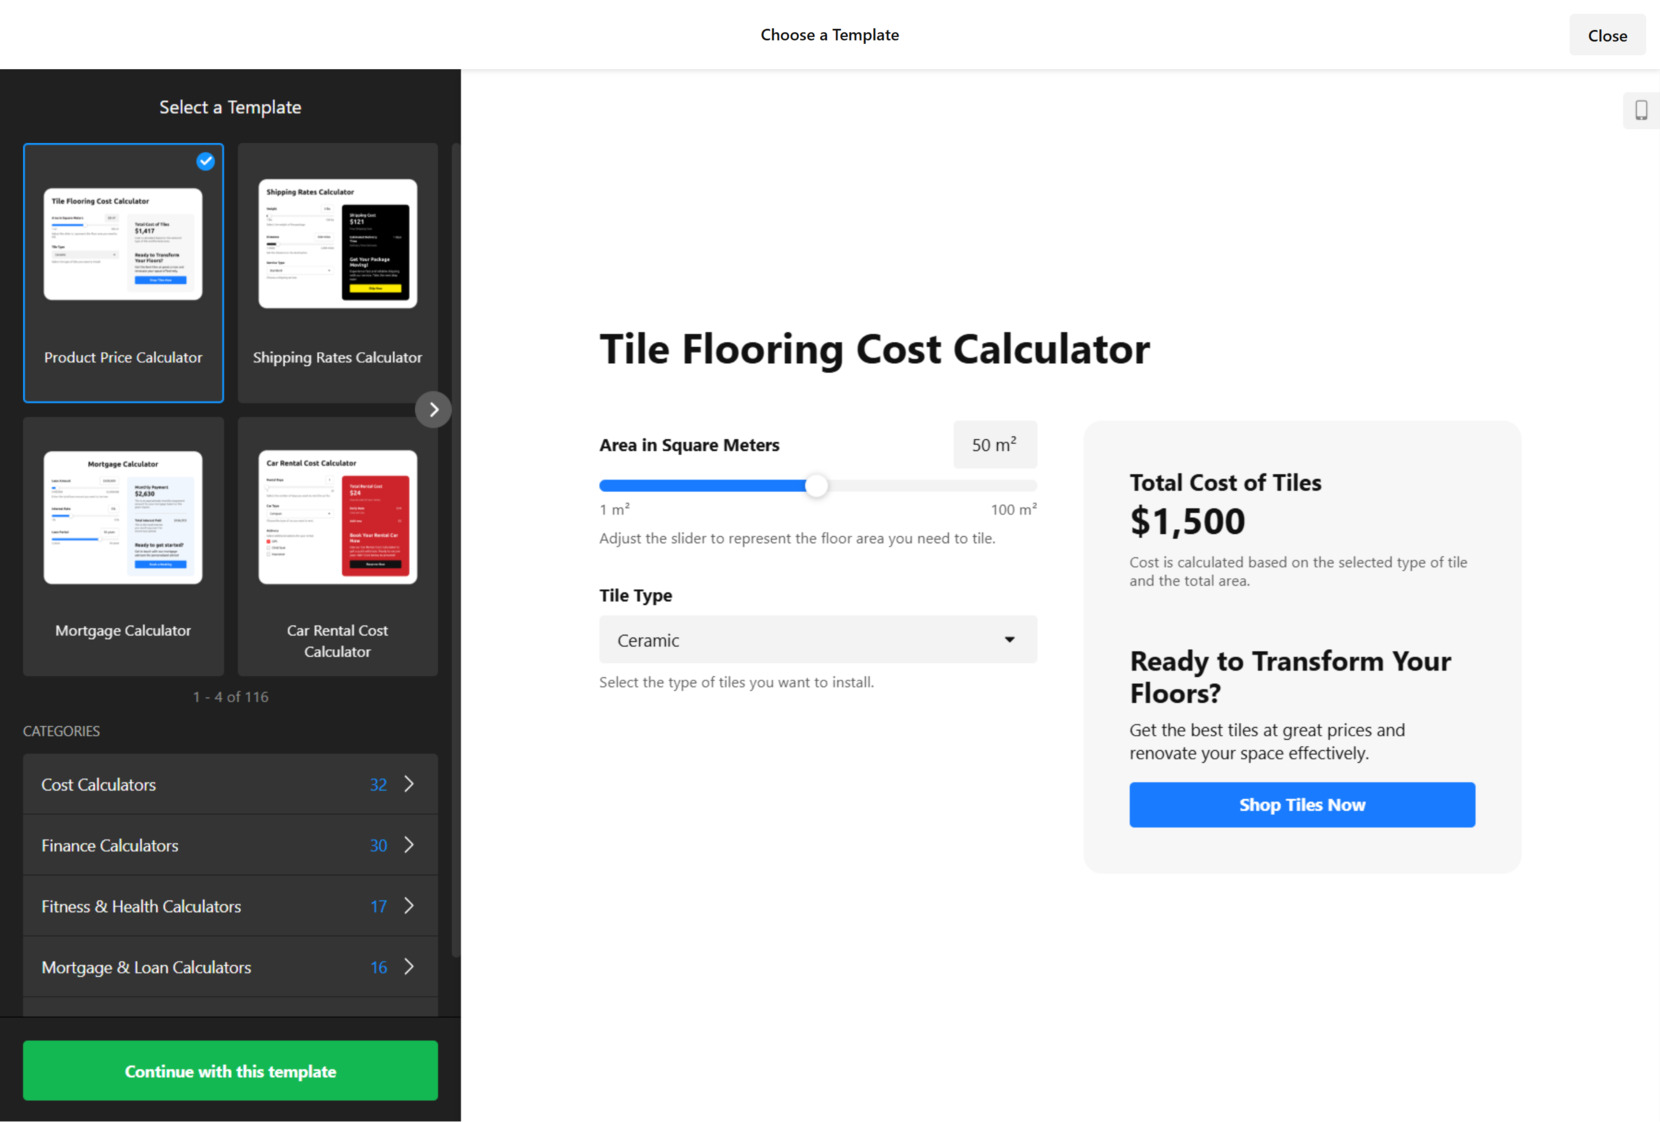
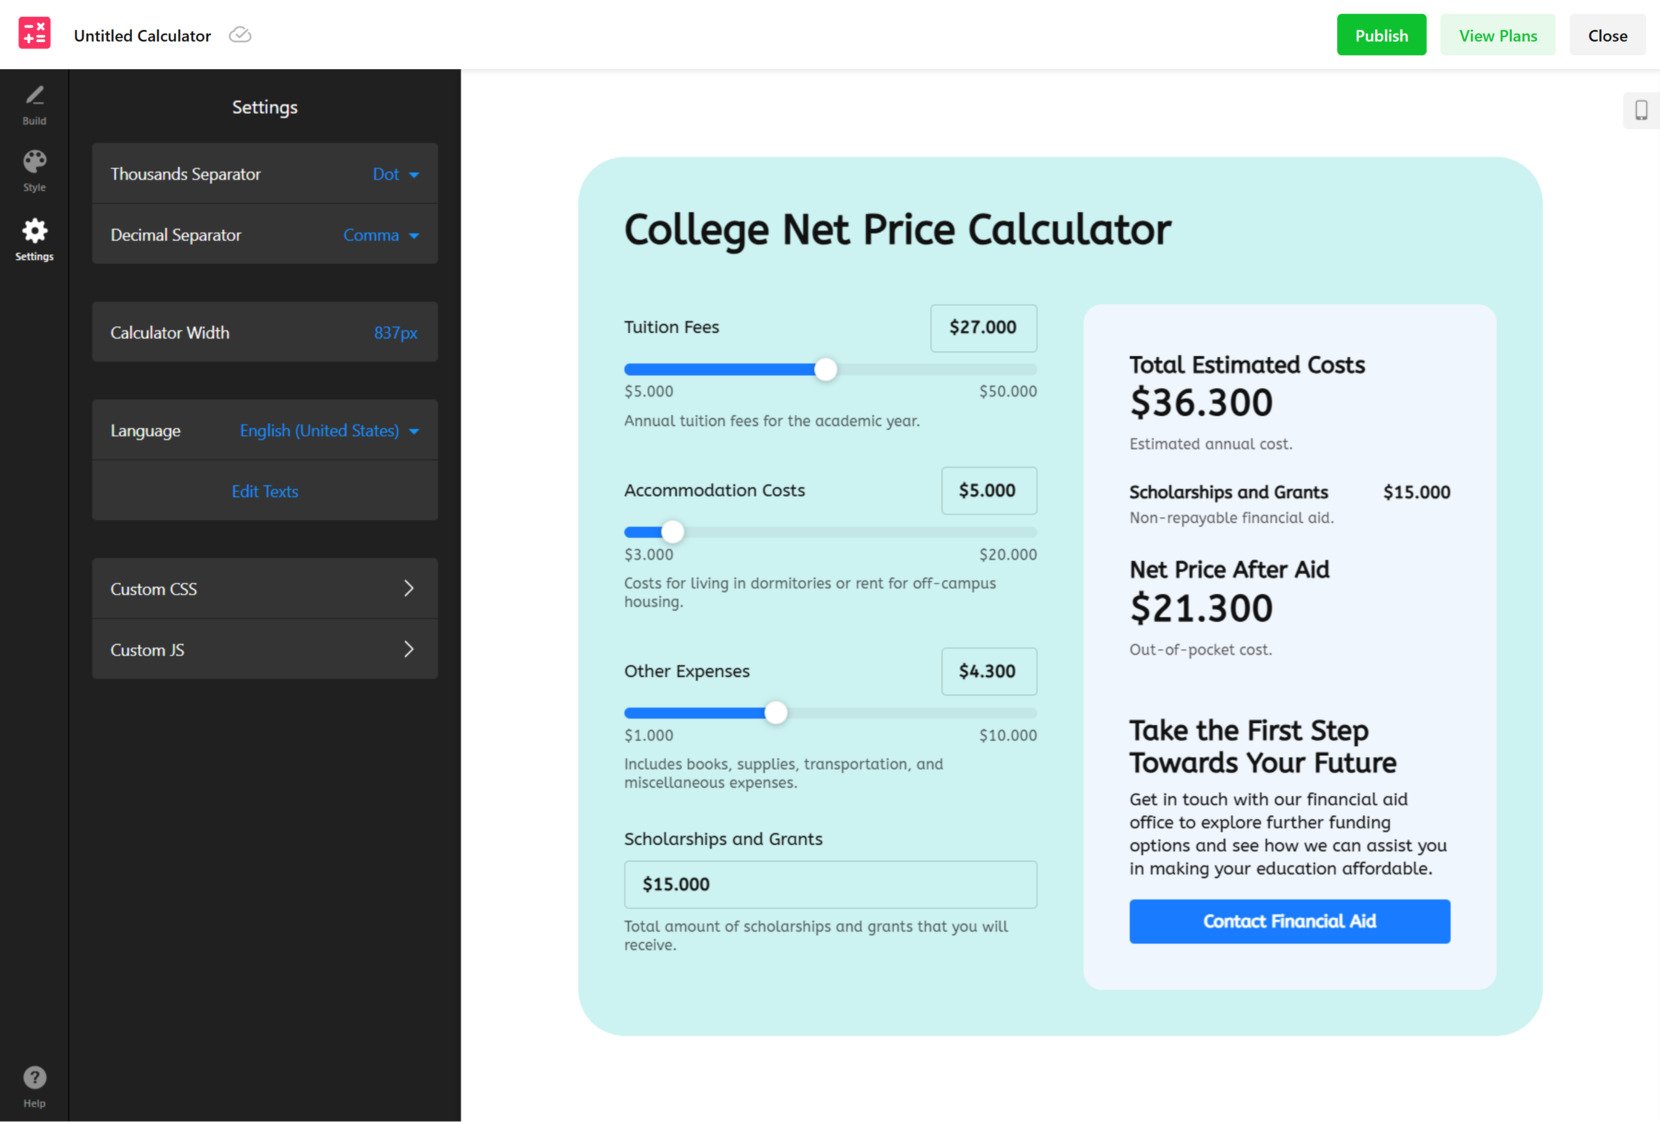
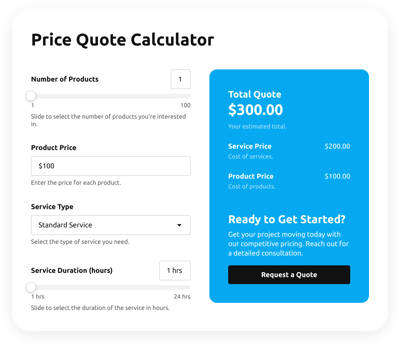
- Select a Starting Layout. Launch the calculator builder and explore the selection of pre-designed templates, such as finance estimators, pricing tools, or cost breakdowns. Click on “Continue with this template” to begin customizing the one that fits your use case.

- Add Inputs and Set Up Formulas. Navigate to the “Build” tab to include input fields like expenses, rates, or any other values you want users to enter. Scroll down to the “Calculations” section to define your formulas — either manually or using the AI-powered generator that builds logic from simple descriptions.
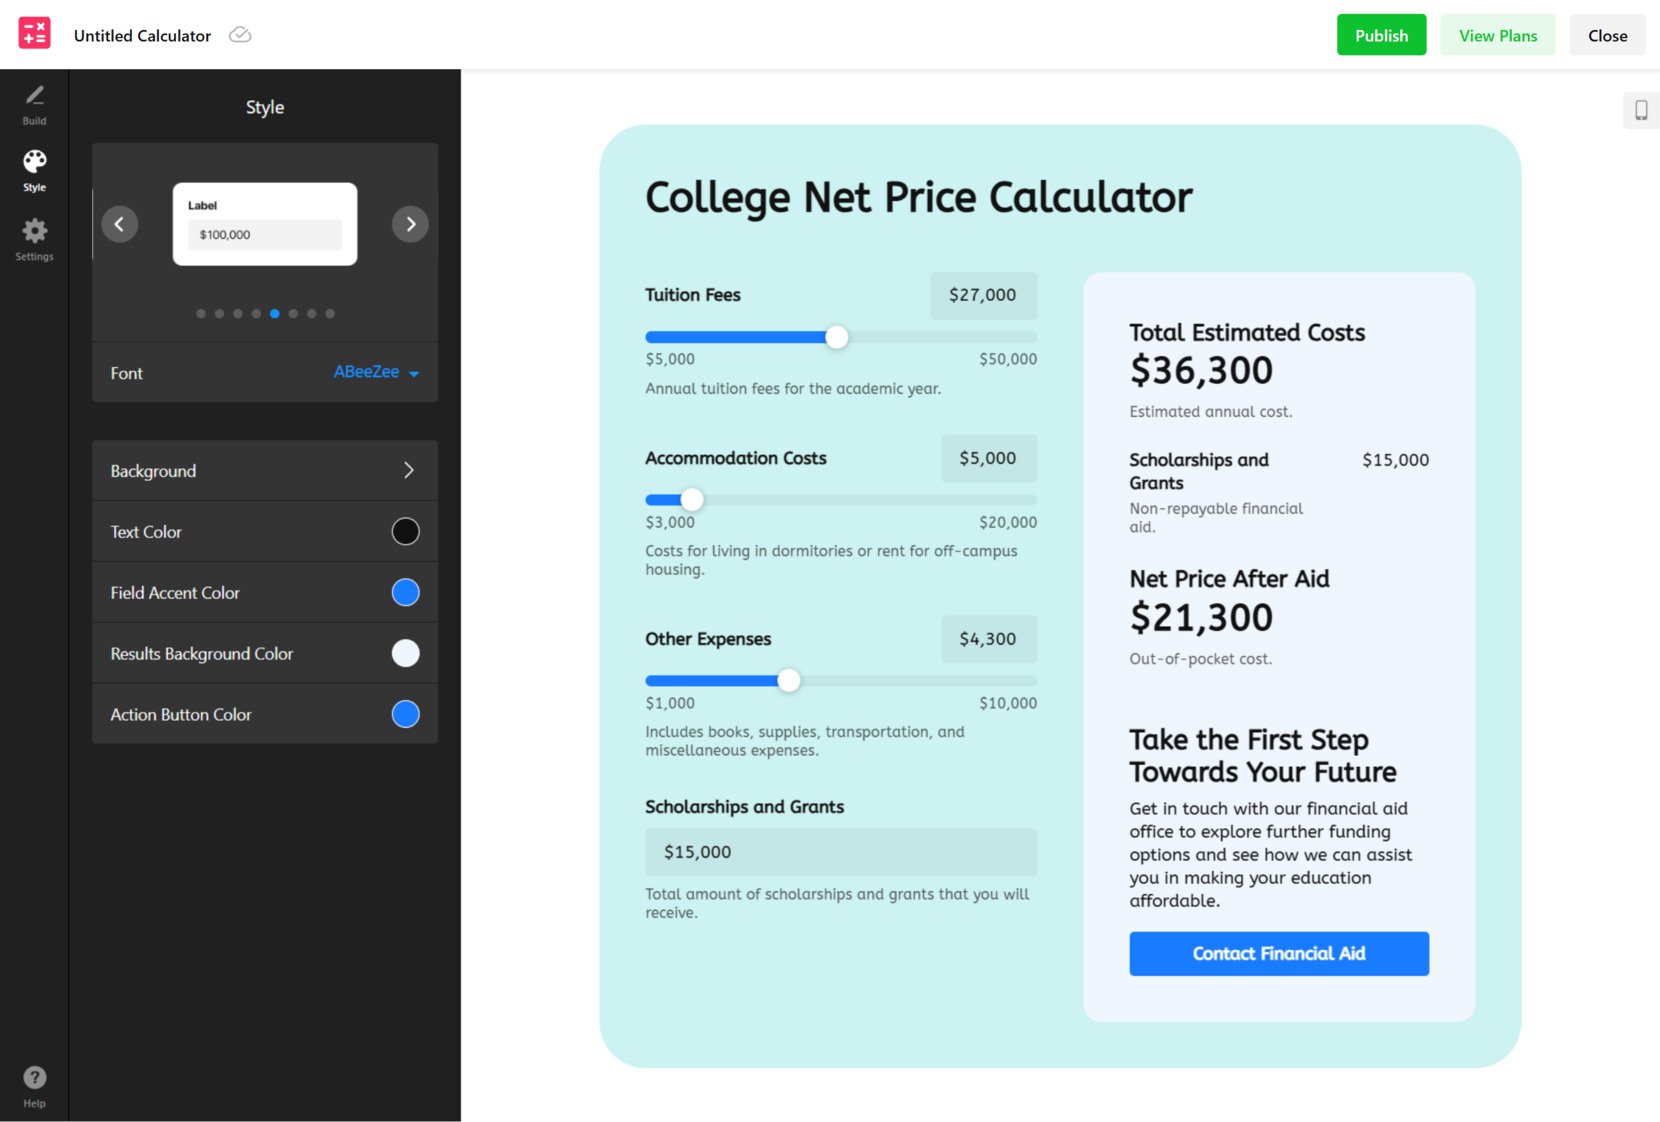
- Customize the Visual Design. Open the “Style” section to tweak the appearance of your widget. Change font styles, colors, backgrounds, and button accents so the calculator aligns with your website’s overall look. A live preview will update as you make adjustments.
- Tweak Settings and Display Language. Head to the “Settings” tab where you can fine-tune numeric format options, adjust the widget’s width, and set the display language. This is also where you can rename labels, or insert custom scripts to expand the widget’s behavior.
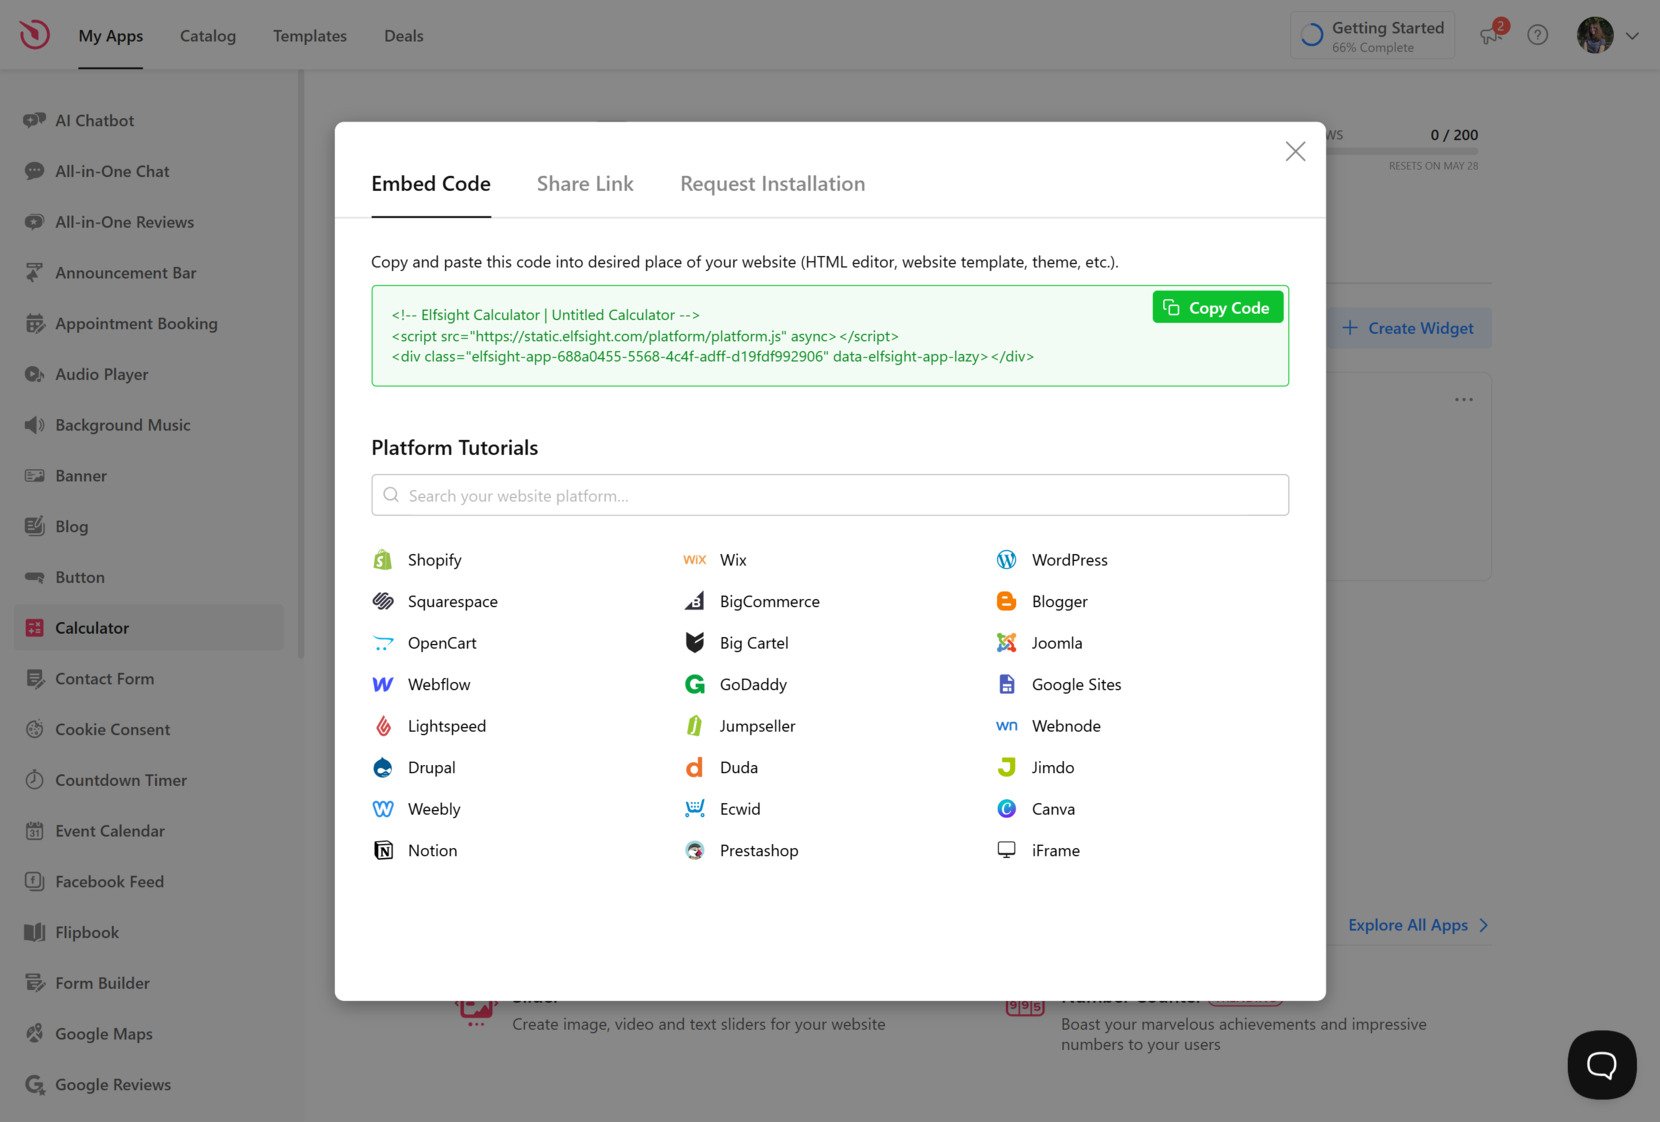
- Install the Calculator on Your Website. Once everything is set up, click “Add to website for free” to generate your embed code. Copy and paste this code into your website’s HTML editor or a designated code block to publish the calculator live.

This detailed walkthrough ensures your calculator is not only functional but also perfectly adapted to your audience and branding.
Next, let’s explore other possible ways to add a calculator to your website if you’re looking for alternative solutions that allow more customization.
Other Ways to Add a Website Calculator
While Elfsight provides the simplest and most versatile way to embed a calculator, there are other available methods you can use depending on your platform or technical preference. Let’s review the manual HTML approach to building a calculator.
Using HTML + JavaScript (Manual Embedding)
This method is ideal for experienced users who are comfortable writing code or working with raw markup. If you need a highly tailored solution and want complete control over every detail of the widget’s design and behavior, building a calculator manually with HTML and JavaScript is a solid choice. You can create everything from simple arithmetic calculators to advanced forms with conditional logic, depending on your coding proficiency.
- Open your website’s backend editor. Log into your website platform and locate the section where you can edit HTML — this could be within a custom HTML block, a code module, or directly in your template files depending on the platform you’re using.
- Create the HTML structure. Use standard HTML tags such as <input type=”number”>, <label>, and <button> to design the visual layout of the calculator. Structure the form so that users can enter values and trigger a calculation with a button.
- Insert JavaScript logic. Wrap your code inside a <script> tag either at the bottom of your HTML or in a separate file. Write a function that captures the input values, performs calculations, and displays the result in a designated output field using document.getElementById() or similar methods.
- Style with CSS. Add a <style> section or link to an external stylesheet to adjust spacing, fonts, colors, and borders. This ensures that the calculator aligns with your website’s overall design and remains visually consistent.
- Save and publish. Once your code is complete, save your changes and preview the page in a browser to test the calculator’s functionality. Double-check its performance on both desktop and mobile devices.
Here’s how a sample code may look like:
<!-- Calculator Container -->
<div style="max-width: 300px; padding: 20px; border: 1px solid #ccc; border-radius: 8px; font-family: Arial;">
  <h3>Simple Calculator</h3>

  <!-- Input Fields -->
  <label for="num1">First Number:</label><br>
  <input type="number" id="num1" placeholder="Enter a number" style="width: 100%; margin-bottom: 10px;"><br>

  <label for="num2">Second Number:</label><br>
  <input type="number" id="num2" placeholder="Enter another number" style="width: 100%; margin-bottom: 10px;"><br>

  <!-- Button -->
  <button onclick="calculateSum()" style="width: 100%; padding: 8px; background-color: #0073e6; color: white; border: none; border-radius: 4px;">Calculate</button>

  <!-- Result Display -->
  <p id="result" style="margin-top: 15px; font-weight: bold;"></p>
</div>

<!-- JavaScript Logic -->
<script>
  function calculateSum() {
    // Get values from input fields
    var num1 = parseFloat(document.getElementById('num1').value);
    var num2 = parseFloat(document.getElementById('num2').value);

    // Check for valid numbers
    if (isNaN(num1) || isNaN(num2)) {
      document.getElementById('result').textContent = "Please enter valid numbers in both fields.";
    } else {
      var sum = num1 + num2;
      document.getElementById('result').textContent = "Result: " + sum;
    }
  }
</script>
Manual embedding is highly flexible and offers the freedom to craft any layout or functionality. It’s a preferred route for developers who want to control every detail and integrate the calculator deeply into their website’s ecosystem.
Comparison: Elfsight vs Manual Embedding
Here’s a closer look at the two most relevant methods for embedding a calculator on your website. This comparison highlights what each approach offers and where each one might fall short.
| Method | Pros | Cons |
|---|---|---|
| Elfsight Calculator Widget | Empowers users to build and publish a fully interactive calculator without writing code, using a drag-and-drop editor and visual logic builder. | Some advanced features — such as hidden fields, multi-step logic, or data export — are only available on paid plans. |
| HTML + JavaScript Code | Provides total flexibility to design, script, and style a calculator from scratch, tailored precisely to your use case and branding. | Requires hands-on knowledge of HTML, CSS, and JavaScript, which can slow down development and create maintenance overhead over time. |
Both approaches are valid depending on your needs, but Elfsight offers a faster, more user-friendly solution that balances customization with ease of use — especially ideal for non-developers or businesses needing quick results.
Now let’s take a look at how to use your calculator more effectively and ensure it delivers the best results for your audience.
Tips to Get the Most Out of Web Calculator
Once you’ve embedded a calculator into your website, optimizing its performance and presentation can make a significant difference. Here are key tips that apply to any visual calculator embed option, regardless of the tool or platform you choose.
- Place the calculator where users naturally expect it. Add the widget to a highly visible section — like a pricing page, service estimator, or product comparison page — to ensure visitors don’t miss it.
- Limit the number of input fields. Keep the interface clean and focused by only including the fields necessary for the calculation. Too many inputs can overwhelm users and reduce interaction.
- Use clear labels and tooltips. Help users understand what each field is for by labeling everything precisely. If needed, use tooltips or placeholder text to explain how the calculator works.
- Make sure it’s mobile responsive. Test the calculator across devices to confirm that it adapts well to different screen sizes and touch interactions. Use flexible layouts and scalable elements when embedding.
- Include a visible call-to-action (CTA). After the calculation, guide the user to the next step — like a contact form, booking page, or purchase button — to boost conversions.
- Track user interaction with analytics tools. If possible, set up event tracking to see how users interact with the calculator. This can help you identify drop-offs and refine the experience.
- Use default values or auto-fill options. To improve speed and clarity, pre-fill certain fields with typical values so users can see a result right away and adjust inputs as needed.
These tips help ensure your embedded calculator is not only functional but also intuitive, fast-loading, and conversion-focused. When implemented thoughtfully, even the simplest calculator can become a powerful tool that adds real value to your website and enhances the user journey.
Who Should Use a Website Calculator
Website calculators serve a broad range of industries by turning static content into interactive, personalized tools. They enhance usability, reduce friction, and make websites more conversion-oriented. Below are detailed examples of how various businesses can apply calculator widgets effectively.
Application in E-commerce and Retail 🛒
Retailers and online stores can benefit immensely from calculators that help users estimate product costs, shipping, taxes, or discounts. For example, product configurators for custom items — like furniture, apparel, or electronics — can dynamically adjust price based on selected options. This gives users real-time clarity and reduces friction at checkout.
To improve performance, embed the calculator directly on product or cart pages and ensure it auto-updates values without refreshing the page. This keeps the process smooth and intuitive.
Application in Finance and Insurance 💵
In finance, calculators are essential for allowing users to estimate mortgage rates, loan payments, insurance premiums, or interest over time. These tools support better decision-making and qualify leads before they even reach a sales representative. When placed strategically, they can serve as lead magnets while educating users.
Make sure the output is easy to interpret and includes currency formatting and disclaimers if needed. Also, highlight next steps clearly — like applying for a loan or getting a quote.
Application in Health and Wellness 🏋️
Health brands — from gyms and trainers to supplement companies — leverage calculators to create personalized fitness, nutrition, and wellness plans. BMI calculators, calorie counters, and macro ratio tools are commonly used to offer immediate, data-driven results to the user. They work best when combined with informative content or a follow-up offer.
Include default values and disclaimers for informational purposes. Visual indicators (like color-coded results or badges) can enhance clarity and user retention.
Across industries, calculators are effective when tailored to specific user problems and integrated seamlessly into the website experience. See Elfsight’s templates to find the perfect calculator for your needs!
Explore 115+ Calculator templates


Fixing Common Issues
Even though adding a calculator to a website is generally straightforward, there are occasional technical issues or usability concerns that may come up. Below are common questions and troubleshooting tips to help ensure a smooth experience.
Why isn’t my calculator showing on the website after embedding?
Why is the calculator misaligned or overlapping other content?
The calculator looks fine on desktop, but it breaks on mobile. What should I do?
My calculator isn’t calculating anything. What went wrong?
Is there a limit to how many calculators I can add to one page?
Can I use the same calculator across multiple pages?
By addressing these common issues proactively, you’ll ensure your calculator remains a reliable and high-performing asset on your website.
Conclusion
Embedding a calculator widget into your website is a smart way to boost engagement, streamline user interactions, and deliver real-time value. Whether you’re using it to calculate product pricing, loan estimates, or nutrition goals, the widget becomes a functional and user-centric asset that enhances the overall experience.
For most users, Elfsight offers the simplest and most flexible solution to add a powerful, visually integrated calculator without writing code. But no matter which method you choose, proper setup, responsive design, and clear logic will ensure your calculator performs at its best and truly serves its purpose.
Need More Help?
We hope this walkthrough gave you everything you need to get started. If you’d like guidance or wish to explore more use cases, don’t hesitate to reach out to us. At Elfsight, we’re dedicated to helping you build smarter, no-code widget experiences for your business.
Join our Community to share your experiences, find support, or exchange creative ideas. Have a feature in mind? Submit it to our Wishlist and help us shape the future of Elfsight widgets.