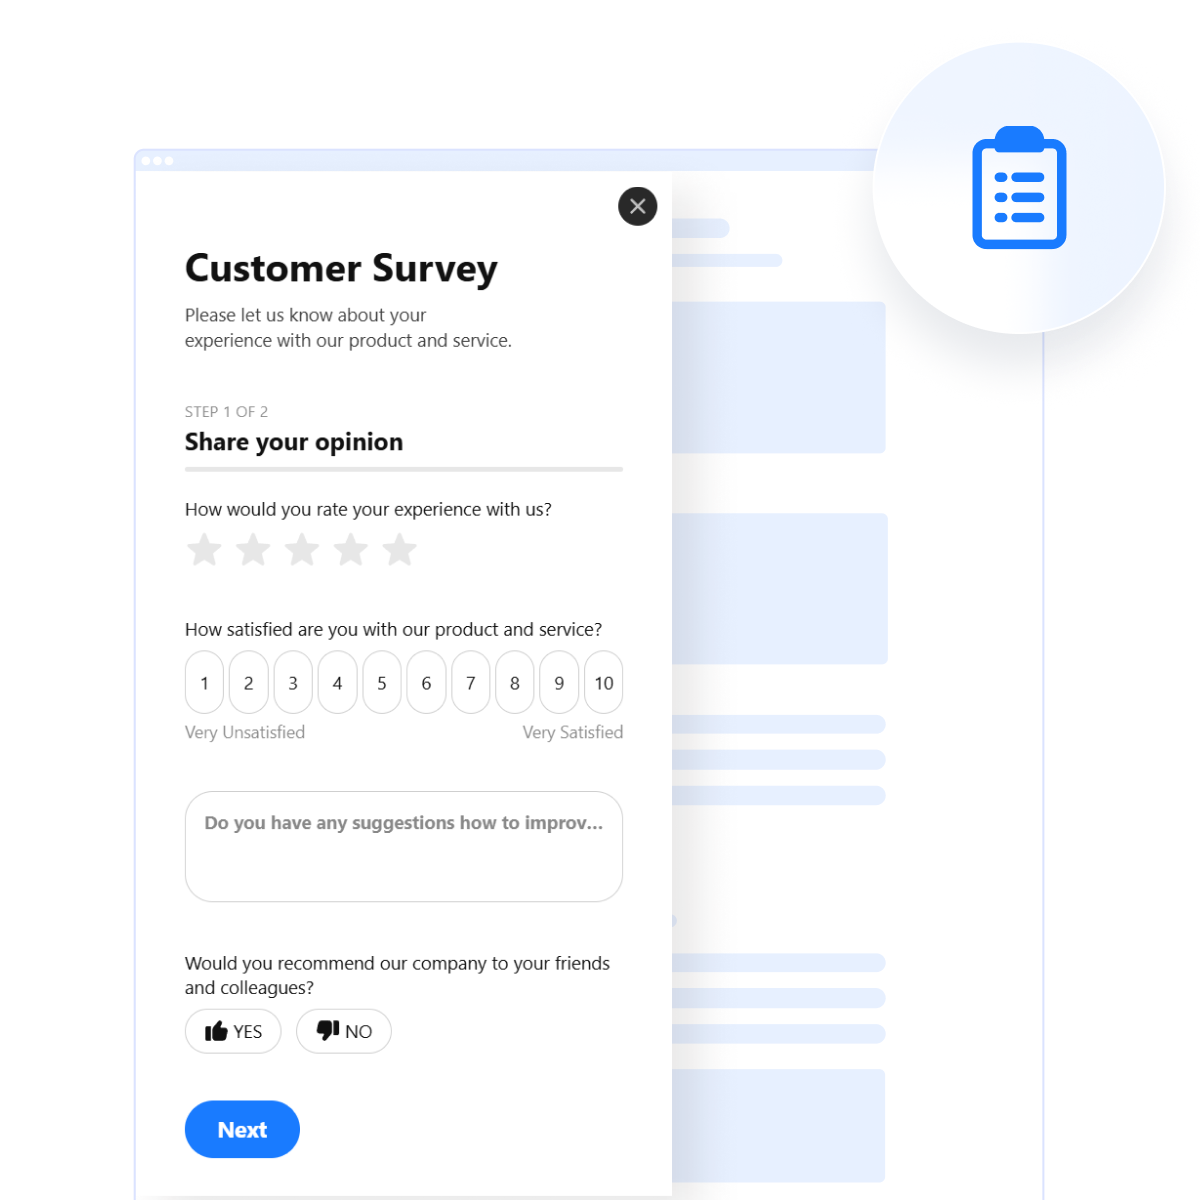
Adding a survey to your website is a smart way to collect valuable feedback, understand your audience, and improve your online presence. Whether you want to measure customer satisfaction or gather opinions on a new product, embedding a survey offers a direct communication channel with your visitors.
If you’re looking for a simple, effective, and interactive solution, a survey widget is exactly what you need. It integrates seamlessly into your website, looks professional, and enhances user experience without requiring complex setup or coding.
- Boost user engagement. Interactive surveys invite users to participate and spend more time on your pages, increasing overall engagement rates.
- Collect real-time feedback. Get instant insights from visitors while their impressions are still fresh, helping you make faster and better-informed decisions.
- Improve conversion strategies. By understanding what your audience wants, you can fine-tune messaging, design, and offerings to drive better results.
- Strengthen trust and transparency. Asking for input shows that you value your visitors’ opinions, which builds credibility and strengthens customer relationships.
- Enhance personalization. Use collected data to deliver more tailored content, offers, or experiences based on what users actually want.
In the next section, we’ll show you how to quickly create and embed a survey widget using an easy-to-use solution — without touching a single line of code.
Create a Website Survey in Minutes
Now that you know the value of having a survey on your website, let’s walk through how you can quickly build and insert a survey form using Elfsight. It only takes a few steps and doesn’t require any coding skills.
- Open the Elfsight editor and choose a ready-made survey template that fits your goals.
- Adjust the layout, question types, and alignment to match your website’s structure and user flow.
- Style the widget with your preferred colors, fonts, and spacing to ensure it aligns with your branding.
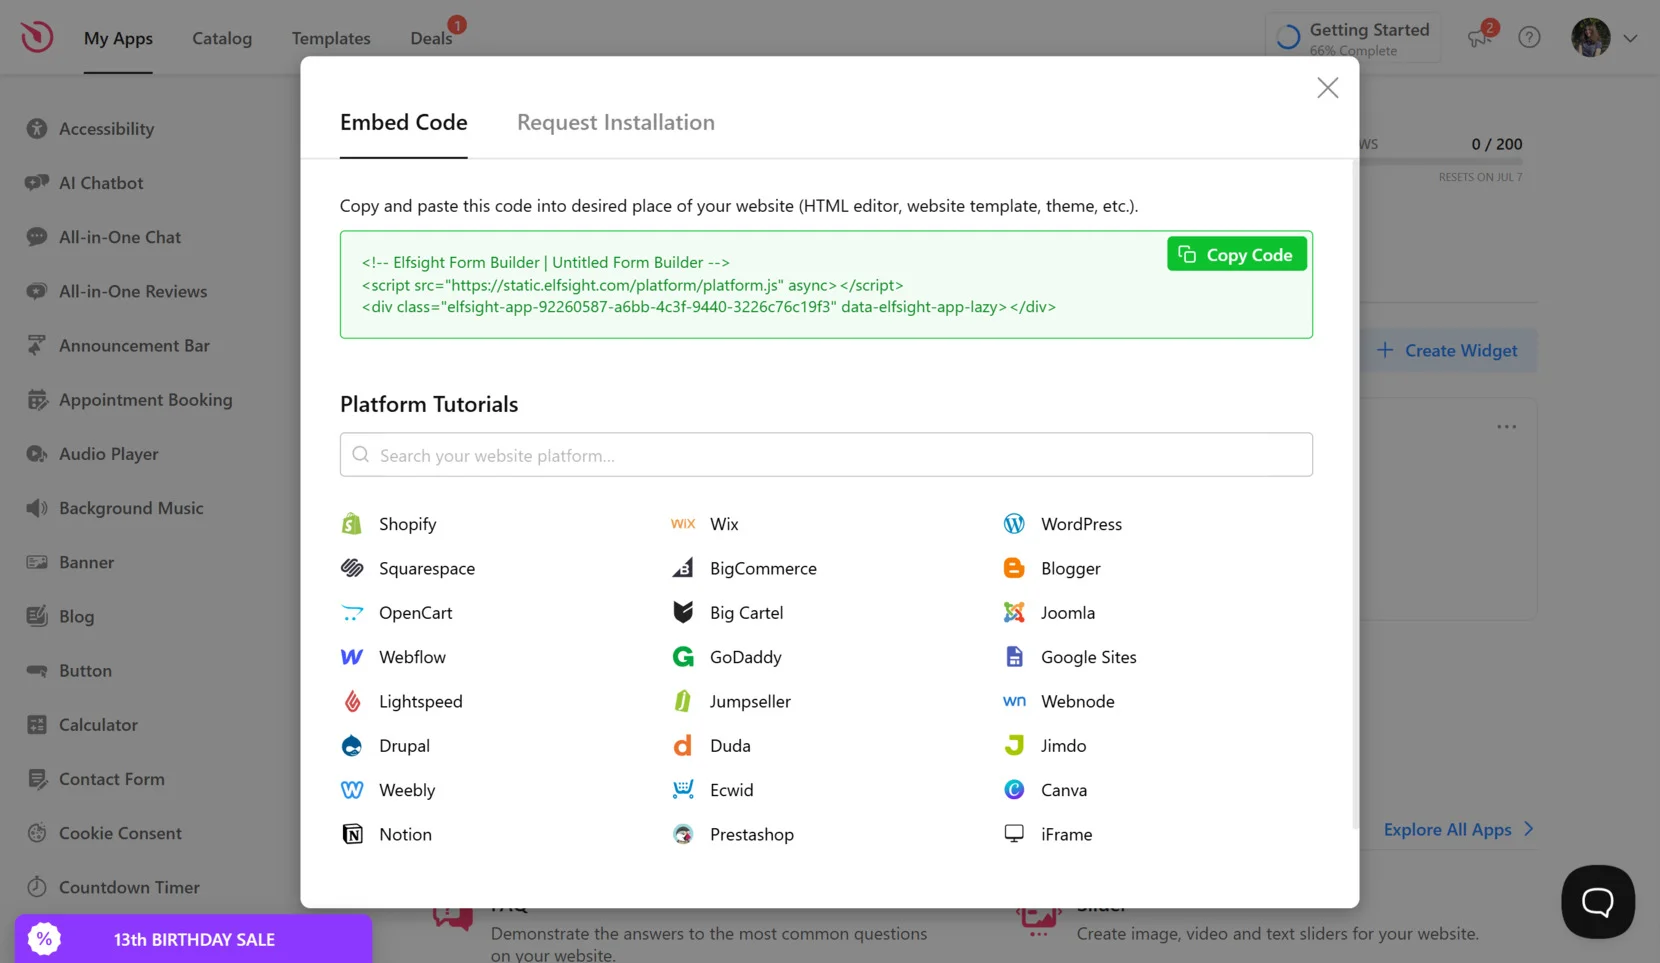
- Click “Add to website for free“, then copy the generated HTML code and paste it into your website’s backend where you want the survey to appear.
This simple setup lets you connect a feedback form to your website in just minutes. No technical expertise needed — just a few clicks and your interactive survey is live and ready to engage visitors.
See the widget in action – build your own survey with the easy-to-use editor!
Top Benefits of Using Elfsight’s Survey Widget
Once you’ve seen how easy it is to build a survey, it’s worth understanding what makes Elfsight’s solution stand out. Designed for seamless website integration and user-friendly customization, this widget offers far more than just form creation.
Here are the key features and benefits that make Elfsight a powerful choice for embedding surveys into your website:
- Customizable templates for quick setup. Start with a professionally designed template that you can fully tailor to your needs — no technical skills required.
- Multiple question formats. Use text fields, star ratings, scales, and dropdowns to collect the exact data you’re after, all in a single form.
- Responsive design on all devices. The widget looks and functions perfectly on desktops, tablets, and smartphones, ensuring every visitor can participate.
- Real-time submission notifications. Get notified instantly when someone fills out your survey so you can take action right away.
- Seamless embedding and updates. Easily insert the widget anywhere on your website and update it without touching code — changes are reflected instantly.
- Clean, branded look. Match the widget’s style to your website’s branding with full control over fonts, colors, and spacing.
With these built-in capabilities, publishing a customer survey online becomes effortless and impactful. Now let’s take a closer look at the full setup process — from creation to installation.
How to Build a Survey for Website: Step-by-Step
To make the most of your survey widget, Elfsight provides an intuitive setup process that requires no technical skills. Below is a detailed walkthrough on how to create, customize, and embed a fully functional feedback form using the Elfsight editor.
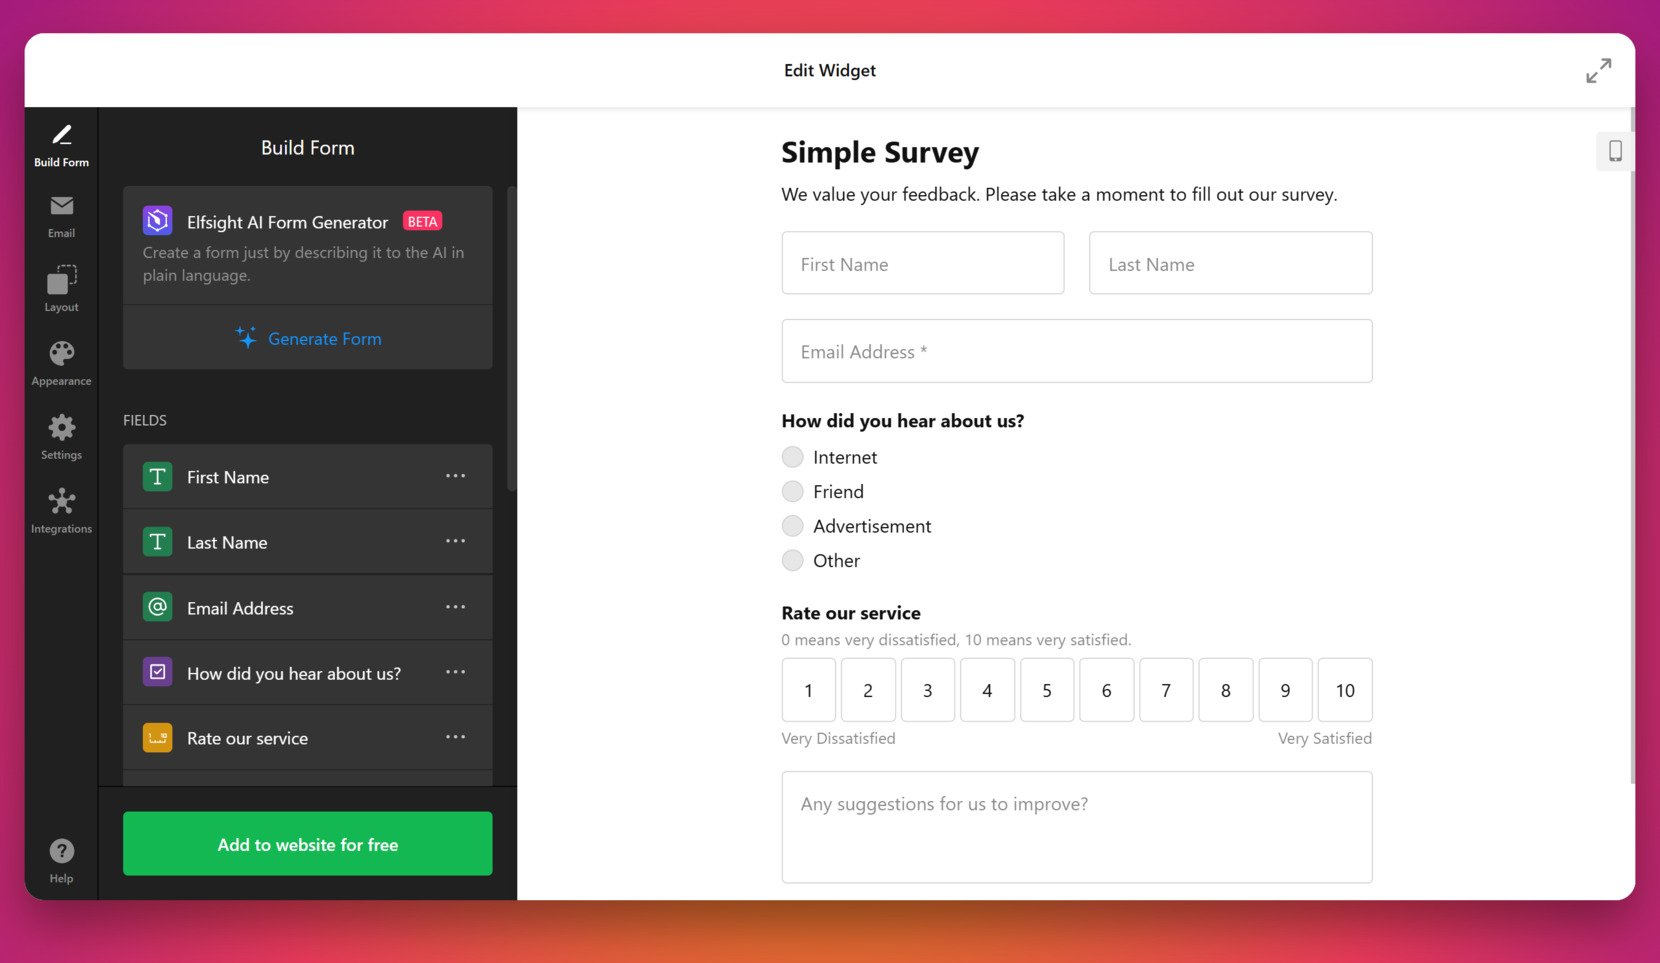
- Select a Template. Open the Elfsight Form Builder and browse the list of templates. Pick one that fits your goals — for example, a “Customer Feedback Form” or “Simple Survey” — then click “Continue with this template”.

- Build Your Survey Form. Use the “Build Form” section to add or remove fields like First Name, Email, Rating, or custom questions. You can rearrange their order and adjust field settings individually. Optionally, use the AI Form Generator to describe your form in plain language and generate it automatically.
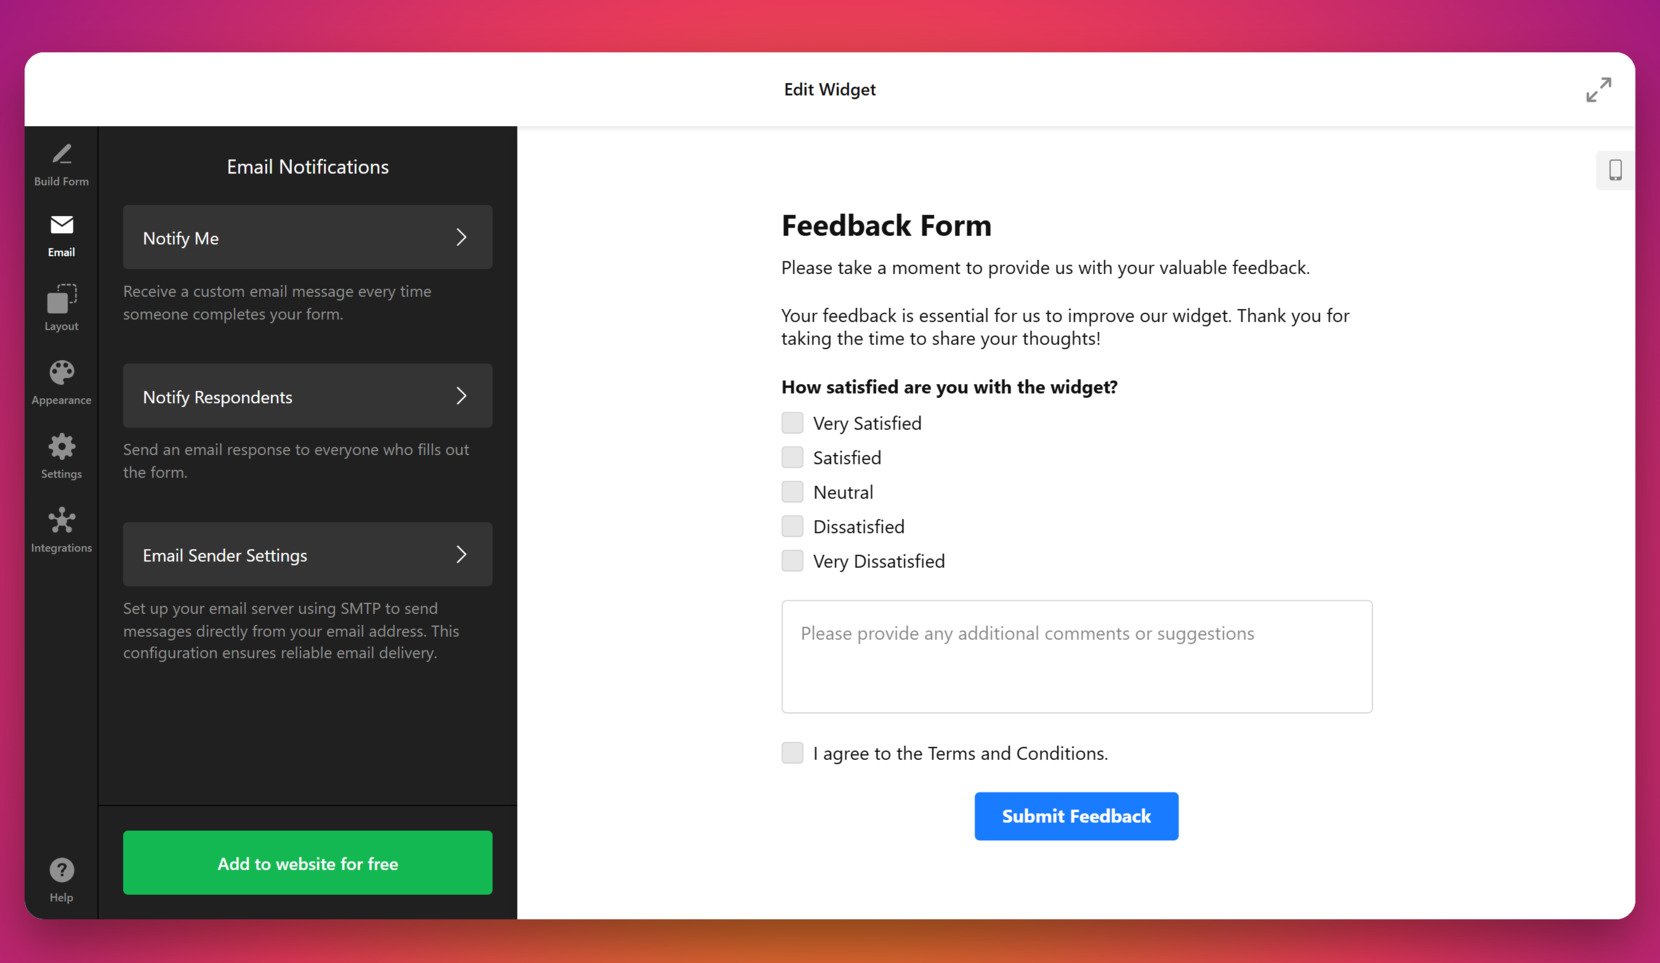
- Configure Email Notifications. Under the “Email” tab, set up who should be notified when someone completes your survey. You can choose to notify yourself, send auto-replies to respondents, and adjust sender settings via SMTP if needed.
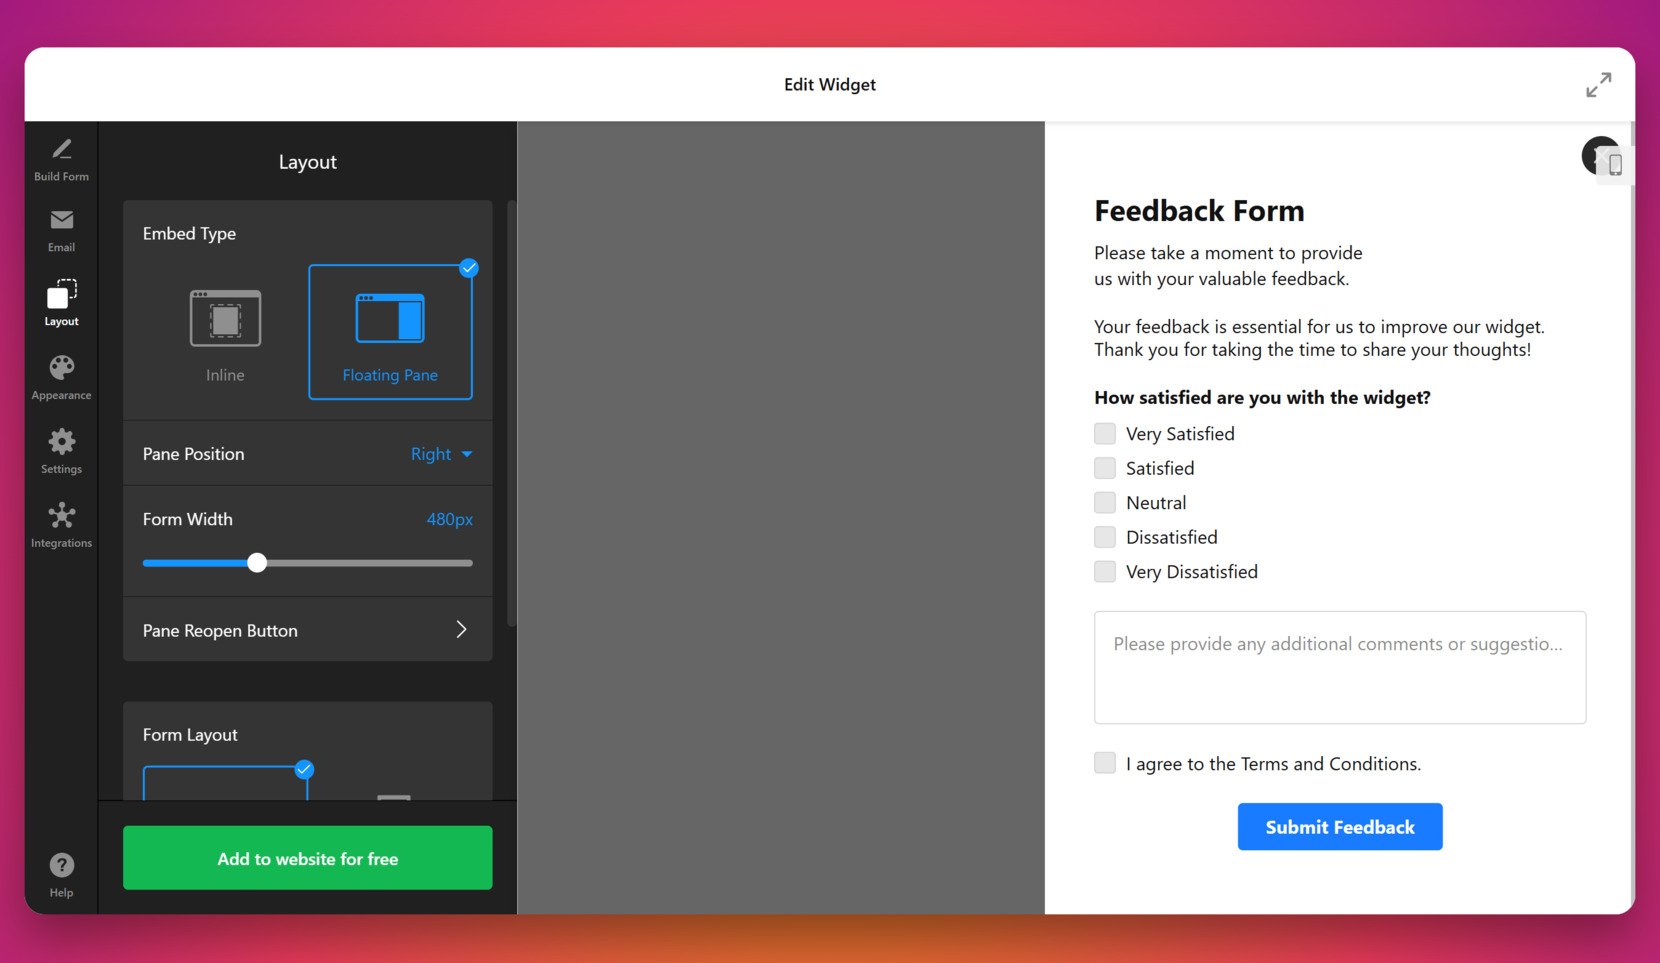
- Choose a Layout Style. Go to the “Layout” tab and select between “Inline” and “Floating Pane”. Set your form width, pane position (left/right), and enable the “Reopen Button” if you want users to access the form after closing it.
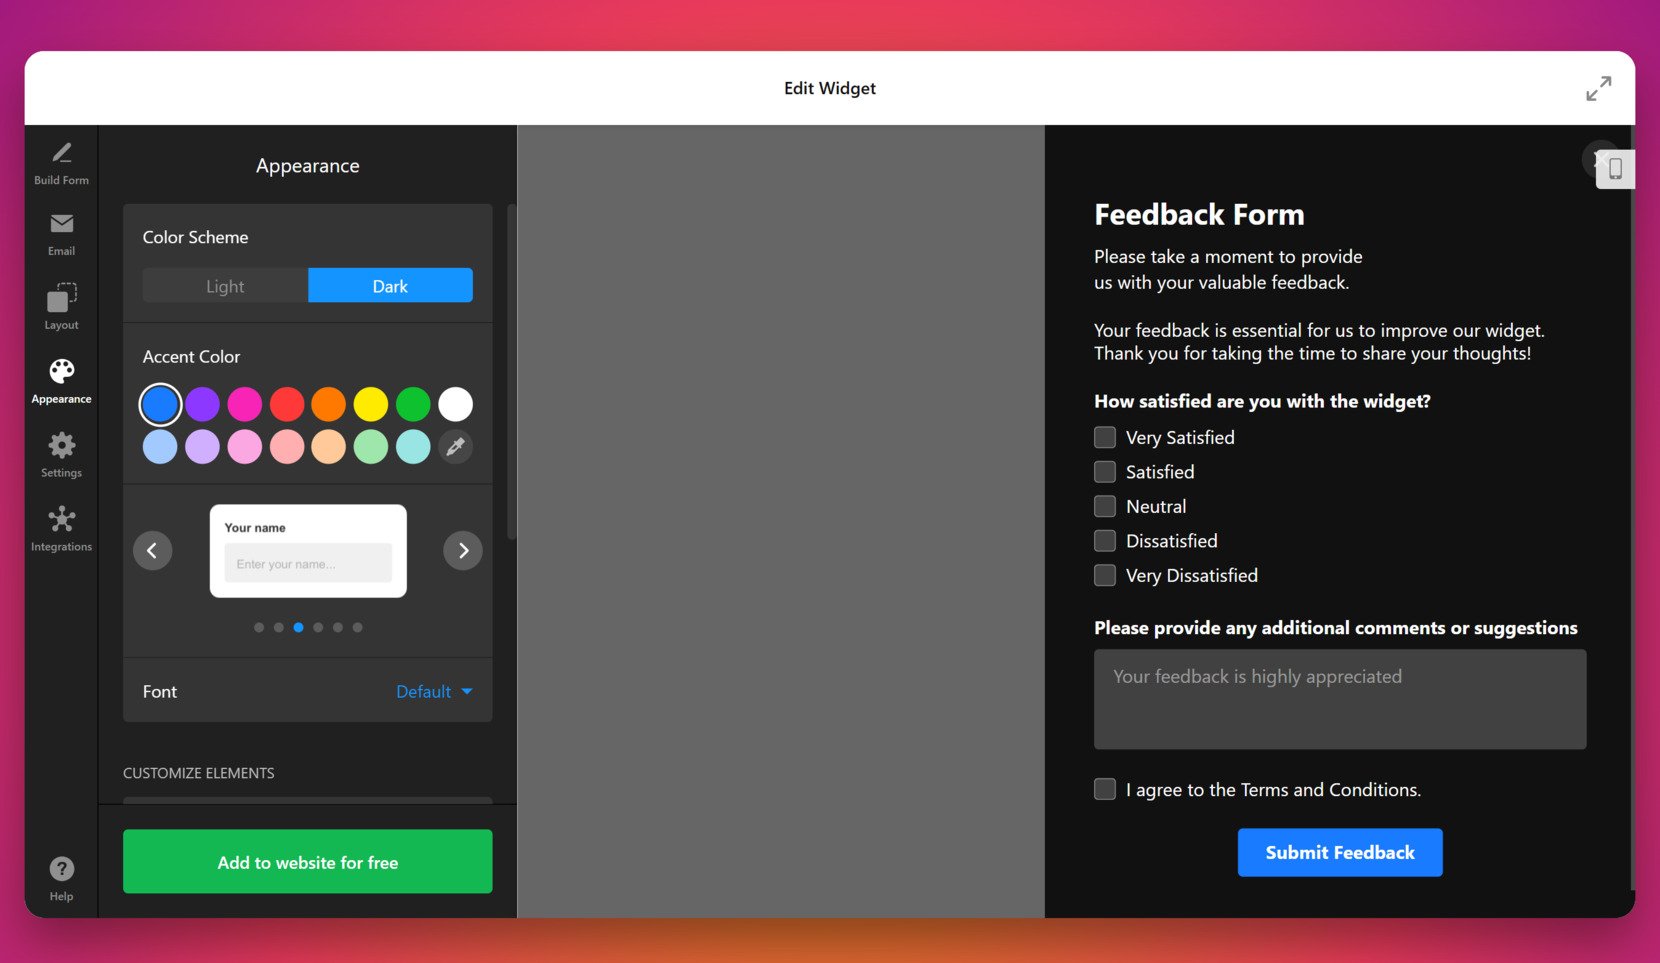
- Adjust Appearance Settings. In the “Appearance” section, select a light or dark color scheme, pick an accent color, and choose a font. Scroll down to further customize form elements such as backgrounds, headers, and input styles to match your branding.
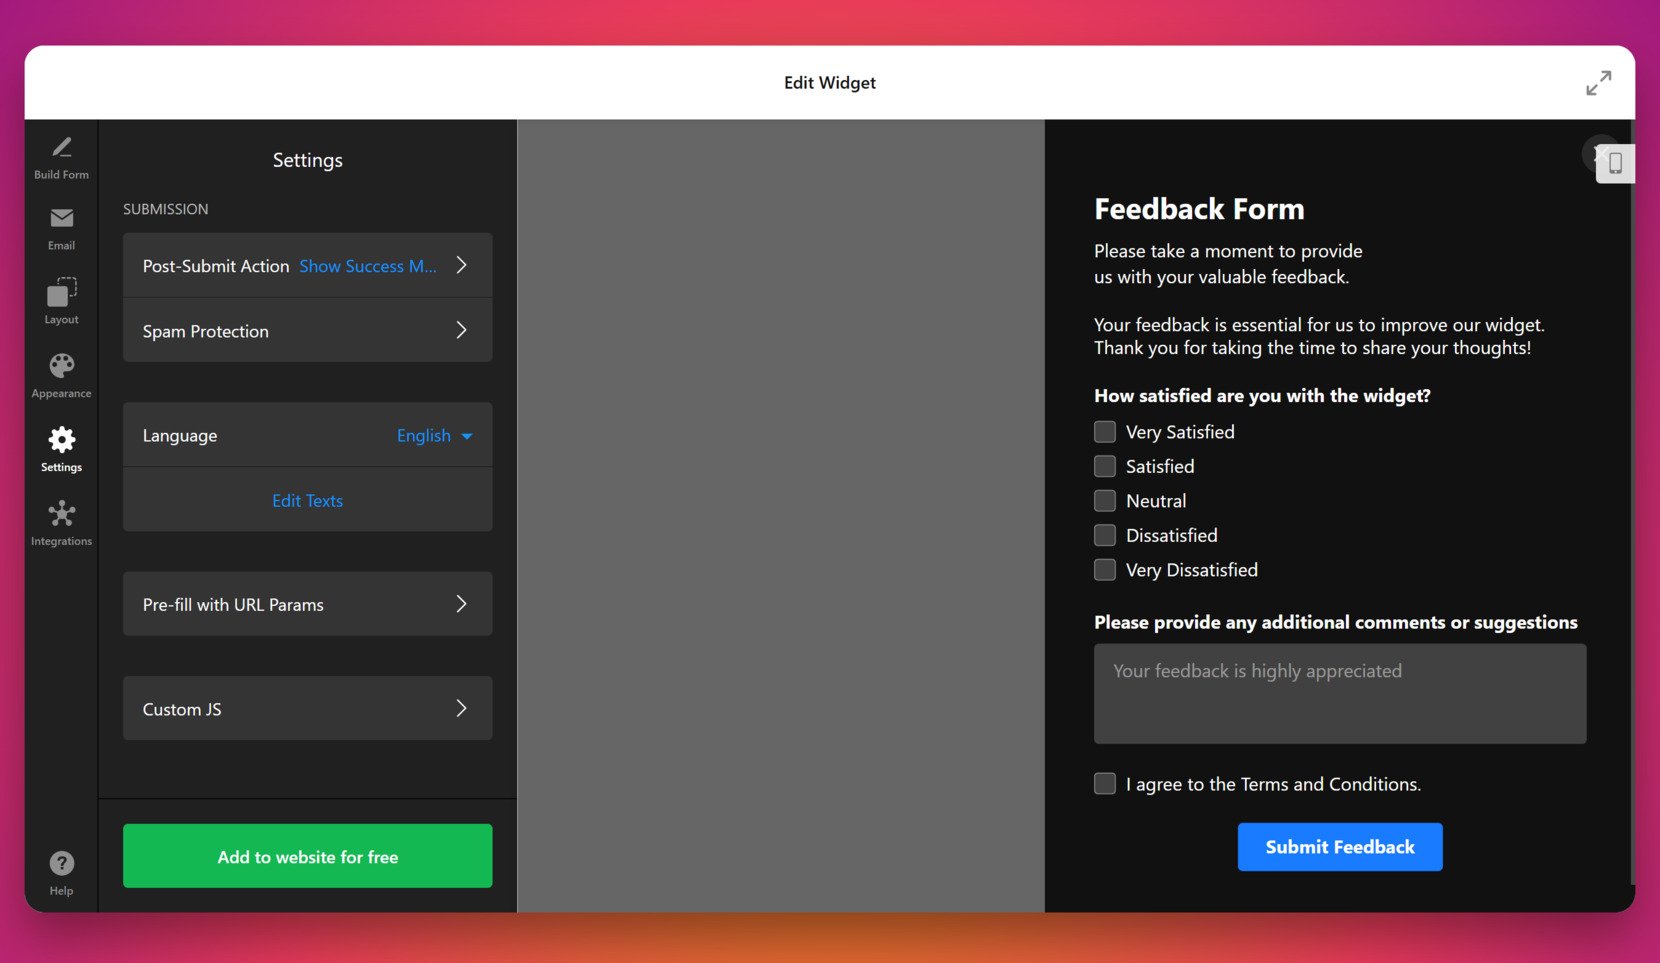
- Modify Behavior and Language. Open the “Settings” tab to control form behavior. Configure the post-submit action (e.g., success message), enable spam protection, select the language, and tweak text labels under “Edit Texts”. You can also set up pre-filled fields via URL or add custom JavaScript.
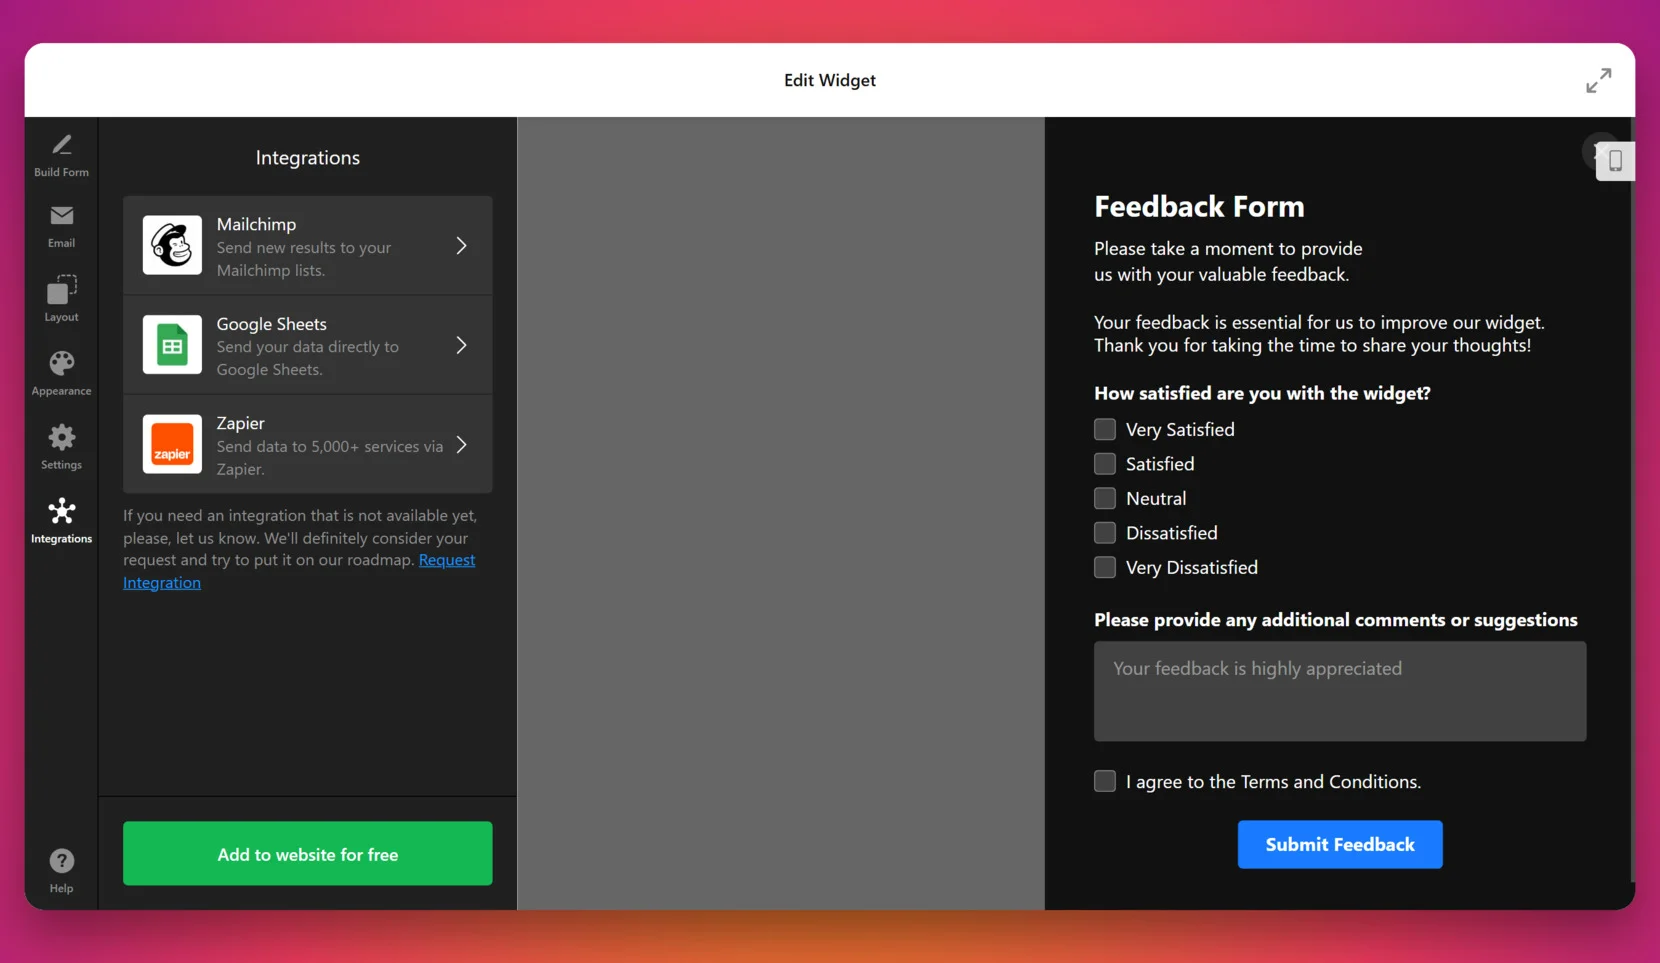
- Connect Integrations. Navigate to the “Integrations” tab to sync form responses with Mailchimp, Google Sheets, or Zapier. Choose the service, authorize access, and map your fields accordingly.
- Add to Your Website. When you’re done, click the green “Add to website for free” button. Copy the generated HTML embed code and paste it into your website’s backend and publish the changes.

Once embedded, your survey widget will immediately be ready to collect responses directly on your website. Next, we’ll explore other methods for embedding surveys and how they compare to this solution.
Other Ways to Add a Survey to Website
While Elfsight is the simplest and most customizable way to embed a survey, you might also consider using native methods offered by other platforms like SurveyMonkey and Mailchimp. These tools allow users to insert forms directly into their websites using built-in embed features. Below, we walk through the two most common options in detail.
Embedding a SurveyMonkey Survey
SurveyMonkey is a popular platform for creating detailed surveys and analyzing results. If you already have a SurveyMonkey account, you can generate an embed code and add it to your website manually. This method is suitable for those familiar with managing basic HTML and working inside a content management system.
- Log in to your SurveyMonkey account. Head to surveymonkey.com and enter your email and password to access your dashboard.
- Create a new survey or open an existing one. From your dashboard, select an existing survey or click “Create Survey” to build a new one using available question templates and layout options.
- Navigate to the “Collect Responses” tab. Once your survey is ready, go to the top navigation menu and click “Collect Responses” to choose how to distribute it.
- Click “Create Collector” and select “Embed on Website“. Choose the embed option to generate an HTML code snippet that can be placed directly into your website’s code.
- Customize embed settings. Adjust height, width, and the behavior of the embedded survey (e.g., inline display or pop-up). Preview how it will appear before copying the code.
- Copy the HTML code. Once you’re happy with the settings, click “Get Embed Code” and copy the provided code to your clipboard.
- Paste the code into your website’s HTML. Open your content management system or access your raw HTML file, and paste the code where you want the survey to appear — often inside a page builder or custom code block.
SurveyMonkey’s method is practical if you’re already using the platform, and it offers multiple collection formats. However, you’re limited in terms of visual customization and flexibility.
Embedding a Mailchimp Survey
Mailchimp, known for email marketing, also provides a basic survey builder. If your business already uses Mailchimp to manage contacts, this method helps you keep responses within the same ecosystem. Although it lacks deep design controls, it allows you to get started quickly.
- Sign in to your Mailchimp account. Visit mailchimp.com and log in with your credentials to reach your dashboard.
- Go to “Audience” and click “Surveys”. In the main menu, click on “Audience”, then select “Surveys” from the dropdown. You’ll see any existing surveys and the option to create a new one.
- Build your survey using Mailchimp’s editor. Add standard question types like short text, multiple choice, Likert scales, and ratings. You can also rearrange sections and write instructions or intro messages for respondents.
- Customize basic appearance. You can add a logo, choose from a few color schemes, and rename buttons like “Submit”. However, customization is limited to a predefined layout and theme.
- Click “Share Survey” and choose the embed option. Once the survey is finalized, click the “Share” button and select the option to embed. Choose inline display or a button-triggered form.
- Copy the generated embed code. A block of HTML will be generated — copy it to your clipboard.
- Paste it into your website’s code or HTML editor. Open the section where you want the survey to appear and paste the code snippet. Save or publish your changes to display it live.
This method works well for integrating with your Mailchimp campaigns and contact management, but the visual control and responsiveness can be lacking compared to dedicated widget builders.
Comparison of Survey Embedding Methods
To help you evaluate the right option for your website, here’s a side-by-side comparison of the most popular methods, including Elfsight, SurveyMonkey, and Mailchimp:
| Method | Pros | Cons |
|---|---|---|
| Elfsight Survey Widget | Offers full customization with real-time updates and easy installation without any coding. | Requires inserting a script into the website’s backend, which may need admin access. |
| SurveyMonkey Embed | Seamless for users already working with SurveyMonkey’s survey builder and analytics tools. | Limited design flexibility and branding options unless you’re on a paid subscription plan. |
| Mailchimp Survey Embed | Convenient for Mailchimp users who want to keep data centralized with email campaigns. | Basic appearance and low control over styling, not ideal for heavily branded websites. |
Each of these methods allows you to put a feedback section on your webpage. However, if you want complete visual control, responsive layout, and fast, no-code integration, Elfsight offers the most efficient and polished solution. Let’s now explore a few smart tips to make your survey more effective.
Tips to Make Your Survey More Effective
Once your survey is embedded, the next step is making sure it works well and encourages users to respond. These universal tips will help you get the most value from any survey widget, no matter which platform or method you used.
- Place your survey where users are most engaged. Position the survey in logical, visible areas like below blog posts, in sidebars, or within pop-ups triggered by user behavior. Avoid hiding it at the bottom of long pages.
- Write a compelling and clear title. Use direct and friendly language to explain why users should take the survey. Avoid vague or overly formal wording that can reduce interest.
- Keep it short and easy to complete. The shorter the survey, the higher the completion rate. Stick to essential questions and avoid asking for information you don’t need.
- Make sure it works well on mobile. A large portion of users will access your website from a phone. Test your survey on smaller screens to ensure it’s readable, responsive, and tap-friendly.
- Thank users after submission. Display a confirmation message or redirect them to a thank-you page once they’ve completed the survey. This reinforces a sense of appreciation and completion.
- Match the design with your branding. Align the widget’s colors, fonts, and button styles with your website’s look to make it feel like a natural part of the page.
- Respect user privacy. Avoid requesting sensitive data unless necessary. Keep questions anonymous or optional to maintain trust.
- Keep the content fresh and relevant. Periodically review your survey and update questions to reflect new goals, topics, or user interests.
Now, let’s look at real-world examples and industries where embedded surveys are making a real impact — and how you can apply similar strategies to your own website.
Who Needs a Website Survey: Use Cases
Survey widgets can benefit a wide range of industries. They help gather feedback, understand customer needs, and improve decision-making. Below are the most common sectors that successfully use embedded surveys and how they apply them to their workflows.
Application in eCommerce 🚀
Online stores use embedded surveys to understand shopping experiences, identify pain points in the purchase process, and measure post-purchase satisfaction. These surveys are often placed on product pages, checkout confirmations, or order tracking sections. They provide actionable insights into customer preferences and buying behavior, helping businesses fine-tune product offerings and optimize their website flow.
Application in Education and Online Courses 🎓
Educational institutions and course creators use surveys to evaluate course effectiveness, gather student feedback, and identify areas for improvement. Embedded forms can appear after course completion, within member dashboards, or at the end of specific lessons. They help instructors tailor content to real user needs and boost retention.
Application in Healthcare and Wellness 💊
Healthcare providers and wellness platforms use surveys to evaluate patient satisfaction, appointment experiences, and service quality. Surveys are typically embedded into confirmation emails, patient portals, or feedback widgets at the end of digital consultations. This helps collect sensitive but important data without overwhelming the user.
As shown, survey widgets are powerful tools across industries — from retail to education to healthcare. In the next section, we’ll address some common challenges users face when embedding surveys and how to solve them efficiently.
Common Issues and Fixes
Even though survey embedding is usually straightforward, there are a few common problems and technical details you might face. Below are typical challenges users encounter when adding a survey to a website — along with practical solutions for each.
Why doesn’t my survey appear after embedding the code?
Why is my SurveyMonkey embed not displaying properly on mobile?
How do I fix styling conflicts between my survey and the website layout?
Why won’t my Mailchimp survey save responses properly?
Can I embed multiple surveys on the same page?
Why is my survey not tracking or recording submissions?
With these issues addressed, you can ensure your survey remains functional and visually consistent across all platforms and devices.
Conclusion
Adding a survey to your website is one of the most effective ways to gather meaningful feedback, improve user experience, and understand your audience on a deeper level. Whether you’re running an online store, an educational platform, or a healthcare service, embedding a simple, interactive questionnaire can transform passive visits into valuable insights.
From no-code solutions like Elfsight’s customizable widget to platform-native embeds from Mailchimp and SurveyMonkey, there are many ways to place an online questionnaire on your website. Elfsight stands out as the most efficient and flexible option, combining ease of use, visual customization, and seamless integration. No matter your technical skill level, it offers everything needed to create a fully functional, engaging survey in just minutes.
Looking for More Help?
If you’re ready to start collecting feedback or still have questions, we’re here to support you. Reach out to us and learn how to create a professional survey experience tailored to your audience. At Elfsight, we’re committed to providing intuitive, code-free solutions that help your business grow.
Want to connect with others? Join our Community to exchange ideas, get inspired, and shape the future of our products. Have a feature in mind? Add it to our Wishlist — we’re always listening.