Did you know?
Customers using PayPal convert 60% more often than non-PayPal users, and PayPal users buy things 60% more frequently than visitors paying by other methods.
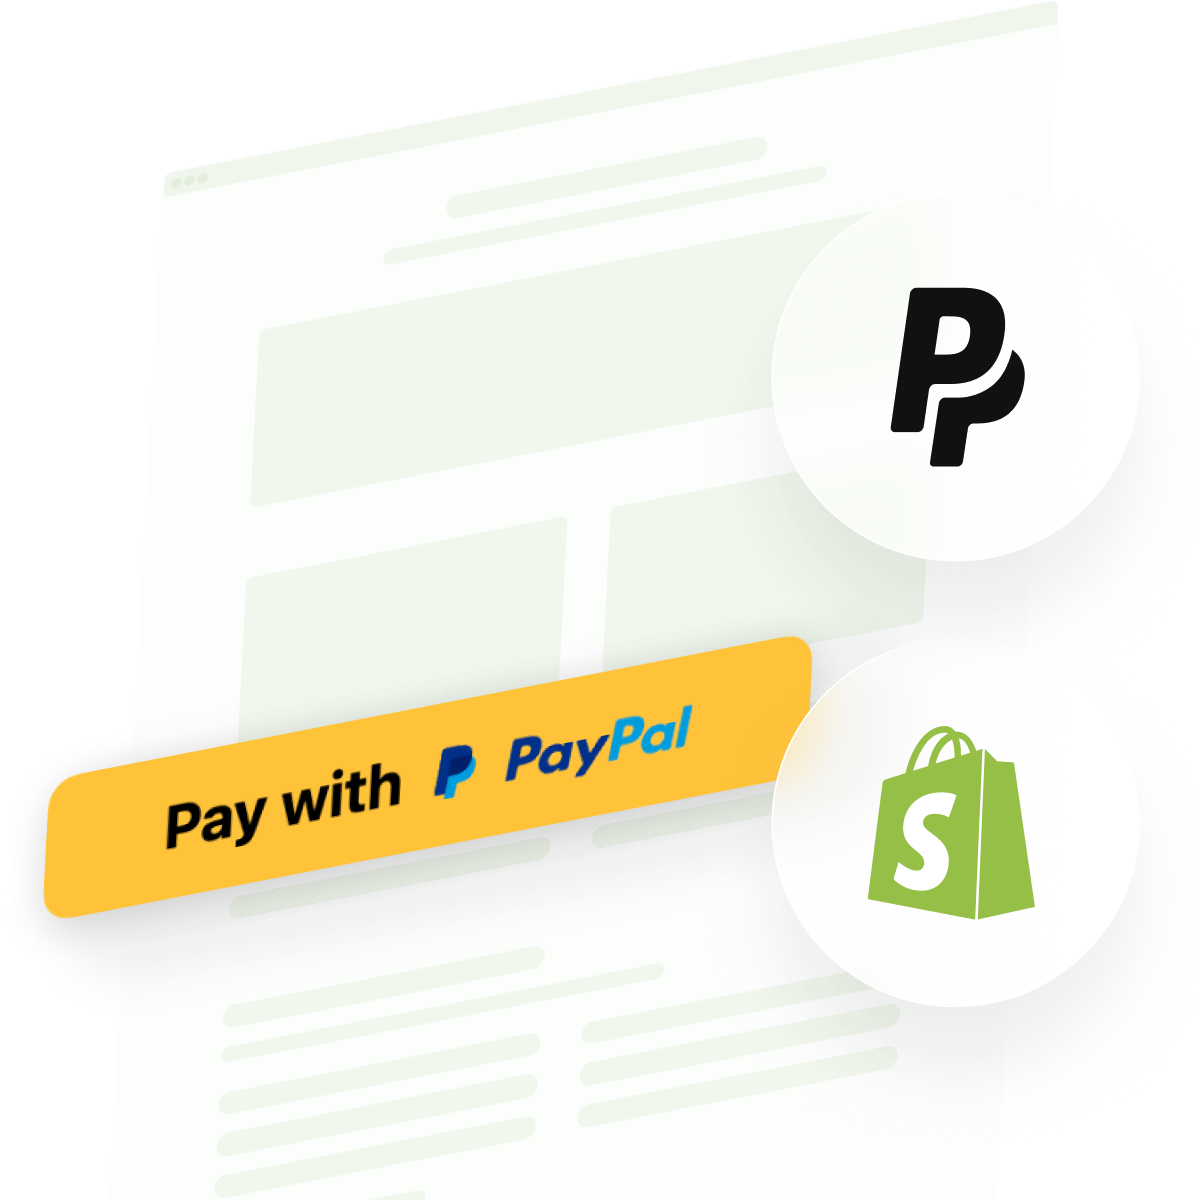
Accepting payments directly on your Shopify store removes friction from the buying journey. The fastest way to add PayPal payment processing to your Shopify store is with the PayPal Button Widget, which lets you create no-code checkout buttons, subscription payments, and donation forms in minutes. Visitors complete transactions securely through PayPal without ever leaving your Shopify store, boosting conversion rates while building trust through a globally recognized payment method.
- How to add a PayPal button to your Shopify store without coding.
- Create checkout buttons, subscriptions, and donation forms with full customization.
- Compare PayPal’s native Shopify method with Elfsight’s advanced solution.
- Strategic button placement and design for maximum conversions.
Let’s walk through two approaches: the express lane for those who want their PayPal button live today, and a comprehensive guide for exploring every detail and customization option on your Shopify store.
Quickest Way to Add PayPal to Shopify
Here’s the fastest route to embedding a PayPal button on your Shopify store:
- Open the Button editor and select your payment type.
- Enter your PayPal seller email and configure payment details.
- Customize the button to match your store.
- Copy the code and paste it into your Shopify backend.
🚀 Create your first PayPal button now in the live editor!
Why Add PayPal Payments to Your Shopify
Before diving into the technical setup, it’s worth understanding why adding PayPal to your Shopify store has become such a critical business strategy, addressing multiple customer and merchant needs at once.
🔄 Global Trust and Recognition
PayPal is one of the most trusted digital payment methods in the world. With over 429 million active users and a presence in more than 200 countries, customers recognize PayPal as a legitimate, secure payment processor. When customers see PayPal available on your Shopify store, they’re significantly more likely to complete their purchase—in fact, customers are 3.6x more likely to buy from a store offering PayPal than from one without it.
💰 Increased Conversion Rates
Adding PayPal to Shopify dramatically improves checkout completion. PayPal Express Checkout on Shopify boosts overall site conversion by 47% compared to stores without PayPal. Since customers don’t need to enter payment details manually—they simply log into their PayPal account—the friction during checkout disappears entirely. This translates directly into more completed orders and higher average order values.
🌍 Accept International Payments Effortlessly
Your Shopify store reaches customers worldwide, but accepting payments from different regions requires flexibility. PayPal supports 25+ currencies and operates in over 200 countries. When customers pay through PayPal, they see prices in their local currency and experience a checkout interface in their native language. This removes barriers to purchase and enables you to scale globally without complex payment processing infrastructure.
📱 Mobile-First Payment Experience
More than half of Shopify purchases happen on mobile devices. PayPal’s mobile checkout is optimized for quick one-tap payments—customers don’t need to manually enter card details, retype addresses, or navigate complex forms. For mobile shoppers, this speed difference is crucial to conversion.
Key Features of PayPal Button Widget
Elfsight’s PayPal Button offers significantly more capability than Shopify’s native PayPal integration alone. Understanding what features are available helps you optimize your setup for maximum conversions and customer satisfaction:
| Feature | What It Does for Your Shopify Store |
|---|---|
| Three payment types in one widget | Create checkout buttons for one-time purchases, subscription buttons with flexible recurring billing, or donation buttons for variable contributions—all from a single tool without switching between different payment solutions. |
| Full style customization | Control button size, shape, color, text, border thickness, and PayPal logo appearance. Your payment button blends seamlessly with your Shopify store design instead of appearing as a generic third-party element. |
| Payment system icons | Display Visa, Mastercard, American Express, and Discover logos beneath your button. Seeing familiar payment options increases buyer confidence by signaling security and payment flexibility. |
| Tax and shipping configuration | Add taxes as a percentage or fixed amount, plus shipping fees directly in your button setup. The final price displays transparently before PayPal checkout, preventing surprise charges that cause cart abandonment. |
| Multi-currency and localization | Offer payments in 20+ currencies with localized checkout interfaces. Customers see prices and payment screens in their native language, dramatically improving conversion for international Shopify traffic. |
| Flexible subscription billing | Set billing intervals daily, weekly, monthly, yearly, or custom periods. Enable automatic recurring payments for membership or SaaS models, ensuring customers stay active without manual intervention from your Shopify store. |
| Post-purchase redirect | Send customers to a thank-you page, special offer, or digital product download after successful payment. Track conversions more effectively and maximize upsell opportunities directly on your Shopify store. |
For a complete breakdown of all available functionality, visit the Features Page.
Setting Up PayPal on Your Shopify Store: Complete Guide
Want to configure every aspect of your PayPal button for maximum Shopify store performance? This section walks you through each setup step, from selecting payment types to styling your button for conversions.
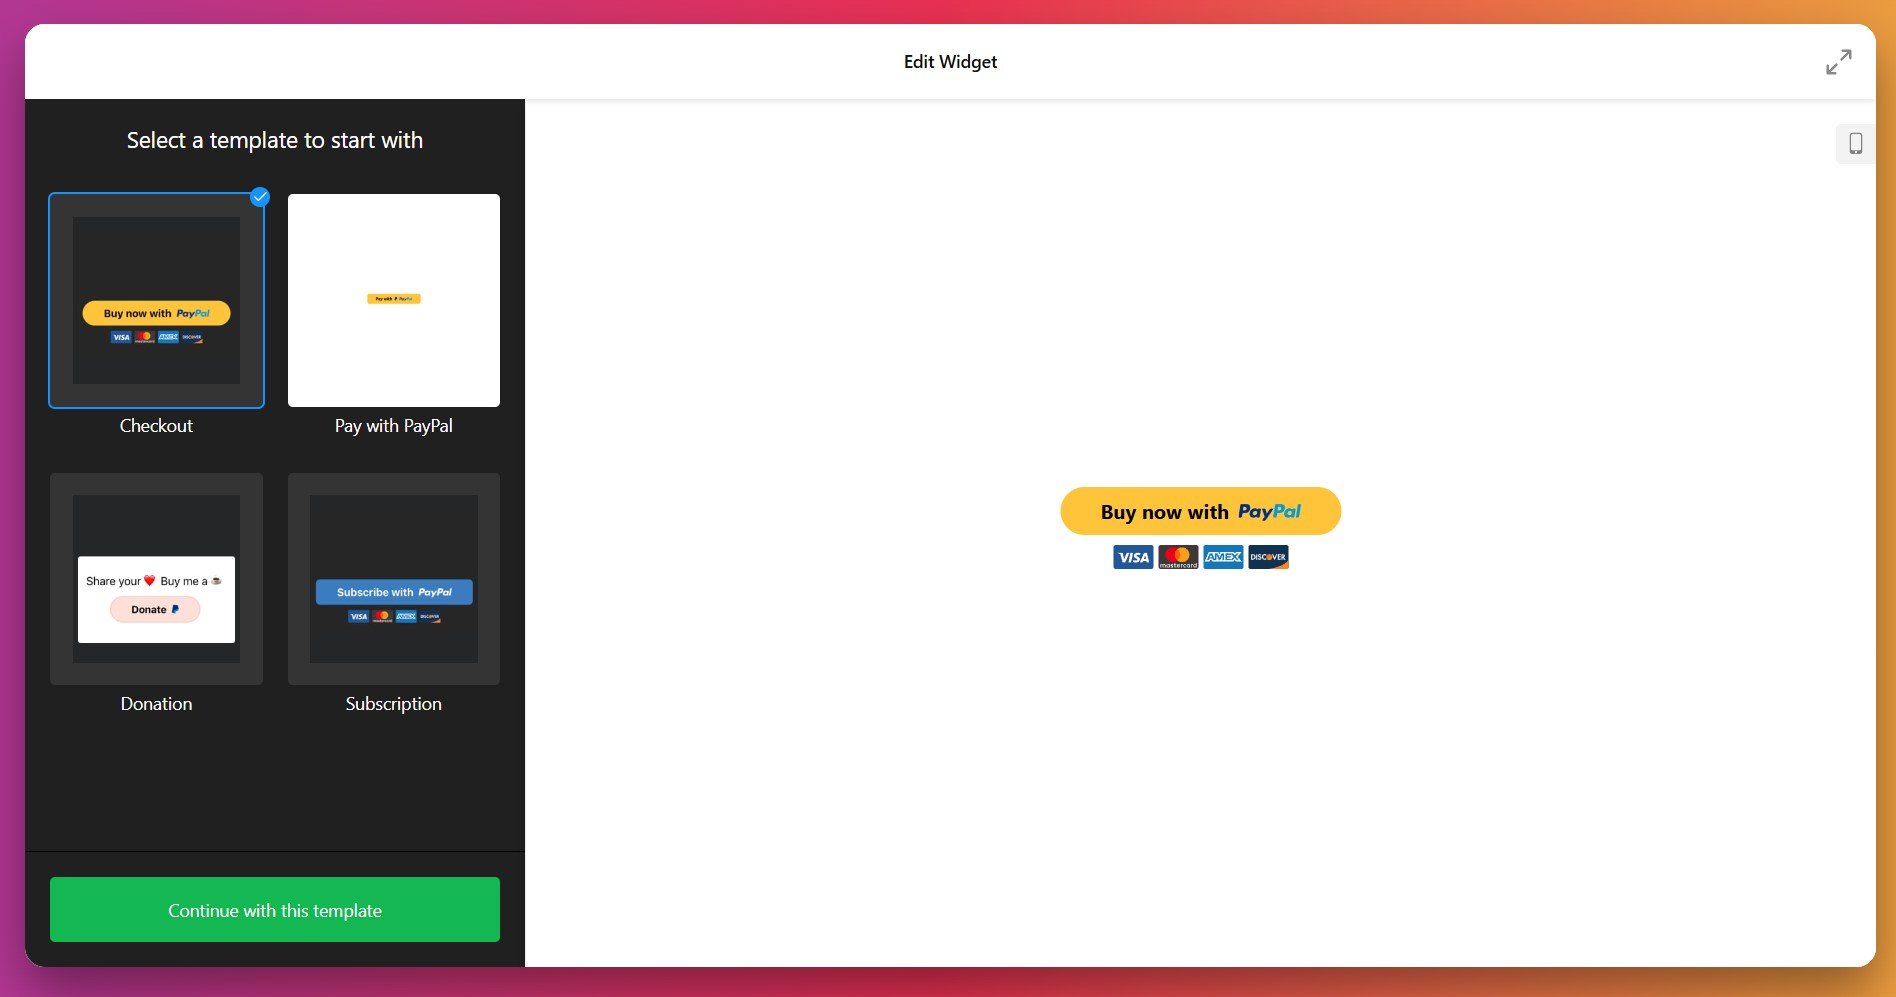
Step 1: Choose Your Payment Type
Launch the Elfsight PayPal Button editor and select the payment model that aligns with your Shopify business:
- Checkout type processes one-time purchases with a product name, price, optional shipping, and tax settings. Ideal for direct sales on your Shopify store.
- Subscription type sets up recurring payments at intervals you define (daily, weekly, monthly, yearly, or custom). Perfect for membership sites, software licenses, or recurring services on Shopify.
- Donation type lets supporters contribute fixed amounts or choose their own donation sum. Works for nonprofits, creators, or community projects built on Shopify.
Step 2: Enter Your PayPal Account Details
Navigate to the Payment tab and enter your PayPal seller email address. This is the account where payments from your Shopify store will be deposited. Important: Make sure you’re using a PayPal Business Account—personal accounts cannot accept payments through buttons on your Shopify store.
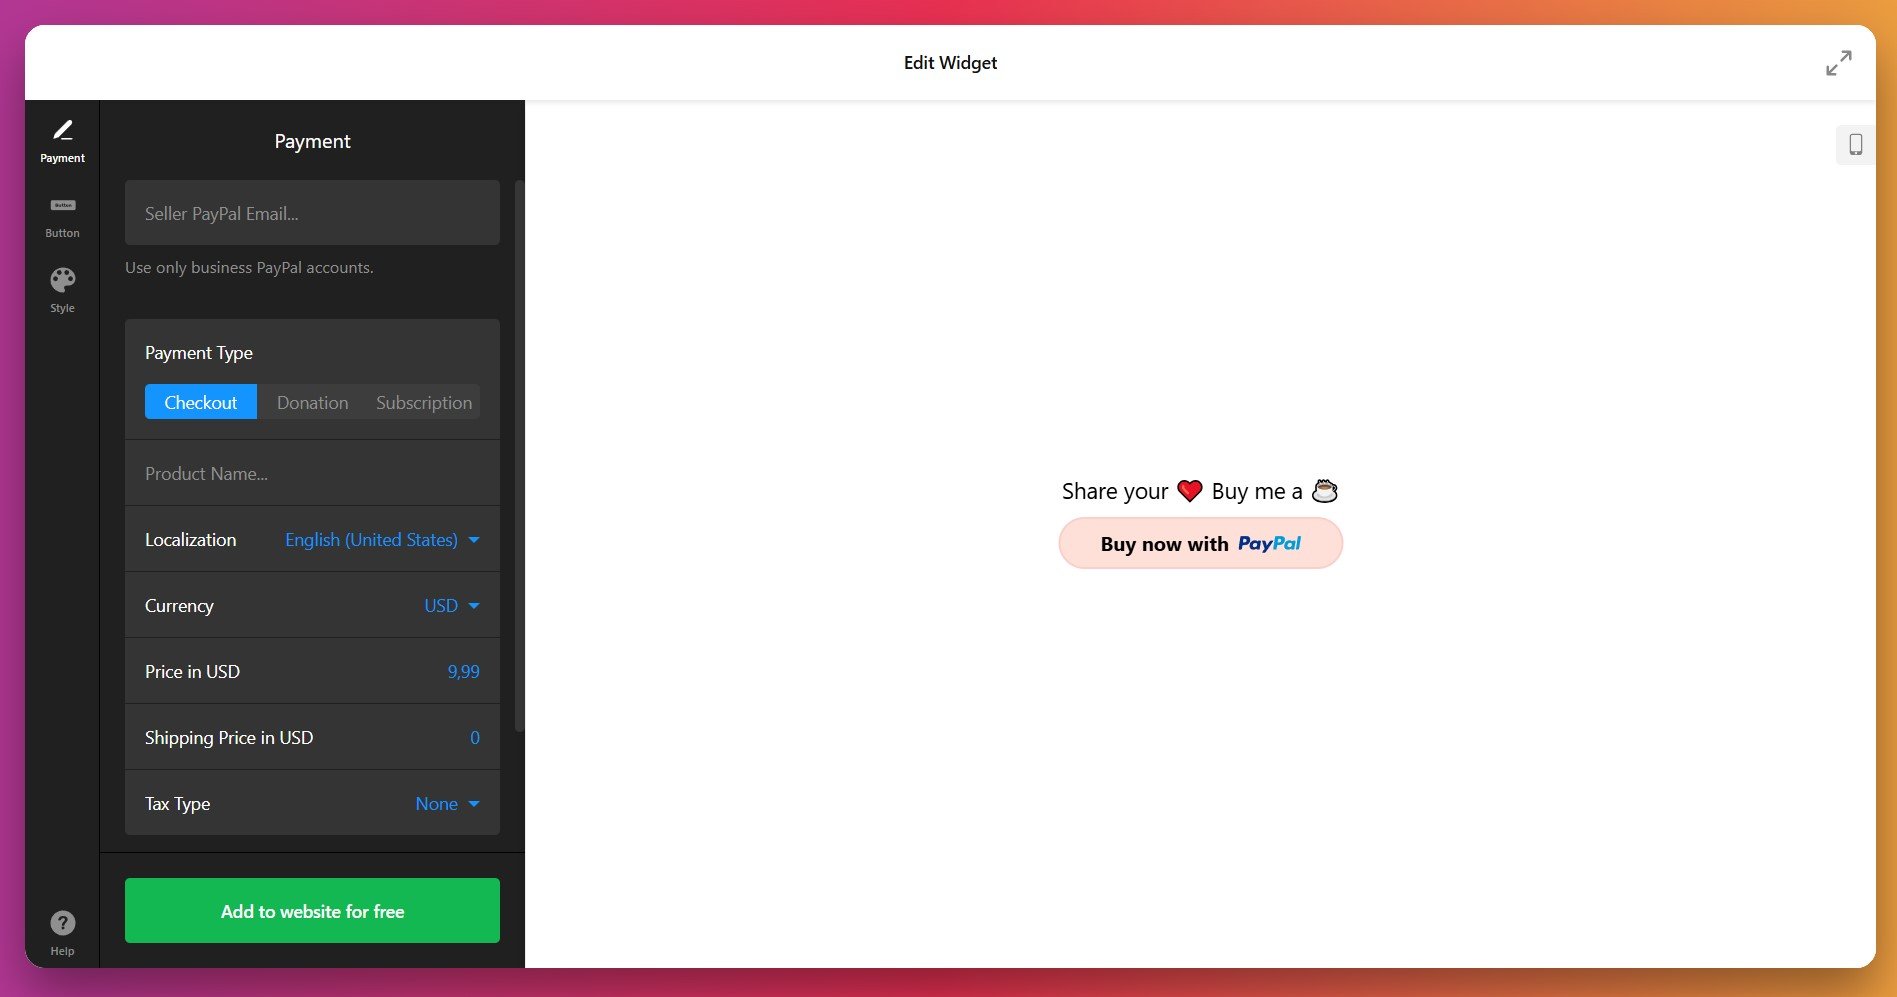
Step 3: Configure Payment Details
For checkout buttons on your Shopify store, enter these essential details:
- Product name – The item or service customers are purchasing (e.g., “Premium Course Access,” “Consulting Package”).
- Price – The payment amount in your chosen currency.
- Currency and localization – Select your country and payment currency (20+ options supported). This ensures the PayPal checkout displays in the local language for your Shopify store visitors.
- Shipping price – Optional fee for physical goods. Leave blank if you offer free shipping or sell digital products on Shopify.
- Tax type – Choose None, Percentage (calculated from total), or Fixed amount.
For subscription buttons on your Shopify store, you’ll also set the billing interval and whether payments recur automatically. For donation buttons, decide whether donors choose their own amount or if you set a fixed sum.
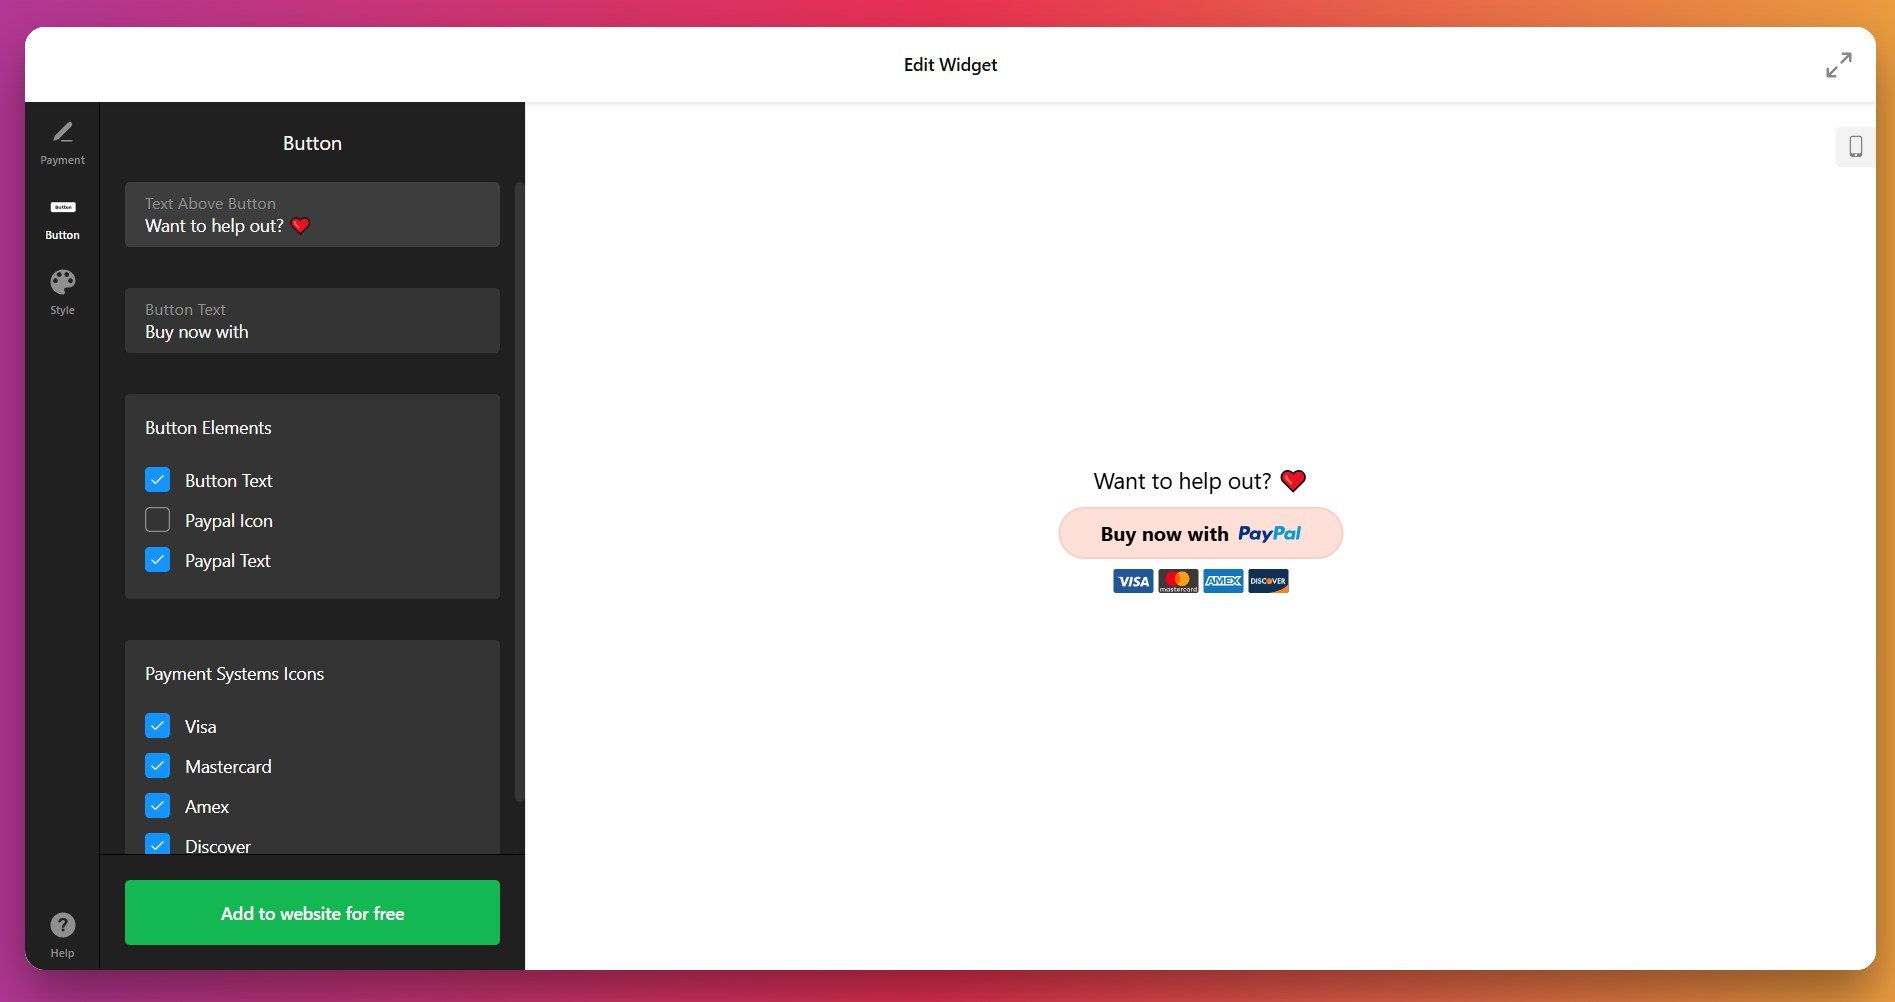
Step 4: Customize Button Text and Elements
In the Button tab, decide which elements your PayPal button will display on your Shopify store:
- Text above button – A headline or call-to-action above the payment button (e.g., “Ready to get started?” or “Support our mission”).
- Button text – The label on the button itself (defaults to “Buy Now,” “Subscribe,” or “Donate,” but you can customize it).
- Button elements – Toggle visibility of button text, PayPal icon, and PayPal branding text.
- Payment system icons – Show or hide Visa, Mastercard, American Express, and Discover logos below your button to build trust with Shopify visitors.
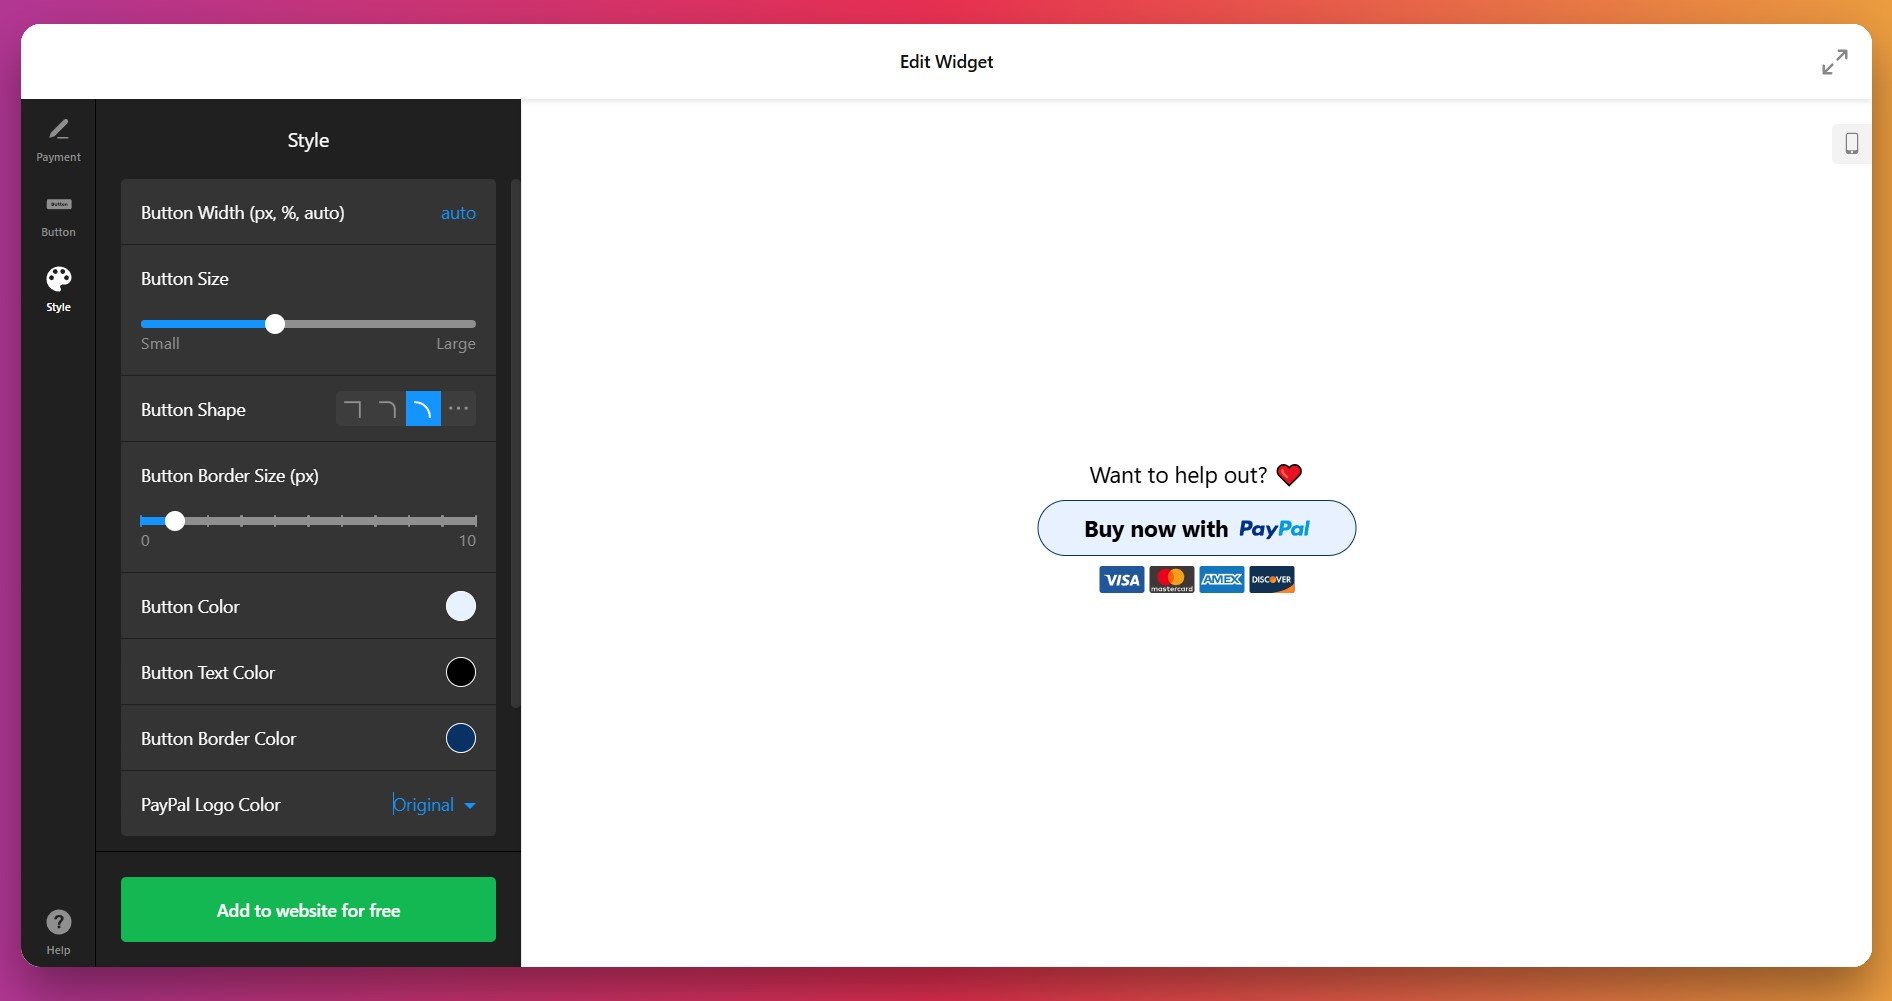
Step 5: Style Your Button for Maximum Impact
In the Style tab, fine-tune your button’s appearance to match your Shopify store brand:
- Button width – Choose pixels, percentage of container, or autofill.
- Button size – Drag the slider from small to large. Bigger buttons get more clicks on your Shopify store.
- Button shape – Rectangle, rounded corners, or fully rounded.
- Border thickness – Adjust from 0 to create a bordered button that stands out.
- Colors – Customize button color, text color, border color, and PayPal logo color independently on your Shopify store.
If default styling options aren’t enough for your Shopify store, the Custom CSS field lets you make granular adjustments. For example, you can change fonts, adjust spacing, or apply hover effects. The Elfsight Community Forum provides ready-to-use CSS snippets for your Shopify store if you’re not comfortable writing code.
Step 6: Copy and Paste Your Embed Code
Once satisfied with your setup for your Shopify store, click the green “Add to website for free” button. Copy the entire code block – you’ll need it to launch your widget on Shopify.
Paste your PayPal button code into your Shopify store backend. The exact process depends on whether you’re adding it to your Shopify theme globally or to specific pages.
Method 1: Add to Your Shopify Store Theme (Global)
- Log into your Shopify admin dashboard.
- Navigate to Online Store → Themes.
- Find your active theme and click Actions → Edit code.
- Open the theme.liquid file in the Layout section.
- Paste your Elfsight PayPal code just before the closing </body> tag.
- Click Save to apply the changes.
- Confirm you pasted the complete embed code—it should be several lines long, not truncated.
- Make sure you saved the theme.liquid file after pasting.
- Clear your browser cache and refresh your Shopify store page.
- Test in a different browser to rule out local issues.
- If still missing, check your browser’s developer console (F12) for JavaScript errors.
Method 2: Add to a Specific Shopify Product Page
- From your Shopify admin, go to Online Store → Themes.
- Click Actions → Edit code on your active theme.
- Navigate to Sections and open product-template.liquid (or your theme’s product template file).
- Find the section where you want the PayPal button to appear on your product page (typically after the price or add-to-cart button).
- Paste your Elfsight PayPal code at that location.
- Click Save to apply changes to your Shopify store product pages.
Beyond Elfsight: Understanding Your PayPal Options for Shopify
While Elfsight simplifies PayPal button creation on Shopify, several other approaches exist for accepting PayPal payments on your store. Each has its own strengths, limitations, and ideal use cases. Here’s how they stack up for your Shopify needs:
Shopify’s Native PayPal Integration
Shopify has built-in PayPal support directly in the platform, requiring no third-party tools.
- Log into your Shopify admin. Go to Settings → Payments.
- Find PayPal. Under the PayPal section, click Activate or Manage.
- Connect your PayPal account. You’ll be redirected to PayPal to grant Shopify permission to process payments on your behalf.
- Set payment authorization. Choose between Authorize (capture later) or Authorize and Capture (immediate sale) based on your Shopify store needs.
- Save settings. Your PayPal payments are now live across your Shopify checkout.
More details are available in Shopify’s PayPal Setup Guide.
PayPal Smart Payment Buttons (Code-Based)
For developers comfortable editing Shopify theme code, PayPal offers Smart Payment Buttons through their developer portal.
- Visit PayPal Developer. Go to developer.paypal.com and create an account.
- Generate Smart Button code. Create a button tailored for your Shopify store through their interface.
- Edit your Shopify theme. Add the generated code to your cart-template.liquid or product-template.liquid file on your Shopify store.
- Customize appearance. Adjust button layout, color, and shape through PayPal’s customization options.
- Test and deploy. Verify payments work on your Shopify store before publishing to production.
Full details are available in PayPal’s Developer Dashboard.
How These Methods Compare for Your Shopify Store
Let’s look at these options side-by-side for your Shopify needs:
| Method | Best For 👍 | Main Limitation 👎 |
|---|---|---|
| Elfsight PayPal Button | Fully customized, branded buttons with minimal setup. Works on product pages, cart, or anywhere on Shopify. One-time payments, subscriptions, and donations all in one tool. | Requires free Elfsight account; button code must be manually placed on each page of your Shopify store where needed. |
| Shopify Native PayPal | Direct integration without extra accounts; zero setup fees; built into Shopify checkout natively; trustworthy as the official Shopify method. | Limited to main checkout only; minimal design customization; no product page buttons; less flexible for custom Shopify needs. |
| PayPal Smart Buttons (Code) | Professional checkout experience; detailed analytics; maximum control for developers; works on any page of Shopify store. | Requires coding knowledge; manual maintenance needed; steep learning curve; not ideal for non-technical Shopify store owners. |
📝 Strategic Tips for Maximum Conversions on Your Shopify Store
The difference between a button that converts and one that doesn’t often comes down to placement, design, and surrounding context. Based on patterns from thousands of Shopify store users, these practices deliver measurable conversion improvements:
- Place buttons where they’re immediately visible on Shopify. Position your payment button above the fold on desktop and prominently on mobile. Shopify customers shouldn’t have to scroll to find it—place it near relevant product descriptions or sales copy. Testing on real devices beats guessing.
- Use clear, action-oriented button text. Instead of generic “Submit” or “Click Here,” use specific text like “Buy Now,” “Subscribe Today,” or “Donate $10.” Descriptive text on your Shopify button increases click-through rates by setting clear expectations about what happens next.
- Create contrast between button and background. Your button should visually pop off the page on your Shopify store. Use a bright color (orange, red, or green) that contrasts sharply with surrounding elements. Avoid muted tones that blend in and get ignored.
- Add a call-to-action headline above the button. Use copy like “Ready to get started?” or “Support our mission today” on your Shopify store to emotionally prepare visitors. This bridges the gap between your sales message and the payment action they’re about to take.
- Display payment system icons prominently. Show Visa, Mastercard, and other accepted payment methods below your Shopify button. Familiar logos reduce purchase anxiety and increase conversions by up to 10% by signaling multiple payment flexibility.
- Include trust signals near your button. Add testimonials, reviews, security badges, or money-back guarantees adjacent to your payment button on your Shopify store. Trust signals reduce cart abandonment and increase payment confidence among hesitant buyers.
- Use post-purchase redirects strategically on your Shopify store. Send customers to a thank-you page with next steps, bonus content, or upsell offers. This maximizes the customer experience and revenue per transaction on your Shopify store.
Troubleshooting Common Issues
Here are answers to the most common questions from Shopify store owners about adding PayPal buttons to their stores:
Do I need a PayPal Business Account to accept payments on my Shopify store?
What payment types can I create for my Shopify store?
How do I know if a payment was successful on my Shopify store?
What happens if a customer has an issue with their payment on my Shopify store?
Can I use the PayPal button on mobile Shopify stores?
Is there a fee for using Elfsight's PayPal button on my Shopify store?
Can I embed multiple PayPal buttons on the same Shopify page?
Questions or Ideas?
Whether you’re selling products, accepting donations, or setting up subscriptions on Shopify, a branded, easy-to-use payment button keeps customers on your store and builds trust through a globally recognized payment method.
Questions along the way? Our Community Forum is full of real-world examples and solutions from Shopify store owners just like you. When you’re ready to launch on your Shopify store, Elfsight support is here to help. Create your first PayPal button today and watch your Shopify conversion rates grow.