Forms are the engine behind any interactive website: collecting inquiries, registrations, feedback, and other valuable visitor data. For Wix website owners, an efficient form solution not only improves engagement but also supports business growth by automating workflows and saving time.
Elfsight’s Online Form Builder was created for users who value quick setup, seamless integrations, and full design control – without writing a single line of code. In this guide, learn how to add a form on Wix in the most efficient way, covering every step and answering the most common questions raised by B2B teams and website owners.
- Quick Setup: Fast, reliable steps for embedding any type of form in Wix.
- Feature Highlights. Discover what makes Elfsight forms uniquely powerful.
- Alternative Solutions: Explore native and third-party methods for adding forms.
- Troubleshooting & Tips: Expert advice for better conversions and fewer headaches.
To make getting started effortless, this article is organized from the easiest “copy & paste” tasks to advanced configuration, so you can move at your own pace and skill level.
How to Add a Form in Wix: Quick Steps
Here’s your shortcut for embedding forms in Wix right away:
- Open Elfsight’s editor and pick a template.
- Customize your form widget.
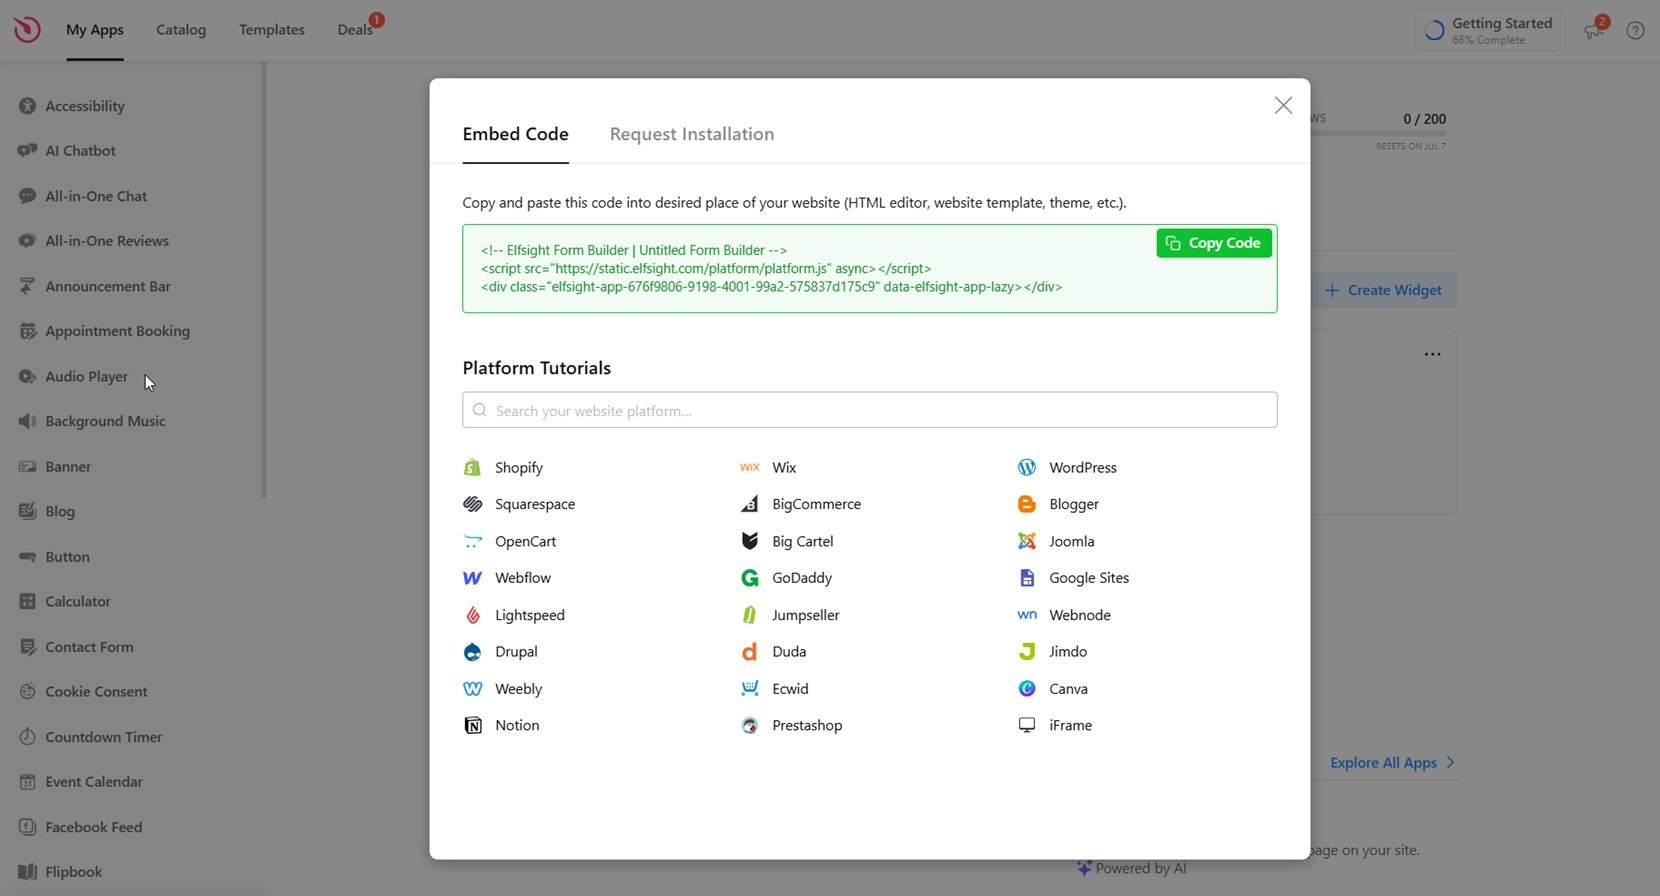
- Click ‘Add to website for free’ and copy the code.
- Paste it into your Wix website’s backend.
Jump into the live editor and build you custom form now!
Features That Set Elfsight Forms Apart
Not all forms are created equal. Here’s why Elfsight’s solution stands out:
| Key Feature | Why it Matters |
|---|---|
| Any form type with ready templates | Build contact, feedback, survey, order, or registration forms in minutes—all fully flexible. |
| AI-powered form creation from prompts | Instantly generate complex, custom forms just by describing what you need. |
| Connects with Google Sheets, Mailchimp, and Zapier | Automatically send entries to where you work, so every response lands where you need it. |
| Multiple layouts and multi-column support | Place your form anywhere, in any shape, so it always fits your website’s design. |
| Spam protection, saved progress, and custom actions | Keep submissions secure, help users finish forms with ease, and control what happens next. |
These are only some of the features that help you create effective, branded forms that make collecting information easy for everyone. To see everything Elfsight’s form widget can do, check out the Features Page.
Step-by-Step: Add Elfsight Form on Wix, from Template to Live
This section breaks down every step for creating, customizing, and embedding your form on Wix, with practical hints to help you tailor form design, notifications, and integrations for different needs.
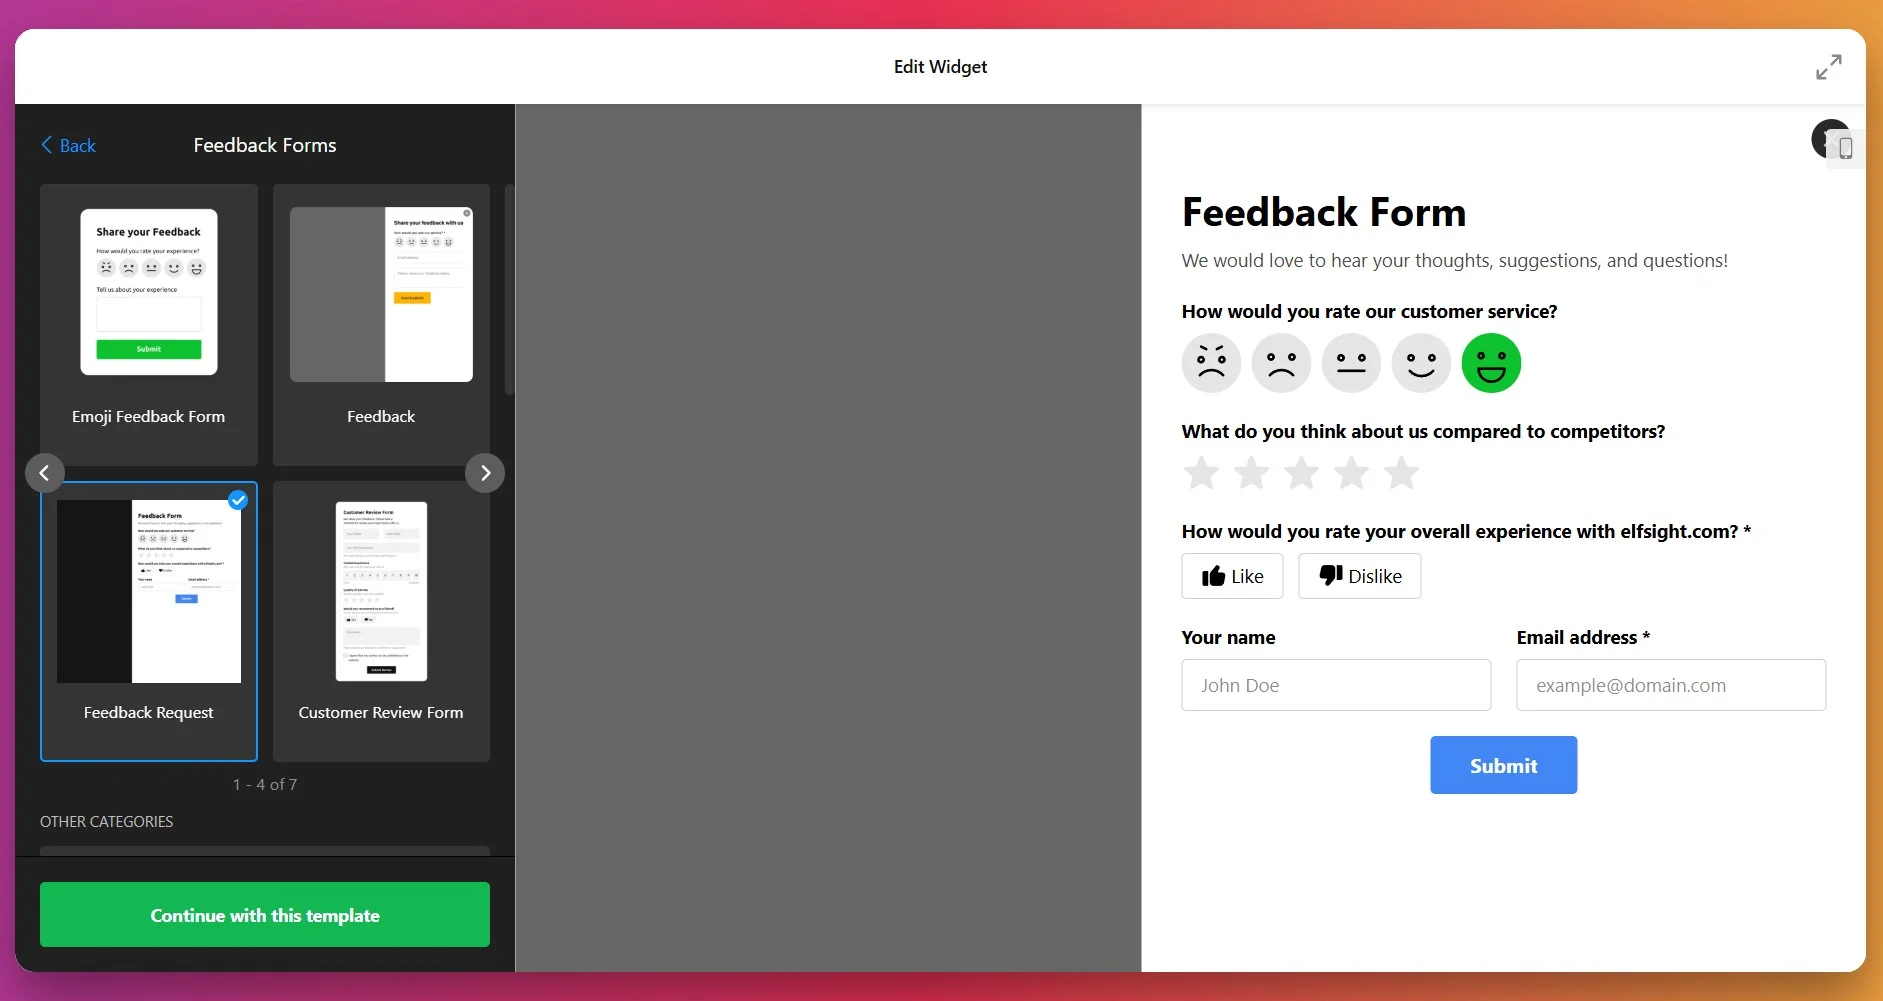
- Select a template. Open the editor. Pick the one that matches your goal and click “Continue with this template”.

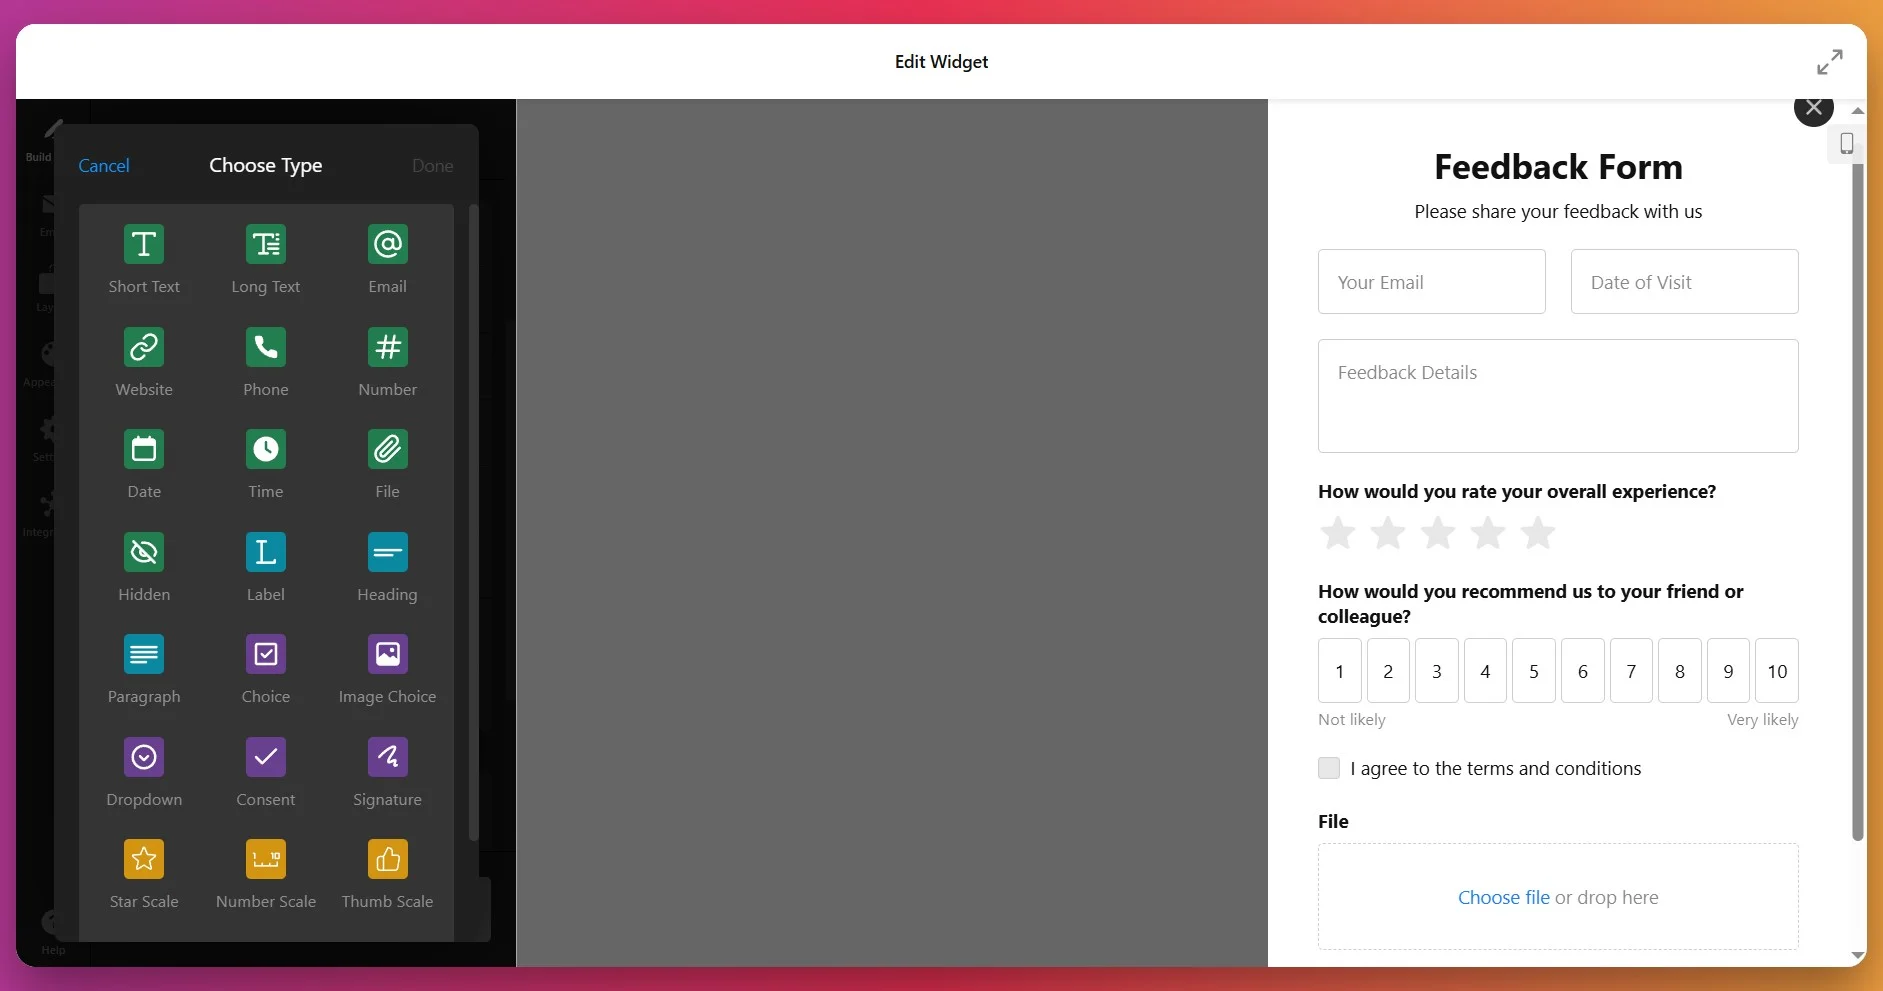
- Build your form. Use the “Build Form” tab to add, remove, or rearrange fields such as name, email, phone number, and custom dropdowns. You can also add fields like file upload, checkbox agreements, or descriptive text blocks to meet your data collection needs.
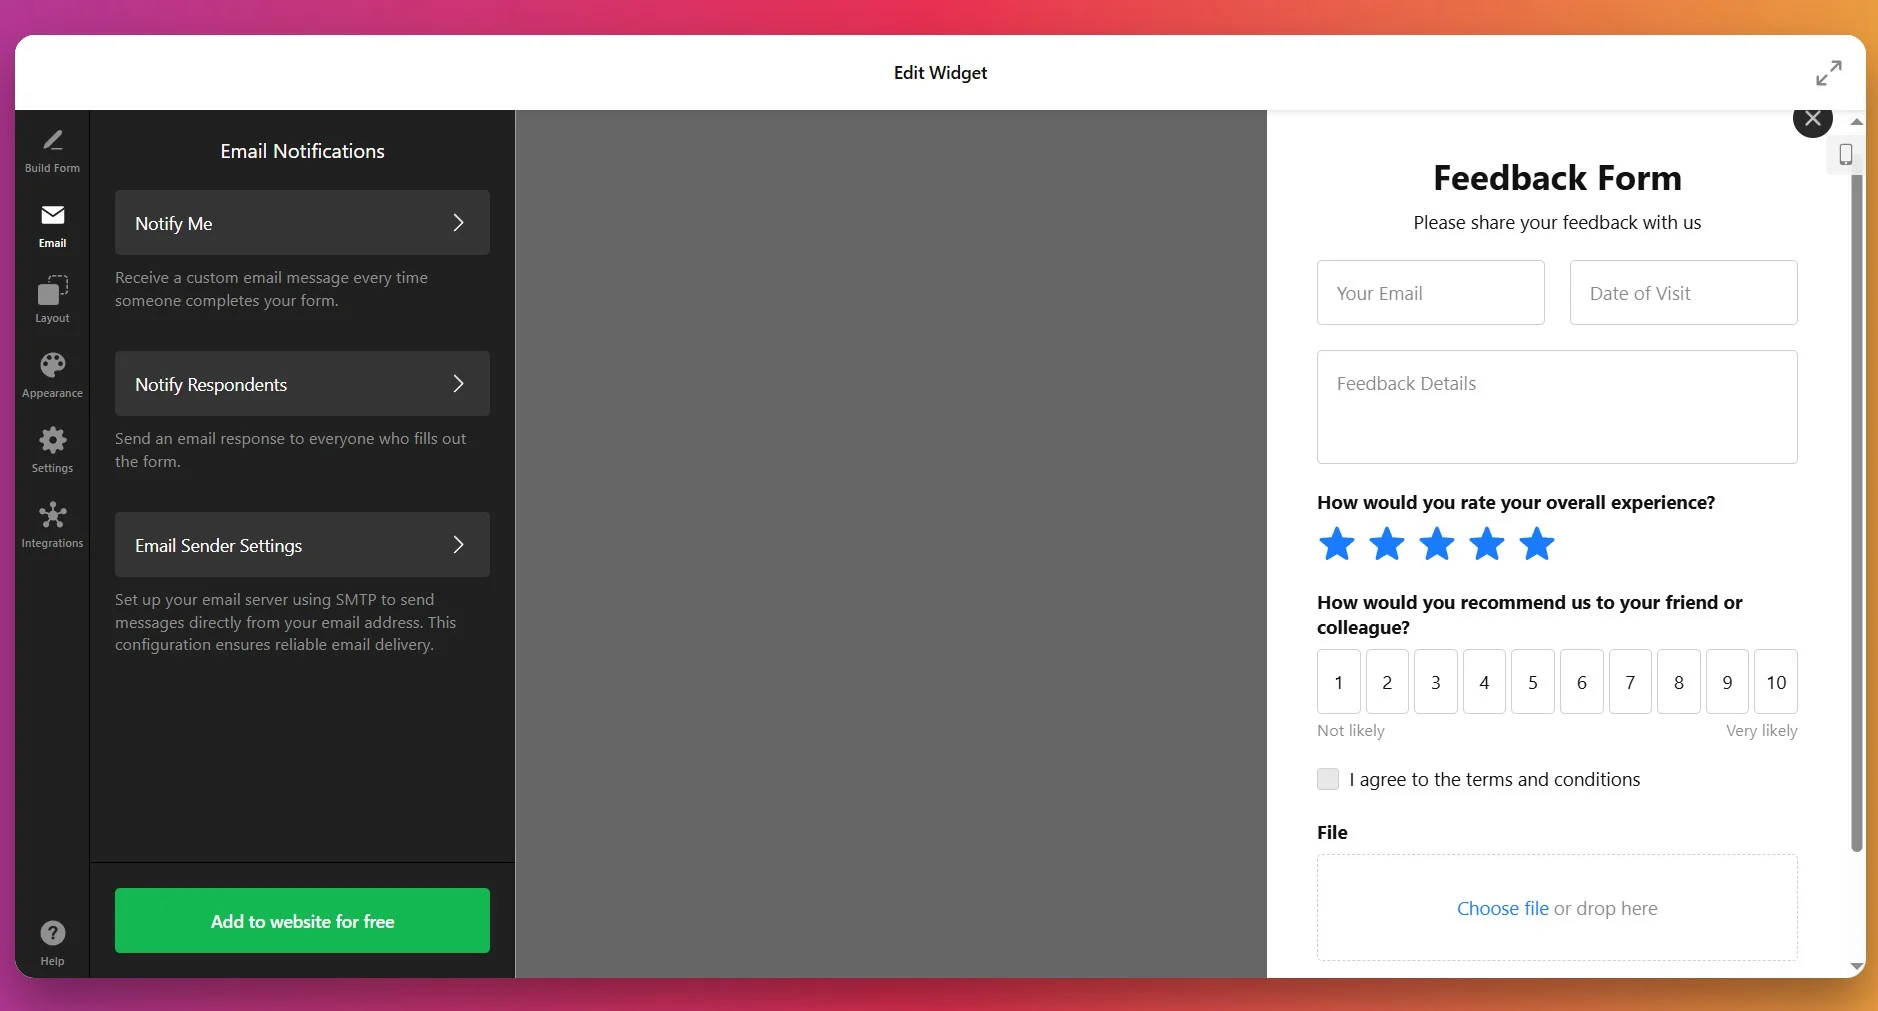
- Set up email notifications. In the “Email” tab, enable admin notifications so you receive a message when someone submits the form. You can also create automatic confirmation emails for respondents, and configure sender details via SMTP if needed.
- Customize layout and behavior. Under the “Layout” tab, choose between inline or floating display. Adjust form width, pane position, and decide whether the form appears in vertical or multistep format based on your preference.
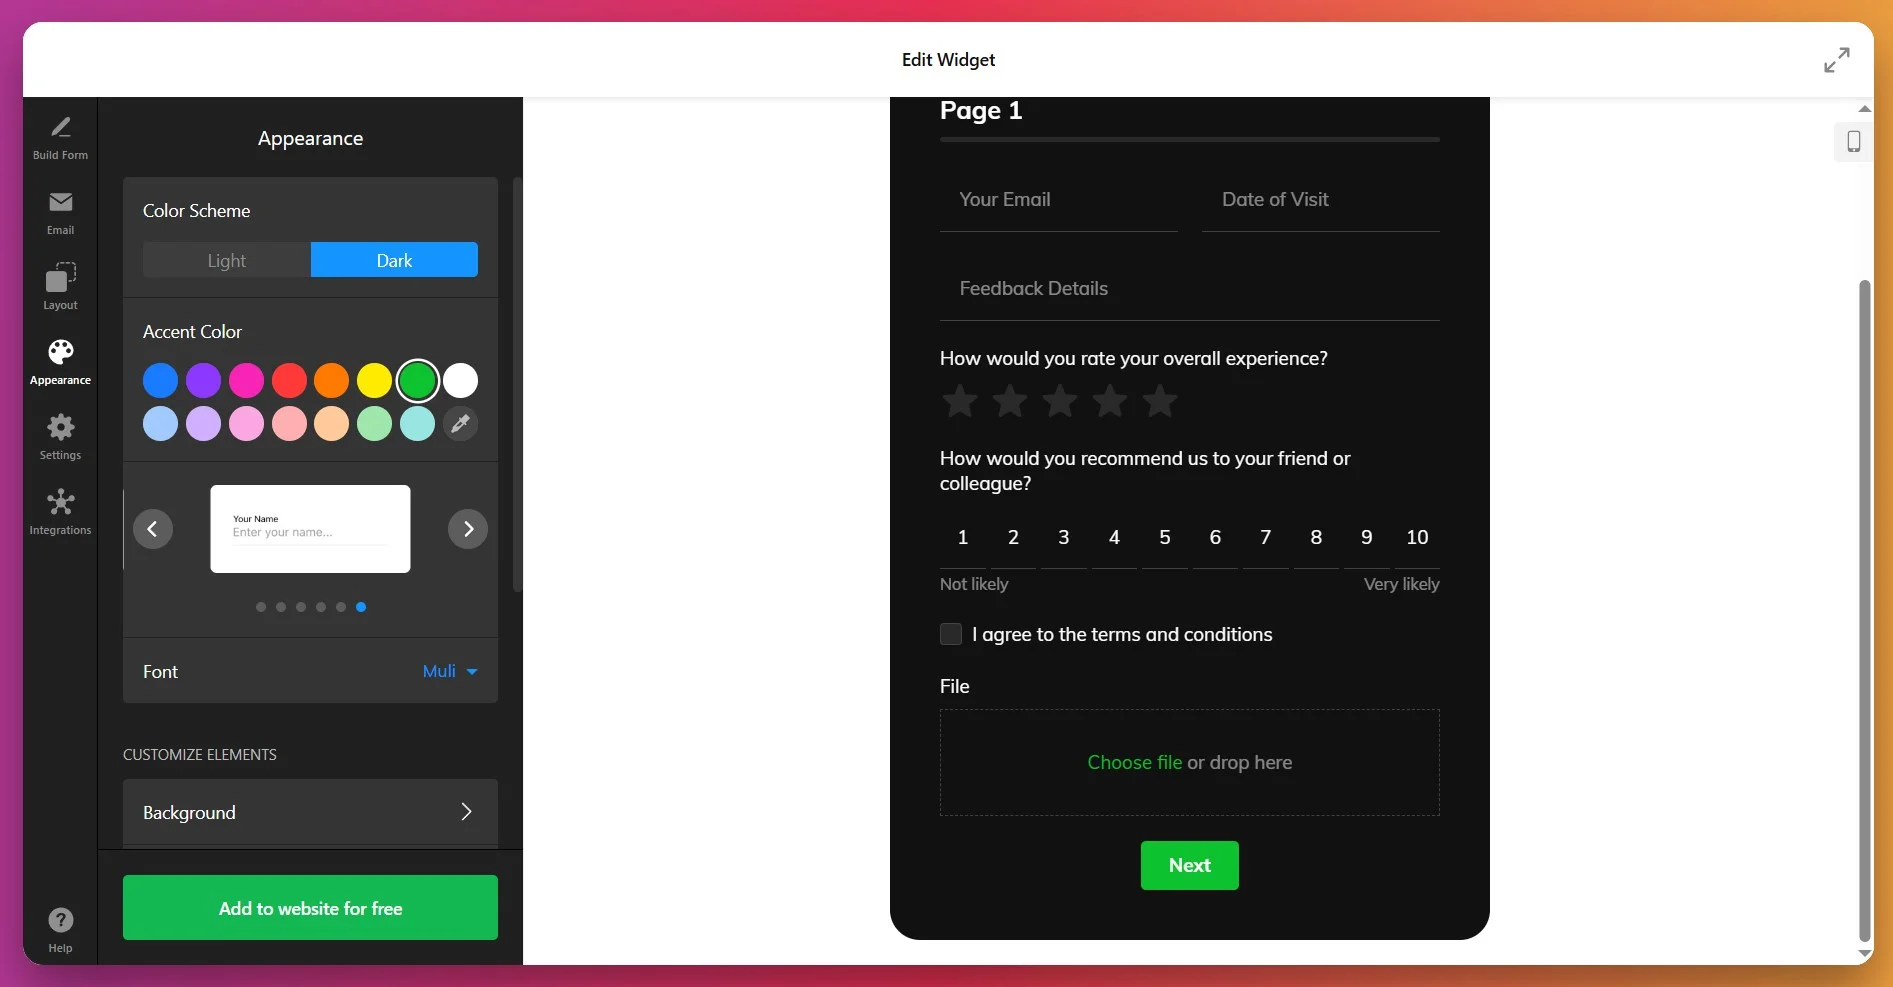
- Style the appearance. Open the “Appearance” section to select light or dark theme, apply a custom accent color, choose a font, and configure visual elements such as background and borders. This ensures your form matches your website’s branding.
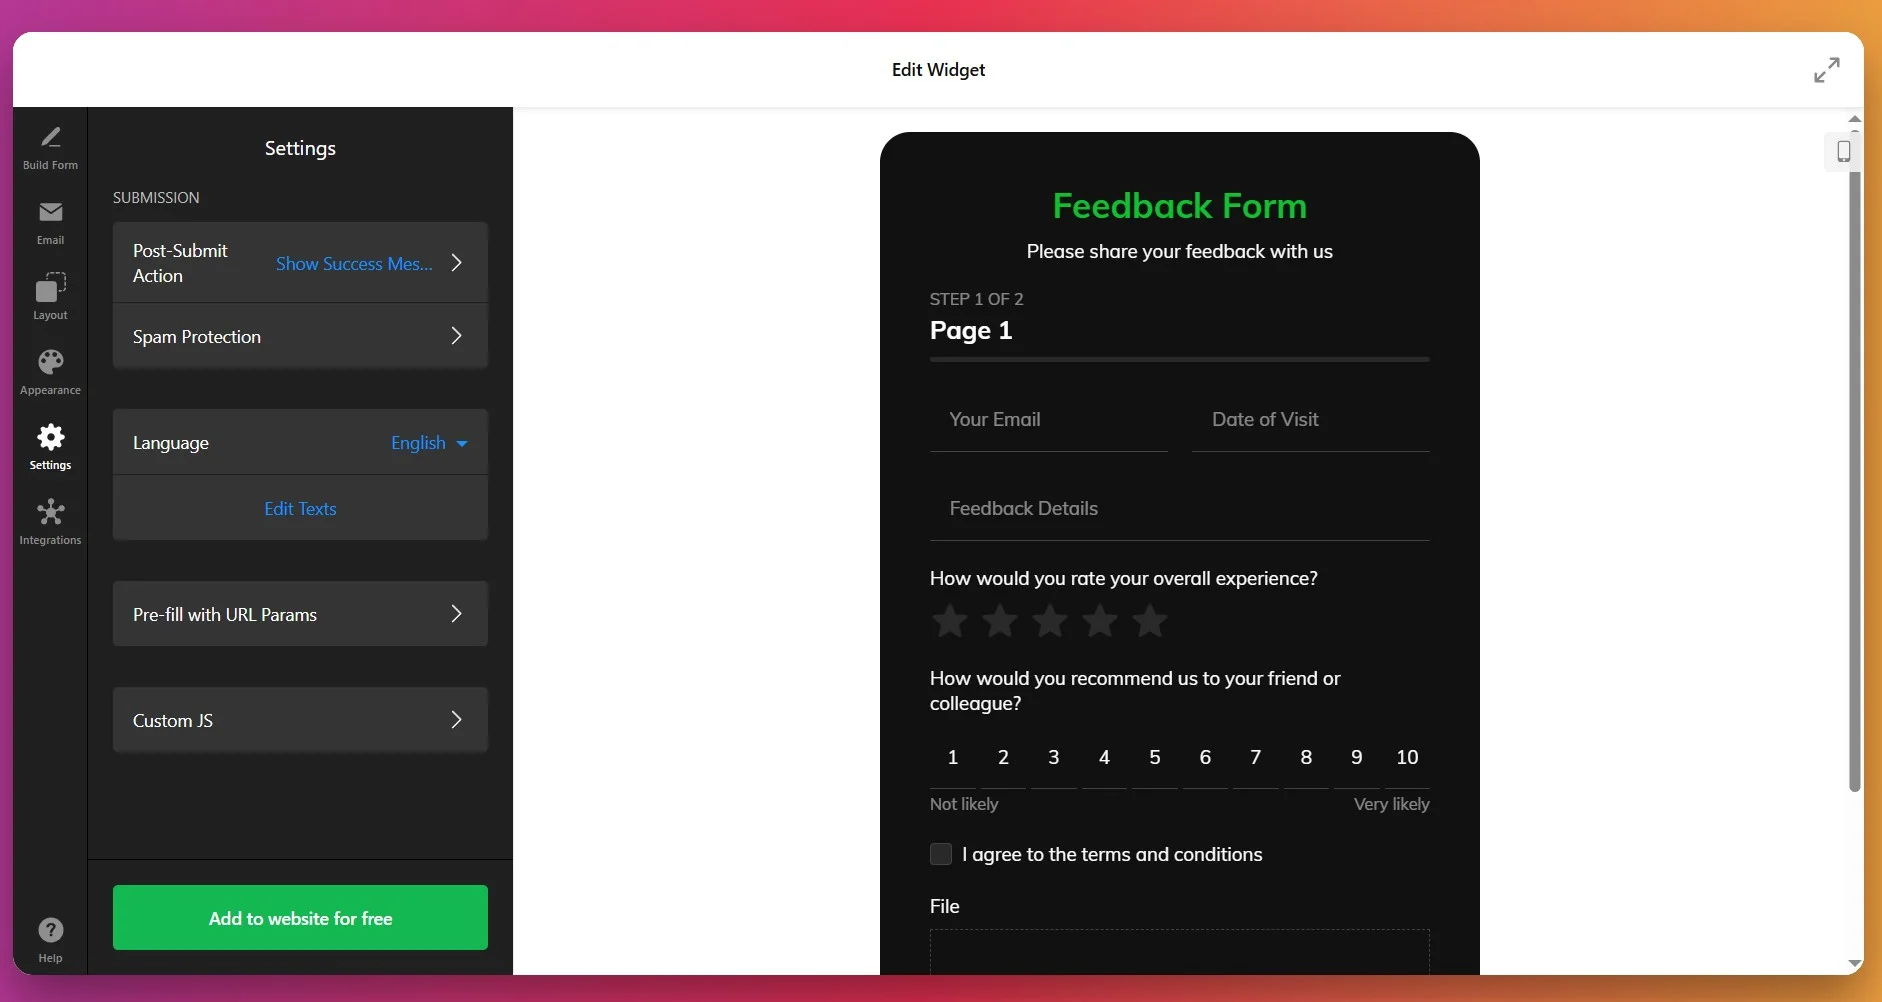
- Configure form settings. Go to “Settings” to define post-submit actions (e.g., show a thank-you message or redirect to a URL). You can also enable spam protection, change language, edit text labels, and add custom JavaScript or prefill options.
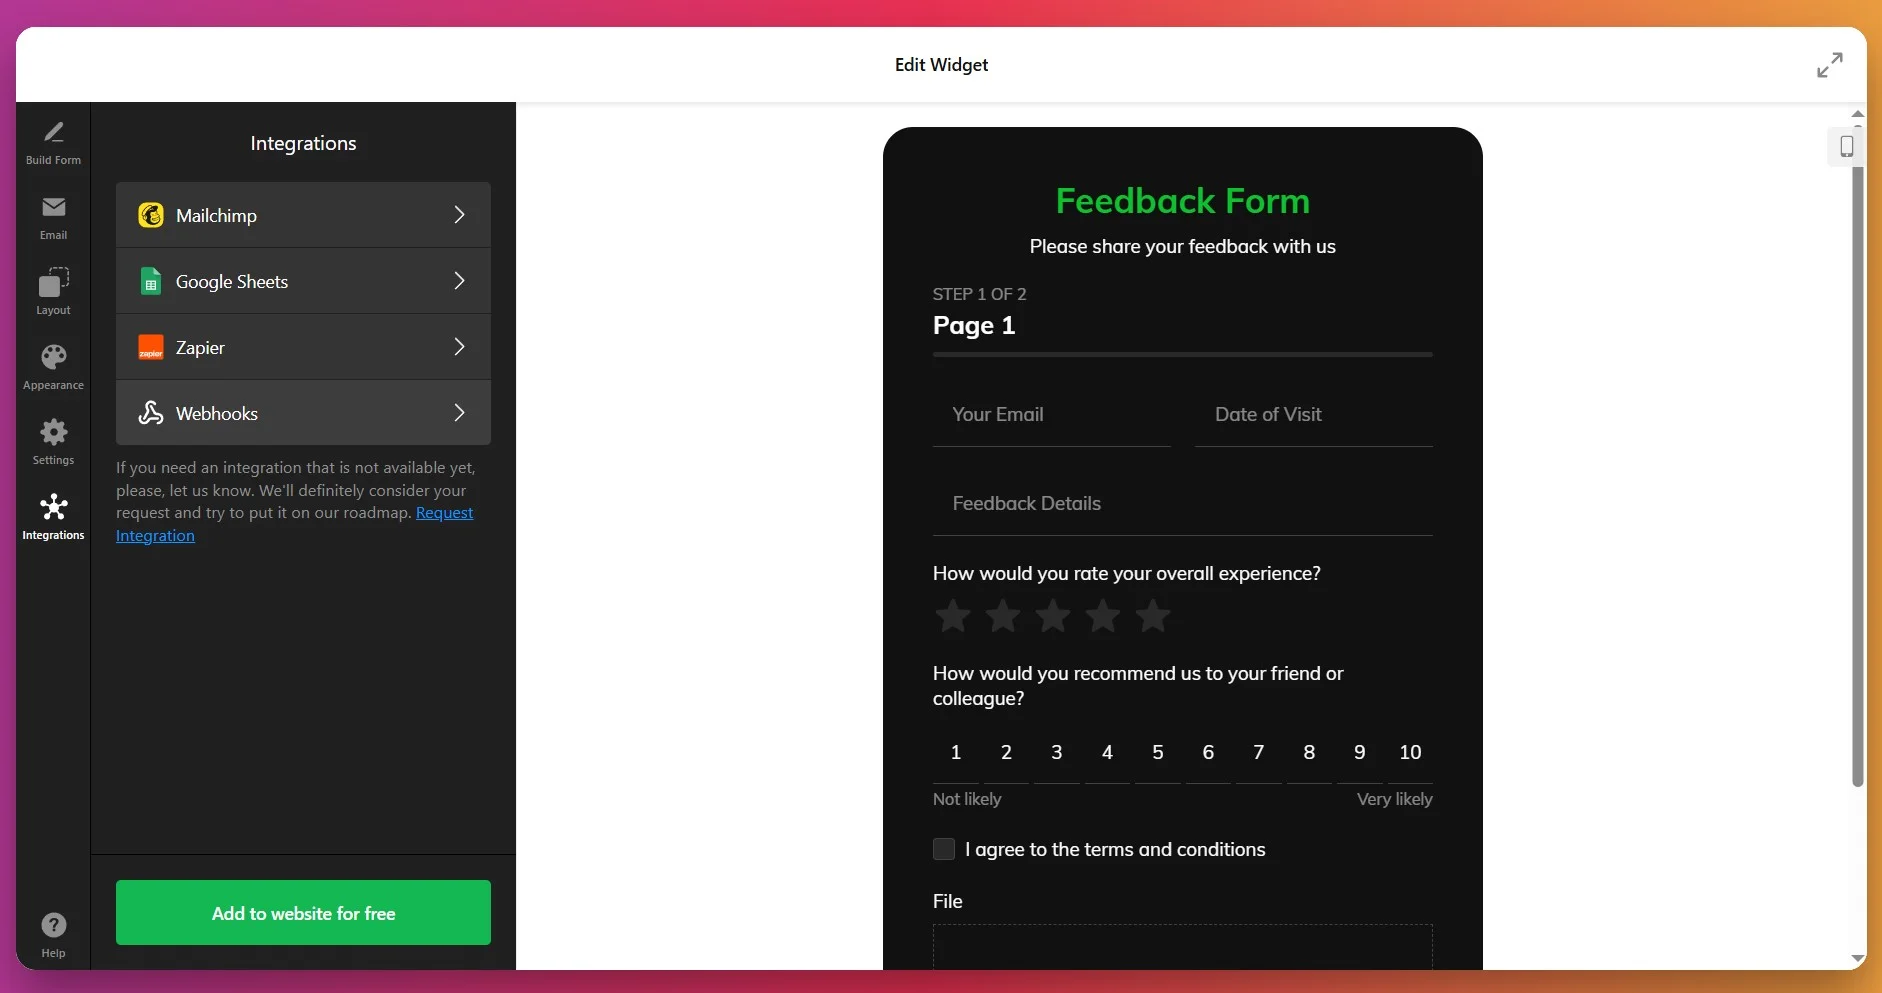
- Add integrations if needed. From the “Integrations” tab, connect your form to services like Mailchimp, Google Sheets, or Zapier to automatically export submission data or trigger workflows.
- Embed the form on your website. Click “Add to website for free” and copy the generated HTML code. Paste it into your website’s editor or template where you want the form to appear, then publish your changes.


If you want more control or need a workaround for iframe issues, the next block explores alternative ways to display your form on Wix.
Ways to Add Forms on Wix Without Elfsight
There are a few official ways to add forms to your Wix website, but each comes with clear trade-offs compared to using an Elfsight widget.
Wix’s Built-in Form Builder
Wix’s own drag-and-drop form builder lets you add contact, registration, or survey forms without extra software.
- Open Wix Editor. Start editing your Wix website.
- Add Form Element. Click the “Add” button and choose “Contact & Forms.”
- Select a Form Template. Pick a form style or blank form.
- Customize Fields. Edit or add fields appropriate for your needs.
- Publish Website. Save and publish for the form to go live.
Wix’s form builder lacks advanced logic, payment options, and deep integrations.
More details can be found in the Wix Editor’s official support resources.
Embedding a Third-Party Form via Code
Wix allows you to embed form HTML or JavaScript code from third-party platforms using the “Embed” option.
- Create the Form Elsewhere. Build your form on a supported external service.
- Copy Embed Code. Get the HTML or JavaScript embed code from your form provider.
- Open Wix Editor. Edit your Wix website.
- Add Embed Element. Select “Embed” from the Add menu and choose “Embed a Widget.”
- Paste Code and Publish. Insert the code, adjust display, and publish.
Embedded forms may not match your website design and can lack smooth integration.
More information is available in Wix’s help section on embedding custom code.
Wix App Market Official Form Apps
Wix App Market offers official apps like Wix Forms, which you can install directly from your dashboard.
- Go to Wix App Market. Access the App Market in your Wix dashboard.
- Search for “Form”. Browse for official form apps such as “Wix Forms.”
- Add to Website. Click “Add to Website” and follow installation prompts.
- Set Up and Customize. Adjust settings and fields as needed.
- Publish Changes. Make your website live with the new form app.
Official apps often have feature or customization limits unless you upgrade to paid plans.
Details about these options are available in the Wix App Market documentation.
How Do These Methods of Adding Forms Compare?
| Method | Major Pro 👍 | Major Con 👎 |
|---|---|---|
| Elfsight | Wide range of advanced features and seamless look. | Account required for dashboard access |
| Wix’s Built-in Form | Instantly available and easy to use. | No advanced logic or integration with external tools. |
| Embed via Code | Supports almost any external form service. | Layout and appearance often break or look inconsistent. |
| Wix App Market Apps | Simple setup from within the Wix dashboard. | Stronger features often require a paid upgrade. |
If you want practical tips for getting the most from your form builder on Wix, read on for the next section.
📝 Essential Setup Checklist for Form Widget
From the Elfsight team’s experience testing hundreds of form setups, we know a few critical steps can make collecting and managing user data much smoother. Here are our top recommendations for getting the most out of your Form Widget on any website.
- Clarify your form’s main goal. Before building, decide whether you need a feedback, survey, order, or registration form. This helps you choose the right template and fields for your purpose.
- Use AI-powered prompts for speed. Start with a natural language prompt to instantly generate a tailored form, then refine the details to match your specific requirements.
- Select a layout that fits your placement. Pick floating, boxed, or default layout and multi-column options based on where the form will appear on your website and how much space you have.
- Integrate with your preferred services early. Connect Google Sheets, Mailchimp, or Zapier right from the start so data flows automatically and you don’t have to revisit setup later.
- Personalize design for branding. Adjust colors, headers, icons, and font styles to match your website’s look and organize fields into categories for a user-friendly experience.
- Enable security and progress options. Turn on reCAPTCHA to prevent spam, and activate saved progress so users can pause and return without losing their input.
- Plan post-submit actions. Decide what happens after submission—show a thank you message, redirect, or trigger an email—so users know their input was received.
- Test responsiveness on multiple devices. Preview the form on desktop, tablet, and mobile to make sure it looks clean and all elements are accessible.
- Export and review collected data regularly. Schedule exports or set up automated data syncs so you always have up-to-date information and can quickly spot trends or issues.
Now that you have a checklist for a reliable Form Widget setup, let’s explore how a real business added a custom feedback form to their website and streamlined their customer support process.
Kapz: Feedback Collection Made Simple
Kapz Custom Bicycle Parts, a specialized online store offering bespoke bicycle designs and components, struggled with collecting customer feedback efficiently through standard review processes. They needed a streamlined way to gather detailed reviews directly on their website without requiring technical expertise.

Before Elfsight
The team faced several critical challenges:
- Customer reviews were fragmented across multiple platforms, making it difficult to compile feedback.
- Manual review collection processes were time-consuming and inconsistent.
- The website lacked a professional, integrated way to showcase customer testimonials.
- Coding complex feedback forms required external development resources.
Solution: Implementing Elfsight Form Builder
Khush deployed the Elfsight Form Builder as a multistep form specifically designed to collect customer reviews directly on the website. The no-code solution allowed rapid deployment without requiring any technical expertise or developer involvement.
“We were looking for a no code widget solution for our website – the first one was an announcement bar and then it went from there.”
Khush, Founder of Kapz Custom Bicycle Parts
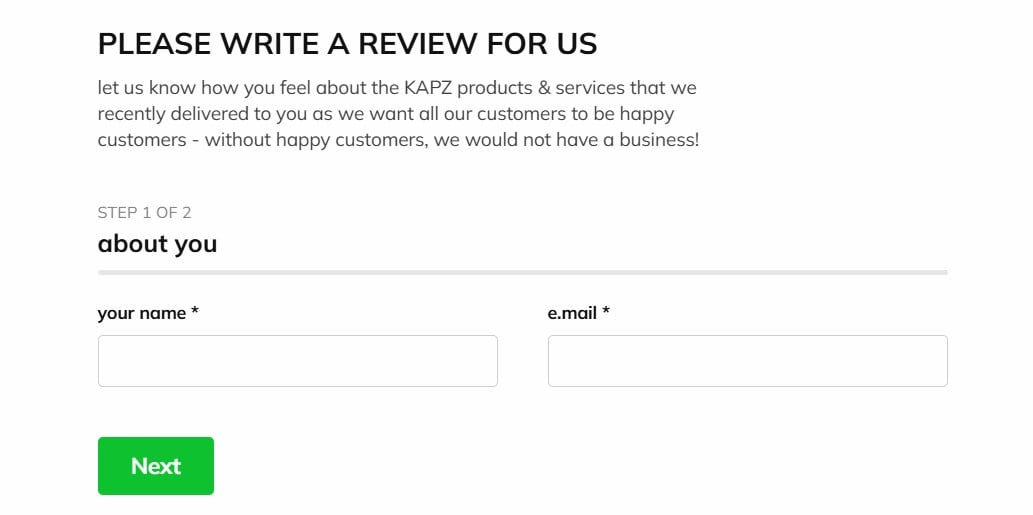
The Form Builder was strategically placed on a dedicated “Write a Review” page, making it the central hub for customer feedback. The multistep form design broke down the review submission process into digestible sections, reducing form abandonment and encouraging more detailed responses from customers about their custom orders and product experiences.
Real Results
- Higher feedback completion rates: The multistep format encouraged customers to provide more detailed and thoughtful reviews compared to single-page forms
- Centralized review collection: All customer feedback now flows into one organized system on their website, eliminating data fragmentation
- Reduced development overhead: No coding required meant zero delays and zero dependency on technical staff
- Professional presentation: The customizable form matched the brand aesthetic and reinforced the company’s commitment to quality
- Actionable insights: Structured review data helped identify patterns in customer preferences and product improvements
The Bigger Picture: A No-Code Transformation
Khush’s success extended far beyond just the Form Builder. The discovery of Elfsight’s no-code approach inspired a complete website transformation that included the Announcement Bar to highlight service benefits, All-in-One Chat to connect customers across messaging platforms, Photo Gallery to showcase custom designs, and Instagram Feed to display beautiful product imagery. This comprehensive widget strategy transformed their website from a basic online store into an interactive, engagement-rich platform.
Whether you’re running an e-commerce store, service business, or content platform, the lesson is clear: by removing friction from feedback collection, you unlock valuable customer insights that directly impact business growth and customer satisfaction.
Adding Forms: Common Issues & Fixes
Below are the most frequently reported problems and practical solutions that help real users get forms working smoothly:
Why doesn’t my form show up on my Wix website after I add it?
What causes form fields to look misaligned or squished on mobile devices?
How do I fix forms that won’t submit or send notifications?
Why does my form’s success message appear in the wrong place?
What should I do if form code gets removed or changed during editing?
If issues persist after these steps, the following block lists official Elfsight support channels and troubleshooting guides for deeper help.
Questions About Forms?
This guide should make it effortless to add forms to your Wix website—so you can start connecting with leads, gathering feedback, and powering your business without IT bottlenecks. Got questions or want to share creative ways you use Elfsight? Drop a message on X, Facebook, or LinkedIn, and follow Elfsight for product updates, inspiration, and tips on building high-converting websites.