How to Create a Squarespace Announcement Bar
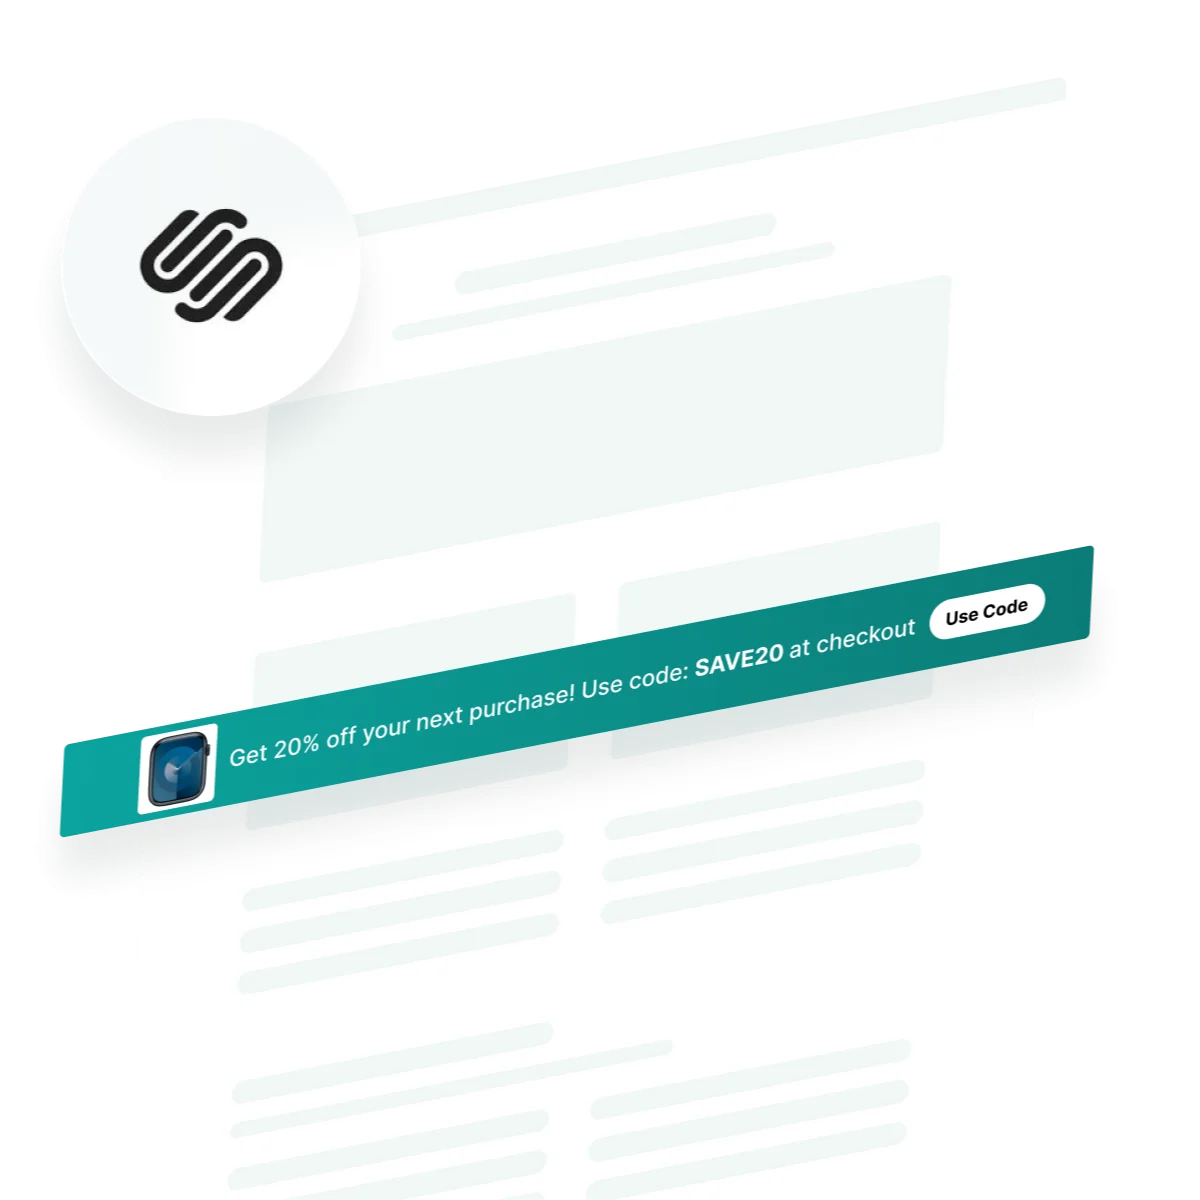
Adding an announcement bar to your Squarespace website is a simple yet effective way to grab your visitors’ attention and keep them informed about important updates, promotions, or events.
Whether you’re highlighting a sale, sharing news, or promoting an upcoming event, a notification bar can make your message stand out. In this guide, we’ll walk you through the step-by-step process to create, customize, and add an engaging Squarespace Announcement Bar plugin from Elfsight. Let’s get started!
To embed a notification bar, follow these steps:
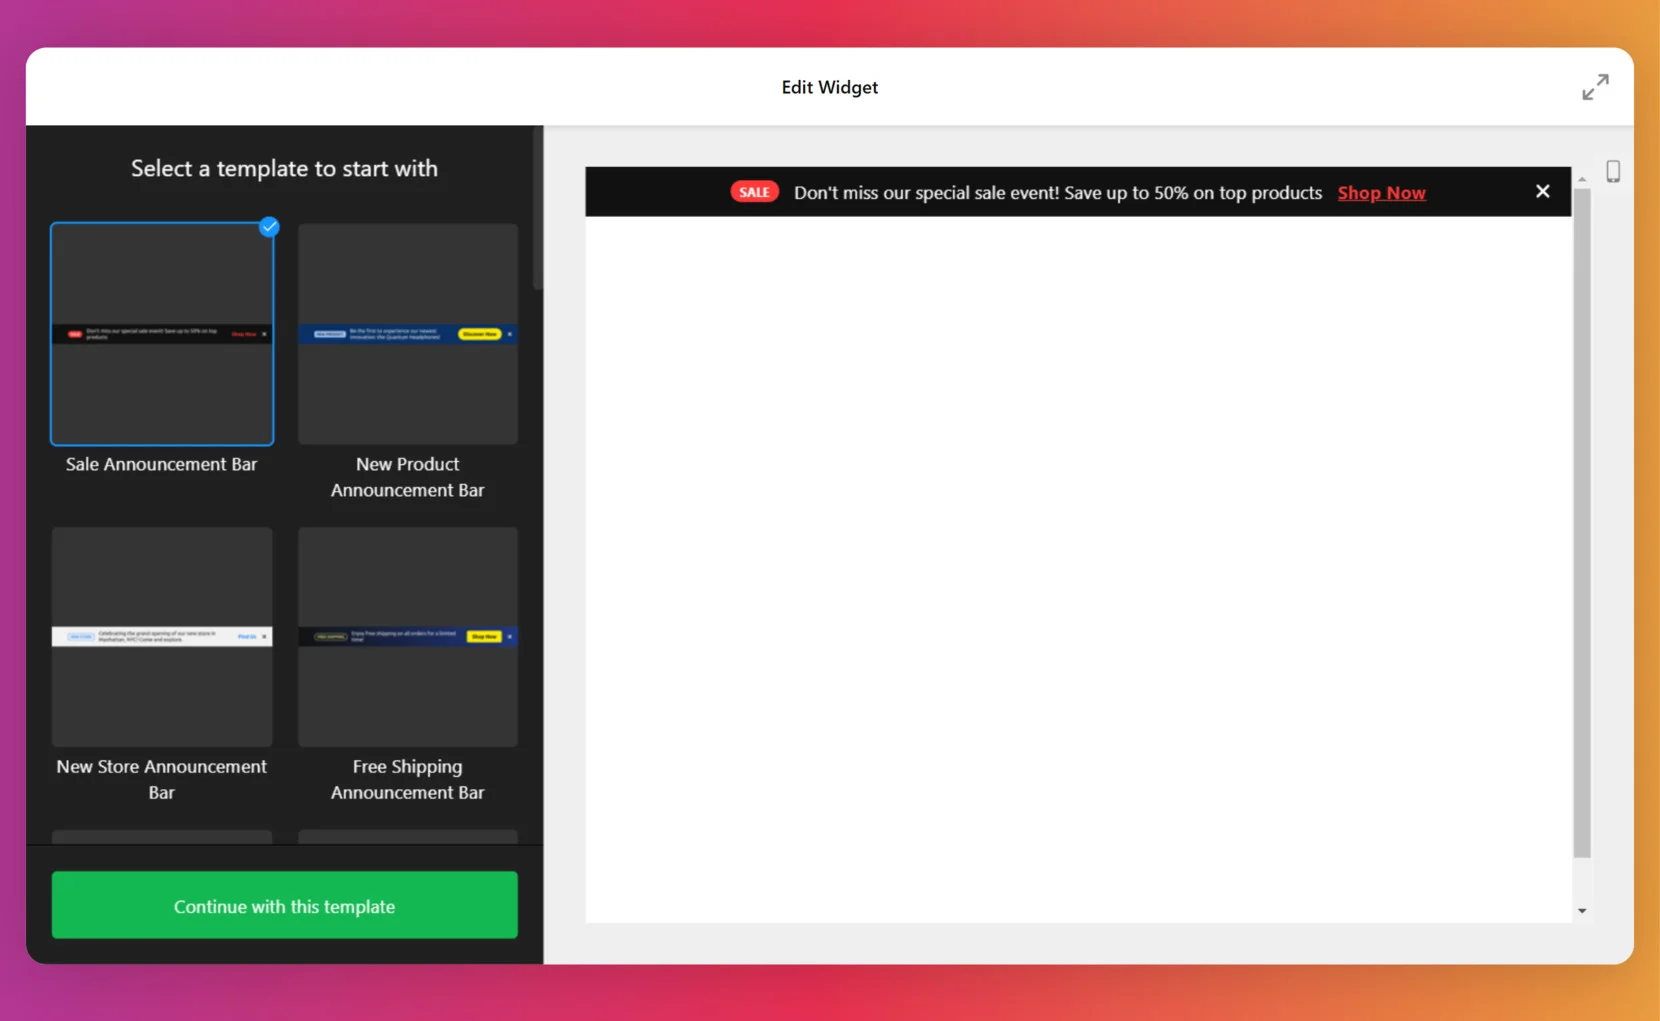
- Launch the plugin editor and choose a template that fits your needs.
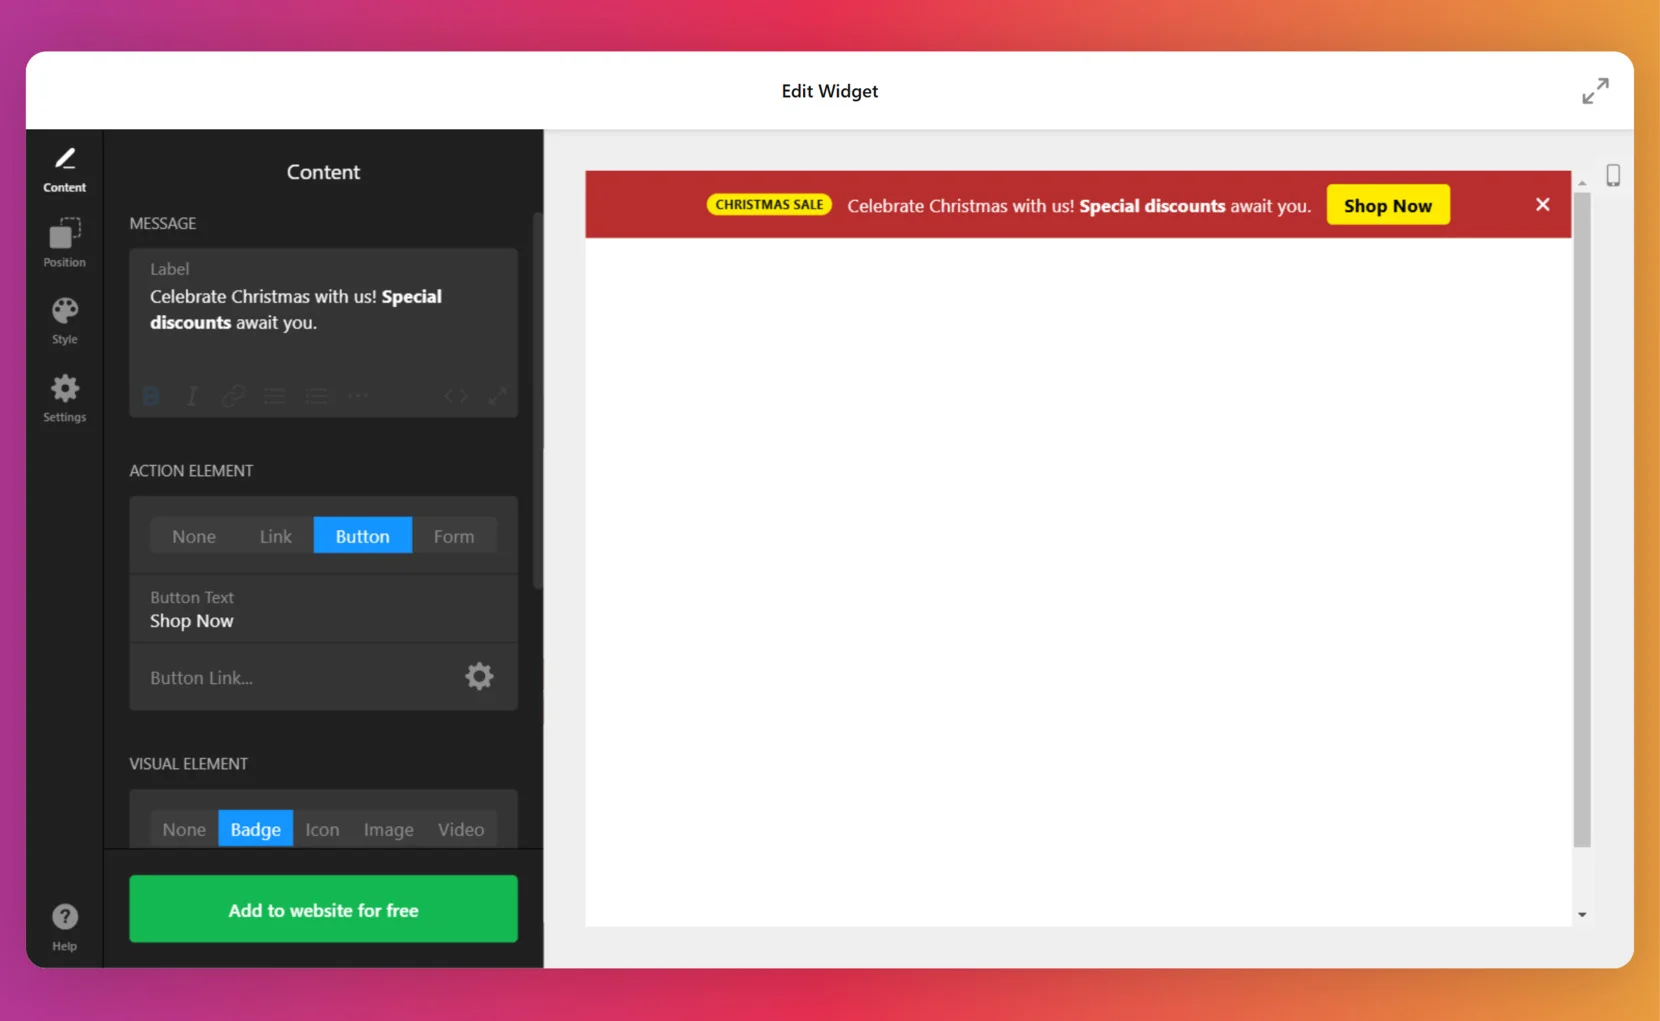
- Now, work on the notification bar’s content: craft an engaging message, include interactive elements such as buttons or forms, and incorporate visuals to enhance appeal.
- Select a layout you love, then tweak the colors, fonts, and other design elements to match your style.
- Configure the settings, save your changes, and publish your widget. Finally, copy the generated HTML code and insert it into your website’s CMS. Done!
Enhance your Squarespace website — try our announcement bar widget and keep your visitors engaged!
Add an Announcement Bar to Squarespace: Detailed Guide
Now, let’s see in detail what kind of customization you can make as you create your notification bar widget.
- Select a template. Open the Announcement Bar widget editor. Choose a suitable template or create a plugin from scratch.
- Add content. Write the message you want your banner to display. You can add action elements such as a link, button, or form with a CTA text. Also, implementation of visuals is available: badge, icon, image, or video.
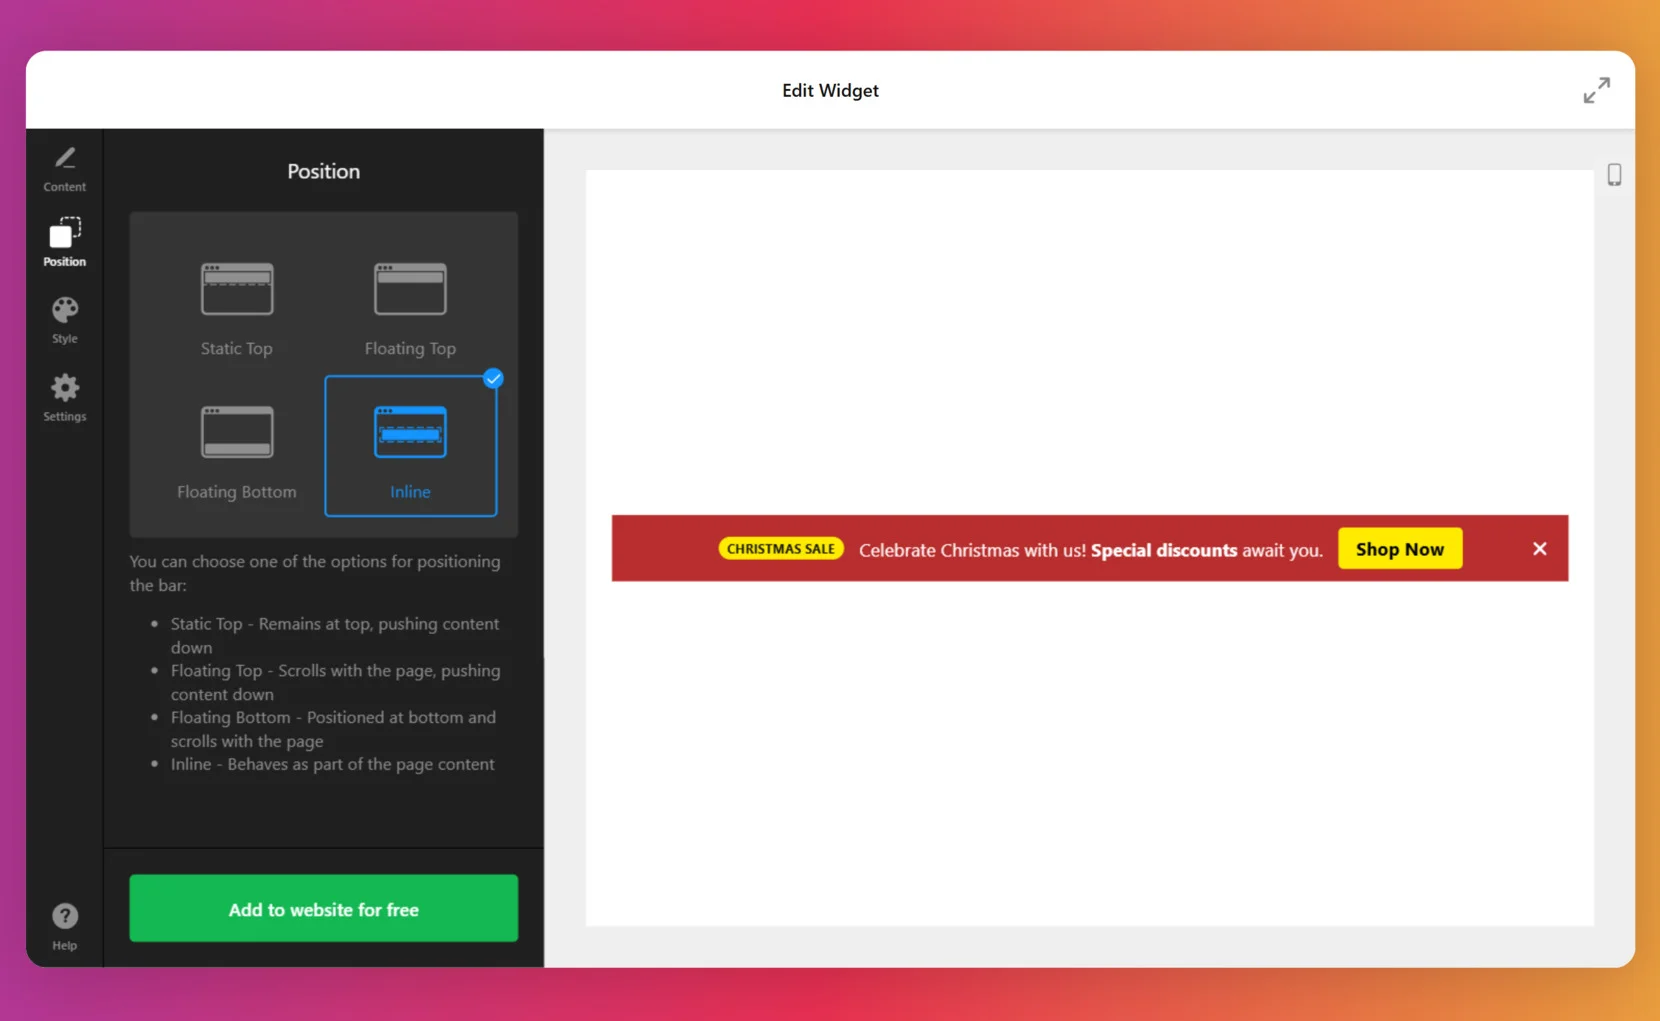
- Choose a position. Decide where and how you want your announcement bar to appear: Static Top, Floating Top, Floating Bottom, or Inline. For those unfamiliar with terms, the plugin’s editor offers detailed descriptions for each position.
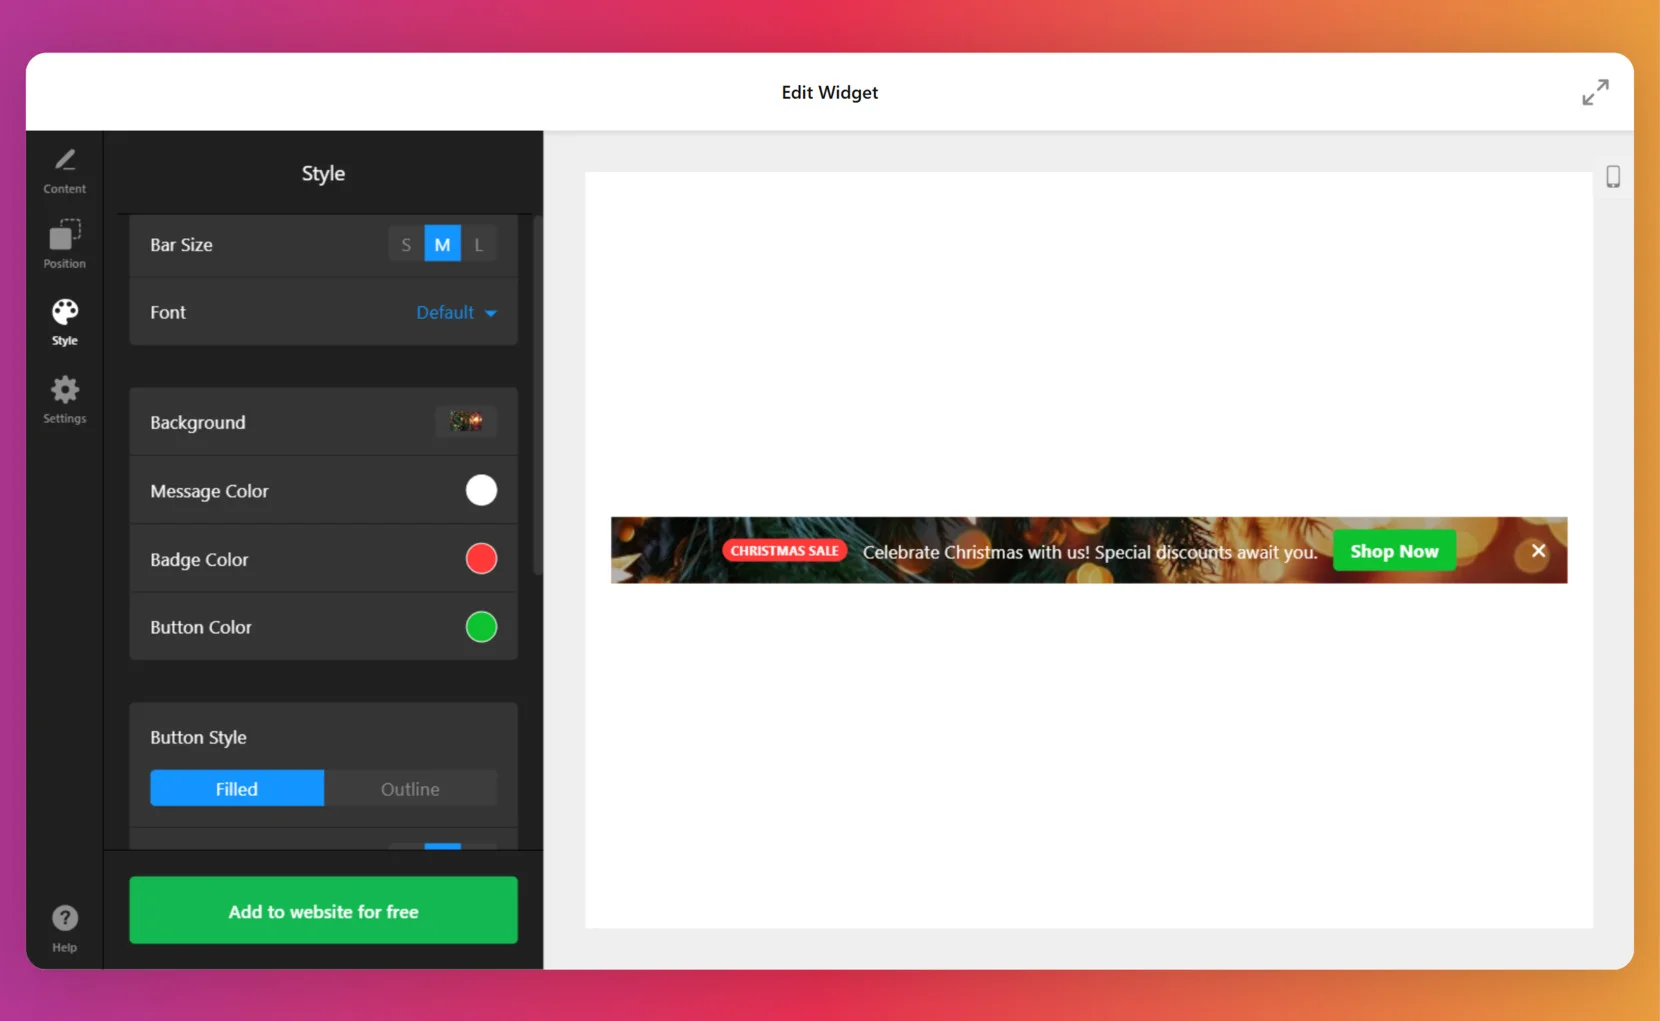
- Customize the style. Now, fine-tune your plugin: choose the bar size, text font, main colors, button or badge style, and more. Add a background. It can be a simple color, gradient, but you can also upload an image or video.
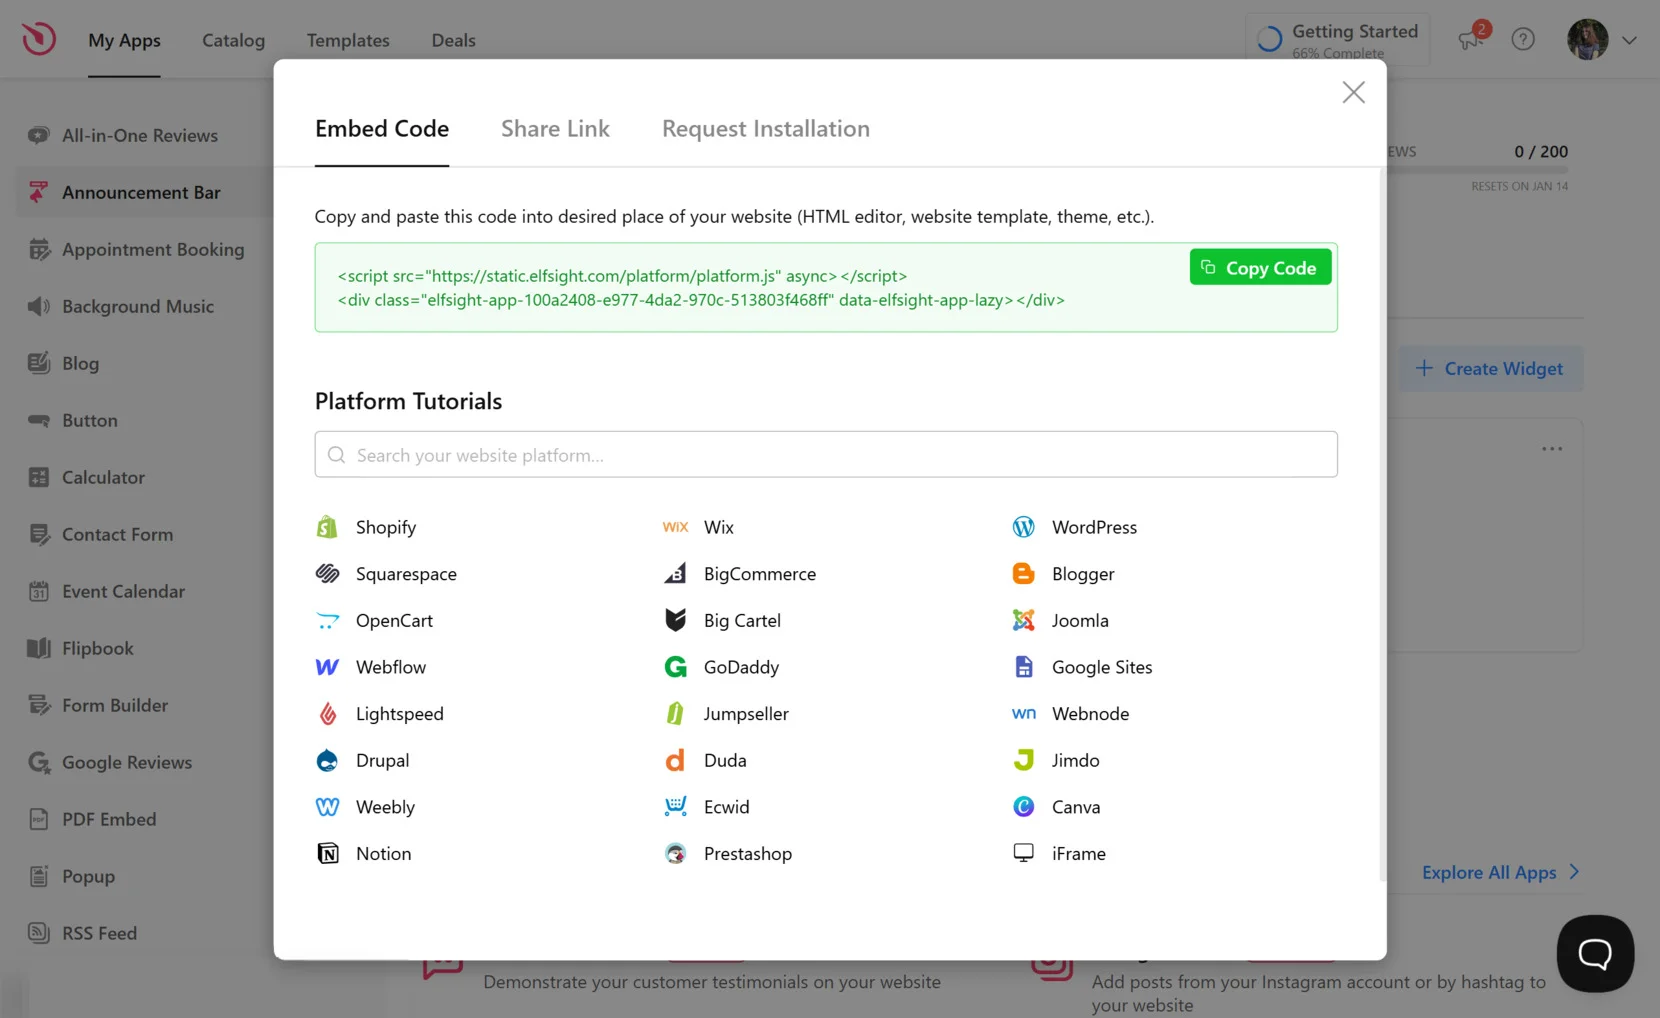
- Finalize settings and publish. Choose which pages you need your plugin to appear on as well as other settings, such as schedule. Hit ‘Add to website for free’ and then the ‘Publish’ button. Copy the provided HTML code.
- Embed the widget into CMS. Log in to Squarespace and select your site from the dashboard. Navigate to the desired page, click ‘Edit’, add a blank section, insert a ‘Code’ block, and paste the generated HTML. Adjust the width and placement for a polished look.
Features of the Announcement Banner Plugin
Now that you’ve learned how to add an announcement bar on your Squarespace, it’s time to explore the incredible value it brings. From boosting customer engagement to driving sales, here are the key benefits and features that make it a must-have for your site.
| Feature | Description | Business Benefit | Customer Benefit |
|---|---|---|---|
| Maximum Attention to Announcements | Position and customize the announcement bar for maximum visibility, ensuring messages are impossible to miss. | Boosts brand awareness and customer loyalty by keeping visitors informed. | Ensures customers don’t miss important updates or offers. |
| Spread Updates and Information | Use static or sticky bars to announce events, product launches, or important changes. | Increases visitor engagement and keeps customers informed about critical updates. | Easily stays informed about relevant news, events, and changes. |
| Visible, Non-Intrusive Messaging | Design announcements with adjustable clickability, style, layout, and closing options for adaptive visibility. | Enhances visitor experience while ensuring the message is effectively delivered. | Provides clear, visually appealing announcements without disrupting navigation. |
| Promote Products and Updates | Announce recent sales, product launches, or updates to attract attention and drive action. | Boosts sales and highlights new offerings, enhancing customer interest and conversions. | Helps customers discover new products, updates, and great deals, encouraging engagement and purchases. |
| Responsive Design for All Devices | Ensures the announcement bar is fully functional and visually appealing on both desktop and mobile devices. | Reaches a wider audience across all device types, maintaining message clarity. | Offers a seamless browsing experience, no matter the device used. |
Where to Add an Announcement Bar on the Website
You’ve created your Squarespace Announcement Bar plugin, and now wonder, “What’s the best placement for this utility on the website?”
Page position
In terms of page position, the Elfsight Announcement Bar plugin offers four options, each with its unique advantages and drawbacks:
Static Top. The bar remains fixed at the top of the page, blending seamlessly into the site’s design.
- Pros: It integrates naturally into the layout and is highly visible without obstructing content.
- Cons: Users may overlook it if they scroll quickly, and it’s less prominent compared to floating bars.
Floating Top. The bar hovers at the top of the screen and stays visible as users scroll.
- Pros: Its constant visibility ensures maximum attention, making it ideal for time-sensitive messages.
- Cons: It may distract from content and feel intrusive if not styled appropriately.
Floating Bottom. This option places the bar at the bottom of the screen, where it stays visible while users scroll.
- Pros: It is subtle yet noticeable, keeping the top of the page clear for navigation.
- Cons: It may conflict with elements like cookie banners or chat widgets, and it’s slightly less visible than top positions.
Inline. The bar is embedded directly into the page content, often appearing between sections or near critical information.
- Pros: This placement fits naturally into the page’s flow and works well for context-specific announcements.
- Cons: It might not immediately grab attention and could be missed by users skimming the page.
Page placement
As for the page placement, you can add the notification bar to your Home page, all pages of the website or make a selection of pages for the plugin to appear. Each option serves different goals and has its own strengths and weaknesses:
Home Page Only. Displaying the notification bar exclusively on the homepage ensures your most visited page highlights key messages.
- Pros: Captures attention early; great for making a strong first impression.
- Cons: Limited reach, as visitors navigating directly to other pages won’t see the announcement.
All Pages. Showing the notification bar across the entire website ensures maximum visibility for your message.
- Pros: Guarantees wide exposure, especially for time-sensitive or critical updates.
- Cons: Can feel repetitive or intrusive for frequent visitors; may clash with other page elements on some pages.
Selected Pages. Choosing specific pages for the notification bar allows you to target messages to relevant audiences or contexts.
- Pros: Provides precise messaging, improving relevance and user experience.
- Cons: Requires careful planning to ensure visitors on untargeted pages don’t miss important information.
Ultimately, the choice of where to place your notification bar depends on your personal preference and the design of your website. Consider how the bar fits into your site’s layout and the type of message you want to convey.
A well-integrated announcement bar can enhance user experience and ensure your announcements reach the right audience without disrupting navigation. Tailoring the positioning to complement your website’s style and purpose will help you make the most of this feature.
Add Squarespace Announcement Bar: Native Solution
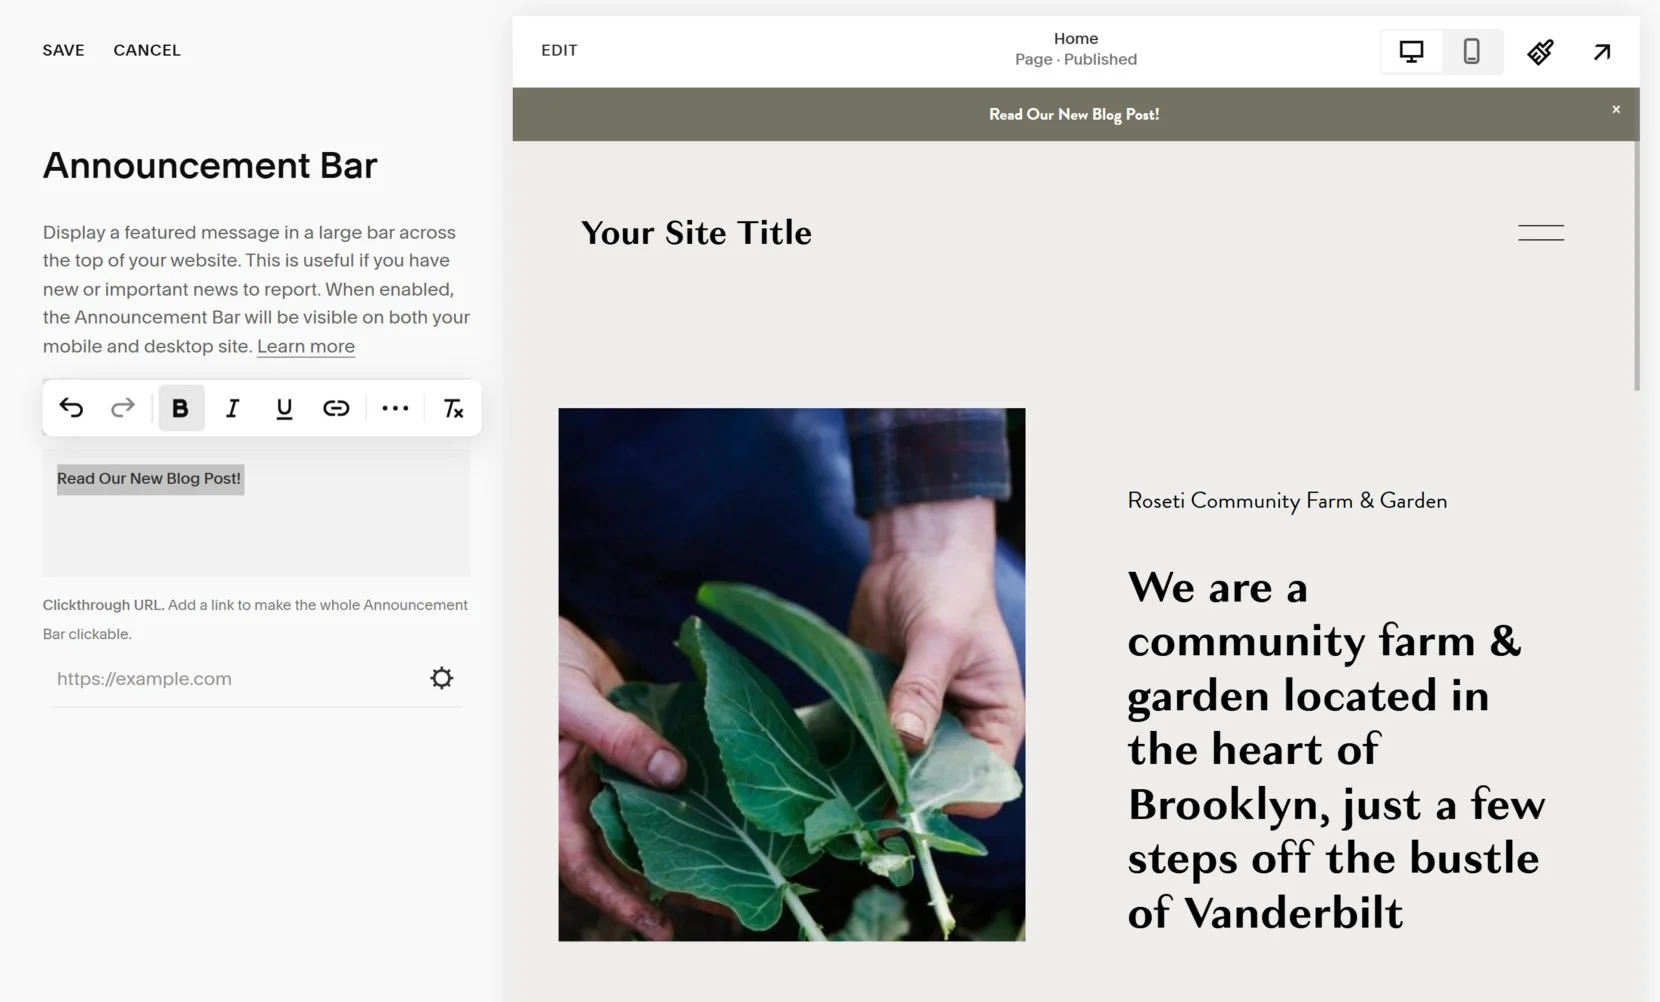
There’s actually a built-in solution for adding an announcement bar to a Squarespace website. It’s not intuitive to find and not as customizable, however, still worth talking about. Follow these steps:
- Access the Announcement Bar settings panel.
- From the dropdown menu, choose ‘Enable Announcement Bar’ to activate it.
- Type your desired text in the input field. You can format the text by making it bold, italicized, or even adding hyperlinks to specific words.
- To turn the entire announcement bar into a clickable link, input a web address in the Clickthrough URL field or use the settings to configure other types of links.
- Press ‘Save’ to apply your changes and publish the announcement bar.
Website Announcement Banner Use Cases
An announcement bar is a highly versatile tool with numerous applications for engaging users and sharing important messages. Let’s explore five common ways businesses can make the most of this feature.
- Seasonal Sales. An announcement bar is perfect for promoting seasonal sales and limited-time offers. Highlighting discounts for Black Friday, Christmas, or back-to-school seasons can capture attention instantly and encourage customers to take advantage of the deal before it ends. This approach drives sales while creating a sense of urgency.
- Product Launches. Use an announcement bar to introduce new products or services directly to your visitors. A brief message with a “Learn More” button can lead users to a detailed landing page. This is an effective way to generate excitement and curiosity around your latest offerings.
- Important Updates. When you need to inform users about crucial updates — such as changes in operating hours, new policies, or system maintenance — an announcement bar provides a clear and unobtrusive way to communicate. This ensures your audience stays informed without navigating away from the page.
- Event Promotion. Promoting events like webinars, conferences, or in-store events becomes simple with an announcement bar. Share the date, time, and a link to register or learn more. By placing the bar prominently, you can increase participation and ensure your audience doesn’t miss out.
- Special Announcements. Make big moments, such as company milestones, awards, or achievements, stand out with an announcement bar. Celebrating these occasions publicly enhances your brand image and connects you with your audience on a more personal level.
These are just a few cases of the plugin’s use. For more creative and inspiring ideas, check out our article featuring the best announcement bar examples to see how others are making the most of this feature!
FAQ
How do I edit the announcement bar in Squarespace?
To modify your Elfsight notification bar, simply login into your account and navigate to the plugin. Hit ‘edit’ and customize all the settings: the content, position, style, etc.
How do I change the color of the announcement bar on Squarespace?
To change the color of the Elfsight’s announcement bar, go to the ‘Styles’ menu. From there, you can adjust the background color, add a gradient, or upload an image or video. For better visual appeal, consider using brand colors that align with your overall website design.
How do I change the announcement bar on Squarespace?
The same applies to the Elfsight’s plugin. You can make all the changes through the editor in your account. Alternatively, you can deactivate the old notification bar and create a new one from scratch.
Conclusion
Adding a website announcement bar on Squarespace is a powerful way to enhance user engagement and keep your visitors informed about crucial updates, discounts, or events. With easy-to-follow steps, customization options, and a range of use cases, you can ensure your message reaches the right audience effectively.
Whether you’re promoting a sale or announcing a new product, an announcement bar helps draw attention without disrupting the user experience. By tailoring its style, position, and content to your needs, you’ll make sure your website remains dynamic and responsive.
Need More Info?
We trust this guide has been useful to you. Feel free to contact us to discuss creating a custom calculator for your website. Our goal is to make your experience smooth and efficient. At Elfsight, we focus on delivering no-code widgets that offer dependable solutions for your business.
Join our vibrant Community, where ideas and insights are shared. We truly appreciate your feedback and invite you to submit suggestions for future improvements — don’t hesitate to add to our Wishlist!


