Many of our users look for a simple way to add YouTube videos to their WordPress websites – whether it’s tutorials, product demos, or event highlights. Embedding videos directly on a website makes content easier to watch and keeps visitors engaged without sending them away to another platform. That extra time spent on site often turns into more clicks, sign-ups, or interactions.
A YouTube Video Widget makes embedding effortless. No technical setup, no compatibility headaches – just a clean, reliable way to display your content. Business owners say it saves them hours while giving their websites a more polished feel.
- Step-by-step setup. Detailed instructions for adding YouTube videos to WordPress
- Alternative methods explained. Comparison of native methods and third-party widget.
- Expert best practices. Key tips for video placement, responsiveness, and performance.
- Troubleshooting tips. How to resolve common issues with embedded videos.
We’ve broken the setup into two parts: a quick-start guide for instant results, and a full walkthrough for deeper customization. Let’s begin with the basics.
How to Add a YouTube Video to WordPress Website: Simple Steps
This quick guide shows you how to add a YouTube video to your WordPress website quickly.
- Open the Elfsight’s editor and pick a template.
- Customize your YouTube video widget.
- Click “Add to website for free” and copy the code.
- Paste it into your WordPress website’s backend.
Get your YouTube video live right in our free editor!
Why Elfsight’s YouTube Widget Stands Out
Discover the primary features that make this widget special and help you organize, design, and monetize your YouTube content – right on your WordPress website.
| Key Feature | Why it Matters |
|---|---|
| Show any YouTube content, grouped and labeled | You decide if visitors see a playlist, channel, or single videos, and everything stays tidy and easy to browse. |
| Three preview layouts and flexible playback modes | Visitors choose how they watch: pop-up, inline, or straight on YouTube, with up to 12 elements that switch on or off for a custom experience. |
| Style your widget with five presets or custom colors | Make each part of your gallery match your brand, from headers to popups, without effort. |
| Adjustable gallery layout and navigation controls | Set the number of columns, rows, and navigation options so your gallery always fits your website and your visitors can find videos fast. |
| Connect your AdSense account to monetize traffic | Earn revenue from embedded video views right on your website, turning your gallery into a new income stream. |
You can explore every feature on the widget’s Features Page, where you’ll find the full description of its functions. Now that you know what it can do, let’s see how it works in practice in our detailed guide below.
Adding YouTube Videos to WordPress Step-by-Step
This walkthrough covers the whole flow: from choosing a template to publishing, so that you know exactly where to click when you decide to create your own widget:
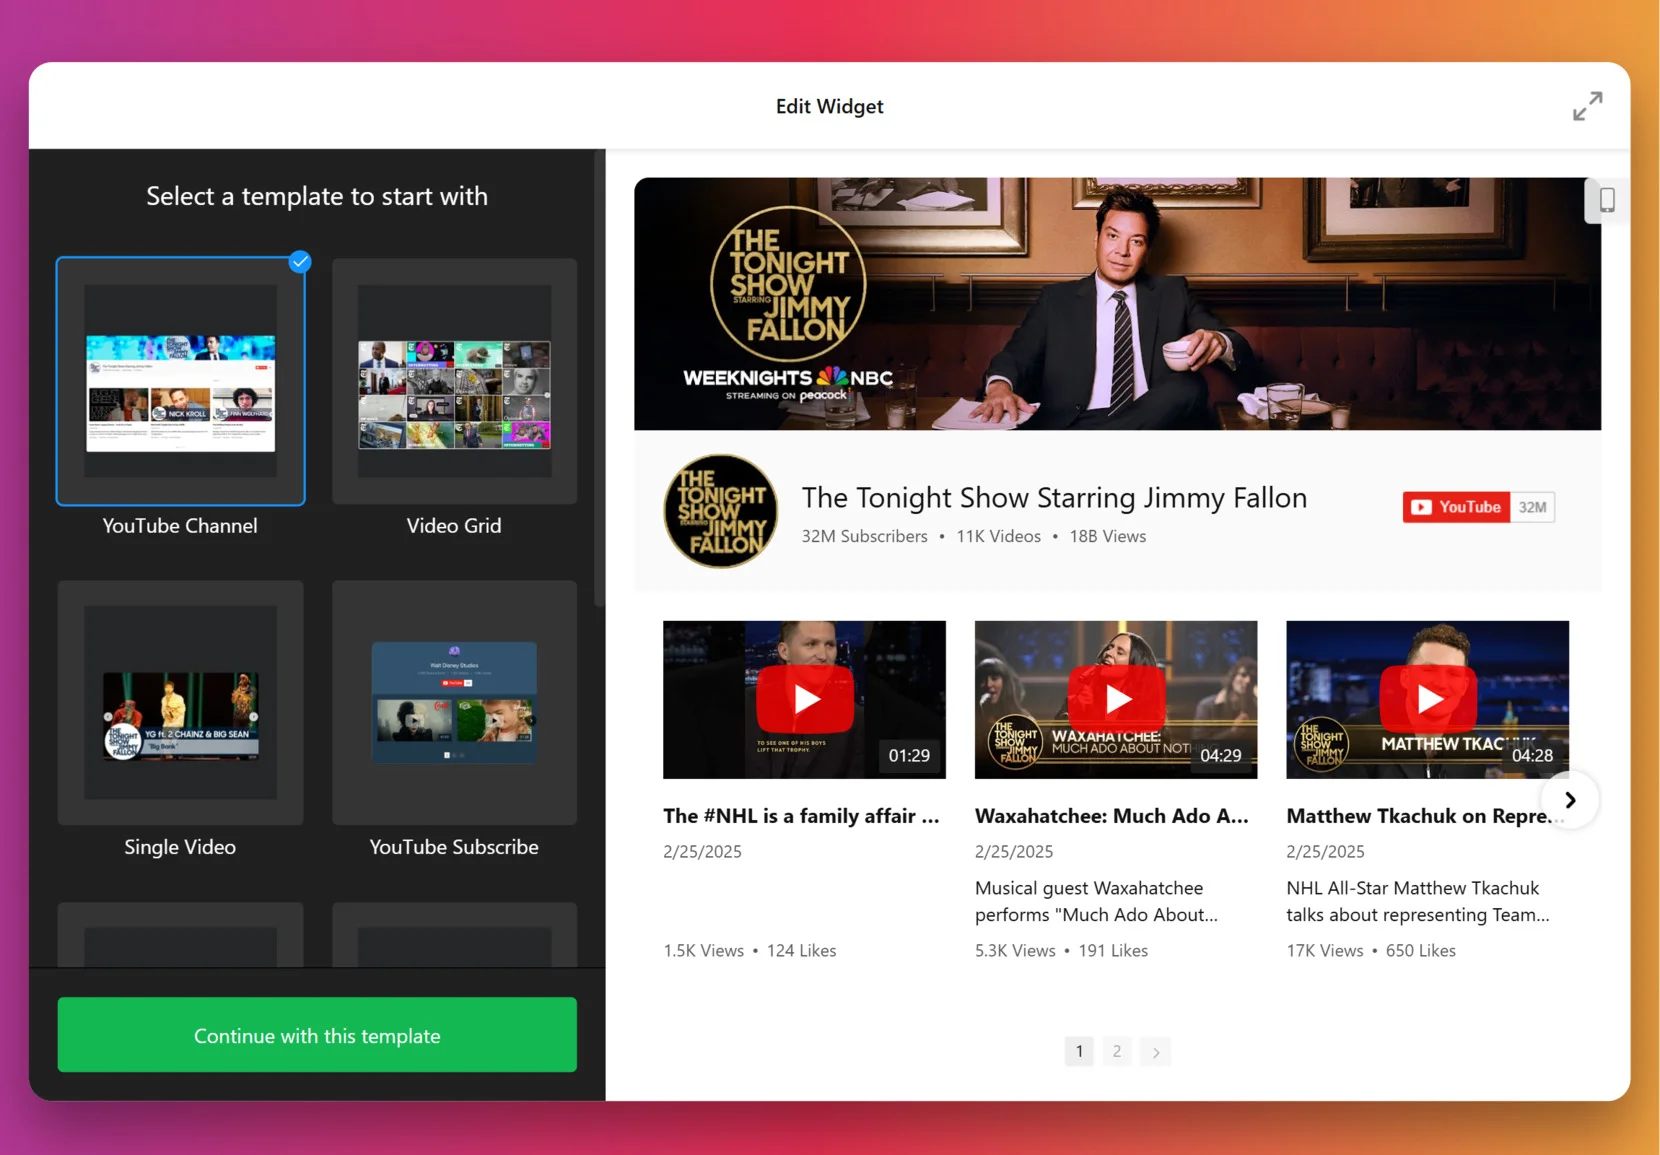
1. Choose a Template
The first thing you’ll see in the widget editor is the choice of three main layout styles: grid, list, and slider. Grid shows videos in rows, List stacks them vertically with more room for descriptions, and Slider displays them in a swipeable carousel.
Once you’ve selected a layout you like – click “Continue with this template“.
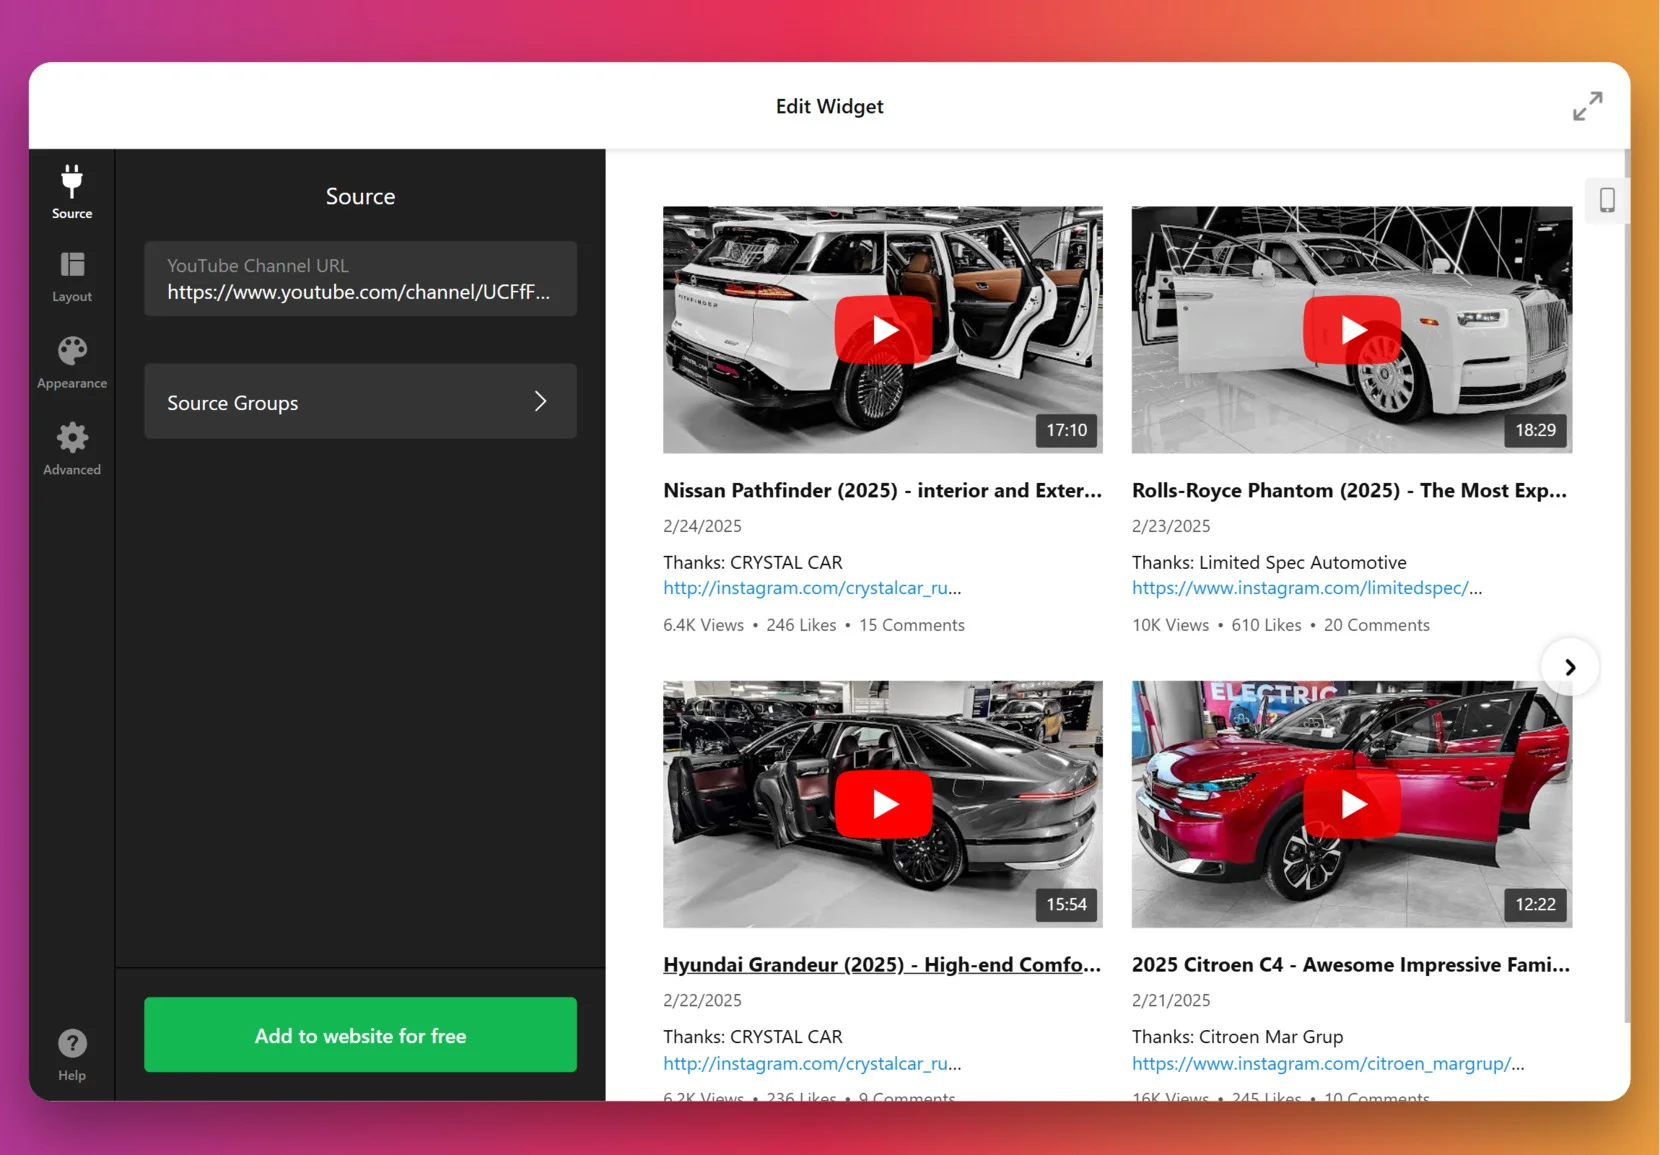
2. Add the Source
This step decides which videos appear in your gallery. Click “Source” in the left panel, enter a URL to a YouTube video, playlist or your entire channel, depending on the goal. To organize videos into categories (for example: Tutorials vs. Testimonials) – use Source Groups. This adds navigation tabs to your widget.
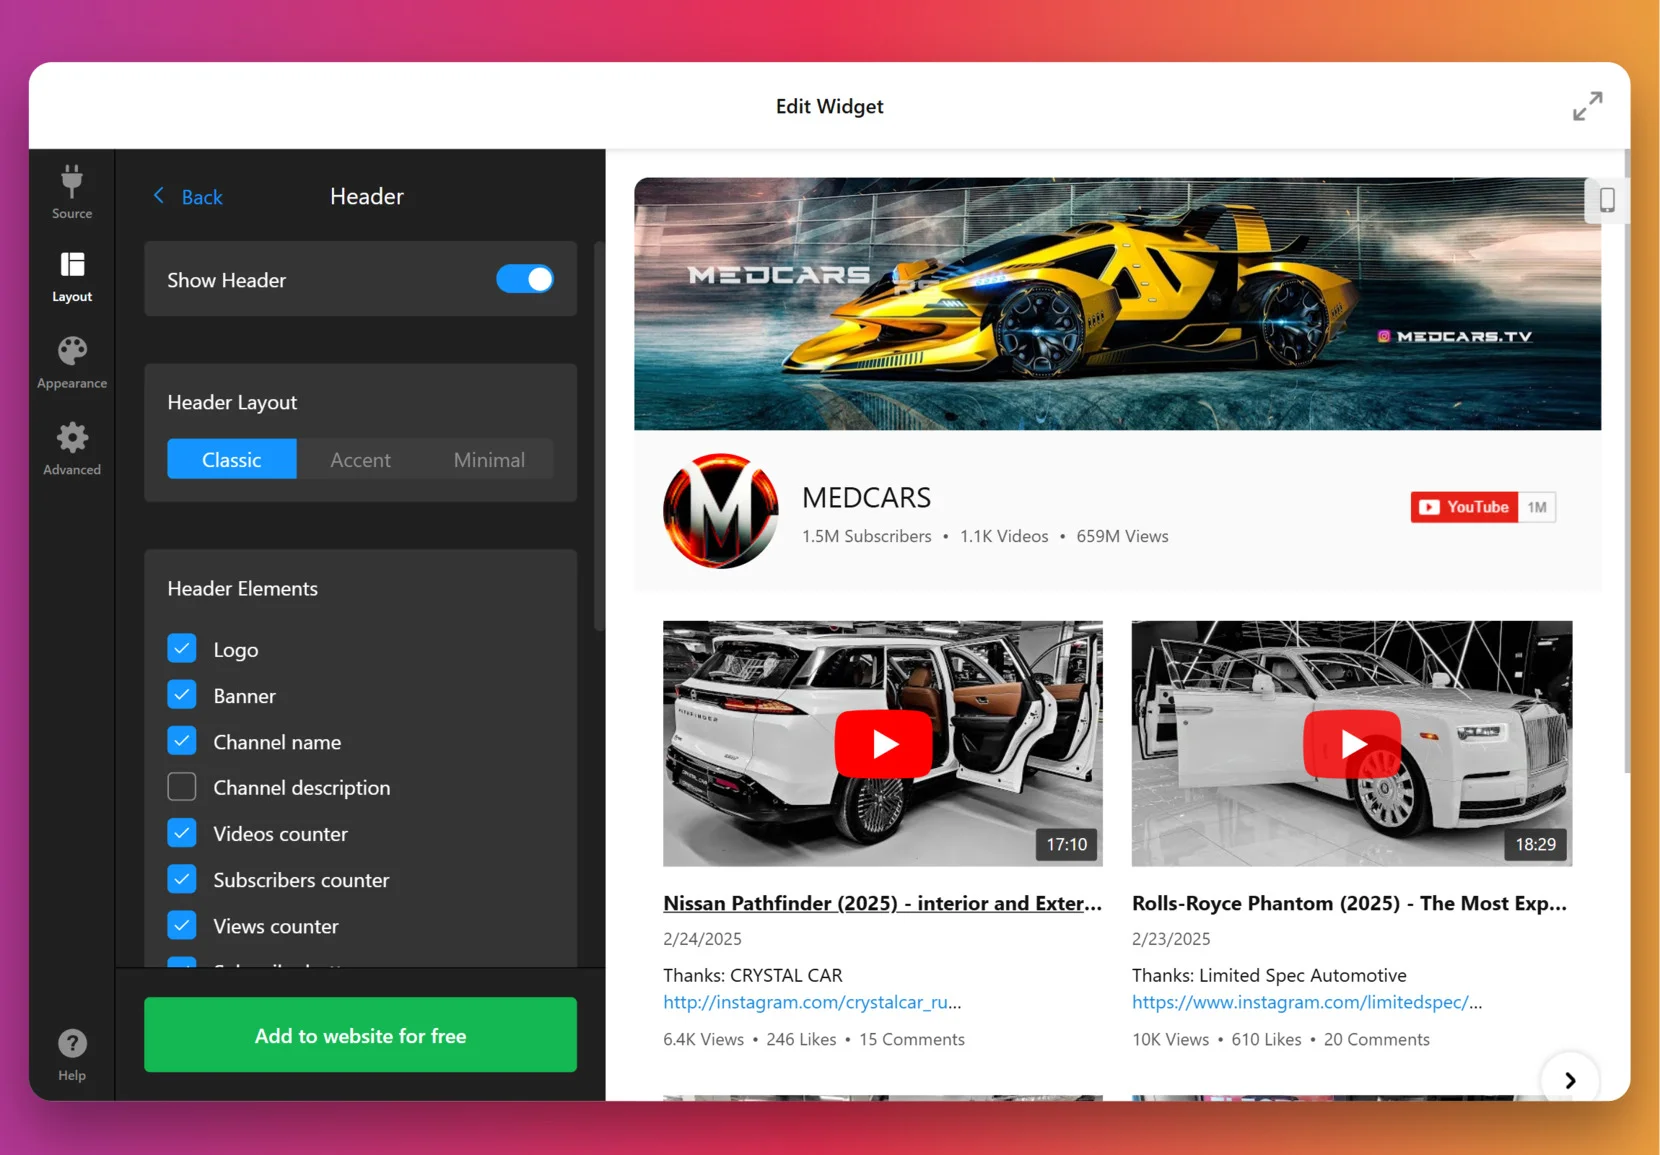
3. Customize the layout
Once the videos are in, it’s time to decide how they’ll appear. You can show or hide the channel information, video details, decide if videos should open inline, in a popup lightbox, or on YouTube itself, pick navigation styles for slider (arrows, drag/swipe, dots, or scroll), and more.
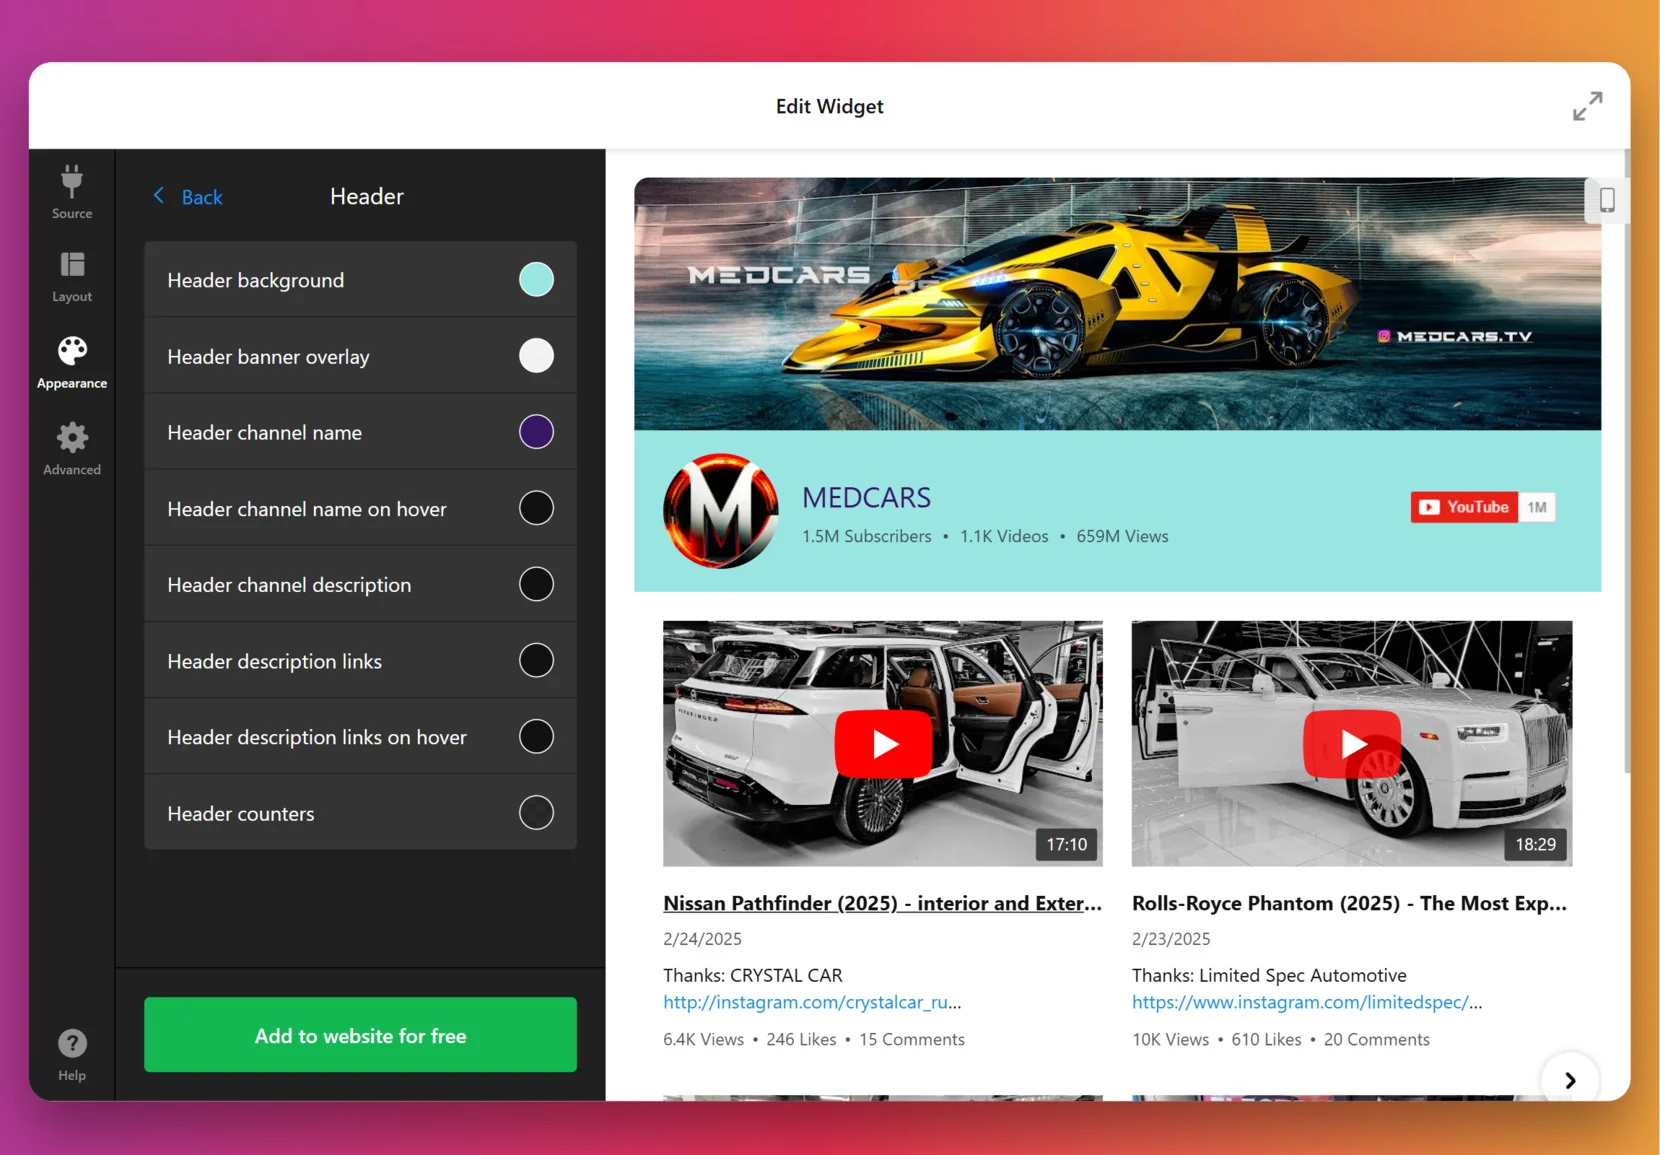
4. Set the design
Now it’s about making the widget match your website’s look. Under the “Appearance” tab, choose a preset Color Scheme to start, then adjust colors of individual elements: header, buttons, tabs, backgrounds, etc.
For full control, paste CSS code directly. For example, you could make thumbnails larger or align text differently. Feel free to explore our Forum for ready-made CSS from other users.
5. Finalize your widget
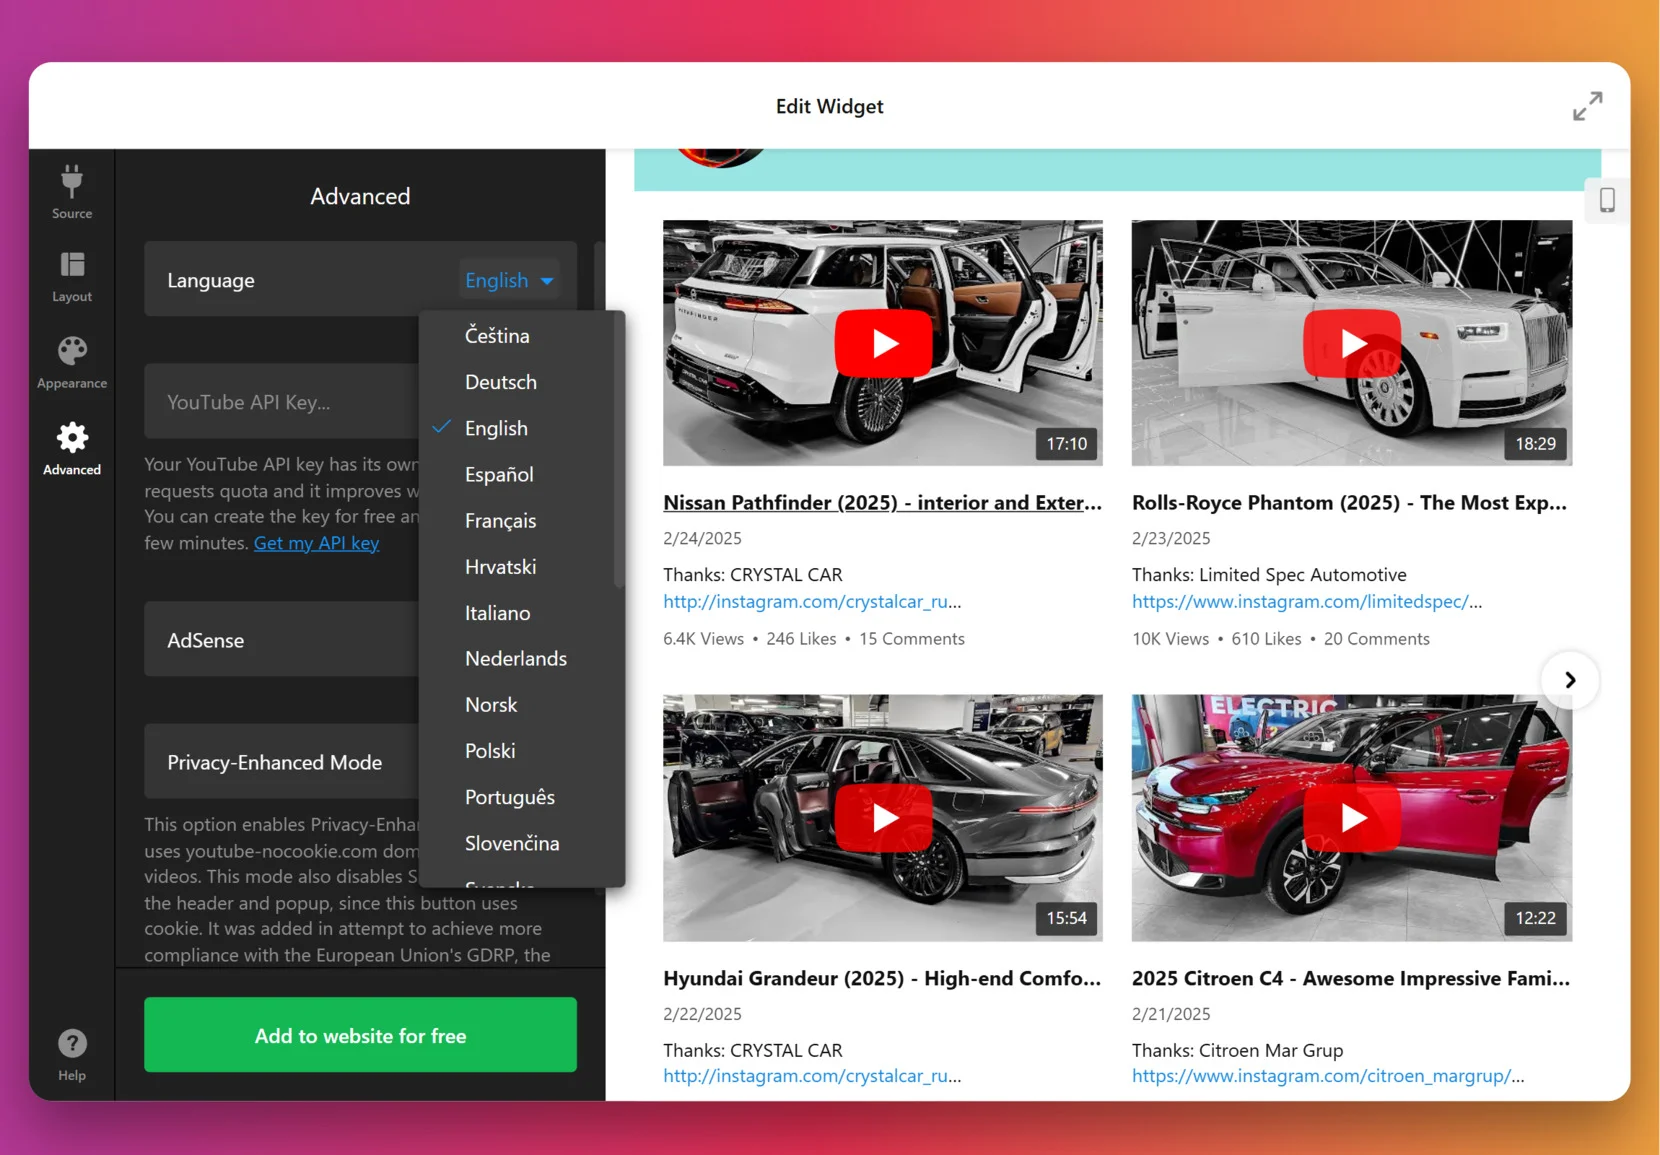
Before you publish, a few optional but powerful settings are worth checking. By default, the widget uses Elfsight’s key to fetch videos, but for many videos or heavy traffic you can add your own YouTube Data API key from Google Cloud Console.
At this stage, you can also enable privacy-enhanced mode, set the widget language to match your audience and double check the layout on mobile.
6. Add the widget to WordPress
Choose the method below that matches whether you want the widget on a single page or site-wide.
Install on a specific page
Method 1: Install via Themes
- In WordPress admin go to Appearance → Themes, find the theme to edit and click (…)
- Open the page/template where you want to show the widget and click Add Block.
- Select Custom HTML, paste your Elfsight snippet into the popup and click Save or Update.
Method 2: Install via Pages
- In WordPress admin go to Pages and open the page you want to edit.
- Click Add Block in the editor and choose Custom HTML.
- Paste your Elfsight code Save.
Install on all pages (site-wide)
Method 3: Install via Theme Editor
- In WordPress admin go to Appearance → Theme Editor.
- Open this file or equivalent:
footer.phpInsert your Elfsight embed code before the closing tag. Click Update File.
Method 4: Install via Widgets
- In WordPress admin go to Appearance → Widgets.
- Open Custom HTML from Available Widgets, choose a Footer widget area and click Add Widget.
- Paste Elfsight code into the Content field and click Save.
Method 5: Install via Customize
- In WordPress admin go to Appearance → Customize.
- Choose Widgets, click Add a Widget and select Custom HTML.
- Paste the snippet, click Done, then Publish to apply changes.
If you want to explore different ways to display YouTube content or need a plugin-based approach, continue to the next section on alternative methods.
Adding YouTube Videos Without Elfsight
You can add YouTube videos to a WordPress website using several built-in methods, but each comes with its own limitations compared to Elfsight.
Pasting the YouTube Link Directly
You can embed a YouTube video by simply pasting its URL into the WordPress editor.
- Find the video URL. Copy the link from the YouTube address bar or use YouTube’s Share button.
- Open your editor. Go to the WordPress post or page where you want the video.
- Paste the URL. Place the link on a new line in the editor.
- Verify the embed. WordPress automatically displays the video player.
- Publish or update. Save your changes to make the video live.
You can’t style the player or adjust layout beyond basic alignment—no gallery options or advanced display settings.
If you want to learn more about embedding a YouTube video by simply pasting its link, check out the official WordPress.com Support Guide.
Using the YouTube Block in Gutenberg
WordPress’s block editor includes a dedicated YouTube block to embed videos.
- Open the block editor. Edit the post or page you want to update.
- Add a block. Click the plus icon and search for “YouTube.”
- Insert the block. Select the YouTube block to add it.
- Paste the video URL. Enter the link and click “Embed.”
- Adjust basic settings. Use the Block Toolbar for minor tweaks.
This method only displays one video at a time and does not support playlists or galleries natively.
For a step-by-step walkthrough about the YouTube block in Gutenberg, check out the this official support article.
Embedding with the Video Widget
You can place videos in sidebars or footers using the WordPress Video widget.
- Access Widgets. Go to Appearance then Widgets in the dashboard.
- Find the Video widget. Drag it to the desired location.
- Add your video. Click “Add Video” and choose a file or paste a YouTube embed code.
- Configure display. Adjust simple settings like position.
- Save changes. Make sure to save your widget layout.
You can only display one video per widget and layout options are minimal.
Which YouTube Embedding Method Works Best for WordPress?
| Method | Major Pro 👍 | Major Con 👎 |
|---|---|---|
| Elfsight | Advanced gallery layouts and customization. | Requires a separate account and may need occasional updates. |
| Paste URL | Fast and easy with no setup needed. | Only basic embedding, no gallery or playlist features. |
| YouTube Block | Simple and works with Gutenberg editor. | Limited to single videos, lacks advanced customization. |
| Video Widget | Lets you show videos in sidebars or footers. | No support for galleries or playlists, and very basic styling. |
Here are some practical tips for making your YouTube Gallery widget look great and work smoothly on any WordPress website.
Essential YouTube Gallery Setup Tips
With Elfsight team, we’ve helped hundreds of users embed YouTube galleries and optimize them for real results. Here’s our hands-on checklist to make your YouTube Gallery stand out and work seamlessly from day one.
- Select the right source. Looking for an updating feed? A channel works best. Showcasing a product line? Go for the playlist. Featuring one standout video? A single link keeps it simple.
- Group videos by topic, product, or theme. Split videos into groups like “Tutorials,” “Customer Stories,” or “Behind the Scenes”, so your visitors instantly know where to click.
- Test all three preview layouts to determine which best fits your design. For example, the list layout works well when text matters, like tutorials. The slider feels lighter on crowded pages.
- Customize gallery styles with branded colors. Even a small tweak – matching the gallery’s header and button colors to your store’s palette – stops the widget from looking bolted on.
- Adjust for both desktop and mobile to guarantee an optimal viewing experience across devices. Drop columns to 1–2 for small screens and make sure tap targets aren’t too tiny.
- Enable search and navigation controls to allow visitors to quickly filter and jump to the content they want, especially in larger galleries – they’ll stick around longer.
- Integrate your AdSense account to start monetizing video traffic. Be mindful with ads: one or two well-placed units are enough to complement your content without feeling too spammy.
- Preview like a visitor. Check the gallery on multiple devices and browsers before publishing. Look out for cut-off titles, squished thumbnails, or clunky popups.
Let’s move from features to practice and see how the YouTube Gallery Widget works for real businesses. Here’s a success story shared by one of our users and community members.
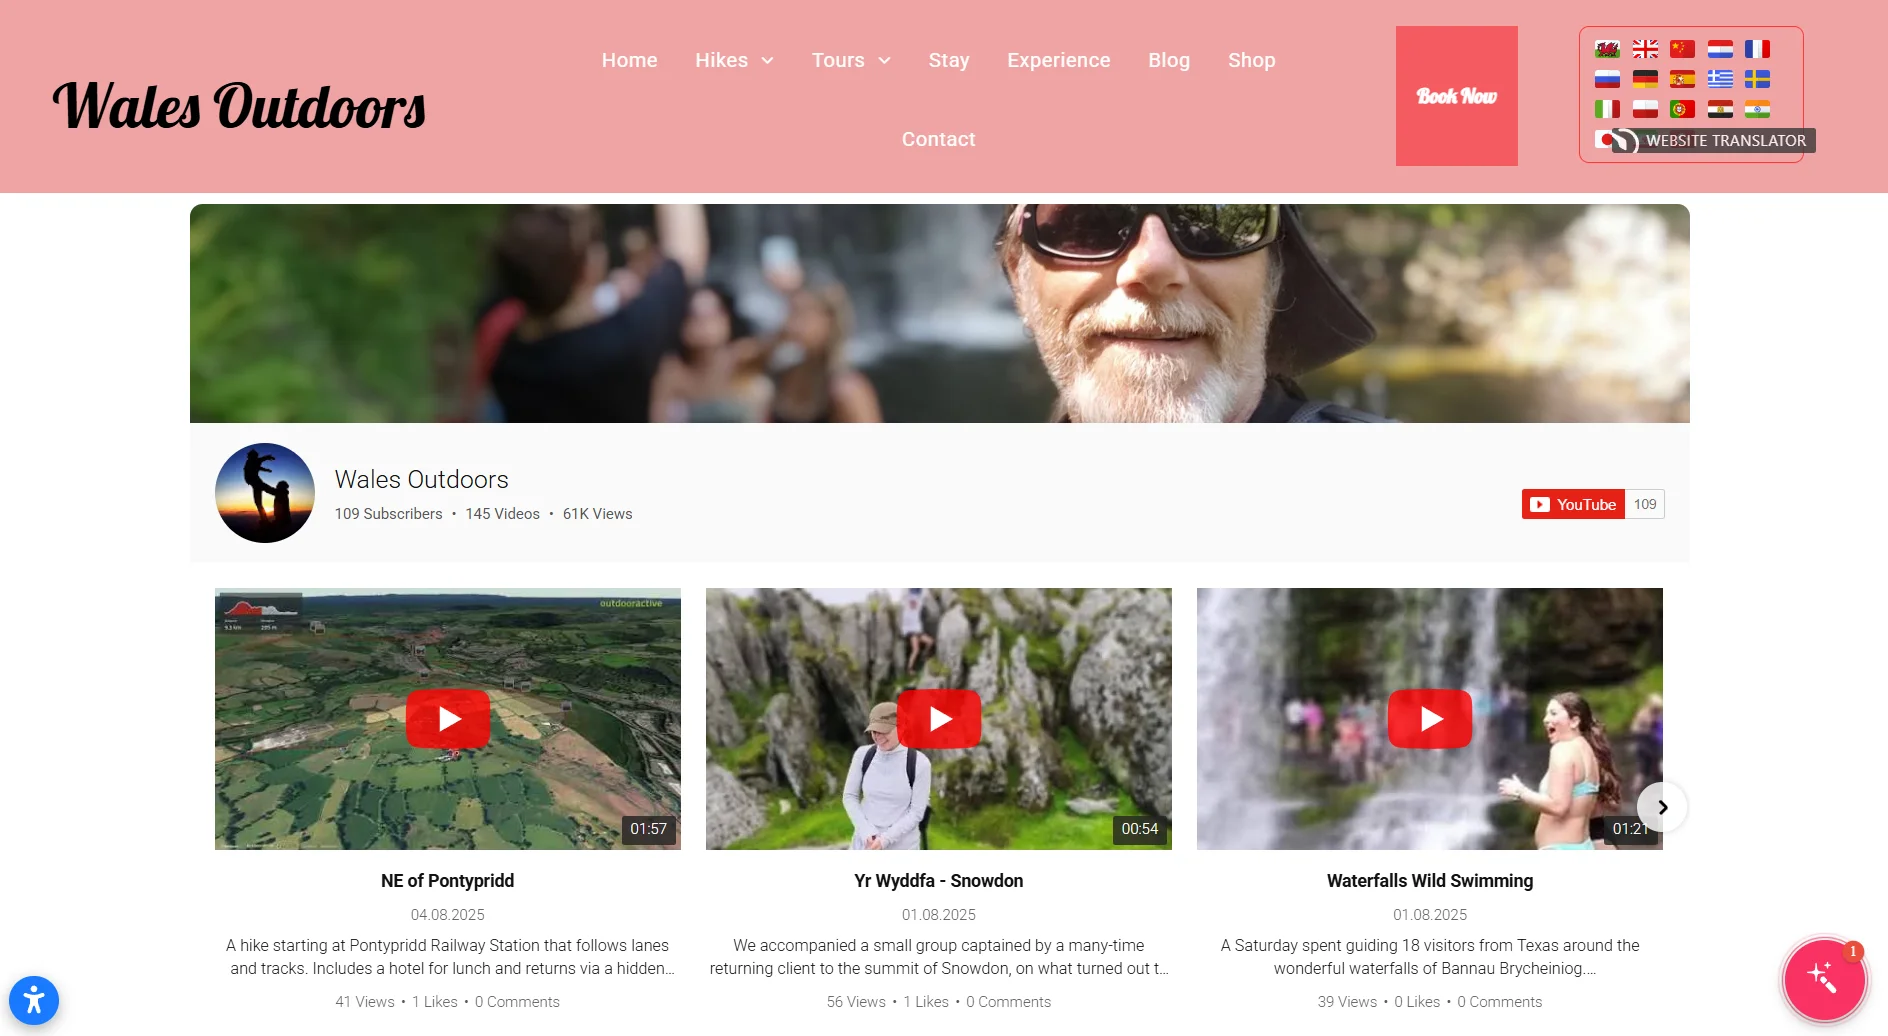
YouTube Gallery at Work: Wales Outdoors
Wales Outdoors is a tourism business run by Andrew Lamb. His website promotes hiking and adventure tours across Wales. With 10+ Elfsight widgets in place, the YouTube Gallery has become one of the cornerstones, giving visitors a lively space to explore video highlights of real tours and experiences.
Before using Elfsight
Presenting multimedia content in a consistent and appealing way was a challenge. Video and social content felt scattered, which made it harder to show the unique character of the tours and to build trust with potential clients.
- No central space for video content
- Limited visual appeal and branding options
- Difficulty using media to build trust and drive bookings
With the YouTube Gallery
“Elfsight has been a game changer with widgets that work, work well, and are visually attractive.”
Andrew Lamb, Wales Outdoors
On a dedicated YouTube page, the widget now gathers all of Andrew’s tour videos into a structured, easy-to-navigate gallery. Visitors can browse past adventures, watch highlights, and get an authentic feel for upcoming tours without leaving the website. The consistent styling ties the gallery into the rest of the brand design, creating a polished impression that supports both marketing and sales.
Results
By embedding the YouTube Gallery, Andrew created a central hub for his video content that holds visitors’ attention longer and encourages them to explore more. The videos add credibility to his tours, supporting customer trust and helping convert interest into bookings.
Other widgets in use
Wales Outdoors also uses All-in-One Reviews, AI Chatbot, Photo Gallery, Store Locator, and more. Together, these widgets create a website that is informative, interactive, and ready to support customer decisions at every step.
The YouTube Gallery gives tourism websites a simple way to turn authentic video content into a sales driver by combining trust, visual appeal, and easy navigation.
With these real-world examples, it’s clear that YouTube Gallery can transform how businesses present video content, no matter the industry. The following FAQ answers common questions to help you make the most of your own YouTube Widget setup.
YouTube Widget Issues & Fixes
Adding a YouTube video widget to a WordPress website feels straightforward, but real-world setup brings surprises. You might see videos not loading, layout issues, or strange error messages after pasting the code. Hands-on troubleshooting usually solves things quickly if you know what to check.
Why isn’t my widget displaying on my website after installation?
How do I fix layout or responsiveness problems after embedding the widget?
What should I do if the widget installation code gets commented out or removed?
Can browser extensions block Elfsight widgets from loading?
How to solve issues with Content Security Policy (CSP) blocking external scripts?
If you still run into trouble after checking the basics above, below are the official Elfsight resources and links to deeper troubleshooting guides.
Looking for Deeper Insights?
We hope this guide gives you a solid starting point for working with widgets on your website. We love hearing real stories and creative use cases from our readers – share your feedback, suggestions, or experiences with us, and stay connected with the Elfsight team on X.