Webflow Appointment Booking integration
Create your Appointment Booking widget
Why People Love Elfsight
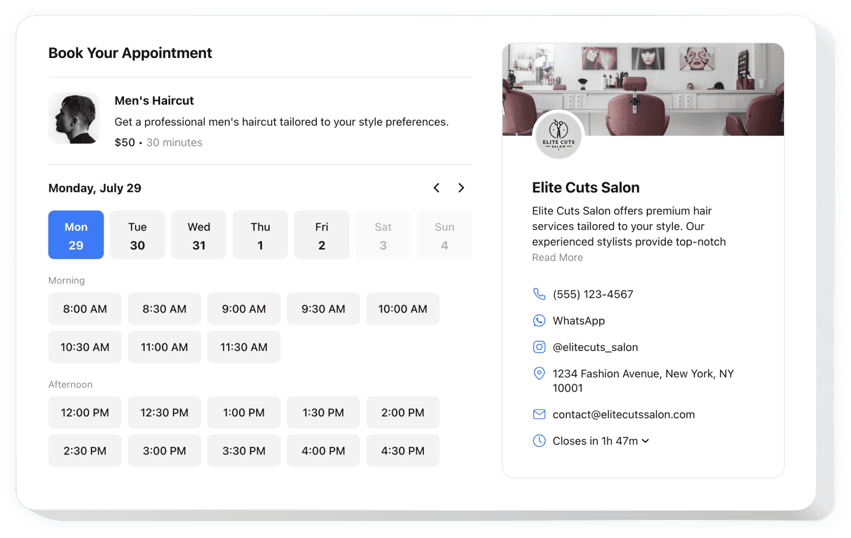
Wouldn’t it be great if your customers could book a time with you without emails or calls back and forth? The Elfsight Appointment Booking widget lets people reserve slots directly on your website, while you stay in control of your schedule.
You can manage services, sync your schedule with Google Calendar, and customize the design to match your brand – all without touching a single line of code. It works smoothly even if you’ve never built a booking system before. Think of it as giving your Webflow form superpowers.
Did you know?
According to Zippia, 67% of people prefer booking online instead of over the phone.
Start using Elfsight’s Booking integration to give your visitors the modern, fast, and hassle-free scheduling they expect.
Key Features of the Webflow Appointment Booking Widget
Here’s what makes this widget practical and easy for everyday use:
- Flexible scheduling options: Set your availability, break times, and buffer periods between appointments.
- Google Calendar integration: Connect with Google Calendar to keep everything in sync and avoid double bookings.
- Mobile-ready design: The booking form adapts perfectly to any screen, so customers can schedule on the go.
- Notifications and reminders: Get instant alerts when someone books and make sure no one forgets their appointment.
- Flexible services: Offer single or multiple services, set durations, and add descriptions.
- Easy setup: Adding it feels as simple as drag-and-drop – if you know how to copy and paste in Webflow, you can add this too.
Play around with the features in the live editor – no login required.
How to Add the Appointment Booking to Webflow
Adding your new booking system is quick and doesn’t require any coding. Here are two easy ways:
Method 1: Inline Booking Form
Perfect for placing the form right inside a page, such as a Contact or Services section.
- Pick a template: Open the Elfsight editor and choose a booking layout you like.
- Personalize it: Add your services, adjust availability, and style it to fit your brand.
- Generate the code: Click “Add to website for free” and copy the code.
- Embed it in Webflow: In your project, drop in an Embed element and paste the code.
Method 2: Floating Booking Button
Ideal if you want a button that’s always visible so customers can book at any time.
- Choose floating style: Select the floating design in the editor.
- Customize it: Add your services available time slots, decide where it appears, and tweak the design.
- Generate the code: Once all the personalization is over, click “Add to website for free”, and copy the snippet provided.
- Embed it in Webflow: Paste the code into your project before the closing
</body>tag.
Need a hand? Check out our Help Center or browse our blog for tips on how to add the Booking widget to your website. You can also share new ideas in the Wishlist or track updates in the Changelog.
