Webflow Localization Switcher Plugin
Create your Website Translation plugin
Why People Love Elfsight
Your visitors don’t all speak the same language – but that shouldn’t stop them from understanding your message. The Elfsight Website Translator helps you translate your entire website automatically into 100+ languages, so you can reach a truly global audience.
It’s fast to set up, looks great on any page, and works right inside Webflow – no technical skills required. You can easily add a language switcher that matches your design, customize it with flags, colors, and labels, and let it do the rest.
Did you know?
According to CSA Research, 76% of customers prefer buying from websites available in their native language.
Make your content accessible globally to increase engagement and conversions – start using the Elfsight Translation plugin on your Webflow website for free today.
Key Features of the Webflow Language Switcher
Everything you need for smooth, automatic, and stylish translation – right in one widget.
- Automatic website translation: Translate your content instantly with Google Translate – no separate pages or coding.
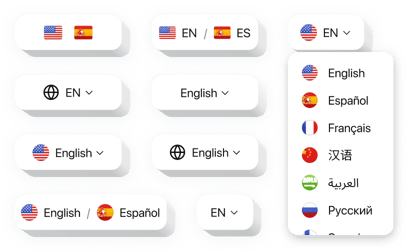
- Custom language selector: Add a selector that looks natural on your website and matches your design style.
- 100+ supported languages: From English to Japanese, connect with audiences everywhere.
- Personalized design: Adjust colors, borders, flags, and dropdown styles to fit your brand’s look and feel.
- Responsive and lightweight: Works perfectly on mobile devices and doesn’t slow down your website.
- Quick setup: Installation feels effortless – just copy a short code and paste it where you want the switcher to appear.
See all features in action in our live editor – no registration needed
How to Add the Translation Plugin to Webflow
Embedding your Localization Switcher is quick and straightforward. Here’s how:
Method 1: Inline Widget
Best for adding the switcher right into your header, footer, or any page section.
- Select a template: Open the Elfsight editor and pick a ready-made design.
- Customize your widget: Choose languages, appearance, and placement.
- Generate the code: Click “Add to website for free” and copy the provided code.
- Embed it on your website: In your Webflow project, drag an Embed element to your chosen spot and paste the code.
Method 2: Floating Switcher
Ideal for adding a small floating button that follows visitors as they browse.
- Pick a template: In the Elfsight editor, select the floating style option.
- Personalize the widget: Add languages, set the switcher’s position, and adjust the look.
- Get the code: Once you’ve finished all the customization, copy the installation code.
- Embed: In Webflow, paste it before the closing
</body>tag.
Need help? Visit our Help Center or check our detailed blog article on how to add a Translation plugin to your Webflow website. You can also share your ideas in our Wishlist or stay up to date with new features in our Changelog.
