
Magento Translation Extension
Create your Website Translator extension
Why stores add a language switcher instead of another store view
A new language in a Magento store usually means another store view, a second copy of every product description, or a module your developer installs and keeps compatible. The widget takes a shorter route: install it once, and shoppers switch the storefront to their language from a compact menu, while your team keeps a single catalog up to date.
Product pages and categories, translated on the fly
Product names, descriptions, category pages and CMS blocks are translated with Google Translate when a shopper picks a language. Shoppers can choose from 143 languages, so a store selling across Europe can offer German, French, Italian, Polish and Dutch side by side. Reviews, FAQs or galleries from other Elfsight widgets switch language together with the rest of the page, even when they load a moment later.
Your brand, spelled your way
Machine translation can trip over a brand name, a product line or a size label. Keep such words, phrases or whole page elements out of it with Translation Exclusions, or rewrite any line with Custom Translations. The wording lives in a Google Sheets table in your Google Drive, so your team edits it like any other spreadsheet.
Pick once, read everywhere
A shopper who switches to German on your home page keeps reading German on product and category pages, with no need to pick it again. Turn on Translate to Visitor’s Language, and first-time visitors see the store in their browser language whenever it’s on your list.
Key Features for Catalogs in Several Languages
- Automatic translation into 143 languages – Google Translate handles product, category and CMS pages, including content that loads later.
- Translation Exclusions and Custom Translations – leave brand names untranslated and fine-tune any line in a Google Sheets table.
- Visitor’s language – the widget remembers each shopper’s choice and can open the store in their browser language.
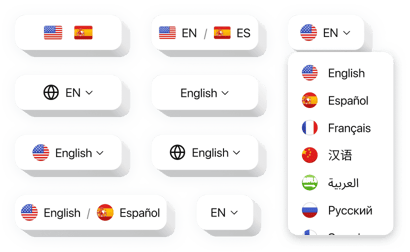
- Inline or floating language selector – place it inside your layout or let it float in one of 8 positions, with offsets that keep it clear of cart or chat buttons.
- Switcher design – match the menu to your theme with a ready-made style, your own color scheme, a Small, Medium or Large size and square, rounded or circular corners.
- Google Analytics events – see how often shoppers open the language list and switch to another language.
You can find out the full capabilities of the widget in the live editor.
Built around store views and the Admin
- No module on your server – the code goes into a Page Builder element, a CMS block or Design Configuration, so there’s no composer package,
setup:upgraderun or deploy. - No extension to re-test after upgrades – the switcher loads from Elfsight servers, so a 2.4.x release or a security patch leaves nothing of ours to check.
- Store views your way – add one switcher to all store views from the Global scope, or keep it to the store view that needs it.
- One catalog to keep up – new languages come from the widget, so you don’t fill in a new store view by hand for each one.
- Changes without touching the Admin – edit languages or the switcher’s look in Elfsight, and the storefront shows the update with no new code.
How to add the Website Translator to Magento
Start in the Elfsight editor: choose which languages shoppers can pick, decide between Inline and Floating, then press Add to website for free to get your installation code. After that, pick the method below that matches where the switcher should live.
Good to know: set Embed Type to Floating in the editor for Method 2, or to Inline for Methods 1 and 3. Page Builder comes enabled in Magento 2.4.3 and later; without it, use Method 4. The Admin preview may not run the widget script, so check the result on the storefront.
Method 1: Place it on a single CMS page through Page Builder
- In the Admin menu, open Content → Pages and use Select → Edit in the row of the target CMS page.
- Expand the Content section, open Elements in the Page Builder panel and drag HTML Code onto the stage.
- Hover over the element, click the gear icon, paste the installation code and click Save.
- Save the page, then open it on the storefront through Actions → View.
A switcher placed on one page translates that page only; for the whole store, use Method 2 or 3.
Method 2: Float it over every page with Design Configuration
- Go to Content → Design → Configuration and click Edit in the Global row, or in the row of one store view.
- Expand Other Settings → Footer and paste the code into Miscellaneous HTML.
- Click Save Configuration.
- When the message about invalidated cache appears, open Cache Management from the System menu and refresh those cache types.
- Reload the storefront and look for the switcher in the corner you picked.
Method 3: Pin it to your theme’s header through a CMS block
- Go to Content → Blocks → Add New Block, set Enable Block to Yes and enter a title and an identifier, such as
language_switcher. - Drop an HTML Code element into the block (or switch to HTML with Show / Hide Editor), paste the code and save.
- Go to Content → Widgets → Add Widget, set Type to CMS Static Block, select your theme and click Continue.
- Name the widget, choose the store views, click Add Layout Update, set Display on to All Pages and select a header container.
- Under Widget Options, click Select Block, choose your block, save the widget and refresh the cache.
Container names depend on your theme.
Method 4: Use the HTML view when Page Builder is off
- Go to Content → Pages (or Content → Blocks) and edit the item where the switcher belongs.
- In the Content section, click Show / Hide Editor to switch to the HTML view.
- Insert the snippet at the right spot in the HTML and click Save.
- Refresh the cache if prompted and check the page on the storefront.
Use this way on Magento Open Source before 2.4.3 or when Page Builder is turned off in your configuration.
After publishing, switch a live product page to a language you know and check how product and brand names read. Short on time? Ask our support team, and they’ll set up the switcher for you.