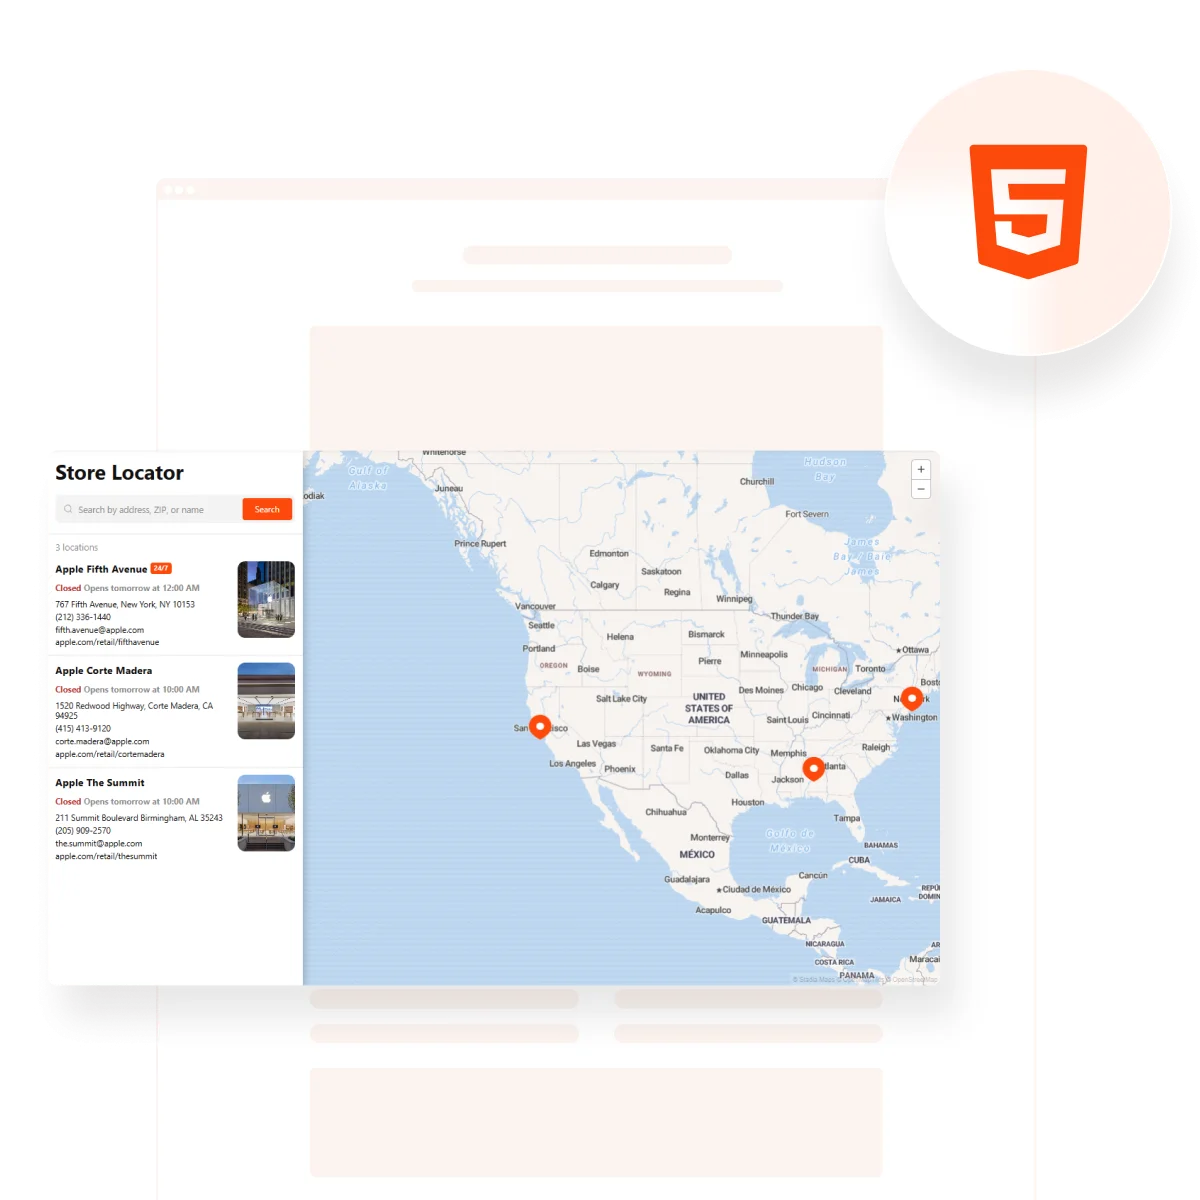
Adding a map to your website is one of the easiest ways to help visitors find your business or physical location. A Google Maps generator simplifies this process by providing you with ready-to-use code that you can copy and paste — no coding skills needed.
If you want to show your location clearly, offer directions, or build trust with users, an HTML Google Maps widget is exactly what you need. It saves time, looks professional, and works perfectly across devices.
- Boosts local visibility and trust. When visitors can instantly see where you’re located, it builds transparency and strengthens your online presence.
- Simplifies user navigation. With clickable directions and zoomable maps, users can easily plan their route to you without switching apps or tabs.
- Improves user experience. A visually embedded map keeps users engaged and gives your contact section a clean, modern look.
Whether you’re running a local business, managing multiple branches, or showcasing an event location, using a Google Maps HTML code generator is the fastest and most effective way to display your address. Let’s see how to create your own widget in just a few clicks.
Generate a Map’s HTML Code in Seconds
Now that you know why adding a Google Maps widget is essential, here’s how you can create one in just a minute using Elfsight. No need to code or deal with APIs — the process is fast, intuitive, and beginner-friendly.
- Open the Elfsight editor and select a pre-designed Google Maps template.
- Enter your address or coordinates and adjust settings like zoom level, controls, and pin style.
- Customize the look by choosing map themes, colors, and sizing to fit your website design.
- Click “Add to website for free”, copy the map code, and paste it into your website’s backend.
Ready to try the widget? Build your own Google Maps in 1-2-3!
Features of the Elfsight Google Maps Widget
After generating your Google Maps widget, you can customize it with a wide range of features designed to enhance functionality, appearance, and user interaction. Elfsight makes it easy to match the widget to your website’s design and needs.
Here are the key features and benefits that make Elfsight’s map generator solution stand out:
- Multiple location support. Add several markers to show all your branches, offices, or service areas in a single map view.
- Custom pin icons. Use your own images or choose from built-in icons to personalize map markers and improve visual consistency.
- Adjustable controls and zoom levels. Enable or disable features like scroll zoom, drag, map type, and street view for better usability.
- Color schemes and map themes. Select from pre-set themes or tweak colors manually to match your brand’s style and palette.
- Responsive and mobile-friendly layout. The widget automatically adapts to all screen sizes, delivering a seamless mobile experience.
- Info cards with details. Attach descriptions, contact info, or working hours to each location for added context.
- Fast loading and clean code. The generated HTML and CSS are optimized for performance and smooth website integration.
With these features in place, you’re not just adding a map — you’re giving users a convenient, branded way to find and connect with you. Next, let’s walk through the full setup and installation process using Elfsight’s Google Maps code generator.
Use Google Maps Code Generator: Step-by-Step
To help you get the most out of Elfsight’s Google Maps widget, here’s a complete walkthrough for creating and setting up your map. These steps will take you from template selection to customization and final embed, using only the built-in editor — no code required.
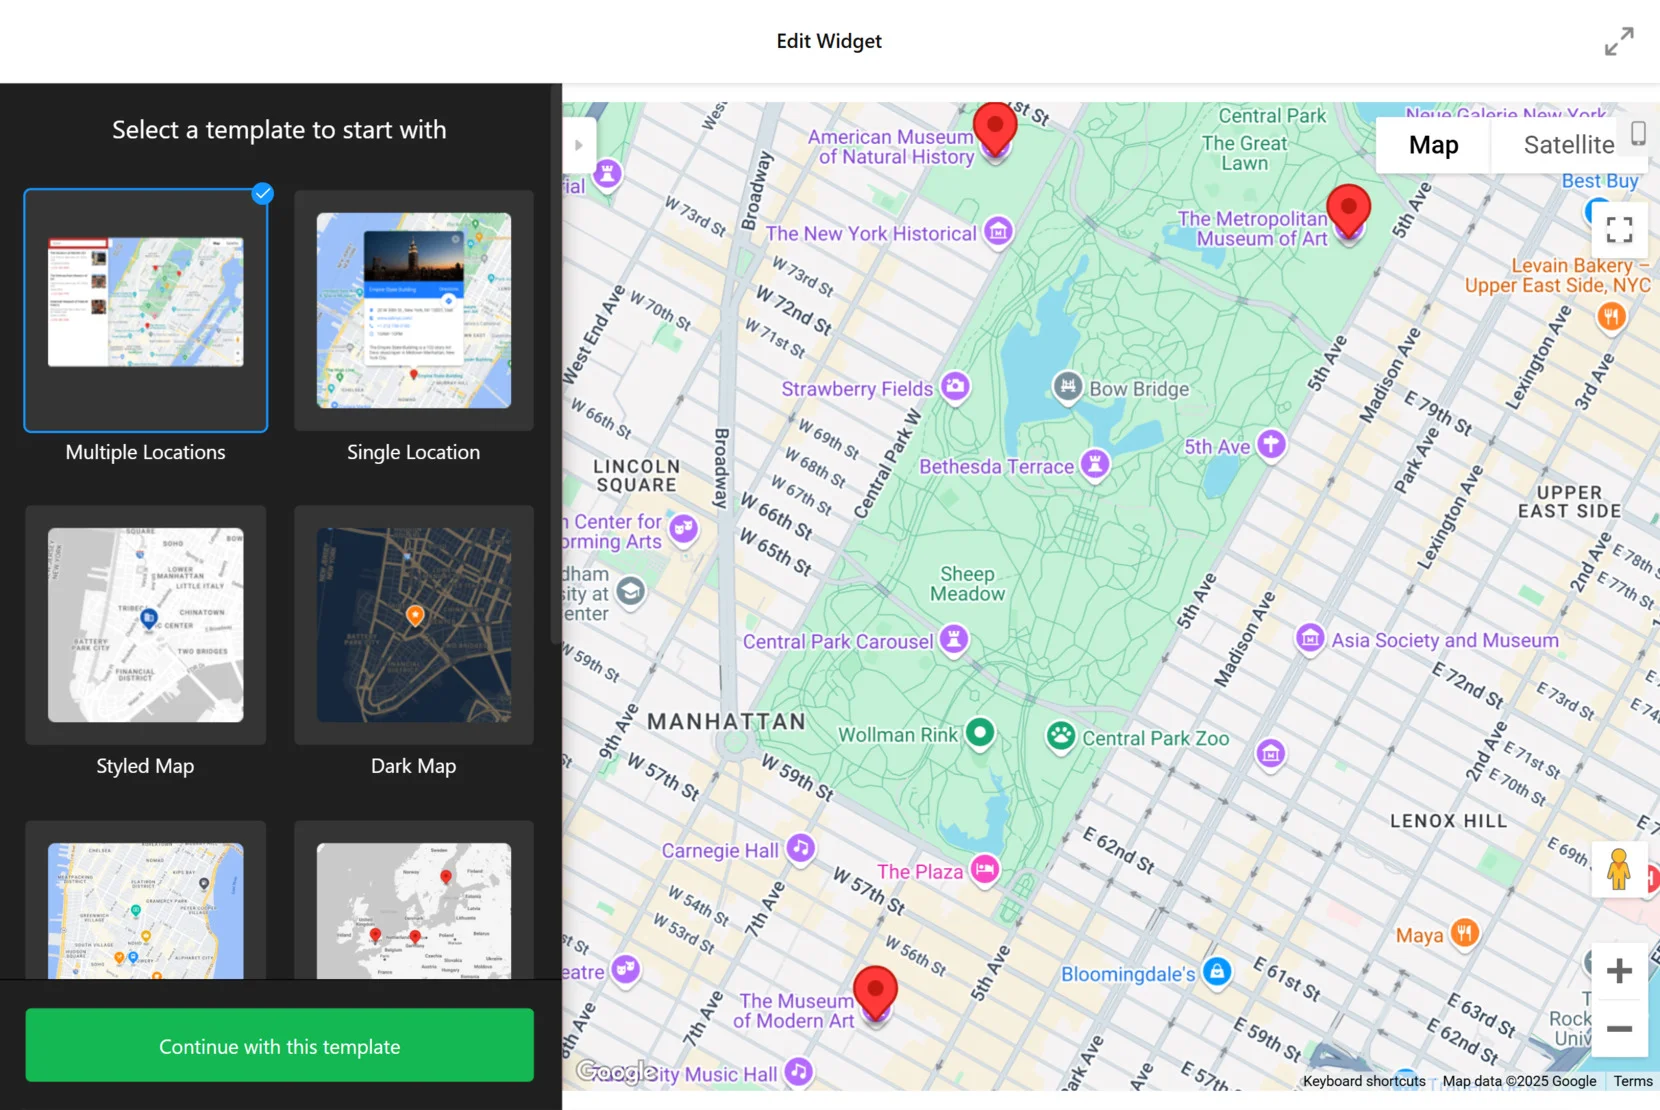
- Choose a Template. Open the widget editor and pick from various layout options. Select the one that fits your website’s needs and click “Continue with this template”.

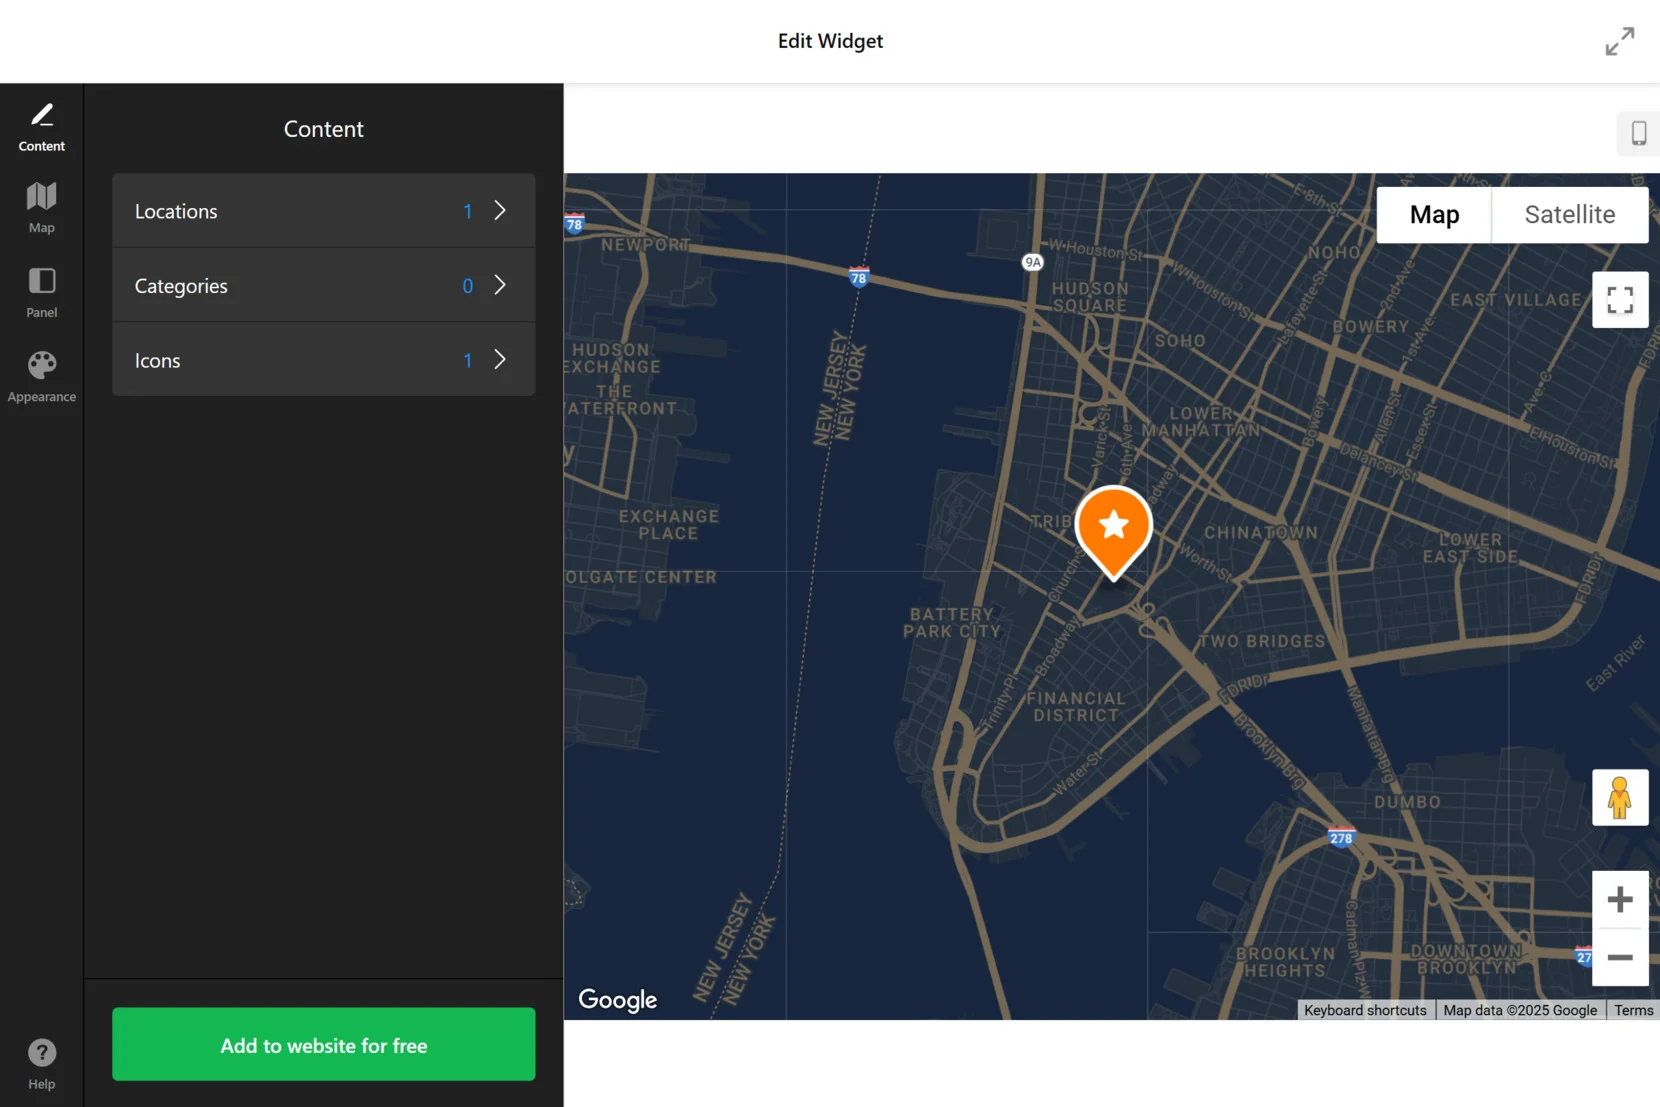
- Add Your Locations. In the “Content” tab, go to “Locations” and input the addresses or coordinates you want to display. You can add multiple pins if needed. Use the “Icons” section to assign custom marker styles to each location.

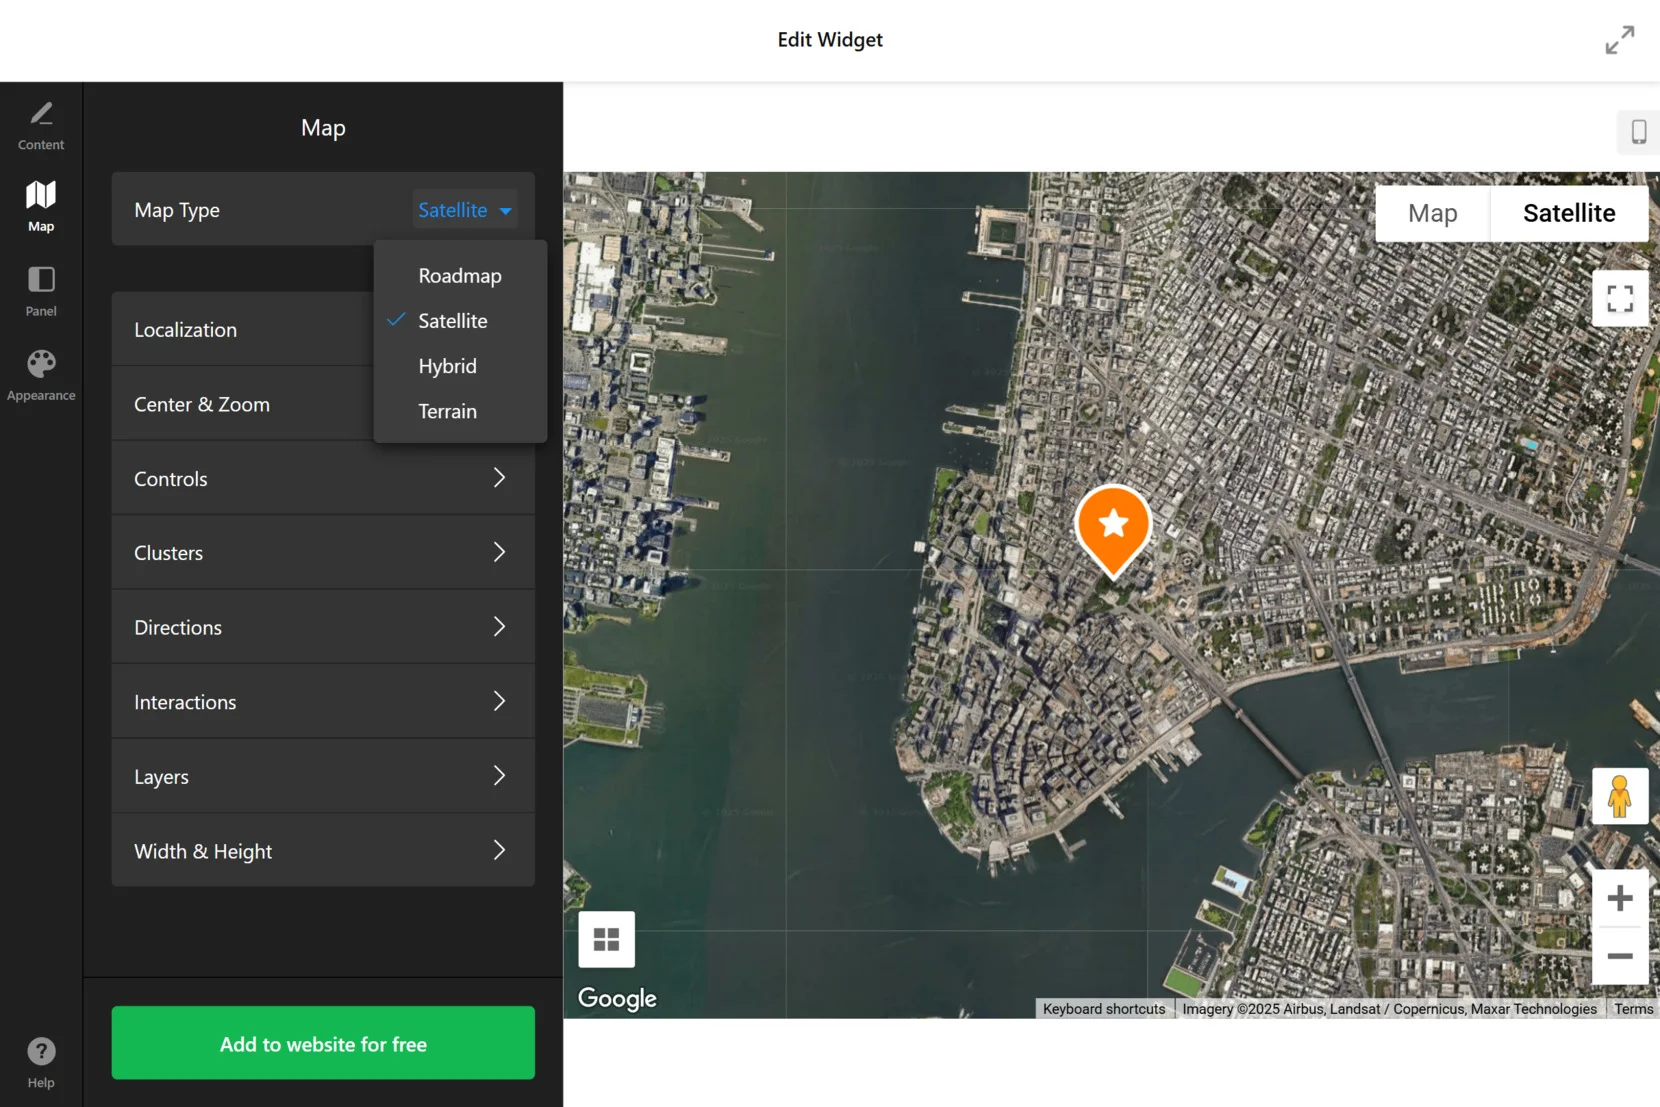
- Pick a Map Type. Head to the “Map” tab and choose your preferred view type — Roadmap, Satellite, Hybrid, or Terrain. You can also control zoom level, localization, clusters, and how the map interacts with the user.
- Enable Directions. Still within the “Map” tab, open the “Directions” section and toggle the “Show Directions Button”. Choose where directions will appear — either directly on the map or in a new browser tab using Google Maps.

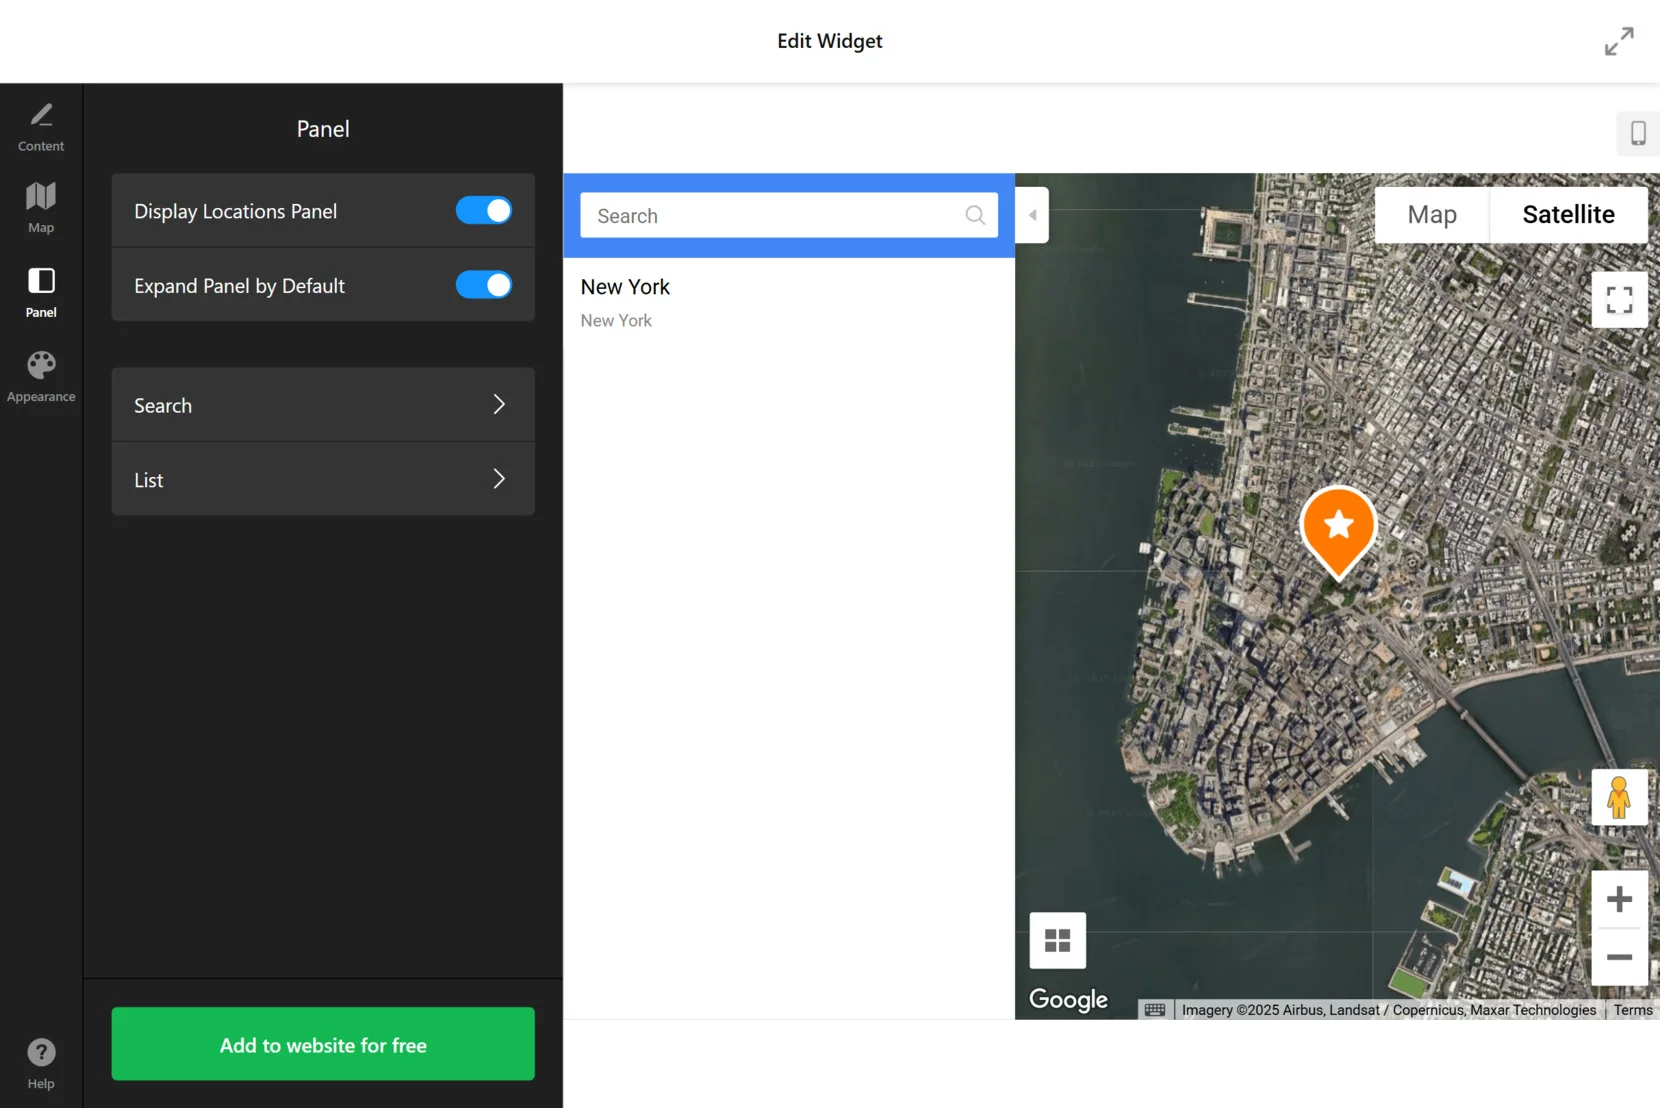
- Adjust the Side Panel. In the “Panel” tab, enable or disable the Locations Panel. You can choose to expand it by default and customize the layout using “Search” and “List” settings for better navigation.

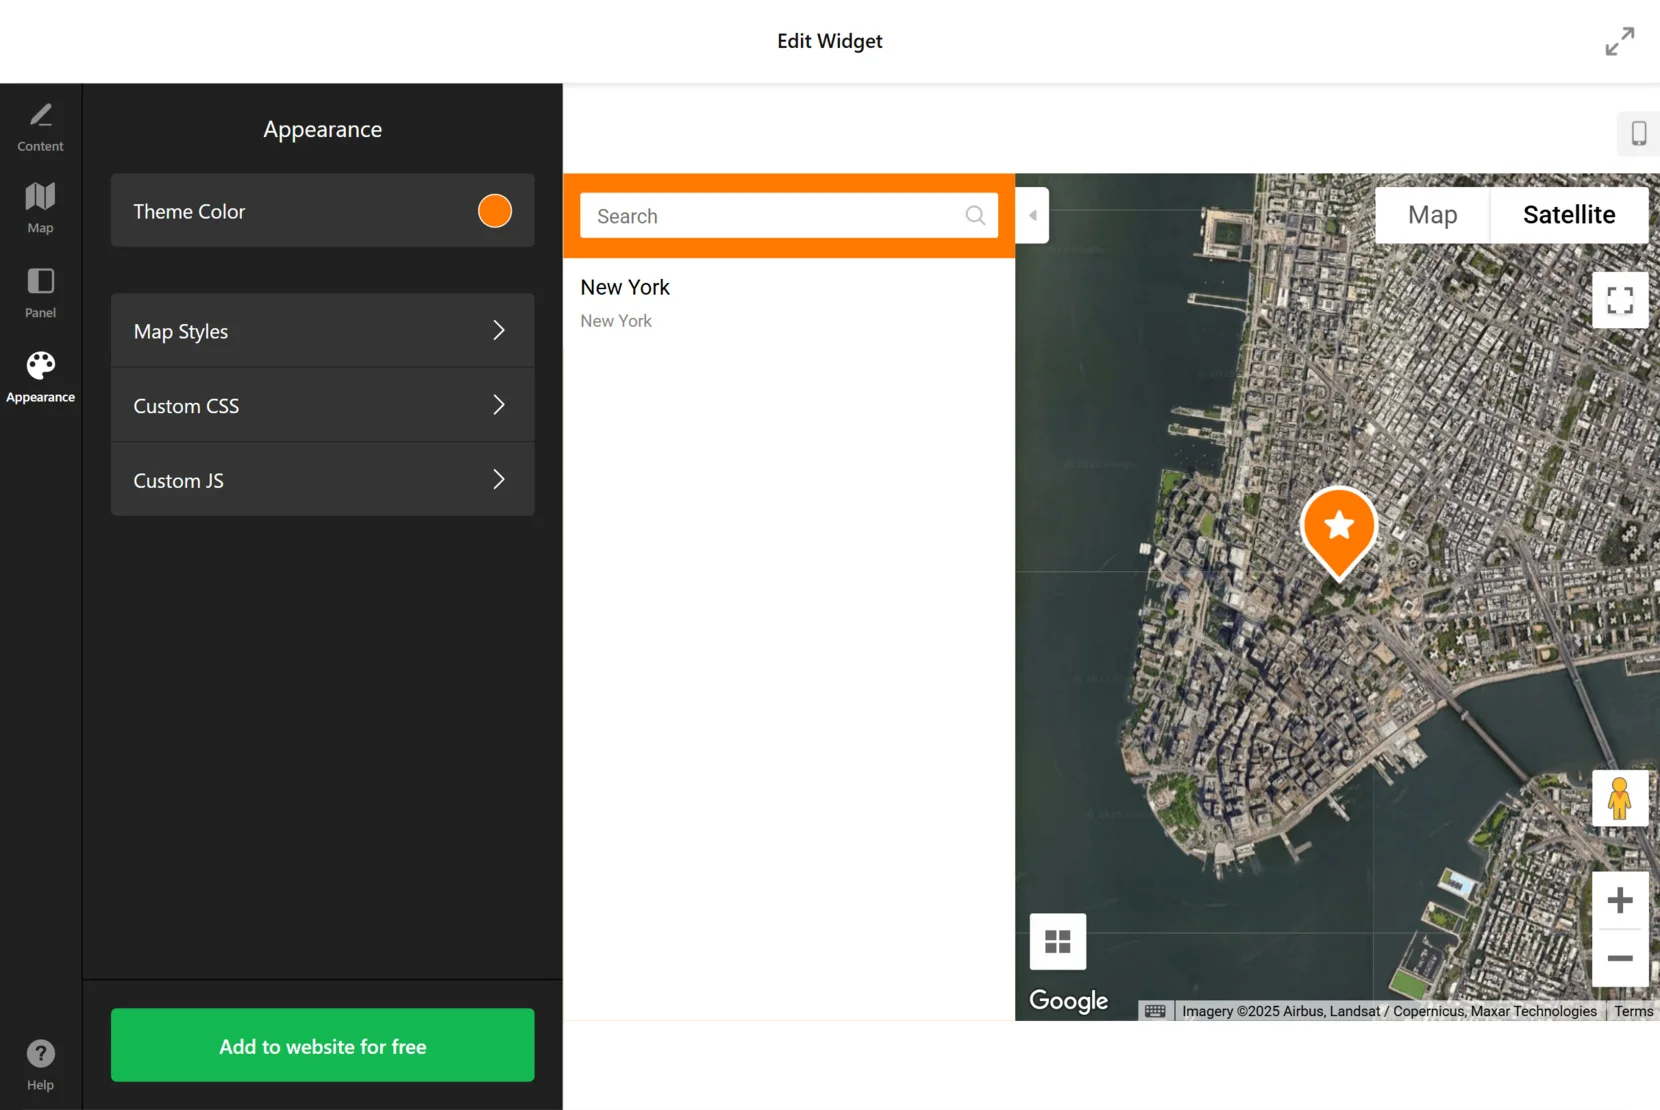
- Customize the Appearance. Go to the “Appearance” section to personalize your widget’s color scheme. Choose a theme color, switch map styles, and optionally add custom CSS or JS for advanced styling.
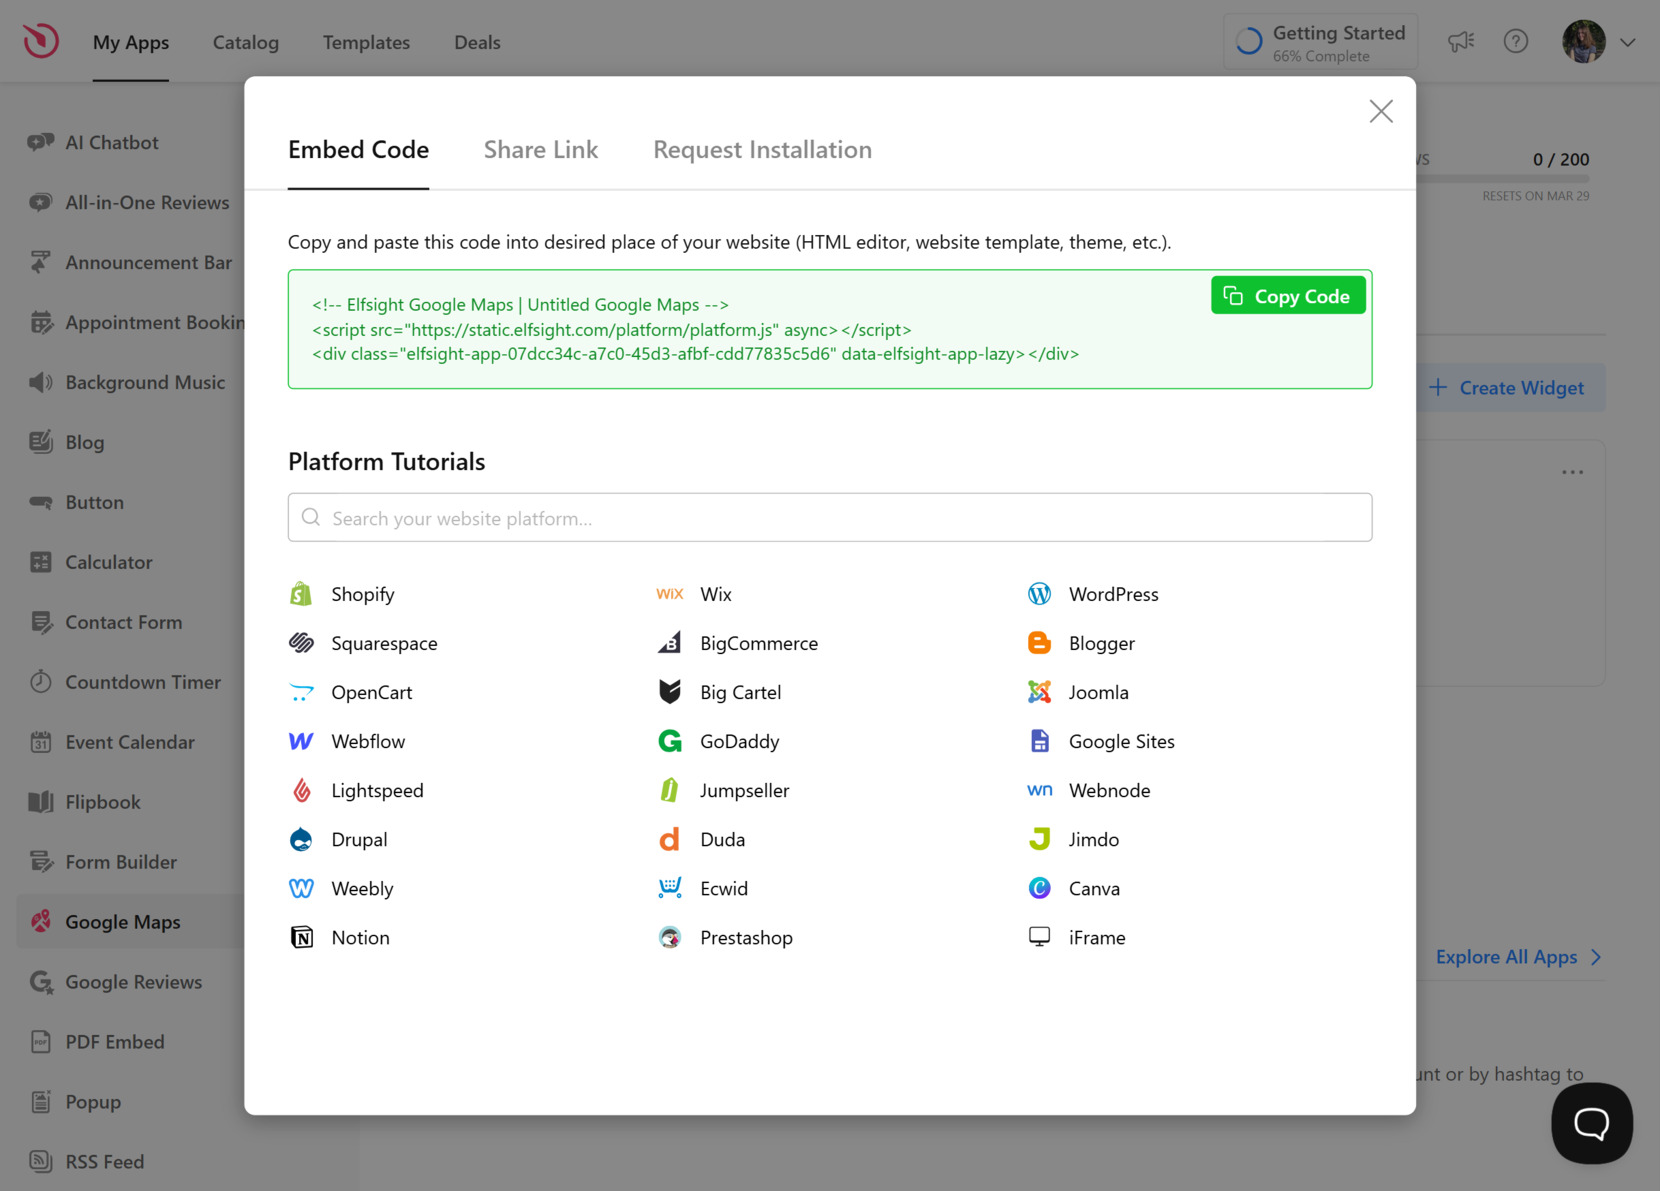
- Copy and Embed the Code. Once you’re done, click “Add to website for free”. Copy the generated HTML map code and paste it into your website’s backend using an HTML block or code editor. Save and publish to go live.


This step-by-step setup ensures that your Google Maps widget looks professional, functions smoothly, and reflects your brand. With your map now ready, let’s see the best ways to embed it across different website platforms.
Where to Embed Your Map Code: Tips
Once you’ve customized your map widget, it’s time to embed it into your website. Elfsight provides a simple HTML code snippet that works on any platform. Below are instructions for both general HTML integration and platform-specific embedding methods.
- Raw HTML embedding: Copy the generated code and paste it inside the <body> section of your HTML document where you want the map to appear.
- WordPress: Open the page editor, switch to “Custom HTML” block in Gutenberg or “Text” tab in Classic Editor, and paste the code where needed.
- Webflow: Add an “Embed” element to your layout, paste the code, and adjust container size if needed.
- Squarespace: Use a “Code” block to insert the widget on any page. Make sure JavaScript is enabled in the block settings.
- Shopify: Open the Theme Editor or the relevant template in the code editor and paste the code inside a section or page file.
- BigCommerce: Use the Script Manager or manually add the code to a specific template file to show the map in your desired location.
Also think about visual balance — your map should complement nearby content, not overwhelm it. Use spacing and alignment to keep the layout clean and scannable.
Whether it’s for a storefront, office, or event, embedding the map is straightforward and platform-friendly. But if you’re interested in more control, you can also create and style your own Google Maps manually using HTML. Let’s explore that next.
Writing Google Maps HTML Code Manually
If you’re comfortable editing raw code and prefer a manual approach, you can create a Google Map widget for your website using basic HTML elements. This method gives you full control over the structure and style, and it doesn’t require any third-party tools. It’s ideal for developers or users who want to build a custom location section from scratch using native Google Maps embed features.
Follow these steps to manually embed a location map using Google Maps:
- Open Google Maps and find your location. Go to https://www.google.com/maps and enter the address or business name. Use the zoom and drag tools to frame the exact area you want to show. You can preview different views (street, satellite, or map view) before embedding.
- Click the “Share” button and select the “Embed a map” tab. In the bottom right corner of the location info panel, click “Share”, then switch to the “Embed a map” tab. Google Maps will generate an <iframe> embed code with a preview window.
- Choose the embed size or customize dimensions manually. Google offers preset sizes (small, medium, large), but you can click “Custom size” to define width and height. Alternatively, you can set these directly in your code later.
- Copy the generated <iframe> code. Click the “Copy HTML” button to grab the embed snippet provided by Google.
- Create an HTML container on your page. Use a <div> or <section> element to wrap the map for layout control. This is helpful for applying custom CSS, spacing, and responsive behavior later.
- Paste the embed code inside your container. Adjust the width, height, or add style/class attributes to suit your layout. For mobile responsiveness, use percentage widths or responsive class utilities.
Here’s an example of a custom HTML block embedding a Google Map:
<section class="location-map">
  <h3>Visit Our Office</h3>
  <iframe
    src="https://www.google.com/maps/embed?pb=!1m18!1m12!1m3!1d3153.019319823711!2d-122.4206796846815!3d37.77928097975725!2m3!1f0!2f0!3f0!3m2!1i1024!2i768!4f13.1!3m3!1m2!1s0x8085808c2ed0f2d3%3A0xb45bdf53e4e3e92f!2sSan%20Francisco!5e0!3m2!1sen!2sus!4v1618876956475!5m2!1sen!2sus"
    width="100%"
    height="350"
    style="border:0;"
    allowfullscreen=""
    loading="lazy">
  </iframe>
</section>
This method gives you direct access to HTML and styling for custom layouts. However, it can be time-consuming to manage manually — especially if you want multiple pins, design customization, or seamless updates.
Next, we’ll compare this approach to using a map code generator for a faster and more flexible solution.
Map Code Generator vs Manual Solution
While manual HTML embedding provides flexibility, it also demands more time, technical skills, and hands-on updates. A visual map generator eliminates those complexities, offering an easier and more reliable way to display your location. Here’s a detailed comparison to help you choose the better option:
| Feature | Manual HTML Embedding | Elfsight Map Code Generator |
|---|---|---|
| Setup Time | 5–15 minutes, including map generation, copy-paste, and layout testing. | 1–2 minutes using a visual editor and instant embed code generation. |
| Technical Knowledge | Requires knowledge of HTML, containers, and embed practices. | No coding required — fully visual with guided steps. |
| Design Customization | Limited unless paired with custom CSS or JS tweaks. | Full control over colors, map type, pins, labels, and layout options. |
| Error Risk | Prone to broken layouts, unresponsive design, or code misplacement. | Validated code output — error-free and ready to paste. |
| Responsiveness | Requires manual CSS tuning for mobile compatibility. | Mobile-optimized by default — adapts automatically to screen sizes. |
| Map Features | Basic embed only, with no custom pins or styling support. | Multiple locations, custom markers, labels, themes, and tooltips. |
| Maintenance & Updates | Manual edits needed in each HTML block or template file. | Manage and update maps anytime through your Elfsight dashboard. |
| Platform Compatibility | Depends on placement and formatting — requires testing per platform. | Works on any platform including WordPress, Shopify, Webflow, and more. |
For developers and non-developers alike, a generator is a time-saving, scalable solution that guarantees professional results with minimal effort. But even the best tools can run into small issues — next, we’ll cover how to fix the most common problems when embedding your map code.
Fixes for Common Issues
Even with a reliable map widget or correctly embedded HTML code, certain issues can arise after pasting the map into your website. Below is a detailed FAQ covering common problems, display errors, and what to check when your map isn’t working as expected.
Why isn’t my map showing up after embedding the code?
Why does the map overlap or break my page layout?
Can I style the embedded map with my website’s CSS?
Why is there a gray box or blank space instead of a map?
The map loads, but controls like zoom or drag don’t work. What’s wrong?
How do I adjust the map location after embedding it?
Fixing most map display issues comes down to proper placement, responsive layout settings, and making sure the code is cleanly integrated.
Conclusion
Embedding a Google Maps widget on your website doesn’t have to be complicated. Whether you choose to write the HTML manually or use a visual code generator, displaying your business location clearly enhances user experience and helps visitors connect with you faster. However, as we’ve seen, using a generator offers clear advantages in terms of speed, visual consistency, and ease of use.
From quick customization to mobile-friendly design and error-free deployment, a map generator is the most efficient way to create and manage your location block. It simplifies the process, removes the guesswork, and ensures your website always shows accurate, professional-looking maps that work everywhere.
Looking for More Guidance?
We hope this guide gave you everything you need to start embedding Google Maps with confidence. If you have additional questions, contact us — we’re here to help. Elfsight is dedicated to making powerful, no-code widgets that elevate your online presence with zero hassle.
Join our growing Community to share feedback, connect with others, and stay updated on new features. Got an idea for improvement? Add it to our Wishlist — we’d love to hear from you!