Adding forms to your website no longer demands technical skills or hours of development. An HTML form generator is a no-code tool that allows you to create and publish forms on your website without writing code manually.
Whether you need a contact form, feedback form, survey, or booking request, these generators make it simple to build structured and functional forms using a visual interface. They’re widely used across industries to streamline user communication and data collection.
- Improve customer interaction. Forms help businesses stay connected by giving users an easy way to send inquiries, feedback, or requests directly through the website.
- Streamline lead generation. Capture potential customer details through embedded forms and connect them with your CRM or email marketing tools automatically.
- Simplify appointment and order handling. With form fields tailored to booking or ordering, businesses can manage service requests or product interest more efficiently.
- Reduce development time and cost. Teams no longer need to rely on developers to add or update forms — generators offer a flexible, self-serve solution.
For businesses of any size, using an HTML form builder ensures fast deployment, design consistency, and a professional user experience — all without the complexity of coding. In the next section, we’ll show you how to create your own form in just a few steps.
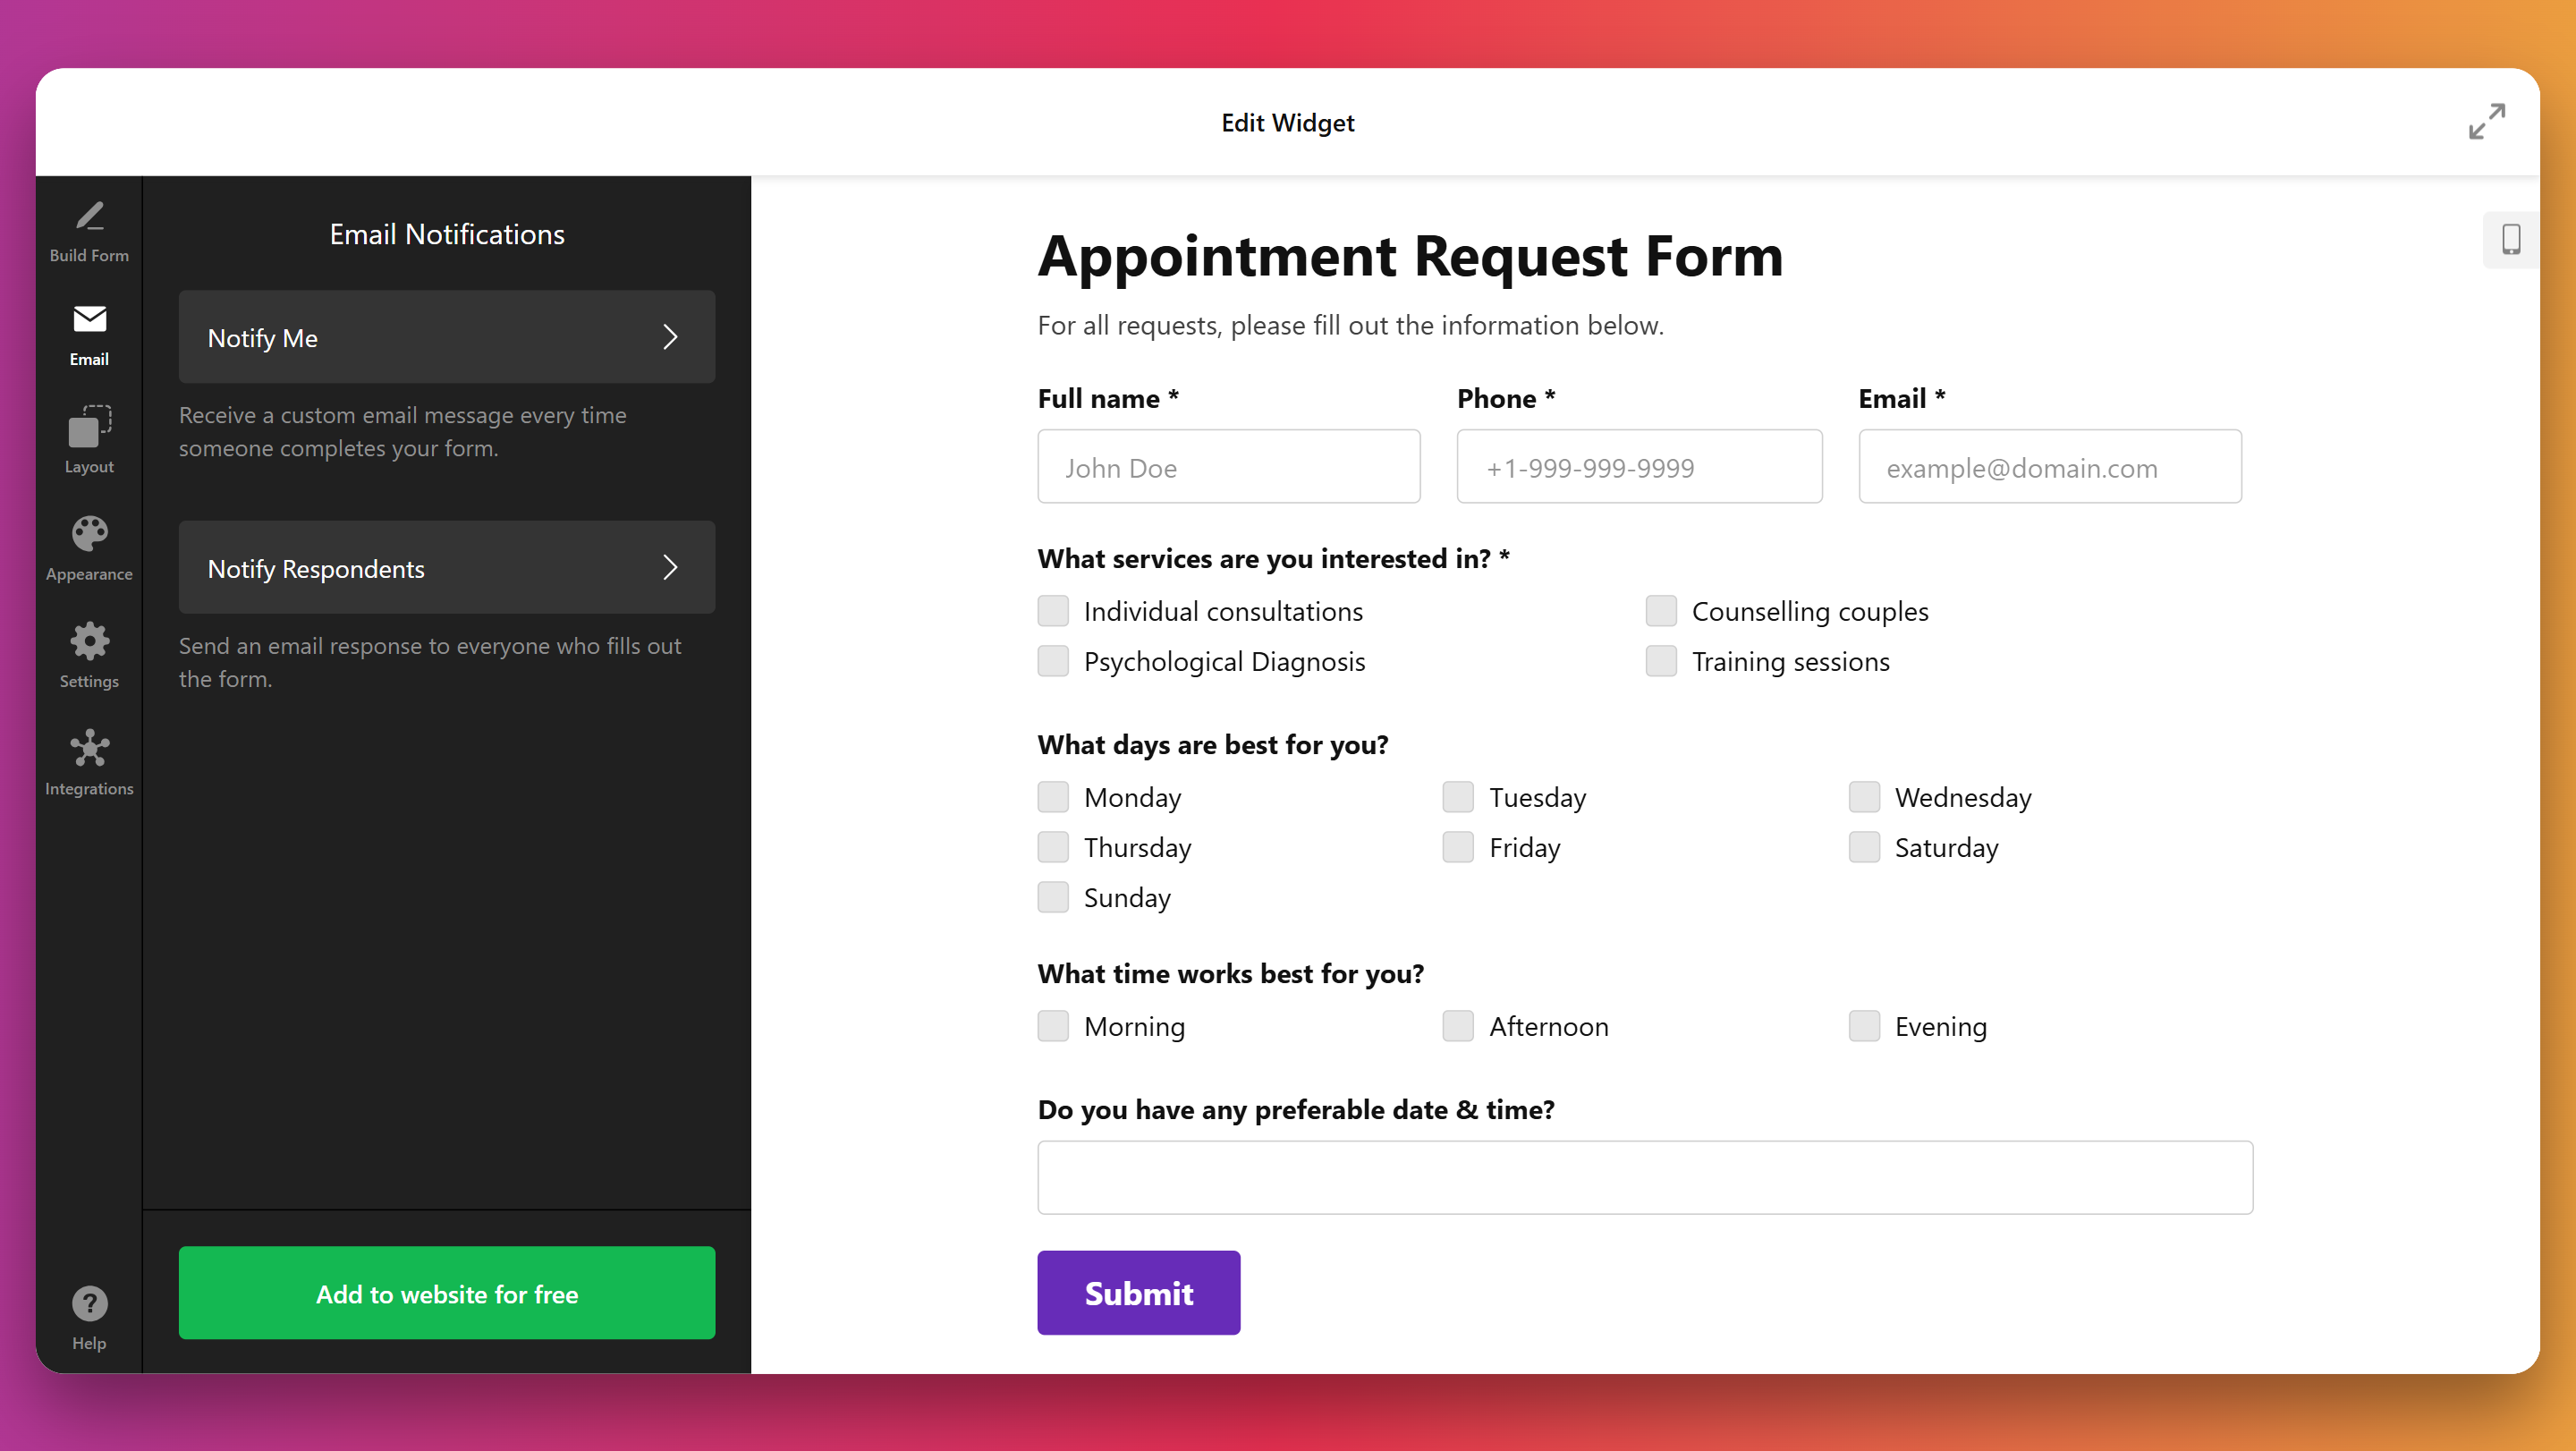
Build a Web HTML Form in Seconds
If you want a fast, code-free way to create HTML forms, Elfisght is exactly what you need. Here’s how to quickly create one using elfsight. With its drag-and-drop builder and visual customization tools, the entire process takes under a minute.
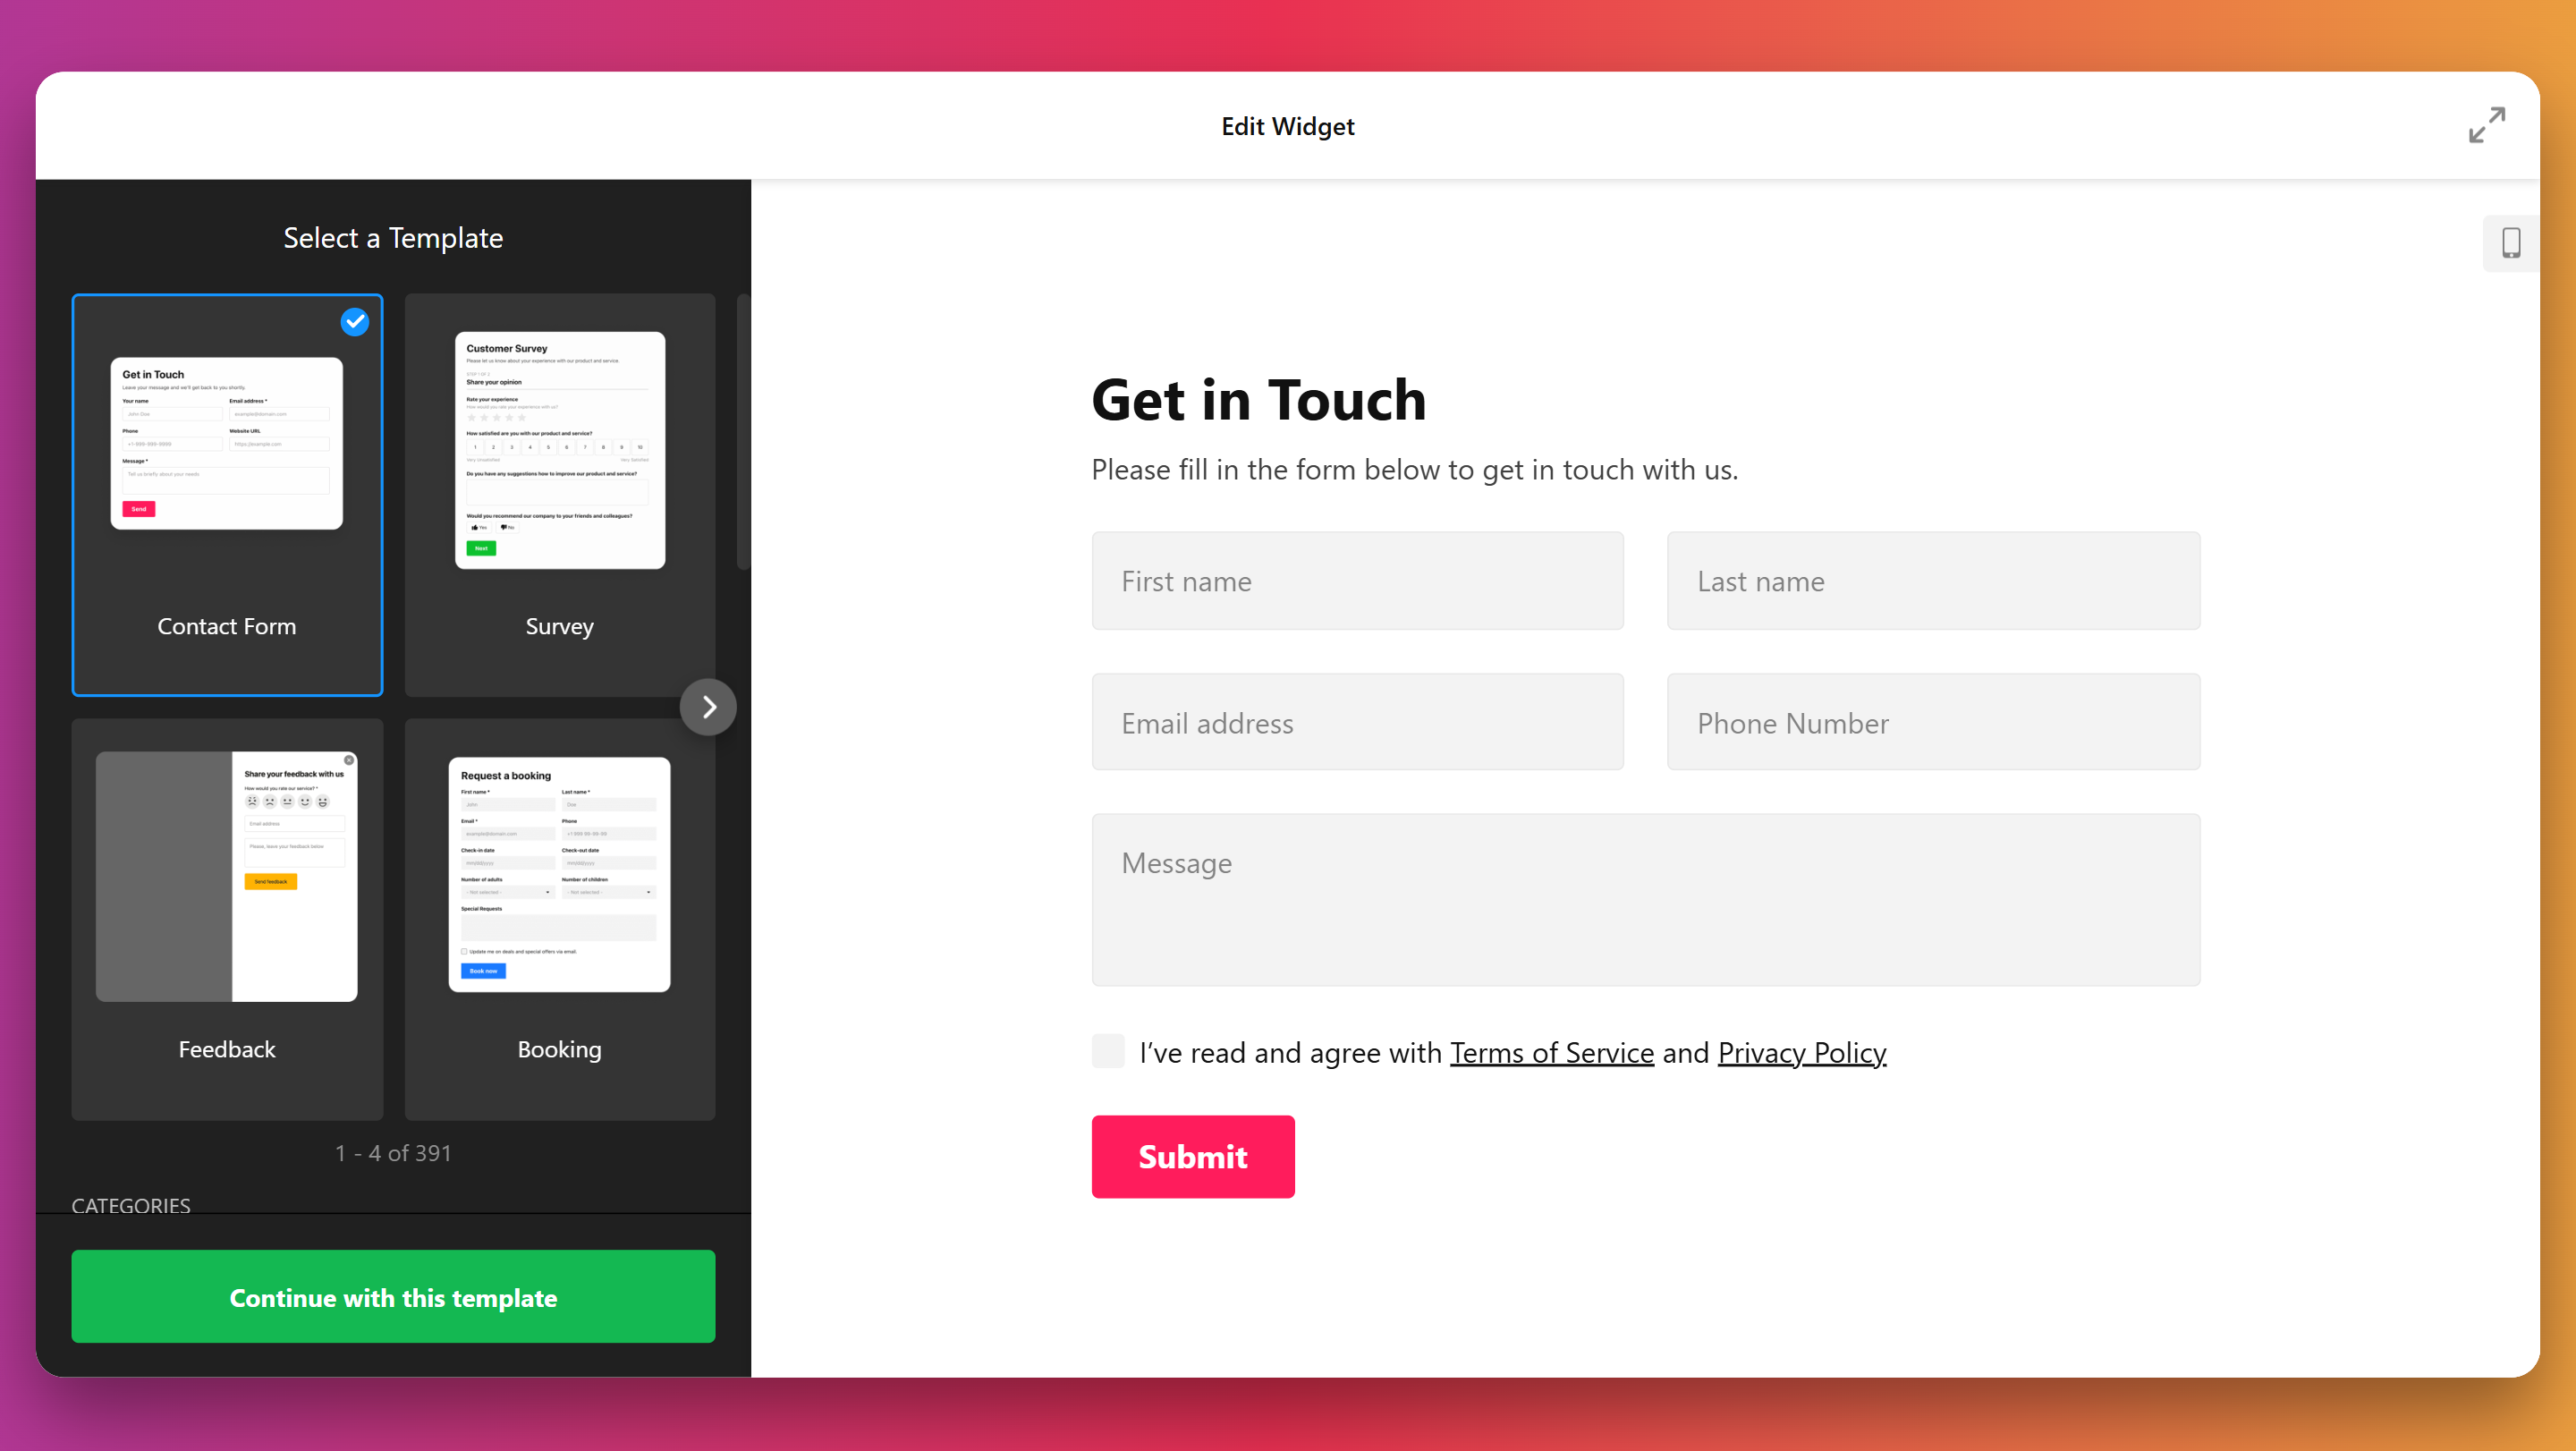
- Open the editor and select a ready-made form template that fits your goal.
- Customize fields of your form, change labels, layout, and spacing.
- Adjust design settings like colors, fonts, and borders to match your branding.
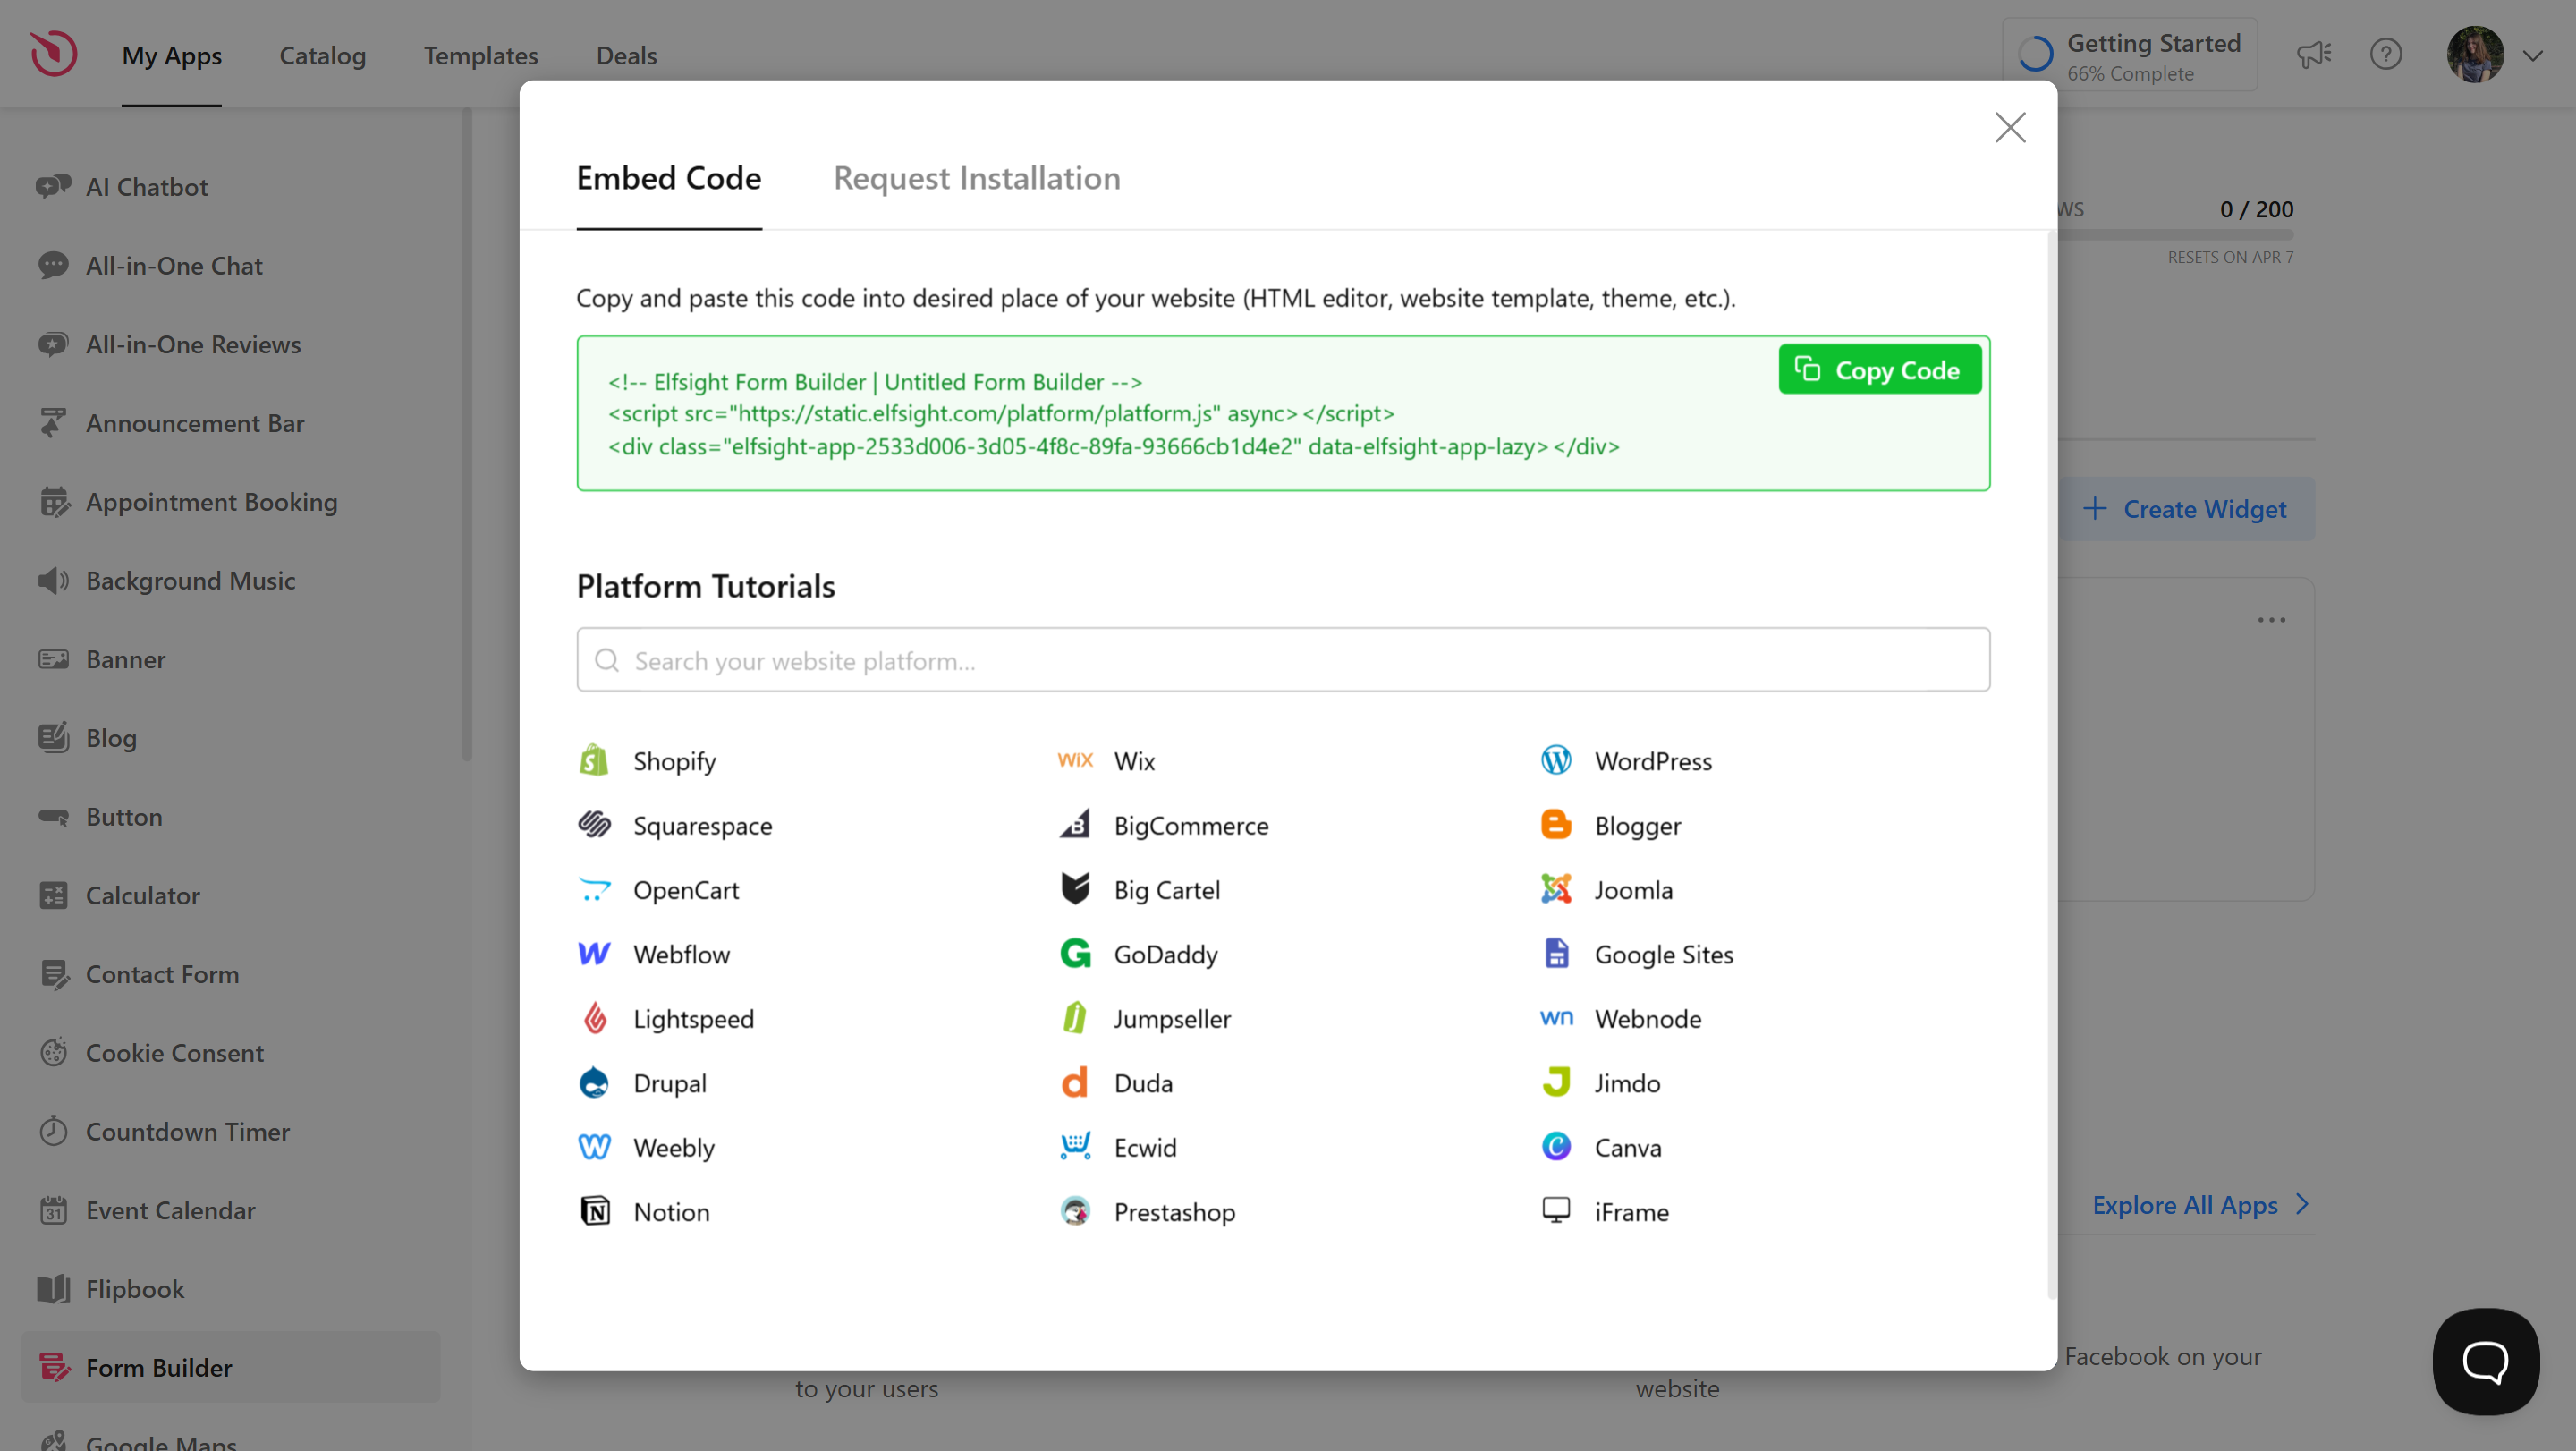
- Click “Add to website for free“, copy the embed code, and paste it into your website’s backend.
See it in action – build your own form with the easy editor!
Features of Elfsight’s Form Builder
Once you’ve built your first form, it’s time to explore what makes Elfsight stand out. This generator offers powerful features designed to simplify form creation and improve how HTML web forms function on your website.
Here’s what you get when using this solution to create a simple HTML form:
- Ready-made templates for any purpose. Choose from pre-built form layouts like contact, feedback, booking, support, and more to save time and launch faster.
- Drag-and-drop customization. Add, remove, and rearrange fields visually without touching code, giving you full control over form structure.
- Responsive design out of the box. Every form automatically adjusts to mobile and tablet screens, ensuring a flawless user experience on all devices.
- Flexible field types and logic. Use input types like text, email, phone, checkbox, dropdowns, and condition-based visibility to create dynamic forms.
- Email notifications and auto-replies. Instantly receive new submissions and optionally send confirmation messages to users.
- Custom success messages and redirects. Decide what users see after submitting a form — show a message or redirect them to another page.
- Anti-spam protection built-in. Forms include CAPTCHA to block bot submissions and protect your inbox.
These features make Elfsight’s solution more than just an online form creator. In the next section, we’ll guide you step-by-step through creating and embedding your first form on your website.
How to Generate HTML Form: Step-by-Step
Now let’s walk through the full setup of your HTML form using Elfsight. Each step below reflects an actual stage in the widget creation process and is based on what you’ll see inside the editor.
- Select a template. Open the Elfsight editor and choose a suitable template. Click “Continue with this template” to use a pre-made layout.

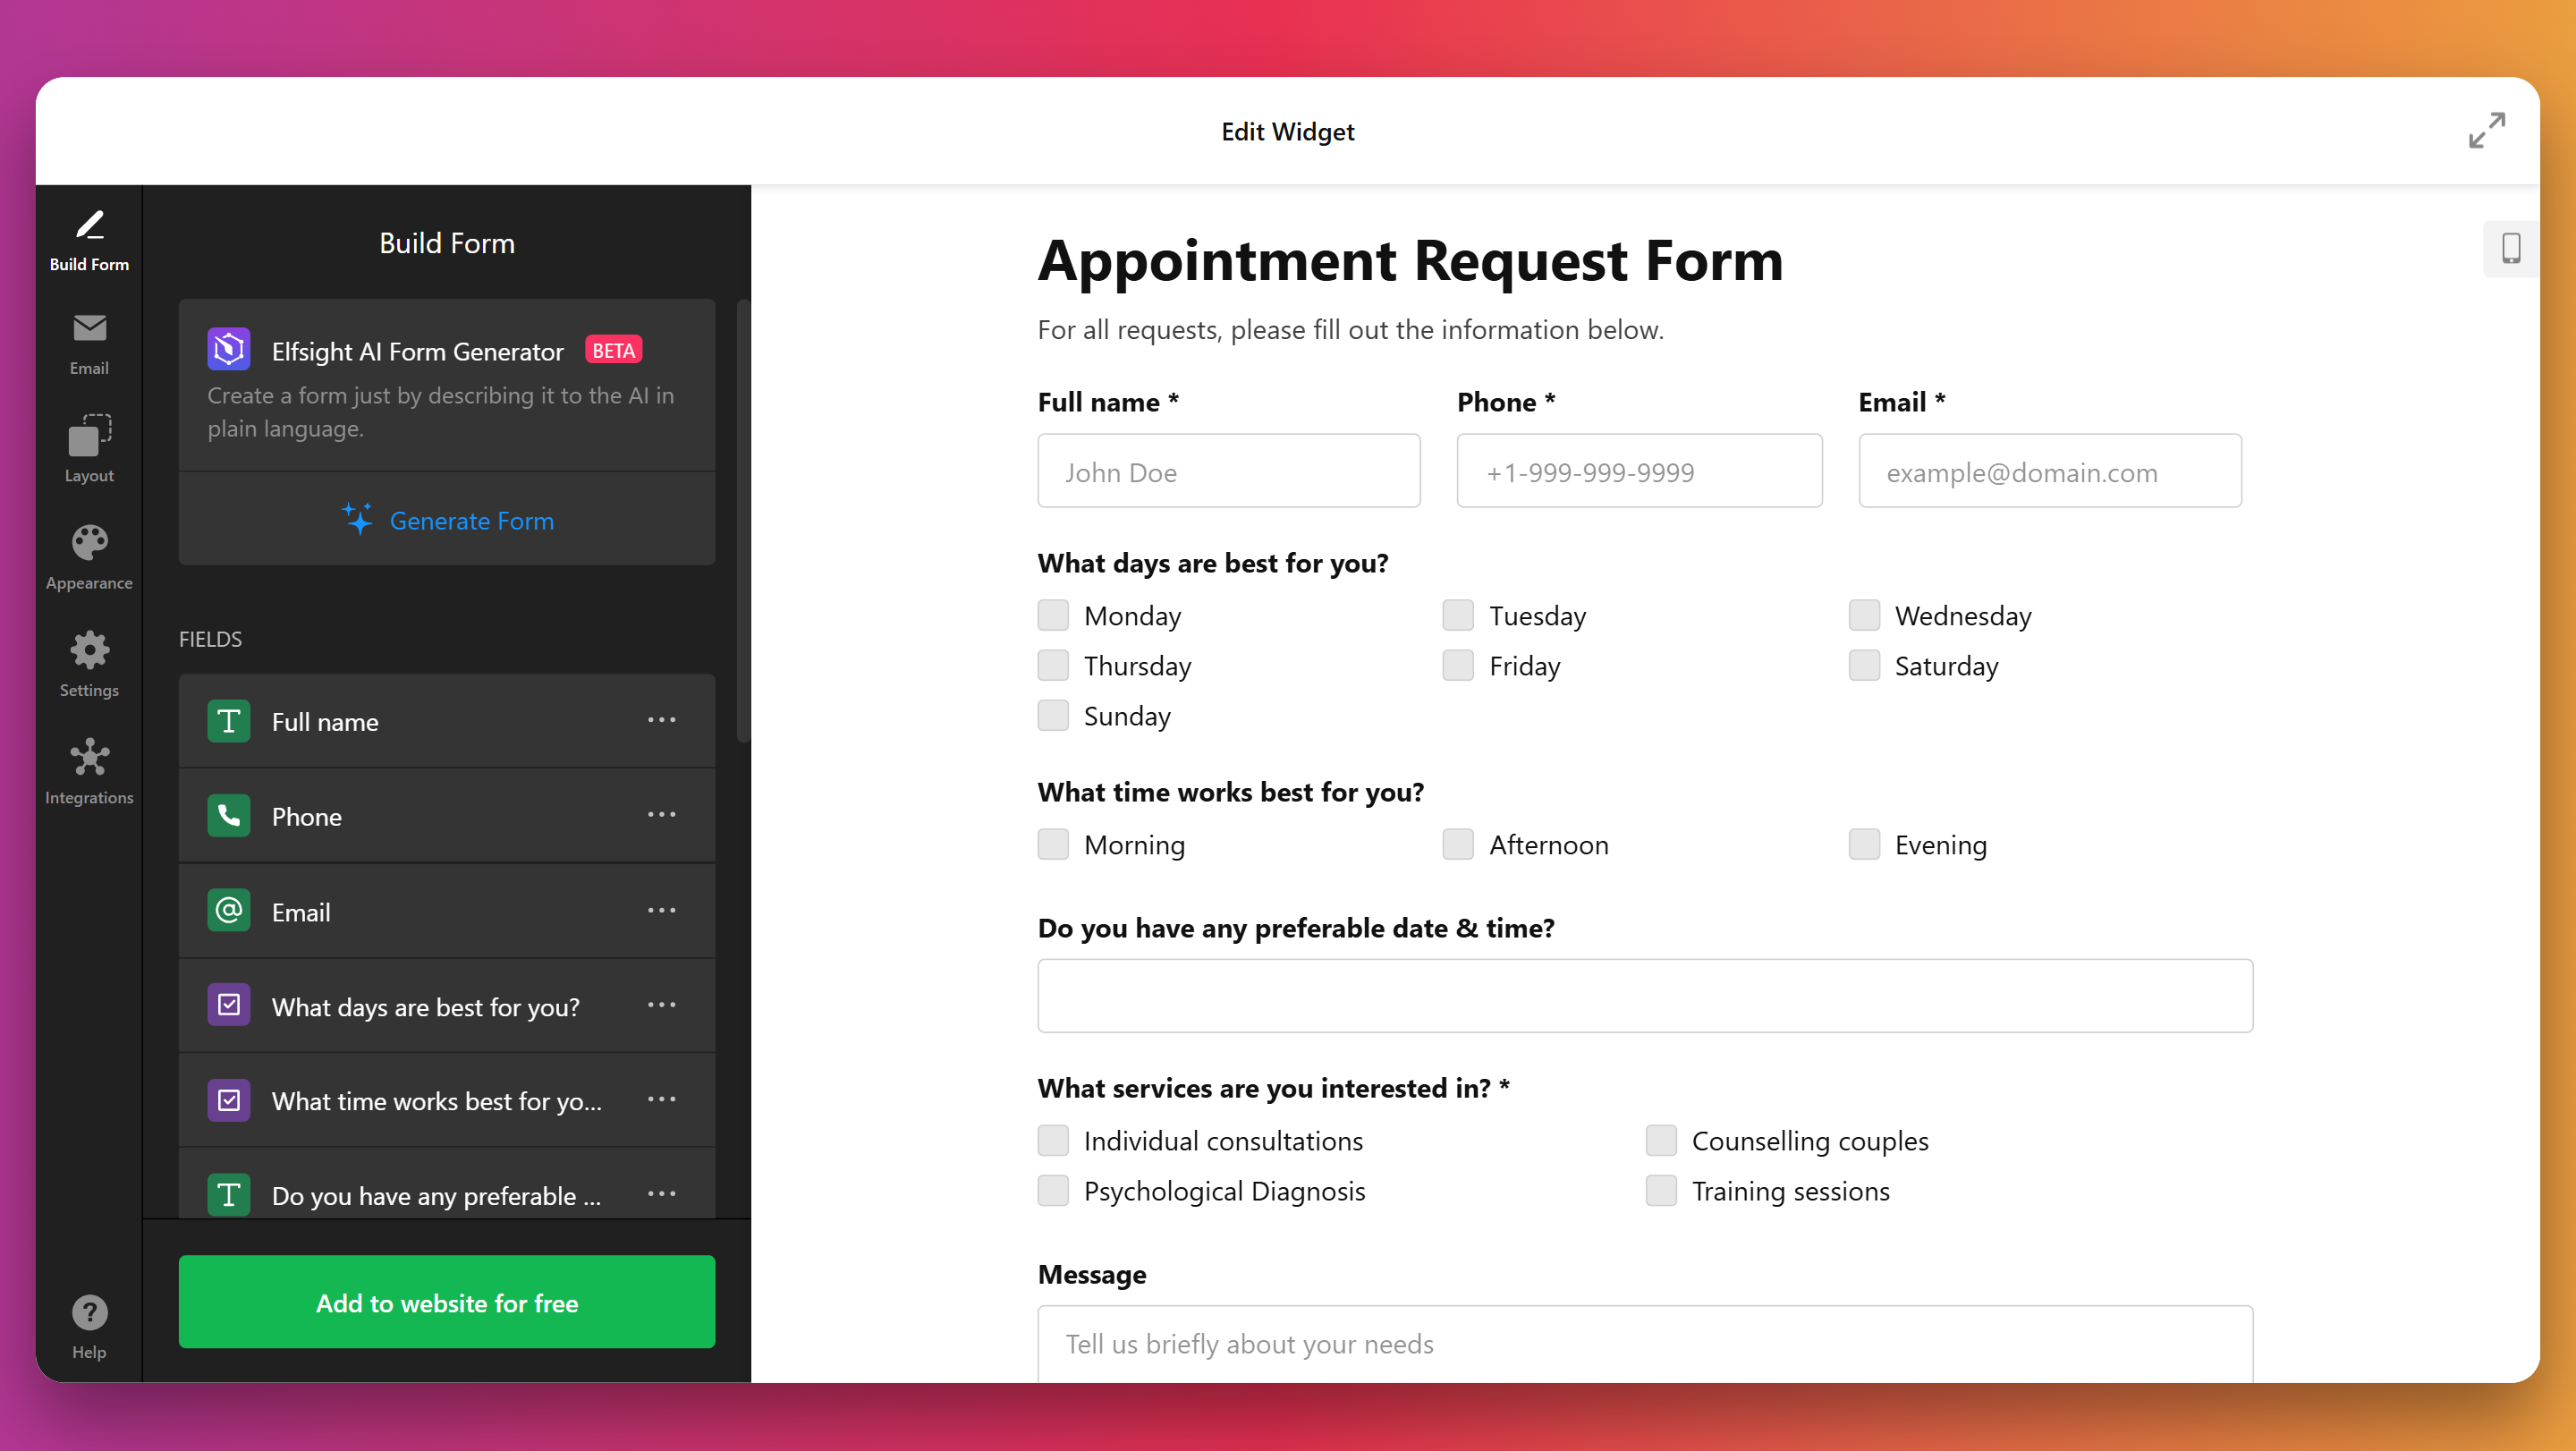
- Build your form structure. In the “Build Form” tab, add, remove, or edit fields like rating scales, email inputs, and text areas. You also have the option to generate a full form using a prompt through the AI Form Generator.
- Configure email alerts. Inside the “Email” section, define who will receive notifications for each form submission. You can alert yourself and send confirmation emails to users who complete the form.
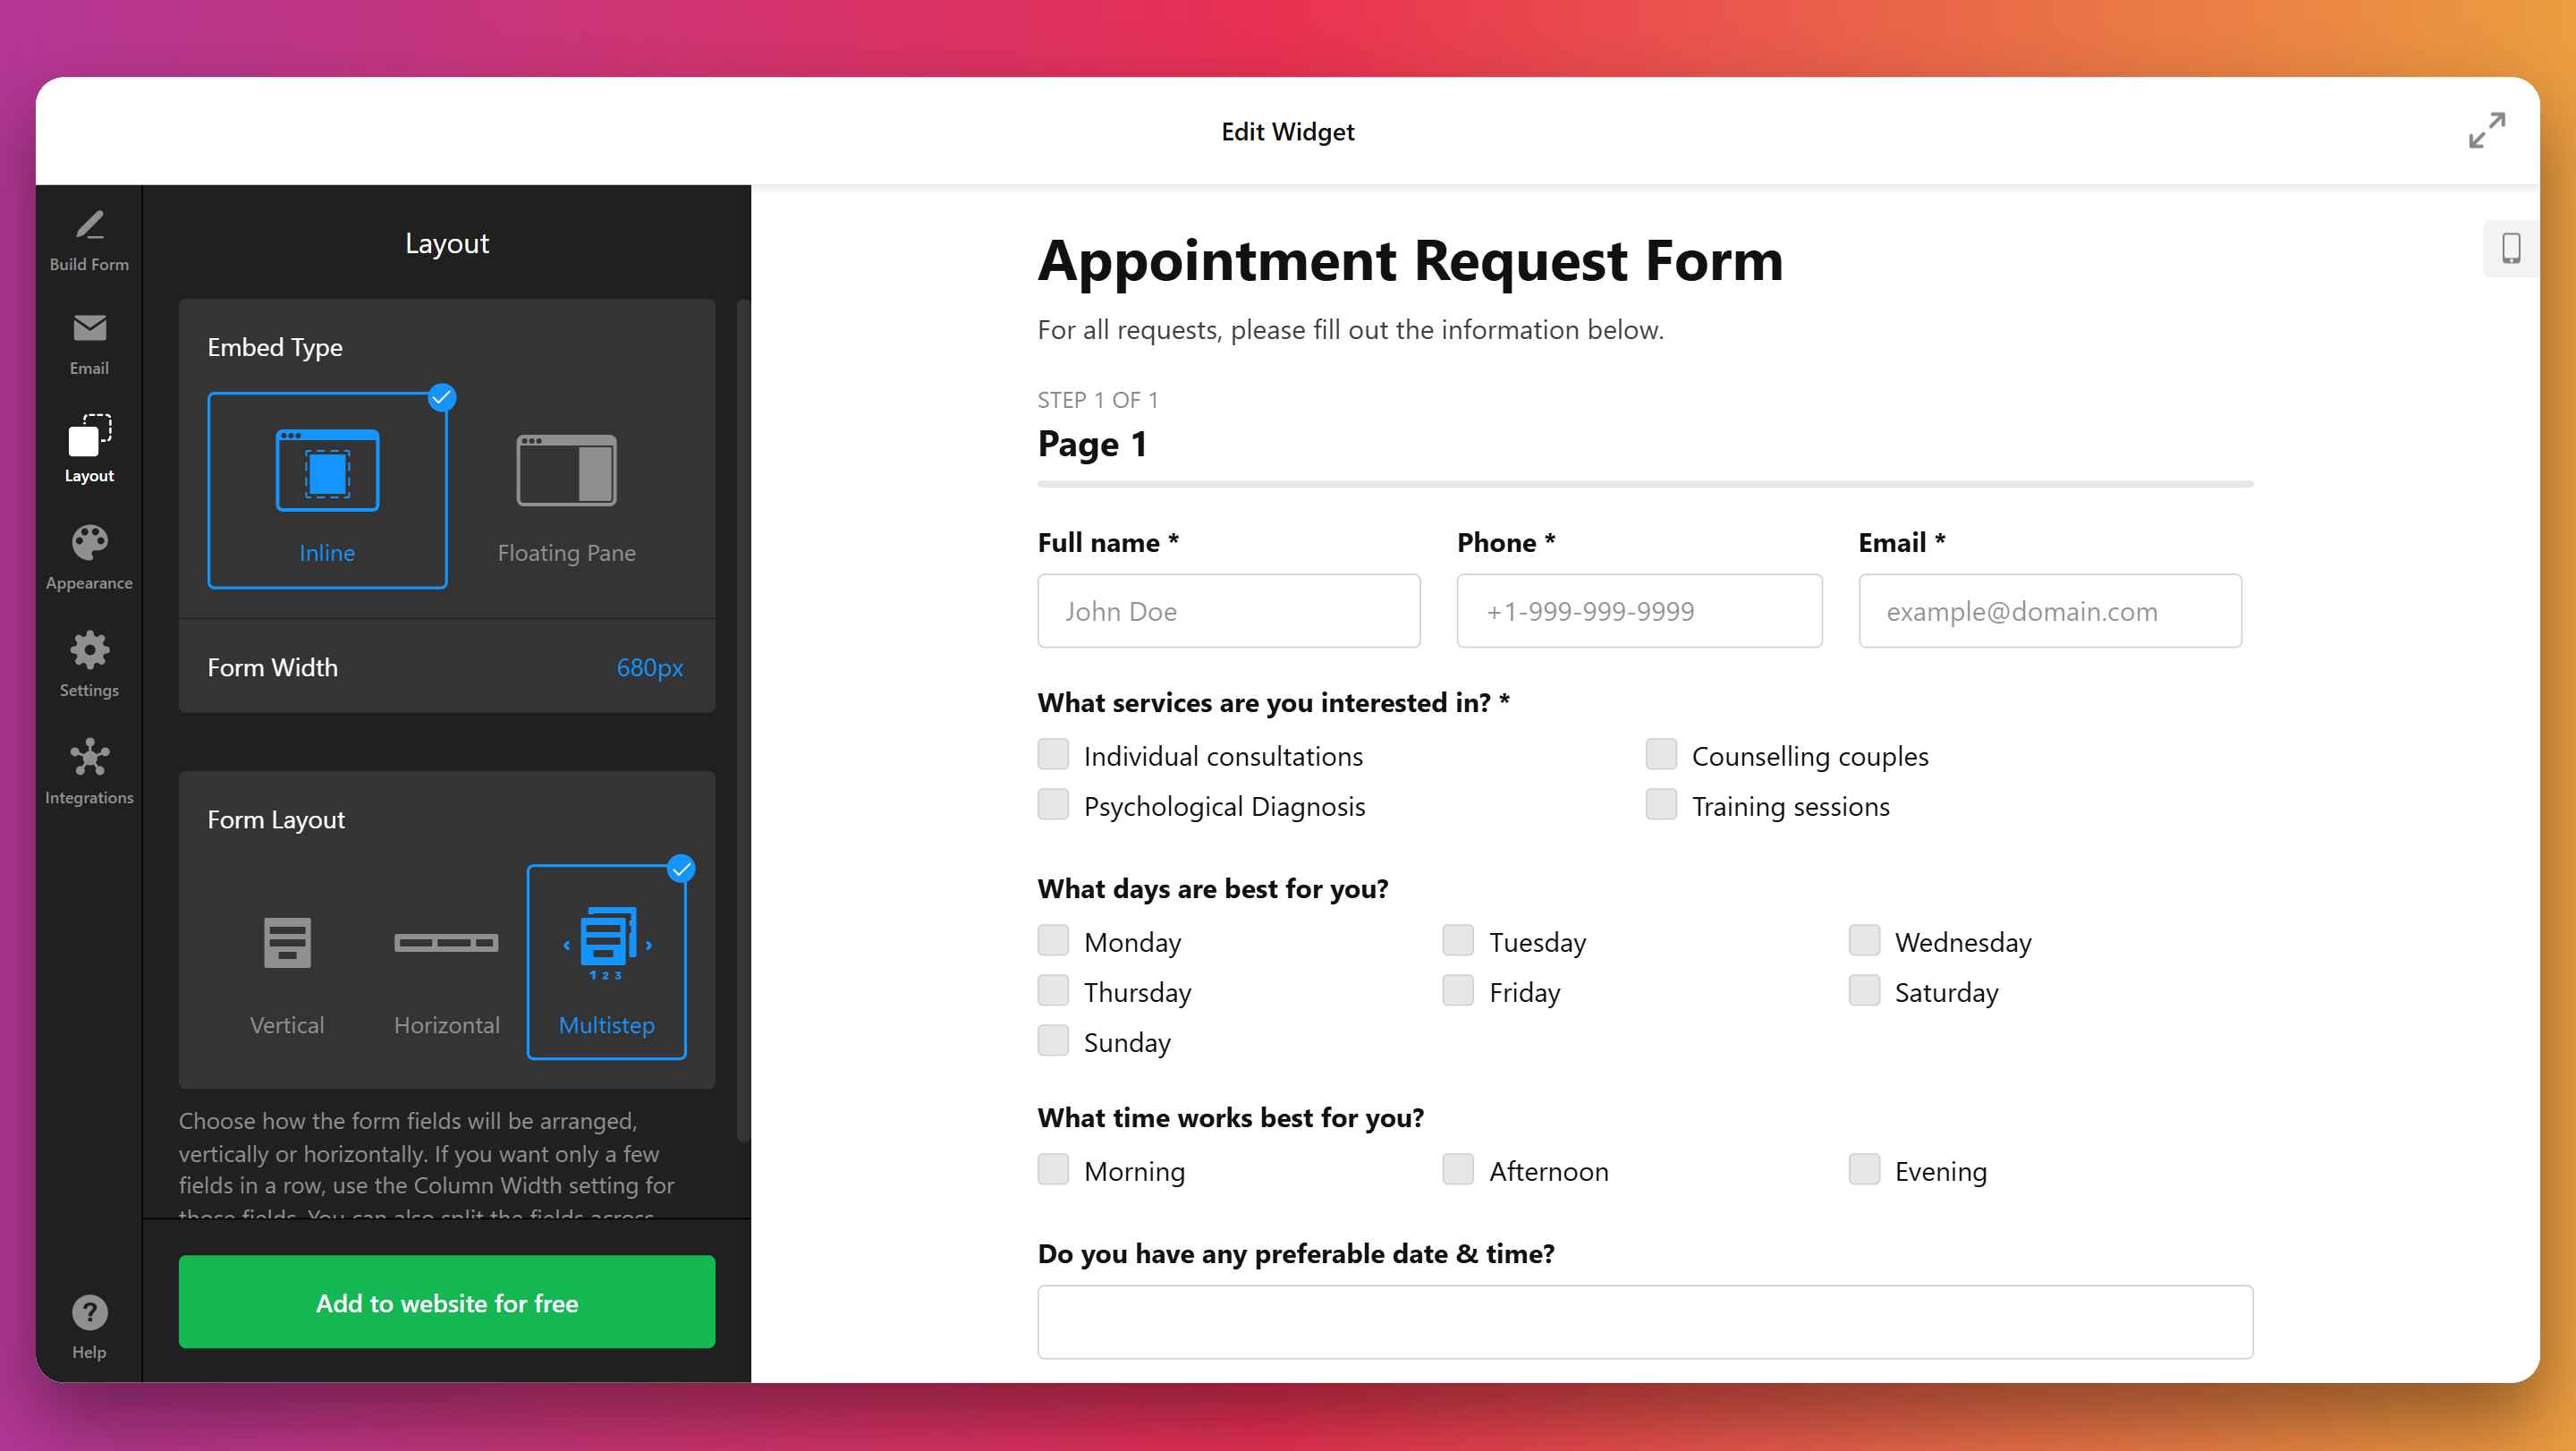
- Set up layout options. Under the “Layout” menu, choose how your form will display — inline or as a floating pane. Adjust the form’s width in pixels and pick a layout style such as vertical, horizontal, or multistep.
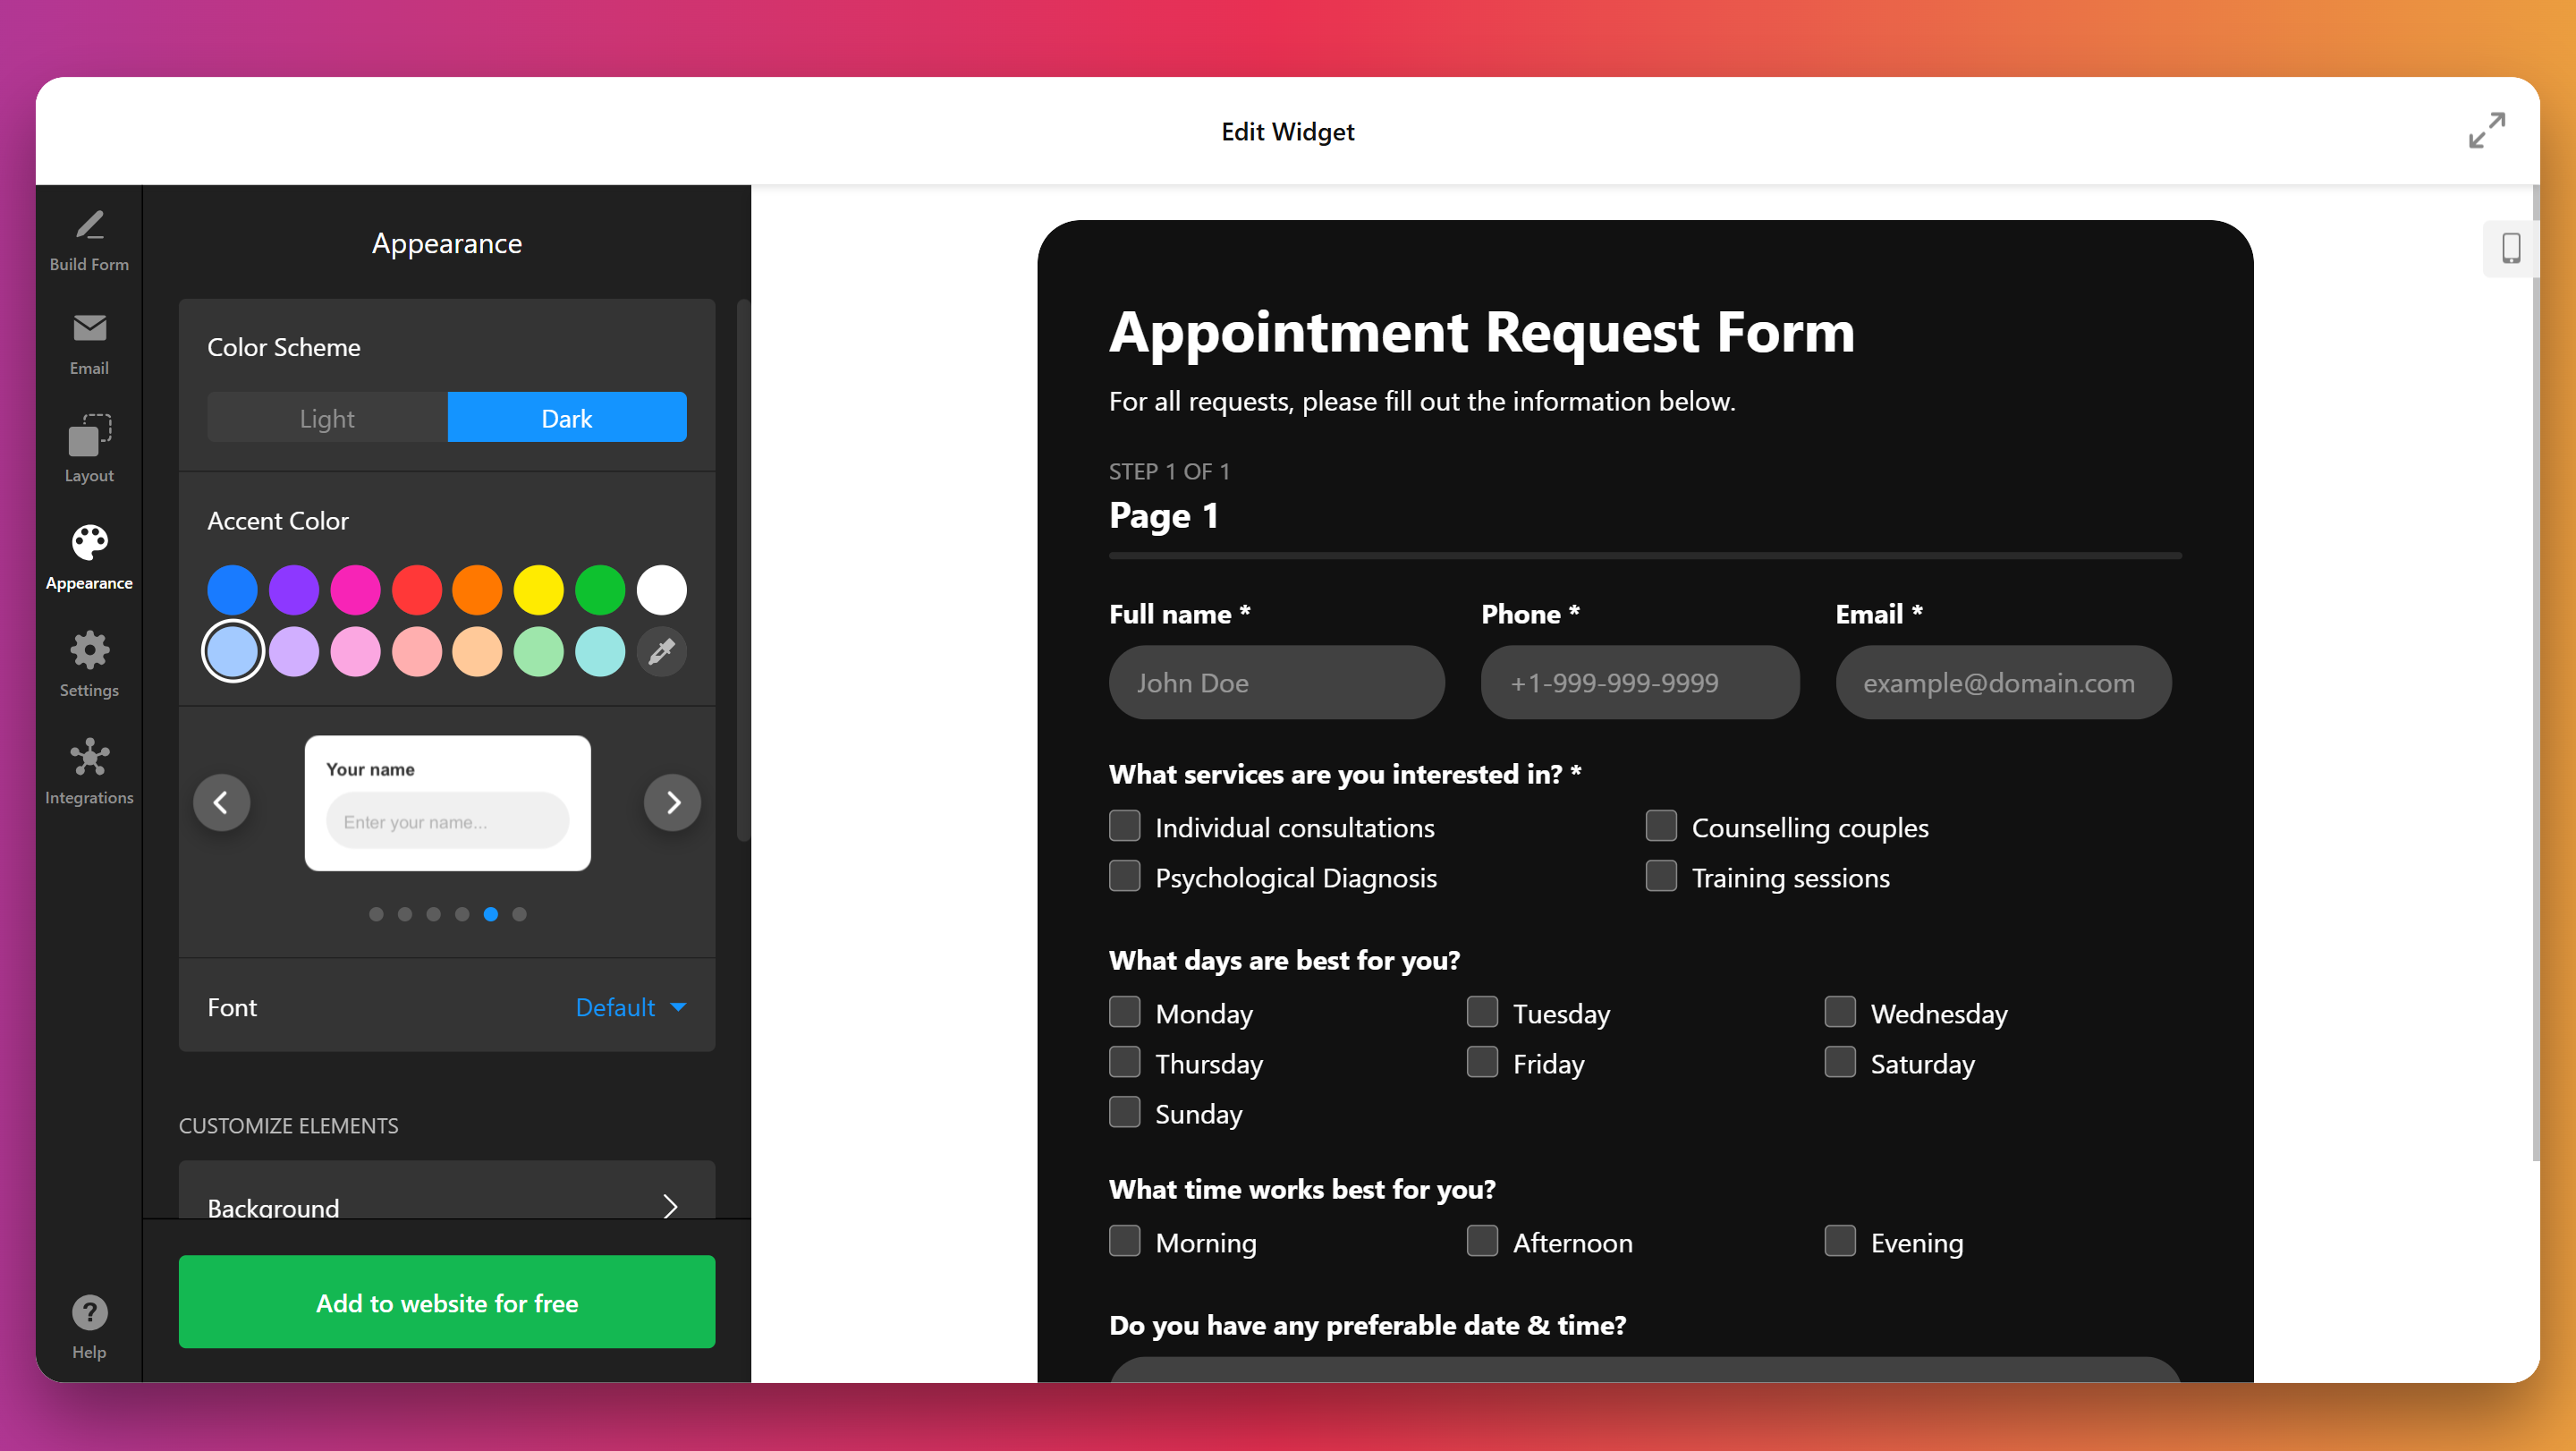
- Design the appearance. Go to the “Appearance” tab to switch between light and dark themes, set your accent color, and choose a font. You can also update the background, button design, and borders to match your website style.
- Update advanced configurations. In the “Settings” panel, turn on spam protection, pick the language, define what happens after submission (e.g., show a message), or pre-fill fields using URL parameters.
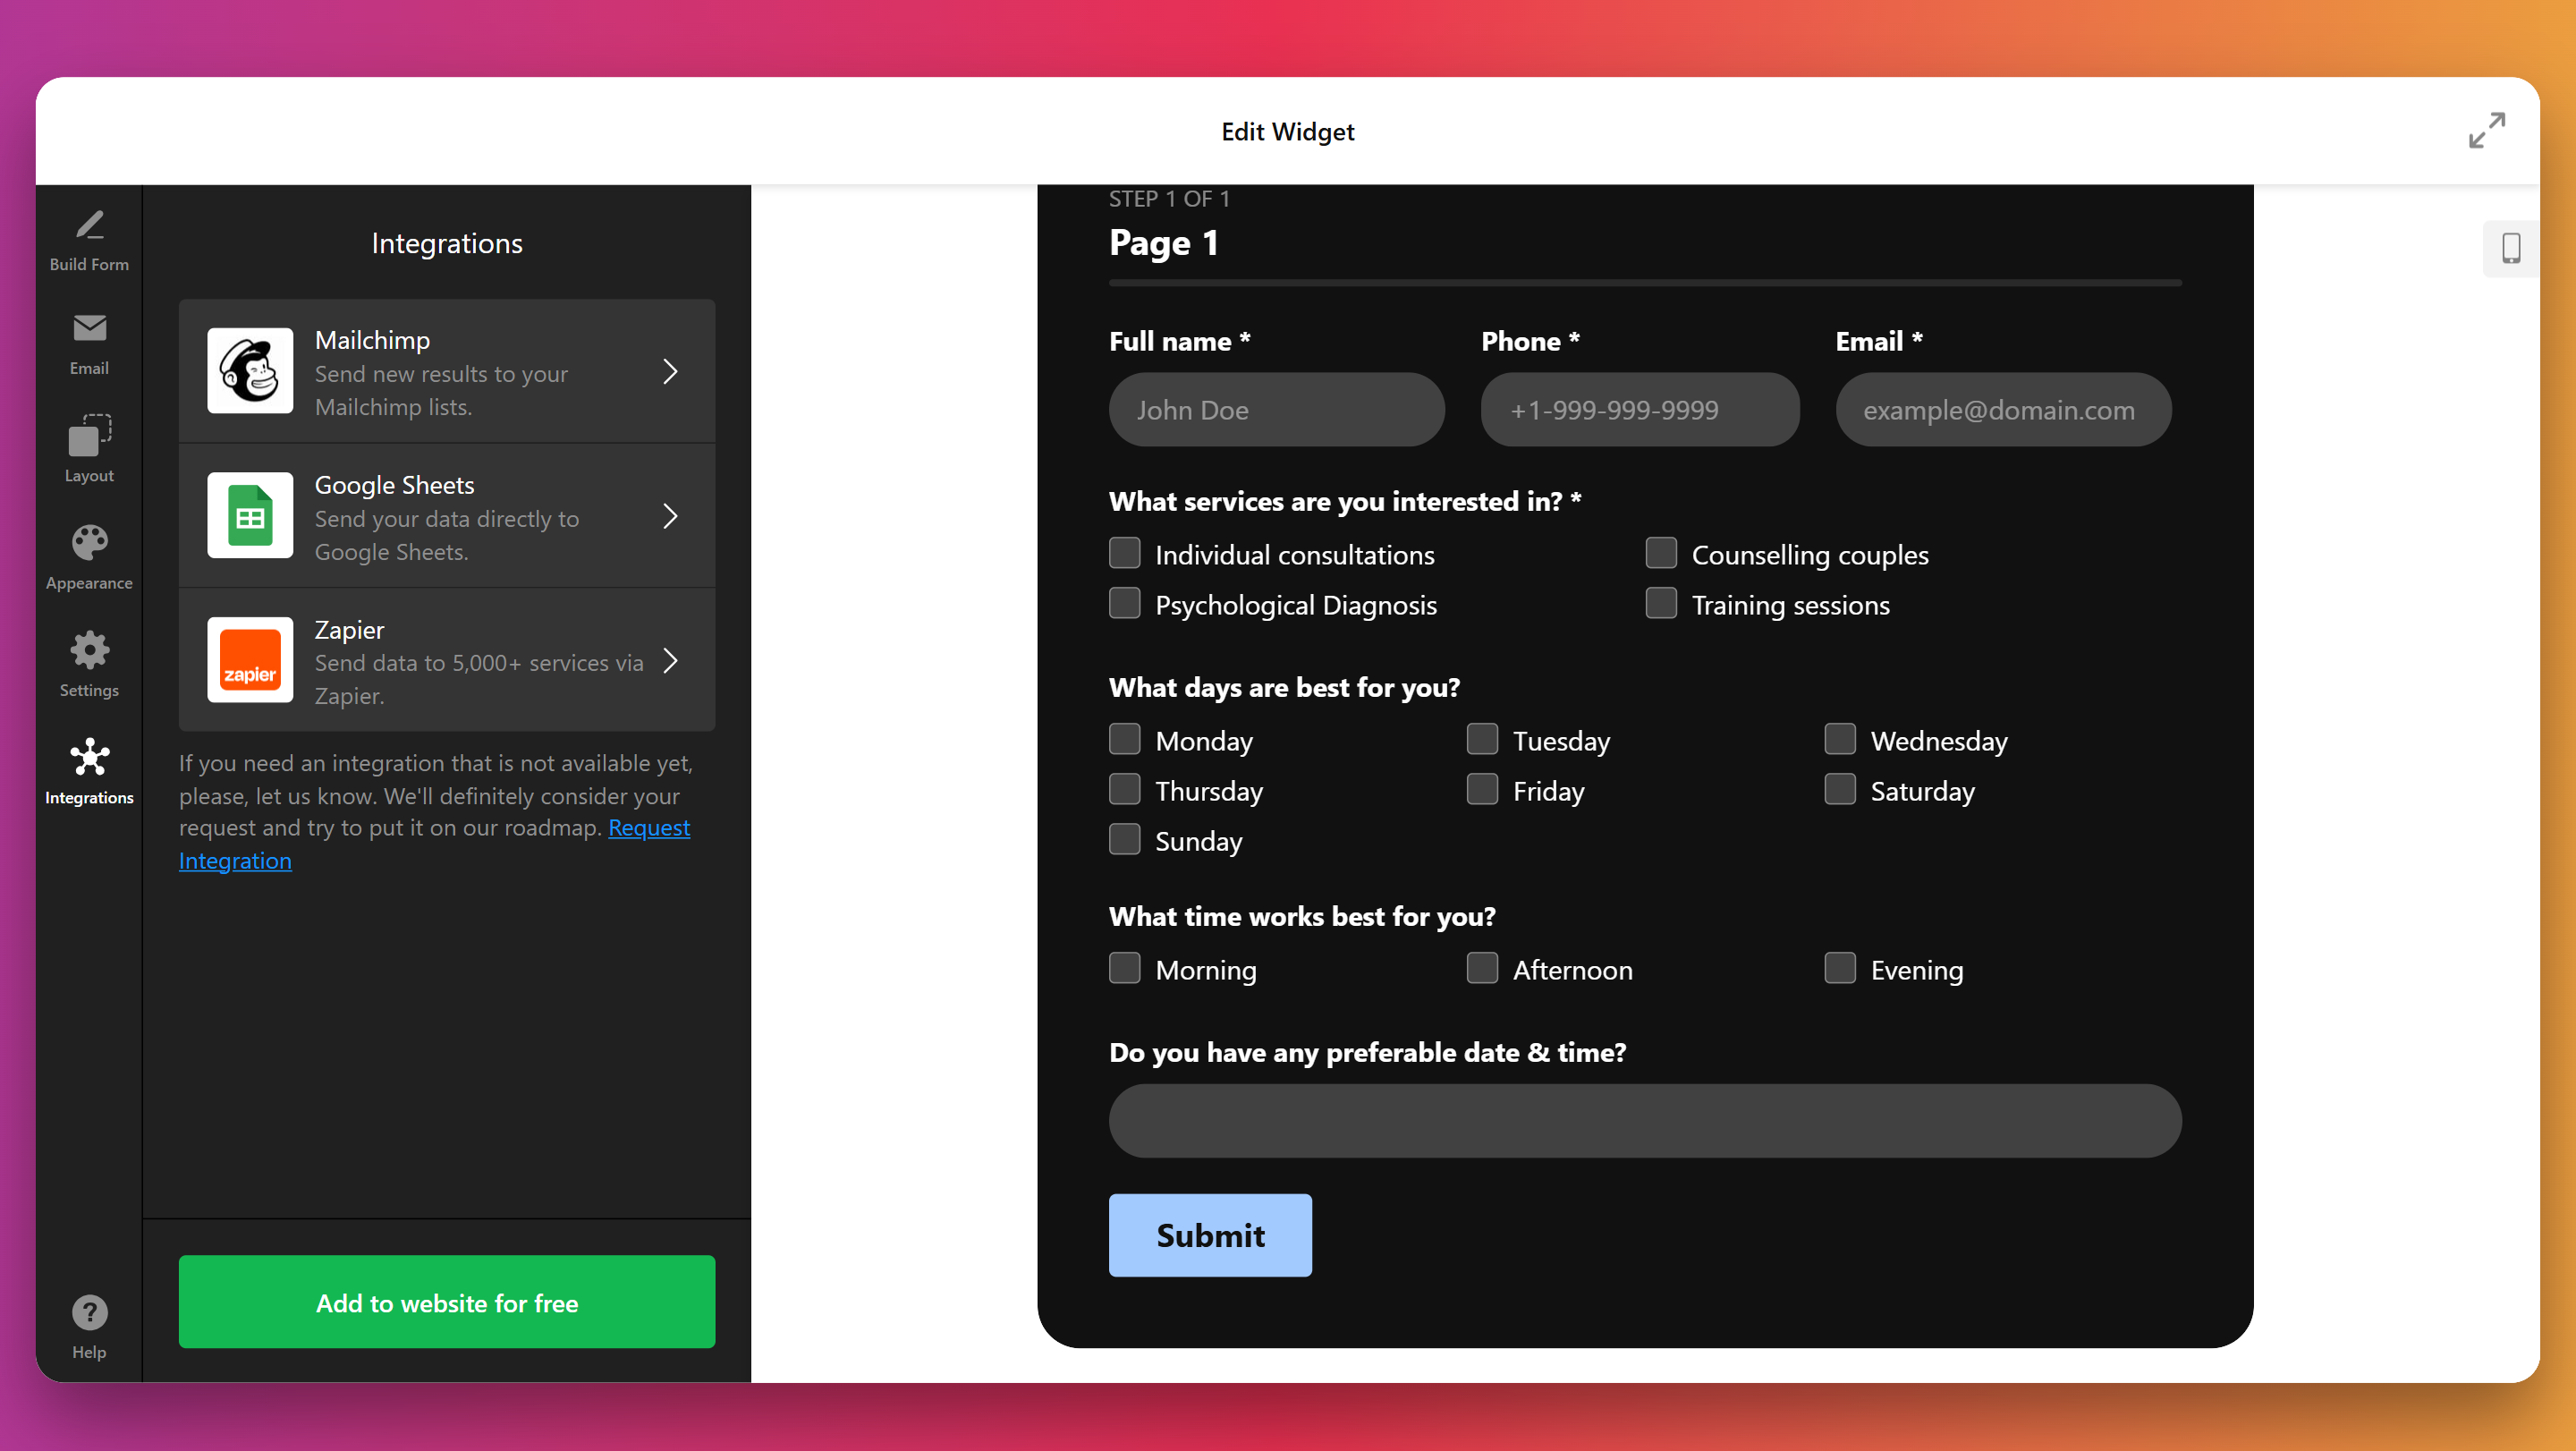
- Connect external services. Head to the “Integrations” section to sync your form with tools like Mailchimp, Google Sheets, or Zapier. This ensures responses are automatically forwarded to your chosen platforms.
- Add the form to your website. Click “Add to website for free” to generate your HTML embed code. Copy it, paste it into your website editor where the form should be displayed, and publish your changes.

With your form now complete and embed code in hand, let’s go over where to add to your website.
Where to Embed Your HTML Form
Once your form is built, it’s time to embed it on your website. Elfsight offers a universal embed method for raw HTML as well as dedicated guides for popular CMS platforms. Here’s how you can integrate your widget effectively depending on where your website is built.
- Raw HTML integration. Copy the Elfsight embed code and paste it directly into the HTML editor of your page or template. This is ideal for custom-coded websites and platforms that allow full HTML access.
- WordPress. Use the “Custom HTML” block in Gutenberg or switch to the “Text” tab in the Classic Editor. Paste the code where you want the form to appear and update the page.
- Webflow. Drag an “Embed” element into your layout, then paste the Elfsight code into the HTML editor window. Save and publish the changes to apply the form.
- Squarespace. Add a “Code” block where you want the form displayed, then paste the code and apply. Make sure code injection is enabled for full functionality.
- Shopify. Open your theme in the editor, go to the page or section you want, and paste the form code into a custom HTML or Liquid block.
- BigCommerce. Use the “Script Manager” or edit the page with a custom HTML section. Paste your form code and save to display the widget across product or contact pages.
Placing your form in the right location on your website can significantly boost user interaction and submission rates. Whether it’s for collecting inquiries, leads, or feedback, positioning the form where it’s easy to notice and access is key.
Here are the most effective pages and page sections to consider:
- Homepage above the fold. Great for lead capture or newsletter sign-ups, placing a form near the top increases visibility and engagement.
- Contact page main section. A standard and expected location for users looking to get in touch, ideal for detailed inquiry forms.
- Sidebar or floating panel. Useful for persistent visibility across all pages without disrupting the main content flow.
- Product or service pages. Helps capture interest right when the visitor is considering a purchase or asking for more information.
- Footer area. Ideal for simple forms like newsletter sign-ups that stay accessible on every page of the website.
- Popup or exit-intent forms. Triggered at the right time, these catch attention and can reduce drop-off rates, especially for special offers or feedback requests.
Elfsight’s no-code embed method means anyone can add a form in minutes, no matter the platform. Now, let’s take a look at how to code an HTML form manually from scratch.
Write Your Own HTML Form Code Manually
If you want full control over the structure and behavior of your form, writing the code manually is a reliable option. This approach is ideal for users with basic HTML knowledge who prefer to build forms from the ground up.
Below is a detailed guide that walks you through creating a simple yet fully functional HTML form for collecting user data such as names, emails, and messages.
- Create a container to wrap the form. Use a <section> or <div> to contain your form. This wrapper makes it easier to apply layout or styling later via CSS. Give it a class or ID for targeting in your stylesheet.
- Set up the form element with proper attributes. The <form> tag defines the boundaries of the form. Use the action attribute to specify where the data will be sent (e.g., a script or endpoint), and set the method to POST for secure data handling.
- Add labeled input fields. Use <label> tags to describe each input, improving accessibility and usability. For basic contact forms, include input types such as text for names, email for addresses, and textarea for messages. Always include id attributes that match the for values of labels.
- Group related fields using fieldsets. Use <fieldset> and <legend> to visually and structurally group form fields. This helps users navigate complex forms and improves semantic clarity for screen readers.
- Include a submit button to complete the form. Add a <button type=”submit”> element at the end of the form so users can submit their entries. You can customize the button text to match your form’s purpose (e.g., “Send Message”, “Register”, or “Submit”).
Here is an example of how a basic HTML contact form might look using semantic structure and best practices:
<section class="custom-form-block">
  <form action="/submit-form" method="POST">
    <fieldset>
      <legend>Get in Touch</legend>

      <label for="name">Full Name:</label>
      <input type="text" id="name" name="name" placeholder="John Doe" required>

      <label for="email">Email Address:</label>
      <input type="email" id="email" name="email" placeholder="you@example.com" required>

      <label for="message">Your Message:</label>
      <textarea id="message" name="message" rows="5" placeholder="Write your message here..." required></textarea>
    </fieldset>

    <button type="submit">Send Message</button>
  </form>
</section>
While manual HTML form coding provides full flexibility, it often involves extra effort for validation, styling, and backend integration. In the next section, we’ll explore how a visual generator can help you skip these steps and build forms more efficiently.
Generator vs Manual: What’s Better?
While writing your own HTML form gives full control, using a visual generator like elfsight offers major advantages in terms of speed, consistency, and reliability. Here’s why most users choose a no-code solution to build and embed their forms.
- Faster setup and launch. Creating a form with a visual editor takes just minutes and doesn’t require any technical skills.
- Consistent design across devices. Every form built with a generator is responsive by default and looks great on desktops, tablets, and phones.
- Fewer errors and no debugging. The generator automatically structures and validates code, reducing the risk of layout issues, broken fields, or failed submissions.
- Live preview for instant feedback. You can see changes in real time and tweak your form’s appearance before publishing it.
- Custom styling without CSS. All design changes — colors, fonts, borders — are handled in a visual interface, no coding or stylesheets needed.
- Built-in integrations and notifications. Elfsight includes features like email alerts, autoresponders, and third-party service connections out of the box.
- Maintenance-free deployment. Once embedded, your form stays up-to-date and continues to work even if you update its design or settings later.
For most users, choosing a form designer or interactive web form generator is the smarter and more scalable option. Still, even with visual tools, occasional issues may arise after embedding.
Let’s walk through how to troubleshoot common form display problems.
Common Issues and Fixes
Even when using a visual builder, you might run into minor display or embedding issues. Below is a list of frequently asked questions that address the most common problems when adding HTML web forms to your website and how to resolve them quickly.
Why isn’t my form showing up after I embed the code?
Can I reposition the form if it appears in the wrong place?
Is it possible the form conflicts with other scripts on my page?
Why is the form not responsive on mobile?
How do I make sure my form loads quickly?
Most issues are easy to resolve with a quick check of the code or settings. Once everything is working smoothly, you can enjoy a seamless form experience across devices and platforms.
Final Thoughts
Using an HTML form generator is one of the fastest and most efficient ways to build, style, and publish fully functional forms on your website. Whether you’re looking for responsive design, ease of use, or quick integration, Elfsight offers a complete solution with minimal effort. You don’t need to write code or worry about browser compatibility — just build your form visually and embed it where you need it.
Looking for More Help?
We hope this guide has answered your questions. If you’re ready to explore more ways to create dynamic forms for your website, contact us — our team is here to assist. At Elfsight, we’re committed to offering intuitive, no-code widget solutions tailored to your needs.
Join our growing Community to exchange ideas and learn from others. Have a feature request in mind? Drop your suggestions in our Wishlist — we’re always improving based on your feedback.