If you need to add dynamic, real-time calculation functionality to your web pages, an API can be the solution. It allows you to run calculations directly within your interface, enhancing user experience and delivering accurate results instantly.
This is especially valuable for businesses in finance, e-commerce, and other sectors where users frequently need to estimate costs, interest, total pricing, or conversions. Whether you’re a developer or a business owner, using a calculator API can streamline your operations and simplify user interaction.
- Instant results without page reloads. Users get real-time feedback as they enter data, improving flow and engagement.
- Reliable numeric processing interface. APIs are designed for consistent accuracy, reducing manual errors in financial or technical calculations.
- Seamless client-side API integration. A calculator can be embedded into your layout with minimal disruption and maximum flexibility.
- Enhanced user experience with web-based computation services. Modern interfaces with live outputs feel more interactive and trustworthy to visitors.
Now that you know why it’s useful, let’s look at how to set up and use the calculator API on your own website step by step.
How to Use the Calculator API Step-by-Step
Now, it’s time to explore how to create a calculator for your website. Whether you’re adding a finance calculator, a custom conversion tool, or a basic arithmetic engine, this process will allow you to embed real-time functionality that boosts user experience and interactivity.
Below, you’ll find a simple guide to making your first integration.
- Choose a calculator API provider. Start by picking a universal calculator API that fits your needs — look for one that’s well-documented, reliable, and ideally offers a free plan to begin testing.
- Get your API key or access token. Register with the provider and generate your personal API key. This key allows you to authenticate and securely communicate with the backend endpoints.
- Review the API documentation thoroughly. Pay attention to endpoints, supported operations, expected parameters, and sample requests. This ensures that you know exactly how to format your API calls.
- Test your first API request. Tools like Postman or cURL can help you simulate the API call. Begin with simple operations to make sure everything works before embedding it in your website code.
- Write and embed the API logic in JavaScript. Use fetch or XMLHttpRequest to send input values to the API and receive results in real time. Update the DOM with the returned values dynamically.
- Display the response data on your website. Once the calculation result is returned, insert it into your layout using innerHTML or similar methods. This creates a seamless, dynamic user experience.
- Handle errors and edge cases gracefully. Use try-catch blocks and input validation to protect against empty fields, non-numeric input, or server issues.
- Test across devices and browsers. Ensure that your implementation works consistently on all screen sizes and browsers. Responsive design and performance checks are critical for a polished experience.
As you implement these steps, you’ll gain a better understanding of how backend API endpoints interact with frontend interfaces. Even a simple calculator can transform how users engage with your content and make decisions faster.
And if you’re interested in customizing even more — or want to create an API from scratch tailored to your specific use case — the next section will guide you through building your own calculator API with full control over its logic and performance.
Build Your Own Calculator API from Scratch
If you’re looking for maximum control and customization, building your own calculator API is a great option. Whether you’re using JavaScript, Python, or Java, a self-developed solution gives you full command over every aspect — from endpoint logic to how the server handles math operations. It’s a solid choice for developers building apps that require specific rules or integrations beyond what public APIs offer.
Step 1: Set up your project environment
Begin by selecting your preferred programming language and framework. For example, you can use Express with Node.js, Flask with Python, or Spring Boot with Java. Initialize your project, install dependencies, and create a basic server file to handle requests.
Step 2: Define routes and operations
Design the endpoints that users will call to perform calculations. Create routes like /add, /subtract, or a universal /calculate endpoint. Each route should accept parameters via query strings or JSON bodies, depending on the method used.
Step 3: Implement core calculation logic
Within each endpoint, add the script-based arithmetic handler that will process inputs. Use simple operators (+, −, ×, ÷) to return the result. Make sure to handle edge cases like division by zero or invalid input types.
const express = require('express');
const app = express();
app.use(express.json());

app.post('/calculate', (req, res) => {
  const { a, b, operation } = req.body;
  let result;

  switch (operation) {
    case 'add': result = a + b; break;
    case 'subtract': result = a - b; break;
    case 'multiply': result = a * b; break;
    case 'divide': result = b !== 0 ? a / b : 'Error'; break;
    default: result = 'Invalid operation';
  }

  res.json({ result });
});

app.listen(3000, () => console.log('API running on port 3000'));
You can extend this basic API to include more operations, validations, or even connect it to a database for logging inputs and results.
Step 4: Send structured responses
Ensure your API returns data in a clean format such as JSON. This should include the result, status, and optional error messages. A well-structured server response for math operations will make integration easier for the frontend.
Step 5: Test and refine your API
Use Postman or your browser to test endpoints and validate the logic. If you’re building a calculator API in Python or Java, make sure to check compatibility with external clients or systems. Fine-tune the performance and error handling for stability.
Step 6: Deploy your API and go live
Host your API using platforms like Vercel, Heroku, or your own server. Once live, it can be accessed by any application or website. If needed, use a WSDL structure to define the API as a web service for SOAP-based integrations.
Of course, coding your own calculator API takes time and technical effort. If you’re looking for a faster way to get interactive calculation on your website — without writing a single line of code — the next section introduces a simple no-code alternative.
Create a Calculator Widget Without Any Code
If coding isn’t your thing or you simply want to save time, Elfsight offers a no-code calculator widget for your website. It’s designed for everyone — from marketers to business owners — and lets you publish a visual calculator in minutes, without touching a single line of code.
Below is a full walkthrough of how to create and embed your own calculator using Elfsight’s drag-and-drop builder. This method is ideal for those looking for a plug-and-play API component that’s visually customizable and requires zero technical background.
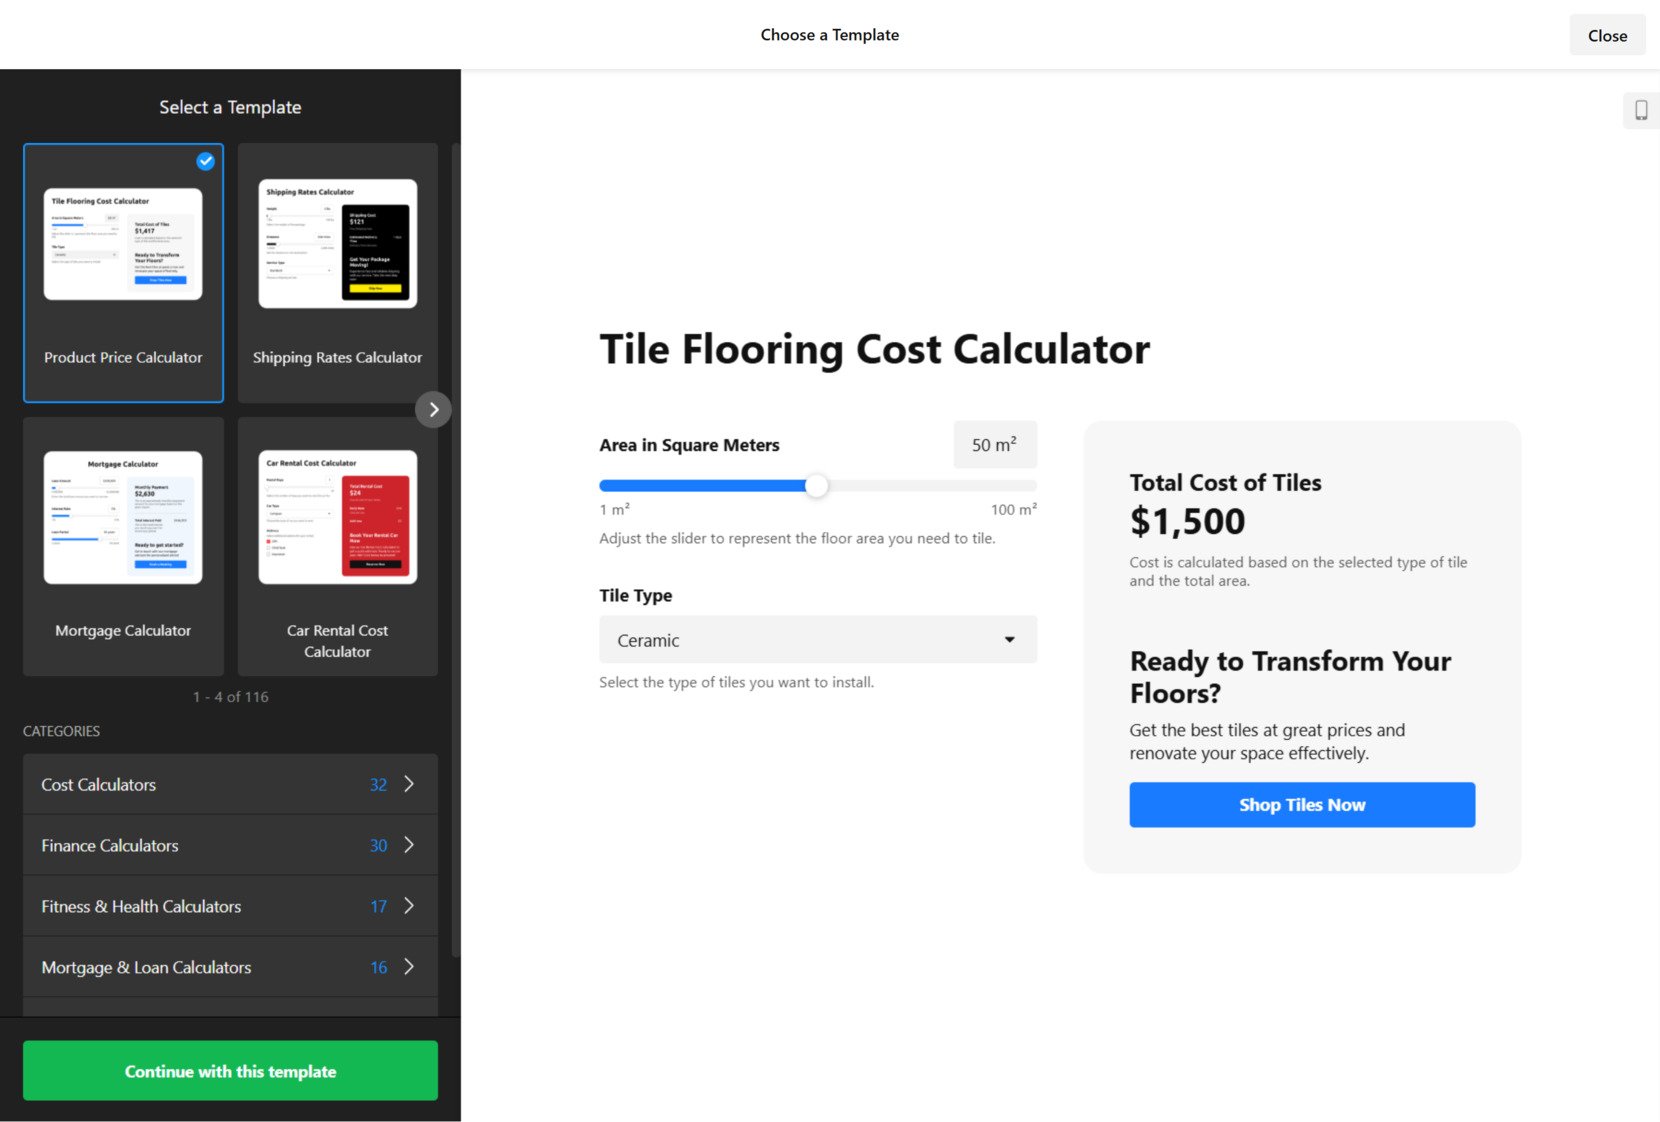
- Choose a Template. Open the calculator editor and start by browsing the available layouts — like cost, finance, or pricing calculators. Click “Continue with this template” to proceed with the design of your selected layout.

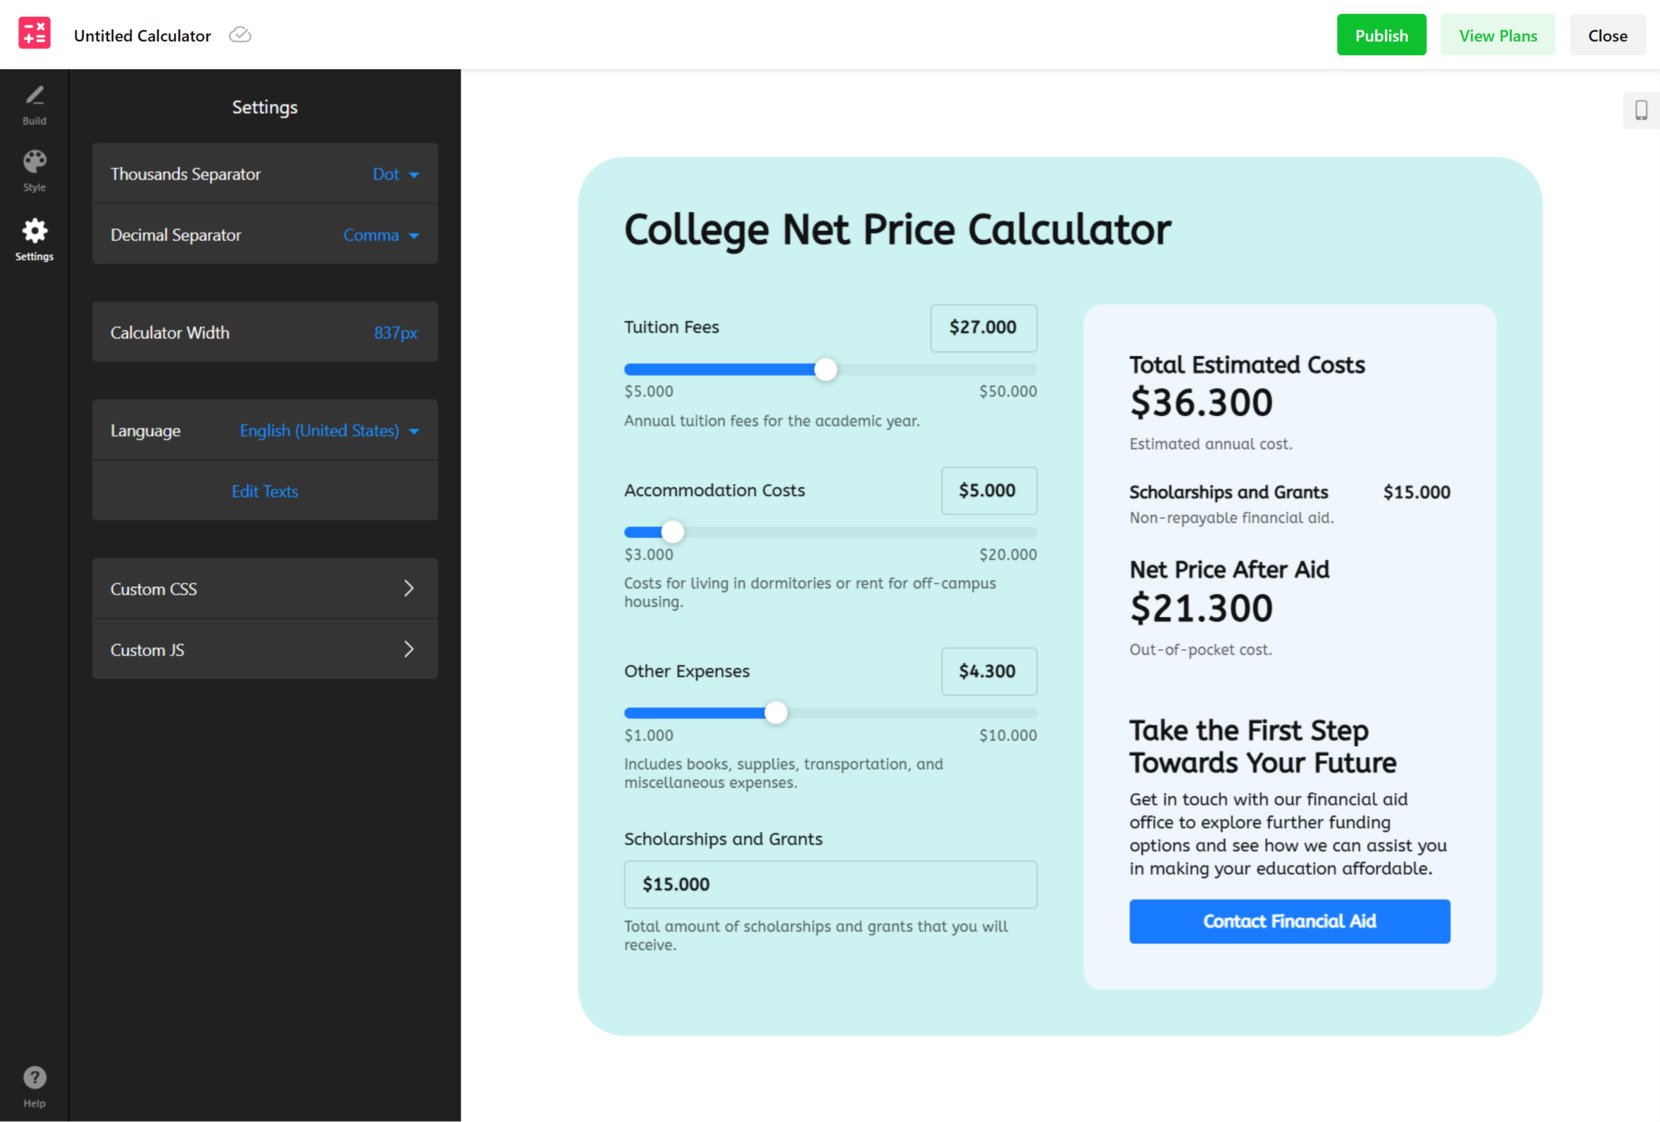
- Build Your Fields and Calculations. On the “Build” tab, add adjustable input fields such as tuition fees, housing costs, or other variables. Then, scroll to the “Calculations” section and define formulas like “Net Price After Aid” or “Total Estimated Costs”. You can manually create them or use Elfsight’s AI Calculator Generator to auto-generate based on your text description.
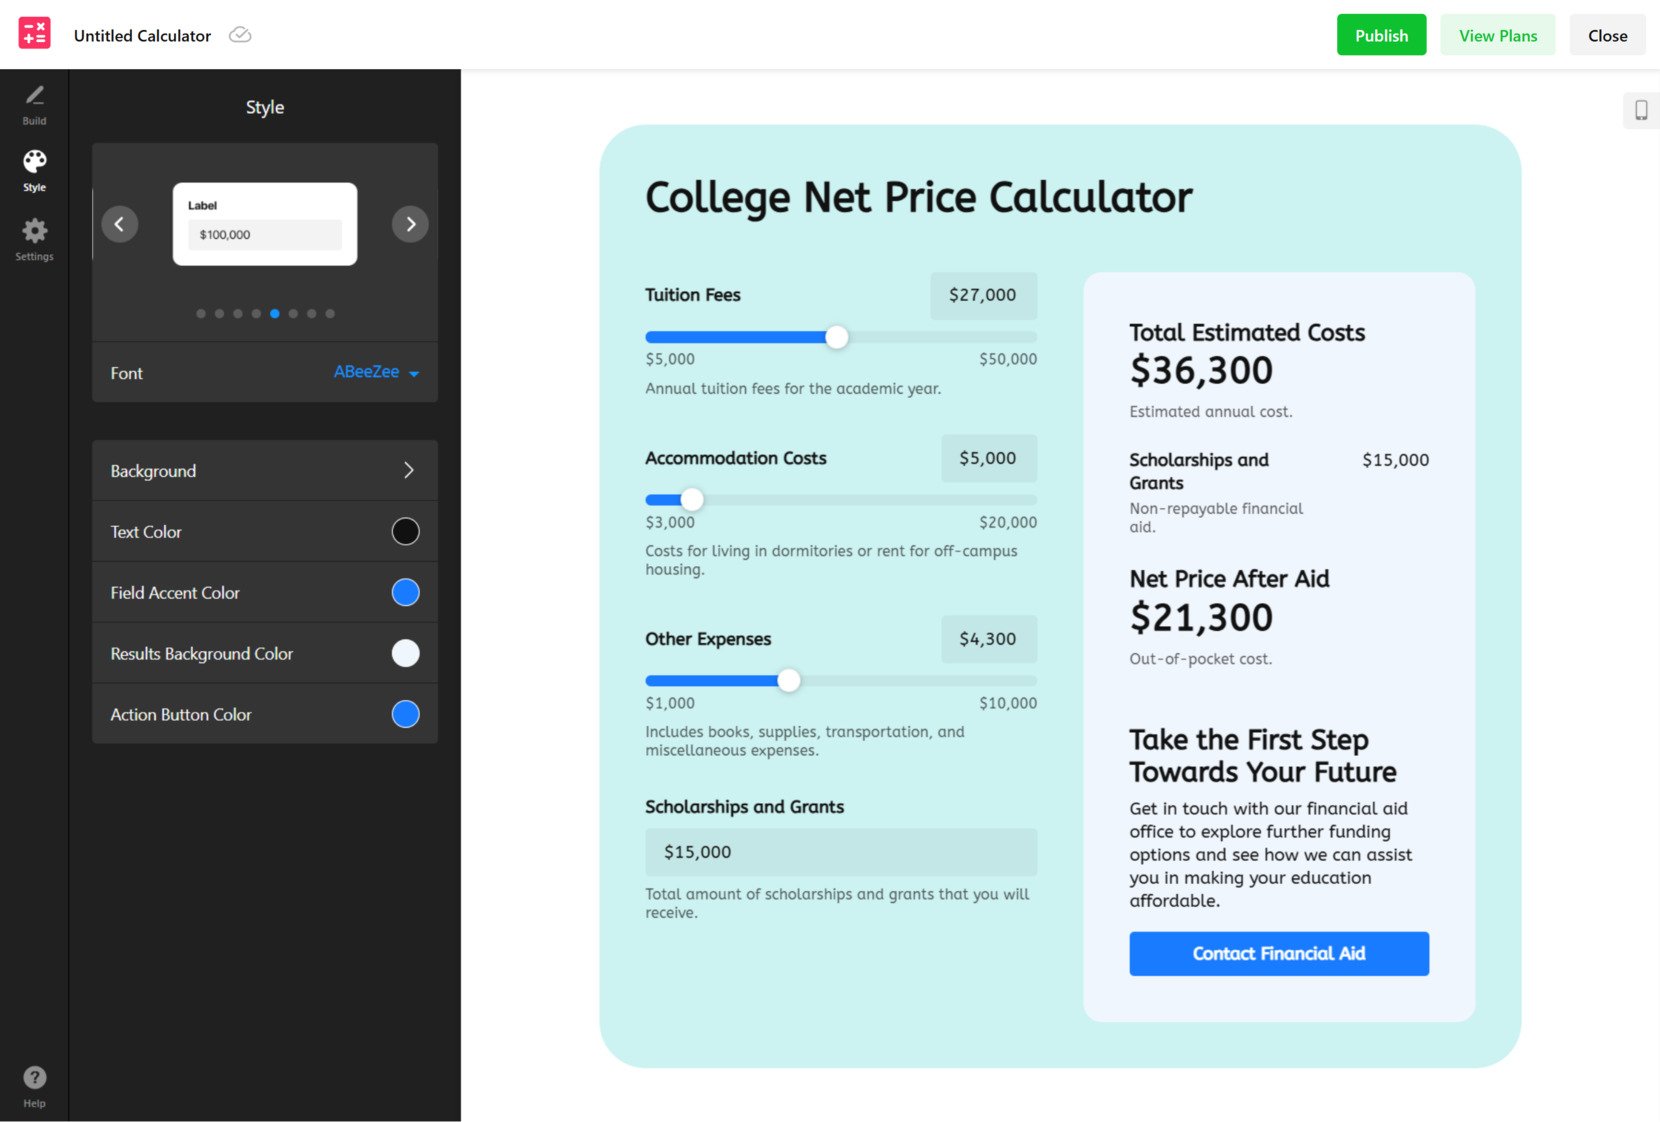
- Style Your Calculator. In the “Style” tab, you can customize how your calculator looks. Change the font, background, text color, field accent, and action button to match your branding. You’ll see the changes applied live on the right preview panel.
- Configure Settings and Language. Go to “Settings” and set options like the thousands/decimal separators, width of the calculator block, and language. You can also edit text labels or insert custom CSS and JavaScript for extra functionality.
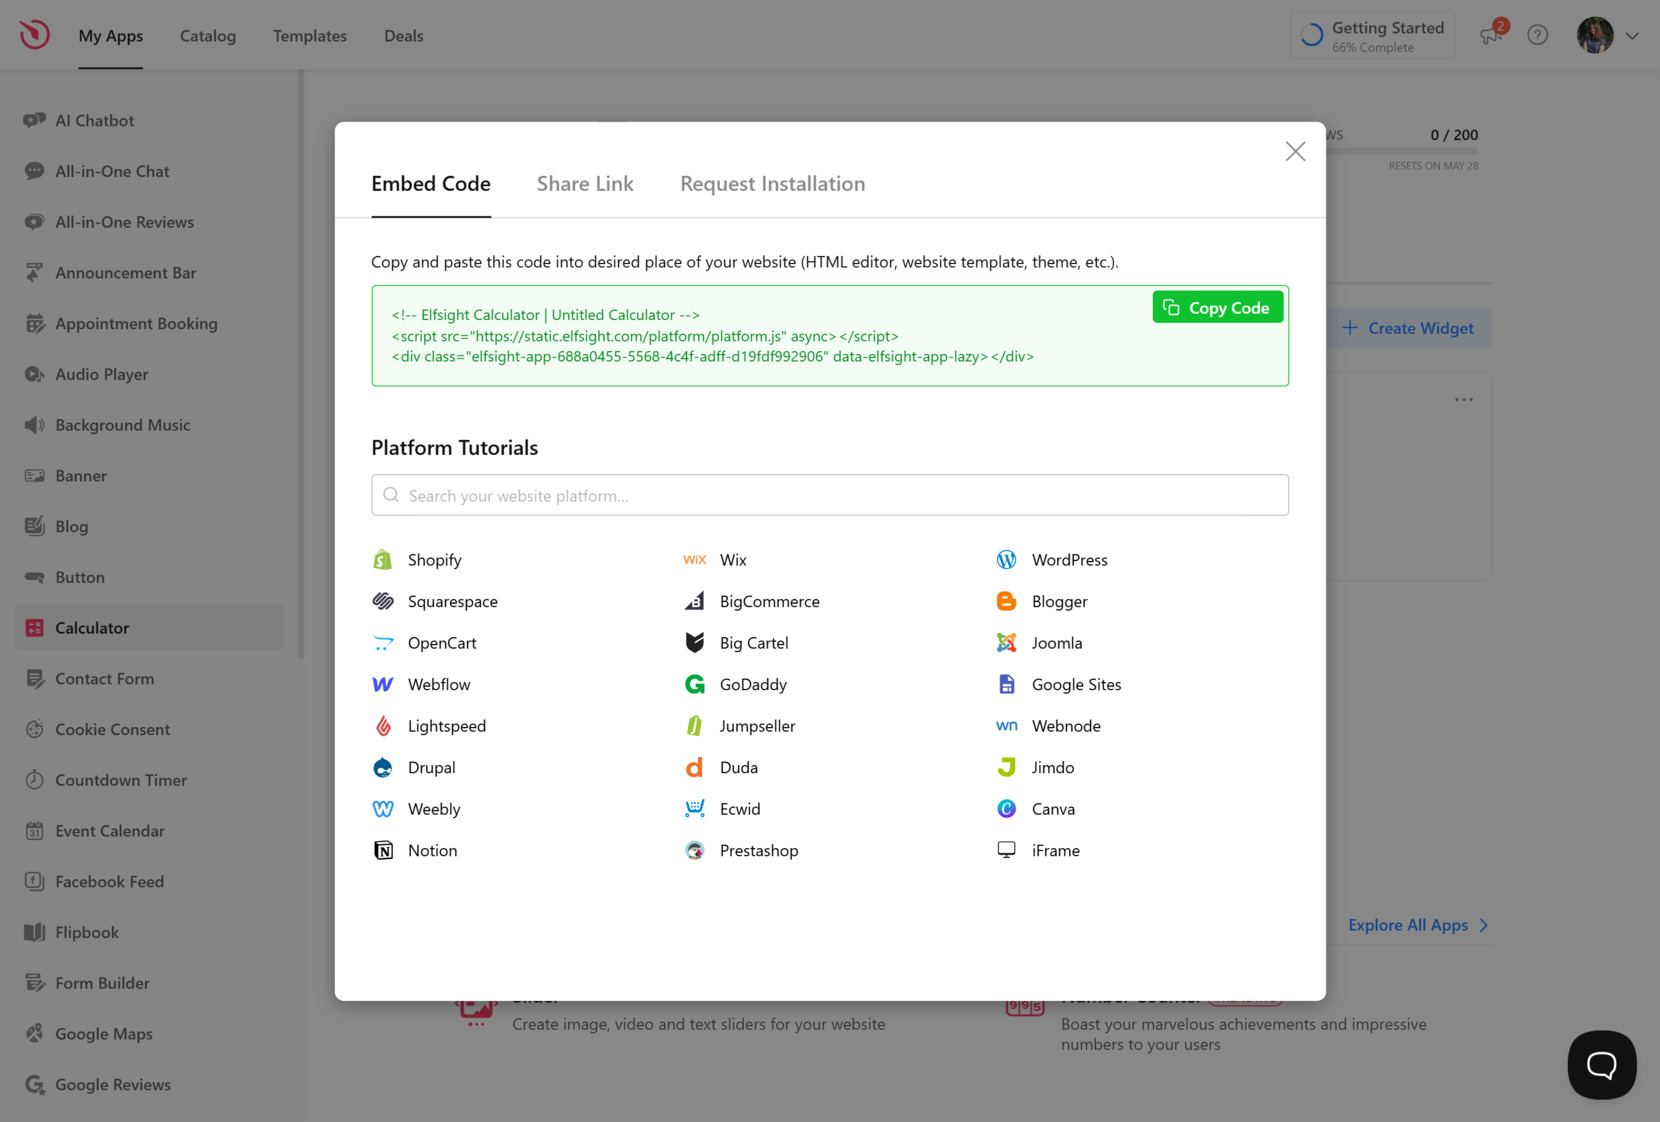
- Embed the Calculator on Your Website. Once your calculator is ready, click “Add to website for free”, then copy the embed code. Paste this code into your website’s HTML editor, block, or custom code section.

With just a few clicks, your calculator becomes a fully interactive visual element that engages visitors and simplifies decision-making. Next, we’ll break down all the features you get when using the Elfsight calculator widget — beyond the visual builder itself.
Ready to try it yourself? Build your own calculator in just a few clicks!
Key Features of the Elfsight Calculator
Elfsight’s calculator widget isn’t just an alternative to a traditional calculator web API — it’s a complete, flexible solution packed with features for building advanced, interactive calculators without writing code. This block will walk you through what makes the Elfsight generator a strong choice.
Here are the main features and benefits that make Elfsight’s visual calculator a powerful solution for non-developers and advanced users alike:
- Flexible visual configuration panel. Customize fields, formulas, sliders, currency formats, and layouts in a fully visual editor — no coding required.
- Pre-built templates for different use cases. Choose from cost calculators, finance tools, loan estimators, and more, all ready for quick launch and easy editing.
- Drag-and-drop builder. Add, remove, or rearrange input fields and calculated results instantly using an intuitive drag-and-drop interface.
- Responsive design across all devices. Every calculator is automatically optimized to look perfect on desktop, tablet, and mobile without manual tweaks.
- Smart field and value formatting. Choose separators, number rounding, and input behaviors to suit any financial or pricing calculation requirement.
- Custom CSS and JS support. For advanced styling or logic control, add your own CSS or JavaScript code to further extend your calculator’s capabilities.
- Automated updates and hosting. Your calculator is hosted on Elfsight’s cloud, with instant updates and zero maintenance from your side.
These features combine to offer a strong alternative to complex cost calculator APIs and backend-heavy solutions. In the next section, we’ll show you where and how to embed your new calculator on different platforms — using raw HTML or CMS-specific methods.
No-Code vs API: Which One’s Better?
Now that you know how to embed the calculator on your website, let’s explore why a no-code solution is often the better alternative to manual coding or using a calculator API. This approach offers practical advantages in speed, usability, and long-term reliability.
| Advantage | Description |
|---|---|
| Faster deployment | Launch your calculator in minutes without backend setup or coding. |
| No technical skills needed | Build and manage your calculator visually — no developer required. |
| Responsive, consistent design | Automatically adapts to all screen sizes and integrates smoothly into your layout. |
| Lower risk of errors | Pre-built logic ensures accurate calculations and fewer issues. |
| Maintenance-free operation | The widget is hosted, updated, and monitored by Elfsight. |
| Real-time editing | Adjust the content, formulas, or design instantly from the dashboard. |
| Automatic updates | Performance, security, and compatibility improvements happen in the background. |
| Platform-wide compatibility | Works flawlessly on WordPress, Shopify, Webflow, and other CMS platforms. |
Choosing a visual calculator over manual API integration means fewer risks, faster execution, and an easier workflow. Next, we’ll break down why choosing a no-code calculator solution can often be a smarter option than building one from the ground up via API.
Embed Your Calculator on Any Website
Once your calculator is fully customized, it’s time to publish it where your visitors can interact with it. The Elfsight calculator is designed to be universally embeddable — you can insert it into raw HTML or integrate it with all major CMS and ecommerce platforms.
Below is a detailed guide on how to embed the calculator across different platforms, including recommended placement options for maximizing visibility and conversions:
| Platform | How to Embed | Recommended Placement |
|---|---|---|
| HTML | Copy the widget embed code and paste it inside a <div> or custom code block in your page’s HTML structure. | Pricing sections, conversion forms, service estimate blocks |
| WordPress | Use the “Custom HTML” block in the Gutenberg editor or embed inside Elementor, WPBakery, or Divi modules. | Product pages, sidebars, homepage feature sections |
| Shopify | Paste the code into your theme’s product template, custom page sections, or dynamic checkout previews via the theme editor. | Product detail pages, price calculators, shipping estimate areas |
| Wix | Use the “Embed HTML” element from the Wix Editor, then paste the code inside the block. | Service landing pages, booking flows, pricing comparisons |
| Webflow | Drag in an “Embed” element from the components panel and insert the code directly into your layout. | Quote request pages, pricing builders, lead generation sections |
| Squarespace | Add a “Code” block to any page or section, then paste in the widget script. | Contact sections, service cost breakdowns, homepage banners |
| BigCommerce | Use the Script Manager or edit template files to insert the calculator where needed. | Checkout flows, shipping estimate pages, product bundles |
| Joomla | Insert the embed code into an article using the HTML editor or load it as a module position. | Content blocks, product overviews, calculators in sidebars |
| Drupal | Use the Full HTML input format and paste the code in a custom block or content region. | Landing pages, donation forms, cost calculators |
Whether you’re working in a flexible builder like Webflow or inserting code manually, Elfsight’s calculator widget is lightweight, responsive, and easy to publish anywhere on your website.
Now, we’ll cover quick troubleshooting tips in case your calculator doesn’t appear or function correctly after embedding.
Fixing Common Issues
Even with a smooth setup, occasional issues may occur when embedding your interactive calculator. Below you’ll find a list of common problems and simple fixes to help you resolve them quickly without needing technical support.
Why isn't my calculator appearing on the page after embedding?
Why does the calculator look broken or misaligned on my page?
What should I do if the calculator doesn’t load on mobile?
Can JavaScript conflicts prevent the calculator from loading?
Why does the calculator load slowly or appear delayed?
With these solutions, most issues can be resolved without needing to modify code or request developer help.
Final Thoughts
Creating a functional, reliable calculator for your website doesn’t have to involve complex APIs or manual coding. With a no-code calculator widget from Elfsight’s, you can implement a custom solution in minutes — no backend setup, debugging, or design conflicts. From fast deployment to responsive design and seamless integration, it’s built to offer everything a modern website needs to deliver real-time, interactive calculations.
Whether you’re a developer looking for quick implementation or a business owner aiming to enhance user experience, the calculator widget provides a streamlined alternative to calculator APIs. Its visual editor, one-click integration, and broad platform compatibility make it the simplest path to adding math functionality to your pages.
Need More Help?
We hope this article gave you a clear understanding of how to add a calculator to your website. If you still have questions or want guidance tailored to your use case, reach out to our team — we’re here to support your success. At Elfsight, our goal is to make powerful, code-free solutions accessible to everyone.
We also invite you to be part of our Community to exchange ideas, ask questions, and stay updated with the latest features. Got an idea to improve the widget? Share it with us on our Wishlist — we value your input and innovation.