Google Maps is an essential tool for businesses looking to provide accurate location information to their website visitors. Whether you’re a local shop, a service provider, or an enterprise, adding an interactive map to your website enhances user experience and accessibility.
If you’re looking to make your website more interactive and user-friendly, creating a Google Map is one of the best solutions. It not only helps with navigation but also increases trust and engagement with your audience. By using a Google Maps widget, you can customize the map according to your needs, from adding multiple locations to changing the visual style.
Here’s why it’s an essential tool for every business website:
- Boost visibility. Help users find your business easily by displaying your exact location on an interactive map.
- Improve user engagement. An embedded map can keep users on your website longer, increasing the chance of conversions.
- Enhance professionalism. A Google Maps widget adds a polished, high-quality feature that makes your website look more reliable and professional.
Now, let’s dive into how you can easily implement this utility with Elfsight’s simple solution.
Make Your Own Google Maps Widget in Minutes
Creating a custom Google Maps widget for your website with Elfsight is quick and simple. Follow these easy steps to get your map up and running in no time:
- Open the editor and choose one of the templates.
- Select your desired layout and customize the map’s settings, such as size, zoom levels, etc.
- Adjust the design by selecting colors, fonts, and styles to ensure the map matches your website’s overall look.
- Click “Add to website“, copy the generated code, and paste it into the backend of your website.
Ready to try the widget? Build your own Google Maps in 1-2-3!
Features of the Google Maps Widget
The Google Maps widget by Elfsight is designed to help website owners create a fully interactive and customizable map with ease. Below are the key features and benefits that make this widget an excellent choice for your website:
- Customizable Markers. Add multiple locations to your map with personalized markers, making it easier for users to find points of interest on your site.
- Responsive Design. The widget automatically adapts to any screen size, ensuring a seamless experience across all devices, including mobile phones and tablets.
- Easy Integration. Add the widget to your website in minutes with simple copy-paste installation – no coding required.
- Multiple Styling Options. Customize colors, fonts, and other design elements to match your website’s theme, ensuring a cohesive look and feel.
- Zoom and Navigation Features. Enable zoom and drag features to enhance the interactivity of your map and give users full control over their experience.
- SEO-Friendly. The widget’s design is optimized to prevent slow loading times, ensuring that your website remains fast and responsive.
With these features, Elfsight’s Google Maps widget offers everything you need to provide a highly engaging map for your website visitors.
How to Set Up Google Maps with Elfsight
Now, let’s explore in detail how you can customize this widget to get the most out of its potential. Whether you’re adding a map with a single location or multiple locations, Elfsight makes the process simple and efficient.
Here are the steps for making your widget truly unique:
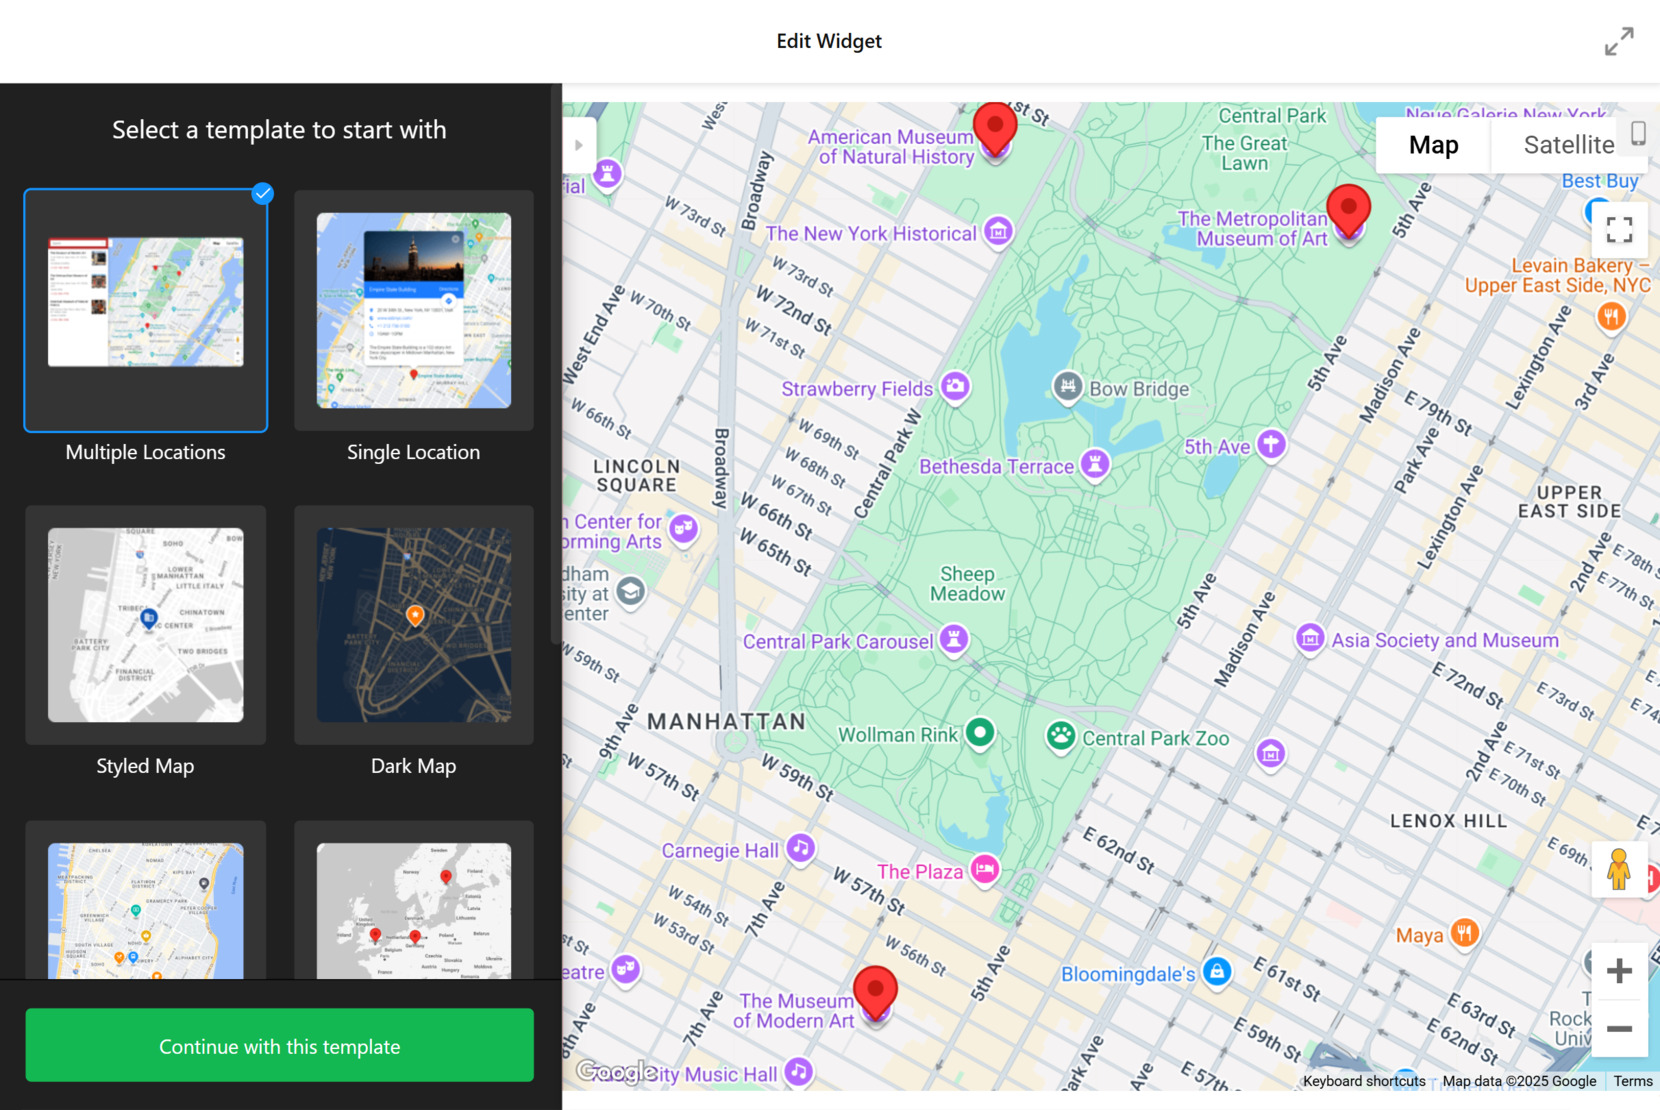
- Choose a Template. Open the widget editor and select a template that best suits your needs. After selecting your preferred template, click “Continue with this template” to proceed.

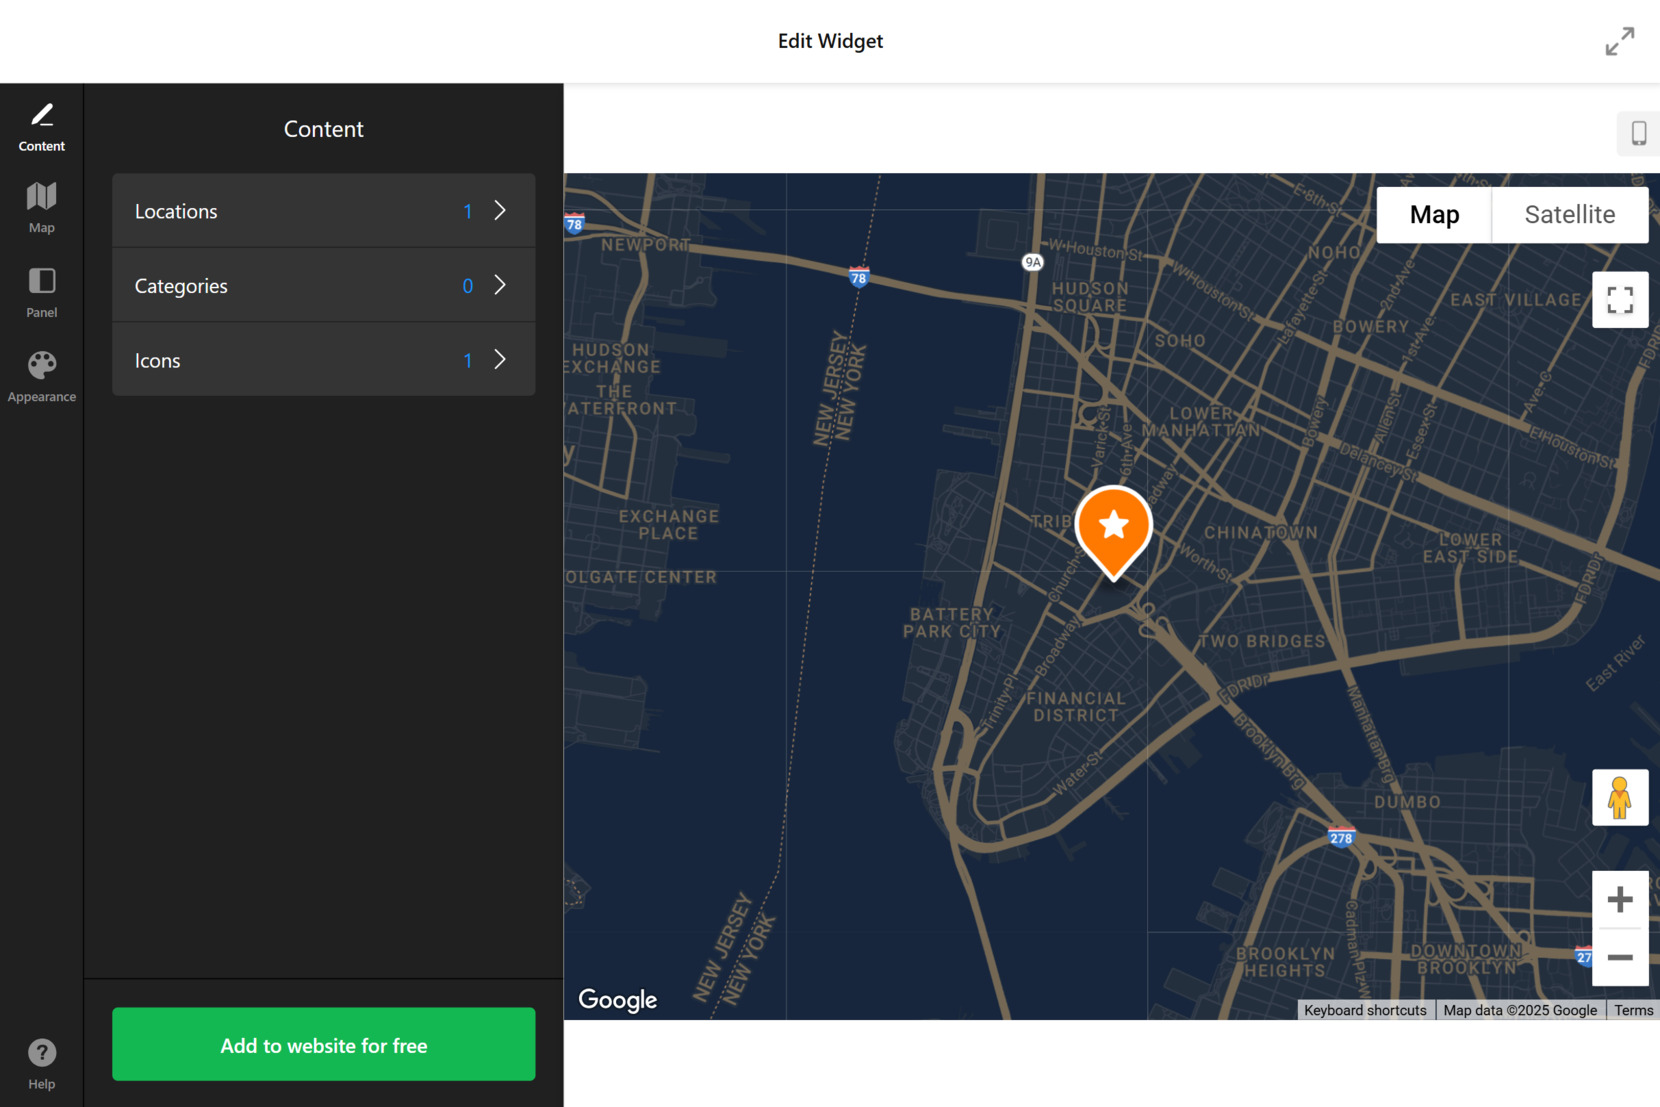
- Add Locations. In the “Content” tab, provide information about your company such as Locations, Categories (if you’re creating a multiple-location map), and Icons.

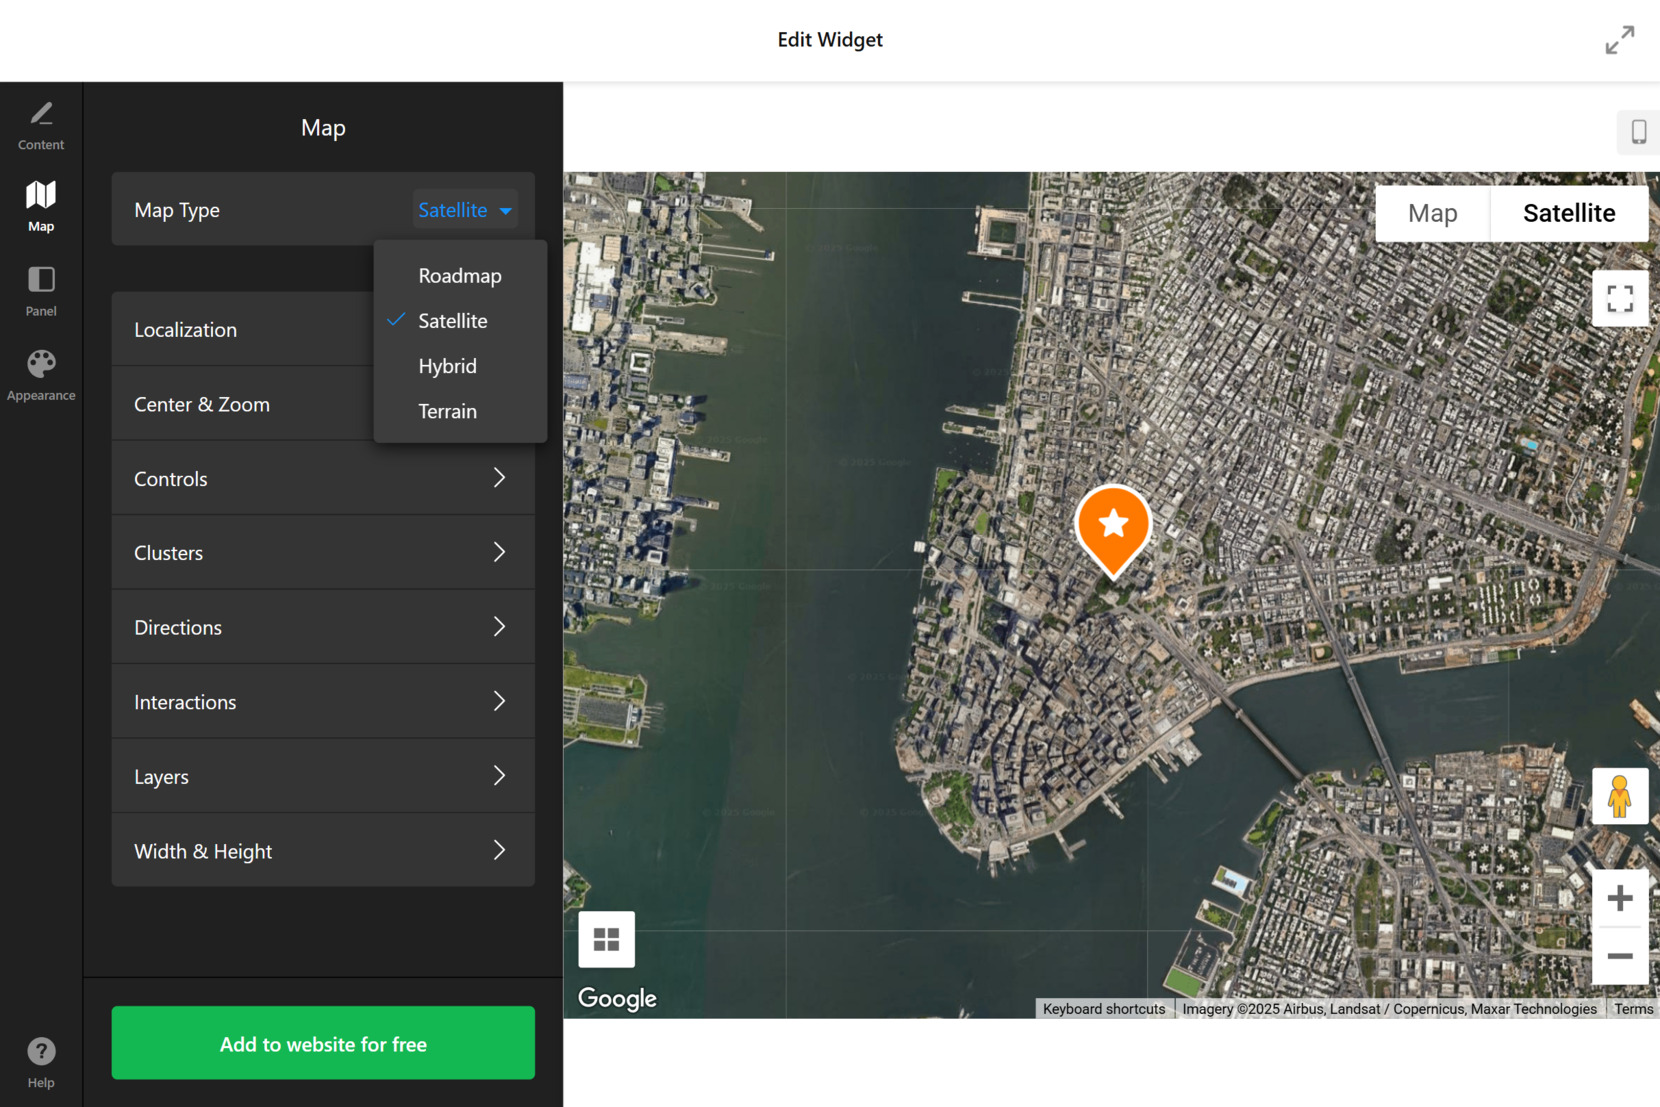
- Choose the Map Type. Under the “Map” section, set how you want your map to look like: Satellite, Roadmap, Hybrid, or Terrain. You can also adjust other parameters such as Localization (pick units), allow Directions, add Interactions elements, etc.
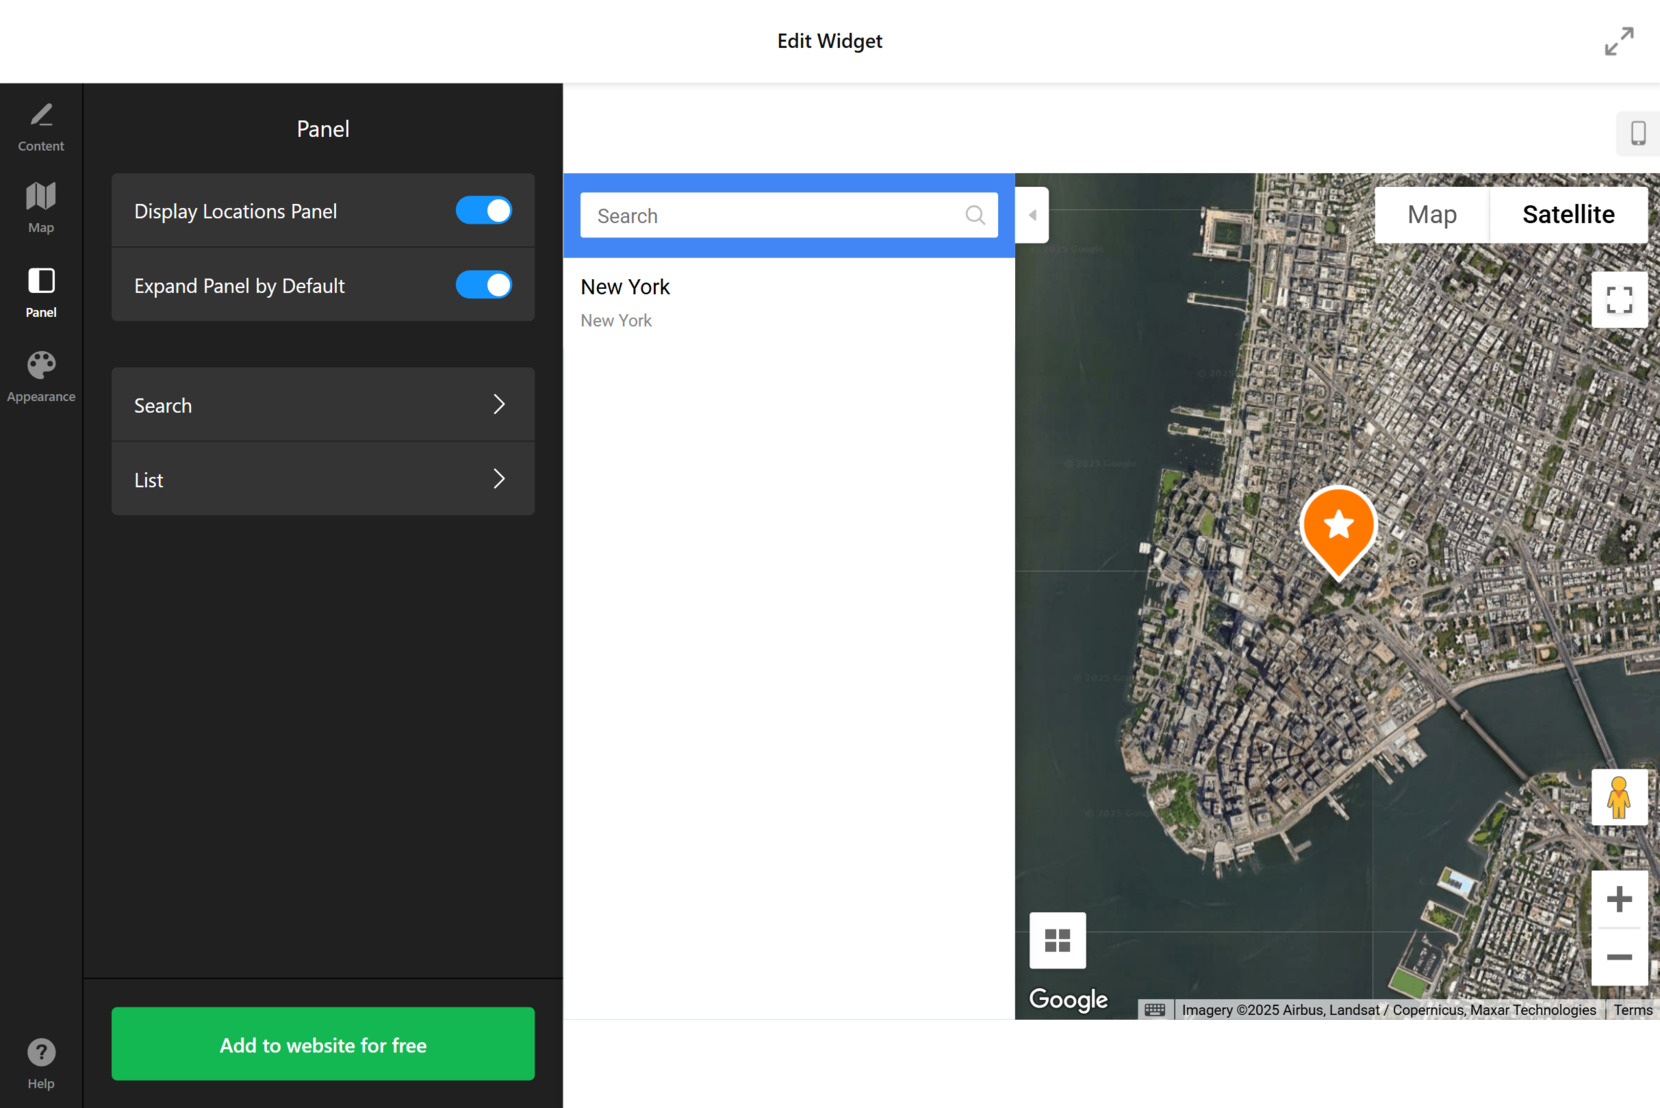
- Adjust Panel Settings. The “Panel” section enables you to display a location panel on the map. You can toggle on the “Display Locations Panel” and select whether the panel should expand by default.

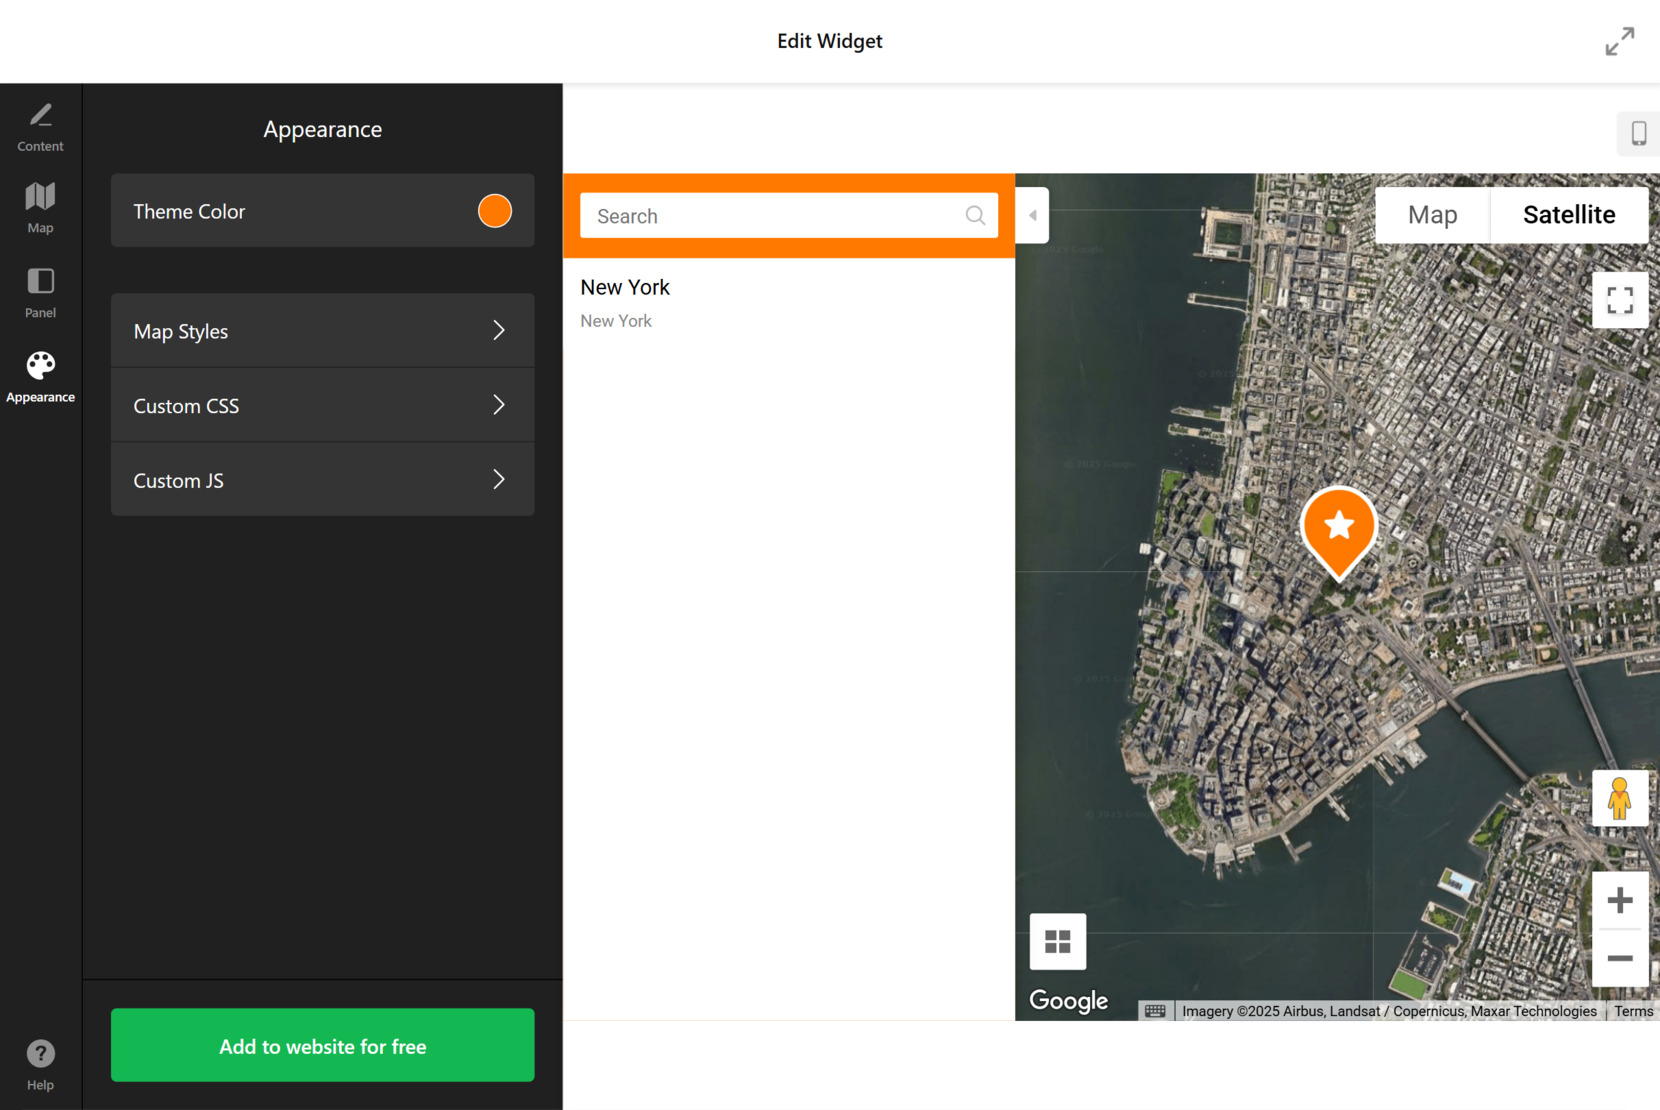
- Finalize the Widget’s Design. Under the “Appearance” tab, select the Theme Color and style for your map. Adding Custom CSS and JS elements is also possible.
- Embed Google Maps to Your Website Once you’re satisfied with the design and settings, click “Add to website for free” to generate the embed code. Copy this code and paste it into the appropriate section of your website’s backend.


With these simple steps, you’ve successfully created and added a Google Map to your website using Elfsight’s user-friendly editor. If you want to explore alternative methods for integrating Google Maps, the next section will provide some options.
Alternative Methods for Adding Google Maps
While Elfsight offers a simple and customizable solution for building Google Maps for your website, there are alternative methods to do so. Below, we’ll explore a few of these methods and provide step-by-step instructions on how to use them, allowing you to make an informed decision based on your needs.
Official Google Maps API
One of the most common alternatives to using a widget is the Google Maps API. This method gives you full control over how the map is embedded, styled, and customized.
Here’s what you need to do to cfreate a Google Map with this tool:
- Go to the Google Cloud Console. Sign in with your Google account, or create a new one if necessary.
- Create a new project by clicking on “Select a Project” and then “New Project”. Give it a name and click “Create”.
- In the sidebar, go to the “APIs & Services” section and select “Library“. Search for “Google Maps JavaScript API” and click on it. Click the “Enable” button to activate the Google Maps API for your project.
- Go to the “Credentials” tab and click “Create Credentials”. Select “API Key”. This key will be used to authenticate your API requests.
- Copy the API key and go to your website’s HTML code. Paste the following code in the head section of your HTML, replacing “YOUR_API_KEY” with the actual API key.
- Embed the map by adding the following code to your website where you want the map to appear. You can customize the map’s settings (zoom level, center, markers, etc.).
Using WordPress Plugins for Google Maps
If your website is built with WordPress, there are several plugins that can help you easily integrate Google Maps into your website. One popular plugin is WP Google Maps, which allows you to add a map with customizable markers to any page or post.
Here’s how to set it up a website map with this utility:
- In your WordPress dashboard, go to “Plugins” and then to “Add New“. Search for “WP Google Maps” and click “Install Now”.
- After the plugin is installed, click “Activate” to enable it on your website. Go to “Maps” in the WordPress sidebar and click “Add New Map”.
- In the map settings, you can adjust the zoom level, location, and map style. Add markers for the locations you want to display on the map.
- Once your map is set up, click “Save Map”. You will then receive a shortcode for the map.
- Copy the shortcode and paste it into any page or post where you want the map to appear.
Comparison Table
Here’s a comparison of the alternative methods and the Elfsight solution, highlighting the major pros and cons of each method:
| Method | Pros | Cons |
|---|---|---|
| Elfsight | Quick, easy installation with no coding required. Customizable design and functionality. Fully responsive and mobile-friendly. | Limited by the widget design options compared to full API customization. |
| Google Maps API | Complete control over map features and customization. Can scale for complex applications. | Requires technical knowledge to implement. Potential costs associated with high usage. |
| WP Plugin | Easy to install and set up for WordPress users. Simple map creation with options for customizing markers. | Limited customization compared to full API. Can’t be used on any other website builder apart from WordPress. |
Each method has its strengths and drawbacks. However, WP plugin and the official API soluitons require more customization and technical skills compared to using Elfsight, which offers an easier, no-code solution.
In the next section, we’ll explore some tips for making your Google Maps widget work to its fullest capacity.
Tips for Using Google Maps Widgets
Get the most out of your Google Maps widget on your website with some helpful tips to simplify the process and enhance the user experience. These best practices will help ensure that your map is not only functional but also adds value to your website.
- Choose the Right Template. When selecting a template for your Google Maps widget, make sure it aligns with your website’s purpose. For example, a single location template is great for business addresses, while multiple locations are ideal for showcasing several branches or points of interest.
- Customize Map Markers. Personalize your map markers to make them stand out. You can use different icons, colors, or even custom images to represent locations, making it easier for users to navigate and find the information they need.
- Keep the Map Clean. Avoid clutter by only displaying the most important locations on the map. Too many markers can overwhelm users and make the map less effective. Focus on key locations that provide the most value to your audience.
- Enable Directions for Convenience. Enable the directions button on your map to help users navigate to your location easily. Allow them to either get directions directly on the map or open them in Google Maps for a more detailed view.
- Optimize for Mobile. Ensure that the Google Maps widget is responsive, especially for mobile users. Maps that don’t adjust to different screen sizes can lead to a frustrating user experience. Elfsight’s widget automatically adjusts to mobile, but it’s always good to double-check the layout on multiple devices.
- Set Appropriate Zoom Levels. Customize the zoom level based on the level of detail you want to provide. Too much zoom will leave your users with a vague view, while too little will focus too much on a broad area. Strike a balance that makes your locations easy to find without overloading the map.
- Use Layers and Clusters Wisely. If you’re adding multiple locations, consider using the cluster feature to group nearby markers. This prevents your map from looking cluttered, especially when many locations are close to each other.
Follow these tips to improve the usability of your Google Maps widget and enhance the navigation experience for your website visitors. Next, we’ll explore use cases to see how different industries can benefit from integrating Google Maps into their websites.
Use Cases for Google Maps Widgets
Google Maps widgets can be implemented in a variety of industries to enhance user experience, provide location-based services, and improve navigation on websites. Below are some ways how major brands have successfully integrated Google Maps widgets into their websites.
Application in the Retail Industry
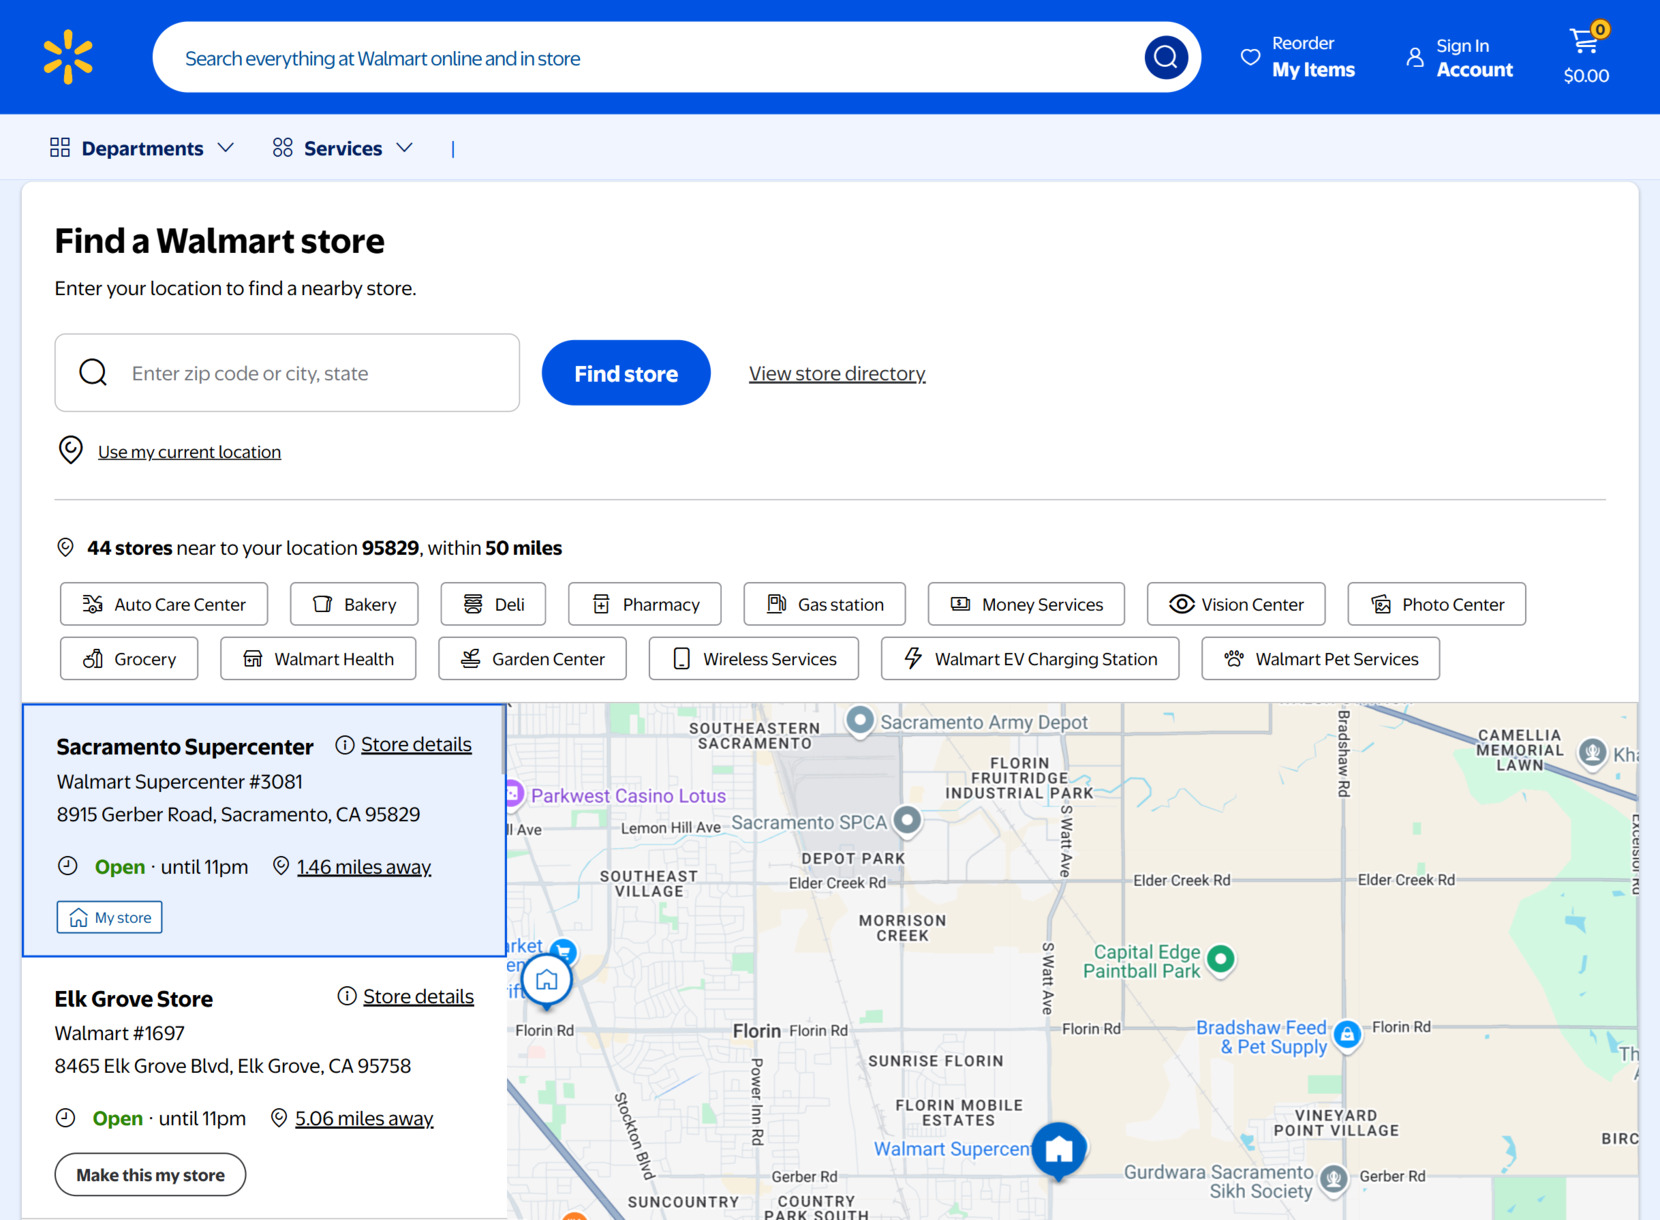
In the retail industry, businesses use Google Maps to help customers find store locations, plan their visits, and enhance their overall shopping experience. Retailers can display interactive maps showing the locations of their stores, along with additional information like store hours and contact details. This increases convenience and accessibility for customers, especially for multi-location brands.
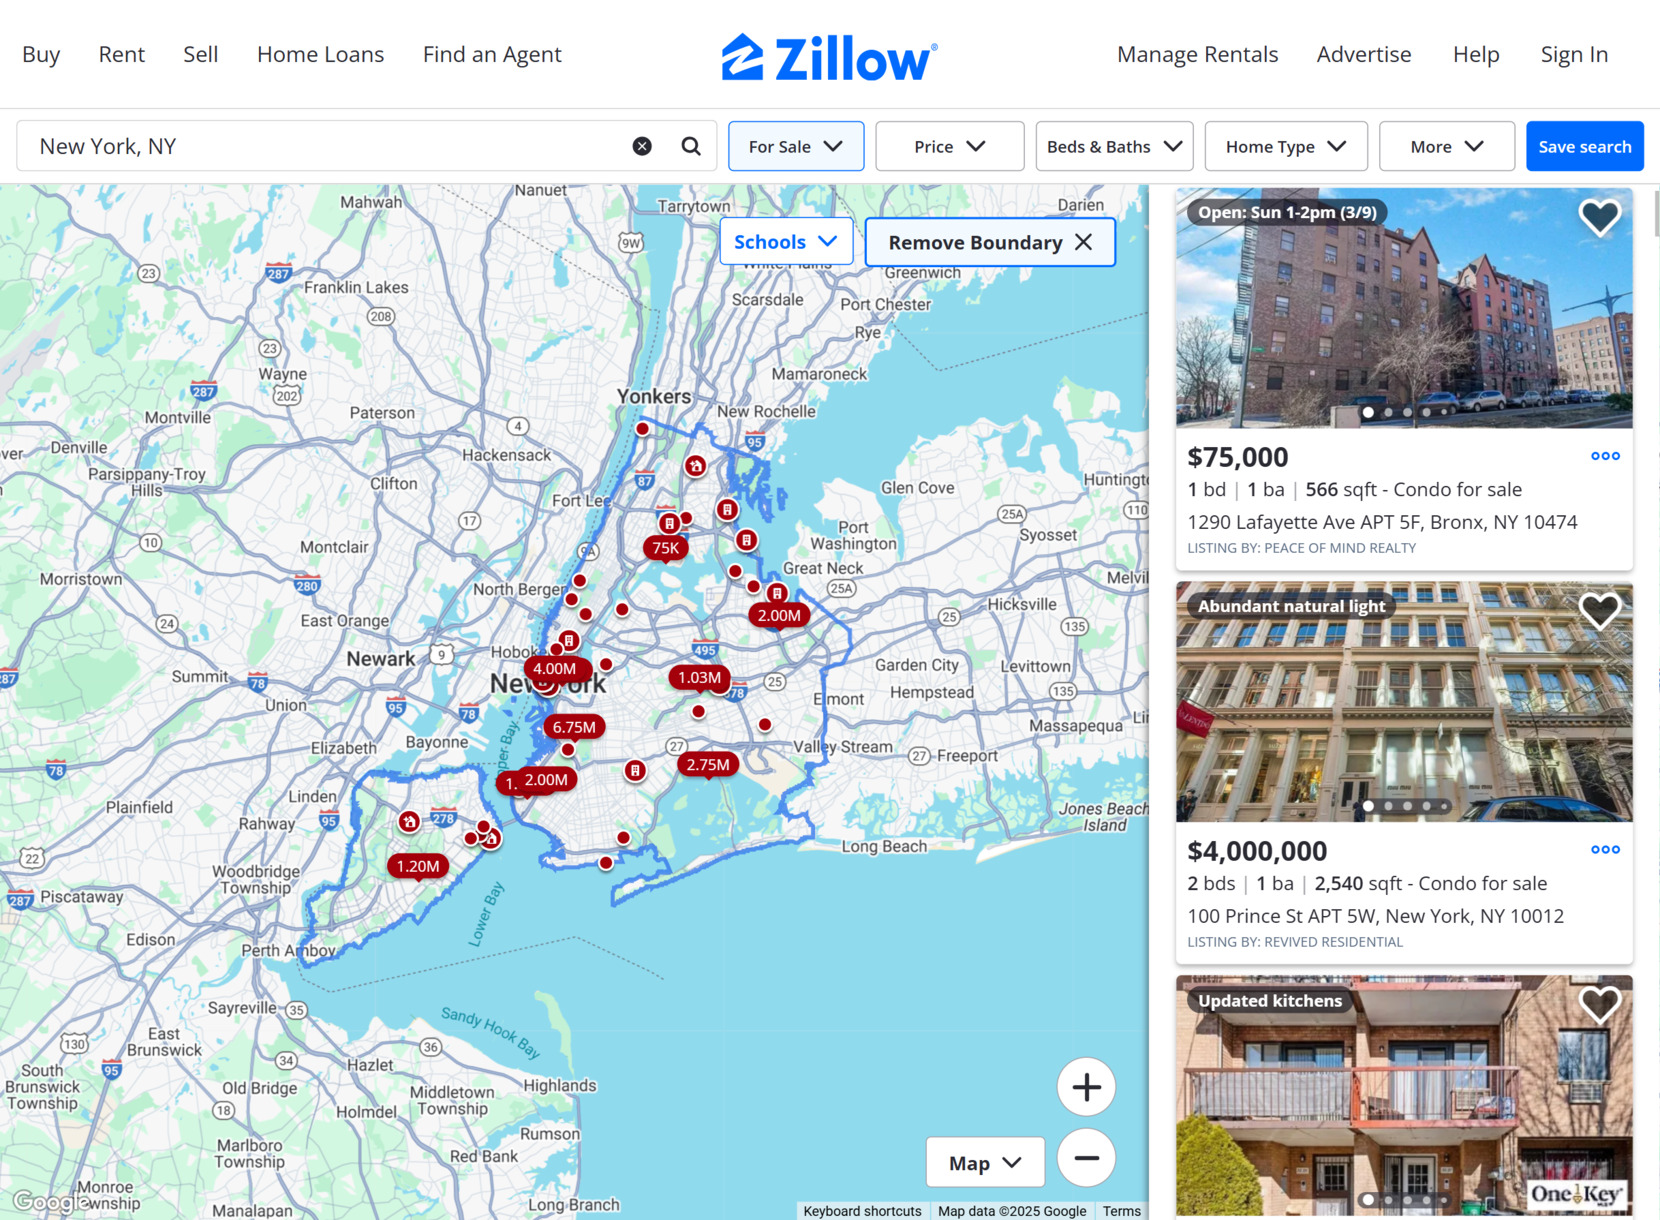
Application in the Real Estate Industry
For real estate businesses, Google Maps integration allow potential buyers or renters to explore property locations in great detail. Real estate websites integrate maps to show nearby amenities, neighborhoods, and schools, making it easier for users to understand the location and surroundings. Realtors can also highlight specific property listings on the map, providing an interactive experience for potential clients.
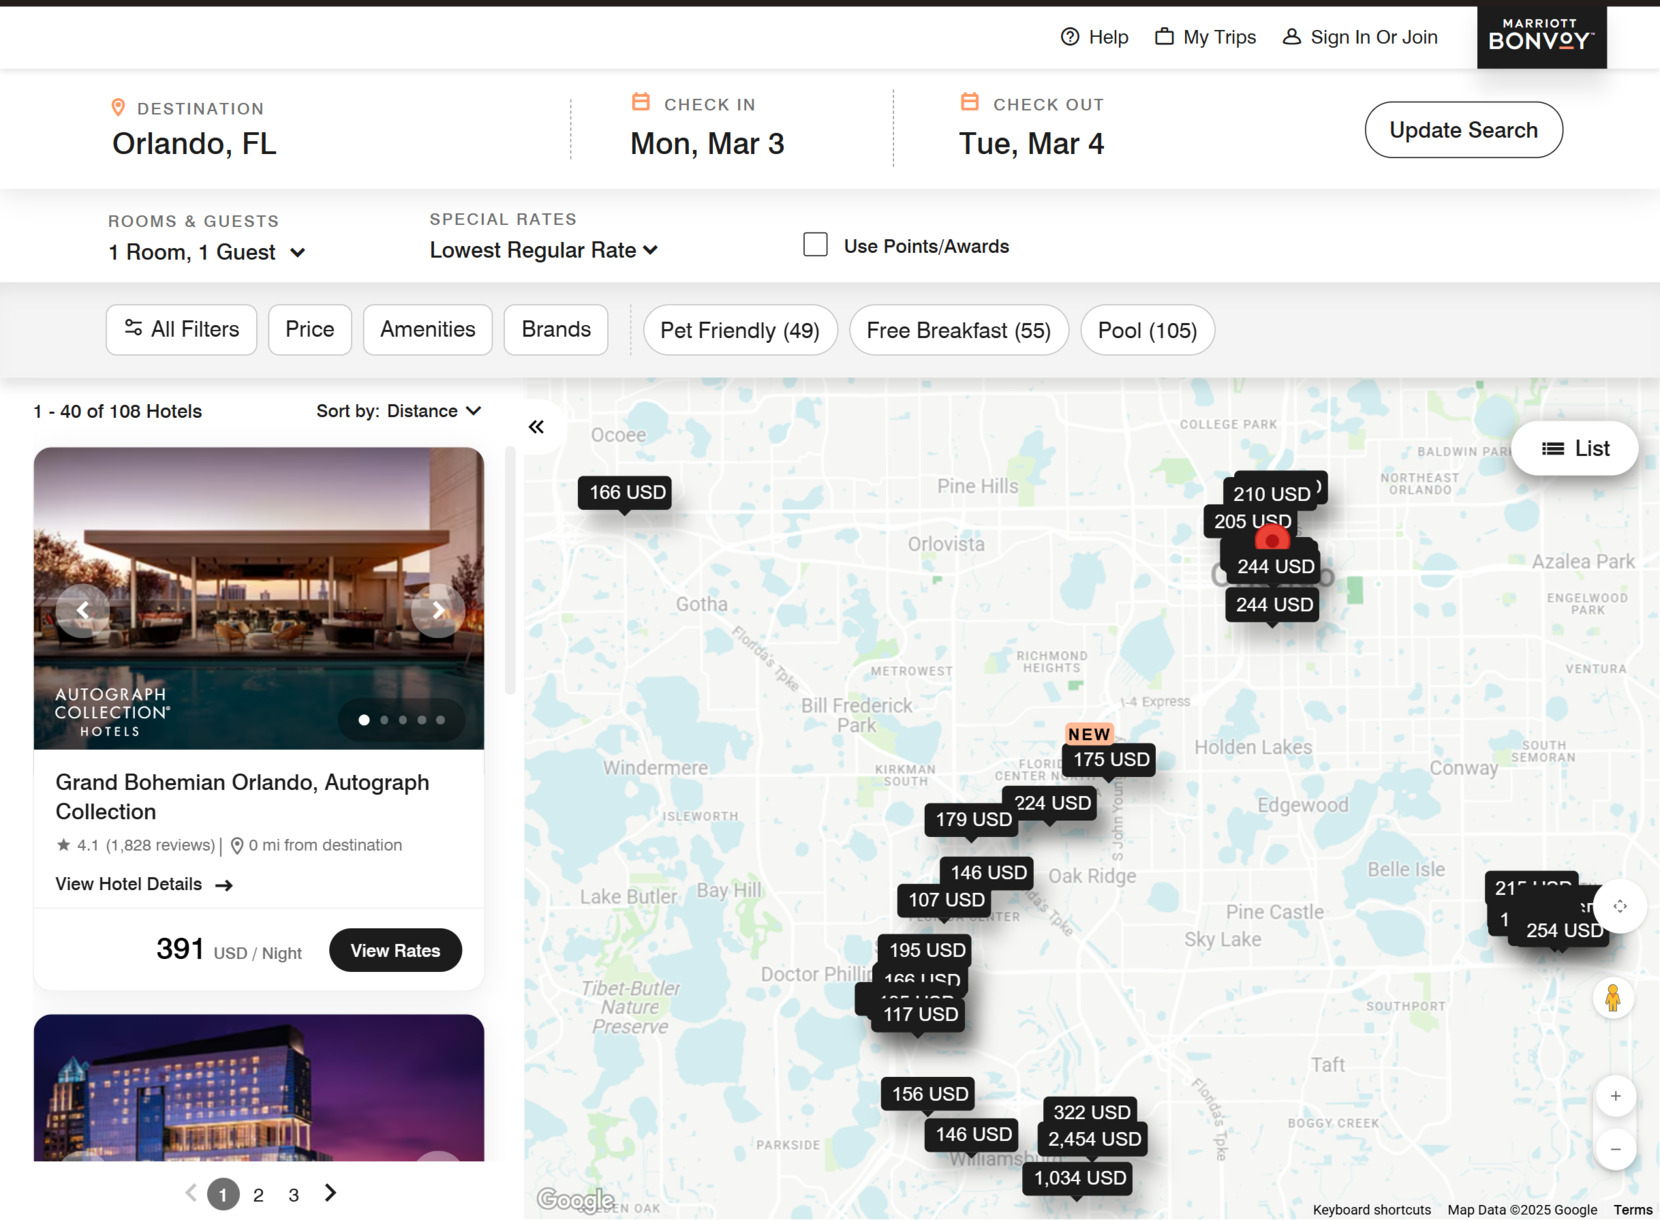
Application in the Hospitality Industry
The hospitality industry, including hotels, resorts, and tourism agencies, can use Google Maps widgets to display locations of hotels, resorts, tourist attractions, and other points of interest. This allows travelers to visualize the area, plan their travel routes, and explore local attractions with ease. Hospitality businesses can also provide interactive maps with the ability to offer directions and showcase nearby facilities such as restaurants, spas, and shopping areas.
As demonstrated, Google Maps display can be highly beneficial across multiple industries, offering value to both businesses and their customers. Each of these industries uses the widget in a way that enhances user experience and provides valuable location-based information.
In the next section, we will explore some of the common issues faced when integrating Google Maps on websites, along with solutions to resolve them.
Troubleshooting Google Maps Widgets
When embedding Google Maps on a website, users may encounter various challenges. Below are common problems, along with practical solutions and tips to resolve them effectively.
What if my Google Map isn't displaying on the website?
How do I fix the issue of Google Maps loading slowly?
How can I make the map mobile-friendly?
What should I do if my map markers are not displaying correctly?
Why is my Google Maps widget not working on certain browsers?
By addressing these common issues, you can ensure that your Google Maps widget works seamlessly across all platforms. In the next section, we will summarize key takeaways and provide a conclusion to wrap up this guide.
Conclusion
In this guide, we’ve covered various methods to create and integrate a Google Map on your website, ranging from using Elfsight’s simple and customizable widget to leveraging more advanced options like the Google Maps API and WordPress plugins. Each method has its own set of advantages and challenges, so it’s essential to choose the one that best aligns with your website’s goals and technical capabilities.
Ultimately, integrating a Google Maps widget can greatly enhance your website’s usability and provide your visitors with an interactive, visually appealing experience. With the right map solution, you can improve user engagement, drive traffic to physical locations, and make your website more informative and user-friendly.
Need More Info?
We hope this guide has provided the insights you need to successfully create and embed a Google Map on your website. If you have any further questions, don’t hesitate to contact us. Our goal is to ensure you have a smooth and successful experience with our widget solutions. At Elfsight, we are committed to offering easy, no-code solutions that empower businesses to enhance their online presence.
Join our vibrant Community, where you can share ideas and suggestions for future enhancements. We encourage you to explore our Wishlist and let us know your thoughts. Your input is invaluable to us as we strive to provide the best possible tools for your website’s success.