Creating an application form in WordPress is a smart way to streamline how you collect structured information from users directly on your website. Whether you’re hiring, gathering registrations, or processing service requests, a form helps you manage incoming data efficiently.
If you’re looking for a clean, organized, and professional way to capture applicant contact fields or employment request formats, this is exactly the solution you need. It’s fast to implement, easy to manage, and improves your overall workflow.
- Structured information collection. Standardized fields ensure that every applicant provides consistent and complete information, reducing the need for back-and-forth communication.
- Improved user experience. A simple, on-page form is easier for users to fill out than attaching documents or sending emails, helping increase the number of submissions.
- Faster response handling. Automatically receive form entries in your email or connected software, speeding up how quickly you can review and follow up.
- Customization for your needs. Tailor the form to match your branding and specific role requirements, whether you’re requesting a resume, cover letter, or portfolio link.
- Centralized applicant data. All responses are stored in one place, helping you organize, sort, and track applicants more efficiently over time.
In the next section, you’ll see just how easy it is to create a professional application form on your WordPress website — even without technical skills.
Quick Way to Create a WordPress Application Form
Now that you know how useful an application form can be, let’s take a quick look at how you can build one using Elfsight. It’s a straightforward process that requires no coding or technical setup — just a step-by-step form builder with everything pre-configured for ease of use.
- Open the Elfsight editor and select an application form template that fits your goal.
- Customize the form fields, layout, and labels to match your needs.
- Adjust colors, fonts, and spacing to create a form that aligns with your branding.
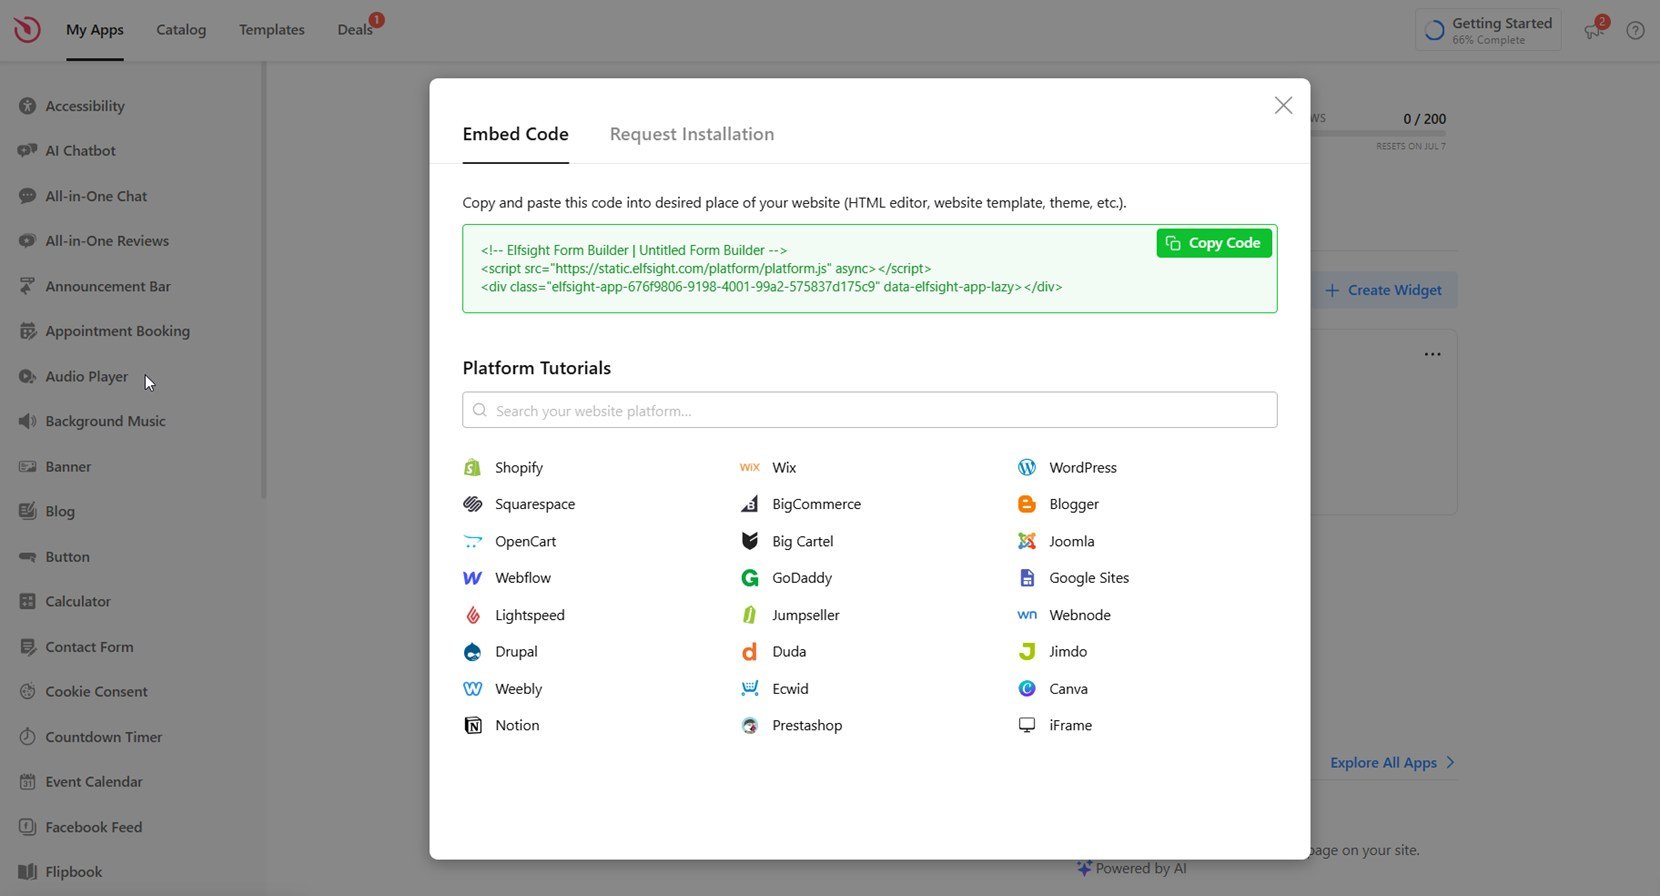
- Click “Add to website for free“, copy the embed code, and paste it into your WordPress backend.
This quick setup gives you a fully functional application form in just minutes — perfect for collecting resumes, gathering project requests, or accepting registrations directly through your WordPress website.
See how easy it is – build your application form with the live editor now!
Features of the Elfsight Form Builder
Once you’ve seen how quick the setup process is, it’s worth exploring what makes Elfsight’s application form solution a powerful choice for WordPress users. Below are the key features that simplify the creation of job application forms and improve your hiring form layout overall.
Here are the core features and benefits that make this widget stand out:
- Flexible field types for any purpose. Add text boxes, dropdowns, checkboxes, file uploads, and more to match the structure of your hiring form layout.
- File upload support. Allow users to attach resumes, cover letters, or portfolios directly through the form using the built-in resume upload feature.
- Fully customizable design. Change colors, fonts, spacing, and button styles to seamlessly match your website’s branding.
- Conditional logic. Show or hide form fields based on user input, keeping the form clean and relevant to each applicant.
- Email notifications and autoresponders. Instantly get notified when someone applies and send automatic replies to confirm submission.
- Mobile-friendly and responsive. The form looks perfect and functions smoothly across all screen sizes and devices.
- Google Sheets integration. Automatically sync form submissions to a spreadsheet for easier data handling and collaboration.
With these features, your application form becomes more than just a data collector — it turns into a reliable and user-friendly gateway for applicants. Now, let’s walk through the full step-by-step process of setting it up on your WordPress website.
How to Set Up an Application Form: Step-by-Step Guide
Once you’ve decided to use Elfsight’s Application Form plugin, the setup process is simple and intuitive. With just a few steps, you can create a fully functional, visually appealing application form for your WordPress website — no coding required. Here’s how to do it using the widget editor, based on the latest interface:
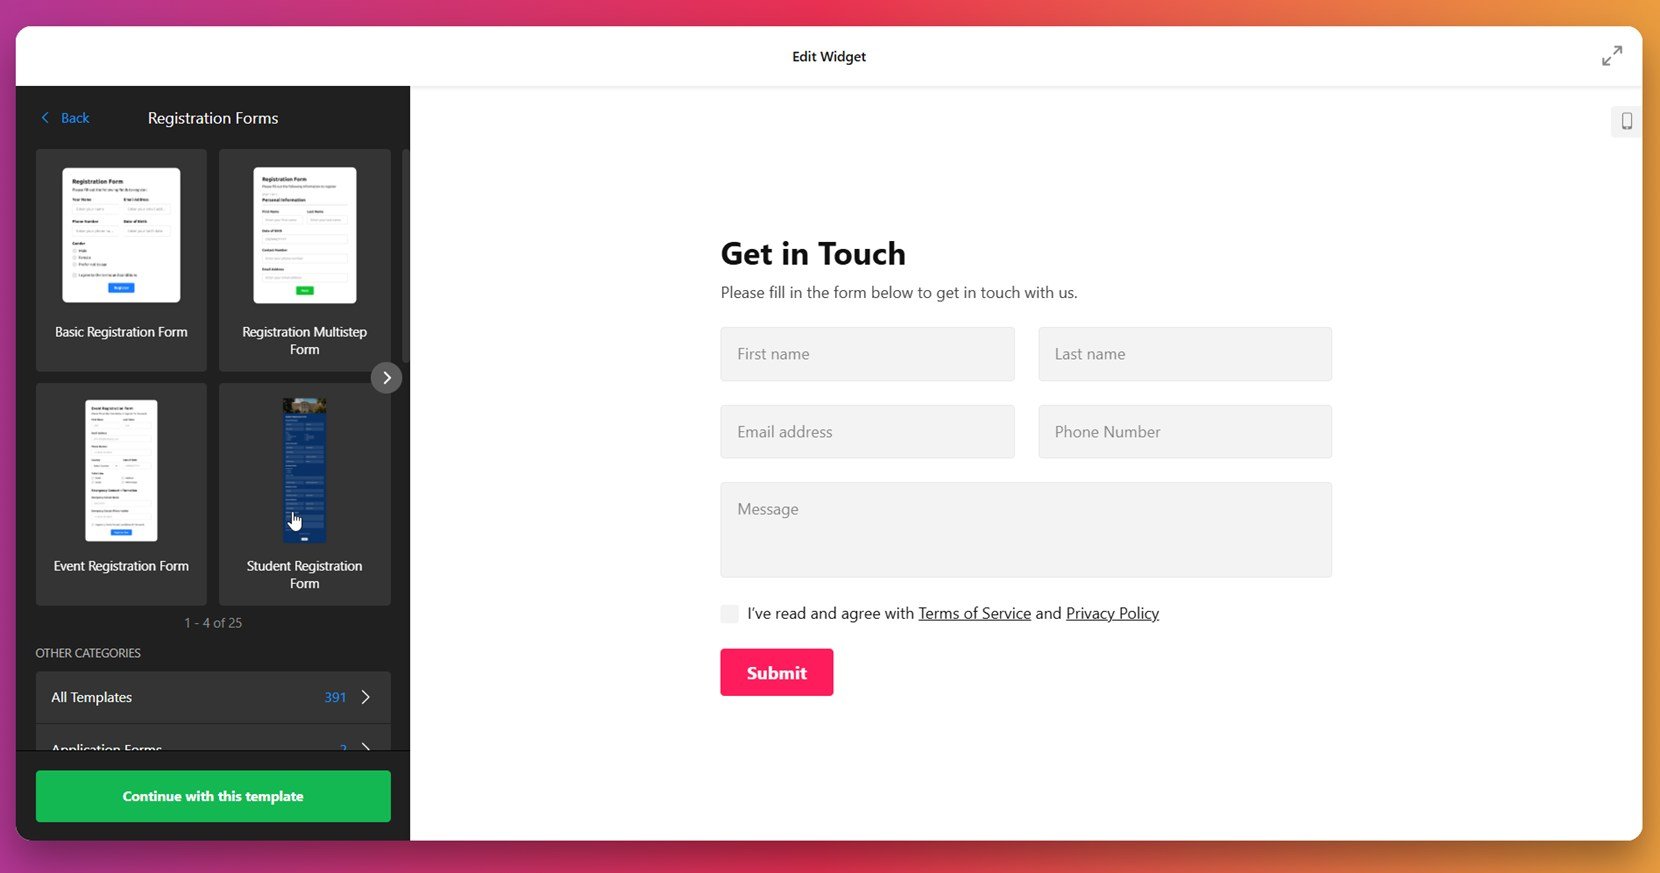
- Select a template to get started. Begin by choosing a form template in the Elfsight Form Builder. Options like Basic Registration, Multistep, Event, or Student Registration forms are available. Click “Continue with this template” to launch the editor with your selected layout.

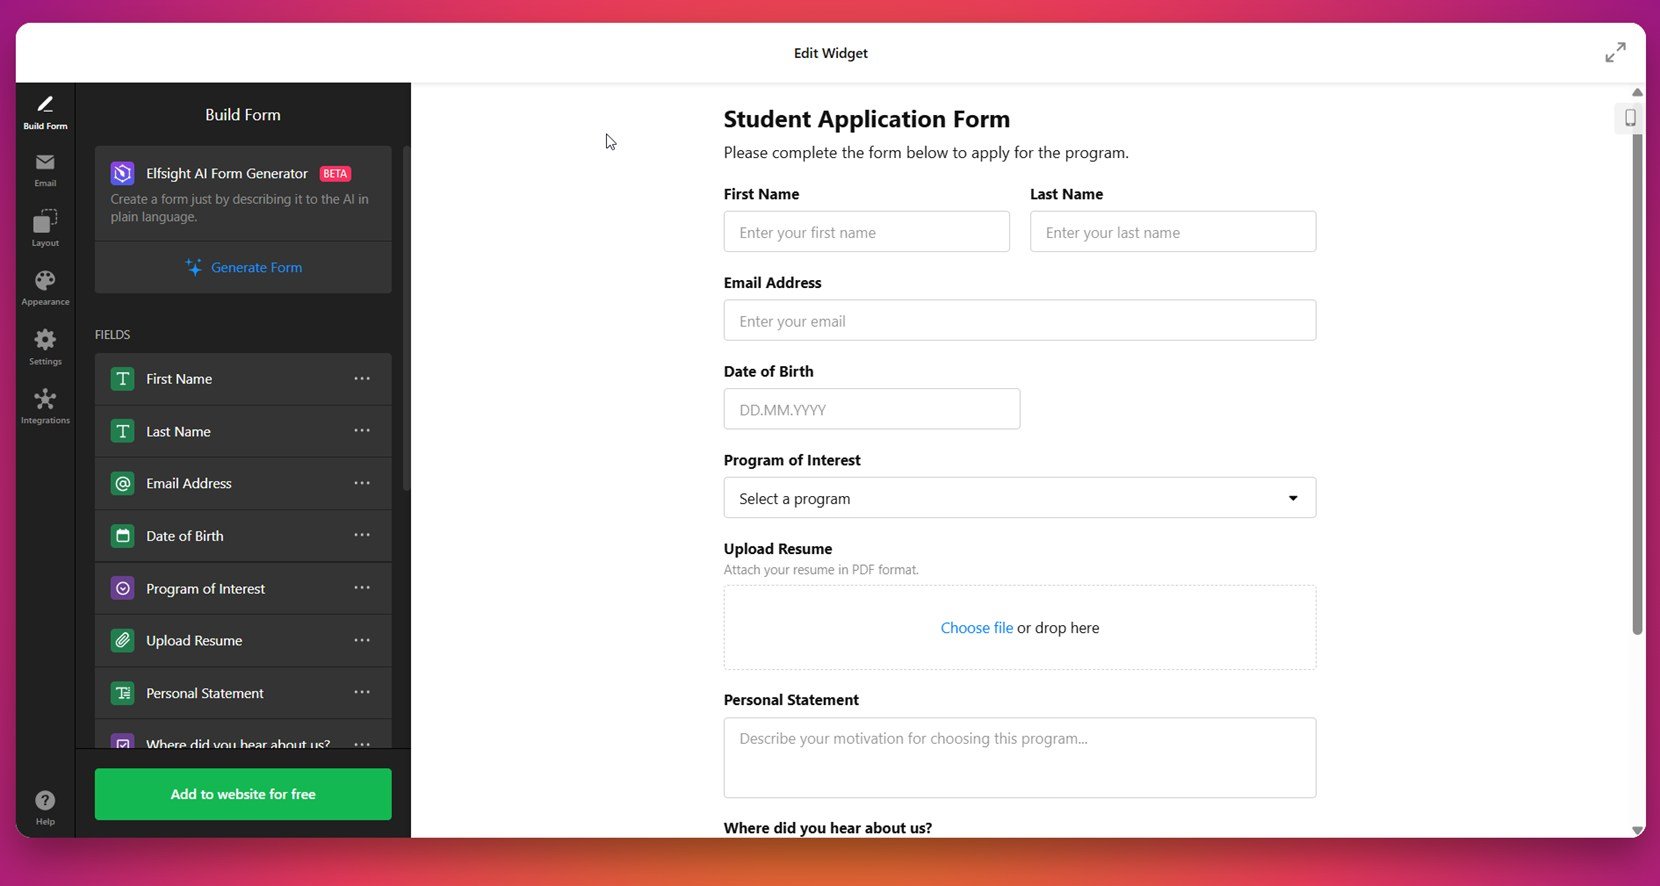
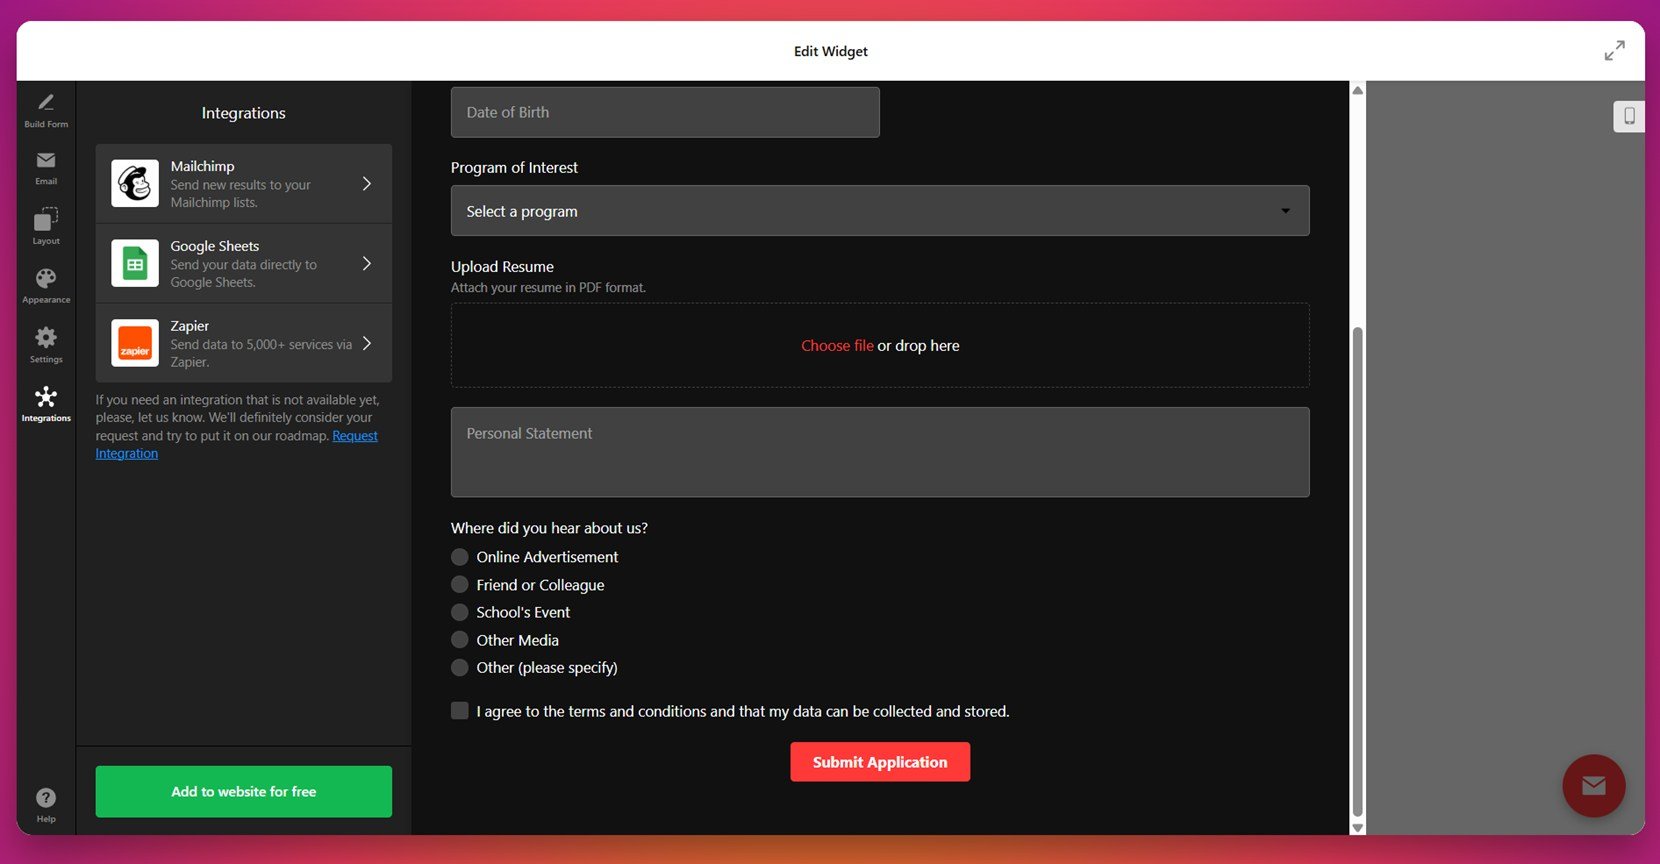
- Customize the form fields. In the “Build Form” panel, add or remove fields depending on your application type. Include key inputs such as First Name, Last Name, Email Address, Date of Birth, Program of Interest, and a file upload option for resumes. You can also add fields like Personal Statement or Source of Referral to collect deeper insights.

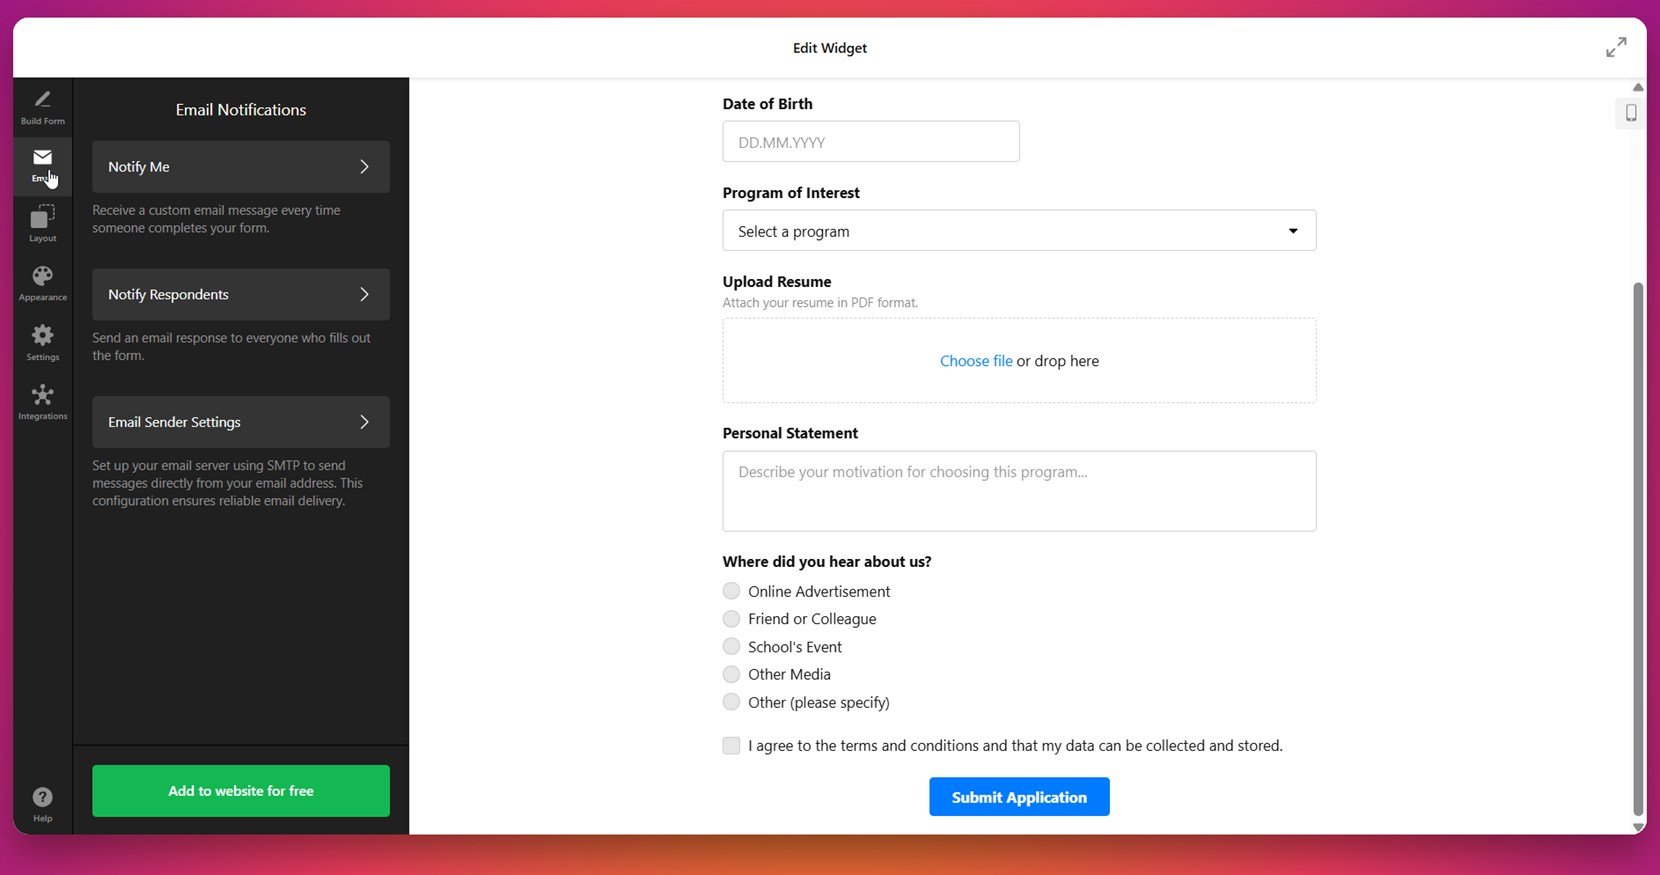
- Configure email notifications. Under the “Email” section, set up alerts for both you and the applicant. Use “Notify Me” to receive submissions to your email and “Notify Respondents” to automatically confirm receipt to users. For advanced control, adjust the “Email Sender Settings” to configure SMTP if needed.

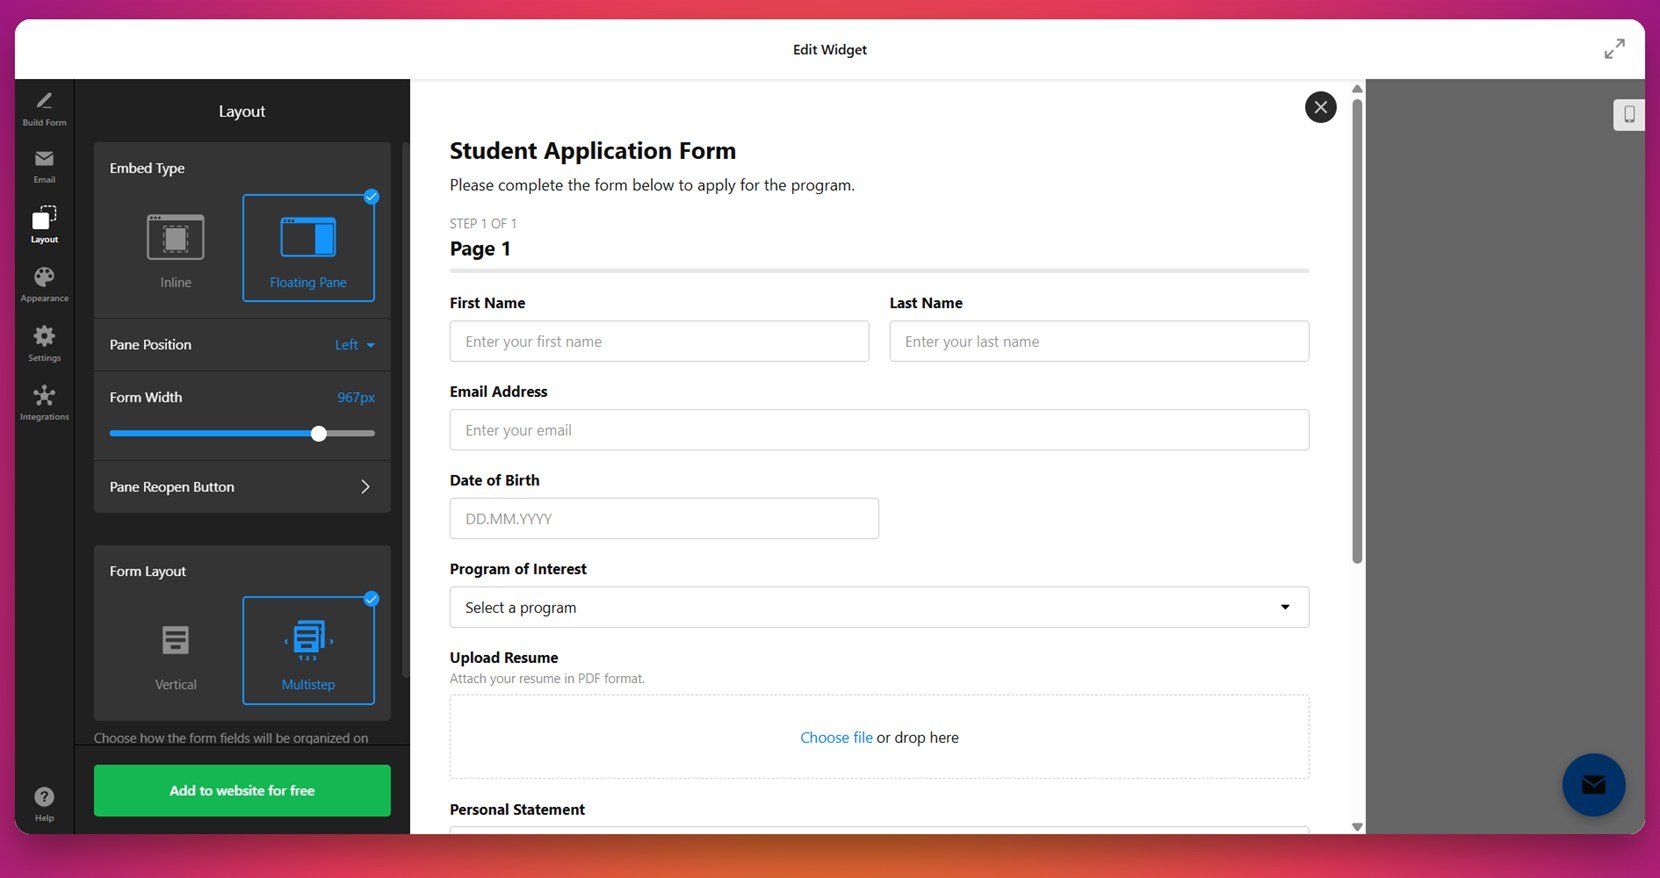
- Adjust the layout and structure. Navigate to the “Layout” tab to choose between Inline and Floating Pane views. Set the pane position (e.g., left) and adjust form width as desired. You can also enable the multistep layout to split long forms into cleaner sections for a better user experience.

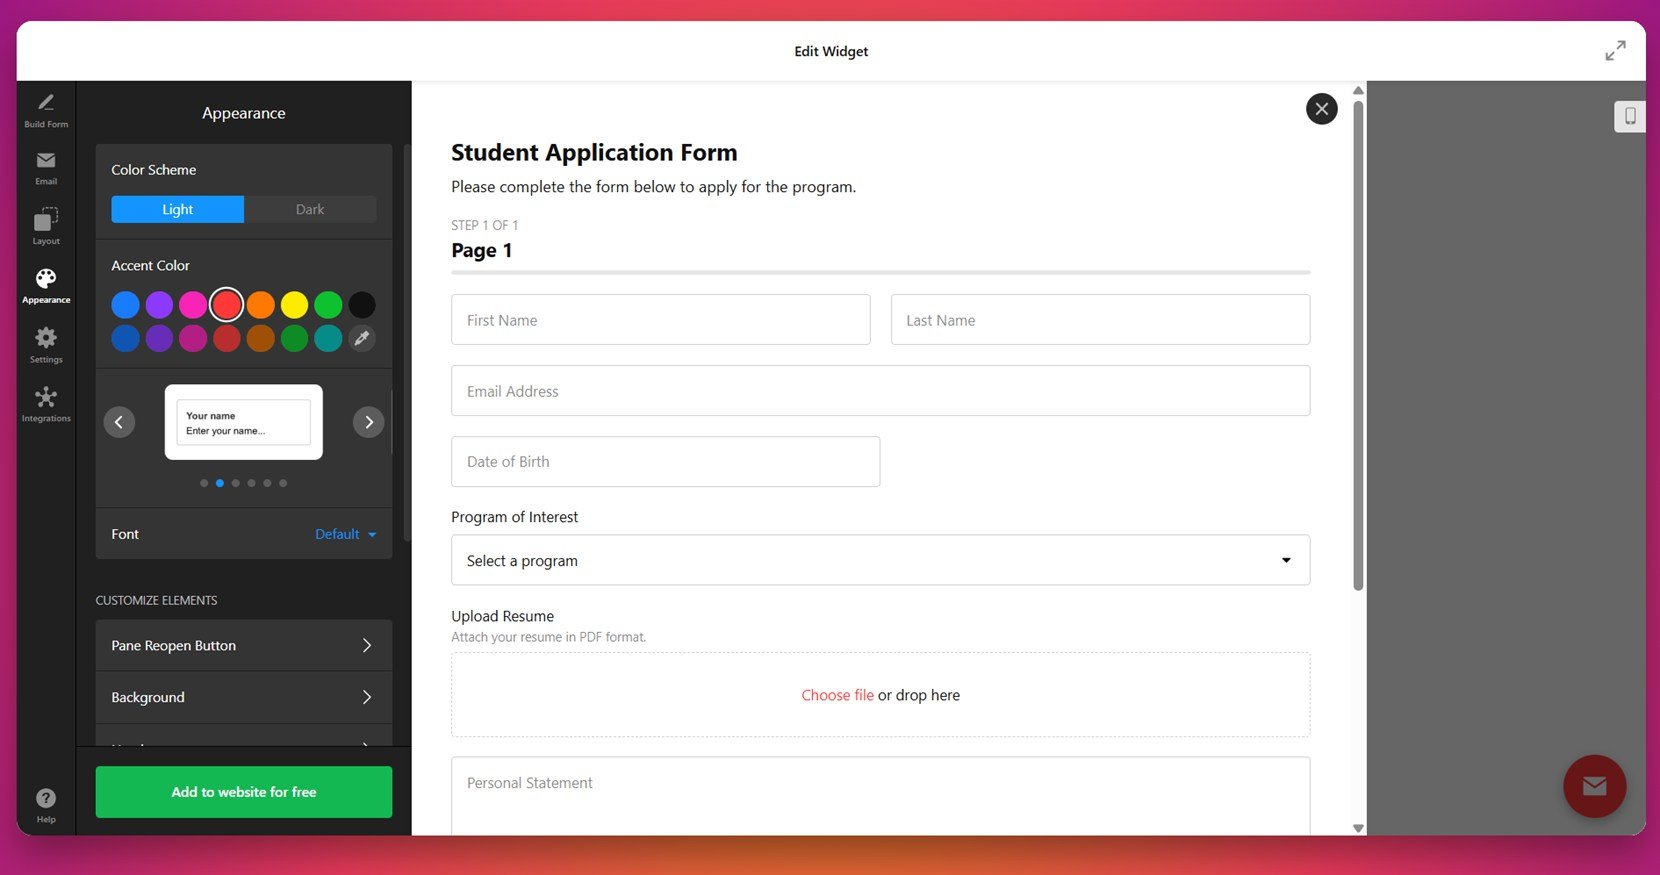
- Style your form to match your branding. In the “Appearance” tab, pick a light or dark theme, select an accent color, and customize fonts. Modify individual elements such as background, button styles, and font size to create a polished look consistent with your website’s design.
- Configure form settings and behavior. Go to the “Settings” tab to define the post-submit action (e.g., show a success message), enable spam protection, and manage language or label texts. You can also pre-fill fields using URL parameters or add custom JavaScript for extra functionality.

- Integrate with external services. In the “Integrations” panel, connect your form to Google Sheets for automatic data collection, Zapier for automating workflows, or Mailchimp to sync leads with your email list. Just click the desired service and follow the integration prompts.

- Embed your form on your website. Once you’re satisfied with the setup, click “Add to website for free” to generate the embed code. Copy the code, head to your WordPress admin panel, and paste it into the desired section using a Custom HTML block. Save and publish the page to go live.


Now that you’ve seen how to create and install the form using Elfsight, let’s explore other alternative ways to build and embed an application form on a WordPress website.
Other Tools to Make a WordPress Form
While Elfsight offers one of the fastest and easiest ways to create an application form in WordPress, there are also native and manual methods you can consider. These options don’t rely on third-party form plugins and can be helpful for users who prefer to work within the core WordPress environment. Below are two practical alternatives with full setup instructions.
Manual HTML Form Embedded in WordPress
Another alternative is to manually embed an HTML application form using custom code. This gives you full control over structure and layout, and is useful for collecting applicant contact fields and documents without plugin overhead.
- Open your WordPress dashboard. Visit yourdomain.com/wp-admin in your browser and log in with your administrator credentials. Once you’re in, you’ll be on the WordPress admin panel where you can manage all pages, posts, and content blocks.
- Go to the page or post where you want to add the form. From the left-hand sidebar, choose either Pages or Posts depending on where you want the application form to appear. Find the page or post in the list and click on the Edit link beneath its title to open it in the Gutenberg block editor.
- Add a Custom HTML block. In the content area, click the + button to add a new block. In the search bar that appears, type “Custom HTML”. Click on the “Custom HTML” block to insert it at the desired location within your content.
- Paste your form code. In the Custom HTML block, insert the following HTML snippet to create your application form. Be sure to replace the email address in the action attribute with your actual contact email so that submissions are sent directly to you:
<form action="mailto:your@email.com" method="post" enctype="multipart/form-data"> <label>Full Name:</label><br> <input type="text" name="name" required><br><br> <label>Email Address:</label><br> <input type="email" name="email" required><br><br> <label>Resume Upload:</label><br> <input type="file" name="resume" accept=".pdf,.doc,.docx"><br><br> <input type="submit" value="Submit Application"> </form> - Click “Preview” to check the layout. Switch to the “Preview” tab at the top of the HTML block or click the “Preview” button in the upper right of the editor to view how the form will look to visitors. Ensure that all fields are visible, properly aligned, and functional.
- Publish or update the page. Once you’re satisfied with the layout and function of your form, click Update (for existing content) or Publish (for new content) in the upper right corner. Your application form is now active and available on your WordPress website.
This is the most flexible method for basic custom forms and can be styled further with inline CSS or block settings.
Comparison of Form Creation Methods for WordPress
Here’s how Elfsight compares to two native or manual WordPress methods in terms of setup, usability, and advanced features.
| Method | Pros | Cons |
|---|---|---|
| Elfsight Application Form | Offers a no-code visual builder with real-time preview and customizable fields. | Requires embedding a widget code into the WordPress backend. |
| Manual HTML Form | Gives full control over structure and layout without using plugins. | Does not support data storage, spam protection, or email automation by default. |
Each of these methods can help you create a basic application form, but for the most efficient, user-friendly, and scalable solution, Elfsight offers the best combination of design flexibility and ease of use. Next, let’s explore how to fine-tune your widget for the best performance and appearance.
Smart Tips to Make the Most of Your Application Form
Once you build an application form in WordPress, the next step is making sure it fits your needs and encourages submissions. A well-customized entry form not only looks professional but also improves usability and data accuracy. Here are practical tips to optimize and personalize your form setup.
- Keep the form layout short and clear. Use a step-by-step form builder or break long forms into logical sections to avoid overwhelming users. Group related fields together — for example, personal details, contact information, and document uploads.
- Use only the fields you truly need. Each extra field adds friction, so only include what’s essential. Too many questions can reduce completion rates and frustrate applicants.
- Label each field clearly and consistently. Use plain language for field labels and include placeholders or tooltips where necessary. This helps users understand exactly what’s being asked.
- Enable file uploads with clear format restrictions. Allow resumes or portfolios to be submitted in accepted formats like PDF or DOCX. Make sure to mention size or type limitations to prevent user errors.
- Apply brand styling to match your website. Customize colors, fonts, and button styles to blend the form with your visual identity. Consistency builds trust and makes the form look native to your page.
- Add confirmation messages after submission. Let users know that their information was received successfully. A short thank-you message or redirect to a confirmation page adds professionalism.
- Test your form on mobile devices. Make sure all fields, buttons, and instructions display correctly across different screen sizes. Responsive behavior is critical for reaching mobile users.
- Use field validation and required settings. Ensure that important fields like name, email, and file uploads cannot be skipped. Set up rules to validate format (e.g., correct email format) to improve data quality.
Now that your form is styled and optimized for better performance, let’s take a look at what types of application forms you can create depending on your needs.
Examples of Forms You Can Build with Elfsight
Depending on your business goals and audience, there are different types of application forms you can create using Elfsight’s widget. Each template is tailored to suit a specific use case — whether you’re managing job recruitment, processing academic admissions, or handling membership registrations. Below are three of the most effective form templates, along with where they can be applied.
Job Application Form 💼
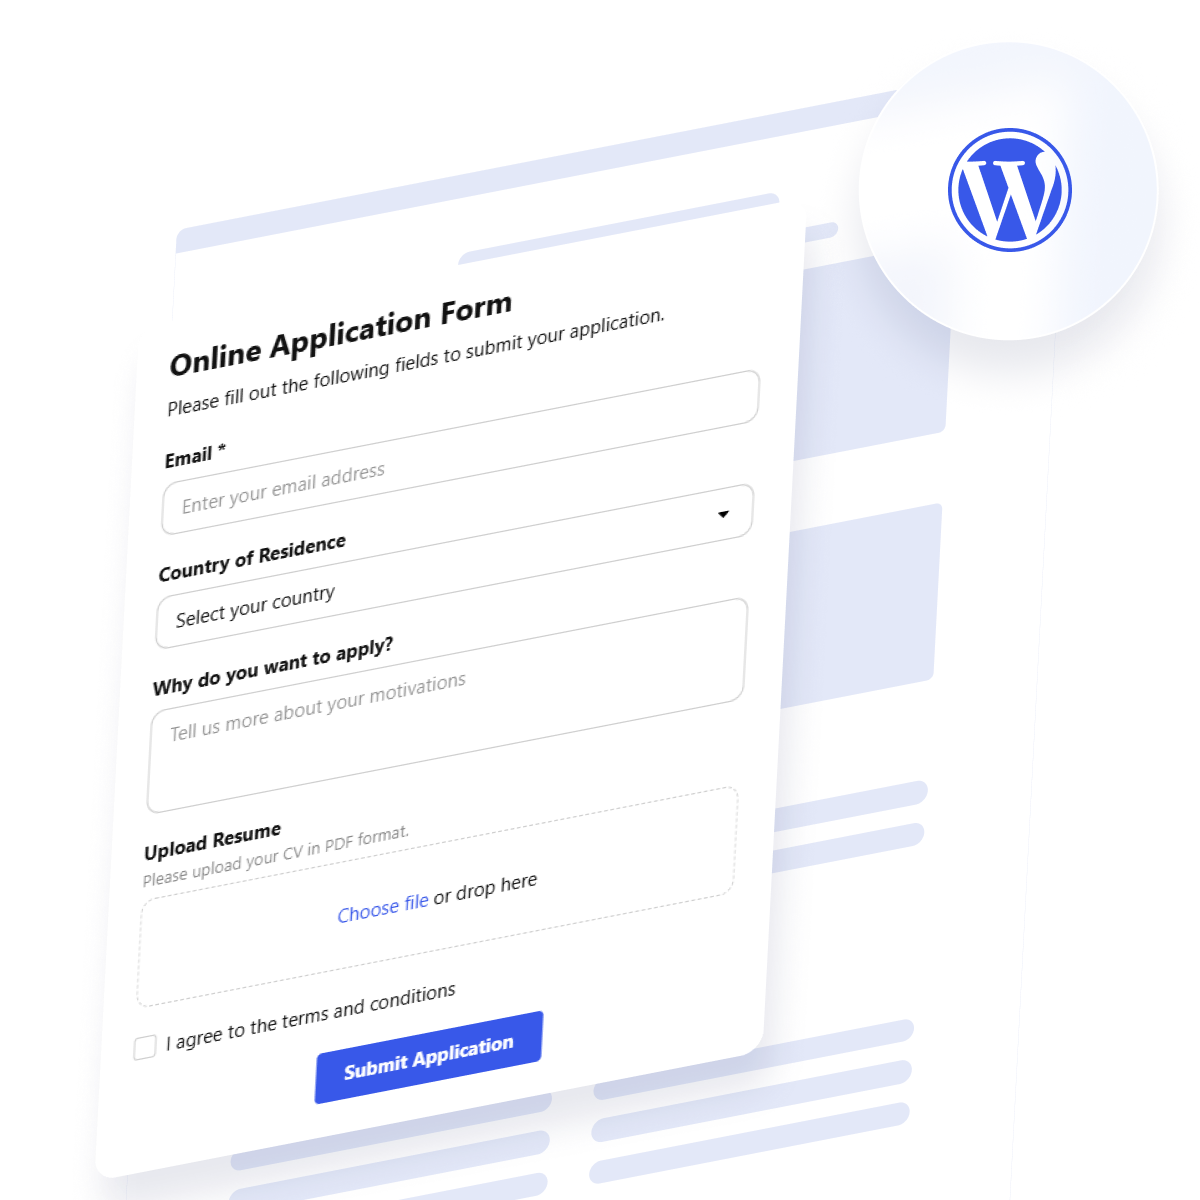
The Job Application Form Template is designed to collect all key information from potential employees, including full name, contact details, desired position, qualifications, and uploaded resumes. You can also include fields like availability, salary expectations, or LinkedIn profile links to gather more context before interviews.
This type of form is perfect for corporate HR teams, small business owners, and agencies that want to manage hiring directly through their website without relying on third-party software.
School Application Form 🎓
The School Application Form Template supports educational institutions in collecting student information during the admission process. It includes fields for date of birth, academic interests, uploaded documents, and motivation statements — allowing for a complete personal details intake form in one step.
This format is especially useful for universities, training centers, language schools, or scholarship programs that need a standardized digital intake form for applicants across programs or levels.
Membership Application Form 👥
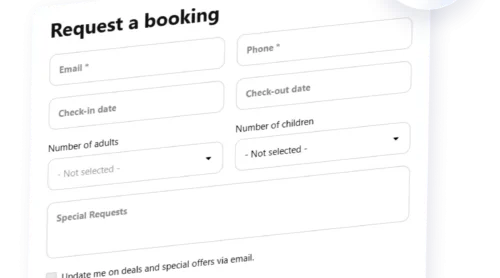
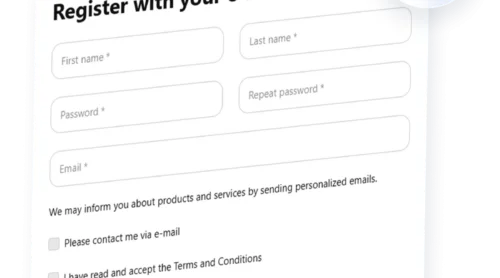
The Membership Application Form Template is great for communities or organizations that require structured signups. Fields like name, email, membership type, interests, and agreement checkboxes ensure that all necessary details are gathered before someone joins your network.
This form suits fitness clubs, alumni associations, volunteer groups, and professional networks that want to automate their member registration and onboarding processes.
Now that you know which types of forms you can build and where they work best, let’s take a look at possible issues and how to solve them before they impact performance.
Fixing Common Issues
Even after customizing and optimizing your application form, you may encounter technical or usability challenges. Below are some of the most common problems users face when building an online application form in WordPress, along with clear solutions.
Why isn’t my form sending submitted data to my email?
How can I make the resume upload feature work reliably?
Why does the form layout look broken on mobile devices?
Can I collect submissions without using email-based forms?
What if users submit the form without filling all required fields?
How do I avoid spam or fake entries in my form?
Handling these issues early ensures your application form functions reliably and captures all the necessary information.
Final Thoughts
Creating a functional and visually appealing application form for your WordPress website is no longer a complex task. Whether you choose a visual widget, a native HTML solution, or a step-by-step form builder, the most important thing is that your form supports your goals — be it for job submission, service inquiries, or intake of personal details. With proper customization, your form can blend seamlessly into your website and deliver a smooth user experience.
From choosing the right method to customizing fields and styling, this guide has walked you through everything needed to make an application form for your WordPress website. By taking the time to plan your structure, address common issues, and focus on usability, you’ll create a customized entry form that helps you collect high-quality responses and simplify your workflow.
Looking for More Help?
We hope this guide gave you the clarity and tools you need to get started. If you have questions or want to explore more ways to build forms for your website, feel free to reach out. At Elfsight, we’re here to help you achieve fast, code-free integration for your business goals.
We also invite you to join our growing Community, where users share use cases, offer feedback, and collaborate on ideas. Got a feature request or improvement suggestion? Add it to our Wishlist — we’d love to hear from you.