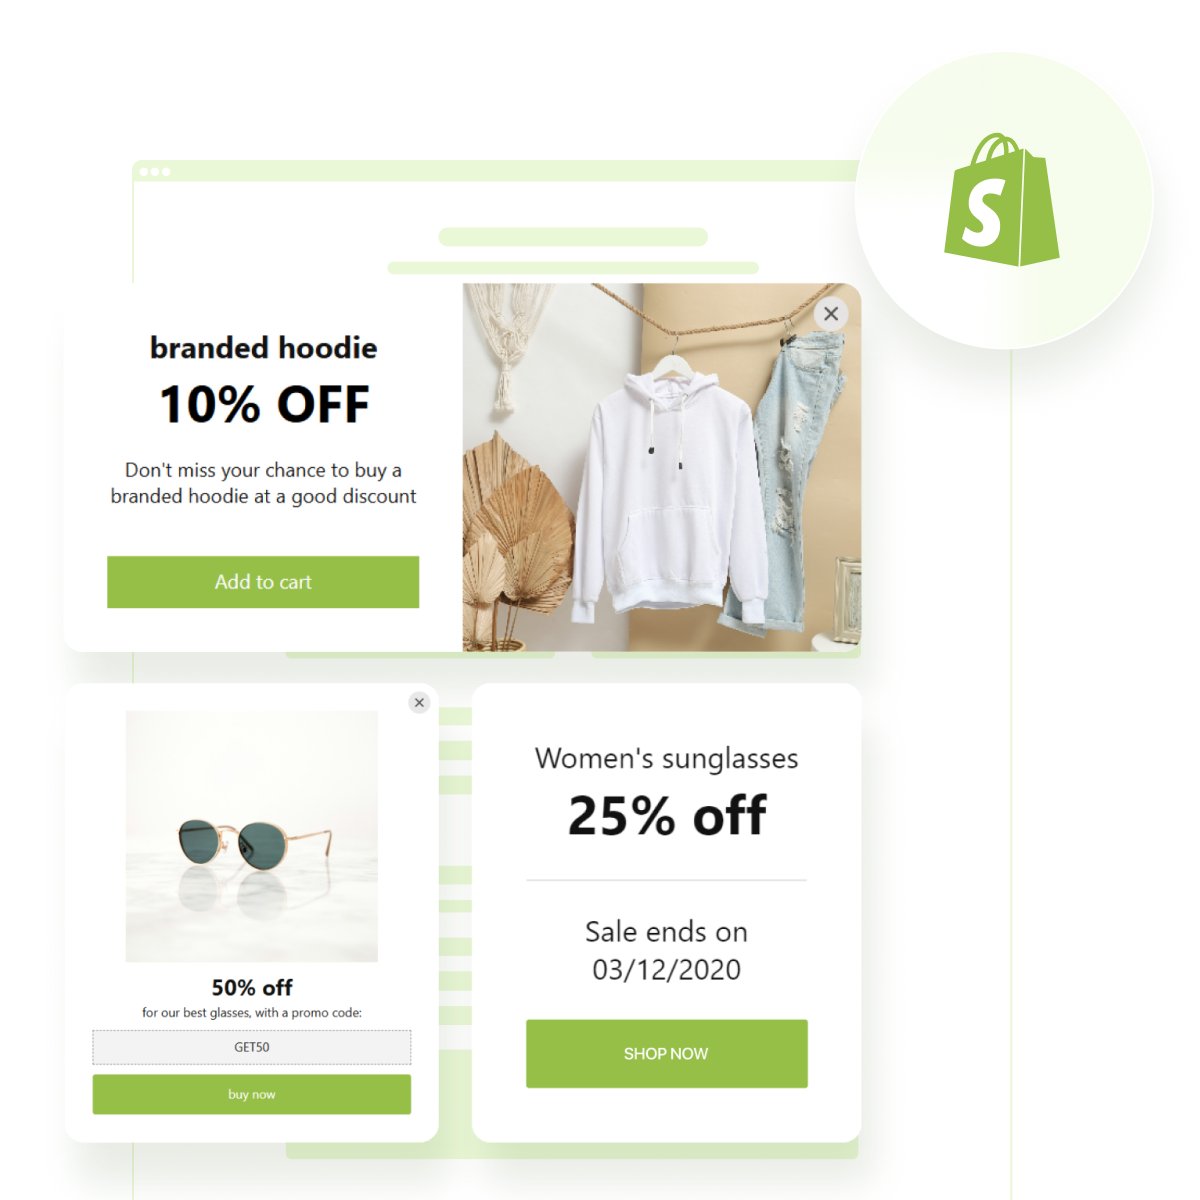
An add to cart popup in Shopify is a small interactive window that confirms the action, encourages further browsing, or guides users toward the checkout process.
Using such a tool is a proven way to enhance user interaction and reduce drop-off rates during the shopping experience. If you’re looking to improve customer flow and streamline cart behavior, this is exactly the kind of feature you need.
- Instant confirmation of cart action. Clearly shows users that their product was added, reducing confusion and second-guessing.
- Smoother shopping experience. Keeps users engaged without forcing them to switch pages or lose their place in the product catalog.
- Increased upsell opportunities. Lets you promote related products or offers directly within the popup window.
- Better conversion flow. Encourages users to either continue shopping or proceed to checkout with fewer distractions.
- Cart interaction enhancement with popup. Adds a dynamic layer of feedback that makes the overall shopping process more intuitive and modern.
Now that you understand the value of integrating a cart popup, let’s quickly walk through how to create one for your Shopify website without diving too deep into the code.
Create an Add to Cart Popup: Quick Guide
Creating an add to cart confirmation popup for Shopify doesn’t require any coding knowledge. With just a few steps, you can build a fully functional popup that shows a notification after an item is selected — directly from a visual editor.
- Open the editor and select a popup template tailored for ecommerce interactions.
- Customize the appearance — adjust text, layout, colors, and animations to match your brand style.
- Choose the trigger settings to display the popup when the “Add to Cart” button is clicked.
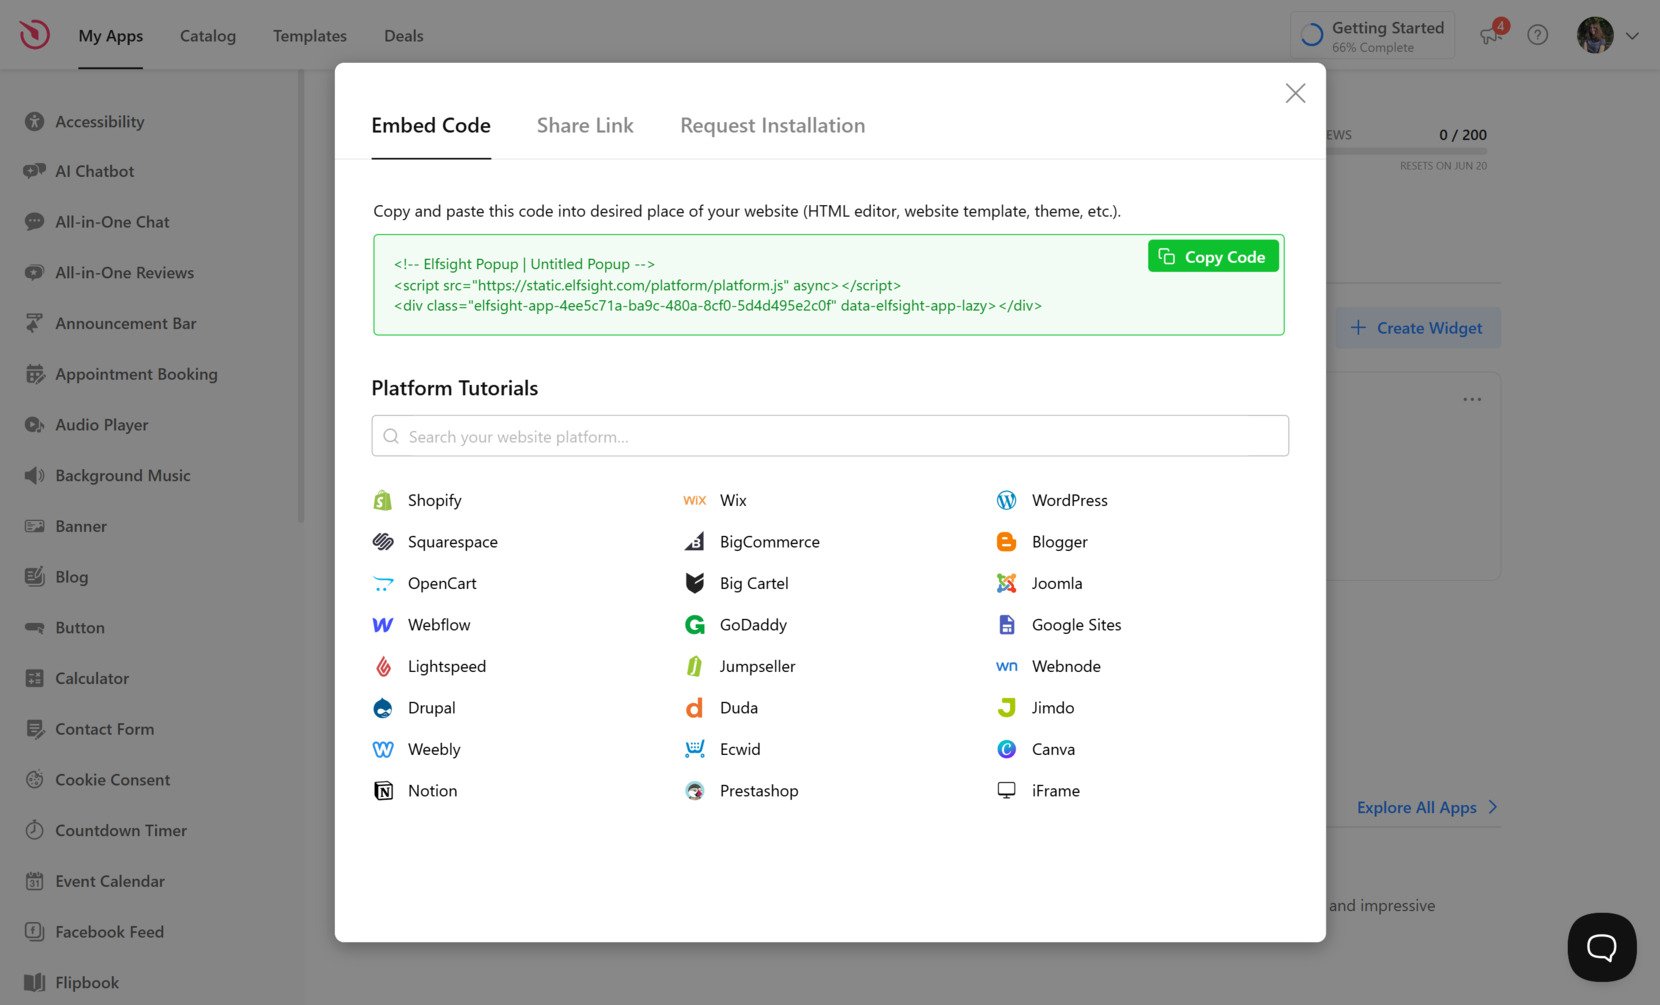
- Click “Add to website for free“, copy the generated code, and paste it into your Shopify website’s backend.
This simplified approach allows you to launch a popup in just a few clicks, without relying on developers or modifying complex code. It’s fast, intuitive, and ideal for boosting conversions right from the cart interaction stage.
See how easy it is – create your own ‘add to cart’ popup in minutes!
Top Features of Elfsight’s Shopify Popup
Now that you know how simple it is to get started, let’s take a closer look at what makes Elfsight’s solution for the add to cart popup powerful and effective. These built-in features are designed to help you engage users at the right moment and enhance the buying experience.
Here are the key features and benefits of using Elfsight’s popup widget on your Shopify website:
- Flexible display triggers. Set your popup to activate when a user clicks “Add to Cart”, scrolls, spends time on page, or tries to exit, giving you full control over timing and context.
- Precise targeting options. Show popups based on user location, device, traffic source, or page URL to deliver more relevant messages.
- Fully customizable design. Modify layout, colors, fonts, images, and animations to perfectly match your branding without touching code.
- Built-in conversion boosters. Add countdown timers, coupon codes, buttons, or form fields to increase urgency and collect user actions directly from the popup.
- Seamless Shopify integration. Easily embed the widget without modifying theme code, and activate your cart modal with zero friction.
- Responsive and mobile-friendly. Popups automatically adapt to screen size and touch interactions, ensuring a smooth experience on any device.
- Analytics and performance tracking. Get data on views, clicks, and conversions to see what works and optimize your popup strategy over time.
With these features in place, you’re not just showing a message — you’re adding a smart layer of engagement right after product selection. Next, let’s go through a full guide to building and installing your popup from start to finish.
Step-by-Step: Embed Popup to Shopify
If you want to create a fully customized add to cart popup and integrate it into your Shopify website, Elfsight’s popup widget offers a smooth, no-code experience. Below is a detailed, five-step process based on the current Elfsight interface.
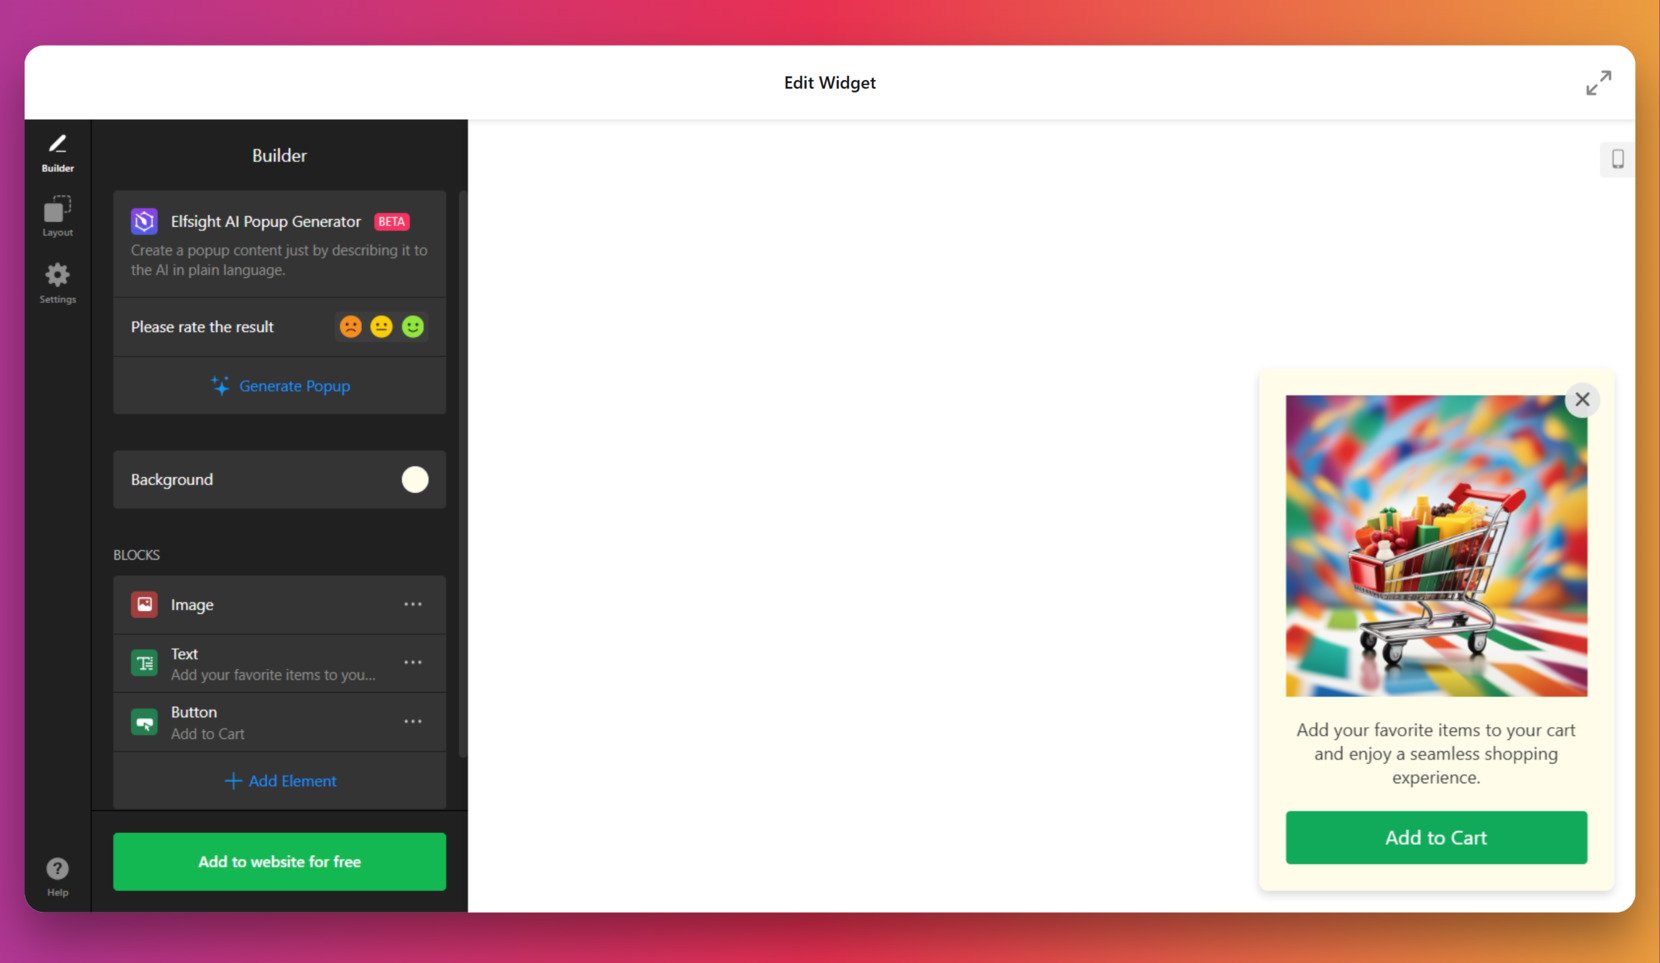
- Choose a popup template. Start by selecting a design in the widget editor. You’ll see a range of templates including “Floating Popup”, “Popup Form”, and themed sales popups. Pick one that suits your goal and click “Continue with this template” to launch the editor.

- Edit content blocks inside the Builder. In the “Builder” panel, customize each block: update the image (e.g., product visuals), change the text to something like “Item added to cart”, and edit the button label. You can also generate content with the built-in AI Popup Generator.
- Adjust the layout style. Go to the “Layout” tab and pick how the popup will appear — Modal, Slide-in, Top Bar, Bottom Bar, etc. Use the width slider to fine-tune the popup’s size and click “Customize” to refine visual elements further if needed.
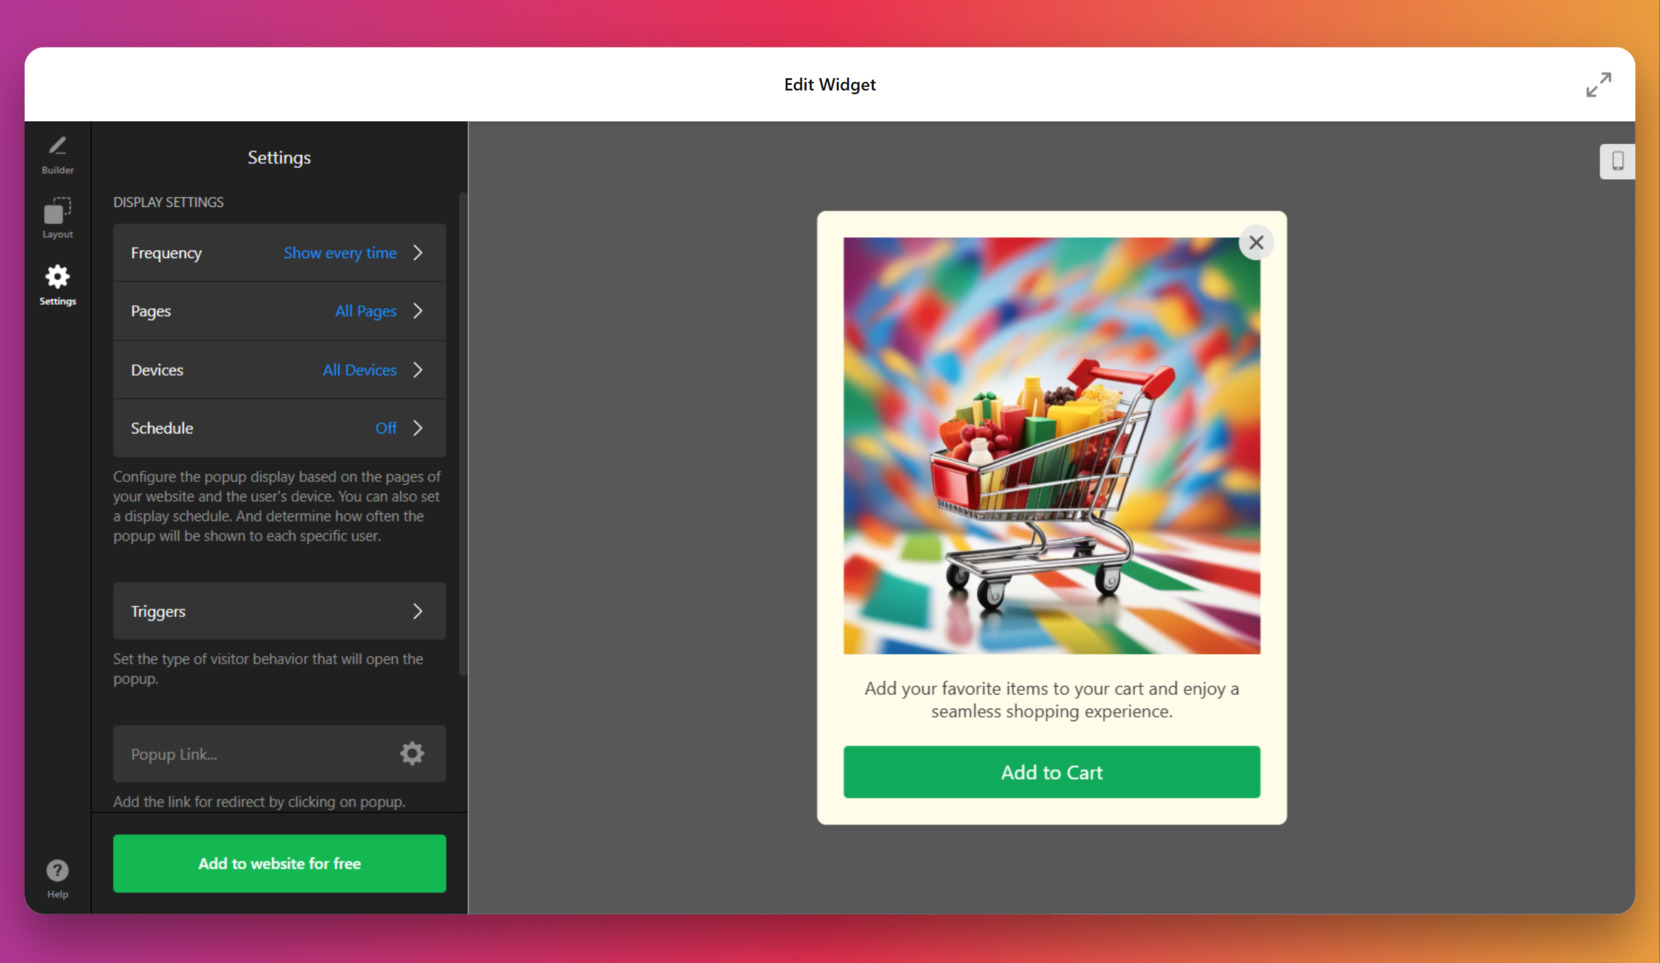
- Configure popup behavior. In the “Settings” tab, define when and where the popup should appear. Set the frequency, select pages and devices, and optionally activate scheduling. Use the “Triggers” section to specify how the popup will be launched — ideal for pairing with add to cart button clicks.
- Embed the code into your Shopify website. When the design and logic are ready, click “Add to website for free” and copy the provided code. In your Shopify admin panel, go to “Online Store” → “Themes” → “Edit Code”, and paste the code snippet before the </body> tag inside the theme.liquid file. Save and publish the theme.


This method allows for full design flexibility and precision targeting, giving you complete control over how and when your popup appears. Next, let’s explore other ways to implement similar functionality if you prefer not to use a visual builder.
Other Ways to Make Shopify Add to Cart Popups
While using a visual widget builder is the fastest way to create a popup, there are also other native and manual options available to Shopify users. These alternatives include modifying your store’s theme code or, for Shopify Plus users, using the Script Editor for advanced functionality. Each method provides different levels of flexibility and control, but may require more technical involvement.
Shopify Theme Code Customization
This is the most accessible native option for standard Shopify users who are comfortable working with JavaScript and theme files. By editing your theme’s code, you can set up a simple add to cart popup that activates immediately after a product is added to the cart. This method gives you full control and allows you to tailor the behavior to your exact needs.
- Go to your Shopify admin and click “Online Store” → “Themes”. Under your published theme, click “Actions” and then select “Edit code”. This will open the theme file editor.
- Locate your JavaScript file. Navigate to the “Assets” folder and open either theme.js, global.js, or any JS file that handles cart functionality.
- Find the Add to Cart function or event listener. Look for code handling the .add-to-cart button. It may include jQuery or vanilla JS that intercepts the click event.
- Insert your popup logic. Add a custom function to display a modal using HTML and CSS, or insert a basic alert() as a placeholder. You can also create a hidden <div> and use JS to show it with a fade-in effect.
- Style your popup with CSS. If you’re using a modal div, write CSS rules to position, animate, and style it for a seamless user experience.
- Test your implementation. Preview your website, add a product to the cart, and confirm that the popup appears exactly when intended.
This solution is completely under your control and doesn’t depend on third-party apps. It’s well-suited for developers or those with coding experience.
Shopify Script Editor for Shopify Plus
For merchants using Shopify Plus, the Script Editor app allows for backend-level logic that can influence frontend behavior. While it’s mainly used for promotions and line item scripting, it can be configured to trigger custom behavior — such as signaling the frontend to launch a popup — when paired with theme updates.
- Open your Shopify Plus dashboard and install Script Editor. You can find it in the admin panel under “Apps” → “Script Editor“. This app is exclusive to Plus plans.
- Create a new script. Choose “Line Item” or “Cart” as the script type and define your conditions — for example, checking when a user adds a specific product or quantity.
- Use the script to tag cart items. These tags can be read by your theme’s JavaScript to determine when a popup should appear.
- Modify your theme’s JS files to look for these tags. Update the frontend logic so the popup is displayed if a flagged condition is present.
- Deploy and test the script. Run several tests by adding products to the cart to ensure your script flags the correct behavior and the popup displays accordingly.
This method allows for powerful customization without relying on third-party apps, and it integrates deeply into Shopify’s cart logic.
Comparison Table of Methods
The table below provides a side-by-side comparison of Elfsight’s popup solution versus the native alternatives. It highlights their biggest advantages and limitations so you can choose the most fitting option for your needs.
| Method | Advantages | Limitations |
|---|---|---|
| Elfsight Popup Widget | Can be added without coding and fully customized in a visual editor. | Relies on embedding an external script into the website. |
| Shopify Theme Code Customization | Provides complete control over popup appearance and timing. | Requires technical knowledge and can break the theme if misconfigured. |
| Shopify Script Editor (Plus only) | Enables backend-level customization for advanced store logic. | Only available to Shopify Plus users and needs developer involvement. |
Each method has its own use case and level of complexity. If you’re looking for speed, ease, and no coding, a visual solution is the way to go. Up next, we’ll explore the best practices and tips for using popups effectively on your Shopify website.
Smart Tips for Using Shopify Popups
Once you’ve embedded your Shopify add to cart popup, it’s important to configure and test it carefully. Below are essential tips to ensure your popup works smoothly, enhances user interaction, and doesn’t interfere with the shopping or checkout experience.
- Test across multiple devices and browsers. Popups can behave differently on mobile versus desktop, or in Safari versus Chrome. Always check responsiveness, placement, and functionality before going live.
- Keep popup content short and clear. A popup should confirm the action (like showing a notification after item selection) without overwhelming the user. Avoid excessive text or distractions that may delay the checkout path.
- Delay the trigger by a split-second if needed. Some themes or third-party apps need time to register cart actions. Adding a 100–300ms delay to the popup can help avoid overlap or bugs.
- Avoid covering critical UI elements. Make sure the popup doesn’t hide cart icons, navigation menus, or important CTA buttons. Use placement settings or custom CSS if needed.
- Use CSS z-index carefully. If your popup isn’t showing on top of other elements, check the z-index property and make sure it’s higher than surrounding content layers.
- Test with and without ad blockers enabled. Some popup triggers may be blocked by extensions or browser settings. Testing with these tools active can help identify hidden issues.
- Verify that the popup doesn’t slow down your load time. Large images or animations can delay rendering. Optimize your visuals and avoid using auto-play videos unless necessary.
Once the technical part is handled, let’s explore who benefits most from add to cart popups and look at practical use cases across different industries and types of online stores.
Who Should Use Add to Cart Popups: Use Cases
While popups can work for nearly any online business, some industries gain especially high value by using them to display a message after a product is added or to trigger modal windows that guide users through their purchase flow.
Application in Fashion and Apparel 👑
Online clothing stores often rely on fast browsing and quick decision-making. An add to cart popup helps fashion retailers confirm selections, offer size suggestions, or display recommended accessories right after the user clicks “Add to Cart“. This keeps shoppers engaged while encouraging them to complete their look in one visit.
Application in Health and Beauty 🎁
Health and beauty ecommerce businesses benefit from educating customers as they shop. A popup can be triggered after a cart action to suggest complementary products (like brushes for makeup kits or vitamin packs with supplements) or to offer limited-time trial versions of related items.
Application in Electronics and Gadgets 🔋
For electronics stores, popups help ensure shoppers don’t forget important accessories. When a user adds a main product like a laptop or smartphone, the popup can highlight warranty plans, adapters, or protective gear with a quick “You might also need” message before checkout.
These are just a few examples, but the underlying principle is the same: a well-timed popup builds momentum during the purchase journey. Next, we’ll cover common problems that can arise when setting up a Shopify popup — and how to fix them quickly.
Fixing Common Issues
Even though using a Shopify popup on add to cart can be highly effective, it’s important to be aware of potential issues. Below are the most frequent problems users face when embedding or triggering popups, along with practical solutions to address them.
Why isn’t my popup showing after the add to cart action?
Why does the popup interfere with the checkout button?
What should I do if the popup is triggered too early or too late?
My popup works on desktop but not on mobile. Why?
Why is my popup being blocked by browser extensions or ad blockers?
Can Shopify theme updates break my popup code?
The popup appears, but it's empty or unstyled. What went wrong?
Being aware of these common issues allows you to troubleshoot quickly and maintain a seamless experience for your customers.
Conclusion
Using an add to cart popup in Shopify is a smart way to improve user interaction, reinforce customer actions, and guide shoppers through the buying process. Whether you’re confirming a product selection, suggesting related items, or creating urgency, popups help activate the cart modal at just the right time.
With options ranging from no-code editors to custom-coded solutions, merchants have the flexibility to tailor the popup behavior to match their goals and technical comfort level. With the right approach and setup, popups can become a powerful tool to elevate your Shopify website’s user experience and boost conversions.
Looking for More Guidance?
We hope this guide gave you clarity and direction. If you still have questions or want to learn more about how to create dynamic popup elements for your Shopify website, contact us — we’re here to help. Our goal is to make embedding functional elements simple, efficient, and effective.
Join our Community of users to exchange ideas, get inspiration, and collaborate with others improving their websites. If you have suggestions or want to request new features, feel free to contribute to our Wishlist. We’re always listening.