A blog can become a powerful tool that businesses or individuals use for sharing insights and growing their online presence. Wix is a popular platform for starting a blog thanks to its user-friendly interface.
If you need to start a blog and already use the Wix content management system, then you have two options: create a blog from scratch or add one to your current website. In this guide, we’ll break down each method. First, we’ll show you how to create a Wix blog from scratch. Afterwards, we’ll cover how to seamlessly add a blog section to an existing Wix website using a no-code app.
Creating a Wix Blog from Scratch
If you’re new to Wix, building a blog from scratch gives you complete control over your design, content, and features. Let’s go through the steps for setting up a blog website on Wix from start to finish.
Step 1. Sign up and choose a plan
To create a Wix blogging website, first, sign up with your email, Facebook or Google account. You can create a Wix account completely for free.
Wix offers a free website version with basic functionalities and Wix branding, which is a good starting point if you’re experimenting. However, upgrading to a premium plan allows for a custom domain, access to additional features, and removal of any ads, which can make your blog look more professional.

Step 2. Create your Wix website
Wix offers hundreds of templates tailored for bloggers, from lifestyle and travel to fashion and tech. To select one, click on “Create New Site” after logging in.
Wix provides two ways to build your site: Wix ADI and the Wix Editor.
- Way 1: with Wix ADI. ADI (Artificial Design Intelligence) is a tool that asks you a few questions and automatically creates a basic website for you. This is a great option if you prefer a quick, no-fuss setup.
- Way 2: with Wix Editor. The Wix Editor gives you more control over every detail. Here, you can manually adjust every element, from colors to text placement. This is ideal if you want full customization and have a specific vision for your blog.
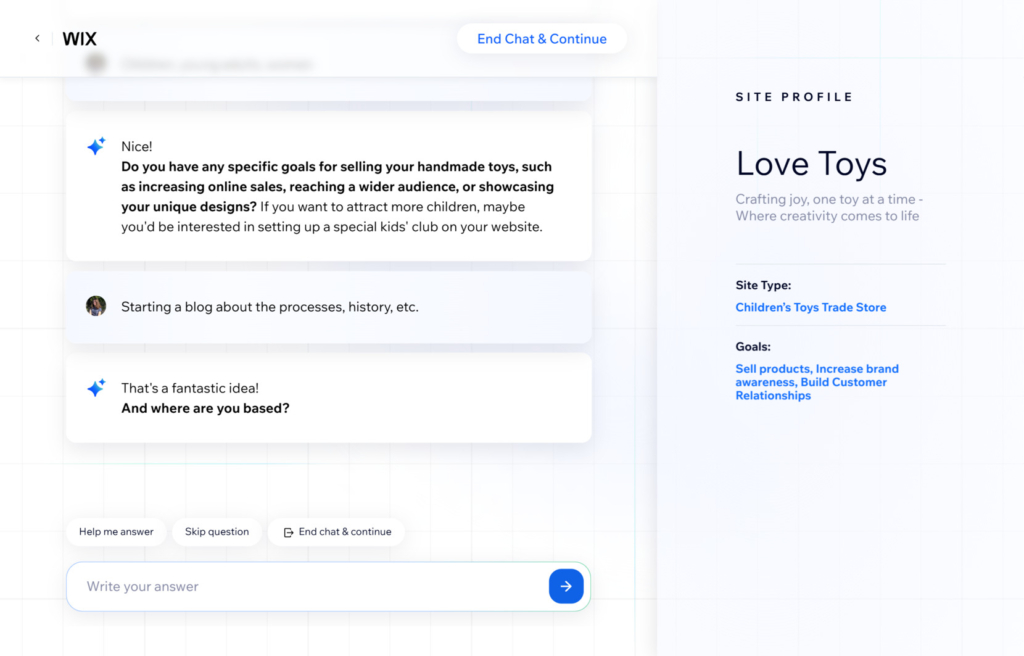
For this guide, we’ll try the Wix ADI feature. This option is popular among users, especially beginners, because it offers a quick, no-fuss setup by automatically creating a personalized website dashboard based on a few questions. Such a solution is ideal for those who want a professional-looking website without needing to manage every design detail manually.
Step 3. Add pages to your website
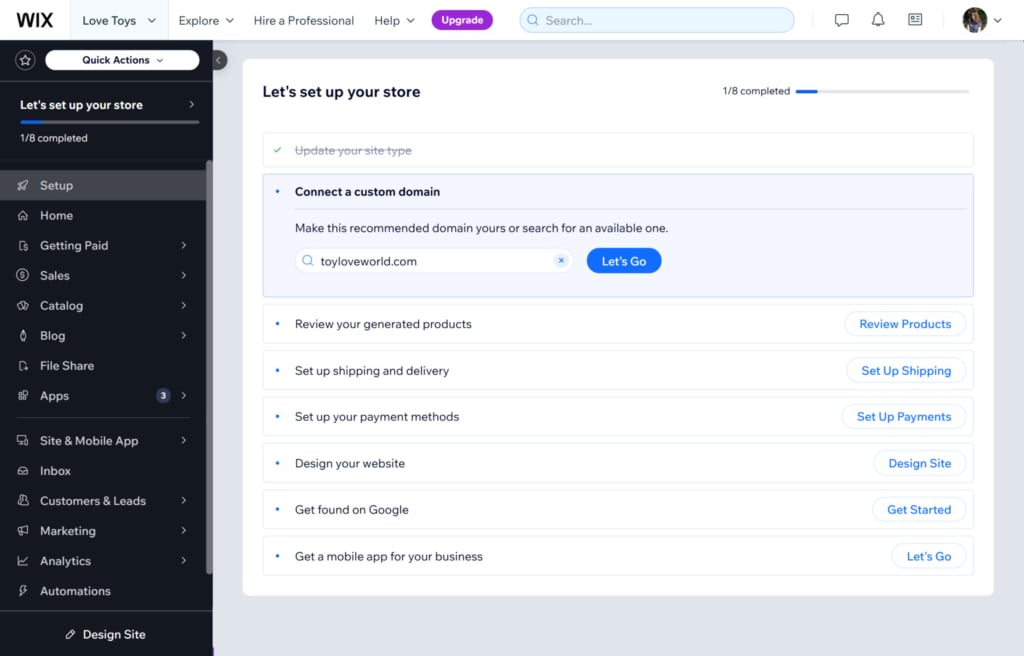
Before you start your blog, it’s important to have a solid foundation for your website. Begin by creating a domain name and building essential pages like your bio, contact page, and any other pages that reflect your brand or purpose.
Step 4. Set up your blog
Once your basic website structure is in place, it’s time to add a blog section.
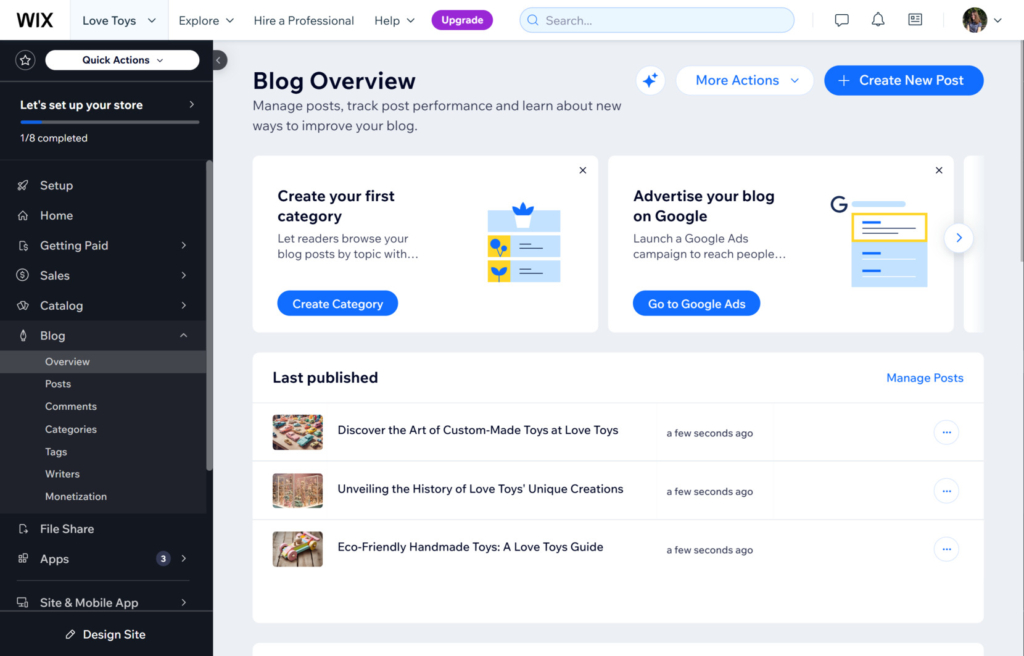
In the Wix Editor, look for the “Blog” option in the left-hand menu. Click “Add Blog” to install Wix’s built-in blogging app. Once added, you’ll see a “My Blog” section appear in your site’s dashboard. Here, you can manage posts, organize content, and set up the blog layout.
Within the Blog Manager, you can control how posts appear on your blog page. Customize layout options such as the display of images, title fonts, and spacing to make your blog aesthetically pleasing. Additionally, configure SEO settings for each post to enhance search engine visibility.
Step 5. Publish your posts
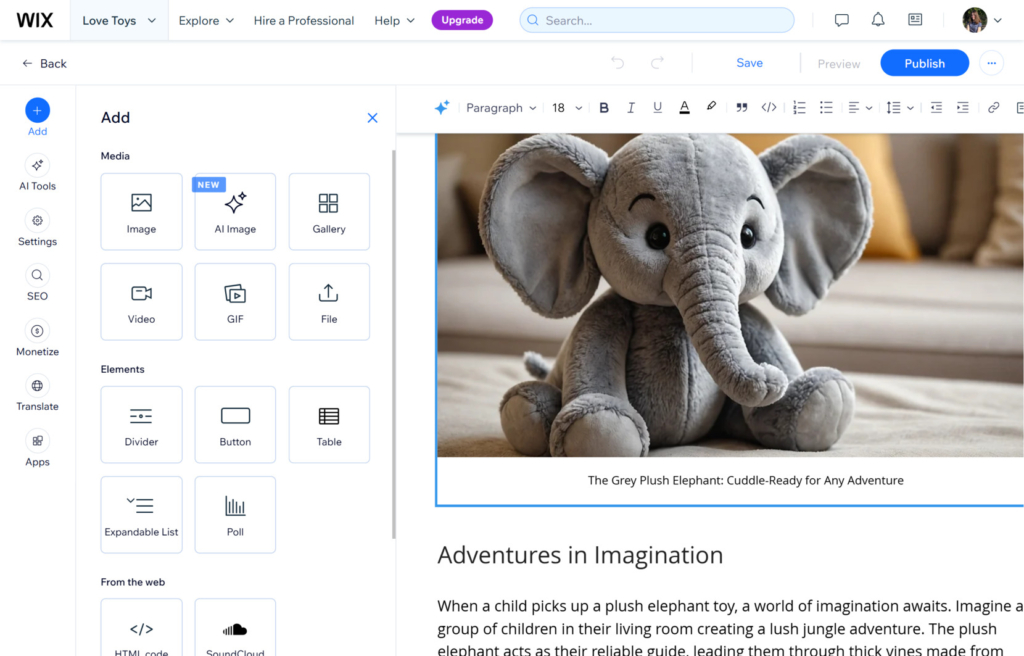
Now it’s time to write and publish! Click “Create New Post” in the Blog Manager to start a new entry. Wix’s editor allows you to add images, videos, and galleries to enhance your post. Use formatting options to break up text, add headers, and emphasize key points.
Wix allows you to customize the design of various page elements, including headers, footers, and navigation menus. Customize these to match your branding and make the blog feel cohesive with the rest of your website.
Once you’re satisfied with your post, click “Publish,” or save it as a draft to review later.
Alternative Solution: Simple No-Code Blog App
If you already have a Wix website and want to add a blog to it, the Elfsight Blog app provides an ideal solution. It’s a simple, no-code option that lets you integrate a fully functional blog into your existing site with just a few steps. Instead of redesigning or reconfiguring your site, you can enhance it by adding a sleek, customizable blog that complements your current layout and branding.
Key benefits of using the Blog app include:
- Quick and easy blog setup
Launch a fully functional blog quickly without needing technical expertise, so you can start sharing content with minimal setup. - Seamless integration with your existing website
Effortlessly add a blog that blends seamlessly with your current website’s design, creating a cohesive and professional look. - AI-powered content creation
Use AI to generate high-quality text and images, speeding up the content creation process and allowing you to focus on engaging with your audience. - Professional blog layouts
Choose from beautiful, pre-designed templates that enhance readability and keep your audience captivated, boosting the effectiveness of each post. - No-code customization options
Customize colors, layout elements, and more in real-time to match your brand’s style—without needing coding knowledge.
Now, let’s see how to create a blog with the app from Elfsight.
How to Add a Blog App to a Wix Website
To add the Elfsight Blog app to your existing website, follow the steps below.
Step 1. Choose a template
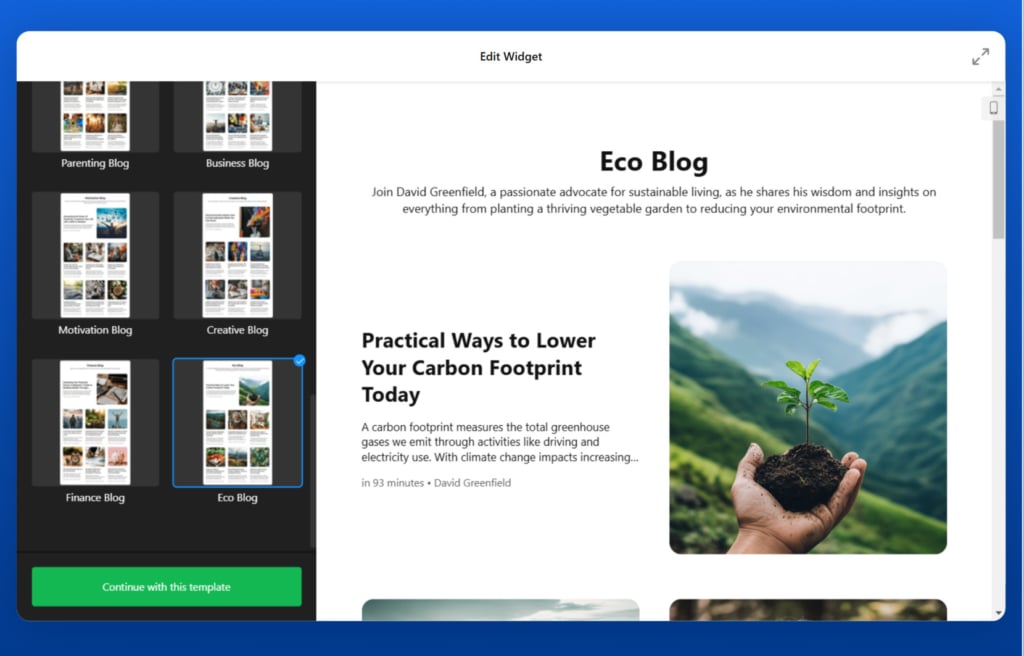
Open the Blog app editor and select a template that best suits your needs. Hit “Continue with this template”. The templates include such blog topics as Sci-Fi, Travel, Eco, Motivation, and more. There are also different layouts you can choose from: simple cards or list cards.
Step 2. Create content
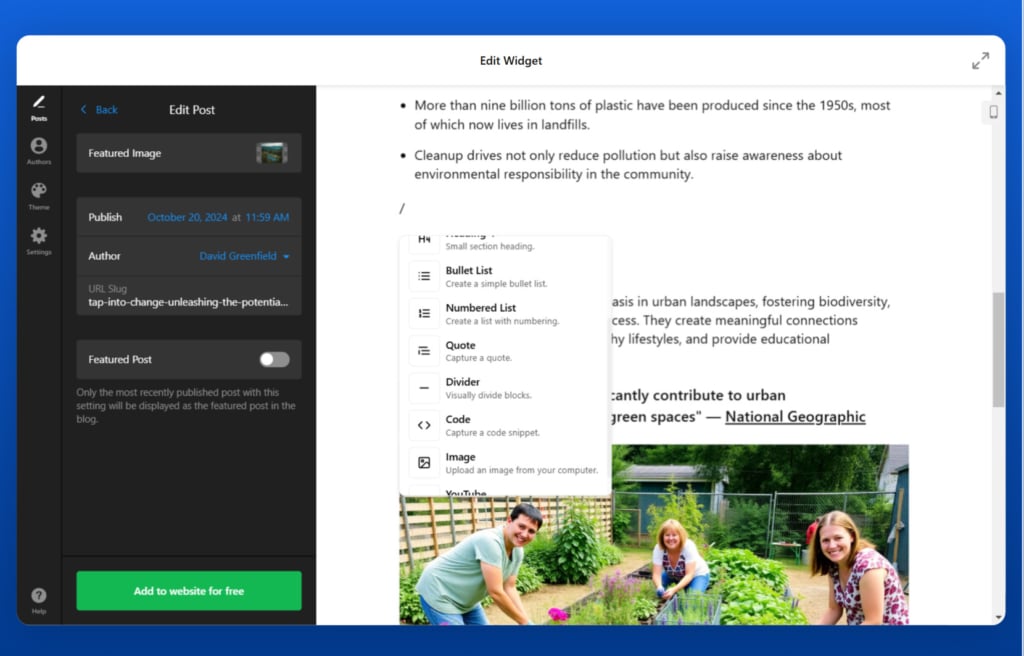
Now that you’ve selected a template, create the content for your blog. Add a new post, writing its text, uploading images. Or use AI to help you create a post. Set the author’s info and the publish date. To add a new writer, simply navigate to the “Authors” tab.
Step 3. Configure the app
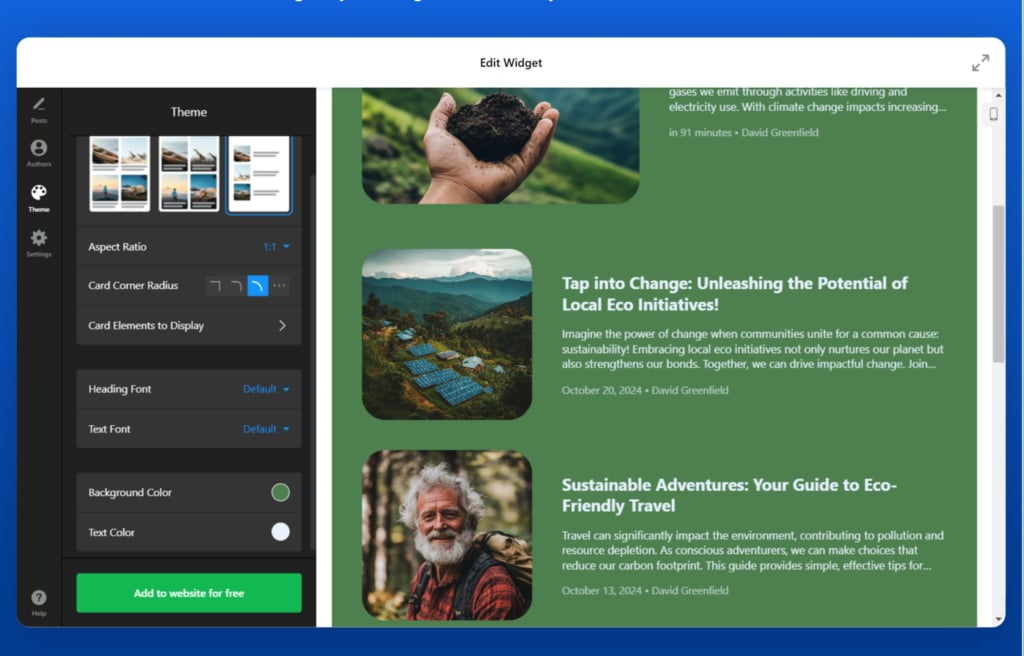
Customize the app design by selecting colors, fonts, layout, and post organization settings that align with your website’s style. Elfsight’s user-friendly editor allows you to preview changes in real-time, ensuring the widget matches your site before going live.
Step 4. Customize the settings
In the “Settings” tab, write the blog’s title and description. You can also choose what language will be the primary used. Advanced CSS and JS settings are available too.
Step 5. Add the Blog app to your Wix website
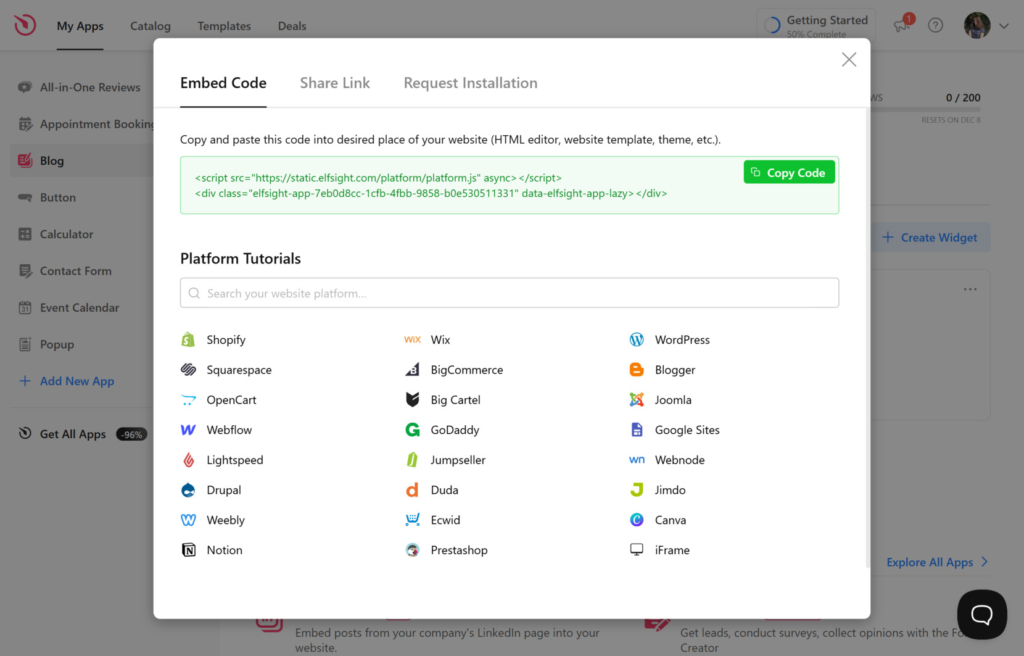
Save your customized widget, and a unique code snippet will be generated. Copy this code.
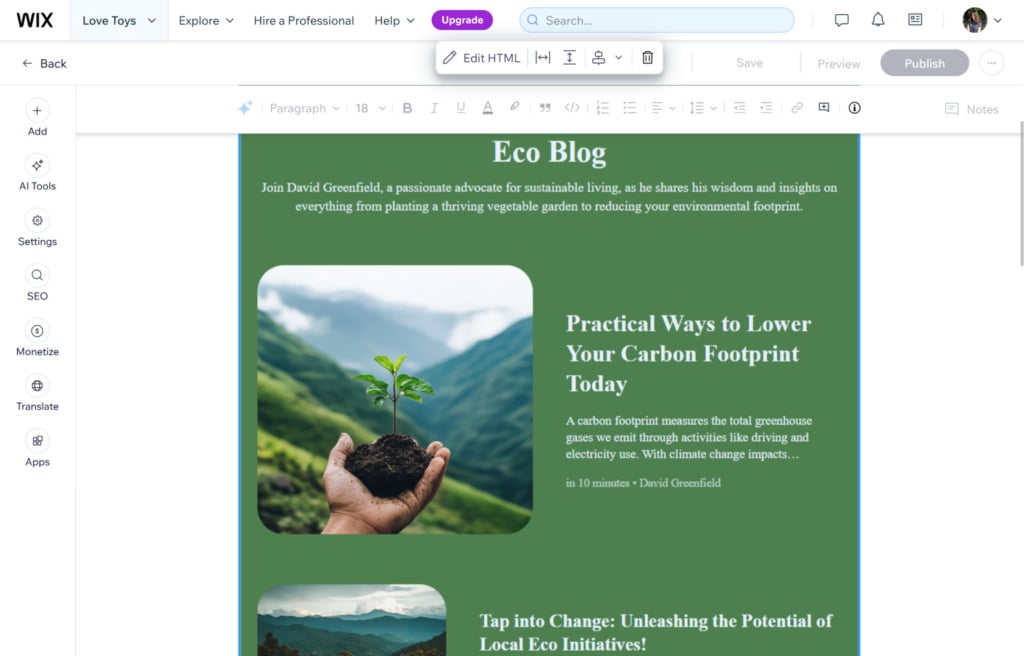
Log in to your Wix account and go to your website’s editor. Open the page where you want your app to appear and hit the “Add” button. Choose “HTML code”. Past the embed code from Elfsight. Position the app on the page where you want the blog section to appear.
Try building your Blog app in a few clicks right from our free editor!
Conclusion
Whether you’re starting fresh or adding a blog to an existing website, both solutions offer user-friendly tools to create a polished, functional blog.
You can start a blog on Wix from scratch if you want to build a completely new website focused on blogging. With the Elfsight Blog app, you will be able to add a blog to an established Wix website without having to reorganize its structure.
Choose the solution that best fits your needs and begin sharing your exclusive content right away.


