Adding an email sign-up form to your WordPress website is one of the most effective ways to grow your audience, retain interest, and build long-term relationships with your visitors. This small yet powerful element gives you direct access to your users’ inboxes — without relying on algorithms or third-party platforms.
If you want to collect emails from visitors, send updates, or promote new offers, then embedding a subscriber-friendly form is exactly what your WordPress website needs. It’s simple to implement, doesn’t require coding, and delivers measurable results fast.
- Capture leads directly on your pages. A visible email form lets you turn casual visitors into subscribers right from your homepage, blog, or footer.
- Build a mailing list you own. Unlike social platforms, an email list is yours to manage and use anytime for campaigns or promotions.
- Drive consistent traffic through email updates. Subscribers are more likely to return when they receive fresh content and news directly in their inbox.
- Promote products and offers easily. Whether it’s a sale, a new service, or an event, you can instantly notify your audience without paid ads.
- Improve website credibility and trust. A well-designed email form shows that your business is active, transparent, and values communication.
Now that you know why it’s worth it, let’s look at how to create and add a subscription form using Elfsight — quickly and without any technical skills.
Quick Solution to Add Subscription Form to WordPress
Once you understand the value of having a subscription form on your WordPress website, the next step is getting it live. Elfsight makes this process incredibly straightforward — even if you have zero technical experience. Here’s a quick overview to help you get started in minutes.
- Open the Elfsight editor and choose the subscription form template that fits your needs.
- Adjust layout, field labels, and spacing to create a look that blends into your website’s design.
- Style your form by selecting background colors, fonts, and button shapes to match your branding.
- Click “Add to website for free”, then copy the installation code and paste it into your WordPress backend.
This simple setup gives you a fully functional email capture form that works smoothly across all devices. You’ll be ready to collect subscribers in just a few clicks — without touching a line of code.
Build your own subscription form now – it’s fast and free!
Features of Elfsight’s Signup Solution
After you’ve seen how easy it is to create and place a subscription form on your WordPress website, it’s worth exploring what makes Elfsight’s solution truly stand out. This isn’t just another form plugin — it’s a flexible, customizable tool built to help you grow and engage your email audience more effectively.
Below are the core features and benefits that explain why Elfsight is a powerful option for adding a newsletter form to your WordPress website:
- Visual drag-and-drop editor. Build and customize your form in real time with an intuitive, code-free interface that shows instant previews.
- Pre-built templates for fast setup. Choose from professionally designed subscription form layouts, ready to use and easy to personalize.
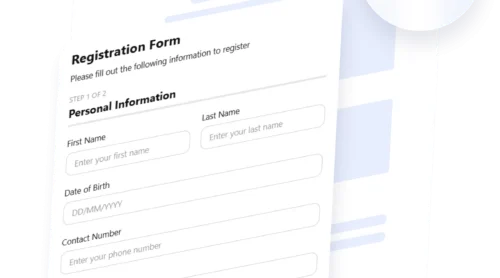
- Multi-step form support. Break long forms into manageable steps to improve user experience and keep visitors engaged until completion.
- Field flexibility and conditional logic. Add multiple field types, set up logic-based visibility rules, and tailor your form to fit specific workflows or audiences.
- Responsive design on all devices. Every form you create looks great and functions smoothly across mobile, tablet, and desktop screens.
- Easy integration with email platforms. Connect your form to services like Mailchimp or Google Sheets to automate list-building and data collection.
- Built-in spam protection. Elfsight includes hidden spam filters and CAPTCHA-free validation to keep your subscriber list clean and secure.
These built-in capabilities help you go far beyond basic email collection. With full control over layout, logic, and integrations, your subscription form becomes a powerful asset — not just a simple widget. Now let’s move on to building and adding your form step by step.
How to Set Up Your Subscription Form: Full Guide
If you’re ready to add an email capture form to your WordPress website, Elfsight makes the process fast and fully customizable. Below is a complete walkthrough for setting up the subscription form widget using the built-in editor. You’ll be able to choose a layout, configure email options, and apply custom styles — no coding required.
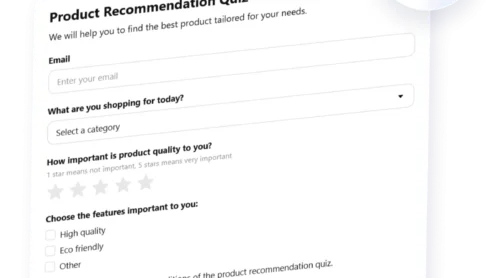
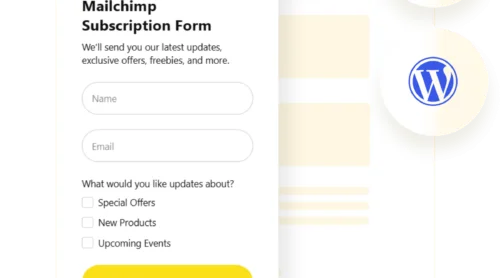
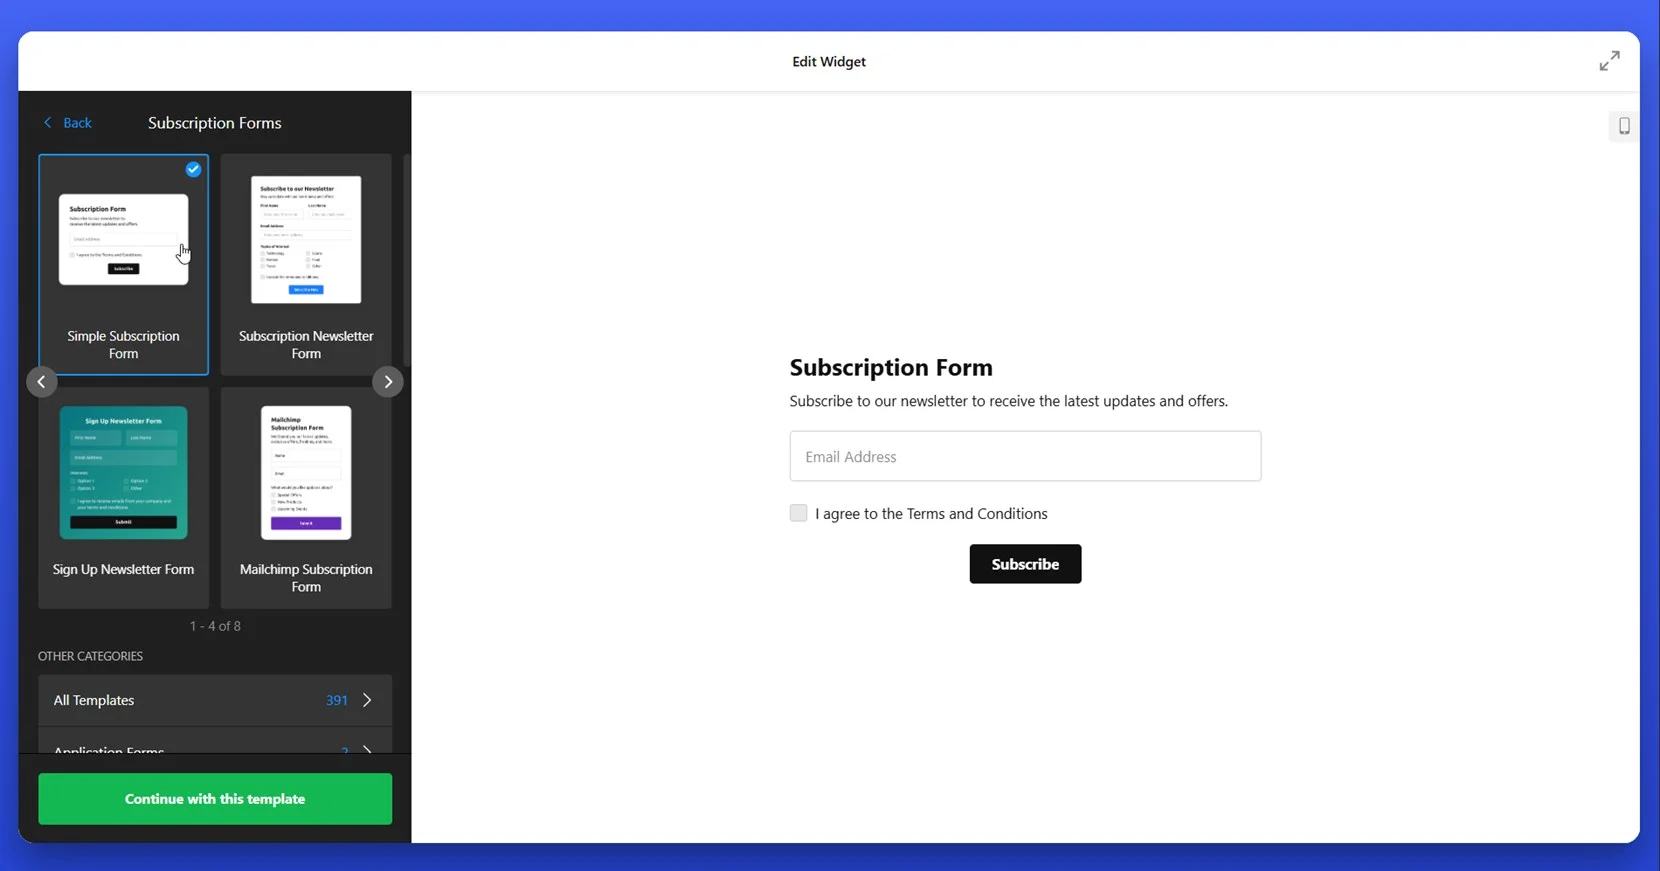
- Select a Template. Open the Elfsight Form Builder, browse the available Subscription Form templates, and click on the one that fits your needs — such as the “Simple Subscription Form” or “Mailchimp Subscription Form.” Then click “Continue with this template”.

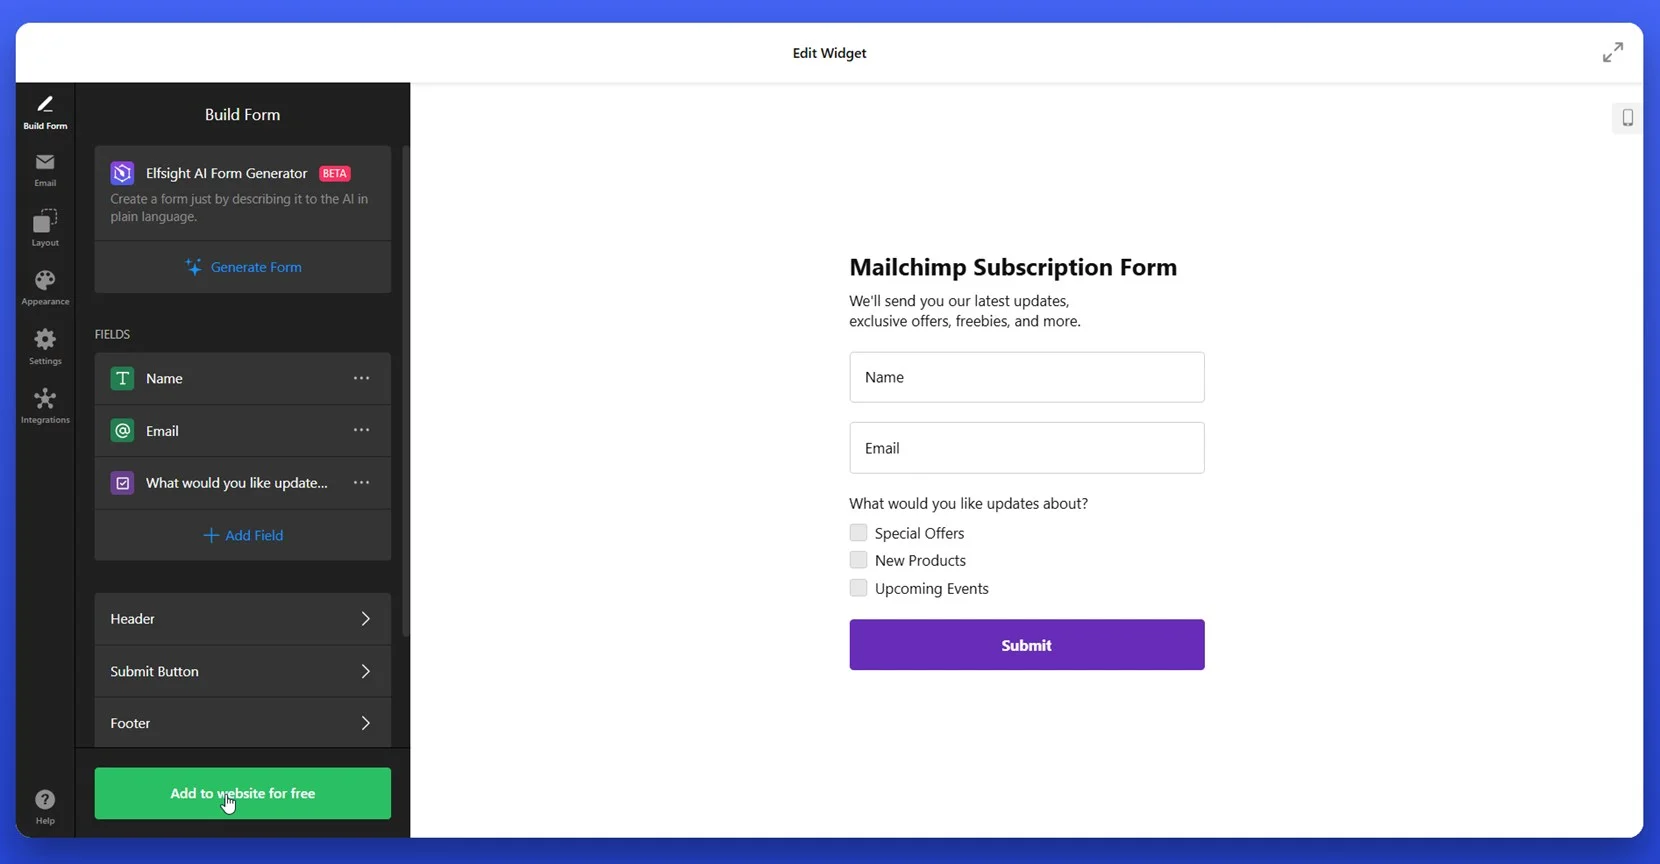
- Build the Form. Under the “Build Form” tab, you can add, remove, or modify fields. Use drag-and-drop to rearrange them. Fields like name, email, and checkboxes (e.g. update preferences) can be configured manually. You can also add new custom fields if needed.

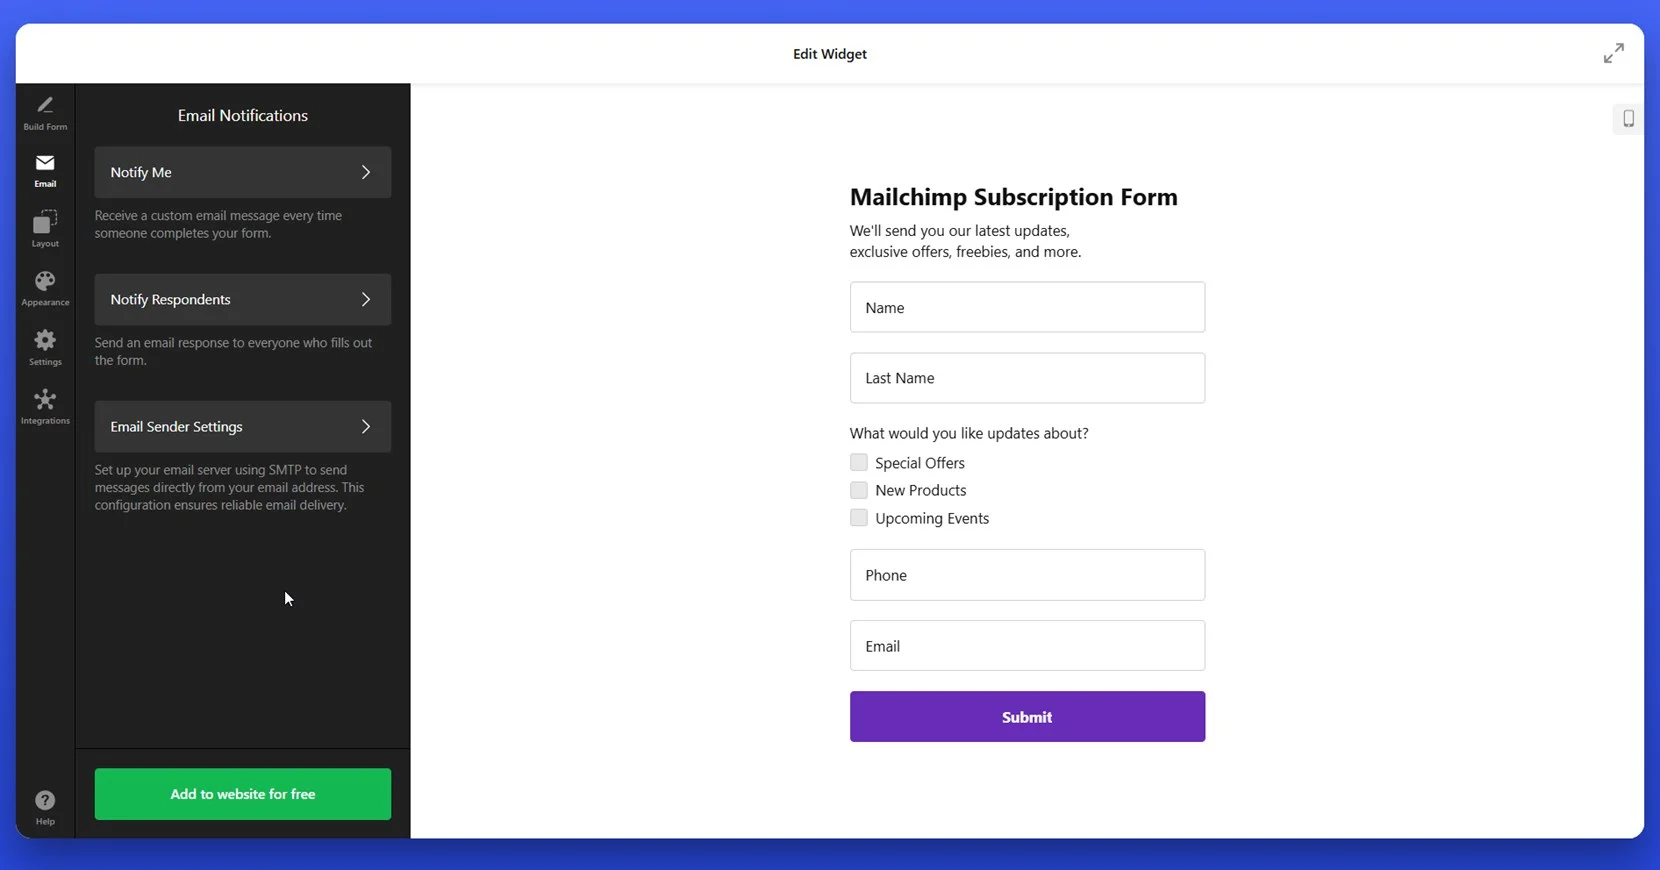
- Set Email Notifications. In the “Email” tab, define how notifications should work. Choose to receive email alerts when someone submits the form (“Notify Me”) and optionally send an auto-response to the user (“Notify Respondents”). Configure your sender details in “Email Sender Settings”.

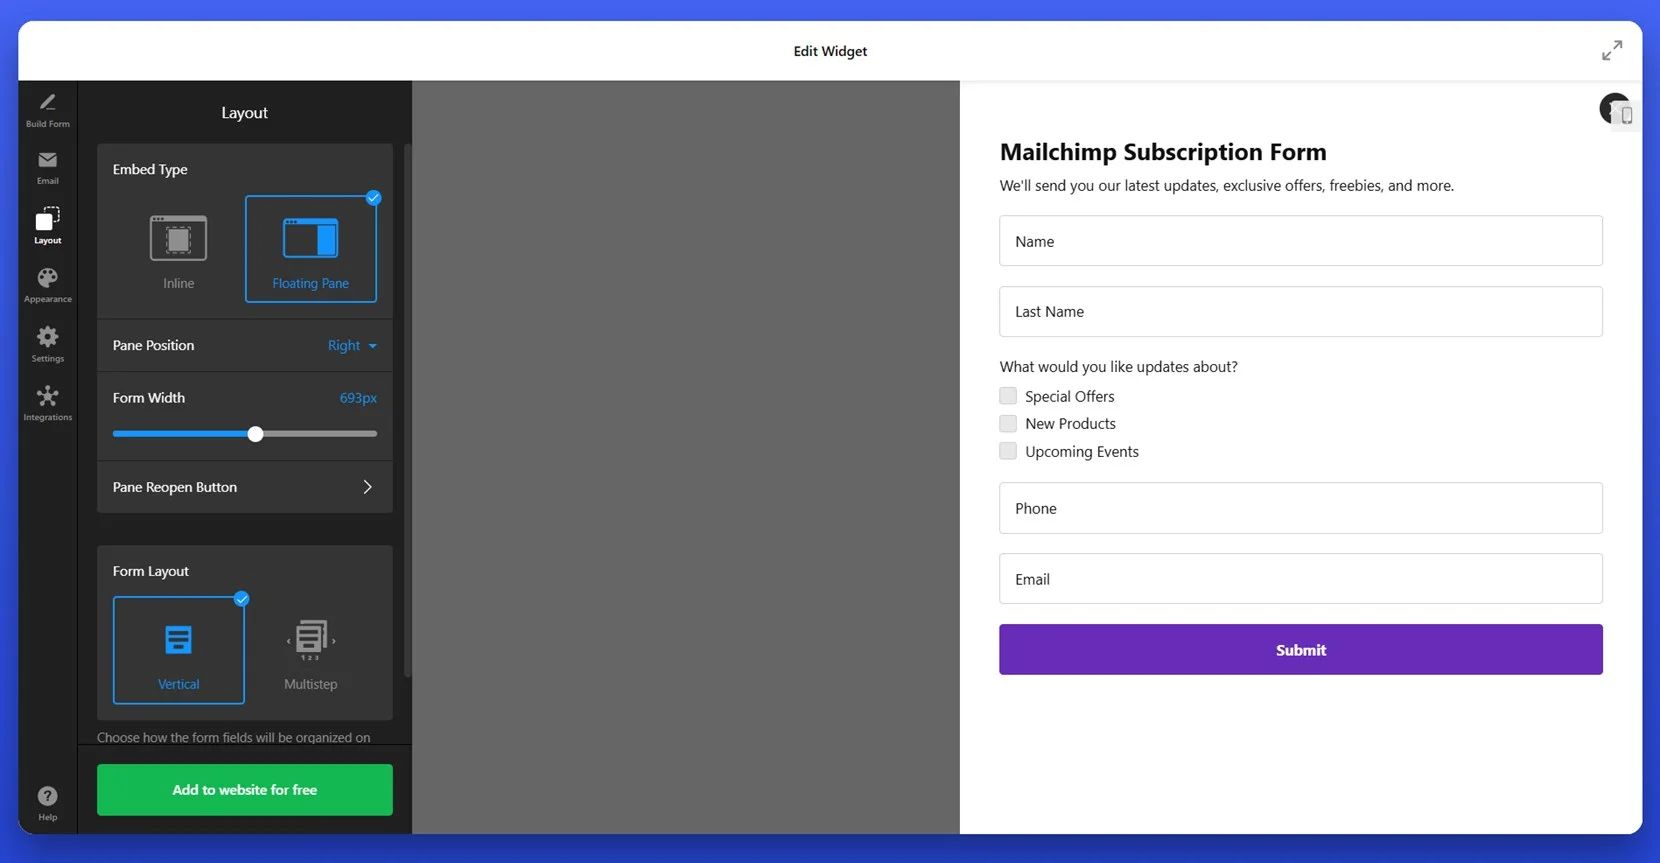
- Customize the Layout. Go to the “Layout” tab to define how the form is displayed. Choose between “Inline” or “Floating Pane” layouts, adjust the position (e.g. right or left for floating), and set the form width. Also choose between “Vertical” or “Multistep” organization for field layout.

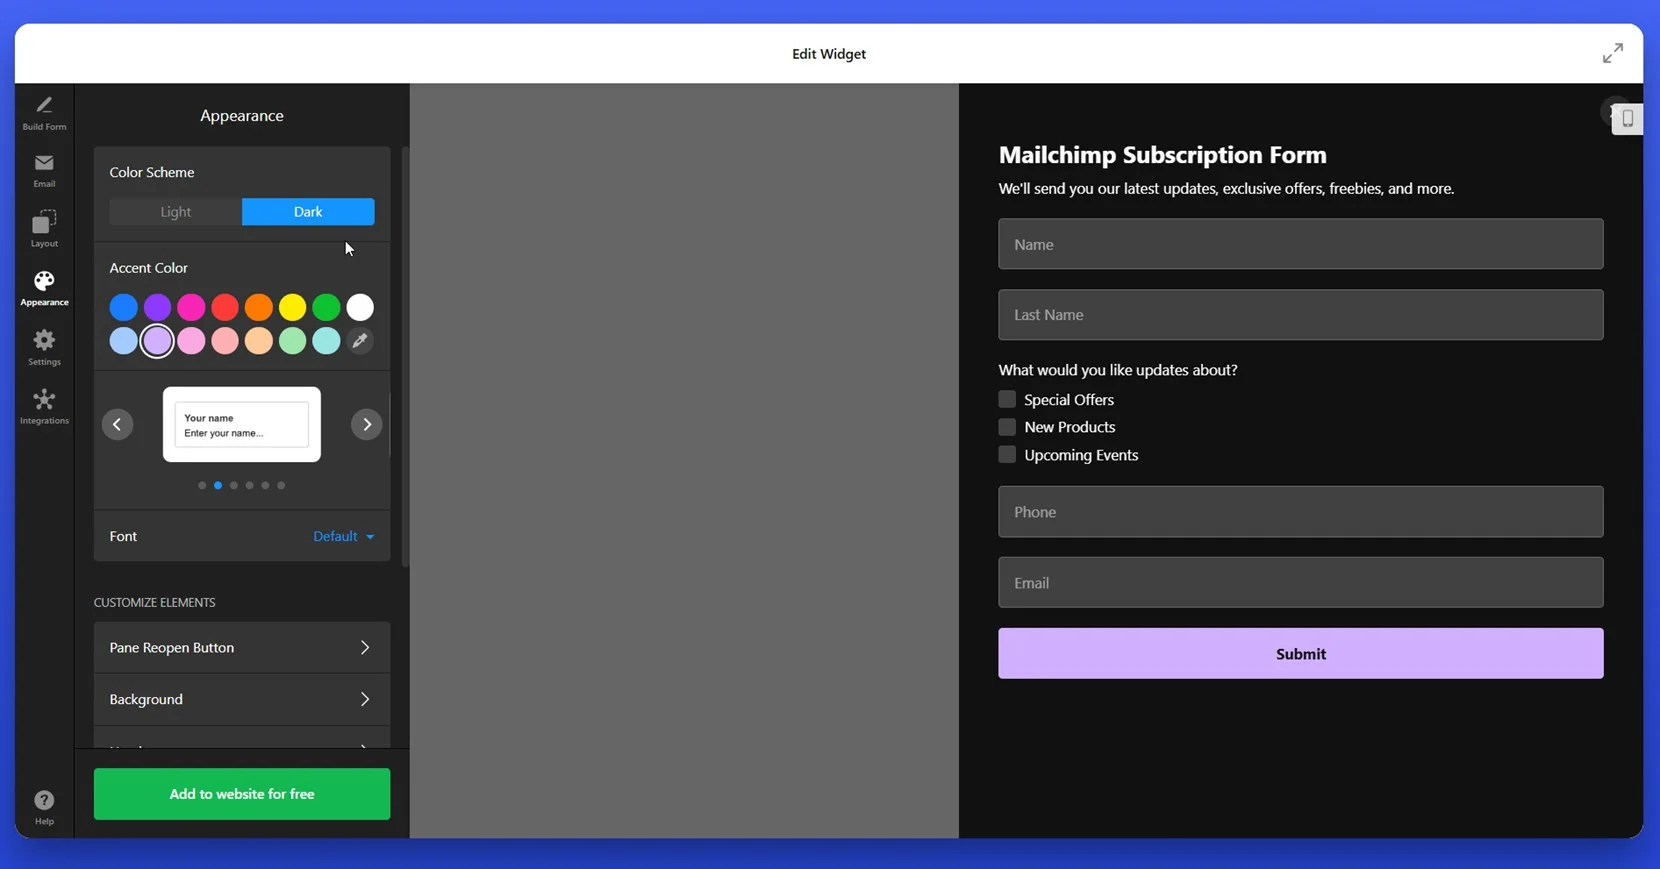
- Style the Appearance. Open the “Appearance” tab to personalize the form’s look. Select a color scheme (light or dark), choose an accent color, and update the background. You can also change fonts and style individual components like buttons and input fields to align with your branding.

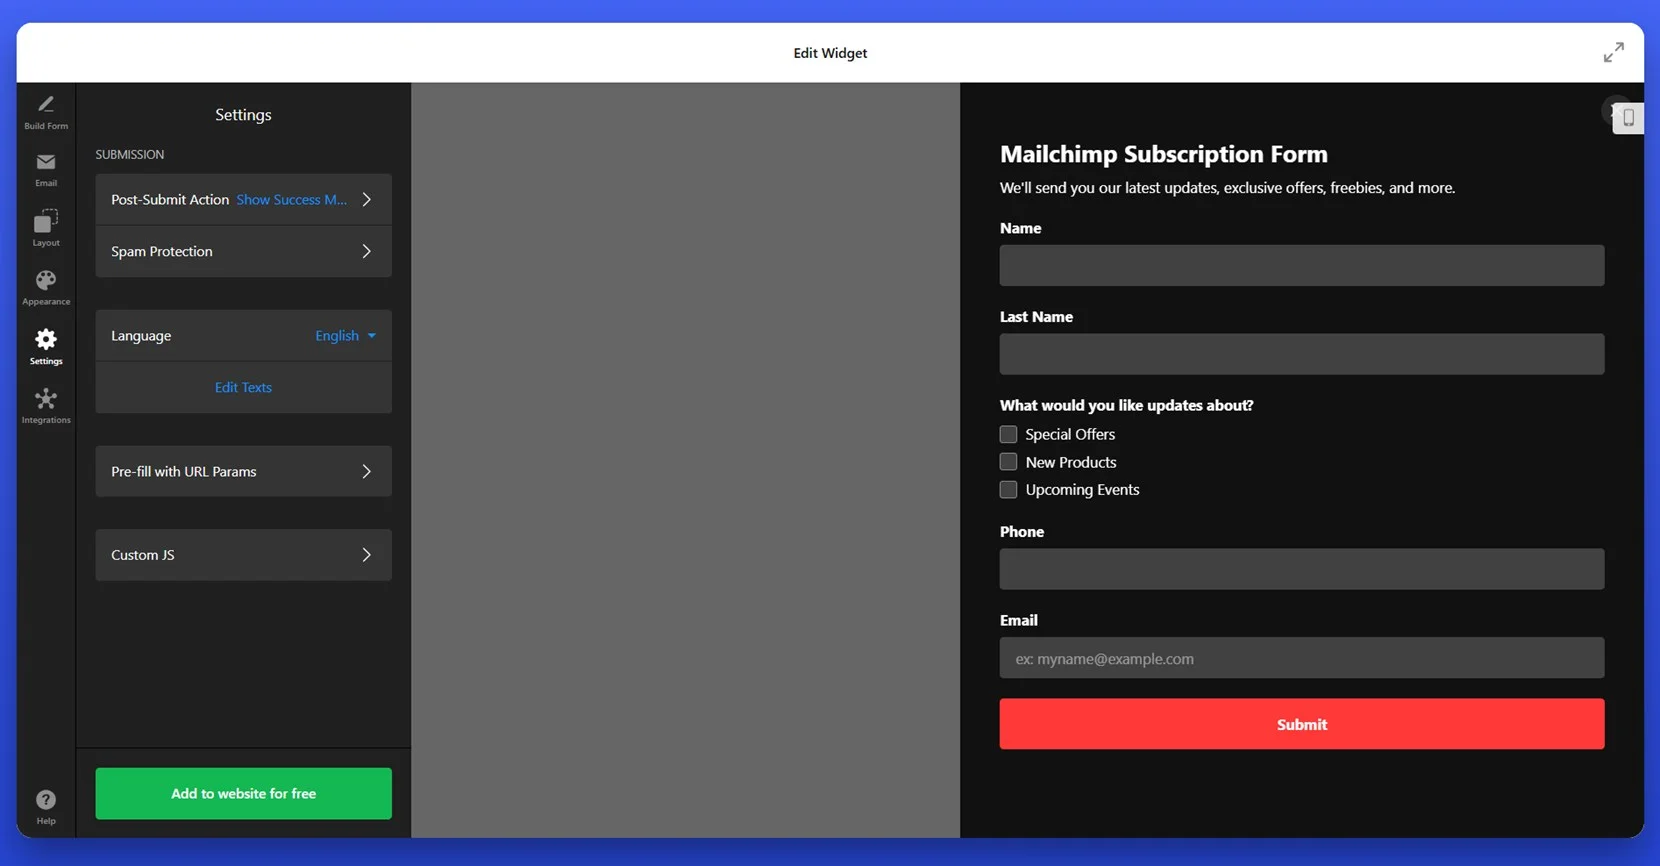
- Configure Settings. In the “Settings” section, set up what happens after submission. Choose to display a success message, redirect to another page, or take other actions. Enable spam protection and configure pre-fill with URL parameters if needed.

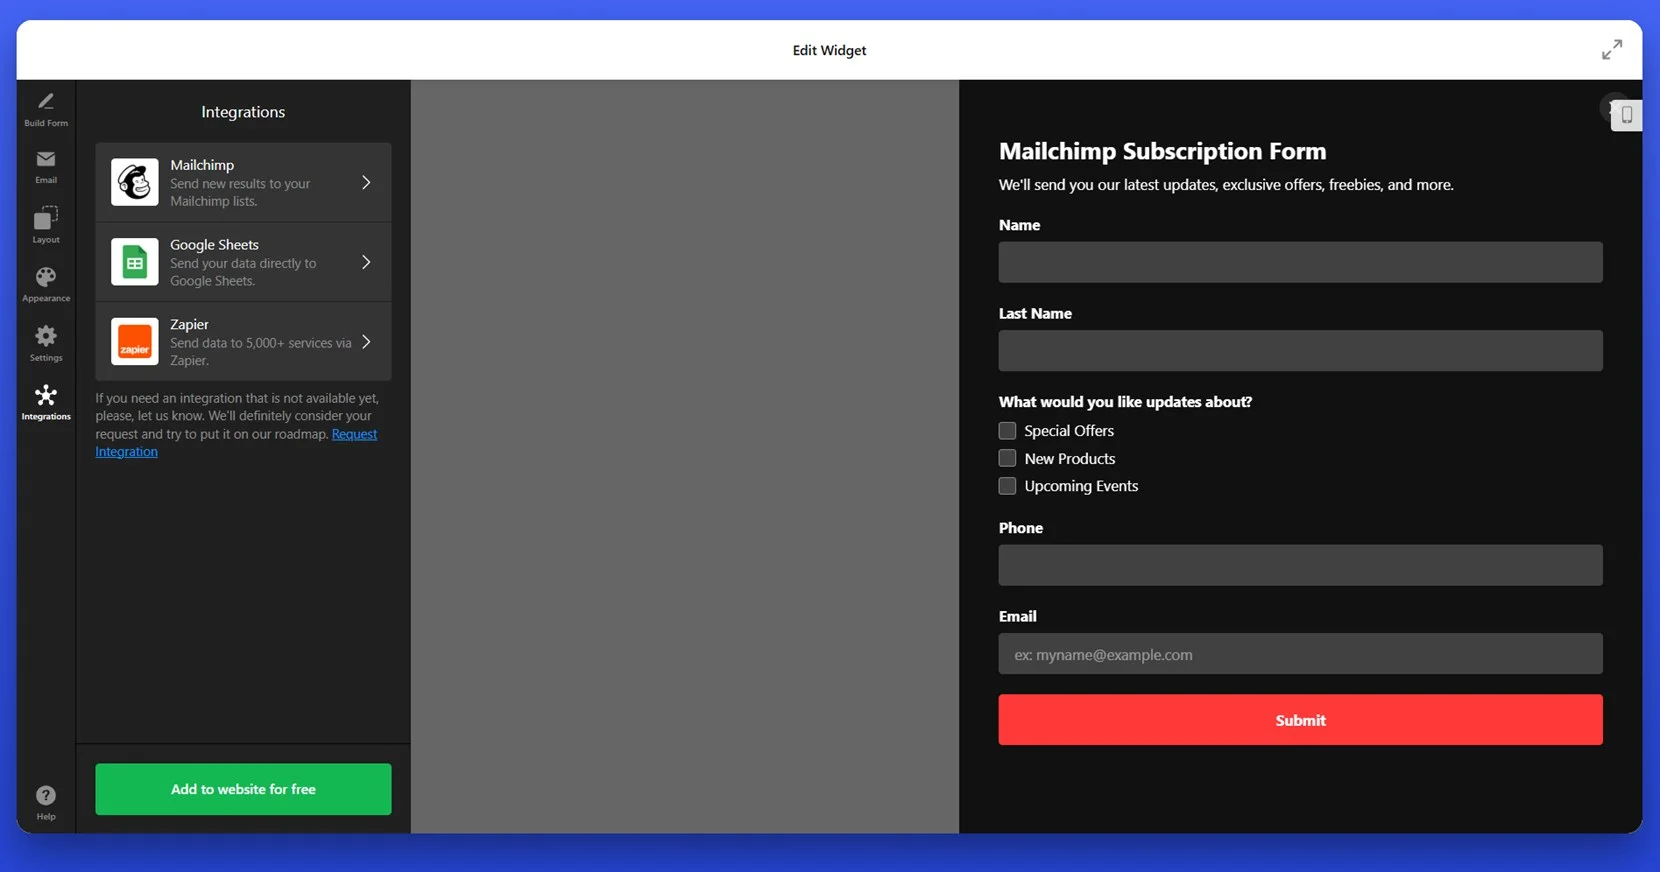
- Integrate External Services. Under “Integrations,” choose where your form data should be sent. Elfsight allows you to connect with Mailchimp, Google Sheets, or Zapier to sync subscriber data across platforms automatically.

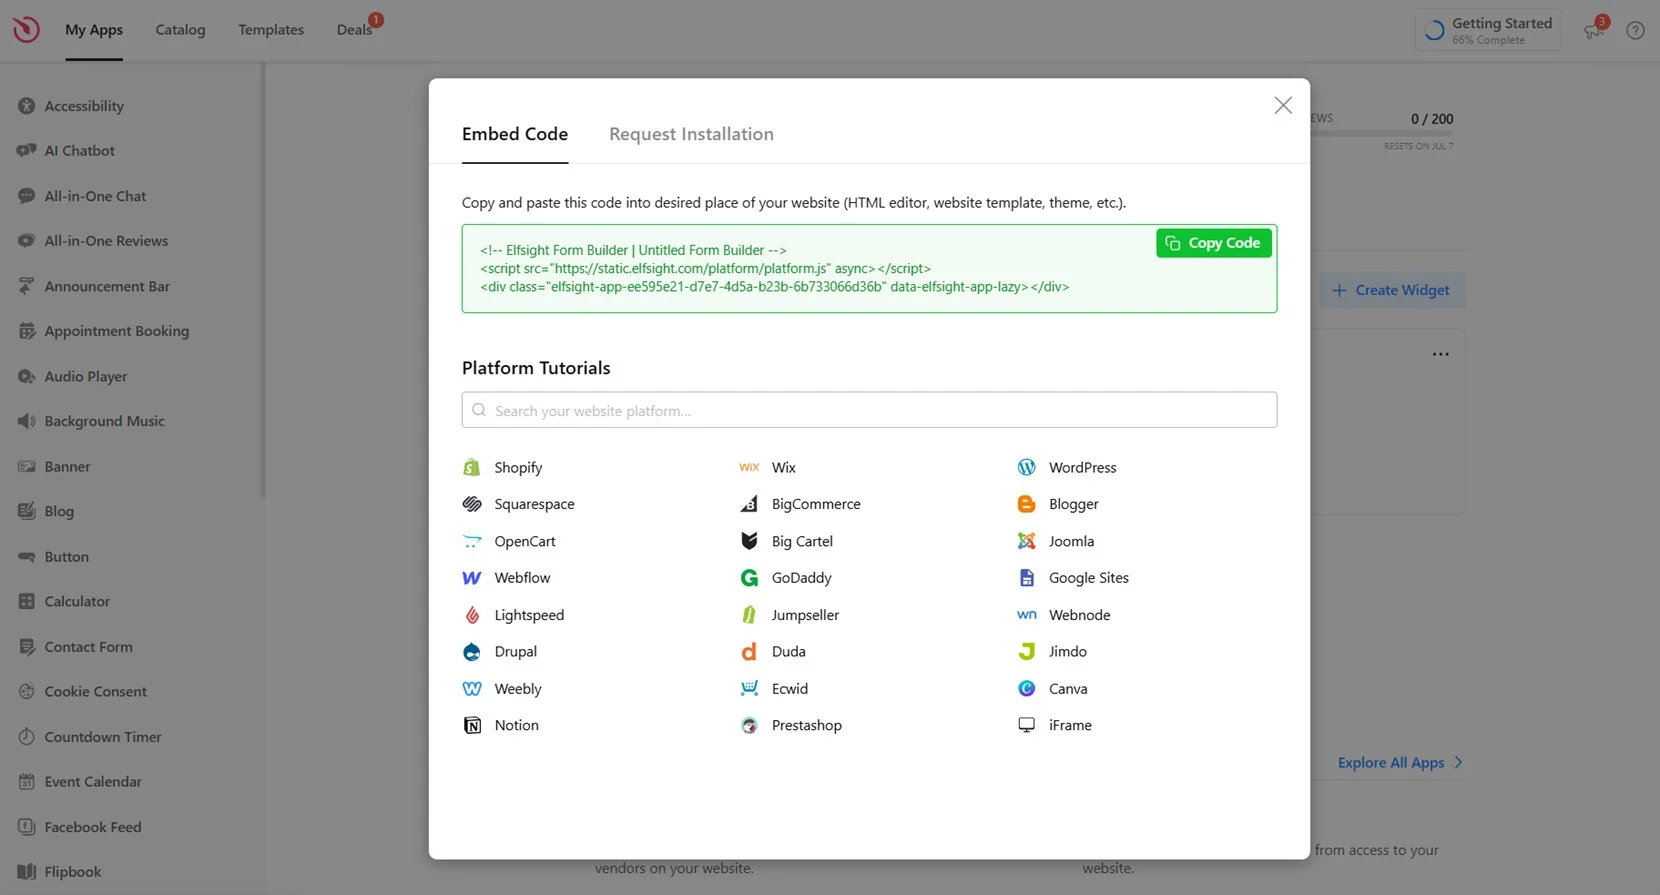
- Add the Form to Your Website. Click “Add to website for free” to generate your embed code. Copy the code provided and paste it into the HTML section of your WordPress page, post, or widget area. Save and publish your changes to make the form live.

With your form fully set up and published, you’re now ready to explore other ways of adding subscription forms in WordPress — whether natively or through alternative integrations. Let’s take a look at those next.
Other Ways to Create WordPress Subscription Forms
Elfsight is one of the easiest and fastest ways to add an email subscription form to your WordPress website. But it’s not the only one. Depending on your needs and preferences, there are also native WordPress features and manual methods that can help you collect subscriber emails directly from your visitors. Below are two popular alternatives that don’t require any competing form builder plugins.
Using WordPress’ Native Editor
If you’re using WordPress 5.0 or later, you already have access to Gutenberg — the built-in block editor that supports adding various content blocks, including email subscription forms powered by external services like Mailchimp.
- Log in to your WordPress dashboard. Open your browser and go to your WordPress admin login page (usually at /wp-admin). Enter your username and password to access the dashboard. From there, go to “Pages” or “Posts” in the sidebar depending on where you want to place the form, and click “Edit” on the selected content or “Add New” to create a new one.
- Click the “+” button to add a new block. Inside the Gutenberg editor, place your cursor where you want the form to appear. Then click the small “+” icon in the top left corner or inline within the content area to open the block inserter.
- Search for “Mailchimp” in the block library. In the search bar of the block inserter, type “Mailchimp.” If the official Mailchimp plugin is installed and active on your website, the Mailchimp block will appear as an option. Click it to insert the block into your page.
- Add the block and connect your Mailchimp account. Once the block is placed, you’ll be prompted to connect your Mailchimp account. Click the “Connect” button and log in using your Mailchimp credentials. After successful authentication, select the email list (audience) where you want new subscribers to be added.
- Customize the appearance and form fields. Use the settings panel on the right to edit the block. You can change the form title, placeholder text, call-to-action button, alignment, and colors. You may also select which fields (like first name or last name) should appear on the form, depending on your list settings in Mailchimp.
- Preview and publish your changes. Click “Preview” to see how the subscription form will look on your live page. Once you’re satisfied with the setup, click “Update” (for existing content) or “Publish” (for new content) to make the form visible to your visitors.
This approach is ideal if you’re already using Mailchimp and want a simple, integrated way to collect emails through WordPress.
Creating a Simple HTML Form Manually
If you prefer full control and don’t mind adding some basic HTML, you can create and embed your own subscription form directly into WordPress using the Custom HTML block.
- Log in to your WordPress dashboard. Open your browser and navigate to your WordPress admin panel (typically found at /wp-admin). Enter your credentials and access the dashboard. From the sidebar menu, go to “Pages”, “Posts”, or “Appearance → Widgets”, depending on where you want to place the form.
- Edit or create a new content area. Choose the specific page, post, or widget area where the form should appear. Click “Edit” on an existing content piece or “Add New” to create one from scratch. This will open the Gutenberg block editor.
- Insert a “Custom HTML” block in the editor. Within the content area, click the “+” icon to add a new block. Use the search bar to find and select the “Custom HTML” block. This block allows you to input raw HTML code directly into your content without interference from visual formatting.
- Paste your basic HTML form code into the block. Include a label, an email input field, and a submit button. Here’s a simple example you can use:
<form action="https://your-email-handler.com/subscribe" method="POST"> <label for="email">Subscribe to our newsletter:</label><br> <input type="email" name="email" id="email" required> <button type="submit">Subscribe</button></form> - Update the action attribute with your processing URL. Replace https://your-email-handler.com/subscribe with the actual endpoint that will receive and process form submissions. This could be a custom backend script or a third-party service like Zapier, Google Sheets via API, or a marketing automation platform.
- Preview your changes before publishing. Click the “Preview” button to see how the form will appear on your website. Check for proper alignment, spacing, and mobile responsiveness. If everything looks correct, click “Update” or “Publish” to make the form live for visitors.
This method allows full layout control and doesn’t rely on external plugins or services, making it lightweight and flexible.
Comparison of Subscription Form Methods
Here’s how Elfsight compares to the alternative WordPress-native and manual HTML methods based on ease of use, customization, and performance:
| Method | Pros | Cons |
|---|---|---|
| Elfsight Plugin | Offers a fully visual editor with live preview and mobile-friendly design options. | Requires a free Elfsight account for form creation and management. |
| Gutenberg + Mailchimp Block | Integrates directly with WordPress and Mailchimp for seamless list connection. | Limited customization options and depends on having Mailchimp plugin installed. |
| Manual HTML Form | Provides complete control over layout and styling using clean HTML code. | Requires manual backend setup to process form submissions and store emails. |
Each of these options serves a different type of user, but if you’re looking for a fast, no-code, and design-friendly way to embed a subscription form with all the essential features built in, Elfsight stands out as the most convenient choice. Next, let’s explore how to fully customize the look and behavior of your form.
Ways to Customize Your Email Form
Once your subscription form is embedded, it’s time to make it look and feel like a seamless part of your WordPress website. Customization helps improve visual consistency, user experience, and overall engagement.
Below are practical tips you can follow to refine your form’s appearance and functionality.
- Match your brand’s color palette. Use the same background, button, and accent colors that appear throughout your website. This creates a visual connection and builds trust with your audience.
- Use clear and personalized call-to-action text. Instead of generic buttons like “Subscribe”, consider using phrases like “Join Our List” or “Get Weekly Tips” that speak directly to your audience’s interests.
- Keep the layout compact and distraction-free. Use minimal spacing and focus on essential fields. A clean design helps users stay focused on the form and complete it without confusion.
- Choose a font that aligns with your website typography. Avoid default or mismatched fonts — use consistent text styles to maintain a professional appearance.
- Test multiple form placements. Experiment with positioning your form in footers, pop-ups, or inline sections of your content. Placement impacts visibility and sign-up rates.
- Make it responsive on all devices. Ensure that your form scales well on mobile screens and doesn’t require users to zoom or scroll horizontally.
- Enable a success message or redirect after submission. A clear confirmation message or a thank-you page can reassure users that their data has been received and builds a positive interaction.
With a bit of styling and strategic placement, your subscription form becomes more than a functional element — it becomes part of your overall experience. Now let’s explore some creative layouts and use cases you can build for different types of websites.
Form Layouts You Can Build: Examples
After refining the design of your form, it’s useful to explore the different ready-made templates you can build with Elfsight. These templates are not just visually diverse — they are also optimized for various industries and use cases. Below are three powerful subscription form templates, each designed to match specific goals and audience expectations.
Magazine Subscription Form
The Magazine Subscription Form template is perfect for websites that publish recurring content — like digital magazines, news platforms, or niche blogs. It features a large, eye-catching header with bold text and a brief description that encourages users to subscribe. The form is centered, clean, and ideal for content-driven websites that want to build a steady readership. It usually appears as a featured block on the homepage or article pages.
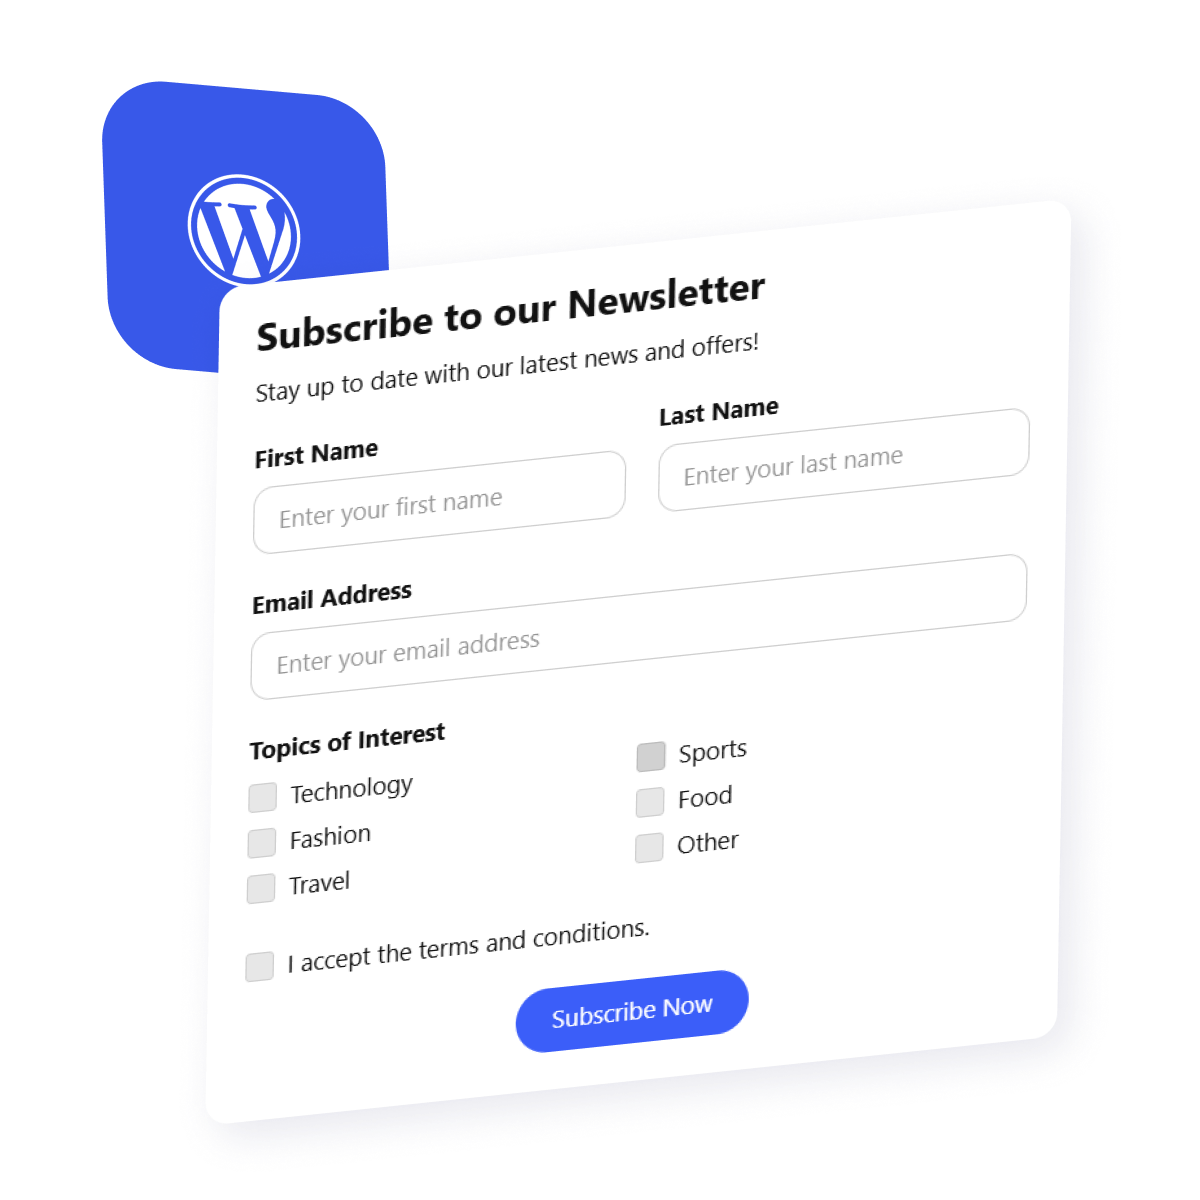
Subscription Newsletter Form
Designed for marketing campaigns, product updates, or general business newsletters, the Subscription Newsletter Form template has a simple, modern layout with a strong call-to-action. It includes a brief text field and a submit button, making it suitable for placing in footers, pop-ups, or landing pages. Its minimalist design ensures that it blends into any section of the website without disrupting the layout.
Email Subscription Form
The Email Subscription Form is the most flexible and universal template available. It works well across industries — from personal portfolios and educational blogs to small business websites. It can be placed inline within content, embedded in a sidebar, or added to a widget-ready area. Its balanced design supports mobile and desktop views, making it an all-purpose solution.
These templates give you a wide range of options to match your subscription goals. Now that you’ve seen what’s possible, let’s look at how to handle any common issues that might come up during setup or integration.
Fixing Common Issues
Even with a well-designed subscription form, you might encounter display or setup problems during the installation process. Below are answers to frequently asked questions to help you resolve the most common issues quickly and confidently.
Why isn’t my email subscription form showing up in WordPress?
Why does the form appear but doesn’t work on mobile devices?
What should I do if my shortcode doesn’t render the form?
Why is the form submitting but not saving emails?
Can browser extensions or ad blockers interfere with the form?
How can I make sure the form displays correctly across all devices?
By understanding these potential issues in advance, you’ll save time and avoid frustration during setup. Next, let’s wrap things up with a quick recap and call to action for creating your own WordPress subscription form.
Conclusion
Adding a subscription form to your WordPress website is one of the most effective ways to grow your email list, engage new visitors, and build lasting relationships with your audience. With Elfsight, you don’t need any coding skills — just pick a template, adjust the design, and embed the form where it matters most. Whether you need a floating prompt, an inline block, or a simple footer form, Elfsight gives you full control and flexibility.
From styling tips to template options and troubleshooting, this guide has covered everything you need to know to get your subscription form up and running. Now it’s your turn to take action — start capturing leads, sending updates, and building a community of subscribers who are genuinely interested in what you offer.
Looking for more guidance?
We hope this walkthrough has given you a clear path forward. If you’d like personalized advice or help getting started, feel free to reach out to our team. At Elfsight, we’re dedicated to helping you build powerful no-code widgets tailored to your business needs.
Join our vibrant Community to connect with other creators, exchange feedback, and submit your ideas to our Wishlist. We’re always excited to hear how we can make our widgets even better for you.